Yu-Gi-Oh! Master Duel for mobile now available worldwide

Last week we saw Yu-Gi-Oh! Master Duel rolled out to PCs and other consoles. This free-to-play play title has been doing very well on these platforms, with Steam reporting over 260k concurrent players at one point. Now, we’re looking forward to the mobile release.

The global release of Yu-Gi-Oh! Master Duel to PCs and consoles also saw a limited soft release on mobile that was restricted to players in certain countries. However, now the mobile game is being released to all players worldwide on Android and iOS devices.

Yu-Gi-Oh! Master Dual is also fully cross-platform. This means you can easily continue your game progression no matter which device you decide to use, whether it’s an Xbox or your Android phone or tablet. However, if you plan to use different platforms, make sure to see if any platform offers bonuses for signing up through that platform. For example, Playstation Plus subscribers were given free in-game bonuses. It’s always easier to get started if you’re armed with a bonus.

If you haven’t played the Yu-Gi-Oh! Master Duel card game yet, or if you’re unfamiliar with the franchise, Yu-Gi-Oh! Duel Links can be a good place to start and get familiarized with how things work before entering the big leagues.

Konami specifically designed Yu-Gi-Oh! Master Duel to become a platform of its own where Yu-Gi-Oh! players can enjoy the game. This is the hope, regardless of whether you’re a casual or serious player. There are also plans to use the platform to host tournaments and even the Yu-Gi-Oh! World Championship events in the future.

The game is quickly gaining popularity, and we look forward to seeing how this popularity grows now that the mobile version is available. Until then, you can check these leaks for possible upcoming content for Yu-Gi-Oh Master Duel.
How to set a custom Safari background in iOS 15

Safari’s iOS 15 comes with many new adjustments and features. From tab groups to a movable address bar, there are so many ways that you can now make the Safari browser your own. Another way that you can start to personalize the Safari browser is by uploading a custom background.

This feature has been available on the Apple Mac systems for a while but has only recently been introduced to mobile versions of Safari for iPhones and iPads. So, how do you set a custom Safari background in iOS?

What is the latest version of iOS?

The latest version of Apple iOS is currently 15.3. To change the background on your Safari browser, you’ll require iOS 15 or newer. If you’re unsure if you have the latest version on your mobile device, check your updates now. You can check for updates on your iPhone by navigating to the general settings on your device. 

To change the background on your Mac computer, you’ll need MacOS14 or newer. You can check the version of your macOS and see if there are any updates available from the system preferences on your computer. 

It is recommended to set your Apple devices to stay up to date with any updates to ensure you have all the newest features and fixes when using your device.

How to set a custom Safari background?

Let’s see how you can change the background of Safari on your mobile device to make the browsing experience more personalized.

  1. Launch the Safari app

    How to set a custom Safari background in iOS 15

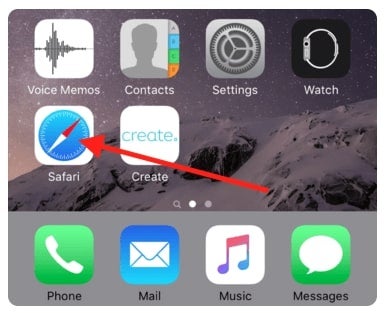
    The first thing you’ll need to do is launch the Safari browser on your iPhone or iPad. You can do so by tapping on the browser icon in your app menu.

  2. Tap on the double square icon

    How to set a custom Safari background in iOS 15

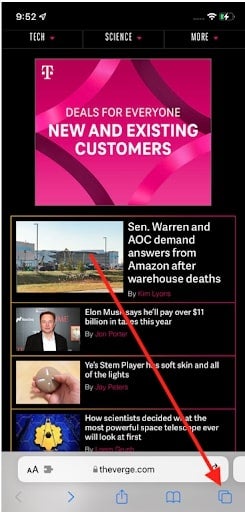
    Depending on your settings, the browser might automatically open on the last page you visited. However, you’ll have to open a new page to change the background. The first step in doing this is tapping on the double square icon at the bottom right of your screen.

  3. Tap on the ‘+’ button

    How to set a custom Safari background in iOS 15

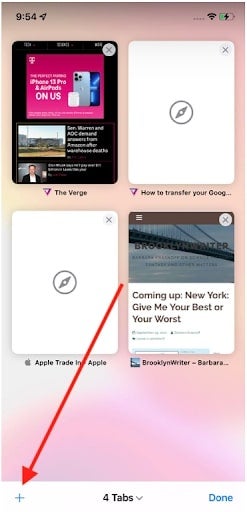
    You’ll be taken to a new page where you’ll see thumbnails of all the pages currently open in your browser. To open a new page, you need to tap on the ‘+’ button at the bottom left of your screen.

  4. Tap on the ‘Edit’ button

    How to set a custom Safari background in iOS 15

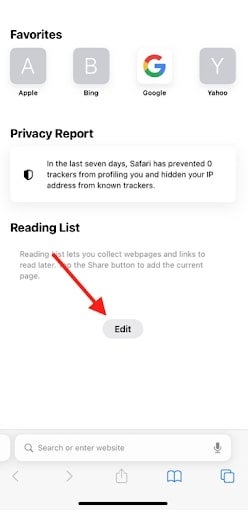
    Now you’ll find yourself on the ‘Customize Start’ page. To set your background, you need to tap on the ‘Edit’ button at the bottom center of your screen.

  5. Toggle background image on

    How to set a custom Safari background in iOS 15

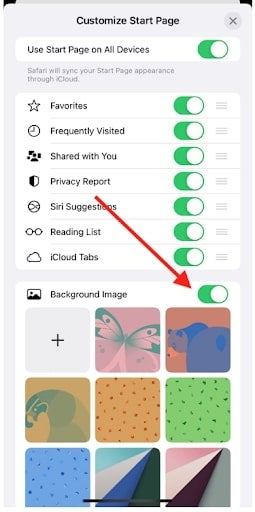
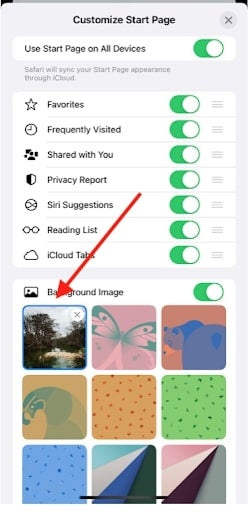
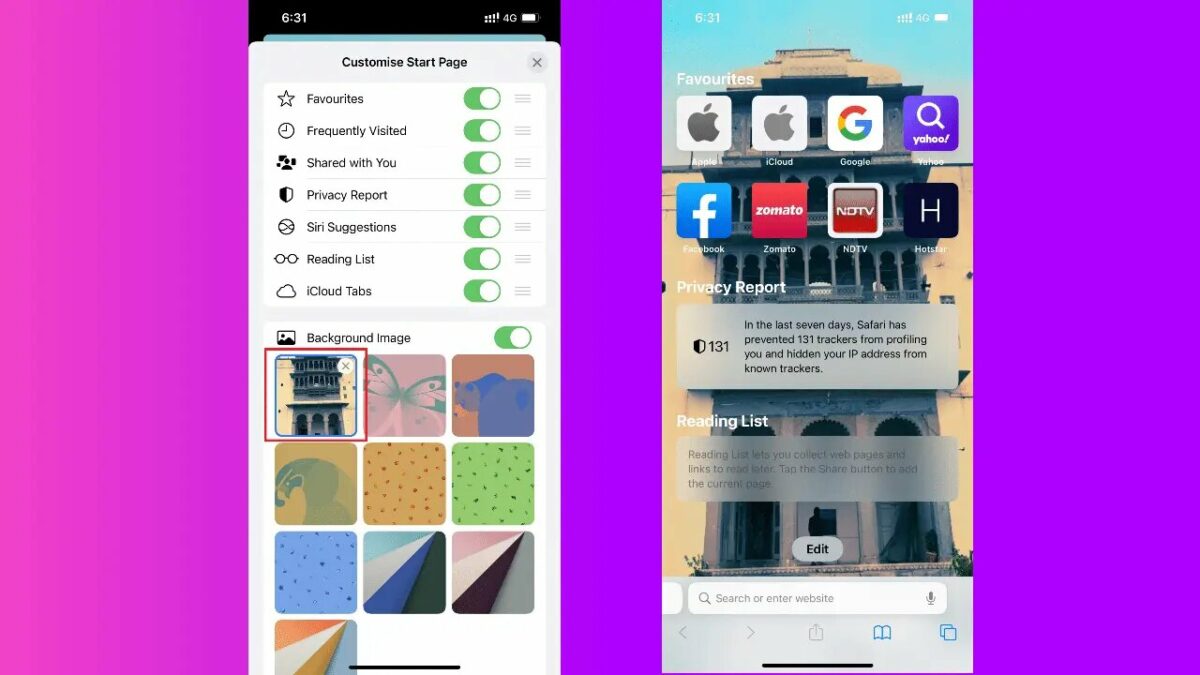
    Now you’ll be on the settings screen where you can change various aspects of your start page in Safari. Here you can toggle what you want to see and, more importantly, what you don’t. Right at the bottom of the list, you’ll see the option for a background image. Turn the toggle on to choose a custom image for your background.

  6. Choose your image

    How to set a custom Safari background in iOS 15

    Now you can choose what image you want to use. You can select any of the pre-installed Apple backgrounds shown by tapping on them. If you want to choose from the pictures and photos on your device, tap on the first box, which is empty and shows a ‘+’ on it. This will take you to your device photos, where you can choose from your saved images.

Personalize your browsing with a unique background

Just like that, you can have a new, customized background in your Safari browser. By following these simple steps and ensuring you have the right version to support customized backgrounds, you can set any background of your choice within a few minutes.

And if you’re working on a computer, you can also enjoy expressing yourself by changing your Safari homepage on a Mac device within a few steps.

How to get your Spotify playlist to Apple Music

There are so many music streaming apps and services that have been released over the past few years. If you’re anything like me, you’ll have tested out a few of them to find the one that fits like Cinderella’s proverbial glass slipper. But once you’ve found the service you want to stick with for the long haul, what do you do with the others? 

If we lived in a perfect world, Spotify would communicate seamlessly with Apple Music, Deezer, Joox, and all the other music streaming services and vice versa. But we don’t, so we need the help of a separate app to get all our music apps speaking the same language. Say hello to Soundiiz, an app that lets you move music, playlists, albums, and even artists from one music service to another. Here’s how you can use it to transfer your Spotify playlist to Apple Music and other platforms.

Transferring your music from Spotify to Apple Music

Music taste is subject to change, even for the most steadfast of us; every now and then, we find something new that rocks our world. It’s likely that across these myriad music apps you’ve tried, you’ve got a lot of different music. The best thing would be if there were a way to somehow merge all your music into one app, no matter where you got it from, so you could listen to all the greatest hits from multiple eras of music discovery. This used to be a concept only existing in dreamland, but not anymore.

  1. Open the Web App

    How To Get Your Spotify Playlist to Apple Music

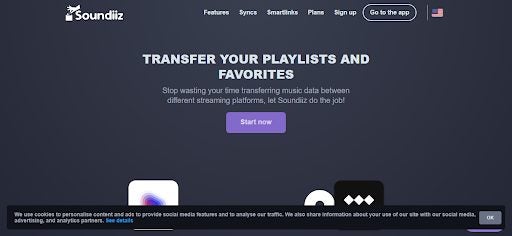
    The first thing you need to do is open your browser of choice and head to Soundiiz.com.

  2. Sign in With Spotify

    How To Get Your Spotify Playlist to Apple Music

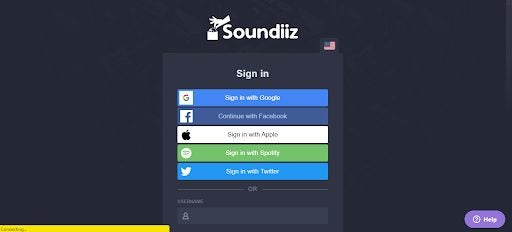
    Next, you’ll be prompted to sign in with a music streaming service of your choice. For the purpose of the tutorial, we’ve chosen Spotify. Enter your credentials and allow Soundiiz permission to access your Spotify discography.

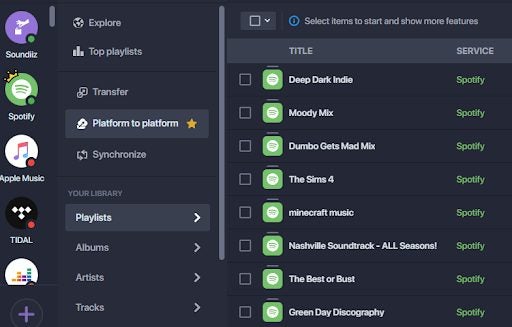
  3. Click on Platform to Platform

    How To Get Your Spotify Playlist to Apple Music

    You’ll see a list of features on the left-hand side of the screen. Click on ‘Platform to Platform.’

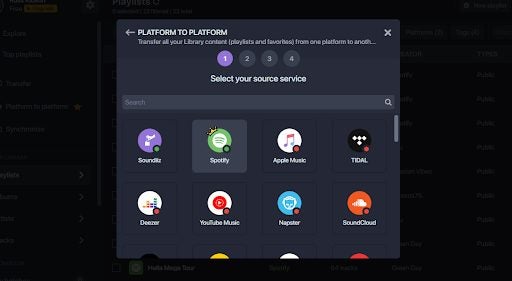
  4. Select and Connect to Spotify

    How To Get Your Spotify Playlist to Apple Music

    Next, you’ll want to select Spotify as your source service. This will let you move content from Spotify to your chosen destination service, in our case, Apple Music.

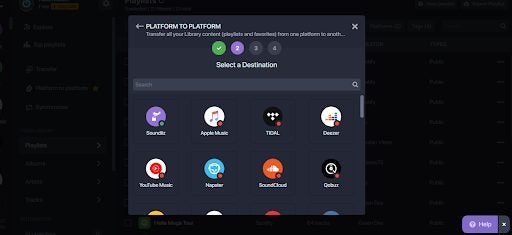
  5. Select Your Destination Service

    How To Get Your Spotify Playlist to Apple Music

    Now you need to select where your music is headed to. In our case, that’s Apple Music, but you can choose from any of the 40+ music streaming services that Soundiiz supports.

  6. Wait Patiently

    How To Get Your Spotify Playlist to Apple Music

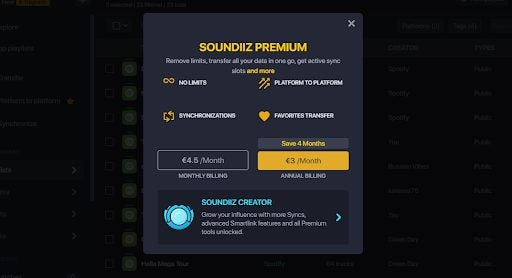
    Depending on the subscription level you choose, Soundiiz will let you transfer your music collection in batches. This happens in the background, so you can carry on doing whatever you were busy with before you came across our article. 

    If you have a free subscription to Soundiiz, you can transfer one playlist at a time. However, for the amount of functionality you’re getting, the premium package is well worth the $3. When your transfer is finished, head to Apple Music or your chosen destination service and enjoy your music.

All Your Music at Your Fingertips

Soundiiz is a really powerful music conversion and transfer tool. With a few simple steps, you can consolidate all your music and have it all in one place. For a small price each month, you get access to all premium features, making the entire process faster, easier, and so much more convenient.

Windows 11 might be getting faster soon

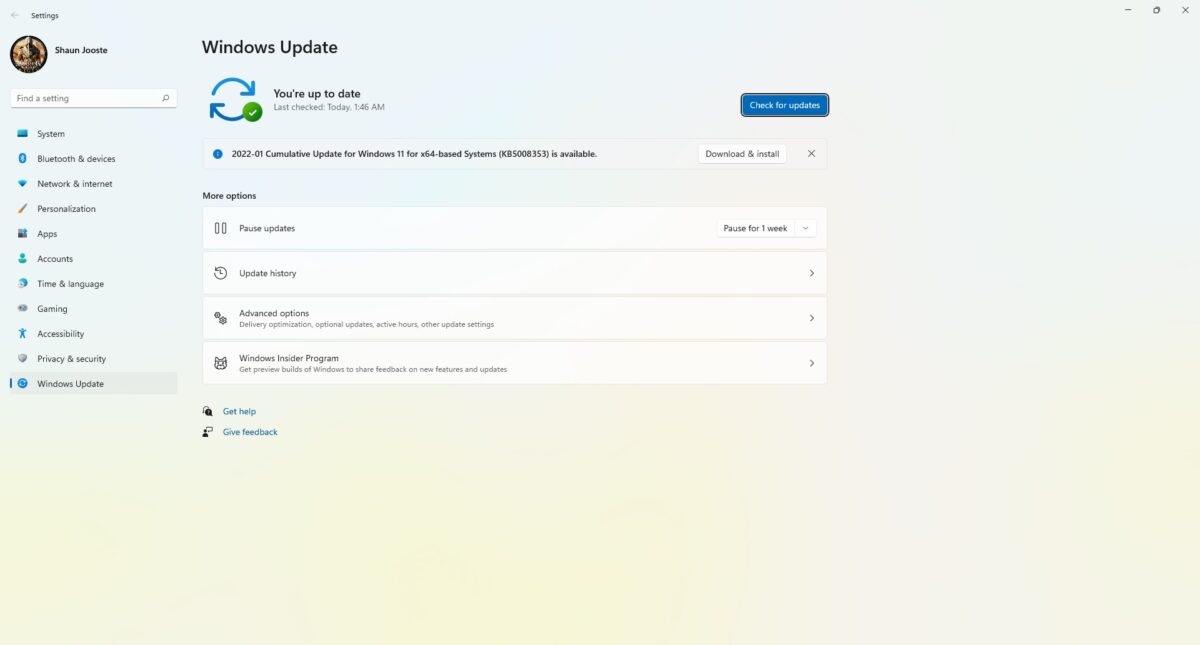
Windows 11 is by no means a perfect operating system. Since the launch of the revolutionary new Windows OS, bugs have been present impacting performance on various devices. An issue affecting solid-state drives (SSDs) and hard drives reportedly slows some systems down more than 50%. Microsoft has yet to resolve the problem, but a new optional Windows 11 update could make the storage bug a thing of the past. 

Windows 11 KB5008353, the latest in a string of performance updates, finally seems to be addressing the issue with storage drives on Windows 11 devices. The proof of this comes in the form of user statements commenting on the increase in speed and decrease of storage drive issues across the board. The new update is entirely optional, and Microsoft says it also fixes another bug found in the USN journal, which caused strange performance regression issues. 

The bugs have been a holdup in productivity and usability since the product’s launch, with key updates attempting to rectify the issue. One such update was the December 2021 Cumulative Update shortly after Microsoft acknowledged the performance issues affecting all storage drives, including NVMe, HDD, and SSD. Microsoft said that the bug affected disks’ performance because it performs unnecessary actions at every occurrence of a write operation. 

This issue with the Cumulative Update is that it only improved performance for a limited number of users, not all. Reports persist of innumerable SSDs and HDDs still being much slower than should be the case. 

With the new update potentially making speed regression issues a thing of the past on Windows 11, the operating system is set to soar past the popularity of its older counterpart, Windows 10. To read more about how quickly Windows 11 has been adopted by users and some tips and tricks on using it to its full potential, take a look at some of our other articles.

Hextech Mayhem is coming to mobile, but there’s a catch

The popular League of Legends spinoff, Hextech Mayhem, is finally coming to Android and iOS devices. This rhythm-runner was released on PC and Nintendo Switch last year, and we were excited to learn of a mobile release. However, there is a catch. Hextech Mayhem and another title, Dungeon Dwarves, are both being released as part of Netflix Games.

Netflix recently started including games with their streaming subscriptions, and these two were the latest additions to the service. This means that anyone with an active Netflix subscription can download and play Hextech Mayhem, or any other of the included games, for free on Android or iOS devices.

Hextech Mayhem was developed by Choice Provisions and was published by Riot Forge. That’s the publishing arm of the well-known Riot Games and is responsible for publishing smaller, self-contained games set in the League of Legends universe. 

Backed by such prominent developers in the gaming community, Hextech Mayhem is Netflix’s biggest title release to date. Hextech Mayhem moves away from the multiplayer online battle arena (MOBA) that League of Legends is known for. Instead, this game makes full use of the developers’ expertise by delivering a compelling rhythm runner set within the League of Legends universe.

In the game, you’ll be playing Ziggs, a chaotic character with a love for bombs. During the levels, you’ll be bombing your way through the industrial city of Piltover, all the while keeping your movements to the rhythm of each level’s music.

It’s great to see Netflix acquiring bigger titles of such great quality as Hextech Mayhem, Dungeon Dwarves, and others. This shows that Netflix Games doesn’t just want to appeal to casual gamers, but more serious ones as well. We look forward to seeing what future additions there will be.

You can now link your PSN account to Discord

Discord is finally allowing PlayStation Network (PSN) users to link their accounts to it. This news comes after an initial announcement back in May 2021 that it was working closely with Sony to “bring the Discord and PlayStation experiences closer together on console and mobile.”

It has been a few months since then, but this long-requested feature is now official and will slowly be implemented in the coming months. Owners of the PS4 and PS5 consoles are getting what they want at long last, with proper PSN integration with their Discord accounts.

Discord is an instant messaging service that was released back in 2015, and it was initially marketed as a social platform wherein gamers can come together to discuss their love for all things gaming. Since then, it has gradually become the preferred chat app for both gamers and non-gamers alike. With PSN integration now in tow, its widespread appeal is only going to get stronger.

Linking your account to Discord will let your friends see your gaming activity and see what game you’re currently playing on your PlayStation console. You can also add your PSN ID to your Discord profile so it will be easier for others to add you. The new feature can be accessed via the User Settings>Connections menu across desktop, mobile, and web versions.

This news comes after Sony made an announcement that it will be acquiring game developer Bungie, known for the Destiny games, for $3.6 billion. Do note that this feature will be a slow rollout, and will start with users in the US first. Expect more countries to be added to its list soon after. Hopefully, the wait won’t take too long.

Google One VPN is finally available to iOS users

Google only entered the world of VPNs in the last few years. So far, the Google One VPN service has only been available to Android users. After what seems like an eternity, Google has just announced the One VPN that has iOS users excited. 

Yesterday, Google announced that the Google One VPN is now available to iOS users with a Premium subscription plan that includes 2TB or more cloud storage. This follows the release of Google One VPNs to Android users in October 2020. At this point, the tech giant promised iOS users that they are working on bringing the same VPN service to iOS devices as well.

In the meantime, iOS users could use the VPN provided by Google Fi, which is a cellular service available to both Android and iOS users. However, those Apple users who aren’t using Google Fi can now use One VPN.

The Google One VPN can be shared with up to five members across Android and iOS platforms at no extra cost apart from the monthly premium subscription. This means that users can share the VPN protection with their family or household and ensure that everyone is protected while browsing the internet.

The VPN service allows users to stream, download and browse content over an encrypted connection. It also provides additional protection on public Wi-Fi and cellular networks. Another benefit of this VPN is that it masks your IP address so that websites can’t determine your location and track you.

A VPN service is a great protection measure and having one included that you can share with five family members is a bonus. We’re just wondering why this feature wasn’t available to iOS users since the beginning and why there was such a long delay?

How to download Wordle for free

After hearing that the New York Times recently bought Wordle, many of us live in trepidation of what the online news agency might do with it. We’ve all been loving this word puzzle game so much, we really don’t want to see it hidden behind the subscription paywall. However, it seems there is a rather clever way of downloading Wordle’s current browser version on your PC.

Aaron Rieke, a technologist that did some exploring, explained on Twitter that you can simply save the webpage on your computer like you would with any other page. When you do so, it includes all the magic coding that Josh Wardle created for Wordle. The words will refresh daily, while the solution is also hidden within the programming.

All you need to do is access the saved folder, crack open the HTML page, and you can play Wordle to your heart’s desire. It even works if the internet is disconnected. However, we’re not sure how the New York Times will feel about this approach, and there may even be future licensing issues involved. For now, you can go ahead and see if it works for you.

The only downfall is that you can’t transfer your saved progress. You’ll need to start over with your offline Wordle version until someone comes along with a way to move your previous profile. Of course, the NYT may update the word puzzle game into something new and fantastic, making all of this unnecessary. But that’s a story for another day.

How to remove annoying ads from Windows 11

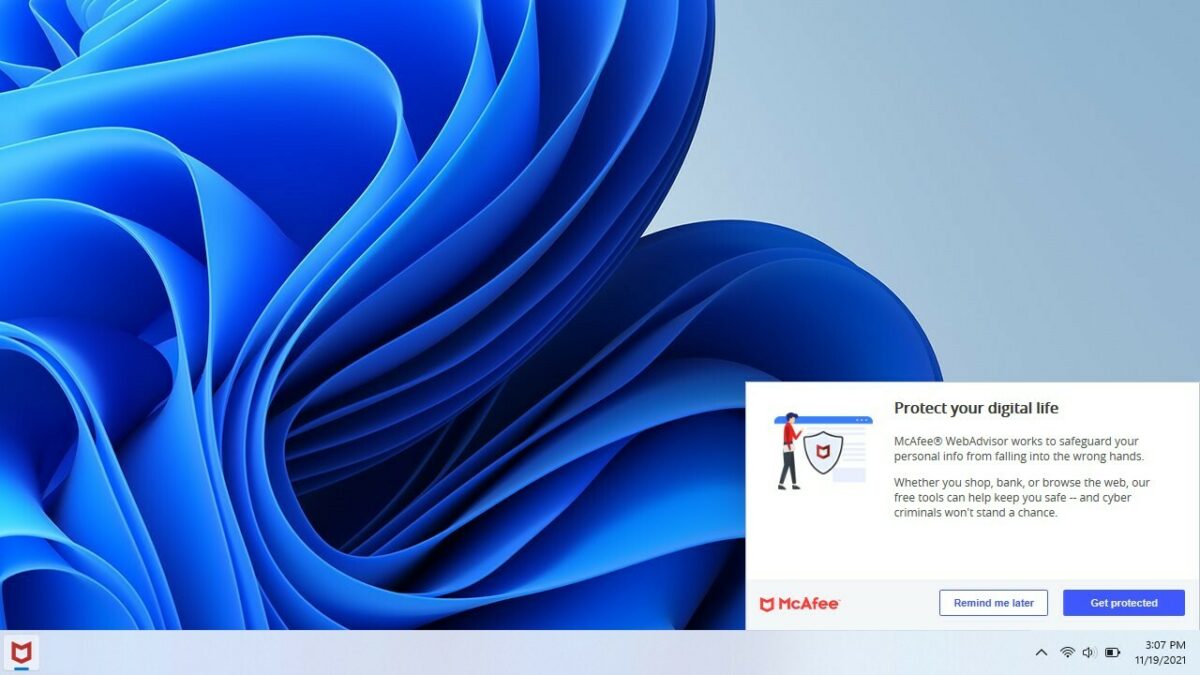
Just like its predecessor, Windows 11 does have ads. Despite the negative feelings around annoying ads, the developers at Microsoft are continuing their quest of injecting ads directly into the operating system. As if users weren’t bombarded with ads whenever they open their browsers or an app on the device, now these ads are even coming directly from the operating system. 

It may feel like there is no escape, but you can enjoy Windows 11 ad-free by changing a few settings. Unfortunately, there isn’t just a single setting to despicable that will solve this issue, but rather a few different ones.

Removing annoying ads from Windows 11

For these methods, check to see which one you need the most and follow the guidelines mentioned.

  1. Eliminating ads from Windows 11’s lock screen

    How to remove annoying ads from Windows 11

    The lock screen is another place that Windows pushes ads on the user. While these may seem innocent enough initially, they can become annoying very quickly. They’re disguised under the phrase ‘Facts, tips, tricks and more’, but in the end, they’re just ads. Here’s how to remove ads from the lock screen.

    – Go to ‘Settings’

    Go to your ‘Settings’ on Windows 11. You can get here by clicking on the ‘Start’ button, followed by clicking on the familiar gear icon representing ‘Settings’. Alternatively, you can use the keyboard shortcut ‘Win + I’.

    – Choose ‘Personalization’

    In the left sidebar, click on the ‘Personalization’ option.

    – Choose ‘Lock Screen’

    From the options provided, click on ‘Lock Screen’.

    – Disable ‘Get fun facts, tips, tricks and more on your lock screen.’

    • Disable the toggle labeled ‘Get fun facts, tips, tricks and more on your lock screen.’
  2. Removing ads from Windows 11’s notifications

    How to remove annoying ads from Windows 11

    Windows 11 was created so that it can show ads disguised as ‘Suggestions’ or ‘Tips’. These ads can appear as pop-ups and notifications in various places on your computer. Let’s see how you can get rid of these annoyances.

    – Go to ‘Settings’

    Navigate to your settings once more. You can access settings through your start menu or by using the keyboard shortcut ‘Win + I’.

    – Select ‘System’

    In the left sidebar, click on ‘System’.

    – Choose ‘Notifications’

    In the menu window, click on ‘Notifications.’

    – Disable ‘Offer suggestions on how I can set up my device’

    Scroll down and disable the toggle labeled ‘Offer suggestions on how I can set up my device.’

    – Disable ‘Get tips and suggestions when I use Google’

    Also, make sure to disable the toggle labeled ‘Get tips and suggestions when I use Google.’

  3. Removing ads from Windows 11’s settings

    How to remove annoying ads from Windows 11

    Not even the settings menu managed to escape the relentless onslaught of ads. Although these ads aren’t as common, there is still a switch that means that anyone can see ads in settings at some point. To avoid this altogether, here’s how you can disable these ads.

    – Go to ‘Settings’

    Open your settings menu by selecting it in the start menu or using the keyboard shortcut ‘Win+I’.

    – Select ‘Privacy and Security

    In the left sidebar, click on ‘Privacy and Security.

    – Choose ‘General’

    In the menu, window click on ‘General’.

    – Disable ‘Show me suggested content in the settings app’

    Disable the toggle labeled ‘Show me suggested content in the settings app’.

    – Disable ‘Let apps show me personalized ads by using my advertising ID’

    While you’re here, you might as well ensure your privacy is secured by disabling the toggle labeled ‘Let apps show me personalized ads by using my advertising ID’.

Start using Windows 11 ad-free

It’s very annoying to have ads thrown in your face every way you turn. With ads now being built-in to operating systems, it can seem like there is no escape. However, by changing a few settings, you can enjoy all the great features of Windows 11 without the pesky ads.

How to enable Microsoft Edge’s Super Duper Secure Mode

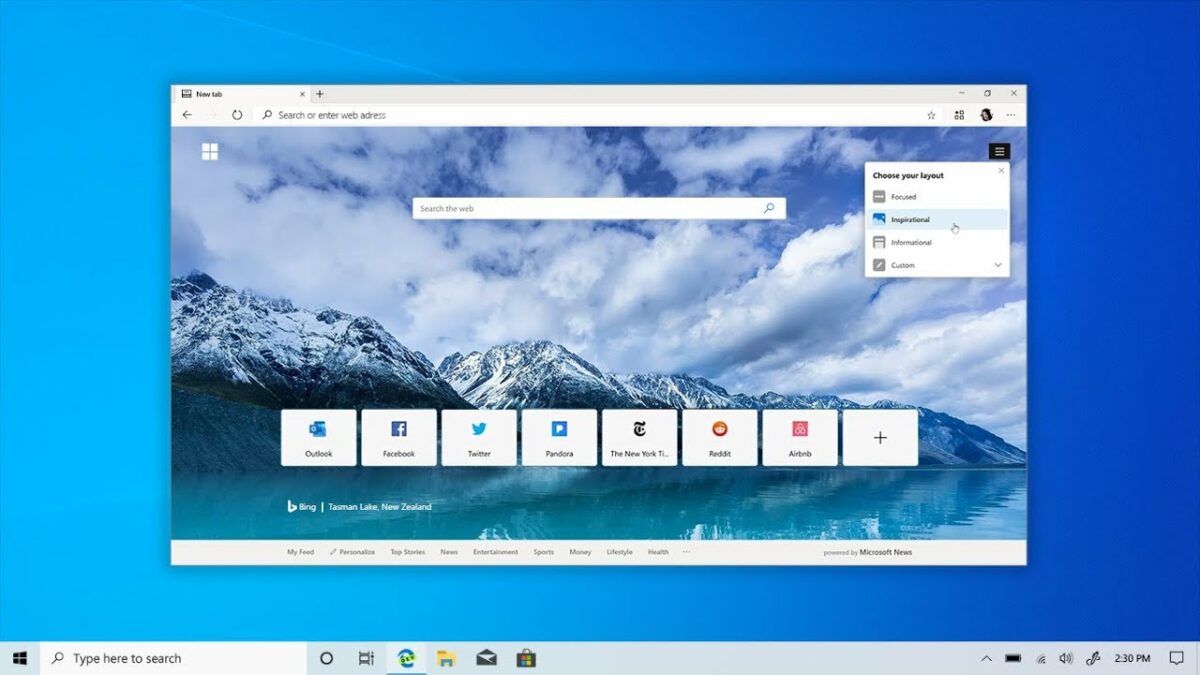
Microsoft’s new resident browser has improved greatly during its short life. Currently, Microsoft Edge rests on its laurels as one of the top three best browsers in the world. Edge is fast and capable, and now with Super Duper Secure Mode, it’s a veritable crypt as well. 

Super Duper Secure Mode basically lets you load webpages faster without compromising on security, as is the case with the JIT compiler tool. Edge can speed up JavaScript-based web pages by up to 17%. It’s available on Windows, macOS, and Linux, and we’re going to teach you how to enable Super Duper Secure Mode wherever you browse.

Enabling Super Duper Secure Mode on Microsoft Edge

  1. Download Edge

    How to enable Microsoft Edge's Super Duper Secure Mode

    The step is to download the browser that makes Super Duper Secure Mode possible; Microsoft Edge. Edge comes standard on Windows 10 and 11 and is easy to download and install on macOS and Linux-based systems. Head over to Microsoft’s website and choose the Microsoft Edge Executable compatible with your OS architecture. You’ll need the latest version of Edge for this feature to work; this is v.96.0.1054.29 0r later.

  2. Run Edge

    How to enable Microsoft Edge's Super Duper Secure Mode

    Everything from here on out will be done on Edge itself. Edge is incredibly capable as far as browsers go and narrowly beat out Google Chrome on speed tests. Edge is also going through a slight resurgence in user popularity. While Chrome still sits proudly at the top of the list, more and more people are choosing Edge over their native browsers.

  3. Open Edge Settings

    How to enable Microsoft Edge's Super Duper Secure Mode

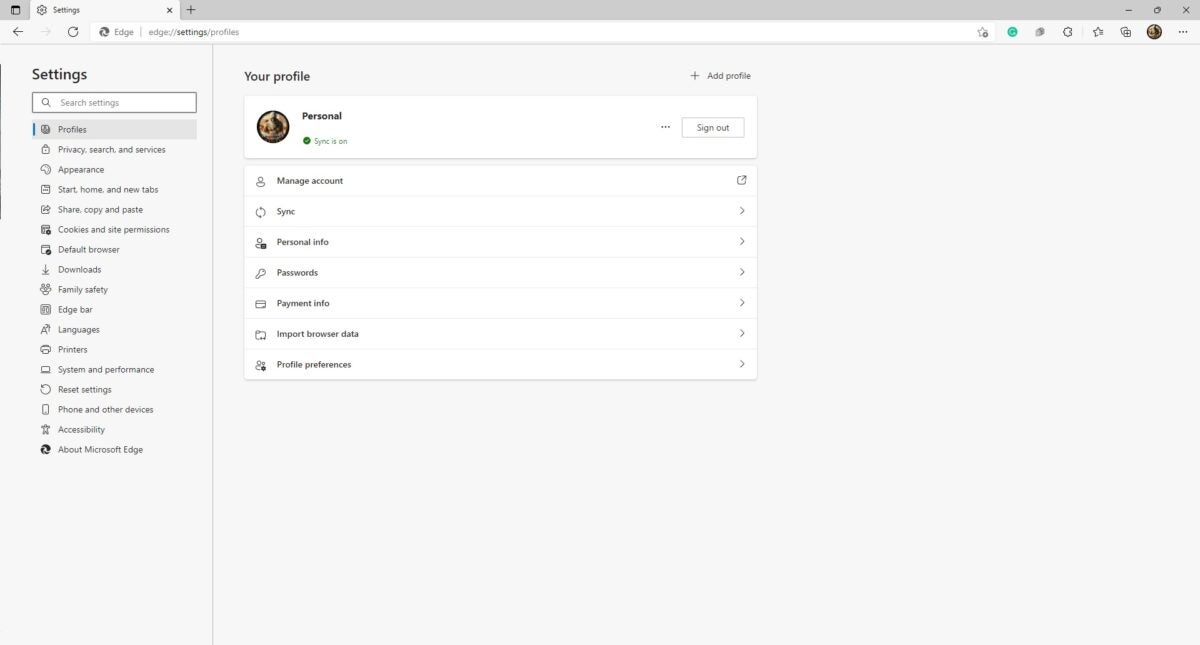
    At the top right-hand side of the Edge toolbar, you’ll see three dots. You’ll see an expandable list of options. From here, you need to head to ‘Settings.’

  4. Security Settings

    How to enable Microsoft Edge's Super Duper Secure Mode

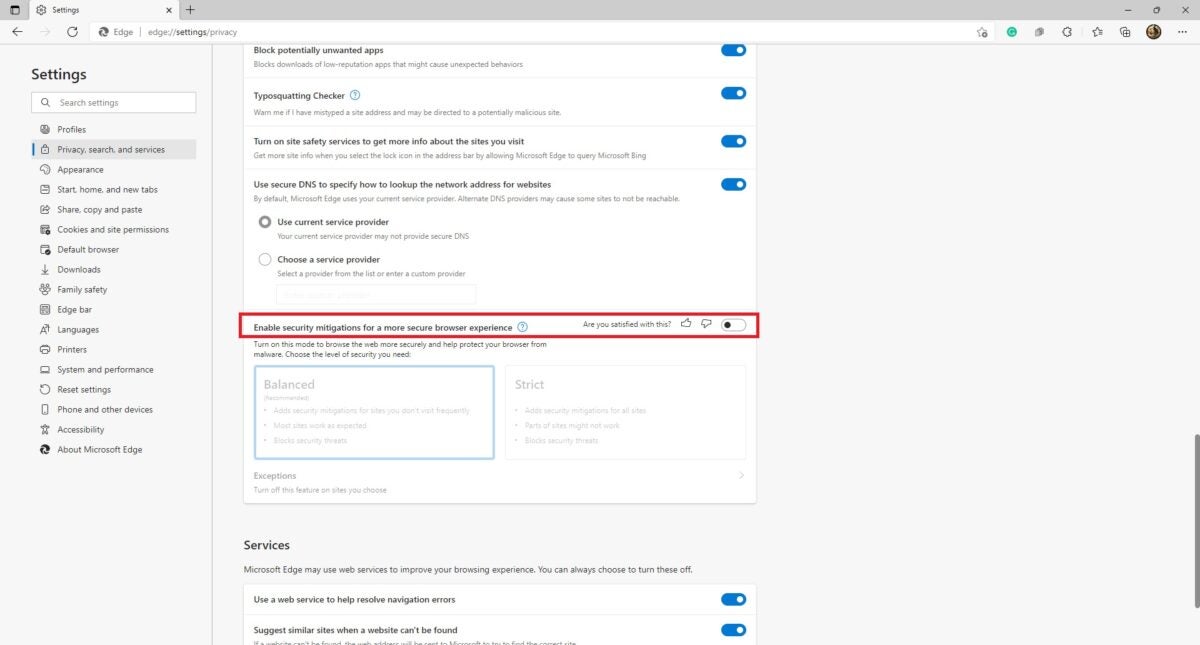
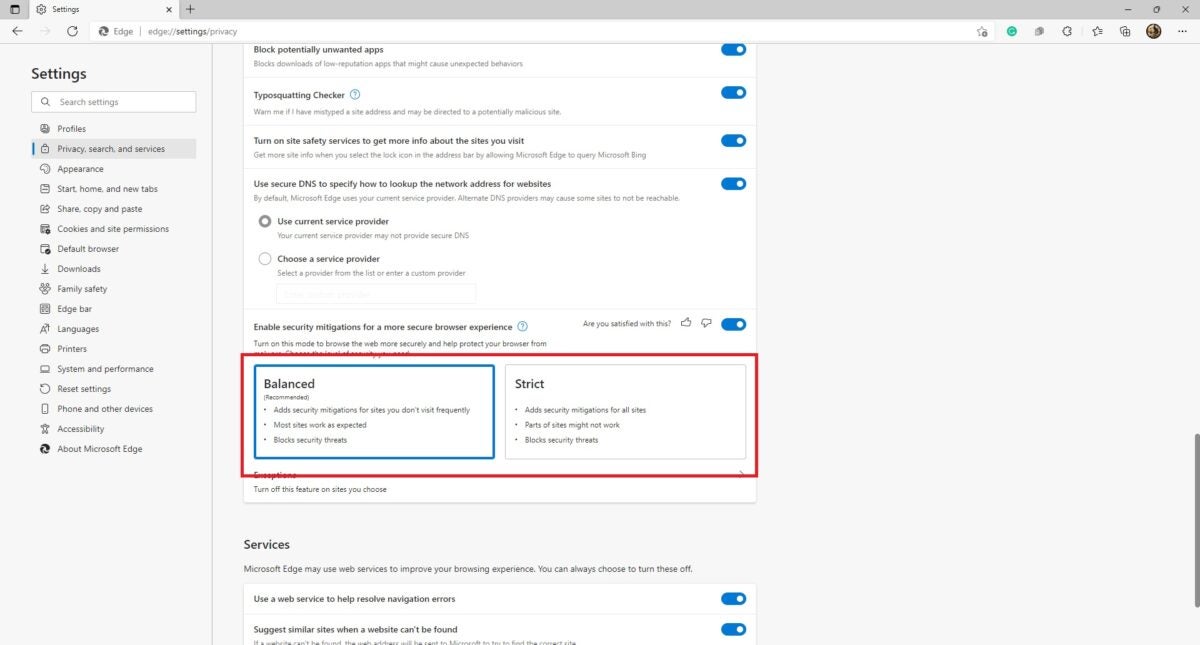
    You’ll see a ‘Privacy, Search, and Services’ tab in the Settings menu. Open this tab and scroll down to the ‘Security’ header. Now you should see an option to toggle ‘Security Mitigations for a More Secure Browser Experience. Turn this on. You have now successfully activated Super Duper Secure Mode.

  5. Choose a Mode

    How to enable Microsoft Edge's Super Duper Secure Mode

    Microsoft Edge offers two different modes when you activate Super Duper Secure Mode. You can choose between ‘Balanced’ and ‘Strict’ security protocols. Balanced adds security mitigations for sites you visit less frequently, allows most sites to work as you’d expect them to, and blocks security threats. Strict mode is a bit beefier. It adds security mitigations for all sites it encounters, blocks all security threats, and can result in some sites not working as they’re supposed to due to heavy JavaScript reliance.

A sign of security integration standards to come

Super Duper Secure Mode can be a bit buggy. To be fair, it’s still very much a work in progress, but it is a crystal clear window into the future of internet browsing security; The fall of the geriatric V8 JavaScript JIT compiler. The tool is quite the dinosaur in technological terms and serves as more of a security nightmare than anything else.

The expectation created by features like Edge’s Super Duper Secure Mode is that slowly but surely, reliance on the JIT compiler will lessen and that more browsers will start disabling it by default in the next few years as Microsoft Edge has done.