Hamachi review: A secure VPN solution for businesses and gamers

Released in 2004, LogMeIn Hamachi isn’t the typical virtual private network solution. As an on-demand hosted service, the VPN lets users establish direct network links to distributed teams, remote co-workers, and online gaming friends, creating an internet-based connection similar to a local area network.

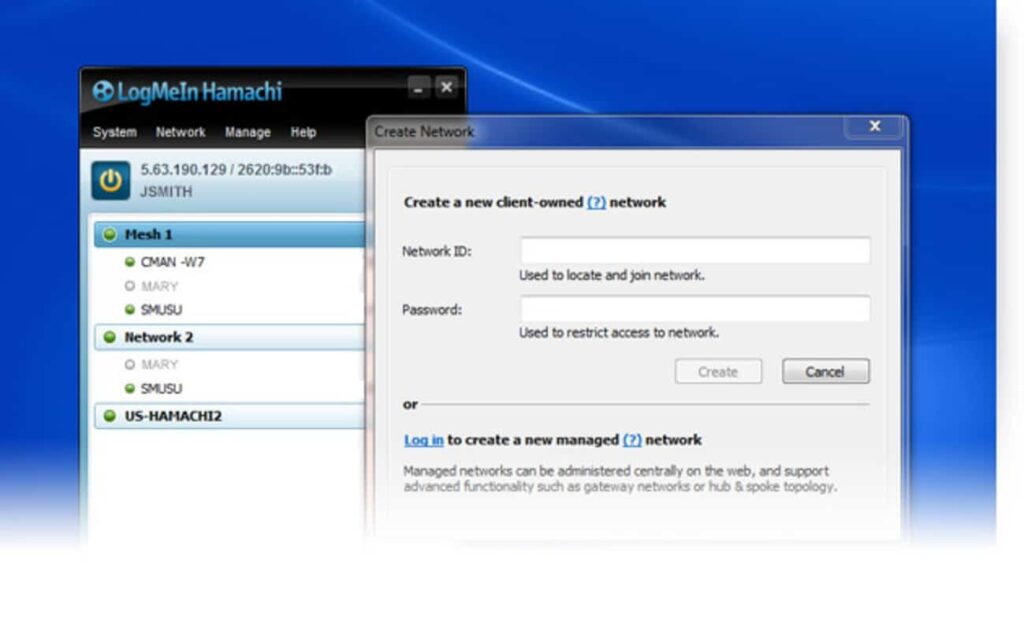
With Hamachi’s unique interface and functionality, you can enable virtual networks from anywhere. It lets you establish end-users as desired for secure conference calls, multi-contributor podcasts, and multiplayer gaming applications. Hamachi subscribers can choose from distinct network types: Mesh, Hub-and-Spoke, or Gateway, depending on their requirements.

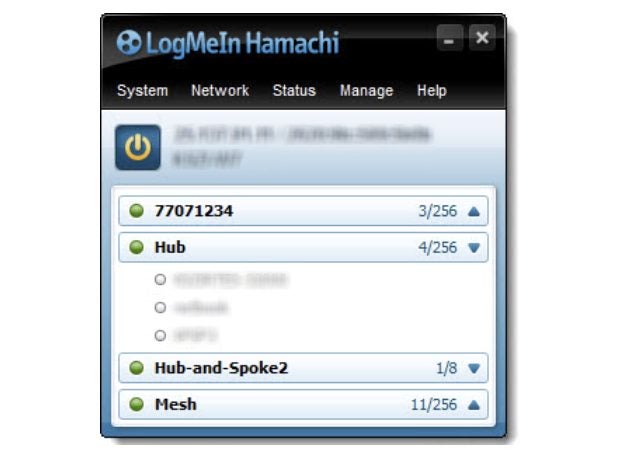
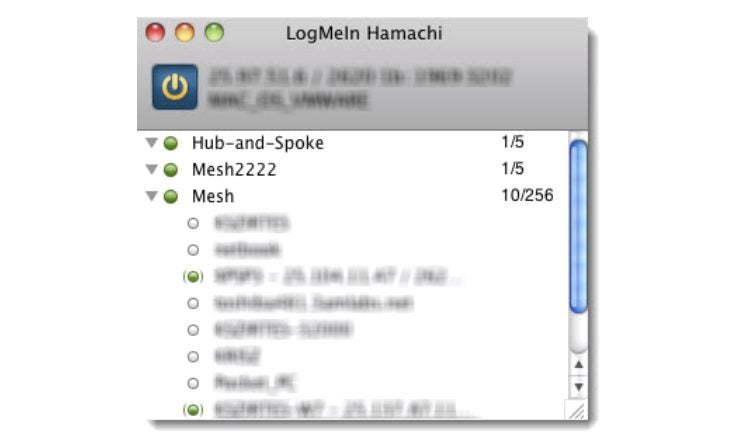
Hamachi network types

To promote a flexible service, Hamachi offers three network solutions for a diverse range of use case scenarios. The networks differ from other solutions primarily in topology, each offering unique advantages depending on use.

Under the Mesh network, for example, all established members remain connected, letting you create a virtual corporate LAN in the absence of a physical LAN. Mesh is the only network type that generates directly from the Hamachi interface. The Mesh network is a popular choice with gamers because online gaming applications necessarily provide individual gaming status to all participants.

The Hub-and-Spoke network differs from Mesh because one or more connected computers operate more like a gateway hub while established users represent spokes. In other words, spokes only connect to the hubs, not other spokes. The hub functions like an informational catalog, as in a centralized library terminal, for example. Individual workstations, in contrast, represent spokes connecting to the hub.

Gateway combines the features of Mesh and Hub-and-Spoke in hybrid form to provide transparent access across your entire network from a centralized Hamachi gateway. Like Hub-and-Spoke, one computer acts as the hub (or gateway) while participating members function as spokes. There exists only one gateway, usually a permanently online service connected to the LAN. Computers acting as a gateway are visible to network members, which means all network resources are available. This network is the most popular choice among digital nomads and workers who office from home.

Hamachi pricing

What’s nice about the Hamachi VPN is that it’s free for up to five computers on your network. For those who require more devices and elect to run Hamachi as a service in unattended mode, there are three different subscription packages.

The standard package pricing begins at $49 per year for every network, setting the pricing at just over $4 every month. This service covers 6-32 devices per network. There are also good options for subscribers with larger membership requirements. Hamachi’s premium package runs $199 annually per network, or $16.58 every month, for 33-256 devices per network. With the Multi-Network subscription, users can run up to 256 devices and access unlimited networks. The cost for this last package is $299 per year, or $24.92 if broken down monthly. All billing is upfront, and subscriptions can be purchased from the LogMeIn Hamachi website using credit cards, PayPal, or bitcoin.

Hamachi VPN for business

Hamachi has several practical applications for business. It is most effective for building mobile LAN-like networks that incorporate various team member devices. Since the Multi-Network provides access to unlimited networks, many outsourced managed IT service providers find this package beneficial for managing multiple networks on behalf of their customers.

Hamachi provides user-friendly apps for both Windows and Mac along with a command-line version for Linux. All approved Hamachi clients running Hamachi software on a computer or mobile device can become members of any Hamachi network. The VPN service offers reliable business support. Business owners have access to a comprehensive “Getting Started Guide,” or they can visit Hamachi’s Support center on their website for more detailed answers about security. Alternately, if you need to speak with a representative in person, you can always call to open a ticket.

Hamachi VPN for gaming

LogMeIn Hamachi offers unique features for gamers, allowing them to set up secure gaming services with specific properties that resemble LAN networks. This option promotes robust server security and enhanced functionality for popular games like Minecraft. Gamers favor Hamachi because it deploys powerful protection against DDoS attacks. In the realm of celebrity streamers and highly competitive gameplay, Hamachi subscribers appreciate this extra layer of protection against malicious cyberattacks.

LogMeIn Hamachi does a great job leveraging AES-256-bit encryption to ensure protection, but the VPN lacks a kill switch. The kill switch is a security feature that terminates your connection if the VPN stops functioning, protecting your IP from being revealed. This means you’ll have to monitor your network connection carefully to avoid exposing your IP address should it ever drop out. While this security feature may be less important in business applications, frequent gamers might find a kill switch useful for keeping their IP address information secure online.

Is Hamachi safe?

Hamachi is among the best VPNs for establishing secure connections between multiple devices. Users can easily share files or play private games with an ultra-secure peer-to-peer protocol. The Hamachi VPN also lets you deploy your home PC as a server if you want to download torrents while overseas, assuming the torrenting is permitted in your country.

All your team’s communications are secured using the AES-256-CBC cipher for data encryption and decryption and ESP-like padding as established in RFC 2406. Packet authentication utilizes the HMAC-SHA-1-96 (RFC 2404) variant of HMAC-SHA1 (RFC 2104), and the packets are numbered to safeguard them from reply attacks. In layman’s terms, this level of privacy and security places Hamachi among the safest VPN options available.

So, what’s the verdict on LogMeIn Hamachi?

Hamachi offers a unique VPN solution that operates differently from several more recognizable options, but unfortunately lacks a global server and a kill switch. Nonetheless, for businesses and gamers, it’s one of the finest VPN services for remote and multiple networks on offer. To learn more about its security features, check out the Hamachi white paper published on their site.

Pros

  • Centralized access control
  • Unlimited networks
  • Unattended access
  • On-demand networking
  • Encrypted communications

Cons

  • No global network
  • Lacks kill switch
  • No money-back guarantee

Ask Softonic!

Want to make the most of your favorite programs? Would you like us to give you a hand in doing so?

We’re opening our weekly software clinic where we’ll help you to solve any program doubts you may have!

This week we’ll be starting with programs compatible with Windows.

All you need to do is complete this short survey with your questions, as well as the exact name of the program you’re referring to. Please note that we can’t do your homework or answer any illegal requests:

ask softonicWe’ll choose the most interesting questions and will answer them here. It’ll be a great way to share common issues and useful solutions with the rest of our community.

So, what are you waiting for? Send us your questions today!

How to use PaintTool SAI: a beginner’s guide

PaintTool SAI is a paint tool for Windows that will help you unleash the artist in you. However, if you’re a beginner you may find this program a bit difficult to use. In this video tutorial we will show you how to get started:

How to use PaintTool SAI – a beginner’s guide

1. First, open PaintTool SAI. Do be aware that during the installation process several additional software will be offered to you, so if you don’t want to install them or change your browser settings please opt out by unticking the corresponding boxes.

2. Go to File and select New to create a new canvas. You will be able to name it and to choose the preset from the drop-down menu. Once selected, click OK.

3. As soon as you see the canvas in the middle of the screen you’ll be able to start drawing! You’ll find a wide range of options available to choose from: including the color you want to use, the tools you want to work with from a range of pencil, airbrush, brush, water color, marker, bucket and more. You’ll be able to select the edge shape and size, density and texture of what you’re working with. You can test every setting on the scratchpad before implementing it on the canvas. While you can use this program with your mouse in order to get the most out of it, we recommend using a drawing tablet.

4. You can drag, rotate and zoom the canvas anytime to work more comfortably. In case you forgot a color you previously used, click on Color picker to use it again.

5. If you click on Layer you’ll be able to add more layers to your creations. Just click on Show / Hide Layer to see which one you’re currently working on. You can also clear or delete specific layers if you’re not happy with the results.

6. On the Filter tab you’ll be able to change the hue and saturation as well as the brightness and contrast of the last line you’ve drawn.

7. Finally, on the File tab you’ll find the option Export as” letting you save your drawing in several formats. This will allow you to share your art and edit it with other programs.

8. Don’t forget to save your drawing before closing PaintTool SAI!


How to update KMPlayer

KMPlayer is a well-known video and audio player that supports a wide range of formats. However, updating this program to its latest version is not that obvious. In this video tutorial we’ll show you how to update KMPlayer.

How to update KMPlayer por softonic-en

  1. First, open KMPlayer. If you don’t have it installed yet you can download it on Softonic or from the developer’s website.
  2. Right-click on the program, go to Options and click on About.
  3. A pop-up windows will appear, and you’ll find an Update button at the bottom. You just need to click it in order to update the program.
  4. If you go back to Options, you’ll see that there’s a Check Updates options where you can check if your KMPlayer is up to date.

And that’s it! You’ll never have to worry about having an outdated version of KMPlayer again!

How to download, install and play Yandere Simulator

Yandere simulator is the game of the moment. By playing it you’ll become a cute Japanese schoolgirl who will do anything necessary to get the attention of the boy she is in love with. And when we say everything possible we mean… everything! Just jump in to find out for yourself. But, before we show you how to download and install Yandere Simulator, please do know that it is a violent game and may be shocking for some, so it isn’t suitable for players under 18 years old. In this video tutorial we’ll show you how to download, install and play this game:

How to download, install and play Yandere… por softonic-en

1. First you have to download Yandere Simulator, which can be done from an external source or the developer’s website.

2. Once you have the file saved on your computer, locate it and double click on it to open. The file you have downloaded is zipped, so you’ll need a unzipping program to open it, such as WinZip or IZArc.

3. Once the file is unzipped, open the folder that has been created and double-click the “yanderesim.exe” file. The game takes a while to load, but there’s no need to install it as it runs directly from the exe file.

4. When the game window appears, select the graphics quality and if you want to play in full screen or windowed mode and then click “Play“. And you’re done! You can start playing Yandere Simulator!

5. When the game has loaded select “New game” with the press of  the “E” button. To move between options press  “W” to go up and “S” to go down.

6. Now you have to select the gender of your beloved. After this, you can customize him however you want, right down to his school uniform! And you can customize yourself as well.

Once you finish the customization, the action will start!
Remember! To move press “W” to go forward, “A” to move left, “D” to go to the right and “S” to go backwards. To perform actions press “E” and to cancel press “Q“.
Now it’s time for you to enjoy Yandere Simulator! It’s hard for us to describe it, so you’d better just give it a try and see what you think for yourself!

Master the Art of Concept Mapping: A Step-by-Step Guide to Using CmapTools

CmapTools is the perfect program for creating relational charts, conceptual maps, or any other kind of diagrams you can think of. However, it’s a bit complex and using it requires a bit of training. In this video tutorial we will show you some basic hints on how to use it!

CmapTools DOWNLOAD

How to use CmapTools por softonic-en

1. First, open CmapTools. If you don’t have it installed, you can download it for free from this link.

2. Double-click on the middle of the screen and start by creating a concept. Name the concept, and drag it to any area of the screen. You can also enlarge it at will.

3. You will see a couple of arrows at the top of the active concept. Click on them to create new arrows that can then be used to link to new concepts. A rectangle will appear with lines connecting both.

4. As you draft your conceptual map you will be able to add more concepts and ideas.

5. In the “Styles” window you’ll be able to change the following things about your conceptual map:

  • On the “Font” tab, you’ll be able to change the font’s name and size, color, alignment, and add mathematical characters.
  • On the “Object” tab you’ll see how to change the color of the concepts, add  shadows, change the shapes, or even add a background image.
  • On the “Line” tab you’ll be able to change the lines’ colors, thickness, style, shape, connection direction, and arrowheads.
  • On the “Cmap” tab you’ll see how to change the background color of the whole conceptual map and to add a background image.

6. Finally, once your conceptual map is finished you’ll be able to export it as a PDF, image file, and many other formats. Don’t forget to save your changes!

How to clear the cache on Safari for Windows

Safari, like other browsers, temporarily saves images and links from the web pages you visit. These files are saved so pages you frequently visit load more quickly.

In this video tutorial we’ll show you how to clear this cache on Safari – helping you delete old files, maintain your privacy, or just clear this data:

How to clear the cache on Safari for Windows por softonic-en

  1. To begin with, open Safari. If you don’t see the Menu Bar at the top of the window, go to the gear-shaped icon and click on “Show menu bar”.
  2. On the menu bar, click on “Edit” and then on “Empty cache…
  3. A warning pop-up window will appear and ask you to confirm that you want the cache to be deleted. Click on “Empty” to finish.

If for any reason you can’t find the menu bar you can always press Crtl + Alt + E to empty the cache. After pressing these keys the pop-up window will also appear.

And that’s it! All the data stored on the cache is now gone!

Why doesn’t uTorrent open?

Why doesn’t uTorrent open por softonic-en

You’ve just installed uTorrent and restarted your computer, but the program won’t open. We know, it’s so irritating! But why does it happen? Usually, by double-clicking on the desktop uTorrent icon, the program should open. However, sometimes, this doesn’t work.

Once uTorrent is installed, it should open automatically when you start Windows and remain minimized in the system tray. Because of this, it sometimes seems like the program won’t open, when in fact it’s already running. This happens because the program’s settings are designed by default to resume downloads as fast as possible when you turn on your computer without having to open the program.

To ensure that uTorrent is open, first locate the uTorrent icon in the system tray, which should be next to the Windows clock.

Once you’ve located the uTorrent icon, double click to open it. uTorrent will open and you’ll be able to use it.

If you do not want uTorrent to open automatically when Windows starts, open the program, click on “Options“, and go to “Preferences“. In the “General” tab, find the option “Start uTorrent when Windows starts“. Then, all you need to do is to unmark this option to avoid uTorrent opening when you turn on your computer.

To close uTorrent, right-click on the icon in the system tray and select “Exit“.

uTorrent has many settings, so you might want you take a look at them and choose those that fit your needs!

How to convert PDFs into Word with Free Word to PDF Converter

We are certain that you have needed to convert a PDF to a Word file for editing at some point. Nowadays there are lots of programs to help you convert PDF to Word, but we recommend a free one called Free Word to PDF Converter.

In this video tutorial we will explain you how to use this program in a few simple steps:

How to convert PDF to Word with Free PDF to… por softonic-en

  1. First run Free Word to PDF Converter. If you don’t have it installed, you’ll find it here.
  2. Find the “Input PDF File” option. Click on the “+” icon and look for the PDF file you want to convert to Word. You can also drag the file you want to convert from a folder or the desktop on to the “Select input PDF file” field.
  3. If you want to convert some of the pages in the PDF, select the “Page range” field, here you can enter in what page, to what page, you want to convert.
  4. In the “Word Document Output” option, you can choose the folder you want the converted Word file to be saved. You can also choose the Word format extension – docx, doc, or RTF – and decide whether you want the file to be opened by the end of the conversion.
  5. Finally click on “Start Conversion” to convert the PDF file in to Word. The larger the file, the slower the process will be. If you want to cancel the conversion during the process you can always click on “Stop Conversion“.

Within seconds a window with the converted Word file will open. Now you can make any changes you want to the document.

How to zoom on Sony Vegas Pro

Sony Vegas Pro is a professional video editing suite that can help you create high quality videos. The program has a lot of tools to edit your videos, and – because of this – it can be hard to get to grips with all of its features the first time you use it.

In this tutorial we will show you how to zoom in on parts of a video that you want to enlarge.

How to zoom with Sony Vegas Pro por softonic-en

To begin, just run the program and open a video you want to edit. After opening the video, go to the editing area and click on Event Pan/Crop. A pop-up window named “Video Event FX” will open.

Make sure that the button Sync Cursor is enabled, so that any changes made here also appear on the preview windows.

To zoom in you need to select the part of the video you want to edit , and with the help of the mouse and the arrow keys, locate the section that you want to extend and enlarge.

When you’ve zoomed in you will see a little diamond-shaped icon appear on the timeline. This icon marks the exact point where the zoom starts.

To return the video to its normal size, select the moment you want the zooming to stop and return the image to its original scale.

You will see another diamond-shaped icon appear on the timeline. Between the two icons is where the zoom effect occurs in your video.

Now you only have to watch the video preview to make sure that the zoom is fine.

Don’t forget to save your changes!