WhatsApp for Android finally allows you to classify notifications according to their priority. Notification prioritization is a function that has been on the way since August 2017, when Android 8.0 first appeared. This new feature is thanks to the newest version of Android giving users the ability to add notification channels.
Sound confusing? The function allows you to assign different types of notifications. For example, you can make a notification of a message from your mother urgent. This means every time your mother writes to you, your mobile will emit a sound vibrate. Meanwhile, a medium priority notification will not emit any sound any at all.
This way, it will be easy for you to know which WhatsApp notifications are important and which ones are not.
There are 10 different channels, you can use to customize your notifications; group notifications, message notifications, chat history backup, critical app alerts, failure notifications, media playback, uncategorized, other notifications, sending media, and silent notifications.
To use this feature you must have the latest version of WhatsApp and the latest version of Android. Once you’re update, the next time you receive a WhatsApp notification on your device, press and hold it and then select All categories. Then, decide what to do with this notification.
If you’re new to Code::Blocks IDE and you’ve already downloaded and installed the program, it’s a good time to create your first program. We’ll go over the steps to create a specific starter program using Code::Blocks and programming in C++. This is a great way to get familiar with the layout and workings of the software.
Add files to your project
Follow these steps to add files:
Go to the Project menu and select Add files. This will bring in the files associated with your program.
Add any additional .cpp or header files to your project at this step.
Name your files. Now you will see your main .cpp file (if programming in C++) as well as any other .cpp files that you have added to your project. Press Select All to have this file saved as both debug & release targets. Press OK when done.
Edit your files
To begin to edit a file from your project, double-click the file name from sources, and it will appear in the window with line numbers.
Write your code in the main.cpp file (or alternate .cpp file that you have chosen.)
When testing your code, make sure that Debug is selected as the target to use. This is needed to have a debug version available once you compile your code.
Syntax
In C++ there is no special syntax for streaming data input or output. Instead, these are combined as a library of functions. Iostream provides basic input and output services for C++ programs; it must be included for your program to function properly. This is why we must include the #include< Iostream> line in our program.
Formatting the C++ code
We also must include the #include <cstdlib> to the program in C++ .
Be sure the statements you wish to print in the console are between “” quotation marks. For example:
cout << “Hello there!….or should I say NAMASTE “<<endl;
Be sure to use correct beginning and ending statements with each line of code. For basic C++ syntax please see this link.
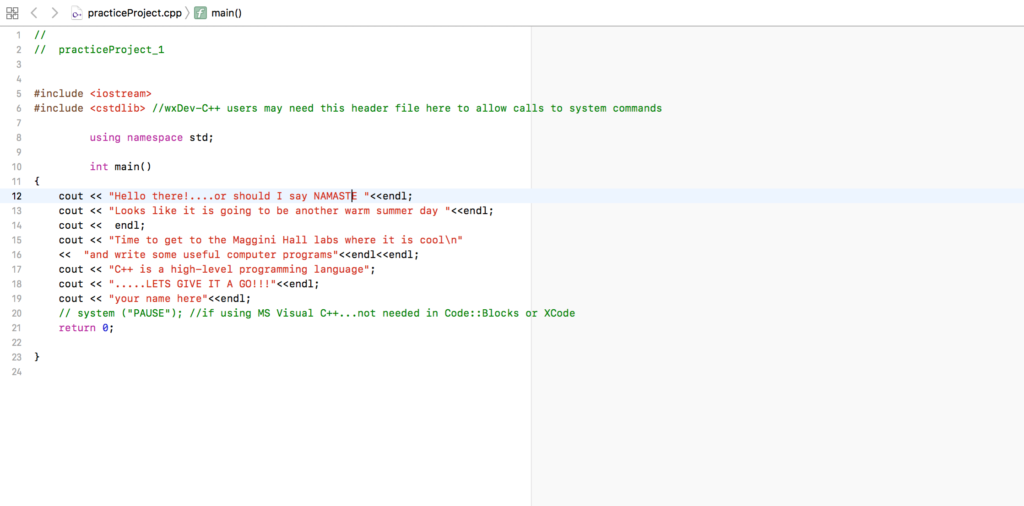
Input the following code into your project (see the image above for comparison):
#include <iostream> #include <cstdlib> //wxDev-C++ users may need this header file here to allow calls to system commands
using namespace std;
int main() { cout << “Hello there!….or should I say NAMASTE “<<endl; cout << “Looks like it is going to be another warm summer day “<<endl; cout << endl; cout << “Time to get to the Maggini Hall labs where it is cool\n” << “and write some useful computer programs”<<endl<<endl; cout << “C++ is a high-level programming language”; cout << “…..LETS GIVE IT A GO!!!”<<endl; cout << “your name here”<<endl; // system (“PAUSE”); //if using MS Visual C++…not needed in Code::Blocks or XCode return 0;
}
Then save your work.
Compiling
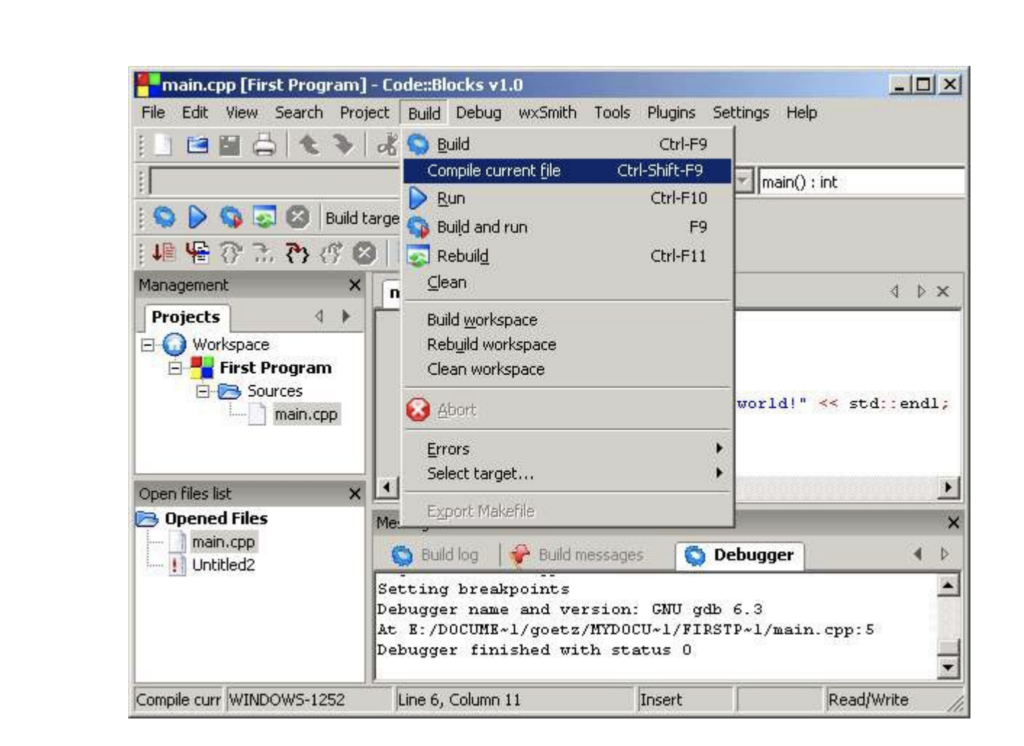
After you complete the writing and editing of your program, you must compile the file. To do this, first go to the Build menu and select Compile Current File (or Ctrl+Shift+F9).
Next, test your project. From the Build pull-down menu, click Build and Run. This step will build an executable file for you. A project build takes the compiled versions of your source files and combines them into one single program. Your program output will now be displayed. You will see all of the text you wrote in between the quotes displayed as program output.
If an error is displayed, check the syntax of your code and check for missing pieces, or unintentional errors.
Although this is a very simple program, it is the foundation for beginning to write more in-depth programs in Code::Blocks. As your programs increase in length and depth, the same basic steps apply. Happy programming!
As you know, owning a PC can often mean so much more than simply pressing the on button. There are often occasions where we need to remove a virus, browse the internet, open files and even write the content of our own.
With this in mind, we have listed the 5 most important software programs for your PC. These tools have been selected based on the most popular products downloaded by Softonic users. So if you have a computer, we recommend that you consider these tools just like our users did!
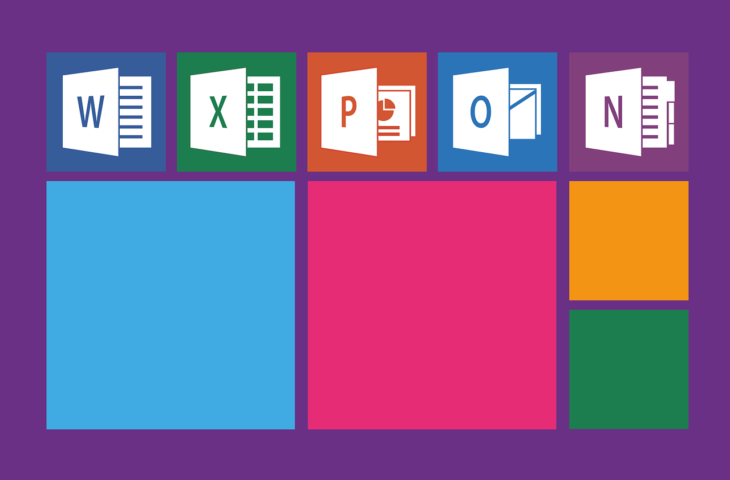
The new Microsoft Office is now on a pay monthly subscription model so no more huge entry costs to gain access to all of the classic tools such as Word, PowerPoint, Excel, Outlook, Publisher, Access and OneNote – all with new and dynamic features!
CCleaner is a ultimate tool for finding and removing junk files and errors on PCs. Is your PC running slow? Well, with a few clicks, CCleaner helps you to recover disk space and makes your PC faster and more efficient.
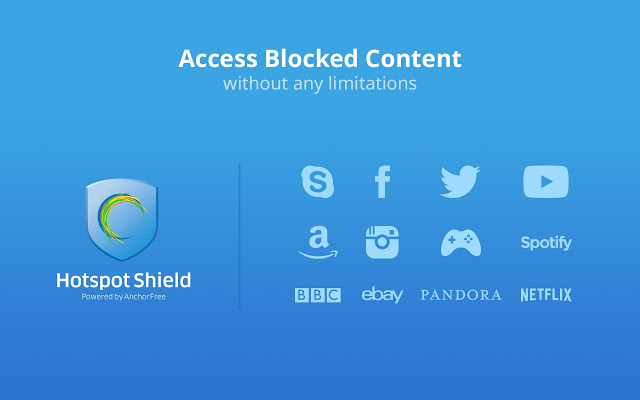
Hotspot Shield is a free VPN that allows you to secure your connection while surfing WiFi hotspots. It also allows you to change location in order to gain access to your favorite sites such as Pandora and Hulu when you’re not in the US. There is also a paid version that removes the ads!
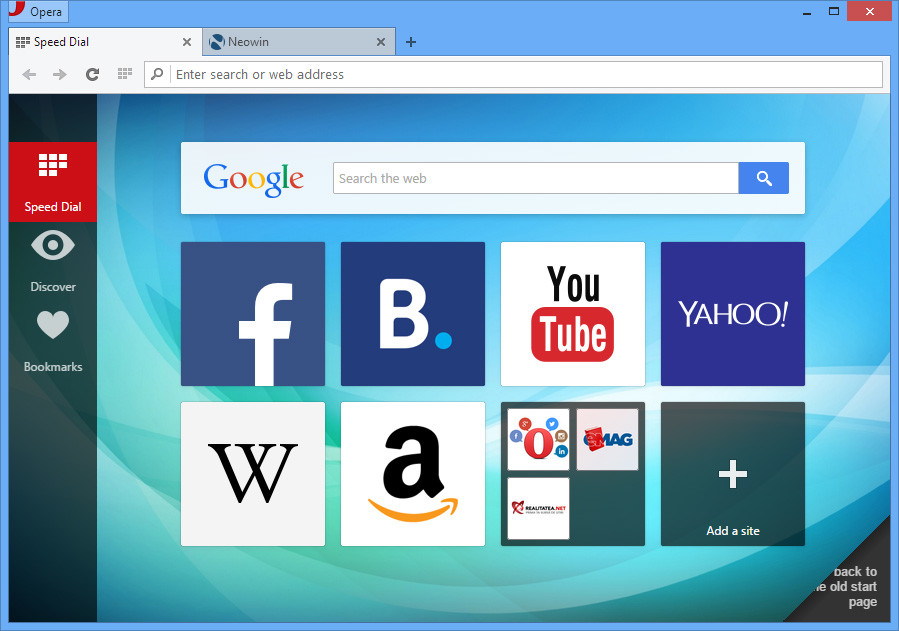
Opera is a free web browser that works in a similar way to Edge, Chrome or Firefox. However, the huge advantage with Opera is its built-in free VPN feature – handy for secure online browsing.
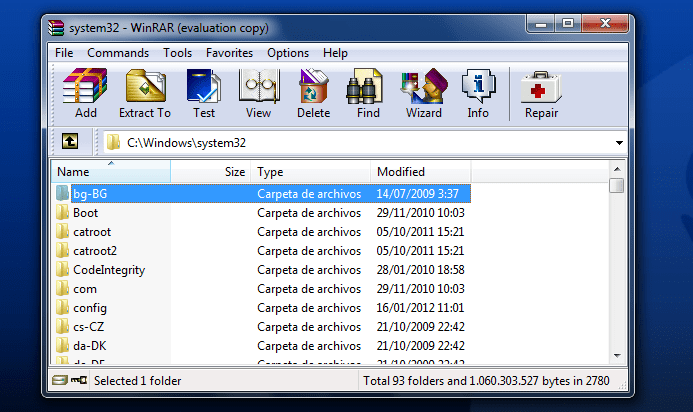
WinRAR is a program that can be used to open, create and decompress RAR, ZIP and other format files. The latest version also supports RAR5, the new compression algorithm. You can open any file with WinRAR!
Each time you open a web page on your browser, potentially sensitive information is stored on your hard drive. Data that is saved by your browser is used for a variety of purposes, such as keeping a bookmark and saving site-specific information in the form of cookies to save your preferences for the next time you visit.
Even if this information is merely used to improve your browsing experience, it can expose information you don’t want others to see. Especially if you share a computer, consider keeping your browsing private by surfing in private browsing mode, whichguarantees that your movement on the web can’t be followed.
Most people don’t need to use private browsing mode all the time, and you do lose some conveniences in doing so; for example, you’ll need to sign into the sites you use each time you open your program, as your browser won’t save the cookies that maintain your login state. But if you are in a public space, it’s good to know how to enable this mode.
What Private Browsing Means
When you browse privately, nobody else who uses your PC can see your movement. Private browsing mode doesn’t offer complete security; it simply prevents your program from saving your browsing history, cookies, data you leave in forms, and other private information between browsing sessions.
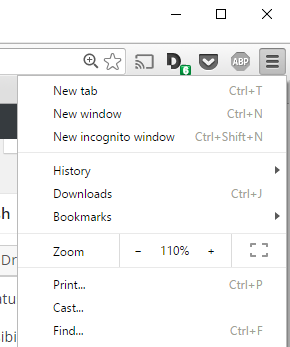
Incognito mode is what Google Chrome names its private browsing feature. To open Incognito Mode, press Customize and control Google Chrome in the top right corner of the window, shown by three vertical bars. Then click New Incognito Window.
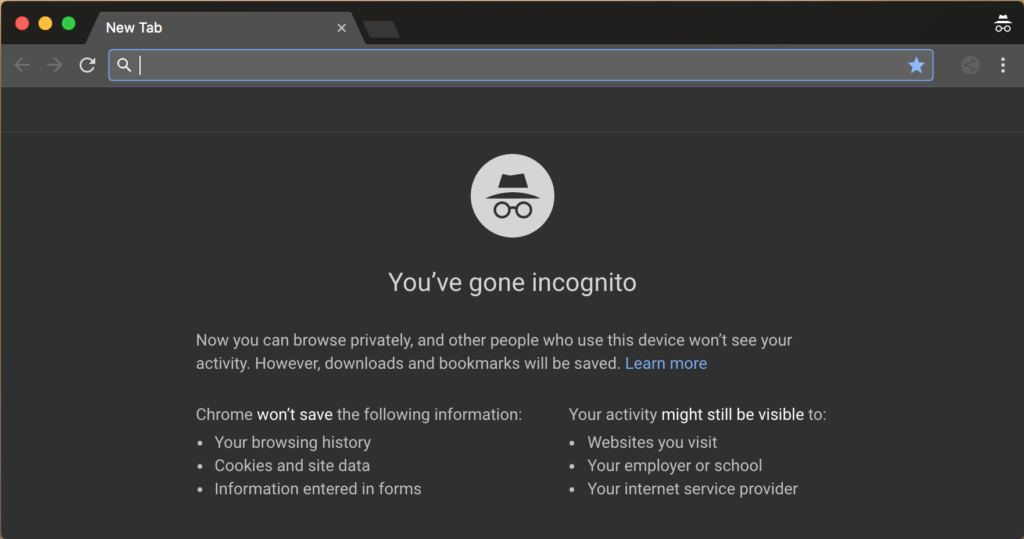
For a shortcut, use Ctrl+Shift+N. A new window will open, describing incognito browsing:
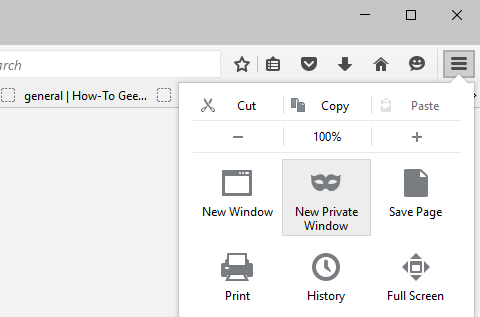
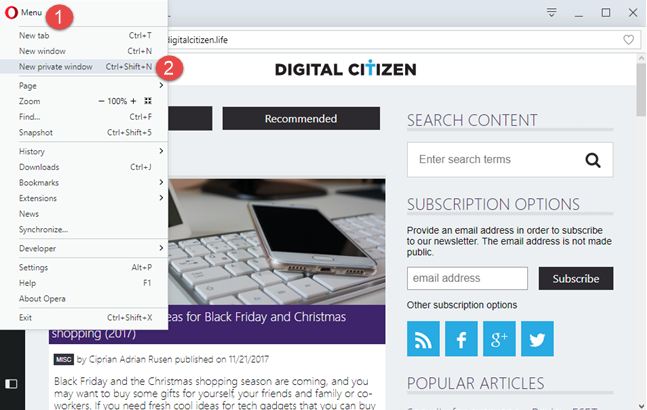
To activate Private Browsing in Mozilla Firefox, tap OpenMenu in the top right corner of the browser window. It is represented by three vertical lines. There, select New Private Window.
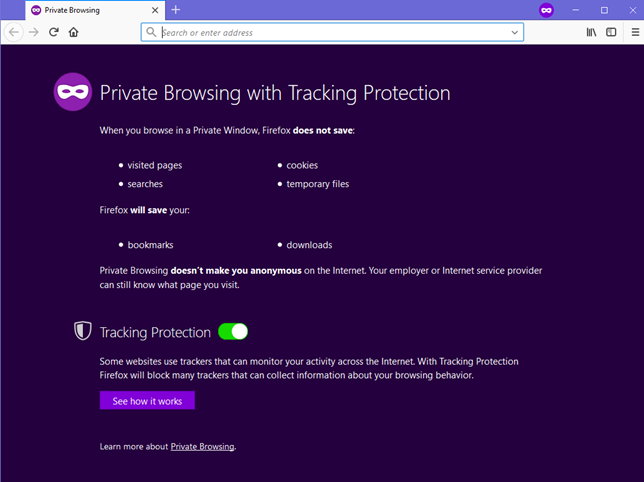
A new private window will open with tracking protection available. Firefox explains to you what surfing privately actually means. One major contrast between Firefox and other browsers is that it warns users that their ISP or employer has the authority to track the pages they visit. It enables tracking protection by default, thus online trackers are unable to collect data about your online activity. For a shortcut, press Ctrl+Shift+P to activate private browsing mode.
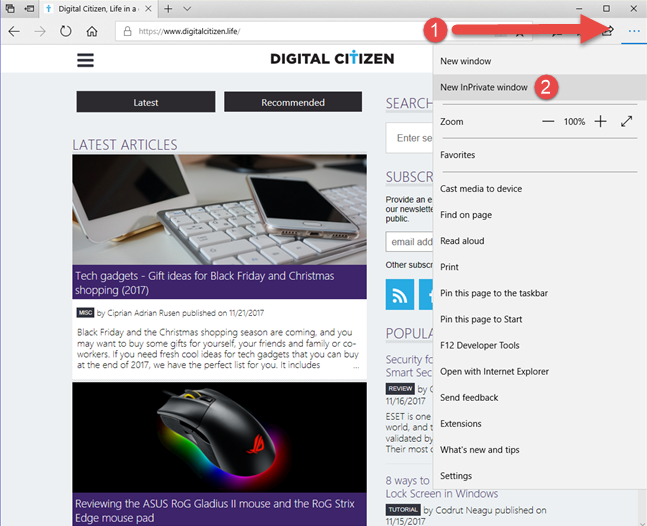
Edge has the same name for its private browsing mode as the early Internet Explorer, InPrivate Browsing. To start a private browsing session, click Settings, located in the top-right corner represented by three horizontal dots. Then in that menu, select New InPrivate Window.
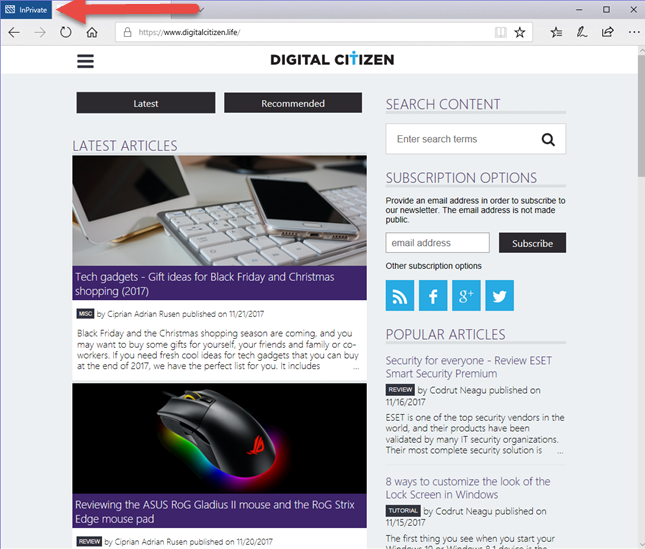
Unfortunately, there’s no keyboard shortcut available to activate private browsing mode here. Your private browsing session will be represented on the top-left corner of the window labeled in a blue square written InPrivate.
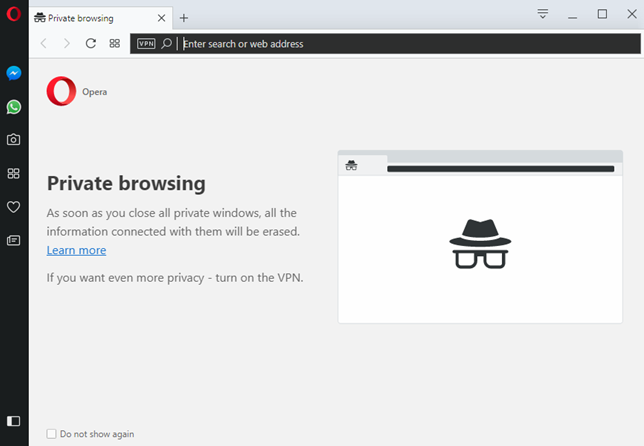
To activate the private browsing window in Opera, click the Customize and control Opera tab located on the top left side of the browser window. Then, click New Private Window.
A new private browsing window will pop up describing Opera’s private browsing feature. As a shortcut, use Ctrl+Shift+N. For extra privacy, you can enable the built-in VPN. This button can be found on the left side of the address bar.
Safari is the actual pioneer of private browsing and is the mainstream browser in Apple gadgets.
Safari on a Mac
Enable private browsing from the File menu or press Cmd+Shift+N on your keyboard.
With private browsing activated, the location bar will become grey and a band will be shown stating that you are currently in private browsing mode. Extensions will continue to run in private browsing mode.
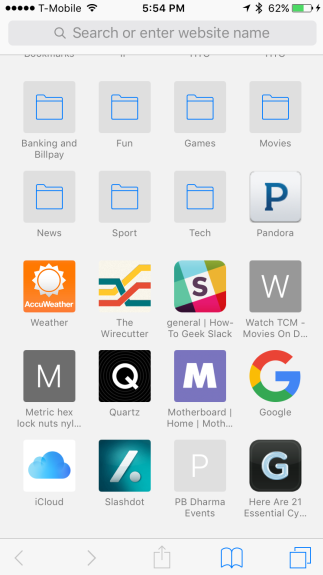
Safari on iphone or ipad
You can enable private browsing on Safari while using an iPad or an iPhone as well. Tap on the new tab icon located on the lower-right corner of the new tab window. Then touch on private in the lower left corner. Now, the browser screen shall turn grey which indicates that you are running in private browsing mode.
Mozilla Firefox Quantum is a free, open-source web browser that offers numerous features and customization options. Its performance is excellent, and it's designed to protect your privacy.
The idea of Microsoft Edge is to be as fast, clean, and lightweight as possible to cope with the demands of different devices, whether it be a PC, tablet or phone.
Opera is a free web browser which functions in much the same way as Edge, Chrome or Firefox, but it has a handy free VPN feature which makes it stand out.
If you're new to Safari, the first thing you'll notice is how clean it feels compared to many other browsers. There are no annoying toolbars or plugins installed and the result of this is that Safari looks trim and loads pages very quickly.
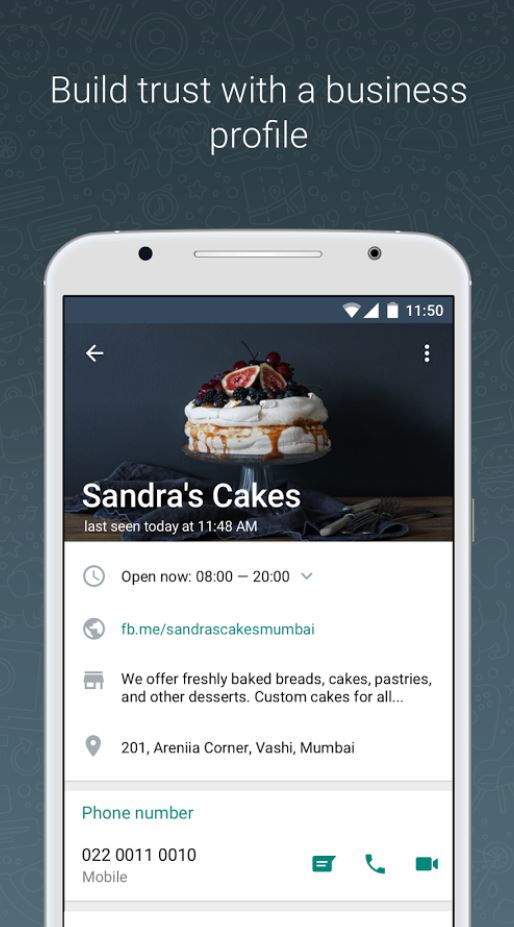
WhatsApp has officially launched WhatsApp Business (Android only for now) in Indonesia, Italy, Mexico, United Kingdom and the United States. It won’t be long before the app is released all over the world.
To be clear, the app isn’t aimed at you but rather small companies. WhatsApp business allows them to establish official communication channels with their clients. In addition, having a WhatsApp Business account is synonymous with security.. It removes all opportunities for criminals to fraudulently pass themselves off as companies in order to swindle WhatsApp users.
Companies can now create WhatsApp Business profiles that include data like a description of their business, email, official website and contact details etc.
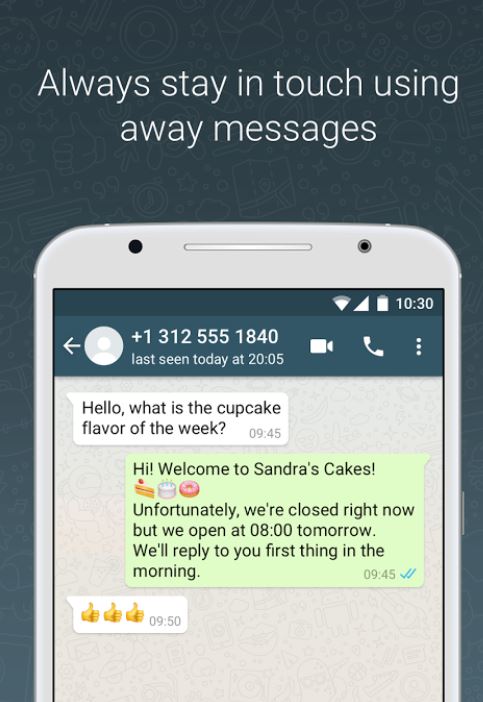
Once businesses have a verified profile, they will have access to a number of tools including quick answers that’ll quickly answer the most commonly asked questions they receive. They’ll also be able to create custom welcome messages etc.
WhatsApp Business will also include analytics so that companies can monitor customer satisfaction.
More than 80% of small businesses in Brazil and India use WhatsApp to communicate with their customers and grow their business. This fact demonstrates how important WhatsApp’s new business app will be going into the future.
As a user, you don’t need to do anything. You don’t need to download WhatsApp Business (unless you have a small business of course). All you have to do is be aware of this new WhatsApp system and know that there is now a way for businesses to contact you officially using the popular messaging app.
Code::Blocks is an open-source IDE (Integrated Development Environment). It helps you to work on software and programs you are developing, including coding, debugging, testing, and much more. It supports many compilers, such as GNU GCC (MinGW and Cygwin) and MS Visual C++. It is also free to download.
If this is your first time with this development tool, you’re in the right place! We’ll reveal what is Code::Blocks and how to use it.
What is Code::Blocks?
Simply put, Code::Blocks is a free cross-platform integrated development environment for C/C++ and Fortran. Code::Blocks is built around a plugin framework, which means you can extend its core functionality with various plugins. Essentially, Code::Blocks is perfect for building onto because with easy integration with user-made plugins; you don’t need to edit any of the source code to add the functionality you need.
Although the software is open-source, so if you need to edit the code, you can. While Code::Block inherently supports the functionality of multiple compilers and debuggers, it isn’t in itself any of these systems.
You can think ofCode::Blocks as a house. The house itself is an empty shell, but it has rooms that certain functions and systems can use. Not all Code::Blocks installation files contain compilers. Instead, Code::Blocks can use the functionality of whatever compilers you have installed, whether that’s GCC, Clang or Visual C++, or any other compiler that tickles your fancy. While you let the house metaphor simmer, let’s take a look at some of the features Code::Blocks is known for.
Code Editor
This integrated development environment (IDE) features code folding and syntax highlighting, driven by a Scintilla editing component. It also features a class browser, hex editor, C++ code completion, among various other utilities. The code editor organizes any files you have open into easily accessible tabs and supports personalized syntax highlighting colors, font, and font size selection.
Compilers
Code::Blocks features support for multiple compilers. Among the most widely used supported compilers are GCC, Digital Mars, LLVM Clang, MinGW, Microsoft Visual C++, Watcom, LCC, Borland C++, and the Intel C++ compiler. Code::Blocks was written in C++ but features decent support for other coding languages such as Fortran and D. The installation file also includes a plugin with support for further programming languages.
Debugger
The Debugger shipped with the Code::Blocks installation file has full breakpoint support. A Breakpoint refers to an intentional pause or stopping point written into a program. Breakpoints are put in place for debugging purposes to gather more information about a program during its execution and are sometimes simply called pauses.
Code::Blocks streamlines the debugging process by giving you access to the argument display, call stack, thread switching, custom memory dump, CPU registers, local function symbol, disassembly, and GNU Debugger Interface.
Easy User Migration
Code::Blocks is an increasingly popular integrated development environment. It, therefore, has features specifically designed for users migrating from other IDE’s. Including Dev-C++, Microsoft Visual C++ project import for MSVC 7 and 10, and Dev-C++ Devpak support.
Code::Blocks Tutorial: How to Use it
With any software, before you learn to use it, you need to install it. While most installs are as simple as clicking a download button, accepting a bunch of conditions, and voila, Code::Blocks might require a little thought.
To condense a long process, if you have a compiler already set up on your system, you simply click the download button, and you’re home free. This version doesn’t come with a built-in compiler, so you’ll just choose the compiler you have installed when it asks you to during use.
If you don’t have a compiler pre-installed, you’ll need a different installation file. To access this, click the link underneath the Code::Blocks download button, and you’ll get to the official website. Now click ‘Download the binary release,’ which is the easiest way to get the utility installed, now onto the bit that requires thought or at least some reading. You’ll see a list of download links if you scroll down to ‘Microsoft Windows.’ The one you want that includes a compiler is called ‘codeblocks-20.03mingw-setup.exe’. Here you can choose to either download from FossHUB or Sourceforge.net.
The minds behind Code::Blocks think of everything. On the list of downloads is an executable file (.exe) for people who don’t have administrative rights on their PCs, and another exe that includes all the Code::Blocks plugins. They really try to make things as easy as possible, not just within their IDE but also with installation. Here’s an easy guide for troubleshooting Code::Blocks if it misbehaves.
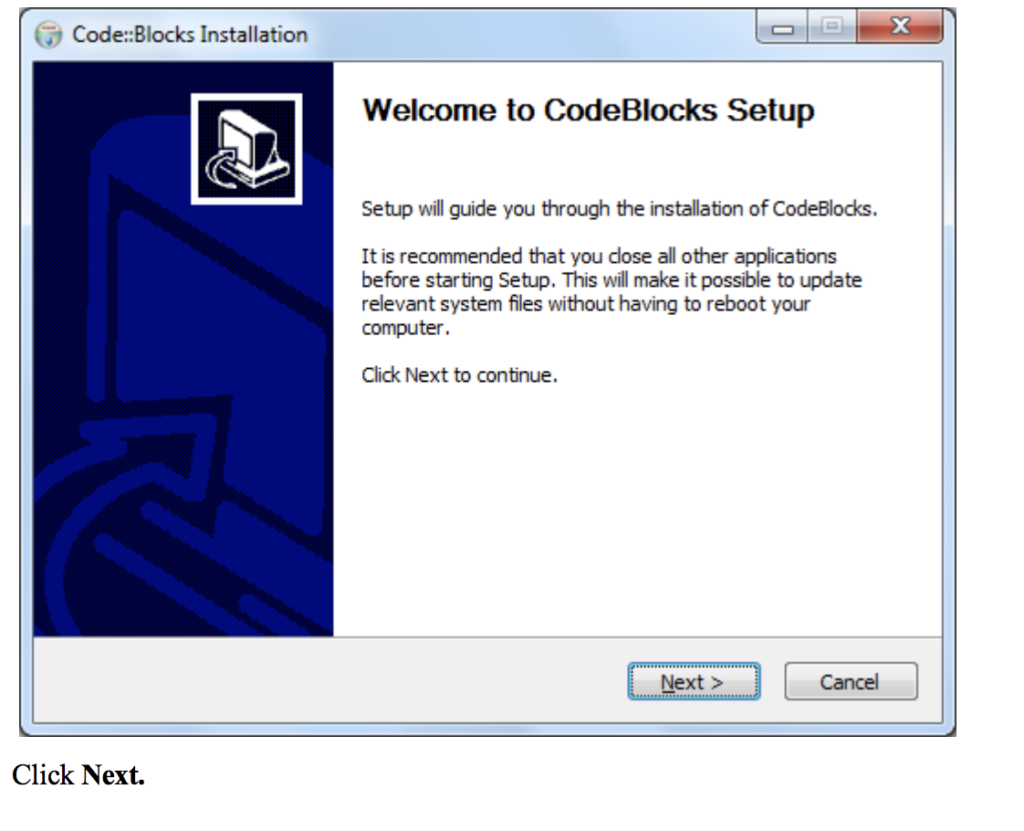
Run the installer. It’s a standard installer for Windows; just press Next after reading each screen. If using another operating system, choose the appropriate option on the downloads page referenced above.
If you’re planning on installing a compiler after you’ve installed Code::Blocks, read the information provided in the installer. Also, see this link for help setting up your compiler.
If you downloaded the installer that doesn’t come with MinGW, you may have to configure the compiler manually (usually Code::Blocks auto-detects the compiler).
Starting your first project
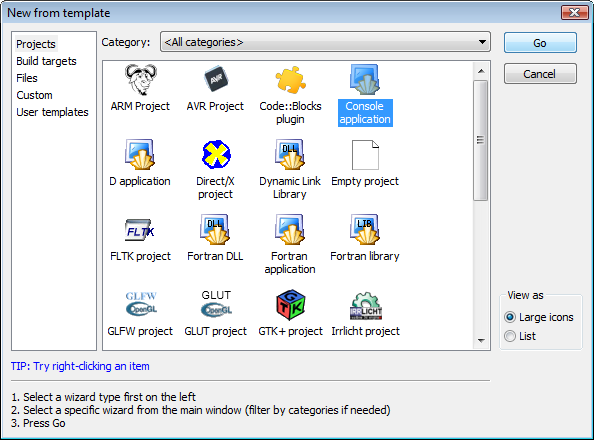
Step 1. Launch the Project Wizard
Select File->New->Project… to start a new project. You can select from many types of templates to help get your project started. For your first project, select Console application, as this is the most common for general purposes. Click Go.
Step 2. Select the destination for your project.
Choose your programming language, (for example C++) when prompted for a language. Then, on the next screen, give the project a title and select a destination folder. Code::Blocks will generate the remaining entries from these two.
Step 3. Choose your compiler.
This is often the default compiler that you use on your machine. The default builds will be debug & release. If another option is needed, select it here.
Step 4. Finish
After selecting Finish, you’re on your way to your first project!
How to Use Code::Blocks for C++
Once you’ve installed Code::Blocks on your PC, all that’s left to do is run it. As soon as you start Code::Blocks up, you’ll see a list of compilers. The utility will detect which one you have and automatically select it. It will ask you if you want to make the compiler the default viewer for C++ files, which you should.
Next, click on File> New >Project, and you’ll see a new window. Select ‘Console application’ and click ‘go.’ You’ll need to click ‘Next’ in succession until the language selection dialog box opens. Choose the programming language you use, and then you’ll be prompted to choose a place to save your project.
Rather place the project in its own folder because it is likely to create several files. Give your project a name and click ‘Next.’ Now, you will set up your compiler. You don’t need to change any settings you see here, so just click ‘finish’ and open the main.cpp file on the left of the screen.
By now, you should have your main.cpp file, which you can modify if you wish. Currently, it just says ‘Hello World!’, run it as is. Hit F9, which compiles and then runs the program. You now have a working sample program. The main.cpp code can simply be edited and then compiled and run again using F9.
How to Use Code::Blocks in Google Docs
Code::Blocks is available as a plugin for Google Docs. Simply go to the Google Workspace Marketplace, type in Code::Blocks and click install. Read through and accept all the permissions if they’re agreeable. Otherwise, you won’t be able to use its full functionality.
Once you’ve completed the install, Code::Blocks is easy to use. Your first step is to create a new document in Google Docs. Next, head to ‘Add-ons’ and choose Code::Blocks from the drop-down menu. Code::Blocks will open up a new panel on the right side; from here, you’ll have access to all the utility’s functionalities.
Next, you need to write or paste code into the body of the document. Once you have your code in place, select it, and you’ll be able to choose a language from the language drop-down menu or a theme from the theme drop-down menu. Click preview to view your code, and as soon as your code looks exactly how you want it, click Format. Your code should now be formatted perfectly, and you can move on to the next piece of code.
Code to your heart’s content
Now that you know how Code::Blocks works, you can get started on your first project. It may seem complicated, but you should get the hang of it soon. Feel free to show us anything you’re currently working on!
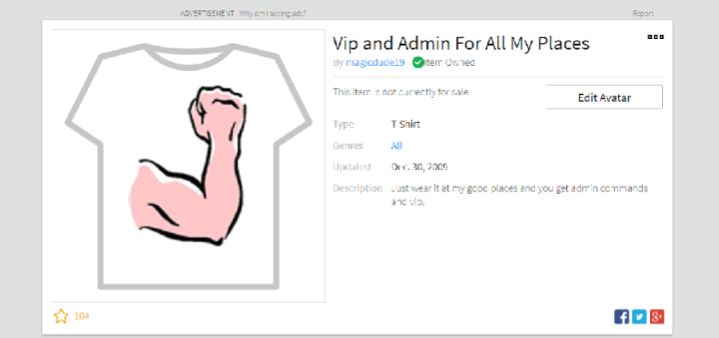
Before the advent of Game Passes, the only way Roblox game developers could monetize their creations was through the production of VIP t-shirts, which would allow exclusive access to restricted areas within a game.
This system had a lot of drawbacks: Only Builders Club members could sell custom-made clothing, meaning regular players could not monetize their games. Plus, the player had to wear the VIP t-shirt to use the game’s VIP features, since the t-shirt behaved like an access card.
An example of an old-style Roblox VIP t-shirt, which, when worn, would give access to VIP features in that individual seller’s game.
The Game Pass was a much-needed improvement over the old VIP t-shirt system. On the creative end, it allows game developers to better track which players have what. And for players, it makes the VIP experience more intuitive by showcasing VIP Game Passes up front, on the game’s actual page.
The Game Pass is free to create and does not require Builders Club membership. Players buy Game Passes directly from a game’s page, and there are no restrictions on what perks and abilities can be unlocked with them. And of course, there is no need to wear the game pass to access the game’s VIP features.
Note: It is recommended that you understand Lua and scripting in Roblox before attempting to create a Game Pass. After all, to earn Robux from a Game Pass you will need to have created a playable game!
Creating your first Game Pass
If you have already created a Roblox game of your own, here’s how to get started creating your first Game Pass:
Step 1. Download the Game Pass badge template, fill in the white area with whatever you want (preferably something related to your game), and then save it.
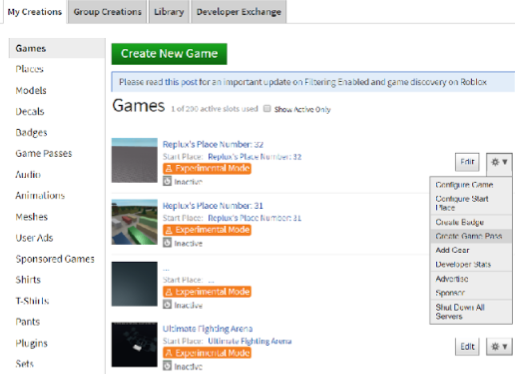
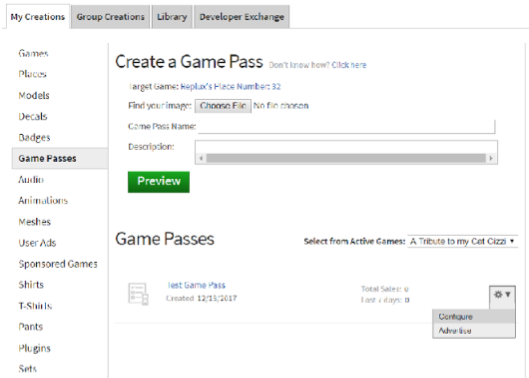
Step 2. Upload the completed template. To do this, go to the Develop section of the Roblox website and click the settings icon next to your game, then click Create Game Pass.
Step 3. Fill out the Game Pass name and description and upload the image, then click Preview and then Preview again. This will upload your Game Pass. It will appear underneath Game Passes.
Step 4. Click the settings icon again to further configure your new Game Pass, where you can set its price and other finer details.
Although you can create a Game Pass as a free Roblox member, you only keep 10% per sale, whereas Builders Club members keep 70% of the sale.
Using your new Game Pass
Unfortunately, it’s not as easy as creating the Game Pass and selling it… you’ve got to make the Game Pass worth buying by giving the players who purchase it something in return. This is done through scripting, primarily using the PlayerHasPass function to detect whether a specific player has a Game Pass for your game, which ties in with MarketplaceService to fully facilitate in-game microtransactions.
This is a good demonstration provided by the Roblox Wiki:
As you can see, this script takes the value from passId and checks if a player owns it. If they do, it returns the GamePassService to cache the result (as true).
The second chunk of code announces if an already connected player buys the Game Pass with the message <plr.Name> has bought the game pass with id <passId>.
Selling Roblox content in your game
In addition to letting you create anything you can possibly think of and sell it within your game, Roblox also lets developers earn commissions through the sale of content created by Roblox.
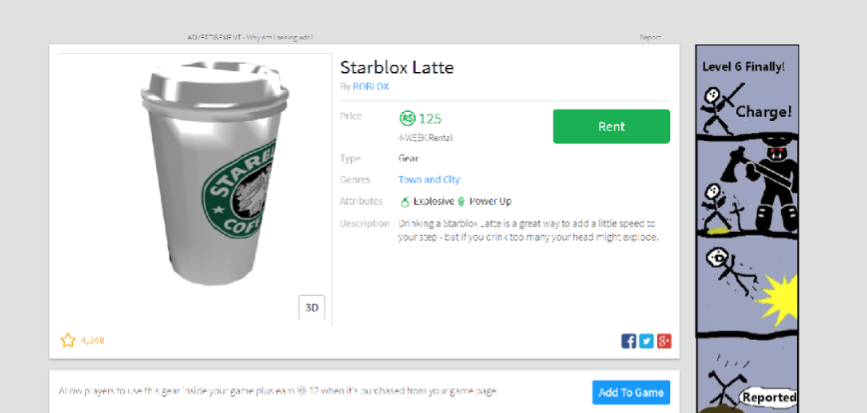
Commissions are very simple – you can add Roblox-created virtual gear from the catalog to your game’s page and, if a player purchases that gear, you keep 10% of its sale price. Essentially, Roblox is allowing you to earn something from nothing.
It couldn’t be any simpler, either. All you have to do is find gear in the catalog that you want to display on your game’s page and press Add To Game, and you’re done. If a player then purchases the Starblox Latte from your game’s page, you make 12 Robux… no creativity required!
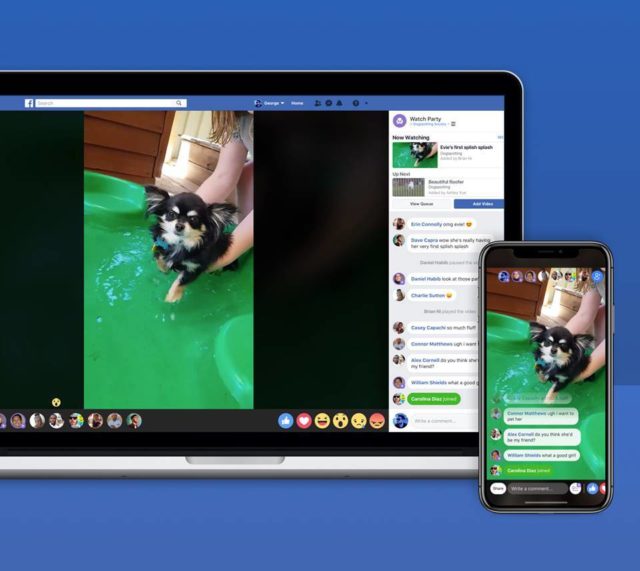
Facebook has a brand new feature called Watch Party, which allow users to watch videos together with other contacts, comment live, and post reactions. Watch Party is quite similar to Facebook Live.
How to Download All of Your Facebook Data in Just a Few Minutes
Vice President of product had Facebok, Fidji Sumo, said:
“In a Watch Party, members of a Group can watch videos together in the same space at the same time – videos are chosen by the Group admins and moderators, and can be any public videos on Facebook (live or recorded). With everyone watching, commenting and reacting to the same moments together, it creates a shared viewing experience for video that helps build the kind of community and engagement we’ve seen with Live.”
Watch Party has a number of potential applications including in academic study sessions or even in a professional setting. The ability to watch videos together and being able to contribute questions and collaborate with comments, answers, and links to relevant pages obviously offers a lot of practical functionality beyond just watching cat videos together with friends.
How to avoid sharing compromising moments on Facebook
A particularly worrying bug, for iPhone users at least, has been discovered. The bug in question, called chaiOS, spreads when a certain link is sent through iMessage. Unfortunately, because iMessage generates a preview of all links, and the bug can be found in the preview, victims don’t even have to click on the link to fall prey to the bug.
5 tips to prevent security issues with your phoneRead Now
ChaiOS can crash iMessage altogether and in some cases can even force a factory reset of the phone’s settings. Other issues reported include freezing victim’s phones.
The bug was posted to Github by software developer Abraham Masri. He claims that he only posted the vulnerability, including the link, to get Apple’s attention after they ignored his private messages notifying them of the bug. In a massively naive move he even tweeted the link with the footnote “Do not use it for bad stuff”.
ChaiOS affects phones running iOS 10 and up so if you’re running one of the latest versions of Apple’s mobile operating system it could be time to back up all your phone’s data, just in case somebody inadvertently sends you the link.
Theme Hospital was an absolute classic back in the day. Bullfrog’s hospital building sim was anything but a run of the mill affair. Everything down to illnesses of the patients walking through door contained comical elements and the resource management elements that Bullfrog had honed in Theme Park made for a fun yet challenging experience. Now more than 20 years later, the team behind Theme Hospital are bringing us Hospital 2.0 and they’ll be hoping that can hit the same sweet spot that they hit with Theme Hospital.
While a hospital simulation isn’t most people’s idea of an exciting game, Theme Hospital takes on the challenge head first and proves doubters wrong. In this game, finding cures for hilarious diseases is all part of the job—you’ll even see the Grim Reaper walking the hallways.
The announcement trailer shows that Hospital 2.0 will definitely try to capture the humor elements of Theme Hospital. Light-headedness is something that at one time or another has afflicted us all. Not one of us, however, has had our head literally turn into a lightbulb like in the Hospital 2.0 trailer. With two of Bullfrog’s own running Two Point Studios, the studio behind Hospital 2.0, there are tangible links to Theme Hospital and we hope that they’ll bleed through into this new title.
There is no announced release date for Hospital 2.0 but if you sign up on the game’s new website, you’ll be kept up to date and get a free in-game item upon the game’s release.


 Step 4. Finish


