How to Split a Clip in Premiere Pro

Adobe Premiere Pro is one of the, if not the, most popular video editing software available. It makes up part of Adobe’s Creative Cloud, along with other popular programs such as After Effects, Illustrator and others. Premiere is a very robust editor with many features that make it popular amongst professionals and beginners alike.

During the video editing process, there will come a time when you need to clip or split specific videos. This can be done to shorten the length of your video, cut out unnecessary parts or improve the flow of your overall video. Let’s look at the steps you need to take to split video clips with Adobe Premiere Pro.

How to Split a Clip in Premiere Pro

  1. Place the Clip in Your Timeline

    How to Split a Clip in Premiere Pro

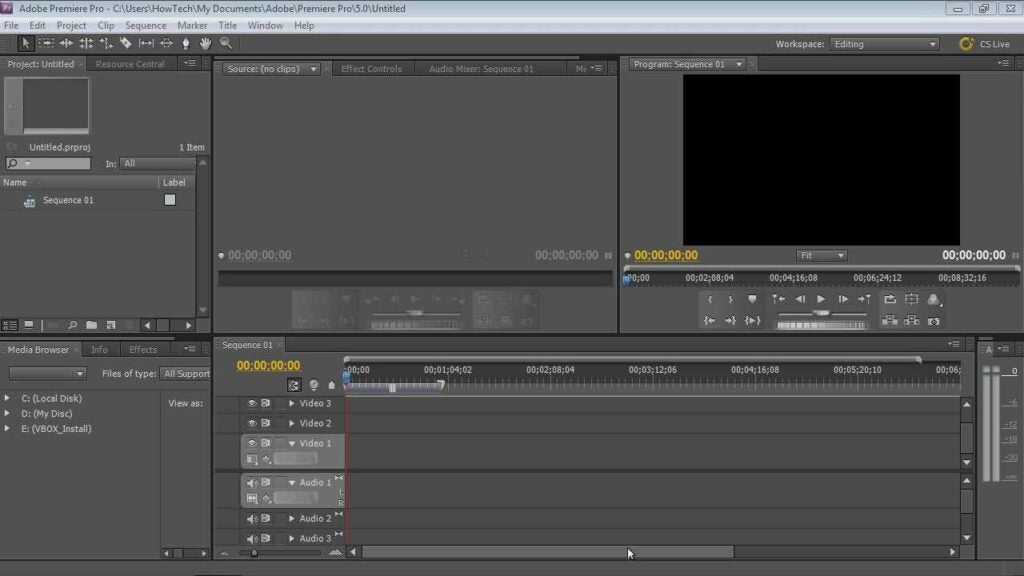
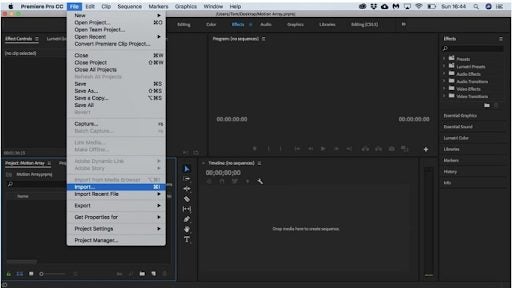
    Before you can start editing anything, you first need to import the relevant clip/s into your timeline. You can do this by clicking on ‘File’ in the top menu and choosing ‘Import’. In the window that appears, choose the video clip you want to split. Make sure to click on the video clip in your timeline so that you can edit it further.

  2. Select the Razor Tool

    How to Split a Clip in Premiere Pro

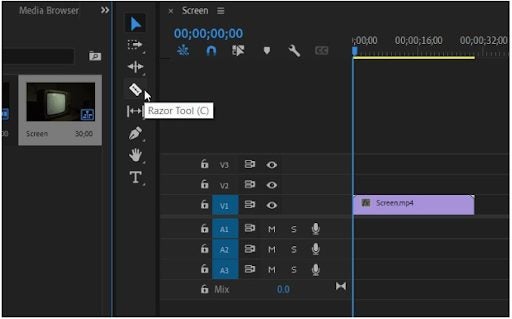
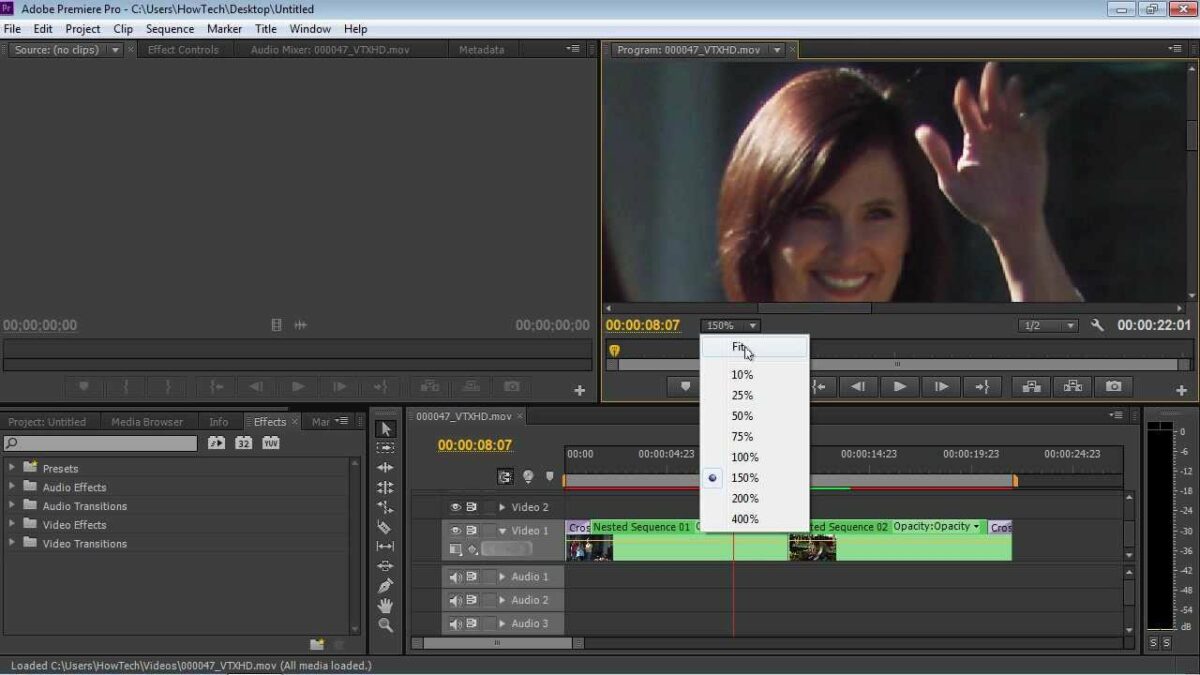
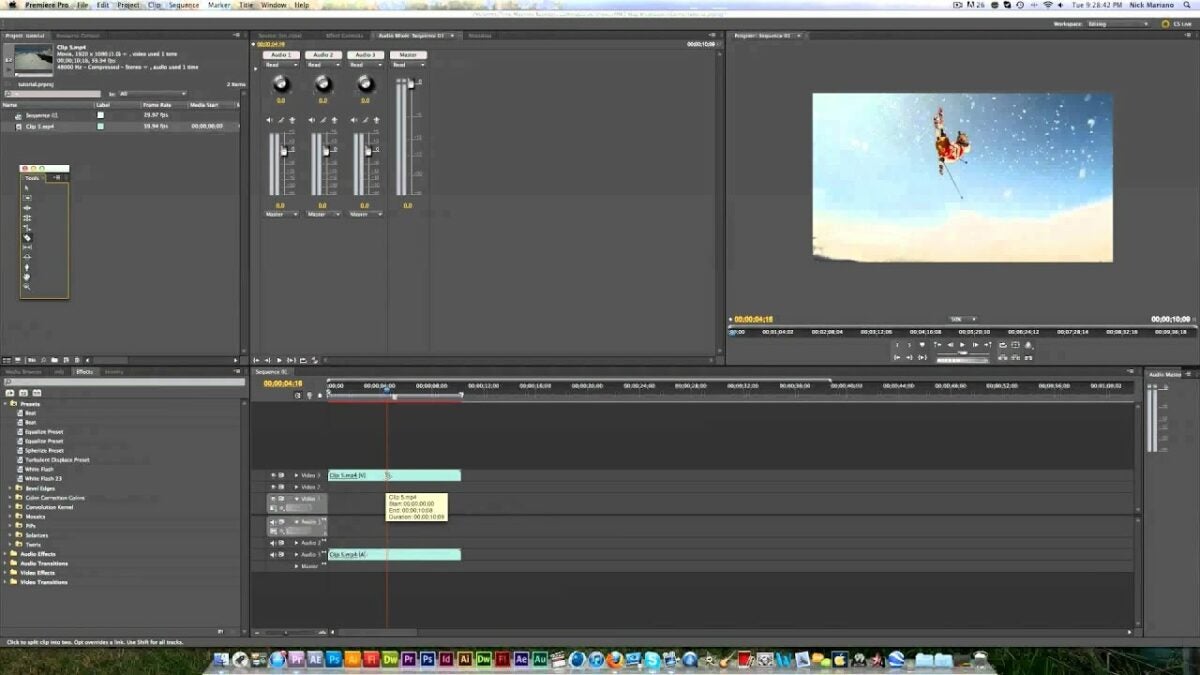
    Look to the left of your timeline, here you will find another menu with tools. In this menu, select the razor tool by clicking on the icon that looks like a razor.

    Tip: to make sure you split the video clip at the correct time, move your playhead to the exact position where you want the split to occur. This way, when you select your razor tool, you’ll know exactly where to split the clip. This is very useful for situations where it might be challenging to remember the exact time (down to split seconds) where the cut should occur.

  3. Select the Spot Where You Want to Split Your Clip

    How to Split a Clip in Premiere Pro

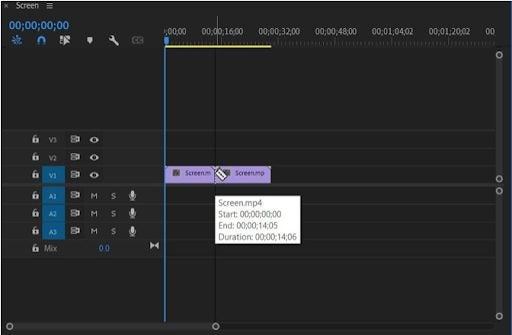
    With the razor icon selected, you need to navigate over to the video clip in your timeline. You will notice that when you hover over the video clip, your mouse pointer now looks like a razor. Click where you want to split the video clip, and you will see the two parts separating.

    Each part will now act as its own video clip and can be edited as such.

Get to Video Editing Simple and Easily

Adobe Premiere Pro makes it very efficient to edit videos. The razor tool can be used to conveniently split video clips so that you can only use the sections you need or so that you can edit them independently from each other.

How to Add Transitions in Premiere Pro

Adobe Premiere Pro is one of the choice video editing programs for professionals and beginners. Premiere is a comprehensive editing tool that can create a range of videos from television adverts, short stories to feature-length films.

Transitions are a key element in any video. With the right transition, you can move seamlessly from one clip to the next. Transitions can also be used to create and improve the tone and mood of your video. Let’s take a look at how to add transitions into a video using Adobe Premiere Pro.

How to Add Transitions in Premiere Pro

  1. Click on the Effects Tab

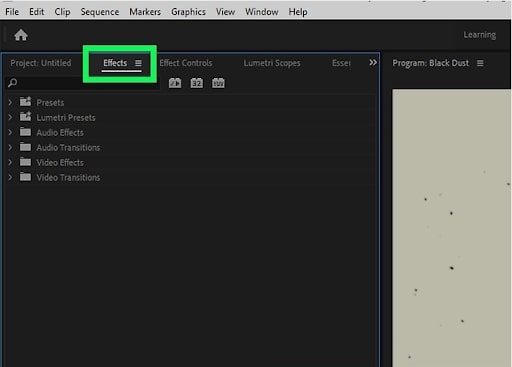
    So, you’ve already added your clips into your timeline in Premiere Pro. You’ve arranged them in the order you want and clipped them where needed. Now it’s time to start adding transitions. You will need to select the ‘Effects’ tab found at the top of your screen.

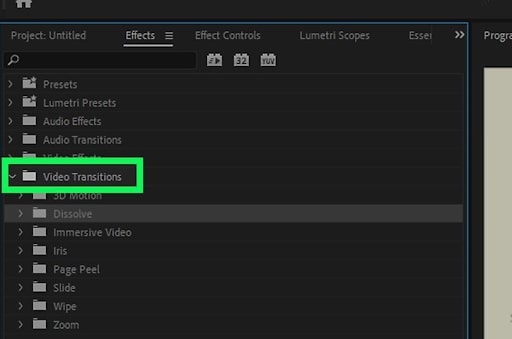
  2. Click on the Arrow Next to Video Transitions

    In the ‘Effects’ tab, select the arrow next to ‘Video Transitions.’ This will open a drop-down list showing all the available video transitions you can use.

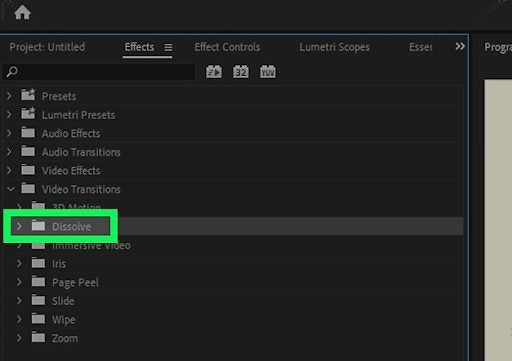
  3. Click the Arrow Next to the Transition You Want to Use

    Select the arrow next to the transition you want to use in your video. The number of transition types you see will depend on your version of Premiere Pro and if you have any plugins installed. One of the most popular transitions to use is ‘Dissolve.’

  4. Drag and Drop the Transition Into Place

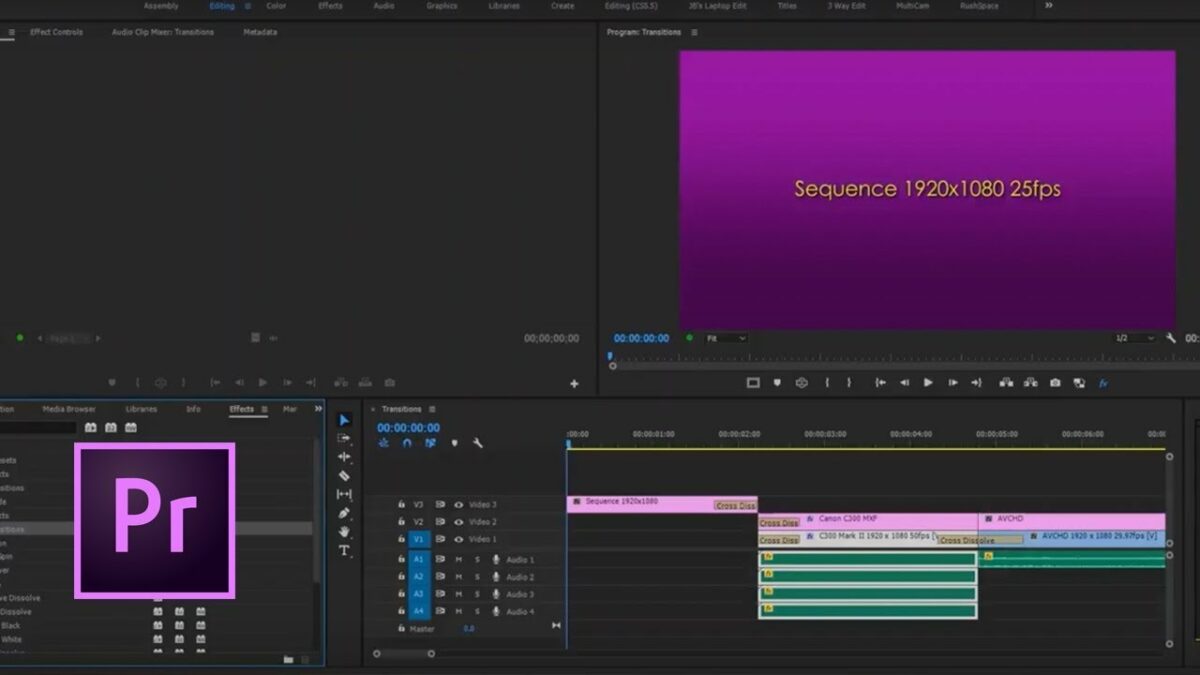
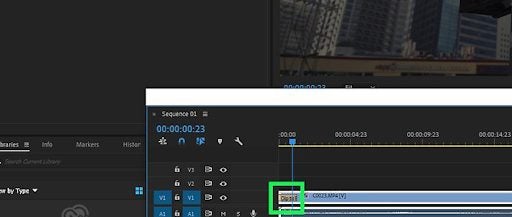
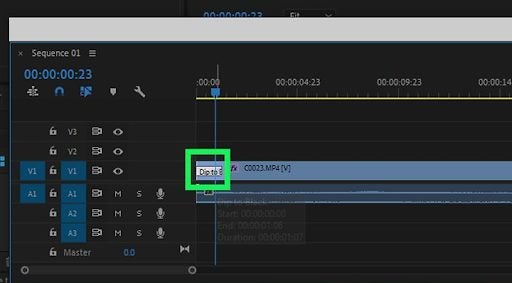
    Now you can drag and drop the transition into place in your timeline where you want to move from one clip to the next. Once you’ve placed the transition, you will see a yellow box appear over the two clips where it is placed with the transition name.

    Alternatively, you can also use a shortcut and right-click the space between the two clips and click on ‘Apply Default Transition.’ The default is usually a cross-dissolve transition.

  5. Click on the Transition to Adjust It

    Select the yellow transition box in your timeline to start adjusting the settings.

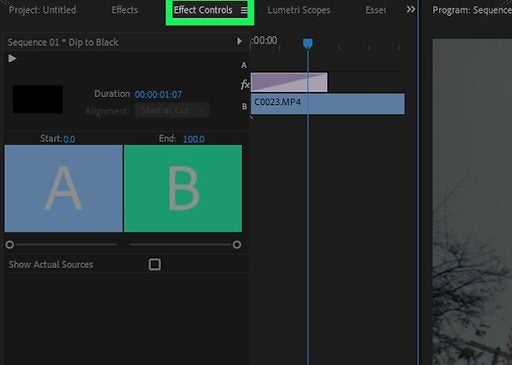
  6. Click on the Effects Control Tab

    Select the ‘Effects Control Tab’ with the yellow box selected to start adjusting your transition.

  7. Adjust the Transition

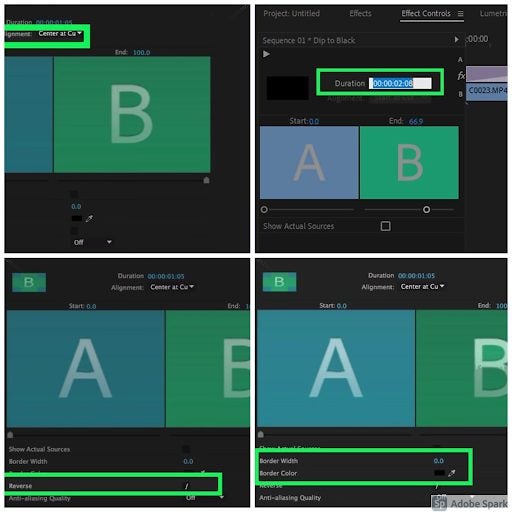
    From here, you can set the alignment, the duration, the border, and you can even reverse the direction of the transition to give it the effect you need for your video.

Start Editing Videos Like a Pro

Using transitions effectively is a true skill when it comes to video editing. Lucky for you, with Adobe Premiere Pro, it is easy to add and adjust your transitions to get the mood just right.

How to play FNF Vs Minus Huggy Wuggy

Friday Night Funkin never seems to stop with modders and indie developers providing new content. The latest edition is FNF Vs Minus Huggy Wuggy, which takes the main boss from Poppy Playtime, slaps on a new coat of paint, and makes you sing against the monster.

In this quick guide, we’ll show you how to play FNF Vs Minus Huggy Wuggy and show you a few tips.

What is FNF Vs Minus Huggy Wuggy?

This mod for Friday Night Funkin presents a combination of two games, namely, Vs Huggy Wuggy in the original colors with the alternatives themes as delivered in FNF the Minus Mod. You may recognize the opponent as the boss from Poppy Playtime, where your goal is to escape the possessed toy in Chapter 1. Now, you’ll need to sing your way out of danger within the time limit.

How to play FNF Vs Minus Huggy Wuggy

How to play FNF Vs Minus Huggy Wuggy

Let’s get to the details of how to play FNF Vs Minus Huggy Wuggy. Fortunately, you don’t need the base Friday Night Funkin game to use the mod. 

Download the mod folder

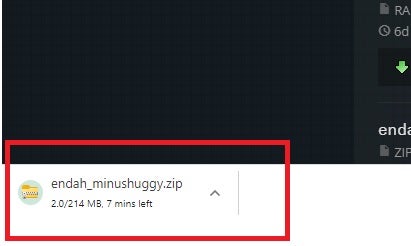
To begin, you’ll need to download the official FNF Vs Minus Huggy Wuggy folder. You’ll see it download as a zip file on your browser to your default location on your PC. When it’s done, you can move it to your preferred place for all your FNF mods. 

How to play FNF Vs Minus Huggy Wuggy

Extract the files

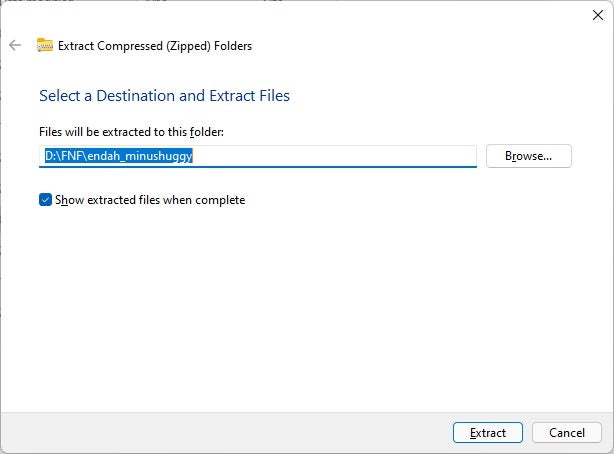
Next, you’ll need to extract the files if you want to play FNF Vs Minus Huggy Wuggy. Right-click on the zip file you downloaded and select “Extract”. It will ask you where you’d like the new files on your PC. Now all you have to do is wait until the extraction is complete.

Open the executable program

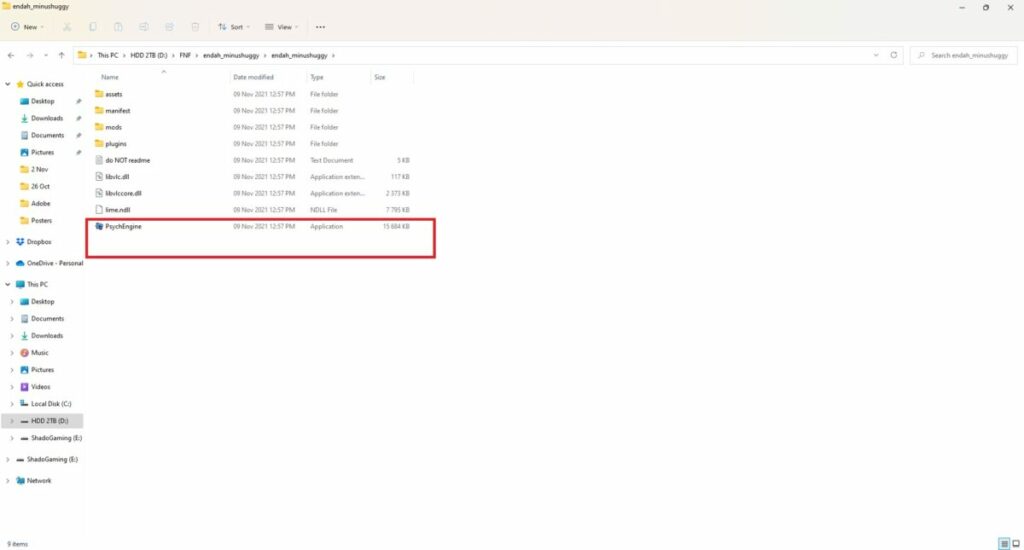
You’ll see an application named “PsychEngine”, which is how you’ll play FNF Vs Minus Huggy Wuggy. Just double-click on the application to get it started. You may want to send a shortcut to your desktop for easier access next time.

Choose the difficulty

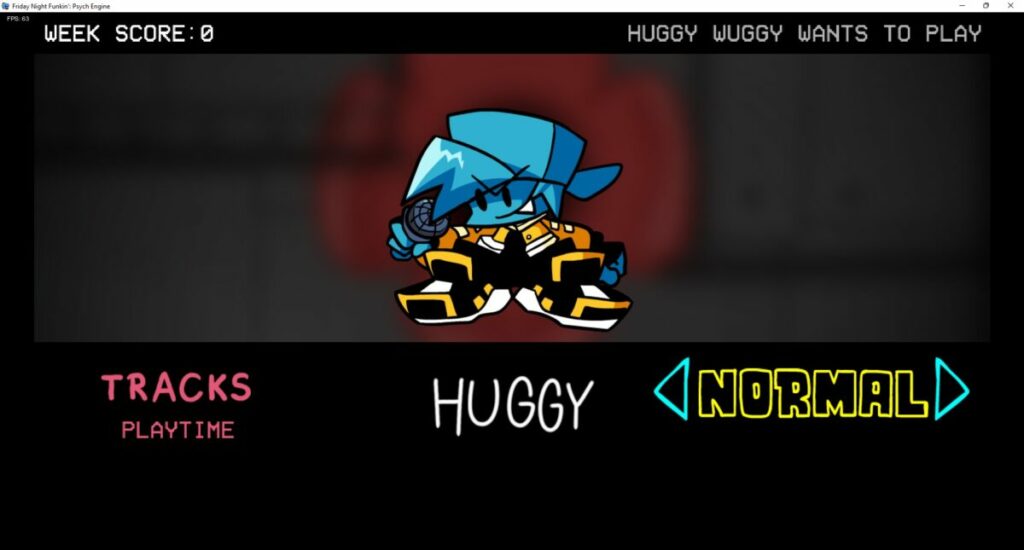
When the menu options, you can choose Story Mode or Freeplay. In the former, you get to choose the difficulty at which you’ll play the game. It makes it more challenging, but we recommend you start with Easy.

How to play FNF Vs Minus Huggy Wuggy

Sing away

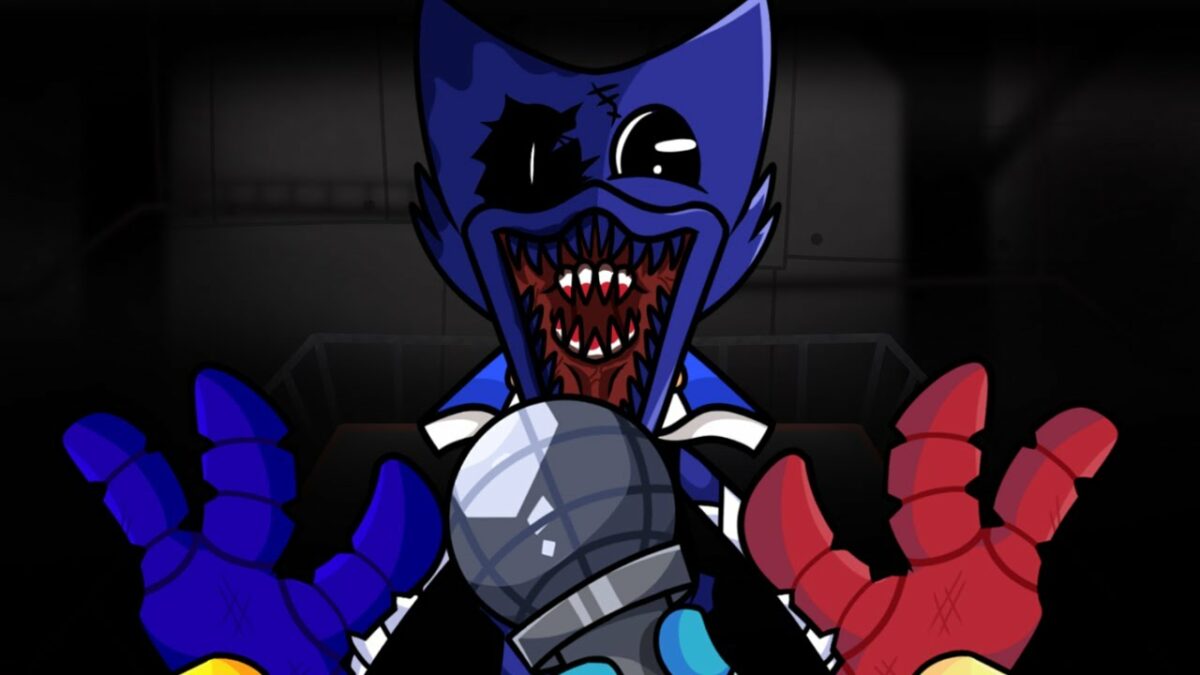
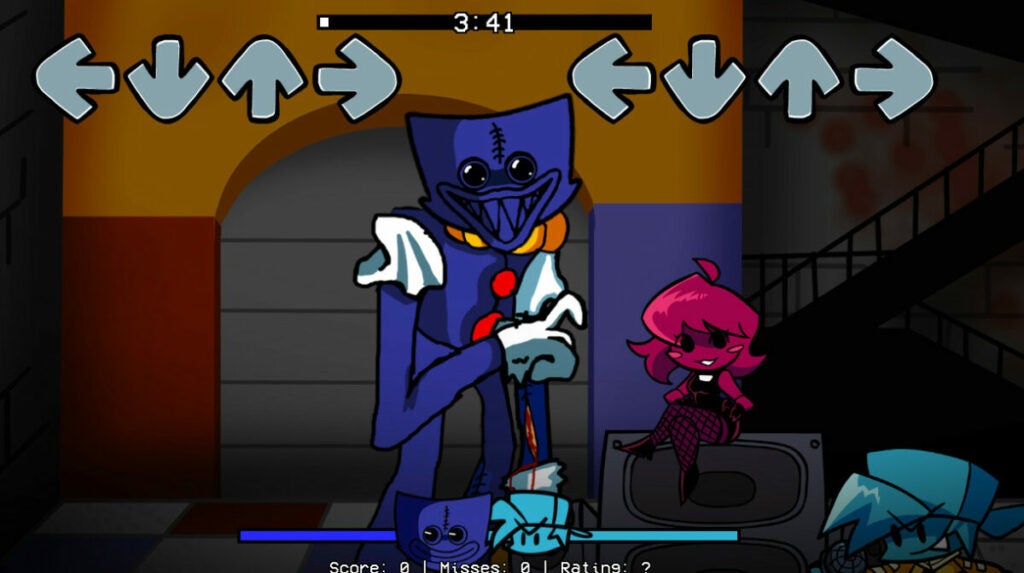
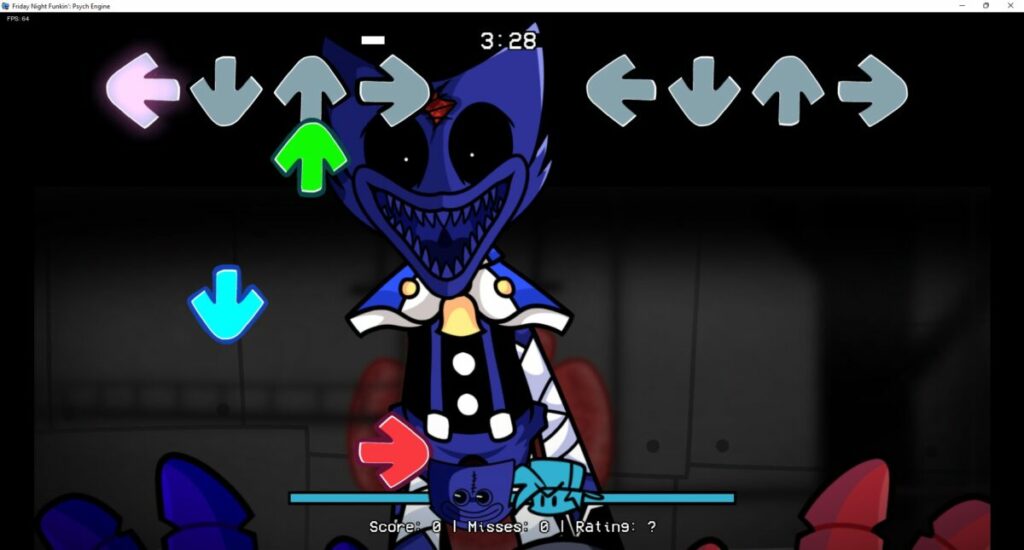
In other Friday Night Funkin games, you see both characters in 2D fashion as a side-viewed platform screen. How you’ll play FNF Vs Minus Huggy Wuggy is with a first-person perspective with Huggy Wuggy facing you. It creates a similar experience to Poppy Playtime when the boss chases you.

There’s a race against the time here, with almost four minutes to spare. You’ll need to survive for that long as the song plays while maintaining your lead on the meter bar at the bottom. Should Huggy Wuggy’s icon reach your end with too many mistakes, you’ll lose. Keep the bar high until the end, and you escape.

So, how do you play FNF Vs Minus Huggy Wuggy? Well, arrows will appear on the screen, indicating which buttons you need to press for the corresponding notes. You’ll need to hit them at the right time; otherwise, it counts as a miss.

How to play FNF Vs Minus Huggy Wuggy

Tips for playing FNF Vs Minus Huggy Wuggy

With the basics out of the way, we can now focus on some tips on escaping Huggy Wuggy in this FNF mod. If you focus on these tricks, you’re sure to beat the monster.

Watch the tempo

It’s essential that you concentrate on the tempo of the music. Watch as the notes arise, but don’t only focus on a single arrow at a time. You’ll need to expand your vision to take in all the incoming traffic, getting your fingers ready to drum the keyboard at the right time.

Stay on the opponent’s of the bar

Another vital task is keeping the Boyfriend’s icon on the enemy’s side of the meter bar as much as possible. If you make a few mistakes, you’ll have some padding until you get back into the swing of things. 

Don’t let Huggy Wuggy distract you

It may be distracting watching Huggy Wuggy’s face while it sings and taunts you. If you let it sway you, you’re going to miss those significant notes that will lead to your downfall. Don’t look anywhere else than at your notes. You can admire its horrid beauty when someone else plays FNF Vs Minus Huggy Wuggy.

Keep an eye on your rating

On the right-hand side, under the meter, you’ll see a rating. While Huggy Wuggy is singing, take a quick glimpse at what it says. You’ll ideally want this rating over 60% if you want to keep winning. Anything less is risky.

Play other FNF titles for practice

If learning how to play FNF Vs Minus Huggy Wuggy is too challenging, you probably need to practice on some of the other mods in the series. Here are some guides you can look at to help you hone your tapping skills:

How to play FNF Vs Minus Huggy Wuggy

Make it out alive!

We hope you have fun playing along to FNF Vs Minus Huggy Wuggy and escaping as best you can. We suspect there’ll be a new mod with a new boss as soon as Poppy Playtime – Chapter 2 releases in 2022, so we’ll keep an eye out for that feature. Until then, good luck!

Top 5 of Adobe Creative Cloud apps

When it comes to Adobe Creative Cloud, there are plenty of apps integrated with it that you can use. You can use them for videos, photo editing, web, UX, design, and so much more! There’s a massive community that you can join to learn how to become an impressive creator.

Adobe is known for bringing the latest and greatest in digital artwork technology. Their Creative Cloud suite is no exception, bringing together some of the best Adobe desktop apps in one big cloud that syncs seamlessly across your devices.

Here are the top five Adobe Creative Cloud desktop apps (please note that Adobe Acrobat is not mentioned here because it is a part of the Adobe Document Cloud suite).

Photoshop

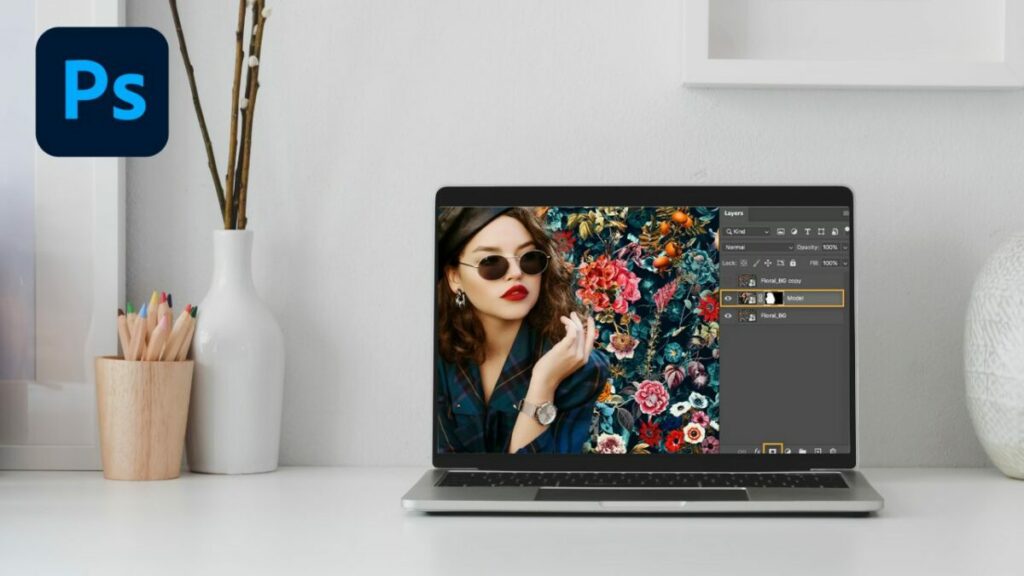
Adobe Photoshop is the industry standard for digital graphics and image editing and is, by far, the most popular Adobe Creative Cloud desktop app. With capabilities that extend beyond images to include web and graphics design, it’s no wonder that it’s been the go-to software for generations of artists and designers.

It’s worth noting that Photoshop is a raster-based program; it does not export vector files. That said, it can be used to create vector files. Plus, it has a “create vector mask” feature that you can use to vectorize raster images. In both cases, you can save the work as EPS files, which you can then open up in…

Illustrator

The vector-based counterpart to raster-based Photoshop, Adobe Illustrator still reigns supreme as a versatile tool to create any kind of 2D graphics from print material to infographics for the web. With amazing native features such as symbols, image trace, the ability to open and work with AI files, and even converting text into curves — as well as features that Photoshop does not have, like layer comps and an artboard tool — Illustrator is a powerhouse for creators of all levels. It also offers the best third-party support. Just check out their plug-in page to see what we’re talking about.

InDesign

Adobe’s go-to for social media content is now InDesign. It’s the ideal tool for social media content creators. With its easy-to-use drag and drop interface, exporting assets for social media has never been easier. Also, with built-in features like creating animated GIFs and QR codes, you can create engaging and interactive content that will stand out from the rest. InDesign is perfect for creating digital or print publications, presentations, and even simple flyers and posters as well.

Dreamweaver

One of the oldest Adobe desktop apps, Dreamweaver has been a mainstay in web design and development for over two decades. While it may be somewhat complicated to get started with, if you’re looking for a powerful WYSIWYG editor with incredible control and customization options, it’s the way to go. The latest release of Dreamweaver takes it even further with modern code editing tools that aren’t too different from a desktop text editor, plus some very helpful new features for coding.

Even if you’re not a web developer but you want to learn how to build websites, you can use Dreamweaver to see your code side by side with your design work.

Portfolio

Now that you’ve used Photoshop, InDesign, Dreamweaver, and Illustrator to create beautiful work, where are you going to organize and store it all? With Adobe Portfolio, of course! Built into the Adobe Creative Cloud, Portfolio is a quick and easy way to create a portfolio website that will house your best work, with the option to share it on social media. Portfolio is an all-in-one solution for showcasing designs, writing, videos, and more. You can even connect it to your Behance account to get extra exposure.

Check out the Creative Cloud All Apps plan

With the top five Adobe Creative Cloud desktop apps, you have everything you could ever need to be a creative genius. Whether you’re looking for an industry-standard image editor, a top-of-the-line web development tool, or a no-fuss way to share your best work with others, Adobe Creative Cloud has you covered.

These are just five of the apps offered in Adobe’s Creative Cloud suite. If you want even more designing capabilities, look at the Creative Cloud All Apps plan, which provides licensing for all 20-plus Creative Cloud apps.

How to zoom in on Premiere Pro

Adobe Premiere Pro is a brilliant video production and editing platform. You can create stunning videos with the tools it provides, including enhanced graphics, live text templates, and faster editing. You can modify your video using filters, transitions, layers, color adjustments, and different effects, including zooming in on an object. 

You’ll pay a monthly fee for this app, but you can have a free trial period to get to know all about it and see what it can do. Let’s show you how to zoom in on Premiere Pro.

How to zoom in on Premiere Pro

If you want to highlight an object in your video, a great way is to zoom in on it. What you’ll be doing is making the image bigger, which will give the impression that you’re zooming towards it. You can zoom by Manipulating the Clip Anchor Point and Scale or Changing Position and Scale.

  1. Method 1: Manipulating the Clip Anchor Point and Scale

    How to zoom in on Premiere Pro

    Click on the clip you want to zoom into. Go to the Effect Controls Panel. Choose the Anchor Point and drag it to your focus point, the cat. Set the play head where you want the zoom to begin. Set the time at, for example, 00:00:01:00. Next, set the first keyframe for Scale by clicking on the stopwatch icon.

    Your play head must be set to the end of the zoom. Then click on the diamond icon, and set the new Scale for the zoom. The anchor point sets the zoom to focus on the correct place automatically. Your zoom is set!

  2. Method 2: Changing position and scale

    How to zoom in on Premiere Pro

    Choose a clip in your timeline. Then place the play head where you want the movement to start. Open the Effect Controls panel.  Locate Scale and Position. To turn key framing on, click on the stopwatch. Then set a keyframe for Scale and Position. Any changes made will be recorded by the keyframe. Move the play head to where you want the movement to stop and adjust the Scale and Position, so you’re zoomed in on your subject. Play it back and make any adjustments you want. To speed up the movement, move the keyframes closer together. To slow it down, move the key frames farther apart.

Get a better view

Zooming in on an object in your video is just one of the special features available to you when you use Adobe Premiere Pro to edit your videos professionally. There are many other features that will enhance your creative work too.

How to play Crab Game with some tips

Following hot on the heels of the rising popularity of Squid Game, Crab Game presents similar themes despite the developer Dani stating that the two have nothing to do with each other. Controversy aside, many gamers are eager to try it out, giving them a taste of the danger and excitement it has to offer.

We’ll show you how to play Crab Game with other players with some tips to prevent you from being eliminated.

Crab Game for Windows FREE DOWNLOAD
8

What is Crab Game?

Crab Game is a first-person Battle Royale first-person survival game where you’ll need to survive mini-games towards the ultimate cash prize. There are plenty of modes you can try, with matches holding up to 35 players. What makes the title so versatile is that there are 28 maps, so you won’t become bored too quickly.

how to play Crab Game

How to play Crab Game

If you’re ready to learn how to play Crab Game, we have the full details here below. You’ll see how to get started before we show you the various modes and how to survive them.

1. Getting Started

Before you can play Crab Game, you need to download and install it. It only needs 200 MB storage space, and you’ll need at least Windows 7 or higher. You can get away with 2 MB RAM, but we recommend Nvidia GeForce GTX650 with an Intel Core I5-4440 3,10 GHz processor for the ultimate experience. It also runs better on Windows 10 and Windows 11 operating systems. 

2. Selecting a Mode

Once you’ve downloaded and installed Crab Game, you can select one of the many modes available, which we’ll touch on shortly. The developer is constantly adding new modes, so you may see more options in the future. Be sure to read the details of the matches before you enter them.

3. Finding a Lobby

Crab Game features a server list you can look at to see which players are hosting lobbies. It’s an easy way to quickly join a game that’s about to start if you don’t want to wait too long. You’ll need to make sure you read all the details before joining any server.

4. Survive the game

As soon as you’re in a game, it’s time to survive. Each mode has its own set of rules, and you’ll need your wits and fast fingers to ensure that you’re not eliminated. 

how to play Crab Game

Crab game tips and tricks

Now that you know how to play Crab Games, let’s take a look at some of the modes and what they entail. We’ll also give some advice on how you can stay in the game while eliminating others.

Glass Window / Rock Path / Ice

This game mode has a simple rule: cross the glassy, rocky, or icy path and get to the other side. There may be crooked sections, while platforms may break when you step on them. A strategy some players use is to push other gamers onto the paths to see which one is stable. You have 2 minutes to reach your goal; otherwise, everyone is eliminated.

Lights Off

In much the same fashion as Squid Game, you and your team will need to survive while the lights are off. Everyone waits in a rest area with weapons, and when it goes dark, you’re released to kill anyone in your path. The lights flicker now and again to show you where the enemy is before you return to blindly hacking away. Those who survive by the end of the clock advance to the next round.

Fish Game

Are you familiar with the now-popular Red-Light-Green-Light game? Well, this Crab Game mode is the same, and you’ll need to run on green and stop on red. If the statue catches you moving, you’re eliminated. Make sure to reach the line before the time runs out!

Pass the Bomb / Stick

As the name suggests, you’ll need to pass the bomb or stick to other players to avoid dying. In the Stick version of this mode, anyone with the item in their hand when the time runs out is eliminated. With the Bomb version, the object explodes if you can’t tag another gamer within a matter of seconds.

The Floor is Lava

You might be familiar with this mode from TV shows and Roblox games with the same title. The floor is lava, and you’ll need to cross various platforms in a set time to get to the other side. Some of them will vibrate before they break, so you’ll need to move quickly.

Other game modes

While the top modes in Crab Game are some of the more exciting ones, there are plenty of others you should try. Here’s a quick list:

  • Hold the Hat: Earn points for holding the hat as long as possible
  • Hide & Seek: Hide from randomly selected killers who will attempt to eliminate you
  • King of the Hill: Stand in the dome shield at the top of blocks to receive a score the longer you remain there
  • Paint the Tiles: You and your team need to change tile colors to your team’s color by the end of the game while stopping the other team from doing the same
  • Bustling Button: Select any button and hope it doesn’t explode
  • Race: Reach the end before other players to avoid elimination
how to play Crab Game

FAQs for Crab Game

Before you leave, we’ve compiled a few questions that many gamers have been asking before heading into playing Crab Game. You might want to check these out.

Is Crab Game safe?

A few weeks ago, Crab Game had a DDoS (Distributed Denial of Service) attack launched at it, which resulted in many I.P. addresses of players being leaked. The developer Dani apologized for the lack of security on its part in early November 2021 and has put more stringent measures in place. The game is now considered safe to play again.

Is Crab Game Free?

Fortunately, you won’t need to pay, as Crab Game is a free-to-play title you can enjoy at any time. You also won’t need to spend any real money on in-game items at this point and can just simply enjoy the free modes available.

Can you play Crab Game on mac?

At this point in time, Crab Game is only available for Windows devices and has yet to come to Mac. Time will tell if the popularity of the title will cause this to change, but we’ll keep you updated. 

Can you survive? 

With the knowledge of how to play Crab Game at hand, we wish you well on your survival adventures. Remember, the goal is to not be eliminated while you watch other gamers vanish before your virtual eyes. And please, do not try this at home…

How to export Premiere Pro

Adobe Premiere Pro is impressive, versatile software for video production and editing. It’s an Adobe Creative Cloud app. Like other Adobe products, Premiere Pro has set an industry-standard in its field. It’s reliable, packed with features, and powerful. You’ll pay a monthly subscription to use Adobe Premiere Pro. But you can learn all about it during a free trial period.

You can import material into the platform, edit and modify it using features like filters, transitions, layers, effects, and color adjustments. When you’re happy with your work and ready to send it out, here’s how to export Premiere Pro.

How to export Premiere Pro

  1. Select the project to export

    How to export Premiere Pro

    Click on your timeline to select your project to export. If properly selected, it will show a blue box around your timeline. Go to File > Export > Media, and you should see a pop-up menu wh an export preview on the left and export settings on the right. You can now fine-tune your export settings to make sure they’re perfect for the destination.

  2. Specify your export settings

    How to export Premiere Pro

    You can customize your export settings in Adobe Premiere Pro. They must be set according to where you’re going to send your video. You can customize almost every part of your video export, including the audio and video, effects, and captions. 

    At the bottom of the right panel, you’ll see your Estimated File Size, where you can choose a video format that fits your size and quality standards. You can also specify your file size if there is a limitation at the destination.

  3. Settings for different upload platforms

    How to export Premiere Pro

    Various upload platforms require different settings. Here are a few you need to research and check.

    For YouTube videos, check the Container MP4, Audio codec: AAC-LC,

    Video codec: H.264, Frame rate, Bitrate, Color space and Resolution, and aspect ratio settings.

    For Vimeo, use codecs H.264, Apple ProRes 422 (HQ), and H.265 (HEVC), the Frame rate, bit rate, and depth, resolution, scan type, audio, and color settings.

    For Facebook, try Uploading HD video for better quality. They suggest H.264 video with AAC audio in MP4 or MOV format, with an aspect ratio of under 1280px wide, divisible by 16px, a frame rate of less than 30fps, and an audio sample rate of 44,100hz.

  4. Name your destination and send

    How to export Premiere Pro

    Make sure you’ve named your export file and picked your location. Click on ‘Output Name’, which appears in blue text you can click on. If you’re working with many files or hard drives, be careful because Premiere Pro will save the last destination you exported to, and if you don’t specify where your new work must go, it will send it there.

Start exporting away!

Adobe Premiere Pro is a wise choice for creating and editing work you want the world to see. It also offers a wide range of settings to ensure that your videos are correctly coded so they’ll look their best when you send them to specific destinations.

Now that you know how to export Premiere Pro, it’s your turn to give it a try!

What Is Adobe Premiere and How Does it Work?

Adobe Premiere is primarily a video editing software that forms part of the Creative Cloud. Along with other popular Adobe programs like Photoshop and After Effects, Premiere allows creatives and designers a comprehensive creation and editing space.

Adobe Premiere Pro is available for Mac and Windows computers, but you will need a subscription to use the program. Premiere Pro can be used to edit videos, commercials, films, and television shows. This program is fast becoming the video editing platform of choice among amateur and professional filmmakers. 

What Is Adobe Premiere Pro?

Adobe Premiere Pro is the subscription version of the video editing software. Adobe changed to a subscription service in 2013. All versions of Premiere before then are available for free. However, these versions don’t receive updates, and there is no customer support available.

If you decide to go with the subscription-based Premiere Pro, you will have access to updates, which usually happen every three to six months. You will also have access to their customer support which is helpful whenever you get stuck.

Adobe Premiere is a comprehensive video editing program, which is why both amateurs and professionals alike use the program. Whether you are editing a short video or a feature-length movie, Adobe Premiere has the tools needed to edit the video.

What is Adobe Premiere and how does it work

Features of Adobe Premiere

Adobe Premiere Pro already has many features that make it a great tool to edit videos. Despite having your essential high-quality video editing tools, many other features make the editing process easier and more seamless.

Video Editing

With Premiere Pro, you will have all the basic video editing features that you’ve come to expect from a video editing program. You can import video, audio, and image files in a range of formats. You can also add effects, filters, titles, and more. Finally, you can export your completed video in a range of formats.

Cloud-Based Service

Adobe Premiere Pro has a cloud-based version, making it easier to use and lighter on system resources. Adobe is also very active in releasing updates for cloud-based products so that you will be receiving more frequent updates.

Fast Multicam

Adobe Premiere Pro allows you to sync files based on the audio. This is a great time-saver and especially useful for anyone who uses short DSLR (digital single-lens reflex) camera clips.

Audio Clip Mixer

Premiere now also features an updated audio clip mixer that gives you enhanced audio functionality. However, if you require advanced sound mixing capabilities, we recommend using Adobe Auditions in conjunction with Premiere.

Closed Captions

Premiere Pro now also lets you edit, change, and include closed captions in all your videos. Adding closed captions to your projects makes them more accessible, especially for those who have hearing issues.

Color Correction

Adobe Premiere has a feature called SpeedGrade that you can apply to projects to create a consistent look and color correction. This is an essential feature to create seamless transitions in your video clips, especially if you combine clips shot at different times of the day.

What is Adobe Premiere and how does it work

How Does Adobe Premiere Work?

Adobe Premiere Pro does have a steep learning curve, but Adobe has many training videos and tutorials that can help you along the way. When broken into its most basic elements, the process to use Premiere is simple.

Get Your Video Clips Ready for Editing

Before you can start to edit a video, you will need to import all the video clips and files into your video editor. In the case of Premiere, you can just drag and drop the files from their original location to Premiere.

Sequence Your Clips and Trim Where Needed

Now you can start a new project by dragging and dropping the clips into the timeline in the order you want them to play. It may be necessary to trim some of the clips, and now would be a good time to do that. You can use the ‘Cut’ tool to remove sections of the clip (either at the beginning of the end) that you no longer need.

Start Editing Your Video

Now that your video is sequenced and trimmed, you can start with the real editing. Now you can start using basic correction settings such as exposure, white balance, temperature, saturation, and contrast to bring your video to life.

It’s important to remember that adjusting exposure in videos is much more difficult than still images. As such, you may find it easier to get the exposure right in-camera when recording your clips.

Add Transitions to Improve the Flow of Your Video

Transitions can change the look and feel of your video by changing how one clip flows into the next. Depending on the type of video you are making and the feel you are going for, you can experiment with different transition styles to create the effect you’re looking for.

Export Your Video

Once you are happy with your edited video, you can export it. The menu will provide you with a few different options for exporting. Some of these options are optimized for specific platforms such as Facebook or Instagram. It is good practice to always export videos in the highest quality possible, usually 1080p HD or 4K. It is helpful to remember that most social media platforms compress videos in any case, so rather, go for the highest possible quality whenever you can.

How Much Does Adobe Premiere Cost?

If you are interested in getting started with Premiere Pro, Adobe has two plans that you can consider. You can either pay a subscription fee of $24.14/month for only Premiere Pro. Alternatively, you can subscribe to the Creative Cloud All Apps, which includes Premiere Pro as well as Photoshop, After Effects, Illustrator, InDesign, and more for only $34.49/month.

Not sure if you want to take the plunge yet and subscribe for Adobe Premiere? Adobe offers a 30-day free trial so that you can try out the software before committing to a subscription.

What is Adobe Premiere and how does it work

More Helpful Guides

If you want to learn more about Premiere Pro and the Adobe Creative Cloud, here are some more guides, how-to’s, and articles to get you started.

Final Thoughts

Adobe Premiere has been around for a long time as it was first released in 1991. In this time, it has cemented itself as one of the best video editing programs available and has a very stable and loyal user base. It is a solid, professional-level application that is adequate for most video editing situations. 

What Is MacOS Monterey and How to Use It?

MacOS 12 Monterey is the latest version of the Mac operating system. This version was released on 25 October 2021, and despite being smaller than the previous version, macOS Big Sur, it still has many useful features.

Along with the new features, there are also many optimizations for existing functions of the operating system (OS). This includes widened capabilities for the FaceTime app, and even the Messages app has seen improvements.

It is important to note that with the release of the macOS Monterey version, Apple will no longer offer support for older Mac models released between 2013 – 2015.

What is macos monterey, how to use it

What Is MacOS Monterey?

MacOS Monterey is the newest operating system. It has been designed to work seamlessly across all Apple products. It is more customizable than previous versions and lets users share content across iOS and iPad like never before. 

Apple was reported saying that this latest version will provide users with new ways to connect, get more done and work seamlessly across all Apple devices.

What Are the Main Features of macOS Monterey?

Now that we’ve covered what macOS Monterey is, let’s look at some of the new features released in this version.

Universal Control

This is probably one of the most significant new features to be released. This feature was not available with the initial release of Monterey as it was still in beta, but we look forward to testing out this feature.

This feature will allow a single mouse, keypad, or keyboard to be used across multiple Apple devices. Users will also be able to drag files from one device to another with their chosen mouse. This feature is meant to increase productivity and let users work with fewer interruptions. 

Airplay for iMac

This new feature will let you stream what is on your Mac to any other Apple devices, such as Apple TV, iPhone, or iPad. This means you can stream series, movies, or games from your Mac to your other devices seamlessly.

iOS Shortcuts App

Shortcuts were originally available on iOS and iPadOS 13, but the app is coming to macOS Monterey as well. You will then be able to use pre-installed shortcuts, or you can access the ones that you’ve already created on your iPhone or iPad.

This will allow you to also use shortcuts to communicate with your smart household products such as the Apple TV or smart kettle. You can also create new shortcuts to improve your workflow directly on your Mac.

Focus Mode

This feature is excellent for anyone who tends to get distracted easily or if you work from home. Focus mode lets you set up profiles on your Mac, where you limit the notifications and alerts that come through. This way, you can ignore the minor disturbances when you need to concentrate on specific tasks. Once you enable focus mode, it will also trigger other linked Apple devices like your iPhone and iPad.

There are preset modes already set up. These include ‘Do Not Disturb,’ ‘Commuting,’ ‘Driving,’ ‘Personal,’ ‘Sleep,’ and ‘Work.’ You are also able to create your own profiles. There is also a setting that will notify anyone in Messages that you have Focus Mode on if they try to contact you during this time.

Shared With You

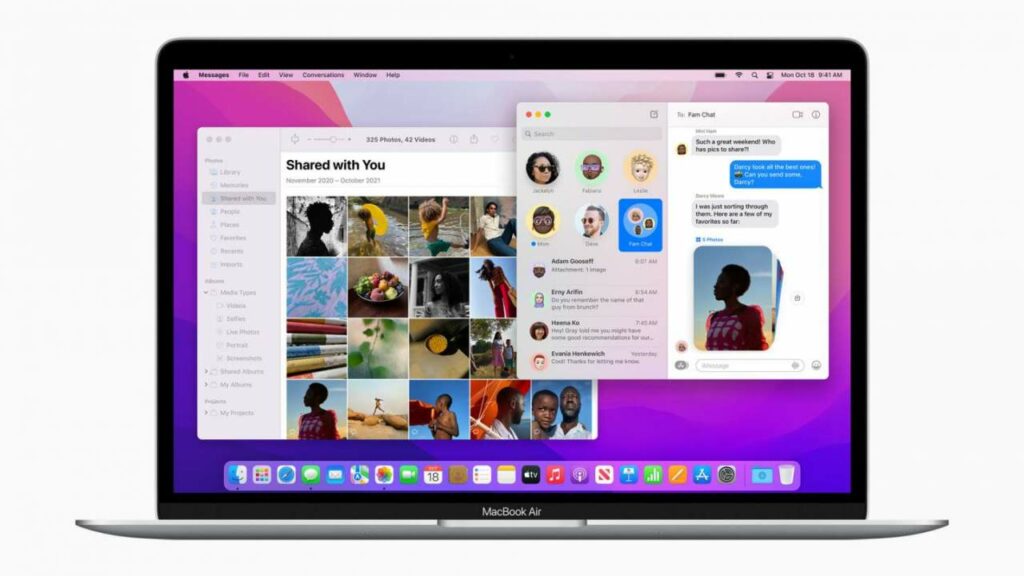
This is a new way to organize all the photos, images, and links sent to you. When you open Apple-specific apps like Messages, Photos, Safari, Apple Music, and Apple News, you will see a new spot called ‘Shared With You.’ This is where all these files will live.

You can now easily access and search for these files. They will also include the details of who sent it to you and the date you received it, making it even more convenient to find the files you are looking for.

Quick Note

Now you can easily access your Quick Notes by just pressing the ‘Globe’ + ‘Q’ key or clicking in the bottom right corner of the screen. With these notes, you can drop links, photos, files, and more. 

You can also add other people to a specific note, similar to how Google Docs works. These people would then be able to make changes and adjustments to the note that is visible in real-time.

Safari Tab Groups

Aside from the other small improvements made to the Safari browser. Some of these include seeing more of the webpage as you scroll, the tab taking up the color of the webpage you are on, and simplifying where you find the toolbar and search field.

Aside from this, Safari can also group tabs. This is ideal if you work on multiple projects and need to navigate between them without losing your current tabs.

Live Text

This feature makes use of on-device machine learning to detect any text in photos. Once the text has been detected, you can copy and paste it into your Quick Notes or Messages. The feature will also identify phone numbers and ask if you want to call the number.

The feature will also identify website addresses and prompt you to open any links or websites shared. The feature will also identify addresses and prompt you to open your maps to the address.

What is macos monterey, how to use it

What Devices Support macOS Monterey?

This latest version, macOS 12 Monterey, is available on the following Apple devices:

  • MacBook Pro (2016 and newer)
  • MacBook (2016 and newer)
  • MacBook Air (2018 and newer)
  • iMac (2017 and newer)
  • iMac (5K Retina, 27-inch, late 2015)
  • iMac Pro
  • Mac mini (2018 and newer)
  • Mac Pro
  • iPad Pro
  • iPad Air (third generation and newer)
  • iPad (sixth generation and newer)
  • iPad mini (fifth generation and newer

When and Where Can You Get macOS Monterey?

As we mentioned, MacOS Monterey was officially released on 25 October. This is also a free release, so if you have a Mac computer that supports this version, you can download and install it for free. You can download MacOS Monterey.

If you update from the Mac Sierra version or newer, you will need about 26 GB of available storage to install Monterey. If you are trying to update a version older than Sierra, we recommend having at least 44 GB of free space.

More Tips and Tricks for Using the macOS

If you want to learn how to use the Mac operating system like a pro, here are some more guides to help you learn the ins and outs of Mac.

What is macos monterey, how to use it

Final Thoughts

The release of macOS Monterey is exciting as it is the biggest release since Big Sur in November 2020. Although there aren’t quite as many new features as its predecessor, the features we did get are good ones. They are ideal for improving productivity and workflow as well as integrating seamlessly with other Apple devices.
How to play Poppy Playtime – Chapter 2

Poppy Playtime by MOB Games caused a stir when Chapter 1 launched on October 21, 2021. The Huggy Wuggy toy caused many screams on Twitch and YouTube gaming channels, but the fun isn’t over yet.

The developer recently announced the launch of the second installment with an official trailer. We’ll show you how to play Poppy Playtime – Chapter 2 when it’s available, when we think it will launch, and what to expect.

Rumored release date for Poppy Playtime – Chapter 2

While the trailer doesn’t reveal the exact launch date for Poppy Playtime – Chapter 2, it does indicate “Early 2022.” If we look at the first installment, there was a five-month gap between the announcement and the release. Using this pattern, we believe we could see Chapter 2 appear around March 2022.

Of course, this is just a guess. However, another option could be Halloween 2022, but that doesn’t tie in with the Early 2022 statement. It all depends on how well development goes and if there’s enough interest in Poppy Playtime – Chapter 2.

How to play Poppy Playtime – Chapter 2

When it becomes available, you can install Poppy Playtime – Chapter 2 as a DLC add-on to Chapter 1. Therefore, you’ll need the base game to play it, as it’s not a standalone title. You’ll pay the same amount as the first version, but that may change by next year. 

How to play Poppy Playtime - Chapter 2

What can we expect in the second installment?

The developers haven’t said much about what to expect with Poppy Playtime – Chapter 2. However, the trailer does give us some hints. You can hear the voice of a female toy, and we wonder if this sets the scene for the next boss to escape from. Nola Klop, the voice behind Poppy and Stella Greybar, has also tweeted her excitement for being involved in the sequel.

Are you ready for more?

There’s no doubt that many gamers will be ready to play Poppy Playtime -Chapter 2 when it launches. We’ll certainly be ready to scream when we try it, as the first title was so intense! Keep an eye out for more information as we get hold of more news in the next few months!