Beware these scammy iOS and Android apps that have been downloaded millions of times

The sheer number of mobile apps that roll out on the likes of the App Store and the Google Play Store every day means there will be no stopping a certain number of scam apps breaking through the security defenses of the stores and becoming available to download through official channels. It’s extra unfortunate, however, when these scammy apps go on to be downloaded millions of times, which is exactly what has happened here. This is what you need to know.

iOS 16 Download Now

Cybersecurity analysts from the firm HUMAN Security have found 80 Android apps and 9 iOS apps comprising of games, screensavers, and camera apps containing scammy adware, which have been downloaded a whopping 13 million times.

According to HUMAN, the scammy apps commit multiple types of ad fraud such as showing ads where they are not supposed to be, pretending to be aps when they are not, creating fake clicks and taps to drive fraudulent engagement.

As well as the blog post explaining the details of the fraud perpetrated by the scammy apps, HUMAN has also released a detailed report, which includes the complete list of apps you need to look out for, which you can find here.

The security specialists have called the threat Scylla, describing and as an ongoing threat because some of the apps are still active. The HUMAN researchers say:

“These tactics, combined with the obfuscation techniques first observed in the Charybdis operation, demonstrate the increased sophistication of the threat actors behind Scylla.”

Fortunately, the HUMAN research team say that they have worked hard with Google and Apple to make sure that all of the scammy apps have been removed from the Google Play and Apple App Stores. Unfortunately, however, as previously mentioned, there are still a few of these apps that remain active on the phones of unsuspecting users who downloaded them. This means, if you have downloaded any apps recently and noticed some strange behavior on your device, you should consult the full list we linked to above to see if any of the apps on your phone are included in it.

In other recent cybersecurity news, a new phishing attack has been discovered, which is leveraging LinkedIn Smart Links to get around email security.

This is what the new WhatsApp camera will look like

We’ve been tracking new and incoming WhatsApp features such as the Communities feature and a massive increase in group chat capabilities for a while now. Another feature, which we’ve touched on but which has mostly been advancing quietly in the background is the new WhatsApp camera feature. Today, however, we can bring you more details about the upcoming feature and even show you a screenshot of what it will look like.

WhatsApp Download Now

As we previously reported, the new WhatsApp camera is needed because the soon to be launched Communities feature will replace the existing camera button. It already has for some of the beta community test users who we can thank for this scoop.

Interestingly, however, as you can see from the screenshot above, the new WhatsApp camera feature is not a simple copy and paste job from the old one. Instead, the new WhatsApp camera will have both a photo and video capture setting, which will at least make it easier for you to record videos while you are using WhatsApp. At the moment, when you use the camera setting on WhatsApp you have to hold the shutter button down when you want to record a video as opposed to simply tapping it when you want to take a photo.

This means that in theory then, it will be much easier to record and send longer videos using the new WhatsApp camera when it launches. This is interesting as it could open up the possibility of sending much larger video files, which is also something WhatsApp has been working on recently. Even though this may only seem like a small update, analysis indicates that it could be part of a much more broader development movement for the popular messaging app.

In other recent WhatsApp news, you can now take a look at what the new WhatsApp avatar feature will look like.

Image via: WABetaInfo

Fortnite new pack pokes fun at the game’s harshest and most critical comments

Epic Games has to have the best sense of humor of all game developers. The company’s biggest flex, Fortnite, recently came up with an ingenious way to make the most of negative comments. And by make the most of, I mean that the company turned the other cheek and then turned it into merch. 

Fortnite DOWNLOAD

Comments have been streaming in from the platform’s harshest critics, accusing it of being nothing more than a dead game. Other comments attempted to call attention to Fortnite’s supposedly chequered past. However, instead of retorting, crawling into a dark hole, or attacking its player base, Fortnite has turned the ‘dead game’ comment into a money-making opportunity.

Fortnite checkered past pack

This sounds like a business lesson; Something along the lines of ‘don’t let your critics get the better of you. Take their opinions and turn them into dollar signs.’ In this case, Fortnite has opted to launch a brand new collection of loot, clothing, and weapons inspired by its ‘chequered past.’ 

The Chequered Past Pack was first teased last week and it’s finally available for purchase. Should you decide to support Fortnite’s response to the dead game meme, here’s what you’ll get:

  • A new outfit complete with a chequered and olive motif.
  • Weapon wrap in the same style, complete with straps and notches. 
  • Harvesting tool that loosely resembles a cane and may be a comment on the game’s age. 
  • A matching skull and cross-bones item. 
  • 600 V-bucks

In case you were wondering, you’ll be able to literally wear the dead game motif, as this is what is scrawled across the front of the surprisingly stylish turtle-neck crop top. Fortnite launched the pack along with a Twitter post reading:

‘*reads comments

*designs Outfit

Results: Chequered Past Pack. Available now!’


If you’re a fan of the Fortnite phenomenon and don’t believe that the game is dead in the water, why not check out our piece on the Fortnite Paradise season?

Twitch is working on the sudden flood of new bot accounts

Twitch is in hot water again. The embattled streaming platform is currently facing a mass incursion of phony accounts. If Twitch doesn’t find a way to make this fake account epidemic a relic of the past, the platform may very well be in serious trouble. This isn’t necessarily the last nail in Twitch’s coffin, but the platform has already seen some of its most popular streamers express disgust over its most recent exploitation issues. 

Twitch DOWNLOAD

Dexerto reports a recent tweet by CommanderRoot outlines that in excess of 4 million accounts had shown up during only 24 hours. This seems to confirm that someone on Twitch has found a way to easily mass-produce fake bot accounts with which to flood the platform. This poses a massive issue for Twitch streamers. Traditionally, player counts are based on streamers’ engagement with their followers. 

Twitch may be embattled at the moment, but at least the company isn’t silent. In response to both an outcry from the wider Twitch community and CommanderRoot’s tweet, one of the devs at Twitch, RayApollo, has confirmed that Twitch is aware of the issue. Furthermore, he has assured the community that the platform is working in the background to try and find a solution to the issue. However, he was not able to mention any kind of plan of action, likely because the company doesn’t know what to do. Who would, though? 

Twitch bots overload

No one really knows how to combat this issue, especially when the bot creator seems to have found a vulnerability in the platform’s organization to exploit. As mentioned at the top of this article, this isn’t the only issue that Twitch has faced in recent months. Another issue that left a stain on the platform was an instance in which a user managed to scam more than $200,000 from the followers of numerous Twitch streamers under the guise of gambling. This has resulted in Twitch adjusting its policies concerning unlicensed gambling sites. 

This flood of fake accounts compounds the issues already plaguing the platform. If the company doesn’t get the issue under control soon, it may see a significant decrease in users. 

In other news, the platform has decided to remove its Twitch desktop app.

9 Best tips for Craftsman 4: Building Craft

Creative building simulation games have really become popular in recent years. If you’re looking for a fun, free indie game similar to Minecraft or Realmcraft, then Craftsman 4: Building Craft is for you. However, true to its indie game nature, this creative game doesn’t have an introduction or tutorial to get you started. So, how do you make the most of Craftsman 4?

Craftsman 4 DOWNLOAD

This guide will look at a few survival and building tips for Craftsman 4to help get you started. Using these tips, you’ll soon master the basics and prepare to take on more difficult challenges.

Start collecting resources early

Survival is one of the three available game modes in Craftsman 4. The other two modes are creative and create a world. Survival is one of the most popular options as you’re challenged to survive in a world with many different challenges. You’ll then have to collect and craft items to help you survive. Let’s look at how to stay alive during survival mode.

From the moment that you spawn into the world, you want to start collecting resources. You will need these to craft tools and other items. Start by collecting wood by punching trees. If you see a stone deposit nearby, collecting some is also a good idea. 

Best tips for Craftsman 4

Craft tools once you’ve got the resources

You’ll want to start crafting tools as soon as you have the resources for them. If you’ve only managed to collect wood, you can make wooden tools. However, if you’ve already managed to collect some stone, you can move directly to making stone tools.

Stone tools harvest much faster and also last longer than wooden ones. Start with crafting an ax, pickaxe, and sword first, as they are the most useful early in the game. 

Best tips for Craftsman 4

Don’t forget to build a shelter in Craftsman 4

Building a shelter is essential as enemies spawn at night. While you’re still weak and defenseless, it’s easy to become overpowered. When you start noticing the sun setting, you should build your shelter. It can be a basic hut made from dirt if you’re still exploring, or you can immediately set up a permanent base.

The option you choose depends on your playing style. A bed is critical as interacting with a bed will set your respawn point. It also allows you to sleep through the night rather than wait in your hut until the sun starts to rise. 

Best tips for Craftsman 4

Locate a town/city

Villages often have tools, gear, and food that can be useful. Big villages also tend to have the protection of an iron golem – which can be a good source of iron early in the game if you can bear to destroy them. Villages will also have unique villagers you can trade with to start collecting more advanced items. 

Best tips for Craftsman 4

Start mining for diamonds in Craftsman 4

Diamonds can be used to craft strong armor and tools. Once you’re ready and stocked with stone or iron tools and torches, you can start looking for mines to collect more ores like iron and, hopefully, diamonds. You will need an iron pickaxe to mine diamonds, so make sure if you don’t have iron tools yet, you craft some before trying to mine diamonds.

Best tips for Craftsman 4

Create a quick and easy self-sustaining farm

Building is an essential part of Craftsman 4: Building Craft. When you choose the creative play mode, you’ll have access to all the resources to build any creation you can imagine. However, building is also frequently used in the survival game – however, you’ll have to collect the resources yourself.

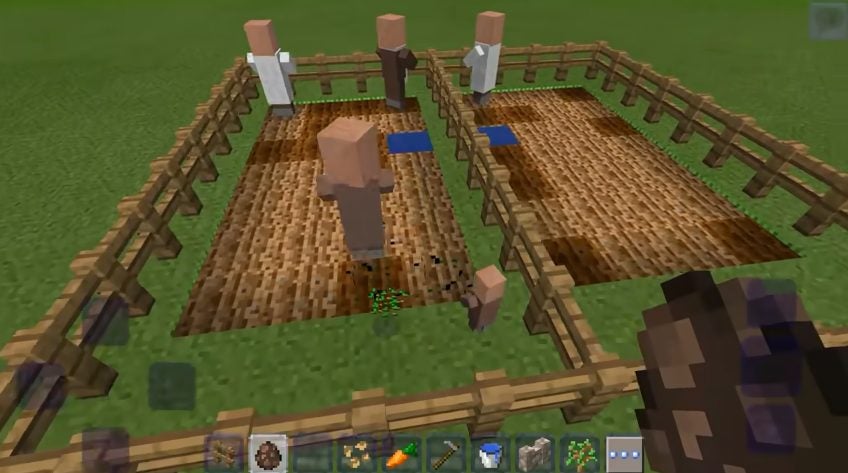
Fence in an area using a wooden fence. Place a single water block within the fenced area. Use a hoe to till the soil around the water block all the way to the edges of the fence. Now, spawn a villager inside the fenced area. Make sure to remove any gates; otherwise, the villager will escape.

You can place a piece of wool on top of one of the fence posts so that you can jump in and out, but the villager will stay put. Next, throw some seeds into the fenced-in farmland and watch as the villager starts planting the seeds for you.

Best tips for Craftsman 4

Create working trash cans using cactus

A cactus may seem like an annoyance. They hurt you if you get too close and can only be used to craft green dye. Boring right? Well, this isn’t all they can do. You can also use them as a handy trash can. If you place a cactus and fence it in with trap doors, you can use it to get rid of the resources you don’t need.

Best tips for Craftsman 4

Create a Nether portal using obsidian and flint-and-steel

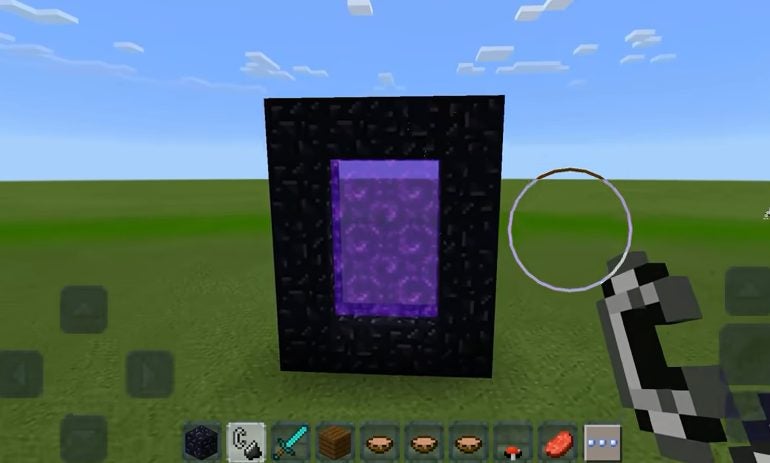
To continue exploring, you need to create a Nether portal to transport you to another dimension. If you want to create one, you’ll need obsidian which can only be mined with a diamond pickaxe. To create the portal, you need to build a gateway that’s at least 4×5 tiles. Then you need to use a flint and steel to activate it to travel between worlds.

Best tips for Craftsman 4

Create village guardians in Craftsman 4

If you’ve decided to settle in a village, you may want to bolster its defenses to keep yourself and the townspeople safe. You can do this by creating guardians. Iron golems are the strongest but require four iron blocks and a carved pumpkin to create. You can also build a snowman guardian with two ice blocks and a carved pumpkin. 

Best tips for Craftsman 4

Hocus Pocus 2 weaves new magic on Disney+

It’s almost the Halloween season, and many people are already preparing makeup and outfits for the week of trick or treating. Disney+ is making this year’s celebrations special with Hocus Pocus 2, a new movie featuring the original Sanderson sisters from 29 years ago. It’s bound to be a comedic yet creepy story that will have us cackling and cringing all the way.

Disney+ members will be able to watch the magical mayhem as part of their membership on September 30, 2022. It’s going to be fun to see what the newly summoned witches of old will catch up to. Keep reading to see how you can receive a discounted membership today!

Disney+ Offer SUBSCRIBE TODAY

A tale of old returns to Disney+

How many of you were around when the original Hocus Pocus movie aired in 1993? It’s hard for me to forget, as I had such a teenage crush on Sarah Jessica Parker. While that’s probably giving away my age, it was fun watching a horror comedy film where you didn’t know if you should be scared or laugh.

The tale told the story of the Sanderson sisters in Salem, Massachusetts, who were three witches. They had taken a girl by the name of Emily, and her brother Thackery sets off to save her. While he failed and the witches restored their youth, the townsfolk noticed the disappearance.

The main point you need to know for Hocus Pocus 2 is that one of the witches made a curse. Should a young virgin light the mystical Black Flame Candle on All Hallows’ Eve under a full moon, they’ll return to cause chaos and mayhem. They were resurrected in the first movie, but it looks like the Sanderson sisters are far from done.

hocus pocus 2 disney plus

Resurrected witches in Hocus Pocus 2

It seems as though the community forgot the lessons from the past. Someone has discovered the magical book and Black Flame Candle, initiation the resurrection spell. The 17th-century Sanderson sisters are back on Disney+, ready to avenge their previous deaths.

The plot follows two girls who are turning 16, which is the age believed by many to receive powers. With newly acquired items, namely the Black Flame Candle and a magical book, they cast a spell. Unfortunately, they get more than they bargained for. The witches have returned!

There’s a slight snag, though. The sisters return to a world that looks very different. There’s new technology around that they don’t understand, never mind all the faces they don’t recognize. It seems this world is set to embrace them instead of fear them… for now.

hocus pocus 2 disney plus

Host of familiar faces on Disney+

Returning to Hocus Pocus 2 on Disney+ are the original actors as the Sanderson sisters, namely, Bette Midler, Sarah Jessica Parker, and Kathy Najimy. They reprise their roles with the same wit and personalities, which is destined to give us a good laugh. 

Other faces you’ll see in the comedy horror sequel are also familiar. Sam Richardson you may recall from “The Tomorrow War”,  while there’s also Doug Jones from “The Shape of Water”. Teen Wolf fans will be happy to see Froy Gutierrez, and Hannah Waddingham from“Ted Lasso also makes an appearance. Other top names include Whitney Peak from “Gossip Girl”,  Lilia Buckingham from “Dirt”, Belissa Escobedo from “American Horror Stories”, and Tony Hale from “Veep”.

Become enchanted with Hocus Pocus 2

It’s been 29 years since we’ve seen the Sanderson sisters in action. Hocus Pocus 2 promises to deliver an exciting movie in preparation for Halloween, exclusive to Disney+. It’s going to be exciting to reunite with our favorite characters from the past and see what new evil they can come up with. I hope you have your blanket and popcorn ready. Just remember to turn out the lights and enjoy the show on September 30, 2022.

Remember, you can only enjoy the Disney+ experience if you have an active membership. Fortunately, you don’t need to pay the full amount if you subscribe. You’ll only pay for 10 months while watching the movies and shows for a full 12 months. Check Disney+ offer to see how you can benefit!

How to switch your Windows 11 system to dark mode

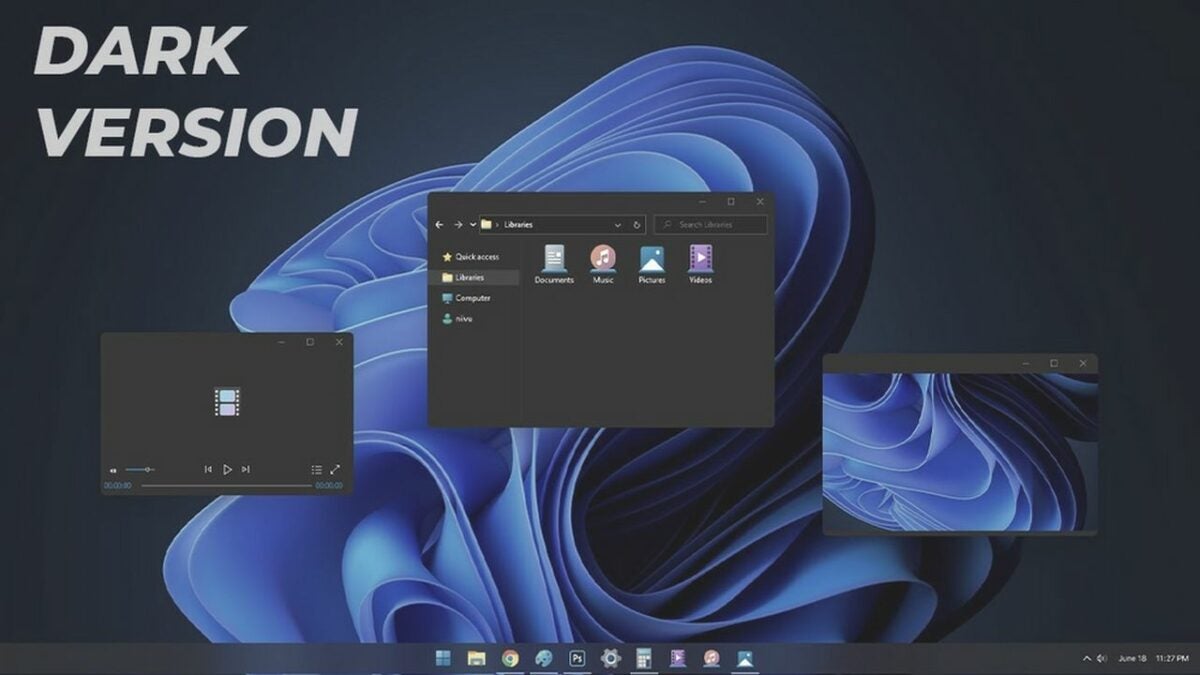
As more people get used to dark color schemes on their devices, the days of bright white beaming from every monitor are slowly becoming history. Dark color modes switch the principal colors in your operating system and apps from white to dark grays. Beaming less intense light into your eyes can help you cut down on eye fatigue so that you can use your device without feeling blinded. It also helps battery-powered computers conserve energy.

Windows 11 Download

One of Windows 11’s most exciting changes is the ability to enable dark mode throughout your entire system. You can find this feature in Windows 11’s Settings menu. Here’s how to turn dark mode on in Windows 11.

  1. Enable dark mode in your personalization menu

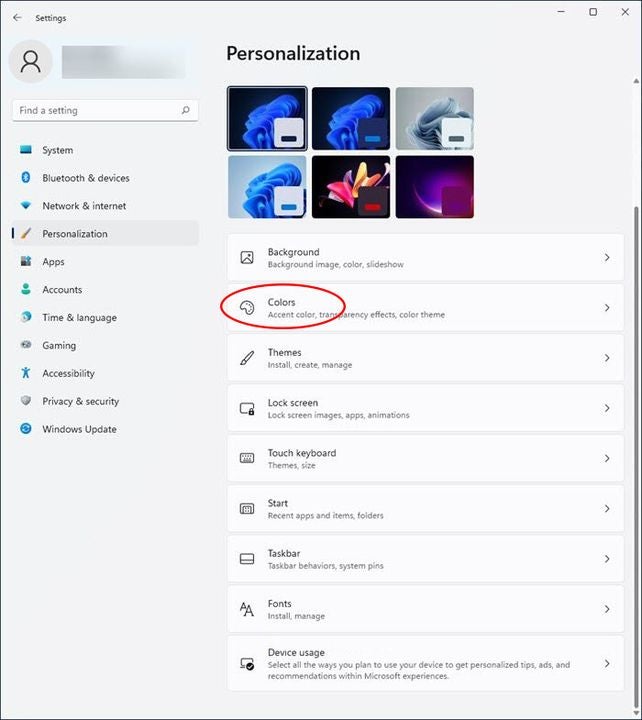
    The Colors menu in Windows 11

    Most smartphones and tablets use a dark theme as their default color setting. The first time you install Windows 11 on your desktop, it will use a light theme by default. You can enable Windows 11’s dark mode from the Personalization menu.

    Click on the Windows icon on the left of the cluster of icons in your taskbar to get started. Click on the Settings icon or just press the Windows key + i to open the Settings window automatically.

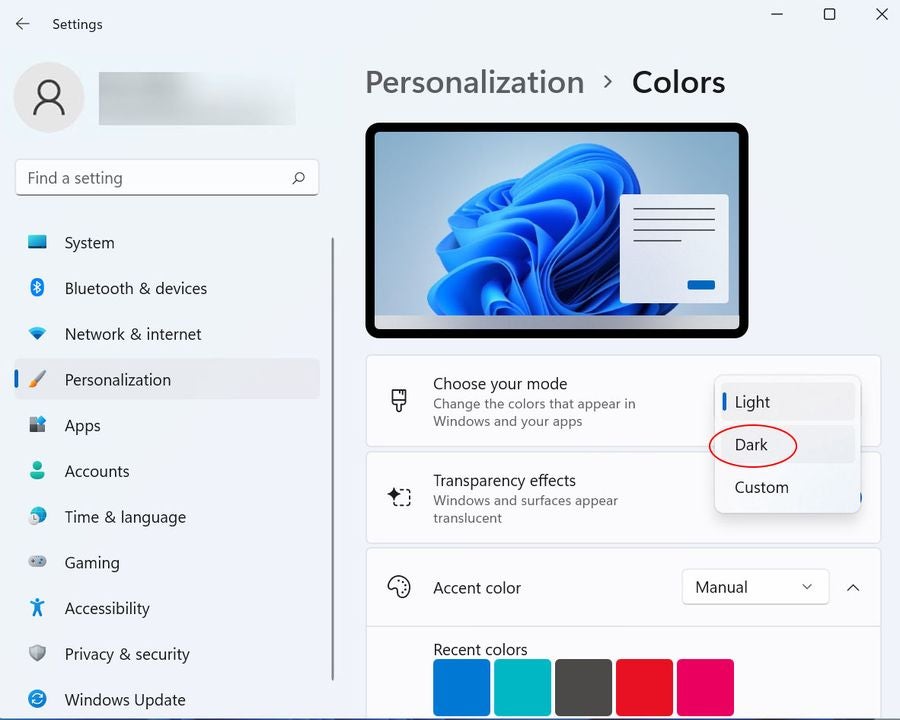
    On the left side of the Settings window, click on Personalization.

    In the Personalization menu, click on the tab labeled Colors.

    Once you’re in the Colors menu, look for where it says Choose your mode at the top of the main pane. When you click on it, you’ll see three options, Light, Dark, and Custom. Light mode is enabled by default.

    Click on Dark to enable dark mode. The background colors in your apps and system menus should switch immediately to dark grays and the text should switch to light gray. You can close the Settings window now.

  2. Why use dark mode?

    The Personalization menu in Windows 11

    Dark mode helps protect your eyes by reducing the amount of bright light that gets projected into them at close range. A little bit of bright light never hurt anyone, but spending prolonged hours inches away from millions of tiny white light bulbs can tire your eyes out quickly. Switching most of your screen’s pixel to dark grays instead will cut down on eye strain.
    Activating dark mode also helps save your laptop’s battery. If you’ve ever used your laptop outside on a sunny day with the screen on maximum brightness just so you could see it, you probably know how quickly a bright screen can drain your battery life. Dark mode cuts down on the energy needed to power your screen.
    The more whites and light colors you need to display, the more energy your screen will drain from your battery. If you have an OLED screen, turning dark mode on can extend your battery life by up to 30%. It also makes it easier to work in dimly lit environments because your eyes don’t have to constantly adjust from the glaring white screen to the darker room around you.
Reduce eye strain and battery use with dark mode

When you enable dark mode as per our above instructions, you change both your operating system’s color scheme and the color scheme of each individual app. If you select Custom from the dropdown menu instead, Windows 11 will give you the option of changing just the operating system or app color scheme individually.

If you want an extra-dark screen with even higher contrast, scroll down in the Color menu to find the Related settings subheading. Right below it, you’ll see the Contrast themes menu. Click on it, and you’ll see a number of modes that use even darker grays and blacks. Night sky is the darkest mode available. Careful though, these high-contrast themes remove all Windows 11’s background animations and give you a drier experience.

If you want an even easier way to switch between Windows’ Dark and Light modes, check out this Easy Dark Mode app for Windows that lets you change display modes with a single click.

How to solve the “macOS could not be installed” failure

It’s definitely stressful to see a giant Mac install failed error message flashing when you turn on your computer. However, there’s no need to panic. Error codes like the “macOS could not be installed on your computer” just mean something went a little wrong during your macOS Monterey update or installation.

macOS Monterey Download

Fixing an error when installing macOS is typically as simple as doing a little troubleshooting. Follow these steps to identify the installation failed mac OS problem and figure out how to fix it.

  1. Restart your computer

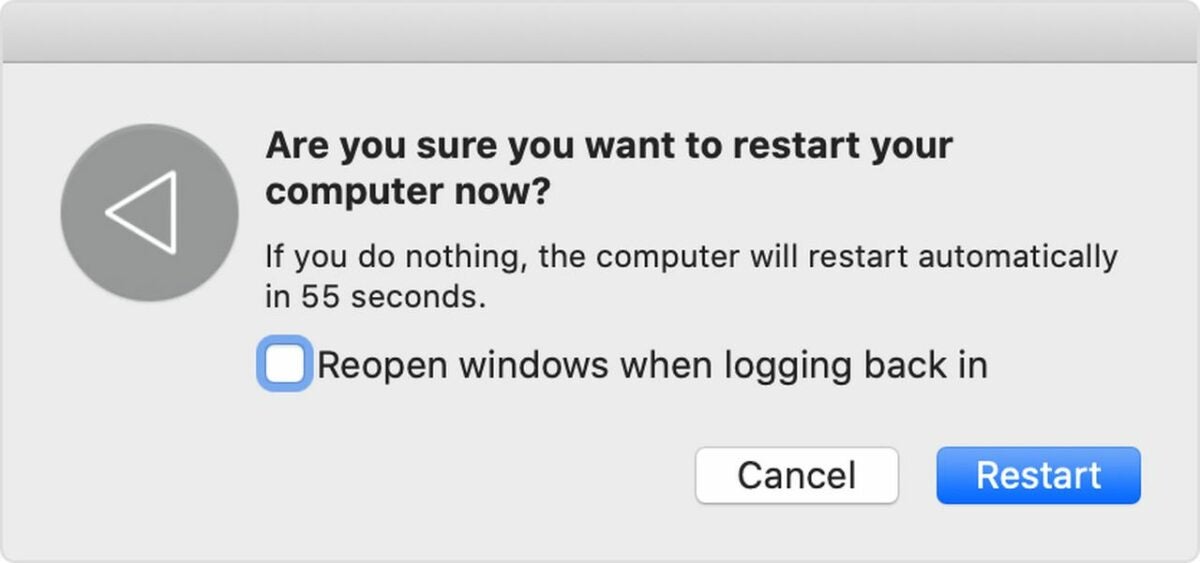
    A Mac screen asks the user to confirm a restart

    Any time you get an error when installing macOS, the first thing you should do is restart your computer. In the majority of cases, restarting allows the installer to try again and correctly install the OS.

    Restarting the computer is usually as simple as clicking the Restart button at the bottom of the error screen or using the normal power menu restart option. When your computer won’t let you try either of these options, press and hold the power button to manually restart.

  2. Launch safe mode on your computer

    A Mac keyboard with a circle on the shift key

    The “macOS could not be installed” error often prevents you from restarting your computer normally. To get around this problem, start your computer in safe mode.

    Do this by pressing and holding the Shift key while the computer powers on. Holding Shift until the login window appears will launch safe mode. This gives you a chance to tinker around with settings without installation attempts getting in your way.

  3. Check to see if you have enough storage

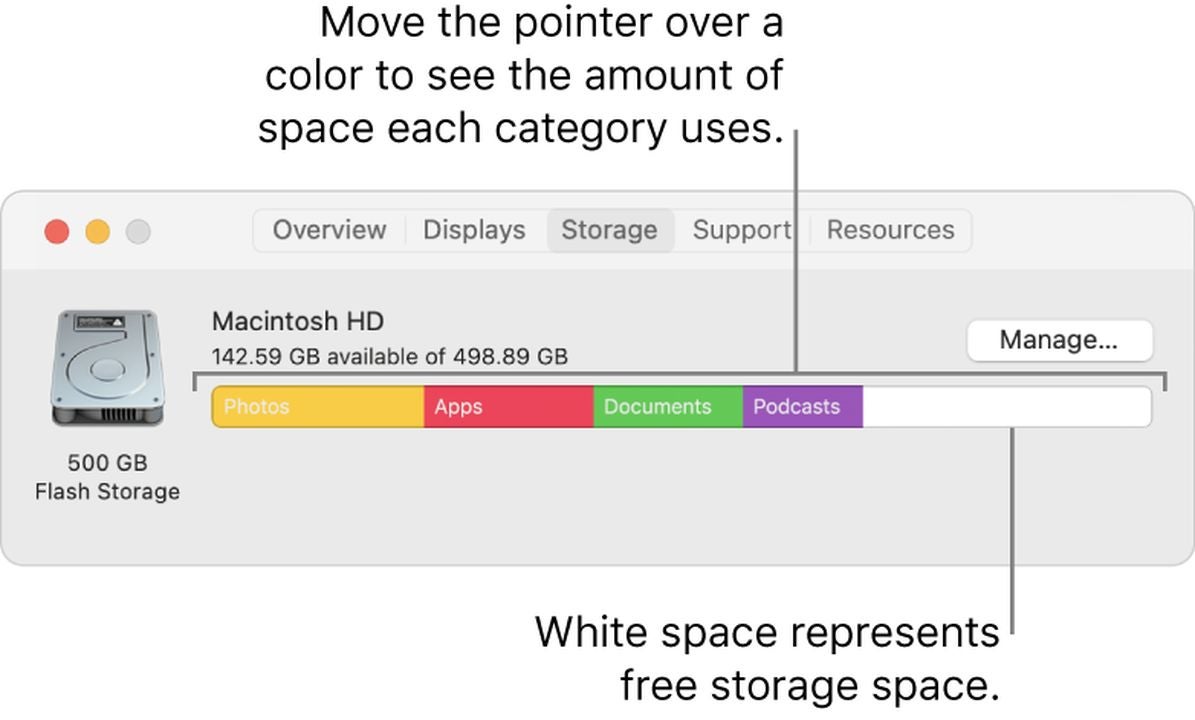
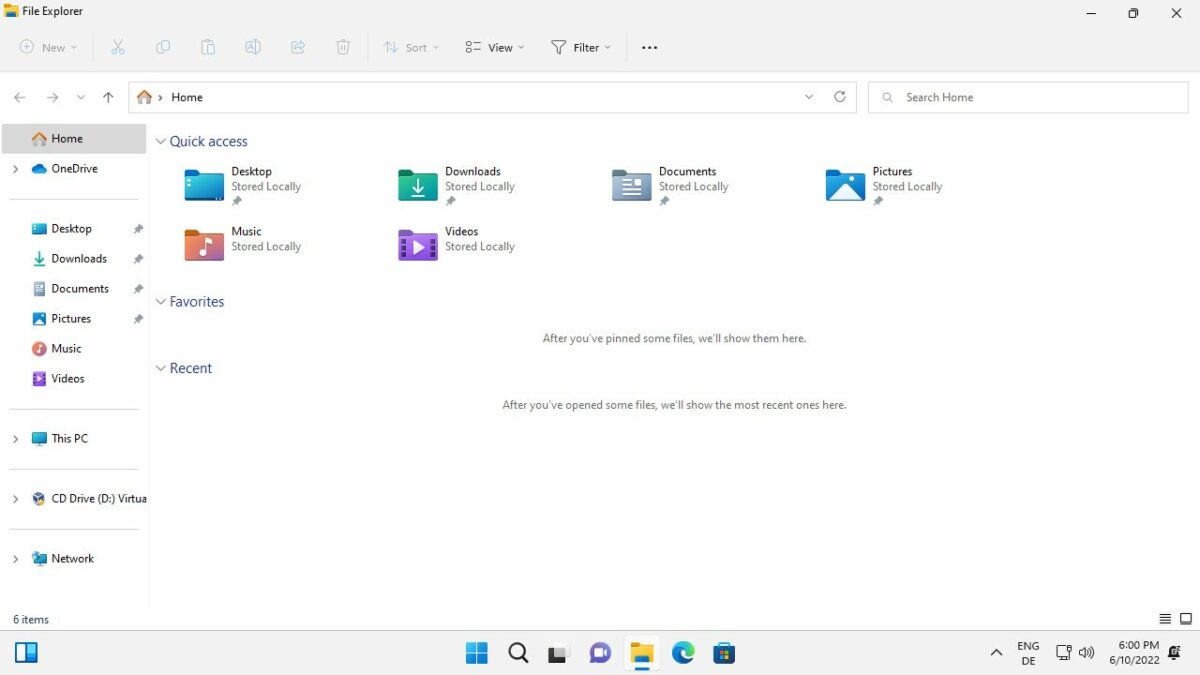
    Use storage management to clear space

    One of the most common reasons for an installation failed Mac OS error is a lack of hard drive space. If your computer can’t fully download the new OS version, it can’t install it properly.

    Most users need around 20GB of free storage. To check the space on your computer, open the Apple menu, click About This Mac and then Storage. If necessary, use the Manage Storage function to clear space.

  4. Make sure your computer’s time and date are correct

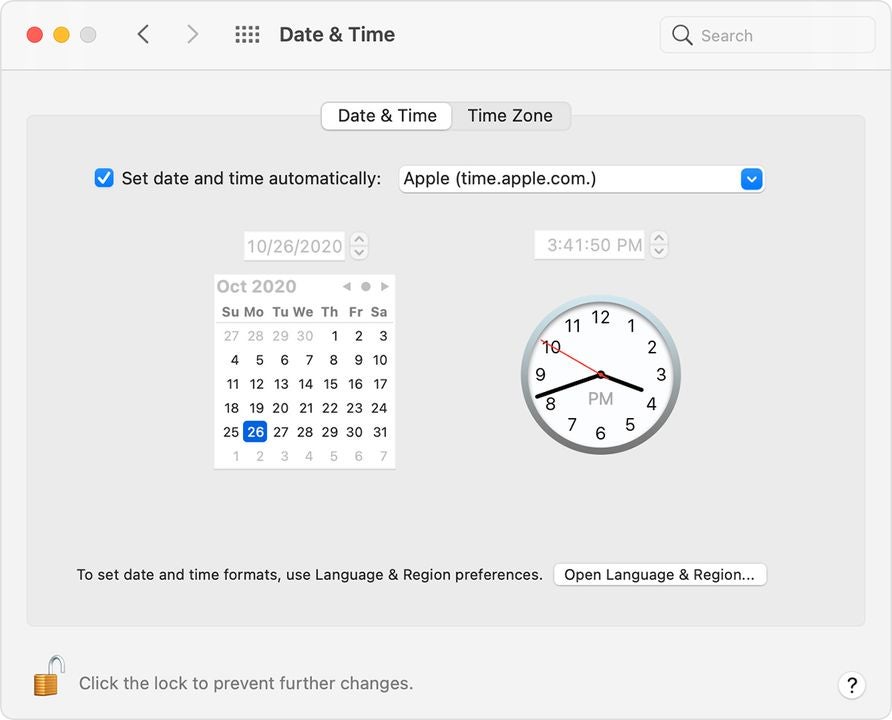
    A Mac screen displays the date and time

    Due to the way Mac designs their OS, it’s necessary for your computer to have the correct date and time. If your computer is using a time or date that doesn’t match reality, the contradiction gets in the way of the installation.

    Go to System Preferences and select the Date & Time option. Then click the Set date and time automatically option to bring your computer up to sync with local time.

  5. Download a fresh copy of your macOS installer

    A pink and purple macOS Monterey icon on a white background

    Many errors when installing macOS are due to a corrupt installer. If basic fixes aren’t working, go ahead and delete your installer. Once you get rid of the possibly-corrupt files, download a new copy.

    Depending on the OS you prefer, download from Apple’s website or the Apple App Store. Give the new copy a try. If it still won’t install, this indicates the problem is with the computer itself.

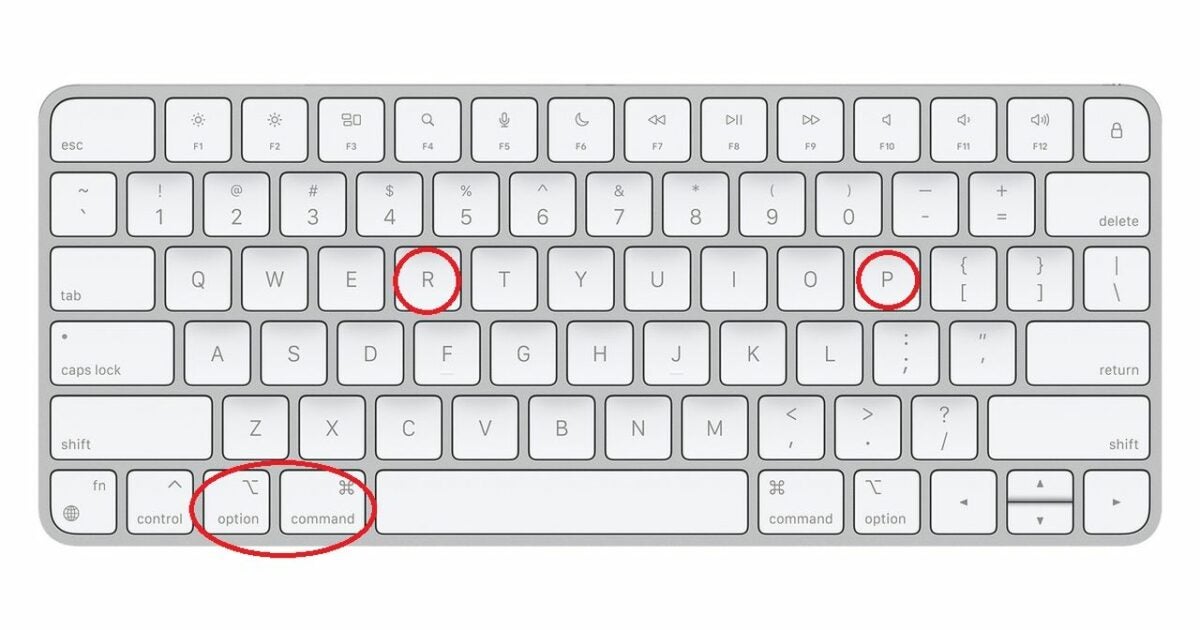
  6. Clear NVRAM and PRAM

    A Mac keyboard with several keys circled

    The NVRAM and PRAM are the part of your computer that stores things like volume settings. Resetting them will get rid of any little issues that are causing the “Mac install failed” error.

    To do this, restart the Mac while holding the Option, CMD, P and R keys. The computer will make a second startup noise to let you know the NVRAM and PRAM are reset.

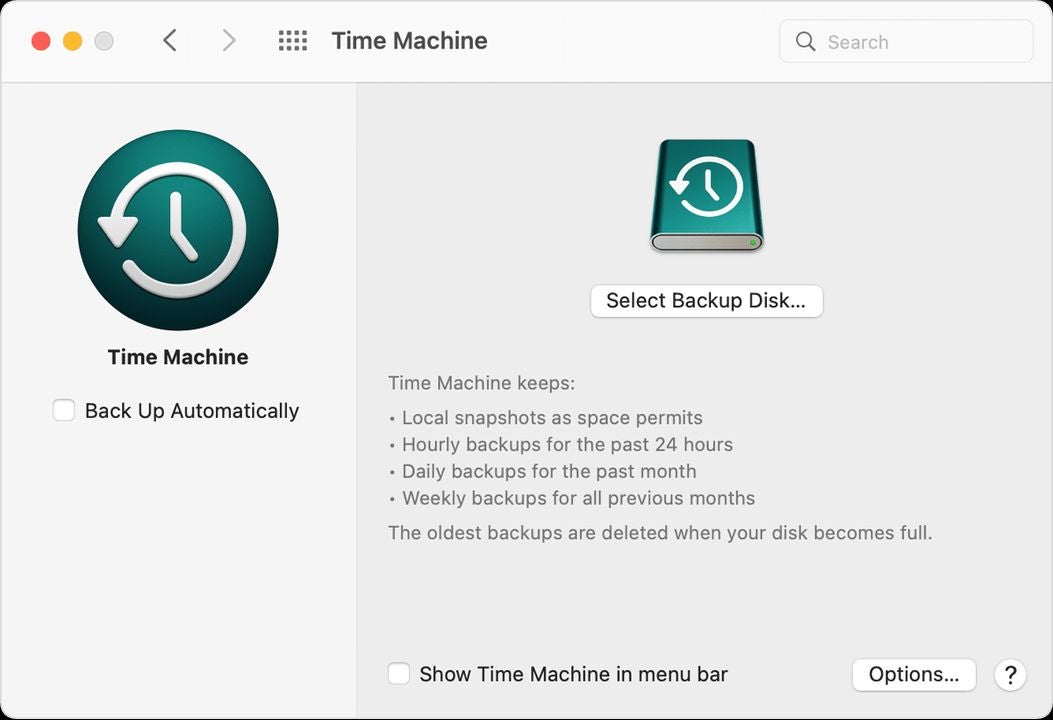
  7. Restore your computer from a backup drive

    Mac's Time Machine feature displays backup options

    Hopefully, you use Time Machine to regularly back up your computer. If not, make sure you upload all essential data to another storage device, because this technique will erase all pictures, documents, and other files.

    Once your data is secure, launch Recovery Mode on your computer. Select an earlier version of your computer and try installing macOS from there. This helps you work around recent errors and restore your computer to a functional version.

Final thoughts on troubleshooting Mac errors

By taking a few simple steps to tweak your settings, it’s usually possible to get your computer running again. Have more questions about troubleshooting the macOS? Check out our guide on how to fix lagging Mac apps.

How to disable the Search button on Home Screen in iOS 16?

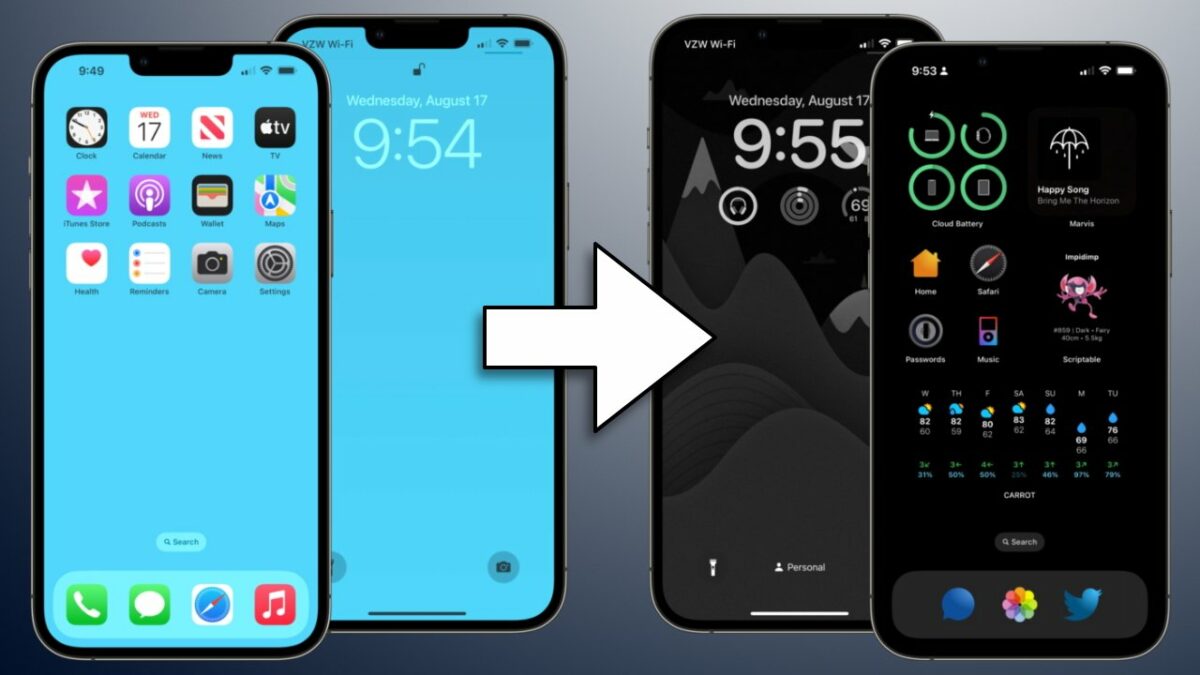
With the release of iOS 16, Apple enabled users to disable the search button on the home screen. While this may be convenient for some, others may find it annoying or intrusive. Fortunately, there is a way to disable the search button if you find it unnecessary.

iOS 16 DOWNLOAD

While the design of the iOS 16 search button was meant to make using your device more efficient, not everyone agrees. Here’s how to quickly remove it in a few steps, plus some helpful tips.

Not a user-friendly search button

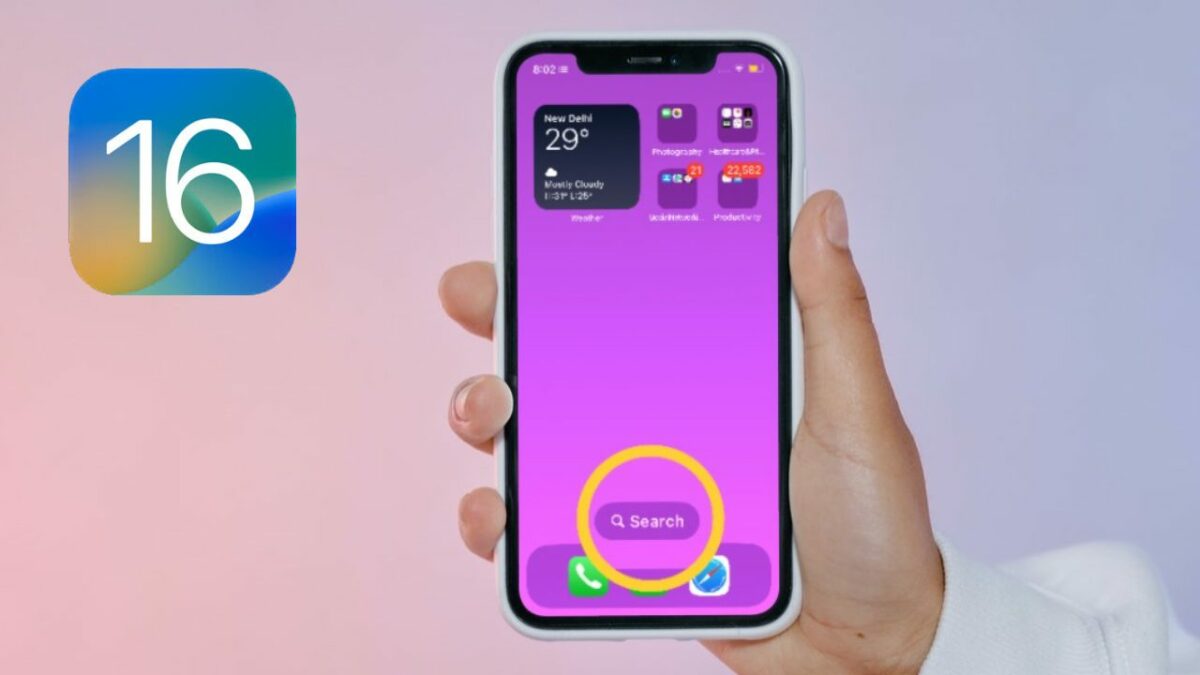
A few people don’t like the new search button on the home screen in iOS 16. It’s not that the button is hard to find or use, but it’s just not as convenient as it used to be. Before, you could just swipe down and start typing. Now, you must tap the button first, and then you can start typing.

It’s a small change, but it’s one that a few people have noticed. It’s also one that a few people don’t like. The good news is that you can still swipe down to access the search screen. So if you’re one of the people who doesn’t like the new button, you can just ignore it and continue using your iPhone the way you always have.

Disable the iOS 16 search button on the home screen

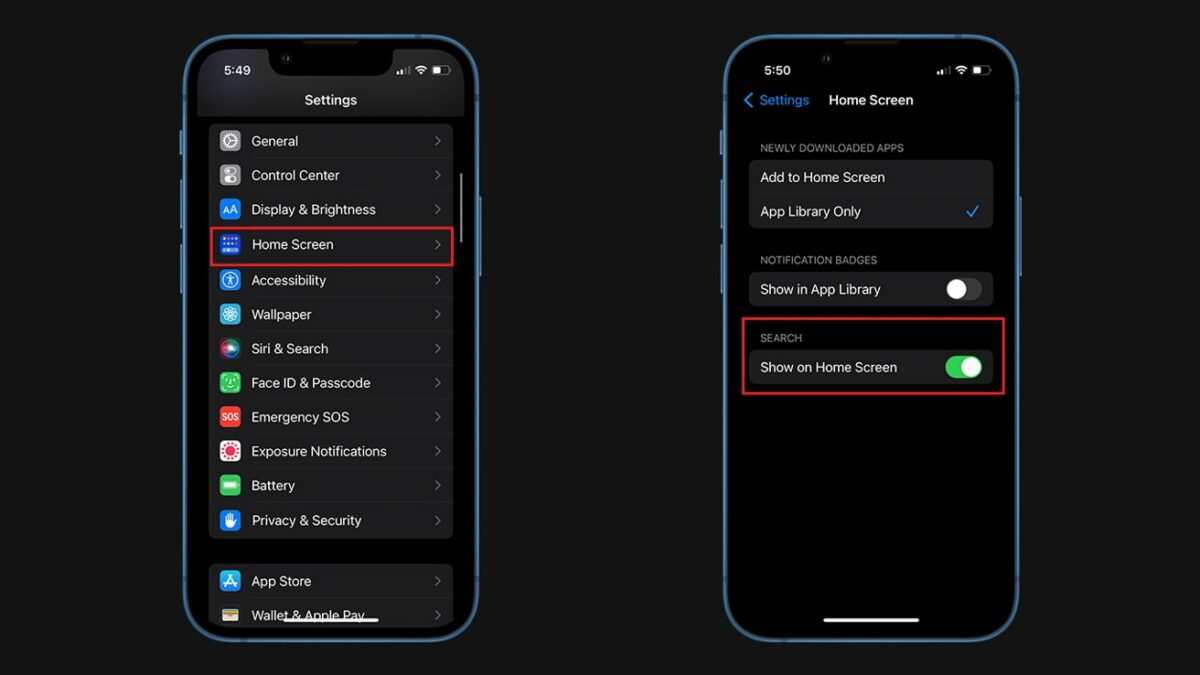
  1. Removing the search button on iOS 16

    Removing the search button on iOS 16

    It’s easy to turn off the Search button on your Home Screen in iOS 16. Just go to Settings > Home Screen. Then scroll down and tap the button next to “Show on home screen.” This will disable the Search button on your Home Screen. If you ever want to enable it again, just follow the same steps and tap the button next to “Show on home screen” to enable it.

  2. Change the way apps are displayed

    Removing the search button on iOS 16

    In iOS 16, you can now change how apps are displayed on your home screen. You can either have them appear as a list, or you can have them appear in a grid. To change how apps are displayed, open Settings and tap Home Screen. Then, tap on App Display. You will then be able to choose between List View and Grid View.

    If you choose List View, apps will be sorted alphabetically. If you choose Grid View, apps will be sorted by category. You can also move apps around by tapping and holding on an app, then dragging it to a new location. This makes it easy to customize your home screen to your liking.

  3. Remove unwanted or unused apps

    Removing the search button on iOS 16

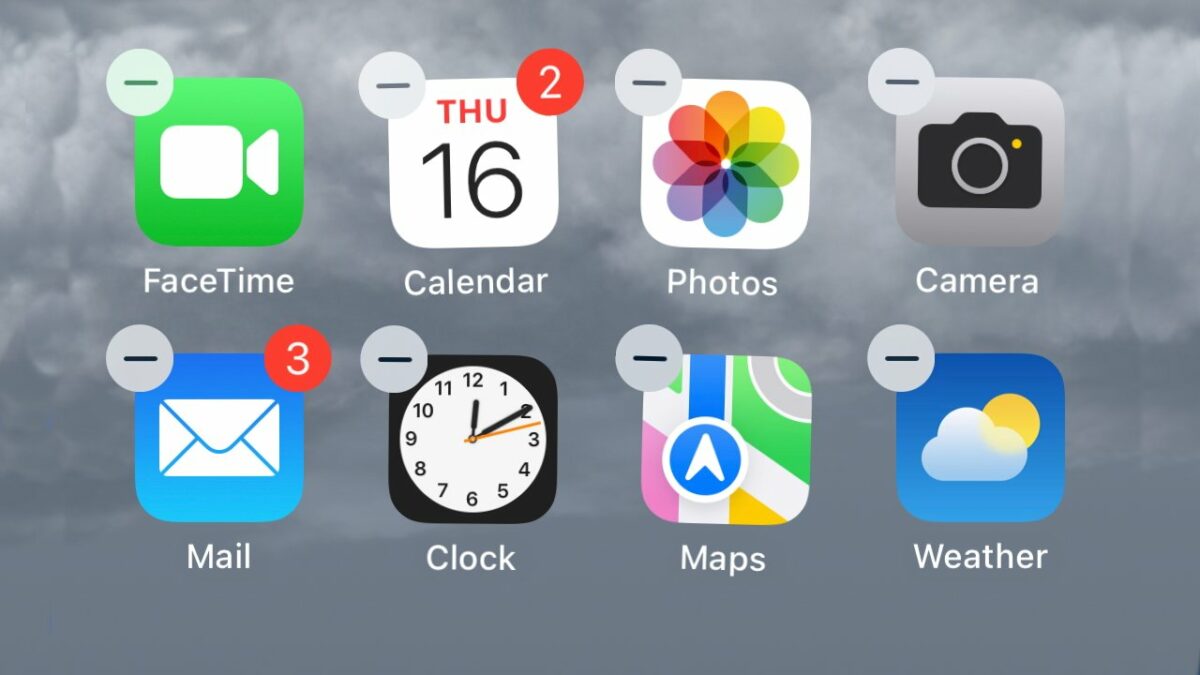
    With iOS 16, Apple allowed users to remove unwanted or unused apps from their Home Screen. This was a welcome change for many, as it helped declutter the screen and make it easier to find the apps being used. However, some users are unaware of this feature or have not yet taken advantage of it.

    If you are one of these users, here is a quick guide on removing apps from your Home Screen in iOS 16. First, long-press on the app that you want to remove. A menu will appear with several options. Tap on the ‘Remove from Home Screen’ option. The app will then be removed from your Home Screen. If you change your mind, you can always add the app back by opening the App Store and tapping on the ‘Add to Home Screen’ option.

    If you’re still confused about the home screen, be sure to read our guide on how to use the new Home app on iOS 16.

How to enable Windows 11 new full-screen widgets in new build

Windows 11 was released to the public in October 2021. That means the OS is almost a year old at this point. Even though the operating system is getting up there in terms of age, it’s still far from perfect. Luckily the Windows 11 team is still hard at work delivering updates and bug fixes and trying to get the OS to a more stable and user-friendly state.

In the article that follows, we’ll delve into how to use one of the brand-new features coming in Windows 11 Build 25201; full-screen widgets! Whether this feature was on your bucket list for the operating system or not, it’s here. Well, sort of. Microsoft has decided it best to roll the feature out slowly to Windows insiders.

How to enable full-screen widgets as seen in Windows 11 Build 25201

Before we start, we here at Softonic pride ourselves on accuracy and truth. Therefore, we need to clear up a common inaccuracy within the tech journalism industry. You’ll no doubt have seen articles like ‘how to enable feature x in Windows 11 build number x.’

Particularly in this case, where the build in question isn’t out yet and is still in the hands of the Windows Insiders, this is false. You cannot enable a feature like full-screen widgets in Windows 11 Build 25201 because that version is not out yet.

When it does drop as a publicly available update, you likely won’t have to enable such a feature as it would be inherently included in the updated Windows 11 productivity ecosystem. Therefore, we prefer to use wording like ‘as seen in Windows 11 Build 25201’ instead. If you think about it, we’re teaching you how to enable a feature that your current version of Windows doesn’t have before it becomes publicly available. Accuracy established – let’s continue with the guide.

  1. Getting started

    enable Windows 11 new full-screen widgets in new build

    Before you get started, we recommend that you back up all of your most important files. Remember that this feature is not yet a part of your current Windows 11 version for very important reasons.

    First off, the feature is still experimental and may cause issues with your operating system. Furthermore, your current version of Windows 11 was not built with this feature in mind, so enabling a feature like carries a certain amount of risk.

    Also keep in mind that if you enable test features on your device, only you are responsible for any issues that may arise. This is similar to upgrading to Windows 11 on an unsuitable device. However, if you want to do that anyway, we have a quick guide you can follow.

  2. Download ViveTool

    enable Windows 11 new full-screen widgets in new build

    You’ll have seen us refer to this tool in past articles. It’s an incredibly powerful utility and you can get it from GitHub. Once you’ve downloaded the utility, extract it into a folder of your choice. The easiest would be to extract it to a new folder named ViveTool or Vive in your C drive. The path should then look something like this: C:\Vive or C:\ViveTool.

  3. Command Prompt

    enable Windows 11 new full-screen widgets in new build

    Next, you’ll need to run Windows Terminal as an Administrator. All you need to do is head to your Start menu, right-click on it, and then select Terminal (Admin).

    From here, you’ll want to head to the top of the Windows Terminal interface and click on the vee. This is the downward-facing caret, also called a ‘V.’ Now, you’ll want to click on Command Prompt or hit Ctrl+Shift+2 as a shortcut.

  4. Using Vivetool

    enable Windows 11 new full-screen widgets in new build

    Next, you’ll need to find the folder where you previously saved your ViveTool utility using the CD command. This will be the same path that you determined earlier. For example, C:\Vive or C:\ViveTool, unless you named it slightly differently. Now, type in the following string and hit Enter:

    vivetool /enable /id:34300186

    The last step is to restart your computer. This will solidify the changes that you’ve made to your OS setup. 

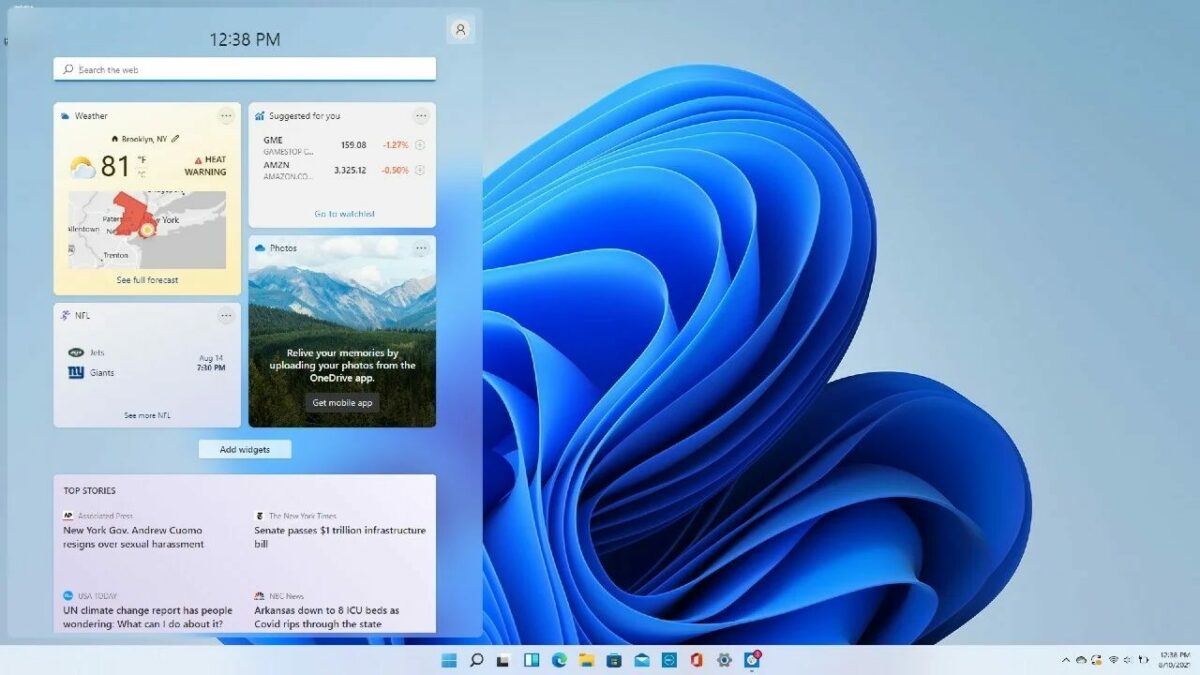
    When your PC starts up again, head to the Windows Widgets utility. Do this by either hitting the Widgets taskbar icon or hitting the Windows button + W. All you need to do now is navigate to your profile picture within the Widgets interface and hit the double-sided arrow next to it. This will extend your Widgets app into a full-screen layout giving you more space within which to view your favorite Widgets.

Almost perfect

Windows 11 has come under fire previously for the various bugs that have plagued certain updates. Do you remember when all the icons on the taskbar disappeared? That was wild. However, with each update, the OS is getting better. Windows 11 is already more sophisticated and user-friendly than its predecessor in many ways. But it’s important to remember that even Windows 10 wasn’t loved universally from the beginning.

Even Windows 10 took a little time to become the most popular and widely-used OS in the world. And even Windows 10 had to go through numerous updates to get it to a truly stable state. Windows 11 is still in its infancy, but updates like the upcoming Build 25201 bring the young OS closer to the expectation that we end users have for the OS of the future.