Google introduced the Home smart speaker back in 2016, amid fierce competition from Amazon’s Alexa. We wrote about what distinguishes them from each other in our blog, and today, we’d like to talk about the quirky features that make Google Home fun.
Did you know that Google Home has a whole team dedicated to developing the device’s personality? Neither did we. Lead by Ryan Germick, (who also manages the team responsible for Google’s doodles), and including writers from Pixar and The Onion, the team has created a range of entertaining, quirky features that really make it stand out.
So what fun things can you do with your Google Home?
1. Remember stuff
For the forgetful among you, this is essential. While it might not be the most fun feature on this list, if you’ve ever found yourself frantically searching for your passport the day before a flight, worry not – Google has your back.
Say something like, “OK Google, remember my passport is in the third kitchen drawer next to the washing machine.” When you need to find it in the future, say “OK Google, where’s my passport?” and you’ll be helpfully pointed to the exact location, and what date you originally asked Assistant to remember.
2. Questions, jokes, and trivia
It’s not known how many individual responses Assistant has, as Google has never released a full list. Needless to say, it’s probably somewhere between many and lots – some probably haven’t even been discovered yet.
Here’s a small sample of fun questions you can ask Assistant:
Can you sing a song?
What’s the meaning of life?
Can you tell me an interesting fact?
Do you know Cortana?
Can you make me a sandwich?
Can you tell me what you want, what you really, really want?
What is your voice?
What are you wearing?
3. Games and kids’ stuff
The smart speaker comes preloaded with a bunch of games to while away rainy afternoons. There are guessing games, adventures games, math and number games, and a host of trivia games where Assistant will act as your game show host.
Here are a few examples:
21 Blackjack, the gambling classic; try to hit 21 without going bust.
Guess My Age, where Assistant will ask you questions and try to guess how old you are.
6 Swords, a game based on the first edition of Dungeons & Dragons, where you and up to six friends can explore cities, castles, and dungeons.
Mad Libs, the classic game where you fill in the blanks with the funniest word you can.
Number Recall, a sequence of numbers which you have to recall back, and every time you get it right, the sequence gets longer.
Google has added a whole collection of apps designed especially for children, including stories like the classic fairy tale Little Red Riding Hood, and more postmodern pieces like The Chef Who Loved Potatoes.
Assistant also comes packed full of children’s games, so they can keep themselves entertained while you, presumably, hide in the kitchen drinking cocktails, and looking for your passport. Some examples include:
Talk Like a Chef, where they learn foodie phrases and facts.
Sporcle Junior, a fun quiz for kids, presumably about sporks.
National Geographic Bee, which will test their knowledge of places across the globe.
Tricky Genie, where you are told a tale and asked for ways to help the characters.
The brilliantly named Ding Dong Coconut is a wacky party game which tests their memory by matching sounds to random words.
Google Home is packed with fun features, and who knows, you might even find a few new ones yourself! Experiment, have fun, and let us know if you find something cool.
Alexa is the brain behind the Amazon Echo, an intelligent two-way speaker and digital assistant. Alexa functions using skills, which are a lot like apps – some come pre-installed while others (especially skills developed by third parties) you can enable afterward.
Alexa has so many cool features and tricks up her sleeve, it’s easy to get lost, so we’ve played around and selected our favorites to help you get started. While we’ve included some specific skills in this list, it’s certainly not exhaustive – there are over 15,000 skills to choose from. To explore in more detail, check them out on Amazon.
In the meantime, here are 7 of our favorite things you should try…
7 tips for using Amazon Alexa
1. Cook confidently without touching a recipe book (with Alexa as your guide)
There are a number of great cooking skills you can enable, but AllRecipes and Recipedia are among the best. You can ask Alexa to find your recipes by ingredients, cooking time, calories, dietary needs, or by searching past favorites. Alexa will tell you the name of the dish, number of reviews, and will even suggest alternatives if you’d prefer to cook something else.
What’s great about AllRecipes and Recipedia is that you can ask Alexa to talk you through each step of the cooking procedure as you go. So no longer will you need to place dirty fingers on iPads, laptops, or smartphones while you’re cooking up a storm.
Many cooking apps will email or text you the recipes, create shopping lists for ingredients, and even – with compatible smart home appliances – preheat the oven for you. So next time you’re thinking about cooking the family meal, ask Alexa for a little help and you’ll be putting your feet up in no time.
2. Control your heating, lighting, and appliances simply by using your voice
Source: Amazon
The Internet of Things is slowly becoming a feature of our homes. Alexa is, essentially, a “smart” speaker, and chances are you’ve other appliances in your home that are also smart. A Nest Thermostat, for example… or a Samsung washing machine… Philips Hue lighting… a Sony Bravia TV… the list goes on.
And you can get more from your smart devices by controlling them with Alexa. Imagine turning your lights on when you get home, dimming them in the evenings, warming your home when the weather turns frosty, or turning plugs off before going to bed – all with your voice alone.
It’s not all about being lazy, either. By making the most of your intelligent appliances, you could actually save money. A voice command is faster and takes less effort than manually controlling something (especially if you’re a bit lazy or forgetful), so you could see electricity bills reduce simply through managing all your smart devices through Alexa. Worth a try, right?
3. Customize your flash briefing for a daily dose of what matters to you
Source: Amazon
Alexa’s flash briefing is one of her most compelling features. As a summary of news headlines, it works well, but there’s much more to it than that. For starters, you don’t have to listen to Alexa’s odd, slightly mechanical cadence: there are flash briefings from international news outlets read by real humans.
Also, the flash briefing needn’t be just about news. You can customize
your flash briefing to include sports updates, weather, travel, tips,
advice, jokes, and mini-lectures on subjects like history and
technology. It’s a great way to get a daily update of what’s going on in
your favorite subjects while sipping your morning coffee.
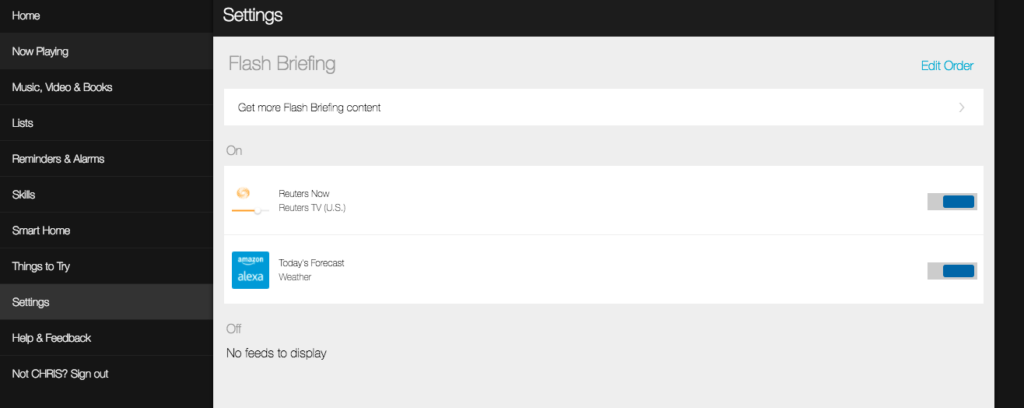
To organize and edit your flash briefing, visit alexa.amazon.com or
open the Alexa app on your device. Go straight to settings, then Flash Briefing, and you can add new content or remove existing feeds. You can
also change the order to get the most important updates first.
4. Order taxis with just a few words
Source: Amazon
Whatever you think of Uber the company, it’s a darn convenient service. Being able to order a taxi at a big discount, monitor its approach, and know who’s driving is a big leap from flagging them down or ordering over the phone.
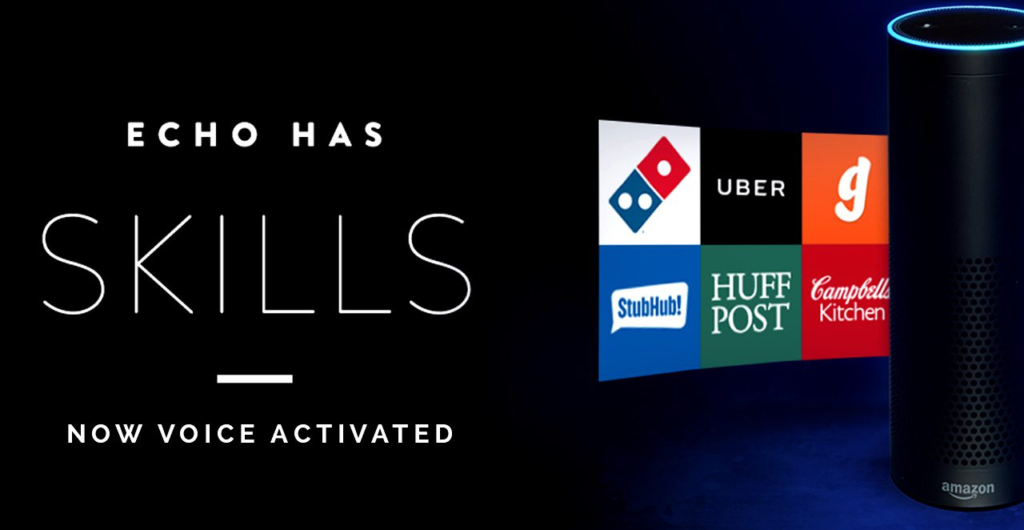
With Alexa, you can now order Uber taxis, Lyft taxis, and others by enabling them as skills and asking Alexa to order them for you. Alexa will tell you how long you have to wait, the price, and you can tell her what type of car you need, too. Not bad if you’re packing in a rush to make that 6 o’clock flight…
5. Stream your favorite music
Source: Amazon
Alexa, being the “brains” behind Amazon Echo, your intelligent speaker, can, of course, play your favorite tunes for you. Alexa can choose from a whole host of online sources, such as Amazon Music, TuneIn, Spotify (you’ll need a Premium account), local, national, and international radio stations, podcasts, Pandora, Audible, iHeartRadio, and more.
If you’d prefer to play your own music selection – streaming from an iPhone or laptop, for example – you’ve got a couple of options. The first is uploading your music to Amazon Music’s MyMusic folder. You’re limited to 250 free uploads, then afterward you have to pay to store more tunes.
An easier option is to keep your music where it is and just connect to your Echo through Bluetooth. To do this, just turn your device’s Bluetooth on, and say “Alexa, pair,” which will put your Echo into Bluetooth pairing mode. Once you see the Echo on your device’s discoverable connections, click to connect. Afterward, you can play, pause, and skip tracks as normal by giving Alexa the usual commands.
Useful tip: Alexa likes to push Amazon’s services before others, so if you’re a Spotify user instead of Amazon Music, you can change the default player here.
6. Create voice profiles for all the members of your household
Source: Amazon
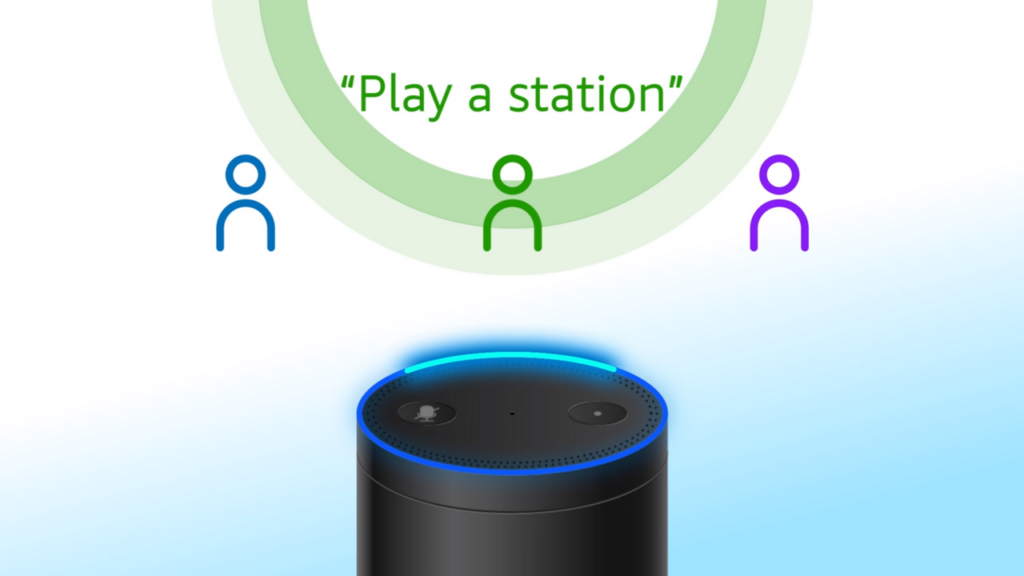
Late in 2017, Amazon announced that Alexa can now distinguish between different voices. This means everyone in your household gets a unique, customized Alexa response to all the usual requests. Alexa will play music according to that person’s taste, recognize who can and can’t buy from Amazon, and skip segments of the flash briefing – all dependent on who’s speaking. This is especially useful if your spouse or child doesn’t want to listen to your heavy metal playlist or your daily dose of political satire.
Setting up profiles is quite simple; you just have to train Alexa to understand each person in your household. You can find full instructions here.
7. Enable skills simply by asking for them
Source: Amazon
If you’ve found or heard of a skill you’d like to try with Alexa, you can ask Alexa to enable it for you. For example, say, “Alexa, enable the Lyft skill” and you’ll be able to order taxis with just a few words. And when Alexa responds to certain questions with suggested skills, you can enable them immediately instead of having to search for them using the app.
The Amazon Echo is a great piece of gear, and Alexa is the star of the show. With the tips above, you’ll find Alexa a joy to live with, and perhaps wonder how you ever lived without her.
Google Chrome is the world’s most popular browser, and it’s easy to see why: With its slick interface, vast extension library, and snappy engine, Chrome is one of the most enjoyable ways to explore the internet.
But there’s much more to our favorite browser than meets the eye. From easter eggs to extensions, Chrome goes far beyond displaying web pages. So without further ado, let’s pop the hood and explore the tools, tricks, and features of Chrome you’ve probably never heard of…
11 things you didn’t know Chrome could do
1. Reopen accidentally closed tabs
If you’ve ever found yourself lost in a sea of open tabs, not sure which one is which or why you opened them in the first place, you’ll know how easy it is to close something you actually need.
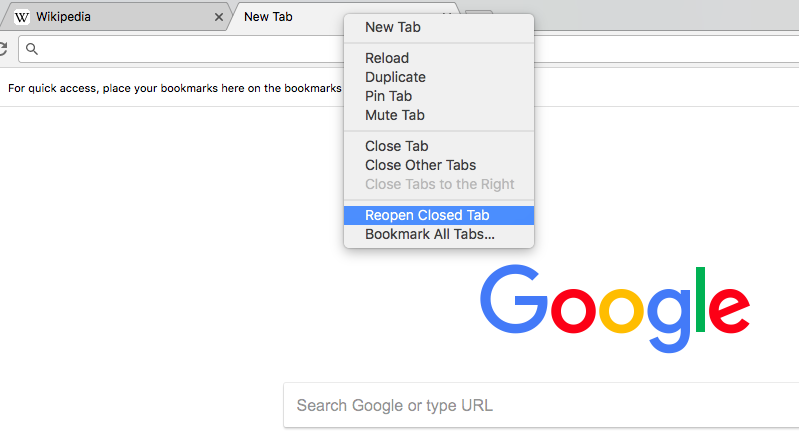
Thankfully, Chrome makes it really easy to reopen tabs after closing them. Simply right-click in the tab bar and select Reopen Closed Tab. The shortcut is Ctrl+Shift+T (Cmd+Shift+T for Mac users). If the page you’re looking for was one of several closed, just keep reopening tabs until you find the page you want.
2. Pull tabs into new windows for easier browsing
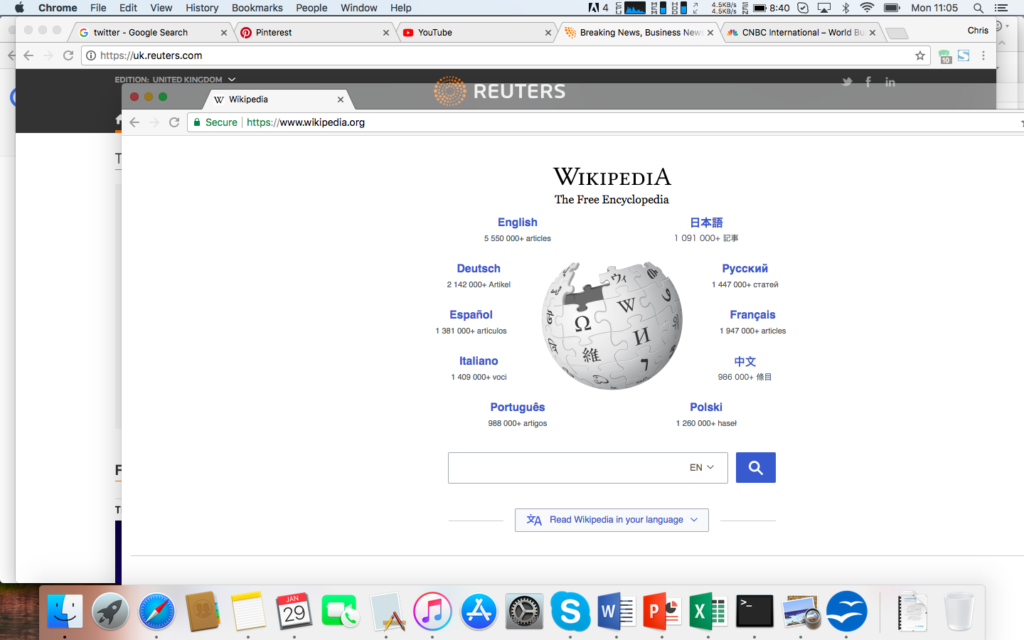
When you’re pulling together information from several web pages, it can be tricky navigating between them in one window. You might want have two or even three windows open so you can browse several sites at the same time, making cross-referencing a lot easier. Once you’ve got all the sites you want open, simply click on any tab and drag it away from the tab bar and Chrome will put it into a new window. (To put it back, drag the new window into your old tab bar.)
Pro tip: To move multiple tabs to a new window, hold down Shift and select the last tab in the group you want to move, highlighting all the tabs, and then drag away from the tab bar as normal.
3. Delete your entire browsing history with one shortcut
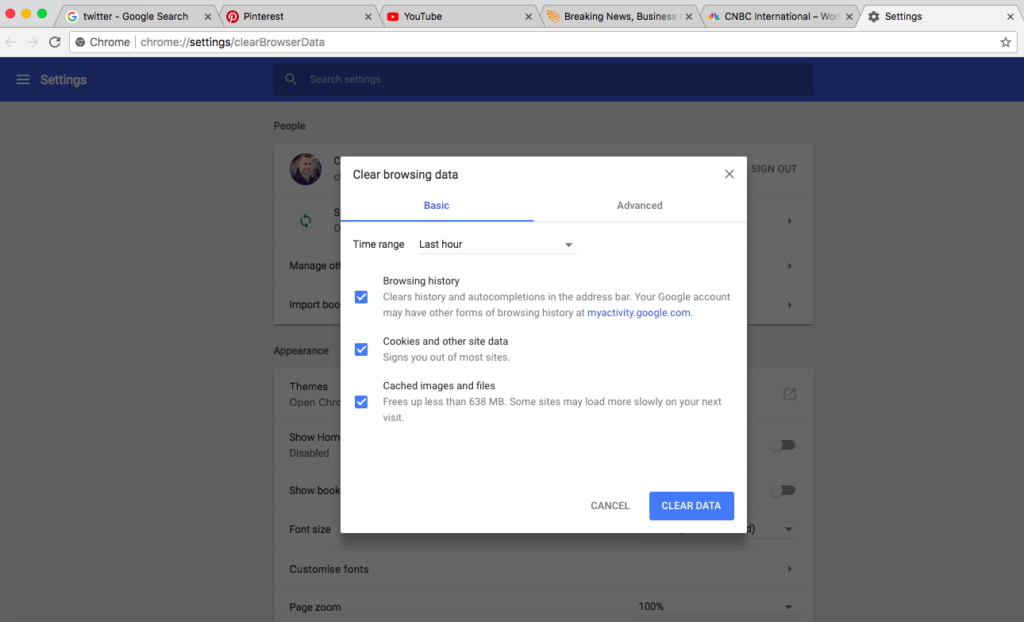
Whether you’re shopping for birthdays or planning a surprise trip, there are times when you’ll want to keep your browsing history secret. Chrome makes this very easy with a shortcut that takes you just one click away from deleting cookies, temporary internet files, images, and pages. Just hit Ctrl+Shift+Delete, choose what you want to remove (and from when), and you’re left with a clean slate.
4. Save data with this extension
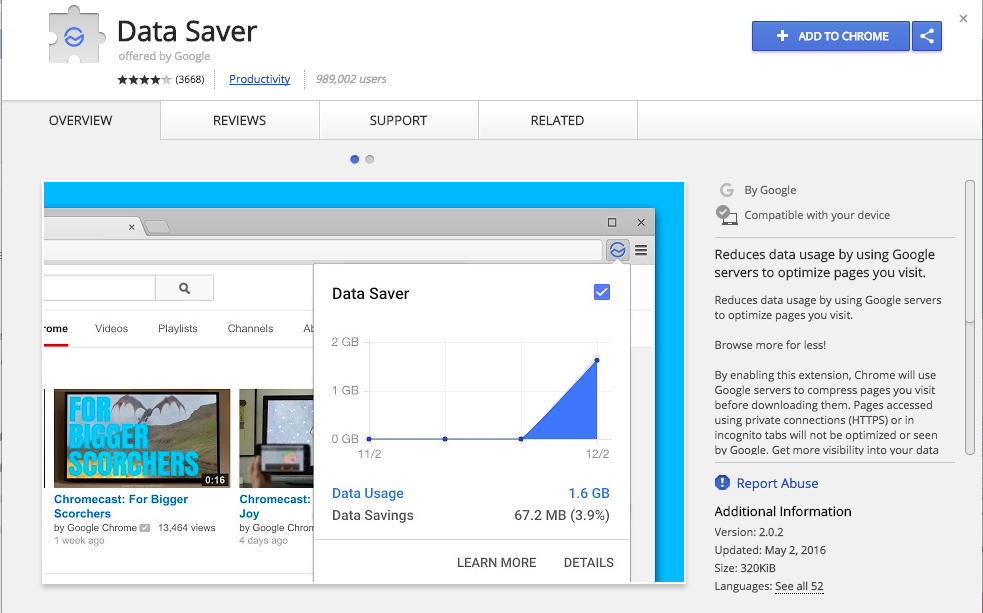
There are many great Chrome extensions out there, but Data Saver deserves special mention. By harnessing the power of Google’s server network, Data Saver compresses web pages so they load faster and use less data (hence the name). In this way, Google is acting as a kind of intermediary between you and the internet. For those of you on strict download caps or slow connections, Data Saver makes for better browsing.
5. Pin tabs you want to keep open
With so many productivity applications moving to the cloud, you could find yourself swamped with open tabs. Some for working, some for research, some for communicating with colleagues, some for social media, news, email… the list goes on.
You need a robust organization policy if you want to avoid headaches, and thankfully Chrome makes it easy to manage open tabs through pins. If you know you’ll need access to a particular web page throughout the day, you can pin it to your browser window. Simply right-click on the tab and select Pin Tab. All pinned tabs are stored on the left of your browser window. They can’t be moved or closed down, so there’s no risk of losing them. To unpin a tab, right-click and select Unpin Tab.
6. Open your favorite web pages every time you start Chrome
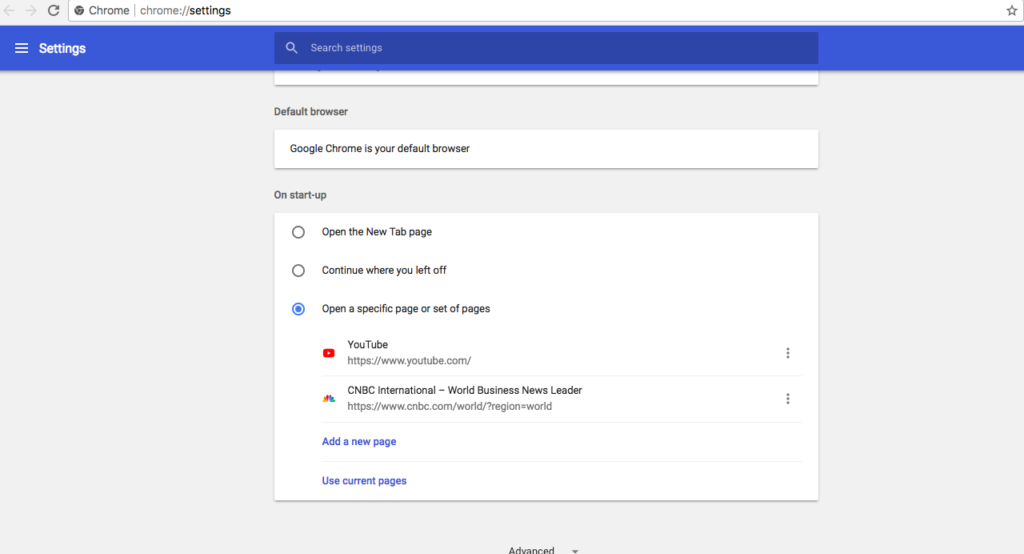
If you visit the same web pages every day, why not let Chrome open them for you? Instead of typing in URLs or searching for your favorite sites, you can set Chrome to open them automatically whenever you start your browser. Simply go to the settings menu, scroll down to On start-up, and add the URLs for the sites you use most often. If you already have the sites open, click Use current pages and Chrome will add those URLs automatically.
7. Do math right in the omnibox
If you need a speedy answer to a math problem, type it into the URL bar (the “omnibox” as Google calls it), and the answer will appear in the suggestions box below. It’s not going to replace your calculator or solve differential equations, but as a ready reckoner it’s a handy tool.
8. Use themes to customize Chrome
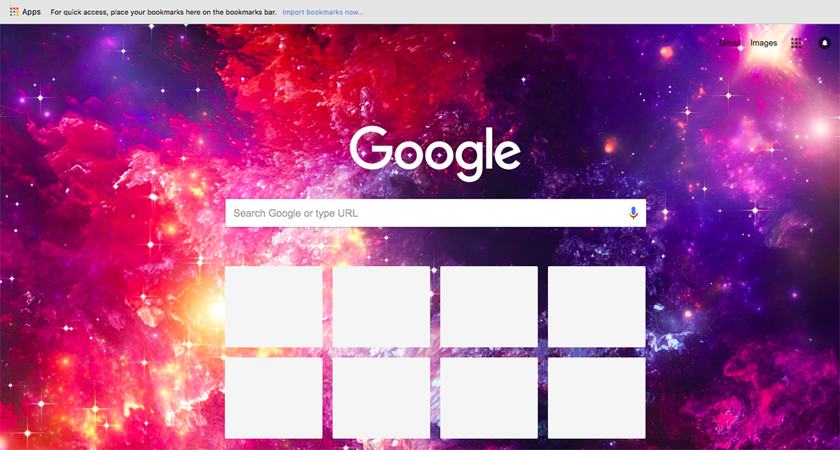
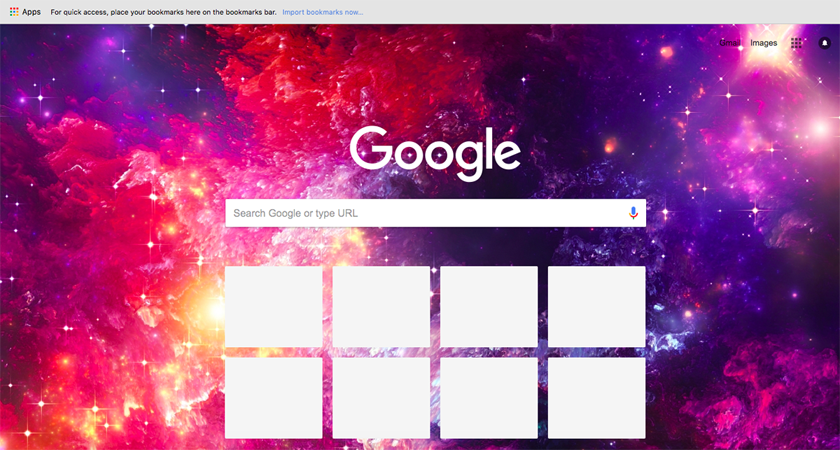
Fancy a change from Chrome’s minimalist style? Themes let you update the browser interface to something a bit more snazzy. By going into settings and selecting Themes under the Appearance category, you can select from hundreds of different designs – some free, some paid for – to make Chrome a bit more personal. From space to flowers, abstract art to landmarks, you’re guaranteed to find the style you want.
9. Search faster by highlighting and dragging text into the omnibox
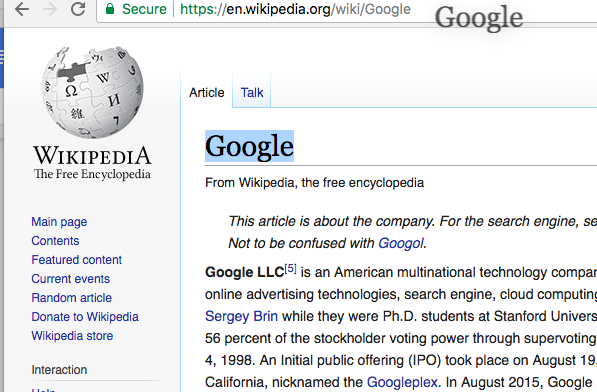
This little trick could save you considerable time doing online research. Instead of manually entering search words in the omnibox (URL bar), you can highlight portions of text, drag them to the omnibox, and Chrome will search Google for you. So next time you’re poring over an academic journal or news article and want to know a bit more about your subject, highlight phrases that interest you and continue learning across multiple sources.
10. Create a different user accounts for greater privacy
As we do more online, our privacy is at risk. And with emails, contacts, and social media accessible from your Google account, there’s more at stake than just your browsing history. So it makes sense not to let others piggyback on your account.
In Chrome, you can set up separate browsing accounts by clicking People in the Chrome menu at the top of your screen and adding a new user. This is useful for creating different profiles for your family, as well as others who might occasionally use your device.
Another way to protect your settings and history is to enable guest browsing. To do this, go to Settings > Manage other people, and select Browse as guest. Then you can hand over your laptop to whomever needs it without worrying about them discovering your passion for Nickelback b-sides.
11. Beat your friends’ high scores with the running dinosaur!
When you lose your internet connection, the last thing you expect is to help a dinosaur jump over cacti and pterodactyls through an endless scrolling desert. But this is Google. The dreaded “no internet connection” screen looks innocent until you notice the dinosaur’s blinking eyes. If you press spacebar your prehistoric friend will jump in the air and the page will open into a endless runner that’ll keep you entertained until the internet comes back to life. Or not. Who cares? You’ve got a high score to beat. Play now by typing chrome://dino into the omnibox.
Chrome is full of surprises, and it’s easy to see why it’s so popular. While most of us use just a fraction of its many features, I hope this list has empowered you to squeeze more fun out of your favorite browser.
Imagine if every great director – from Coppola to Tarantino – released the full, unedited versions of their films. Would they still have won awards? I doubt it. Every masterpiece in the world has been changed in some way during its journey to stardom. Novelists draft, artists sketch, and filmmakers edit.
But despite the importance of editing, many budding filmmakers don’t give it the attention it deserves. Some believe it expensive, time-consuming, and difficult, and in some ways, they’re right: many editing tools are expensive and hostile to beginners, forcing you to climb a steep learning curve that can take months or even years to master.
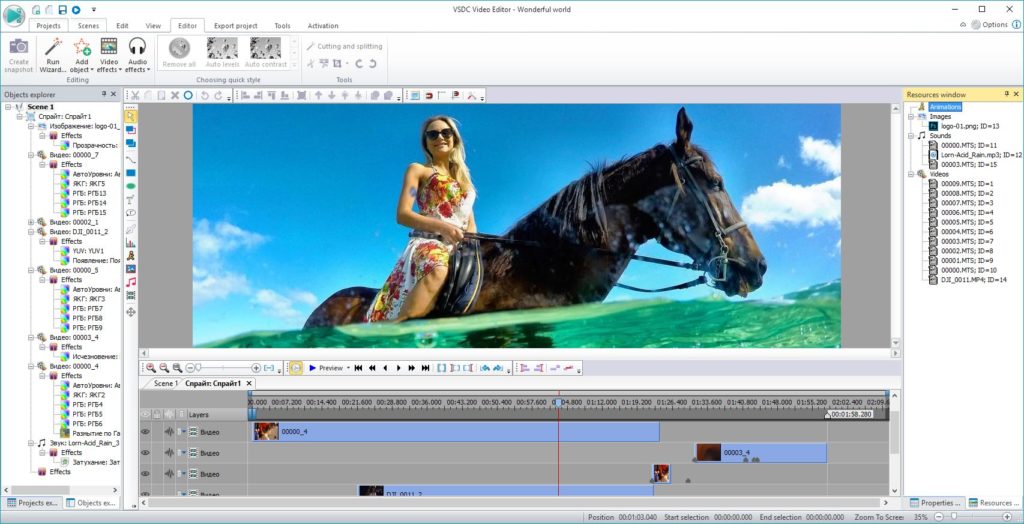
Thankfully, there’s a simpler way. We’ve been testing a bunch of editing software to find the right balance between simplicity, features, and professional output. We believe we’ve found just the right editing suite in VSDC Video Editor Pro.
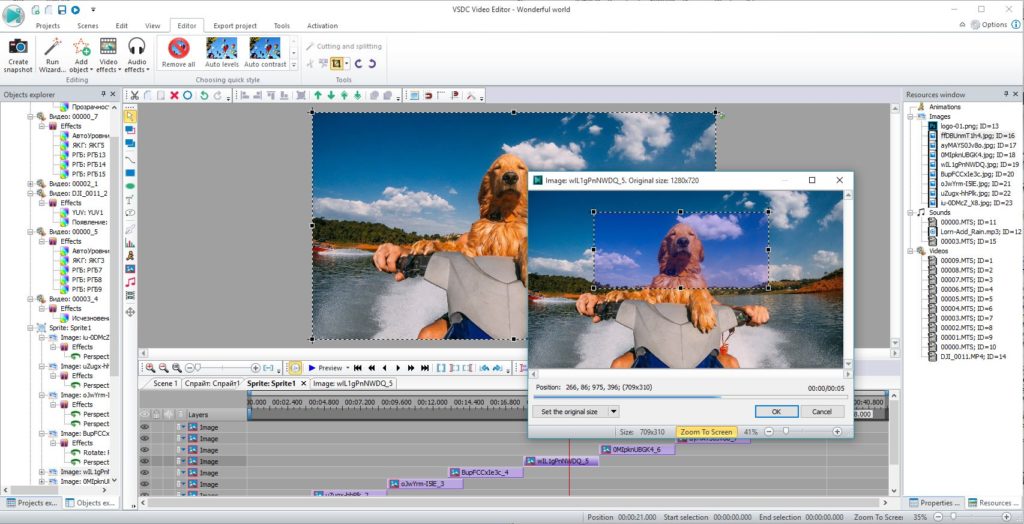
What makes VSDC Video Editor Pro so special? Well, let’s start with the basics. The usual trimming, splicing, and cropping features are all there, so you can stitch multiple movie clips together, break them apart, or zoom in on interesting detail. You can also adjust colour, exposure, and contrast, as well as add sounds, effects, and transitions to really make your movie stand out.
But it’s the professional tools that really shine. Take the sub-pixel editor, for example. Sometimes you need to adjust ultra-fine detail to get the look you want, and this allows you to do it with cinematic precision.
There are also ten video mask types to choose from. Video masking isolates individual objects in your video – a face or car, for example – so you can cut, highlight, or blur them for added realism, or combine them with other media to create something new. While these controls might take longer to master, they can transform your amateur videos into YouTube gold.
You’ve probably heard of “green screening” where you film in front of a uniform background so you can remove and replace it with something more interesting later. Video Editor Pro’s multiple chroma key support lets you do this in different colours, not just green, so you can match and remove the background without harming the foreground of your shot.
Of course, if you’re pressed for time or don’t want the hassle of manual control, you can select from Video Editor’s extensive selection of preset functions and styles. With 4K support in almost every video file format, you won’t need to do any irritating file conversion before you start, leaving you more time to create the perfect movie.
We think Video Editor Pro is one of the best editing suites on the market. Whether you want to direct the next Revenant, or just add a little quirky style to your YouTube channel, the software is a steal at just $24.19.
Faking voices is heaps of fun. Whether impersonating your boss, friend, or favourite TV character, the first thing you mimic is how they speak. Celebrity impressionists, for example, make us laugh over their exaggerated turns of phrase, while voice actors give life to shows like The Simpsons and Family Guy.
Changing the pitch and timbre of our voice is no easy task, however. Just ask the many actors whose foreign accents are often hilariously inconsistent. And while we might get a laugh or two from our impressions of Uncle John’s drunken ramblings, we don’t always nail Aunt Bea’s scathing retorts. So when we want to change our voice, we sometimes need a little help.
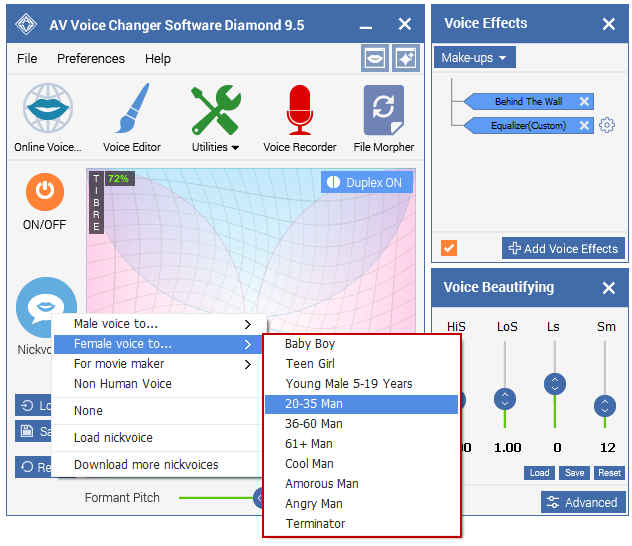
Voice changing software has been around for a while. Radio DJs use them all the time, and there are lots on the market. But none of the voice changers we’ve tested comes close to AVSOFT’s Voice Changer Diamond 9.5 for features, quality, or – most importantly – realism.
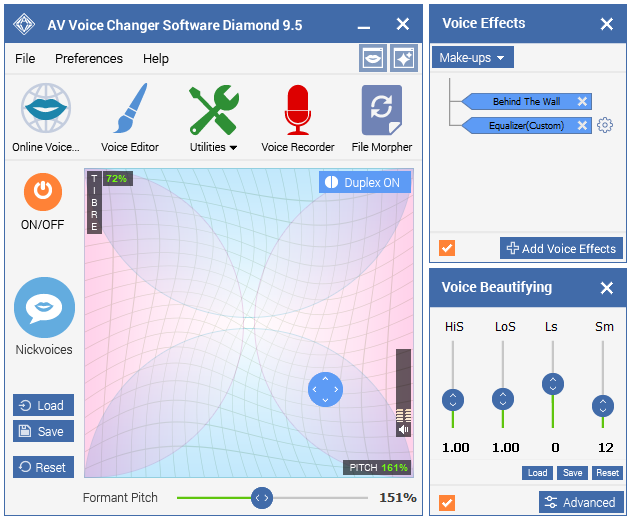
Voice Changer Diamond 9.5 is the most natural sounding voice changer we’ve ever heard. Using sophisticated, market-leading algorithms, it modifies and optimises your voice while still sounding real. We found other voice too obvious, but after a few in-office prank calls, we were mightily impressed by how easily it was to fool our colleagues with Voice Changer Diamond.
Even the preset “Nickvoices” sound great – turning you from robot to grandma in just a few clicks. But for ultimate realism, you’re better modifying your voice manually. You have full control of timbre and pitch with Voice Changer’s graphical controller, and you can add extra realism from a growing library of effects – anything from “breathy” to “trembling”. You can also save voices as named presets, giving you an army of alter egos with which to amuse your fans.
You can modify your voice on the fly, too, as Voice Changer Diamond integrates with chat services, VoIP applications (like Skype), and web-based applications like role-playing games. Now you can give proper voice to your Level 37 Bloodhoof Tauren, frightening your World of Warcraft foes with your thunderous war cries.
For editing existing recordings, Voice Changer Diamond offers a host of tools to make your audio sound great, including a simultaneous voice morph and file converter for large jobs. You can also analyse your voice and compare it with others, learning your harmony, pitch, brightness, and score, and use the information to make you a better impersonator. It’s a vocal coach, audio editor, and voice changer in one!
We’re massive fans of Voice Changer Diamond, and to share the love we’ve managed to secure a 60% discount off the asking price. Just visit AVSOFT to buy for $48.38 (normally $99.95). We hope you enjoy creating your own characters, or even just adding a professional note to your own voice – let us know how it goes in the comments below.
Photos are our mementos of times gone by. By capturing a moment in camera, you lock away a memory you might otherwise have forgotten – a holiday, a night out with friends, or your child’s first steps. We carry our cameras everywhere these days, so it’s easier than ever to snap those happy moments.
But if your photos fizzle instead of pop, you might need a little post-processing to liven things up. Whether it’s boosting colours to reproduce that blue sky or cropping out the photobomber ruining your selfies, photo editing software can really help you get more out of your photos.
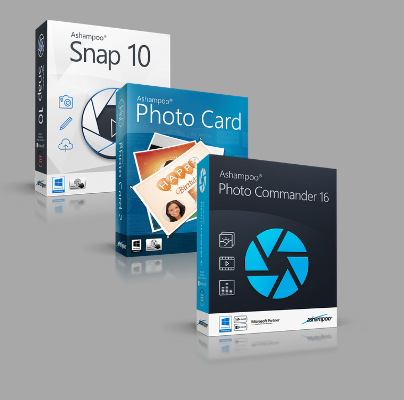
At Softonic, we do a lot of photo editing – even the best, top-of-the-line DSLRs don’t always compensate for our limited photography skills. Our favourite editing suite is the Ashampoo Photo Bundle which includes three powerful photo and video editing tools – and for a limited time only it’s available with an incredible 80% discount.
Here’s what’s you get inside the Ashampoo Photo Bundle.
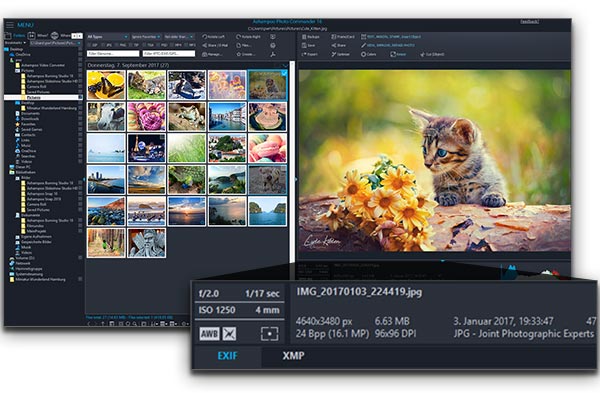
Photo Commander 16 helps you organise and edit your photos with ease. If you’re worried about fiddling with lots of knobs, dials, and sliders, fear not – nearly all corrections and enhancements can be done in one click, leaving you more time to enjoy, share, or print your favourites.
If you like to tinker and add a bit more creative flair, you can go full manual with control over exposure, highlights/shadows, saturation, and lots more. You can even add text or other images, and create slideshows, making this a great tool for family albums.
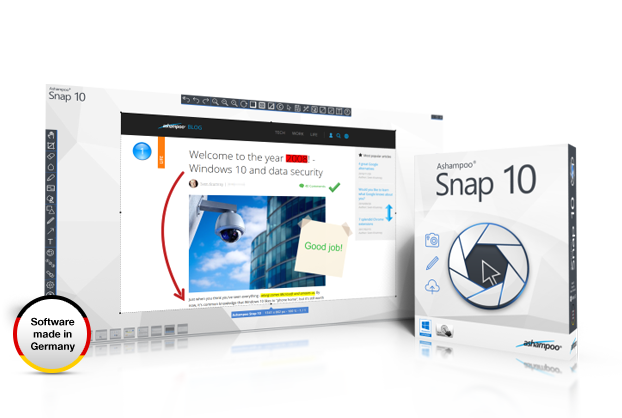
Snap 10 is the ideal for capturing and editing screenshots, screencasts, and videos. At Softonic, we love helping you understand the latest technology, and we create a lot of our videos and user guides using Snap 10.
Snap 10 lets you take snapshots of anything on screen, including pen notes, cursor movements, and full-screen 3D games, and then turn them into videos or single pictures. With 4K recording, and trim, join, and enhancement options on-the-fly, you can be as creative as you want, while still producing professional-grade images, GIFs, or videos.
Have you ever forgotten someone’s birthday? It’s not always easy getting a card last minute, especially if your special person lives far away. An ecard is a good alternative: it’s sent instantly, saves trees, and won’t get thrown out or left to gather dust in the attic.
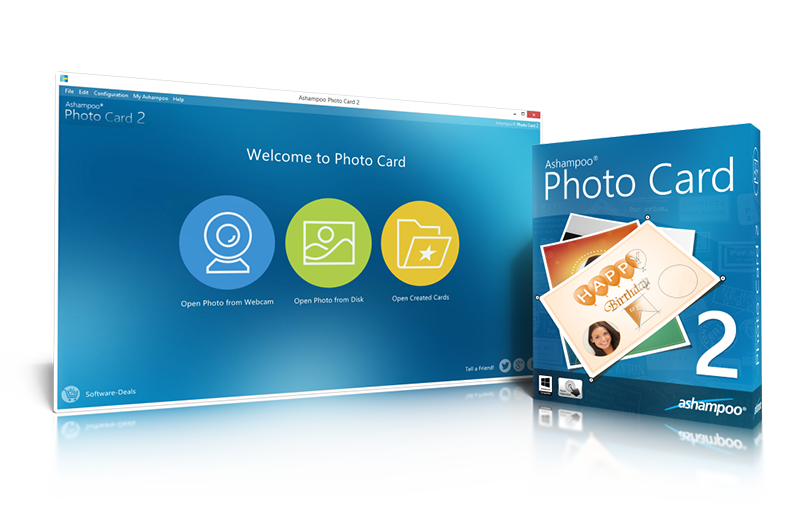
But companies like Hallmark charge a premium for their ecards and don’t always offer the exact sentiment or message you’re looking for. Photo Card 2 solves this problem by letting you create your own professional greetings card from any of your saved photos. You can create a card for any occasion, not just birthdays, with a host of image editing tools and templates to really make your card stand out.
We think Ashampoo’s Photo Bundle is incredible value for money. The whole package normally costs $109.97, but you can buy it now for just $19.99. So go on, treat yourself, and enjoy better photos for life.
Computers often run great the first time you buy one. Then after a year or two of use, they start to slow down. While a cynic might argue this helps manufacturers sell more machines, your software is often to blame. Either you don’t have the drivers to run it, the software was installed without your permission (by a virus, for example), or there are still a few traces of an uninstalled program clogging up your system.
These problems are easily solved with system utilities. There are hundreds of these programs on the market, all promising to speed up your machine, identify security risks, supply missing drivers, and remove all traces of software you don’t want or use. This keeps your computer clean and running smoothly, returning its fresh-out-the-box snappiness.
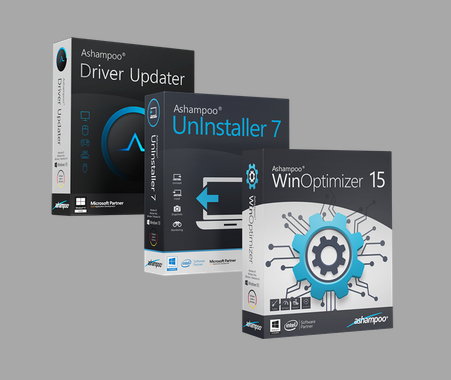
We’ve tested a number of system utilities and our favourite is Ashampoo System Utilities 15. Why? Because it includes everything you need to optimise your computer, as well as a clean uninstaller and driver updater.
At the moment, Ashampoo is offering the bundle with 80% off the retail price. We think that’s a bargain, so let’s take a look at what you get.
WinOptimizer is the ultimate computer clean-up and maintenance tool. It scans, analyses, and diagnoses junk files and errors, and then removes them with the click of a button – and up to ten times faster than the previous version.
Find and delete duplicate files and temporary internet files hogging up disk space. Or if you’ve deleted something in error, recover it with Undeleter. WinOptimizer also improves your privacy on Windows 10 by giving you control over what you share with Microsoft. You can even unlock extra power from your CPU in Game-Booster mode, shutting down unneeded services to increase performance until you exit the game.
Nearly all software installations leave a trace of themselves behind when you remove them. Even if it’s just a registry entry. These small traces build up over time as you add and remove more programs, and the result is a slower, inefficient machine. Uninstaller 7 solves this problem by removing every last byte of unwanted data.
This doesn’t just apply to desktop software, but also to browser plug-ins, many of which are unintentional installations of nested or hidden programs. These range from the nefarious (malware that tracks your browsing) to the annoying (unwanted search bars), but with Uninstaller 7, you can identify exactly what’s on your PC and remove it with ease.
Software bugs aren’t always the result of poor code. Often, it’s because your computer doesn’t have the right drivers to run software at its best. Drivers are updated frequently, usually without warning, so don’t be surprised to find out-of-date, corrupt, or missing drivers spoiling your system performance.
But with Driver Updater, you’ll always have the right drivers for your machine. Driver Updater searches a library of over 400,000 drivers to find and install the most relevant and effective ones for your system. An in-built scheduler ensures you don’t miss important updates, while automatic back-up means you’ll never lose an important driver again.
Right now, you can buy Ashampoo System Utilities 15 for just $19.99 – a huge 80% off the retail price of $109.97. For consistently smooth performance, that’s a small price to pay.
From selfies to landscapes, your smartphone camera is a capable tool when used well. You might need to work a little harder to get the most out of it, but it’s a lot lighter and cheaper than a DSLR. And with a little skill, it can produce comparable images that look great on screen or hung from a wall.
While point-and-shoot is fine for a night out on the town, learning how to take better photos will make you the envy of your pals. So, we’ve put together a list of our favorite smartphone camera tips which, once learned, will guarantee great shots every time.
7 smartphone camera tips for better photos
1. Compose before shooting, not afterwards
If you plan a bit before shooting, you’ll get a better picture.
Award-winning photos are often the result of weeks of preparation. Camping out under the stars, lying motionless in the grass, hunkering on a rocky mountainside – the professionals have done it all. What really sets them apart is composition – knowing the kind of photograph they want to shoot and realizing it in-camera, not pressing the shutter and hoping for the best.
Composition is about what you capture with your camera, and what you leave out. How much of the sea and sky should you include in your holiday snaps? Who should be in them? Do I want whole bodies or just faces? When is the best time of day to shoot? And at what angle?
You can change some things after you’ve taken the shot, but usually at the expense of something else. If you took a whole body shot but think a face would be better, you’ll have to crop the image, lowering the overall detail in the picture. If your friends’ faces are silhouetted by background sunshine, you can lighten shadow detail, but at the expense of highlights.
Your smartphone shots will rarely need weeks of attention, but that doesn’t mean you should just point and shoot. A little thought goes a long way. Get the preview of your shot right first, then shoot.
2. Improve your composition with burst mode
Increase your chances of a great shot by taking several at once
If you’ve ever been at a restaurant and asked the waiter to take a photo of you and your friends, they normally take a few, don’t they? That’s because, as amateurs, we don’t trust ourselves to get composition right first time. Especially when there’s a lot going on in the picture. So, we take a few shots instead of one.
An easy way to do this is by using your camera’s burst mode. This takes several shots, one after the other, with just one tap of your finger. You then choose the best of the bunch. Burst mode is particularly useful for shots involving action or moving subjects, when your eyes and fingers aren’t quite fast enough to capture those mid-air moments.
3. Don’t use digital zoom
Enlarging pixels isn’t the same as getting closer to your subject
There are two types of zoom: optical and digital. Optical zoom is a function of the lens. It works in a similar way to binoculars or a telescope in that the lens itself magnifies the image. Digital zoom is a software feature. It magnifies the image by expanding the pixels. With optical zoom, you retain all the detail of your subject. With digital zoom, you lose detail and gain pixelation (the appearance of little blocks and jagged lines).
If you’re looking for richly detailed images, it’s best to avoid digital zoom altogether. Instead, try to get the composition right before you shoot. Zoom with your feet if you can, or just crop the image afterwards. Cropping will lose some detail, but not as much had you used digital zoom. Better yet, if your smartphone camera has optical image stabilization, stick to using that.
4. Clean your lens before shooting
Dirty equipment leads to deleted photos
Many people keep their smartphone in their pocket, where it gets covered in fluff and whatever else you’ve been keeping in there. Bags are the same. These environments are full of dust, dirt, and other detritus that can leave marks, particles, or smudges on your camera lens – all of which will ruin your snaps.
As smartphone camera lenses don’t usually have retractable lens covers, give your lens a quick wipe with a cloth to get a clean and clear shot.
5. Use flash selectively
Flash is not a substitute for real light, but it’s useful for backlit subjects
Our smartphone flashes are unidirectional, meaning they fire straight ahead in one direction. This isn’t particularly flattering, and can also produce unwanted shadows and artifacts in your images. Use natural light wherever possible, or if your flash has a power setting, dial this down a bit to retain more ambient light (and leave your friends some skin tone).
On the other hand, there are moments when flash is essential. That problem with backlit subjects on the beach? You can make it disappear by forcing your flash on (if you have it on auto it won’t fire). This is called fill flash and is a common technique for backlit subjects.
Always consider your environment and decide whether flash will improve the shot or make it worse.
6. When the going gets tough, go manual
Set the focal point of the image for optimal results
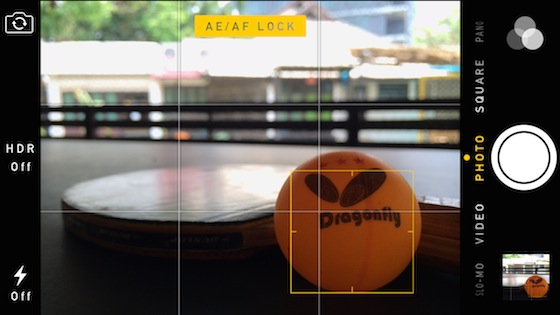
Your smartphone camera uses a lot of clever software to choose the best settings for you. This isn’t foolproof, however, and sometimes you need to take control yourself. While not all cameras offer full manual control, you should at least be able to choose what to focus on and your exposure levels.
Let’s imagine you want to photograph your friend in front of a huge waterfall. You want your friend to be in focus, as the waterfall is just a mass of white spray. If your smartphone has face detection, it might focus automatically, but if it doesn’t, tapping on your friend should do the job.
Similarly, because the waterfall is reflecting so much sunlight, your smartphone might dial down the exposure, making your friend’s face too dark. You can either select the exposure by switching to that setting and tapping on your friend’s face again – assuming your camera supports this – or use a bit of fill flash (tip #5).
7. Use your camera’s self-timer or volume button for pin-sharp images
Avoid jittery images by using the self-timer
Newer smartphones use optical image stabilization (OIS) in their lenses, but until now, it’s mostly been digital. If your hands get a bit shaky, your photos might look blurry and out-of-focus – especially in low light. Tapping the on-screen shutter button without moving your phone is a tough task, too.
Thankfully, there are two solutions to this. One is to use your camera’s self-timer. That means you can concentrate on holding the camera steady while your smartphone takes the shot.
Or you can use the volume button to take a picture. This usually creates less movement than trying to tap the screen. And if you own a pair of headphones with volume controls on the cord, you can take pictures without having to press anything on the phone at all.
It’s never been easier to capture your favorite memories. And with a little technical knowhow, your photos will be crisp, clear, and colorful reminders worthy of any wall in your home.
We’ve all been in a creative slump. When you stare at your computer, tools, or utensils, wondering where you muse is hiding. It’s easy to spend an hour or two like that, frozen by inertia, until something clicks and you snap out of it.
The worst thing you can do is let a creative block overwhelm you. Look for help if you can’t solve your problem within 15 minutes. When you’re scratching your head for inspiration and all that falls out is a few hairs, it’s time to attack things from a different angle…
Pinterest is a free visual bookmarking tool for anything you find online. It works the same as a corkboard – the kind you would’ve used at home or at school to pin notices and other scraps useful info. From recipes to workouts, you can “pin” internet pages, images, text, news stories, factsheets, infographics, and much more to your own individual boards.
Pinterest isn’t just a handy organizational tool, but an oasis of inspiration when your creative juices dry up. So here are 5 tips for using Pinterest to boost your creativity.
5 tips for using Pinterest to boost creativity
1. Learn new things by pinning all your educational resources on one board
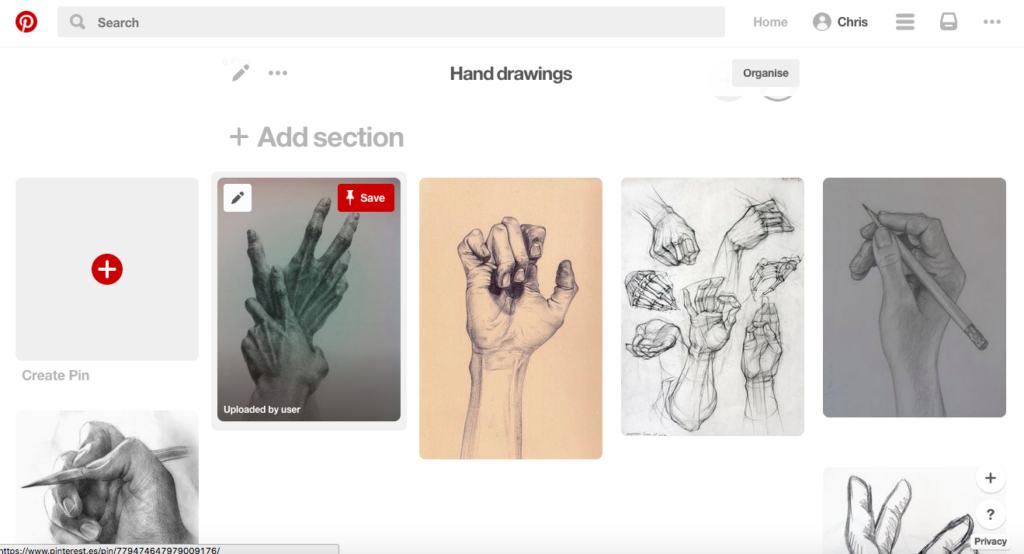
When you’re stuck in a creative rut, it might be because you don’t know how to take your project to the next level. You might lack the technical skill to get you there. In this case, you can use Pinterest to organize all your educational resources into one handy board. That means whenever you get stuck, you’ll have a quick reference guide to what is possible, and a list of resources to teach you how.
It’s also a great way of reminding yourself just how far you can take your project, whatever it might be, instead of settling for something simply because you lack the expertise to develop it further. And it can give you new ideas and perspectives on familiar topics.
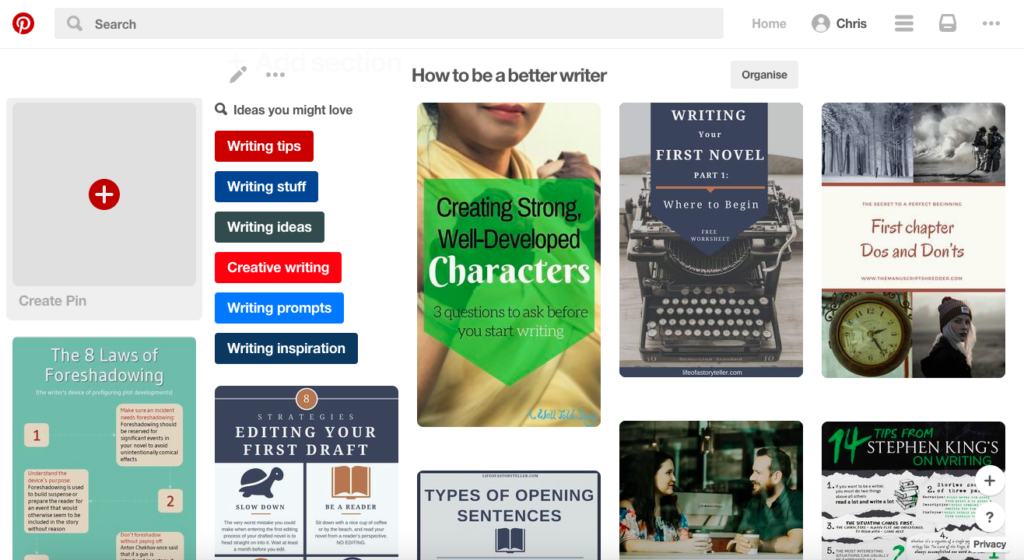
How a board entitled “How to be a better writer” might look
2. Follow people with the same interests as you for inspiration
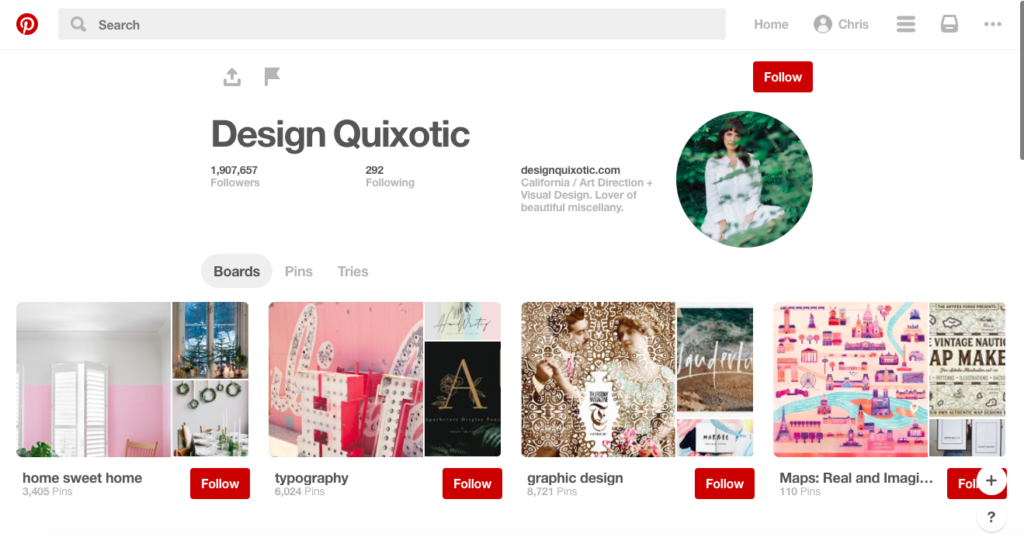
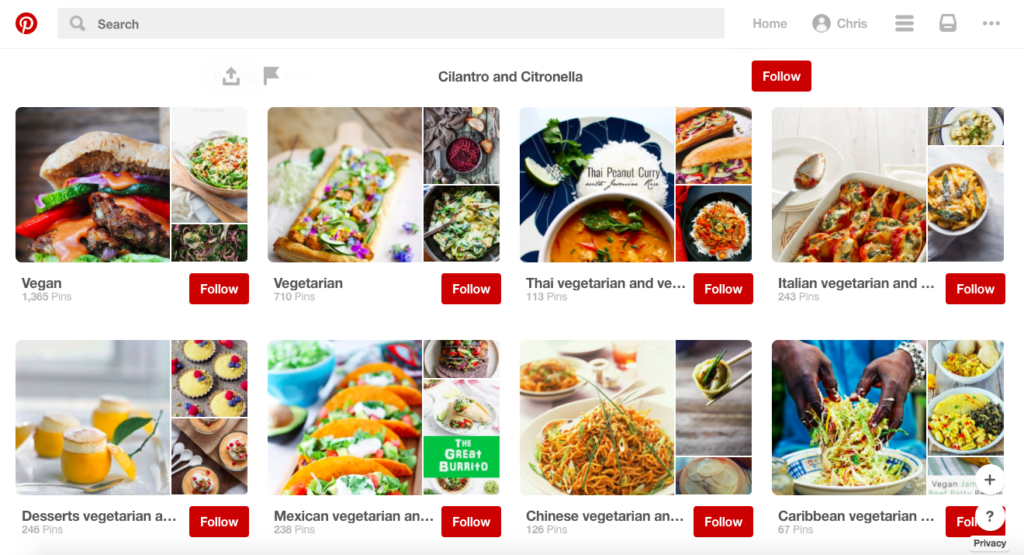
Sharing your boards with others can attract millions of followers, all of whom might inspire you to create something special
Note: I say “inspiration” and not “copying.” Of course, if it’s a recipe idea to use at home, go nuts. Or anything that’s kept strictly private. But for something you’re creating for public consumption, it’s better to use others’ boards to spark your own twists on community ideas, than to copy them. Better yet, pin your new creations to your own board, and you could find yourself with leagues of your own followers.
Lots of thought leaders and innovators have their own Pinterest feeds, and a good start would be thinking of whom you most admire then searching for them by name. Next, try looking for like-minded people under specific category feeds. Finally, you can even check out who’s following you and follow them back.
Finally, if you’re not all that keen on following individuals, follow boards instead. Searching for boards is easier, and you get all the inspirational content for your chosen board without worrying about who created it.
3. Showcase your own work for feedback
Ask for critiques to know if you’re heading in the right direction
Part of the creative process is finding out what works and what doesn’t. Feedback from others is a great way of refining your projects and testing out new ideas. With Pinterest, you can create boards for newly created projects or works-in-progress, and see what people think of them.
Pinterest dropped its “like” button a while back, but the comments box is still there. And if you’d like to keep things private, create secret boards and invite others to view and critique. If you’ve already got a critique circle, drop them an email with a link to your board. Gather feedback from their comments, or ask them to reply to your email. Either way, it’s a great way to get feedback on your portfolio, and allows you to collate your critiques in a simple, easy-to-organize way.
4. Organize resources into themes for your next big project
Thematic boards can inspire your next meal
Collecting things online with Pinterest is really easy, and can spark new creative directions. But Pinterest also lets you develop your ideas along different themes, letting you focus on specific aspects of a new project.
Consider interior design, for example. You might want to collect color schemes for different rooms and arrange them in boards for showing your client later. Or if you’re a jewelry designer, perhaps you want to arrange inspiration by type, creating boards for bracelets, necklaces, and rings.
Organizing your resources this way is a little like mind-mapping, which is a powerful tool for creativity and developing ideas. Your vocation is the center, the boards are the surrounding bubbles. Imagine you’ve decided to invent a new dish for an upcoming party, but you’re not sure what to do. If you’ve arranged your boards into different themes, such as starters, main dishes, and desserts, you’ll find inspiration much faster – the same goes if you’d arranged them by ingredient (fruits, veg, and meat, for example).
5. Decide what you want to create and a list of actions to achieve it
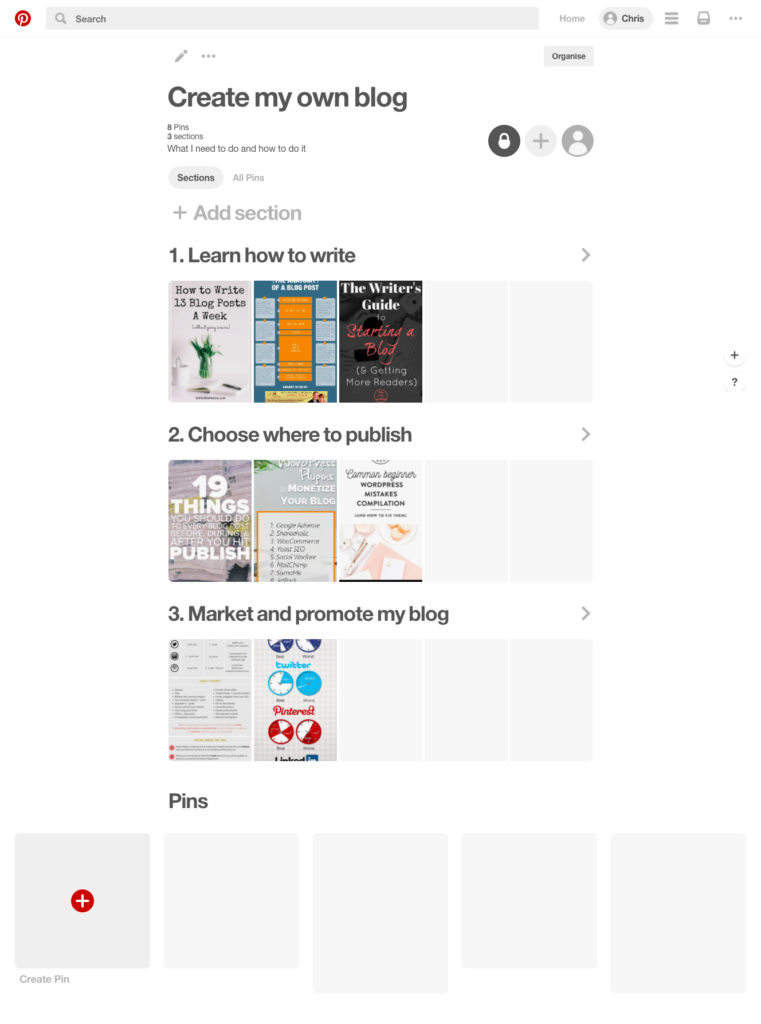
Although you can’t create Post-it note-like things in Pinterest, you can add text in interesting ways. One way is by creating a new board with different sections. Why would you want to do this? Because it lets you create your own to-do list for specific goals.
In the example above, the goal is to write my own blog. So, I create a new board called “Create my own blog.” Then, I create different sections with each step I need to take in order to be successful. Within each section are my pins. Each pin is another resource for helping me achieve the goal outlined in the section heading.
What’s great about this is puts everything you need to achieve your goal at your fingertips. It’s all in one place. No more trawling the internet while you work, you can separate your research and production time by arranging it all on Pinterest first. Then all you have to do is follow your plan.
Pinterest offers something unique in the saturated social media field. For one, the social aspect is optional, you can treat it like a virtual corkboard if you want and leave it at that. But for creatives, it’s a powerful weapon against the funk of inertia – spending time scrolling and pinning isn’t time wasted, but time well spent. At best, you’re inspired to new creations, at worst you’ve got a collection of useful resources and an insight into the things that make you tick.
College students have it tough. Lectures to attend, deadlines to meet, exams to take – and for many of you, it’s your first time living away from home. So there’s cooking, budgeting, and washing to do, too (assuming you’re not taking it home on weekends). Not to mention the partying! It’s a wonder you get any studying done.
Luckily, there are lots of smartphone apps that help take the pain out of student life. Some make learning easier, while others focus on the practical side of living on your own. To make the most of your university experience, you’ll probably need a little help. So, we’ve put together our five favorite apps for college students – all of which will give you a head start and make for a hassle-free graduation.
So read on, download, and enjoy… and good luck with your studies.
Okay, the first app on this list is actually two. I spent an hour or so comparing them to find out which was best, but while they’re both great, there are a couple of huge differences. Having both means you get the best of both worlds.
First, let’s look at the similarities. Both Evernote and OneNote let you collect web pages, audio, images, videos, hand-drawn notes, and lots more, and organize them into easily accessible digital notebooks. Gone are the days of thick folders full of post-its, handouts, and hastily-scrawled notes. And with synchronization across all of your devices, you can go from laptop to tablet to smartphone without losing your ideas – perfect for class, home, or on-the-go studying.
Now the differences. While Evernote is widely considered the king of note-taking apps, especially in terms of its gorgeous user interface and web-clipping features, its free version, Evernote Basic, limits uploads to 60MB. That’s pretty small. You’re restricted to synchronization across two devices, too.
OneNote, on the other hand, being part of Microsoft’s Office suite, gives you 5GB OneDrive storage. You share this among the other Office apps, but even if you set a limit of 1GB for OneNote, you’re still miles ahead of Evernote’s paltry 60MB. You also get offline access, which Evernote doesn’t offer with its Basic version.
Sadly, OneNote’s web-clipping isn’t as good as Evernote’s – it saves your collected webpages as images, meaning embedded links don’t work. So as both apps are free, download the pair and exploit the advantages of each.
Unless you’re one of the lucky ones, the Bank of Mom and Dad (BOMD, for short) won’t last forever. Chances are, going to college means financial as well as social independence. And even if you get a little help, you’ll need a tried-and-tested method of making your money last.
Wally is a free budgeting app that lets you control your finances. You can enter your income and expenditures using its clear, user-friendly interface, with expenses split into helpful categories like home and entertainment (you can even create your own). You can also add notes and pictures of receipts for each item, leaving a digital paper trail of your spending habits.
It supports all currencies, so if you’re studying overseas it won’t be a problem. With geo-tracking enabled, you can even save the location of where you spent that exorbitant sum on a caramel macchiato.
Wally also lets you set financial goals. So if you have a budget of $800 (or want to save $200, for example), Wally will track your income and expenditure and show your progress on the home screen.
For a free app, Wally is incredibly useful and very easy to use. Once you get in the habit of using it, you’ll be making better financial decisions in no time – making it easier to concentrate on your studies without worrying about where the next meal (or night out) is coming from.
During your time at college, your professors will encourage you to stay on top of industry news. Academic journals, textbooks, and papers are one thing, but with our world changing so quickly, you need to keep abreast of what’s new in your field. That’s where Feedly comes in.
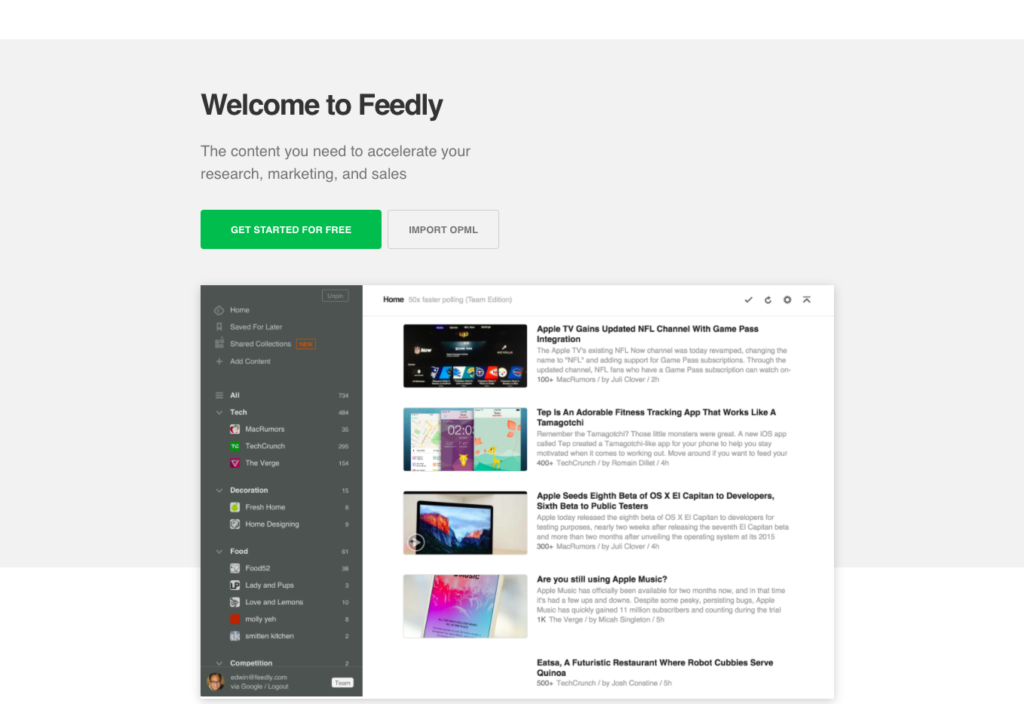
At its core, Feedly is a news aggregator. It pulls together all the internet’s news into one place – your smartphone – so you can read it at your leisure. Just add the sites you want to follow, and Feedly will bring them together for you. You’re not limited to news sites, either, you can add publications, blogs, YouTube channels, keyword alerts, and more.
The interface is intuitive, and once you’ve read your stories for the day, you can save them for access later (such as through Evernote or OneNote) or Feedly will mark them as read. You can also share content with your fellow students or social media, and all content is categorized automatically by Feedly, or by creating your own categories.
Whether you’re into law, arts, or science, don’t fall behind the latest developments in your field of study – get Feedly and you’ll be in-the-know all the time.
The concept of flashcards is as old as studying itself. By organizing knowledge into discrete elements, it is easier to learn or memorize. Flashcards break down complex topics into manageable chunks that are easier to understand, and slot nicely into your memory with frequent exposure and self-testing.
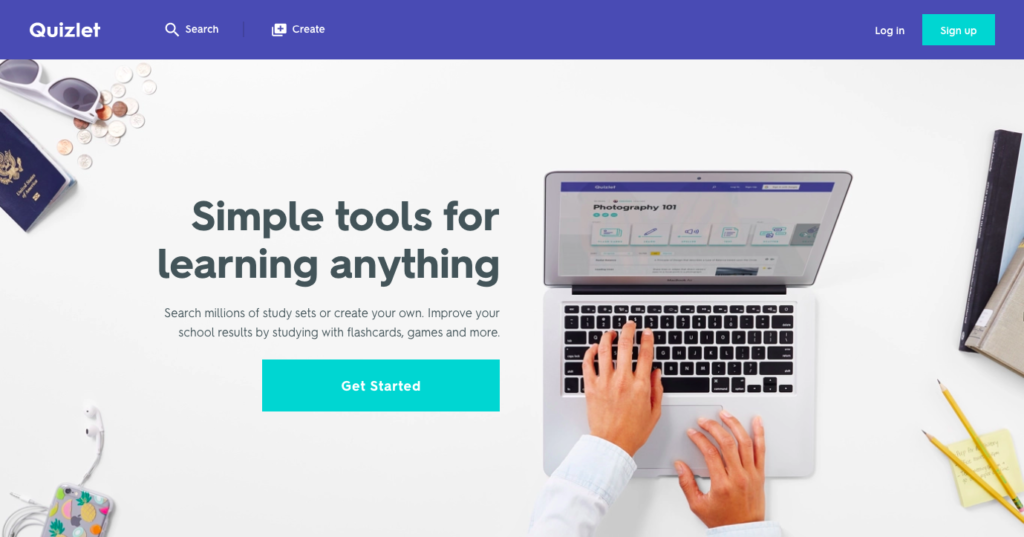
Quizlet is the internet’s most popular virtual flashcard system, claiming that “95% of students who learn with Quizlet improved their results.” That’s an impressive statistic, and proves the efficacy of the flashcard system, as well as Quizlet’s versatile app. You don’t have to use flashcards alone – there are quizzes, games, and collaborative opportunities, too.
Create your own flashcards and share them with friends to help them pass. Ask your TA to create a set for the most important parts of your module. See if you can beat other students’ scores – even win competitions. There’s a lot going for Quizlet, and whatever it is your studying, it’s a powerful tool you can use anytime, anyplace.
There’s a sneaky rumor that most dorms reek of burned toast, baked beans, and pizza, and that hot pockets are student haute cuisine. While this is mostly stereotype, it’s true that not all of us are good cooks, and convenience – especially when competing with busy timetables – often wins the day.
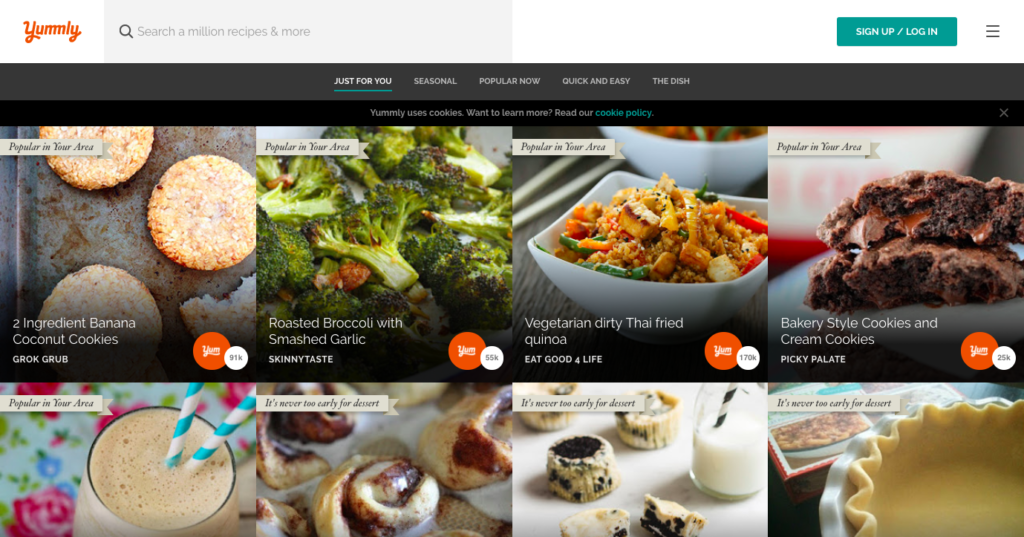
But ready-made meals and takeout aren’t the ideal source of brain fuel. Home-cooking is the way to go, and you can make simple, healthy, and cheap meals through the recipe app, Yummly.
Like Feedly, Yummly is an aggregator of sorts – an online, searchable catalog of millions of recipes from various sources across the web. You can search by ingredient, cost, cooking time, dietary requirements, and lots of other variables, so you’ll always find something you’ll love.
Many of the recipes come reviewed by Yummly’s massive online community, so you can try new dishes recommended by hundreds or even thousands of people. Yummly also learns your preferences with time, returning recipes that are closer to your tastes and budget. You can share your favorites on social media, and even create shopping lists so you know exactly what to buy.
Student life can be daunting. As well as academic pressure, you have to adjust to life without mom and dad. Give yourself a head start by downloading these apps today.