How to set up a poll on Facebook

It’s simple to create a poll on Facebook. Just follow these easy steps!

Facebook has a relatively under-utilized feature where users can create surveys and polls for their friends to answer. It’s useful for quick feedback on a decision, or more importantly when you’re trying to plan or schedule events within a group.

Facebook has two methods for sharing polls – one that’s quick and easy but doesn’t have many customizing options, and another that requires slightly more digging and time, but will make your poll altogether better. Let’s get right into it.

Facebook Free Download
8

How to set up a poll on Facebook

1. Make a poll directly from your news feed

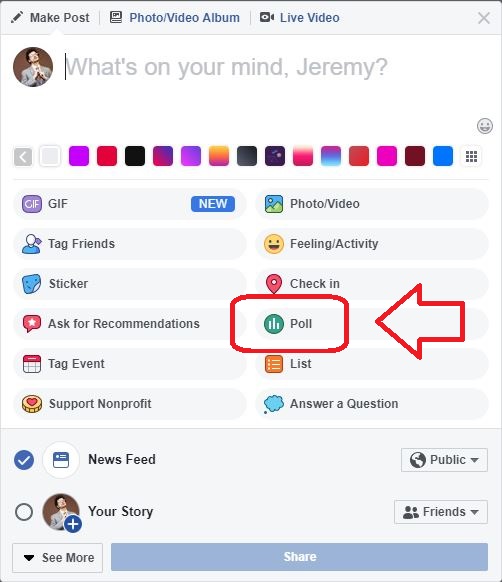
This method is the more straightforward of the two, and allows for you to quickly poll your entire pool of Facebook friends. Open up your Facebook News Feed and up top where you’d normally make a post, click the ellipsis.

Click Here For Options

You’ll see a bunch of options like tagging events, answering questions, or asking recommendations. On the right is a Poll option. Click it.

Create Poll On News Feed

Up top, you can ask your question, and put two options below for people to click on. Unfortunately, you’ll only have those two choices, so this might not be good for you if your question has more than two possible answers. You do get to choose your poll’s duration, though. Choose any length of time between one day to never.

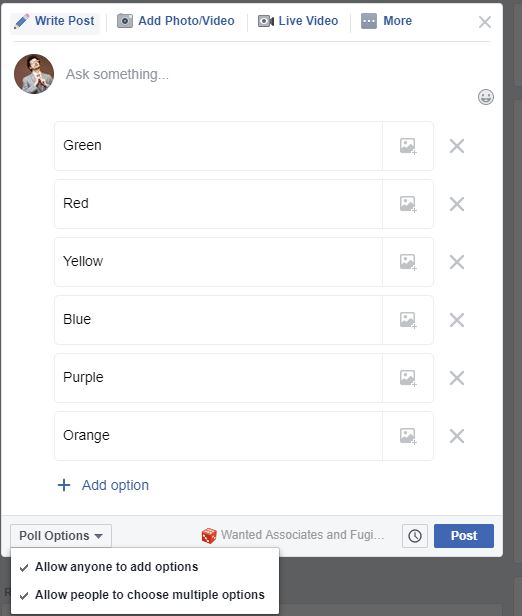
Funny enough, you’re able to set many more options if you set up a poll on a Facebook Group Page. Open the group in question, then just click the ellipsis like before and select Poll. Pose your question and this time notice that you can choose to Add Option, providing more choices.

Add Options In FB Group

2. Make a poll through the Poll App

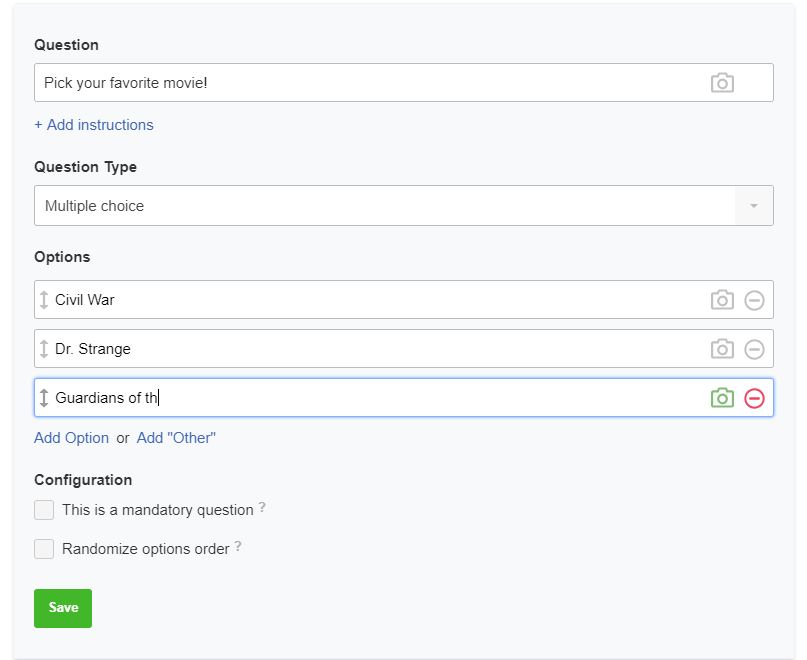
This method takes a little longer, but we find it to be the better choice more often than not. Facebook’s poll app allows for tons of optional responses, added instructions, multiple configurations, and even embedding video or pictures.

Polls For Facebook

Go to this link and click New Poll. Right away you can title your poll and explain what it’s going to be about in the Introduction blurb. You can additionally click on Advanced Options to customize how many times people can answer polls, public accessibility, notifications, and start/end times for your poll.

Write Intro Blurb

The next page lets you add the actual choices for people to pick, and you can add as many options as you wish, unlike back on the News Feed where you could only pick two. This is the main reason we prefer the Poll App. Next, you’ll be taken to a preview screen where you’ll be able to see how it’ll look once people click the link. Once you’re happy with it, click Submit.

Set Up Your Poll Responses

Select Post on Facebook and it’ll be posted just like anything else you’d normally write, and it will appear on everyone’s News Feed. It’ll look something like this:

Poll Appears in News Feed

If you find yourself making polls pretty frequently, you might also consider upgrading Facebook Poll to the premium version, which comes with a variety of added features:

Premium Options

Be sure to check back frequently to see how your poll is doing, and don’t forget to tally up your votes to share the results after it’s complete.

34 Windows 10 keyboard shortcuts

Ready to master Windows 10? We’ve got 34 keyboard shortcuts to help you work faster.

Working on a PC is all about efficiency and time management. If there’s a way to speed up the process, then we do it. Windows 10 comes with a ton of features to help users more quickly and conveniently organize and utilize the various tasks and performances that you’ll be doing on your computer, and shortcut commands help to make things even faster.

Windows 10 Download
7

If you’re a Windows 10 user, you may have even triggered one of the following commands by complete accident. That’s because while almost anything can be done on this OS, they don’t go out of there way to teach or share how these shortcuts work. Below is our list of 34 useful shortcut commands that can save you a ton of time and make all your work that much more efficient. We’ll get to more niche ones towards the bottom, but we’re starting off with the basics.

34 Windows 10 keyboard shortcuts

1. Switch windows: Alt+Tab, Alt+Shift+Tab

This command switches between your open windows. Alt+Tab will bring you back and forth between two windows, while Alt+Shift+Tab will send you back one window, kind of like a “previous” option. Alternately, you can continue to hold Alt after pressing Tab in order to get an overview of all your windows. This is especially helpful when you’re multi-tasking, or when you want to close a window.

2. Task Manager/Sign-out options: Ctrl+Alt+Delete
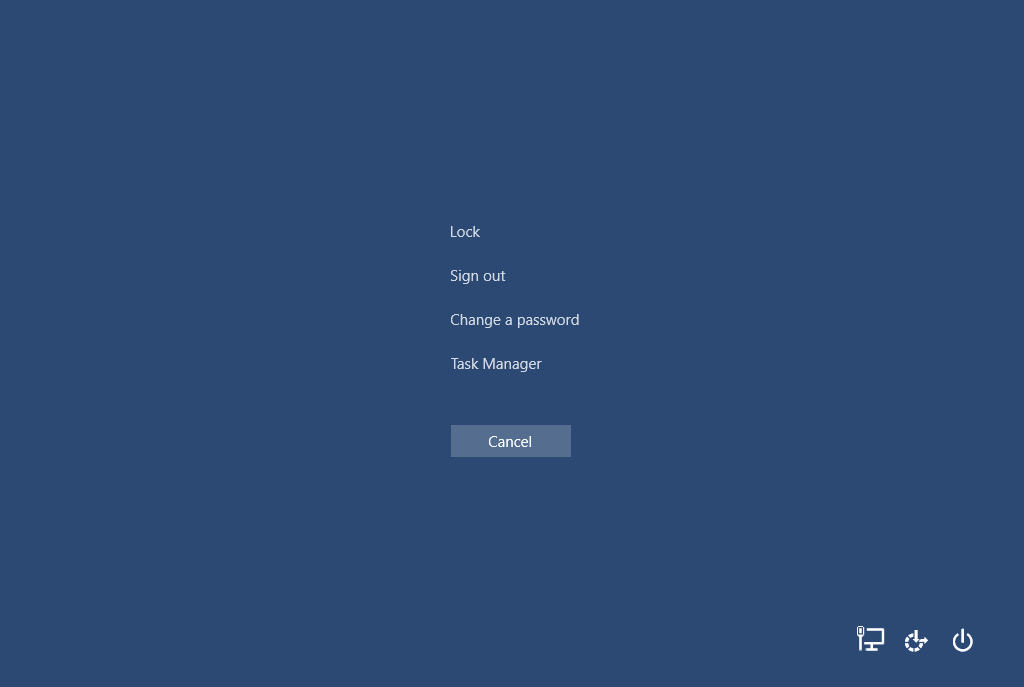
Ctrl alt delete screen

At any given time, during any given operation pressing Ctrl+Alt+Delete will interrupt with the above image. From here you can pick any of the options it says, including signing out, switching users, changing your password, locking the screen, but is mostly used to call upon the almighty Task Manager.
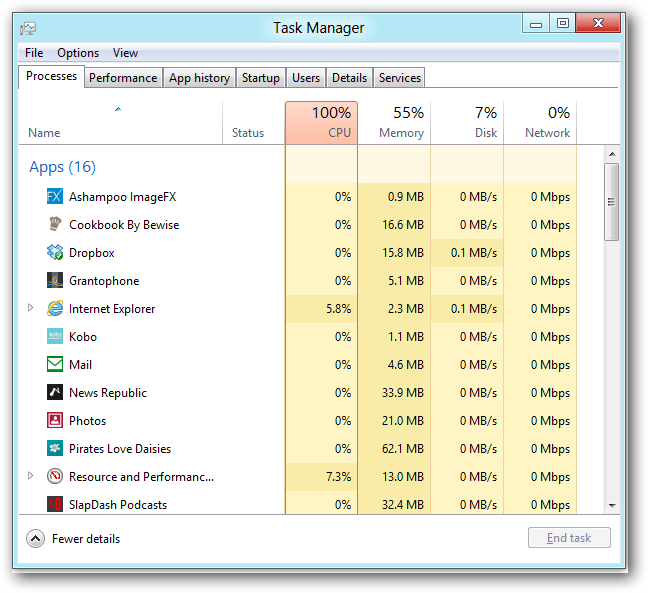
Task Manager

This is an excellent way to regain control of your PC if it’s bogged down with too many processes, and to just generally check on what it’s working on. There are other ways to open the Task Manager (such as Ctrl+Shift+Esc), but this one is better at halting processes and is used as a general “panic button.”

3. Close your current window: Alt+F4

Any time you’ve got a window open that you want to close Alt+F4 can do it for you. This is a useful option if you’re trying to navigate quickly, can’t find the close button in any given program, or if you’re unsure how to close a specific window.

4. Refresh: F5

This one works on your desktop, in your File Explorer, or in a web browser like Opera or Chrome. Since each of these has the refresh button in different places, F5 is a good catch-all. Refreshing the icons on your desktop can also be a good way to eliminate weird visual bugs with your shortcut icons – an infamous one being where all the arrow icons turn into green check marks.

5. Super delete: Shift+Delete

When you pick a file, folder, or shortcut to delete and you do so by dragging it to the Recycle Bin or pressing the Delete key, you’re sending it to the purgatory of the Recycle Bin. Until you go in the bin itself and manually empty it, that program will still be there, taking up RAM and storage space.
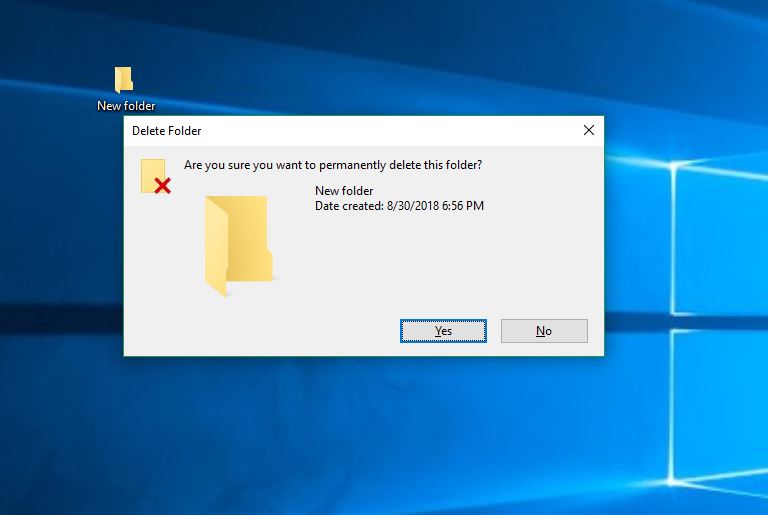
Delete Forever

If you’re looking at a file you know you’re never going to miss, you can select it and Shift+Delete. This will permanently remove the file or shortcut in question, skipping the Recycle step. It’s gone for good. Well, almost.

6. See properties: Alt+Enter
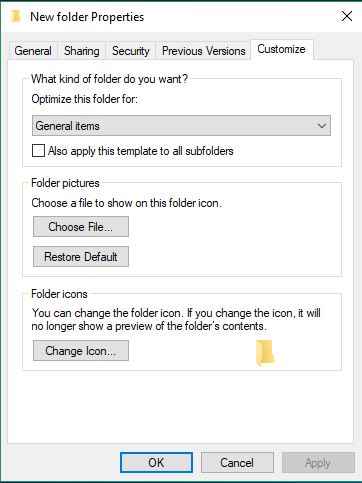
Properties

Useful if you want to quickly check the properties of an object, you can Alt+Enter when you have the file selected to see them. This will tell you useful info like when it was created, how large it is, the file’s location in your File Explorer, and additionally lets you customize pertinent sharing and security information.

7. Open Task Manager: Ctrl+Shift+Esc
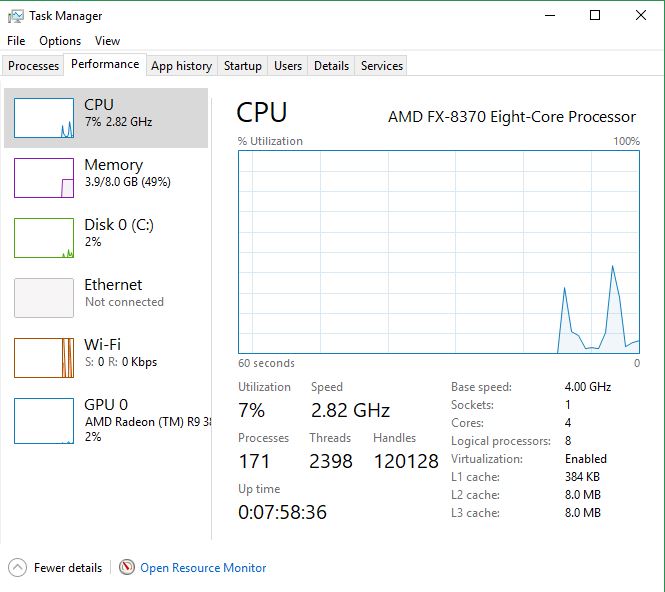
Task Manager

Most people know you can access the Task Manager via Ctrl+Alt+Delete, but Ctrl+Alt+Delete will take you to an additional screen (mentioned above) before you manually have to select it. If you just want to go straight to Task Manager, use Ctrl+Shift+Esc.

8. Open window menus: Alt+Space Bar

This one’s pretty useful when you’re trying to navigate a specific program. Alt+Space Bar works as a catch-all for when you want to quickly access common features in a program’s toolbar. Alt+Space Bar will open the leftmost tab (usually File), and then you can use the arrow keys to quickly navigate between them.

9. Help: F1

F1 is universally linked to tech help in every program, including the base Windows 10. Click it in any browser or even software like Microsoft Word or MS Office to start troubleshooting and accessing FAQs.

10. Open File Explorer: Win+E

Our favorite shortcut on this list, you can use Win+E to quickly open up your File Explorer, where all your various programs, documents, programs, and media are stored. This one saves a bunch of time when looking for paths, locating files, and quickly dragging and dropping images.

11. Run program: Win+R
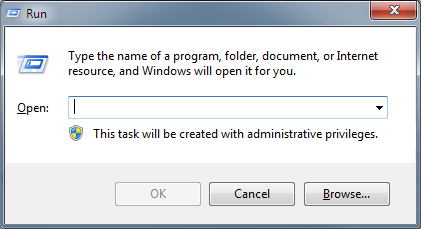
RunOption

This one’s useful when you’re looking to quickly open any of your folders or programs like Command Prompt, Documents, or Notepad. Just hit Win+R and type what you want to open and it’ll appear on-screen instantly. It’s especially useful for programs or documents that you don’t currently have shortcuts for, or for opening notepad or calculator to quickly jot something down.

12. Start in Safe Mode: Press F8 during start-up

Should things go wrong with your computer (and they inevitably will), a super useful tool for debugging and troubleshooting is Safe Mode. If you’re unfamiliar with what Safe Mode does, it means that only essential system programs and services will start up at boot. The rest will need to be manually selected. For such a small change, you’d be surprised how often it fixes most, if not all problems within an operating system. It’s also an effective means of eliminating rogue security software.
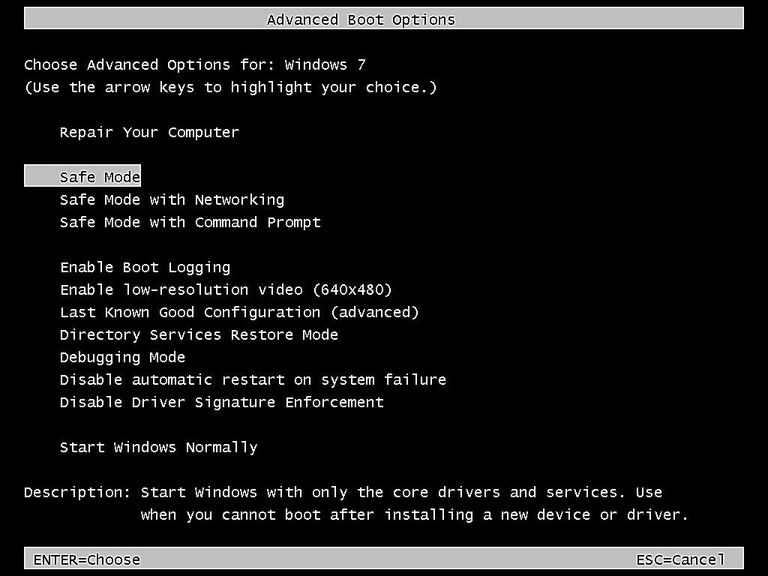
Open With Safe Mode

You can manually select to restart your PC in safe mode via the shutdown options, but you can also make that decision upon booting up your PC. Repeatedly pressing F8 while your PC is booting up will give you a menu from which you can select to start in Safe Mode.

13. Rename a file: F2
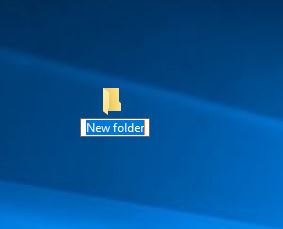
Rename Folder

If you want to quickly rename a file, folder, or shortcut, an easy way is to select it and press F2. Sure you can right-click and click Rename, but our way is faster!

14. Open the Desktop tab of your File Explorer: Ctrl+N

This effectively does the same thing as Win+E, but with the added bonus of taking you straight to the Desktop folder.

If you’re like us and do much of your work (extracting and moving files, managing downloads and shortcuts, or creating new folders) on your Desktop, this is a surprisingly useful shortcut. It’ll allow you to quickly jump between your workspace and your catalog.

15. Open notifications window: Win+A

Windows 10 comes with a hidden notifications banner on the right of the screen that will occasionally alert to you pertinent call-outs or events such as recorded clips, blocked attacks, or defense scan updates.
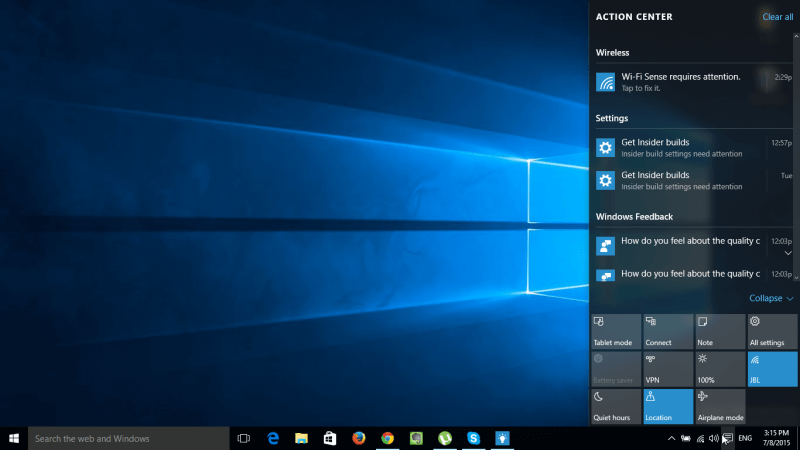
Action Center

Hitting the Windows Key+A will open up your notifications so you can scroll through anything important.

16. Open search portal: Win+S

A super useful shortcut, Win+S will open up your quick-navigation portal. Type in literally any program, folder, document, or file that you have on your PC and it’ll bring it up.

17. Peek at desktop: Win+,

We were surprised by how much use we got out of this one. Whether to look at shortcuts, keep track of moving files, or look at toolbar settings like volume, date, or time, Win+(comma) lets you peek at your desktop without closing out of any of your current windows.

18. Go to Desktop: Win+D

Similar to our above tip, but Win+D fully takes you to your desktop; it’s not just a peek. This is great if you use your desktop to do much of your file moving and extracting work. Hitting Win+D a second time will take you right back to the window you were working in.

19. Minimize all open windows: Win+M

Similar to our above command, this shortcut will tuck away all your active windows without shutting them down, bringing you straight to the desktop. The difference with this is that it’s not a matter of flipping back between all windows and none – rather Win+M minimizes everything, letting you start from scratch, opening the windows you want at your most convenient order.

20. Restore all minimized windows: Key+Shift+M

If you use Win+M and DO decide you want to bring all the windows back, it’s as simple as hitting Win+Shift+M.

21. Open Settings: Win+I
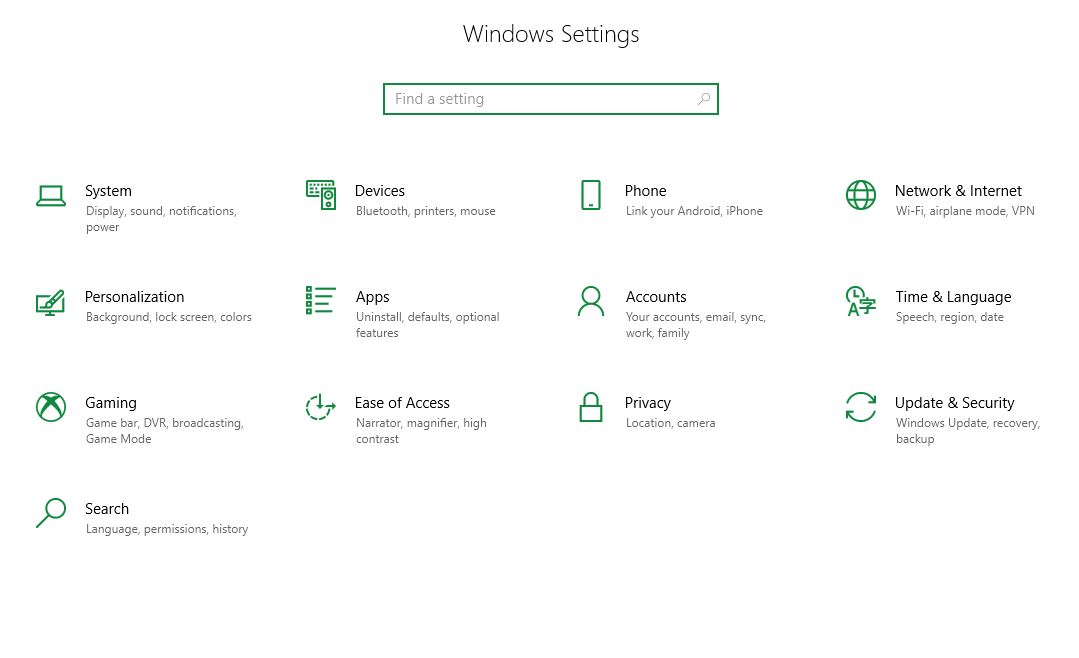
Win10 Settings

You can customize a ton of Windows 10’s features through the Settings menu. Open it up by pressing Win+I. From here you can update, recover, and backup your files, manage your devices and network connection, manage your accounts, uninstall apps, or sync up your mobile device.

22. Connect a wireless device: Win+K

If you have a wireless bluetooth device that you want to sync up to your computer (like a phone or a speaker system) an easy way to do it is to turn on the device and press Win+K.

This will open up a window on the right of your desktop that will search for the device, connect to it, and allow further configuration once it’s found.

23. Record video: Win+Alt+R

One of Windows 10’s more hidden features, you can press Win+Alt+R at any time during any program to immediately begin recording footage! The clip will then be stored in your videos folder by default. Everything about this feature can be customized through the settings menu. To read more about how this works, check out this article.

24. Begin dictation: Win+H

If you have a microphone set up and have dictation enabled, you can use Win+H to immediately begin speaking and having your PC record your voice via text. To enable this feature, go to Settings > Speech and configure it how you wish.

25. Lock your screen: Win+L

To lock your screen at any time, simply press Win+L. It will take you back to the sign-in screen where you input your password. This is useful if you’re working in a public area.

26. Take a screenshot: Win+PrtScn

We finally have a reason to use one of your keyboard’s least-used buttons! If you want to quickly snag a picture of whatever’s currently on your screen, just press Win+PrtScn at any time. The image will be saved to your Pictures > Screenshots folder in your File Explorer. Note that it will take a picture of your entire screen, though, so you might have to do some cropping later.

27. Search for other PCs on your network: Win+Ctrl+F

Useful if you’re working with a company or on a shared network with several different people, you can see and access other computers you’re sharing a network with by pressing Win+Ctrl+F. This is especially useful if you’re looking to transfer and share files or information, or if you simply want to check whether your computer is seeing the network.

28. Open system properties menu: Win+Pause

This one’s handy if you can’t remember your computer’s specifications. Just hit Win+Pause and you’ll instantly be shown all manner of your computer’s hardware information, such as installed memory, computer name, product ID, or system type.

29. Emoji menu: Win+.
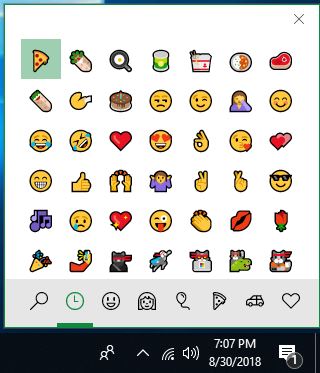
Win10Emoji

Just for fun! You can open your emoji menu any time by pressing win+(period).

30. Reconfigure multi-screen setup: Win+P

If you use more than one monitor, a quick way to configure your new setup is by hitting Win+P. It will open a window on the right of your screen that changes the display. Have them both show the same image, have the image spread, or limit it to one screen. The latter option is useful if you want to use your PC and game on the second monitor.

31. Reposition your current window: Win+Arrow Keys

You can easily adjust the size and positioning of your current window by hitting Win+ any arrow key direction. Left aligns it with the left side of your screen, right aligns it with the right side of the screen. Win+ Up Arrow will maximize the window to full-screen, and Win + Down Arrow will shrink it back into small window.

32. Minimize all but the current window: Win+Home

This one’s really useful for when you’re trying to focus on one task at a time, see the desktop, or just need to clear some space on your screen. Pressing Win+Home will minimize every open window except for the one you’re currently in. You can achieve the same effect by clicking and holding your desired window and shaking it back and forth. What’s better about using the shortcut command, though, is that pressing it again will restore all your minimized windows.

33. Bring up the Start Button menu: Win+X

Pressing Win+X will bring up the same menu as right-clicking the Windows icon on the bottom left corner of your screen. This will bring up a ton of useful tools like power options, Task Manager, Settings, File Explorer, disk management, and network connections.

34. Sleep/Restart/Shutdown options: Win+X > u

Using the same Win+X menu from our last tip, press U and you’ll automatically go to the various shutdown/restart options.

We hope these tips were helpful for you, and that you’ll be able to more quickly navigate and utilize Windows 10’s many feautures, tools, and shortcuts.



6 things we want from Elder Scrolls 6

Can’t wait for Elder Scrolls 6? Here’s what we’d love to see from the minds at Bethesda.

When Elder Scrolls 6 was finally announced at this year’s E3, fans of the series immediately began visualizing and dreaming up what the new game might look and play like.

“It’s something that’s going to take a lot of time,” Todd Howard explained. “I could sit here and explain the game to you and you would say ‘that sounds like you don’t even have the technology.” Howard hopes to make Elder Scrolls 6 look and feel exactly as he always envisioned the series being – fun, open, replayable, and endlessly immersive, with gorgeous vistas and hair-trigger encounters lurking around every dark corner.

It sounds almost too good to be true. Regarding more specifics, Bethesda Softworks have remained wisely (though disappointingly) discreet. Speculations and hopes are running wild as to where the next game may take place, what we might expect from the story, and mostly what we might get in the new gameplay. We’ve put together a list of the top 6 features that we need to see in the next Elder Scrolls game.

Haven’t played Skyrim yet? Download it here:

The Elder Scrolls V: Skyrim Download
8

6 things we want from Elder Scrolls 6

6. Multiple GPU support

This point is specific to PC gamers, but considering the massive number of Elder Scrolls fans who enjoyed playing a modded Skyrim or Oblivion on PC, we think this one’s justified.

For those who do not know what multiple GPU support implies, it essentially means that if your PC has two graphics cards you are able to use them both simultaneously, resulting in double the performance. NVIDIA can easily be configured to support this via Scalable Link Interface (SLI) and AMD uses Crossfire. Through multiple GPU support, two cards can be connected together for a significant improvement in the game’s FPS and general capacity to hold more data (like mods).

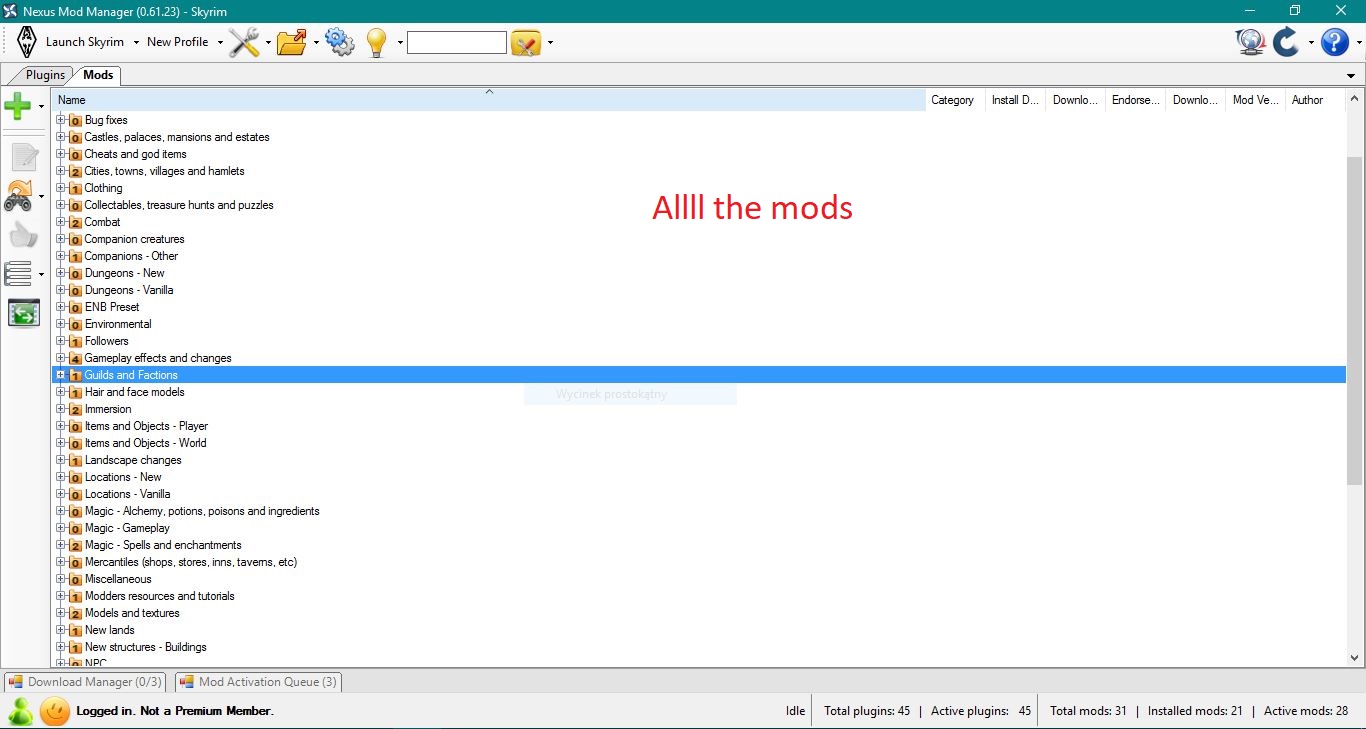
Multiple GPU support becomes especially necessary when trying to run the game with a lot of mods – something Bethesda has always championed and allowed, even in their newer titles like Fallout 4 or the re-released Skyrim in 2016. If Elder Scrolls 6 is going to run with the increased visuals, 60 FPS, heavy scripts, and huge maps the way that Todd Howard envisions, support of a second graphics card is going to be necessary to see and play the game as intended.

Still unsure how multiple GPU support works? Check out this explanation of how it could improve Elder Scrolls:

5. Branching faction quests

Since Skyrim is a non-linear story where the shape of the narrative is determined by the player, the various quest lines end up telling the story. This provides an experience where the player gets to craft his own story, and makes the game much more replayable. The issue here, though, is that all the quest lines themselves remain painfully linear.

From a simple side quest to hunt for treasure to a more involved chain of quests like the Companions, once a player begins a faction’s journey they wind up with the same experience and the same dungeons every single time. Even during quests like the Dawnguard DLC where players had two branching paths – vampire or vampire slayer – the quest took you through the same environments for the same fetch quests with the same dialogue, and even ended with the same boss fight and loot reward.

For Elder Scrolls 6 to take its narrative to the next level, it doesn’t have to sacrifice putting players “in an uncomfortable situation” as Pagliarulo describes – it just needs to feature more divergent paths where the player feels like they have some choice and impact on the decisions being made around them. There are two ways of accomplishing this:

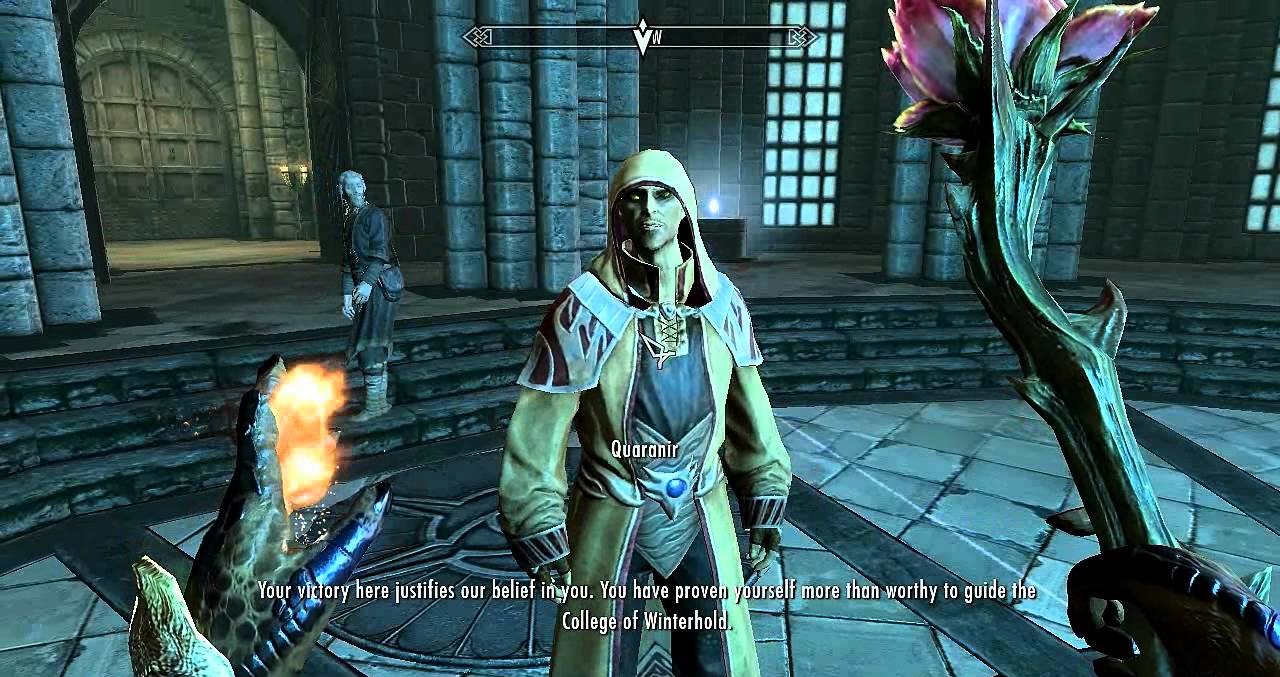
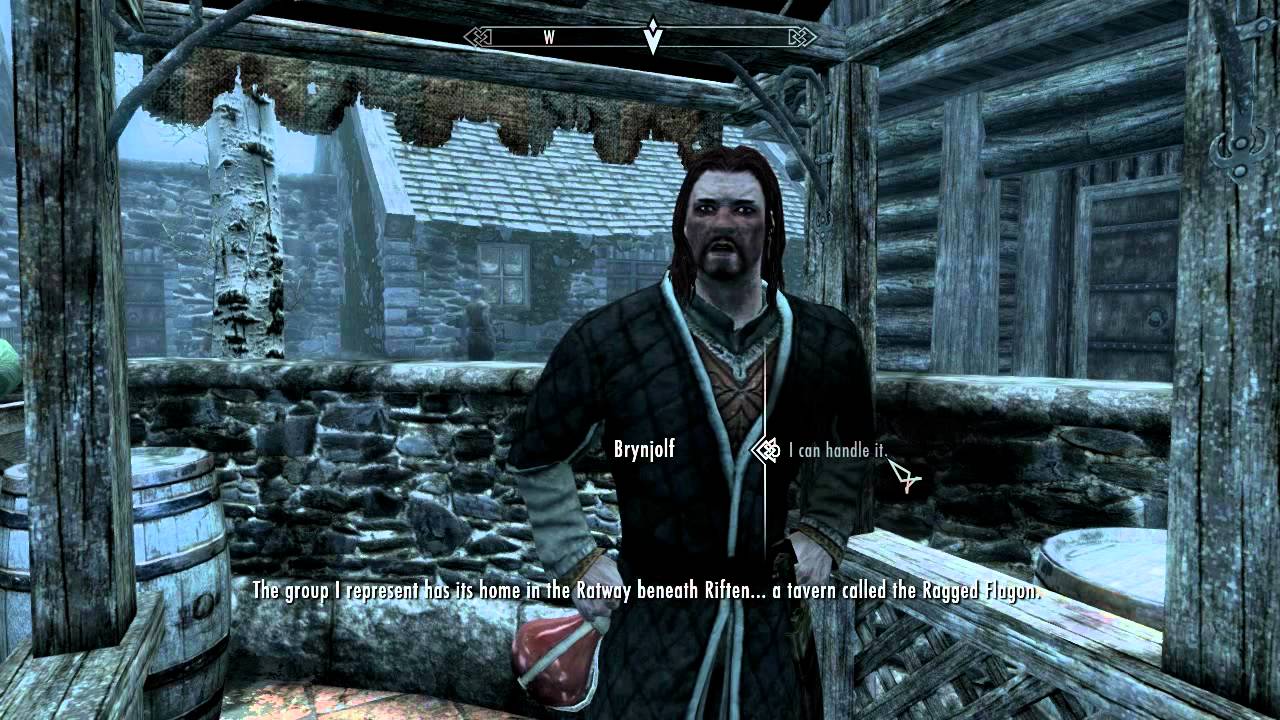
The first is to offer more factions to the player from the start. Magic is abundant in Skyrim, and yet the only quest line that has anything to do with magic is the Winterhold College, in which you play the role of the hero, saving the college from a catastrophic disaster. Once you’re set on the quest this is the outcome you end up with no matter how you want to roleplay. If you want to play as an evil mage, there’s really no way to do it.

Elder Scrolls

It’d be awesome if there was a guild of necromancers or warlocks who existed under the radar and practiced forbidden spells and rituals, and you had the option of joining their ranks instead. Much like the Blades and Greybeards don’t get along, or how the Dawnguard despise Harkon’s court of Vampire Lords, it’d be a more weighty decision having to pick one faction over the other.

Elder Scrolls

The other way to accomplish a deeper quest-based narrative is to have the player’s choices matter more during the quests themselves. At the end of the Thieves’ Guild quest line you’re given the same outcome no matter how you want to roleplay. Join the Thieves’ Guild and you should expect to go on stealth missions, infiltration, and pickpocket runs, but that doesn’t mean the story has to be the same. The quest line even ends in a straight-up boss battle, which is decidedly unlike a thief to engage in depending how you roleplay him.

Elder Scrolls

What if, upon completing the Thieves’ Guild quest, you could elect to run the guild like a Robin Hood character, stealing from rich Jarls and nobles to give to the ratways, orphanages, and warrens? And what if you had the choice to instead organize a mafia that gripped the holds in a vise, demanding payment and tribute every time a guild member entered the city? TL, DR: We want more role-playing in our role-playing game.

4. Optional multiplayer functionality

Skyrim remains one of the greatest single-player experiences on the market today, but what would happen if it was opened to public or private servers? The reason this isn’t out of the question is that ESO and Fallout 76 are already testing the waters. Going multiplayer with the Fallout franchise is a big leap for the studio, and we’re hopeful that Fallout 76 will work out any of the kinks that could show up in Elder Scrolls 6.

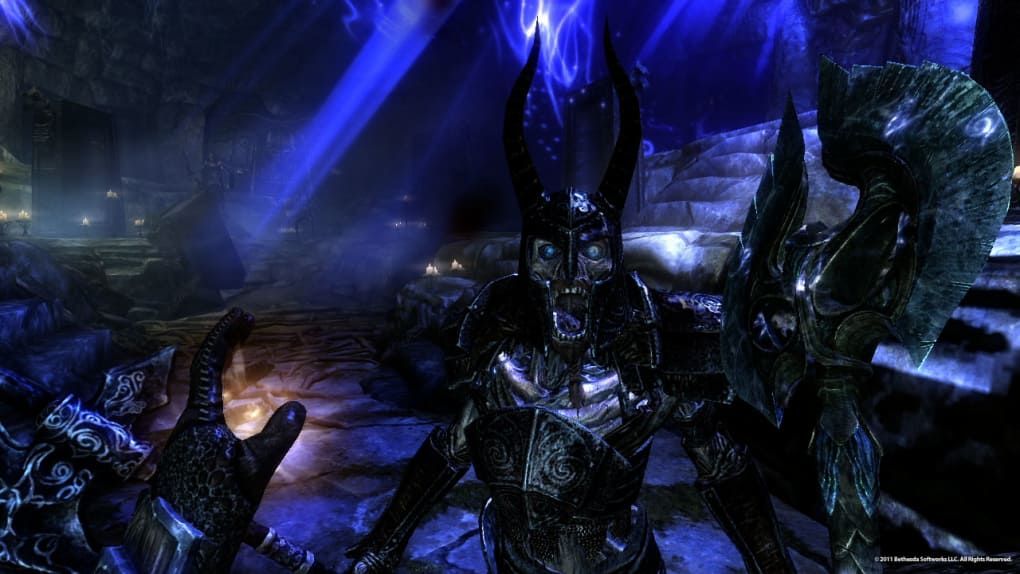
If Elder Scrolls 6’s multiplayer will work anything like Fallout’s, we could be looking at a 1-4 player experience hosted on a private server where you and three friends get to cut through swathes of enemies, clear out draugr-infested dungeons, and battle liches and dragons side by side. We imagine it looking something like this:

One of Elder Scrolls’ more charming features, though, was always being able to explore the world on your own – making a name for yourself, collecting rare gear, and being a singular entity in a harsh landscape. For players who want to continue playing Elder Scrolls in this way, there needs to be a toggle switch or a specific lobby to join so that players continue to have that control over their experience. Multiplayer has been such a dream for Elder Scrolls fans, that there’s even work on a Skyrim mod specifically to integrate players. You can check out Skyrim Together here:

3. Different dungeon environments

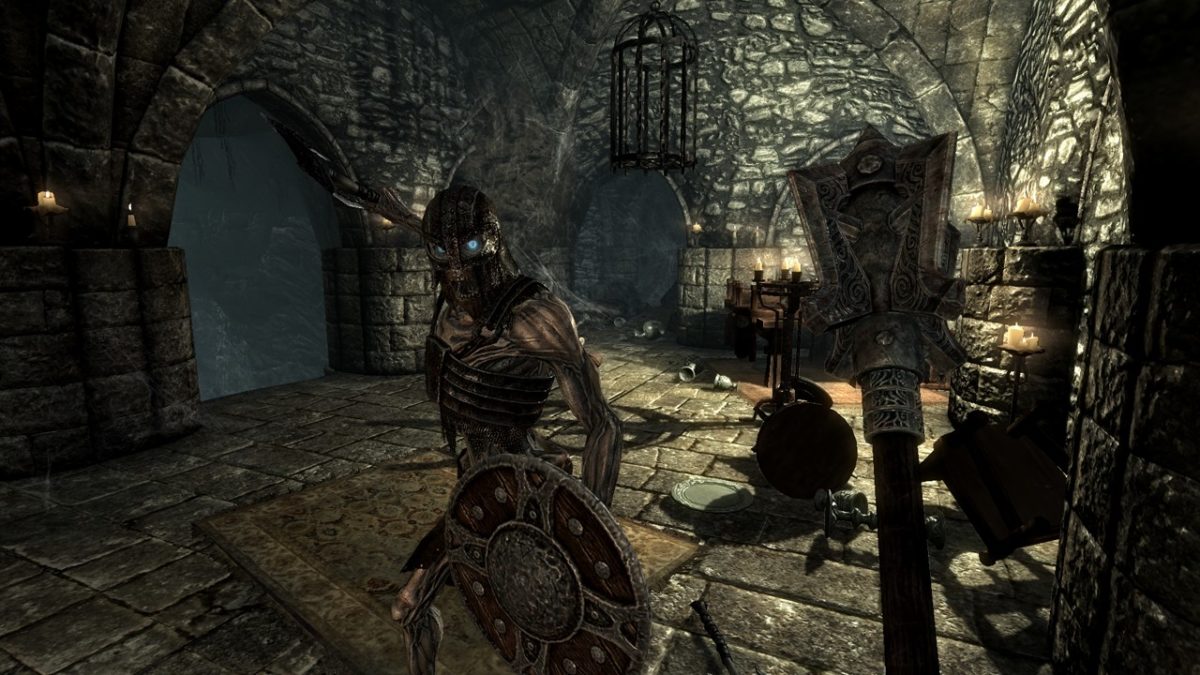
Skyrim – and Tamriel in general – boasts such a versatility of landscapes and vistas that it would be almost criminal for the quests to play out as they so often did in Skyrim: Heading into a cave, crypt, or Dwemer ruin, navigating through brick or earthen tunnels, fighting some enemies, grabbing the loot or shout, and heading out the back door.

Skyrim had over 130 dungeons, and while the number is staggering and offers a huge amount of exploration, replayability, and adventure, the number of dungeons that wound up looking the same was disappointing, to say the least.

Elder Scrolls

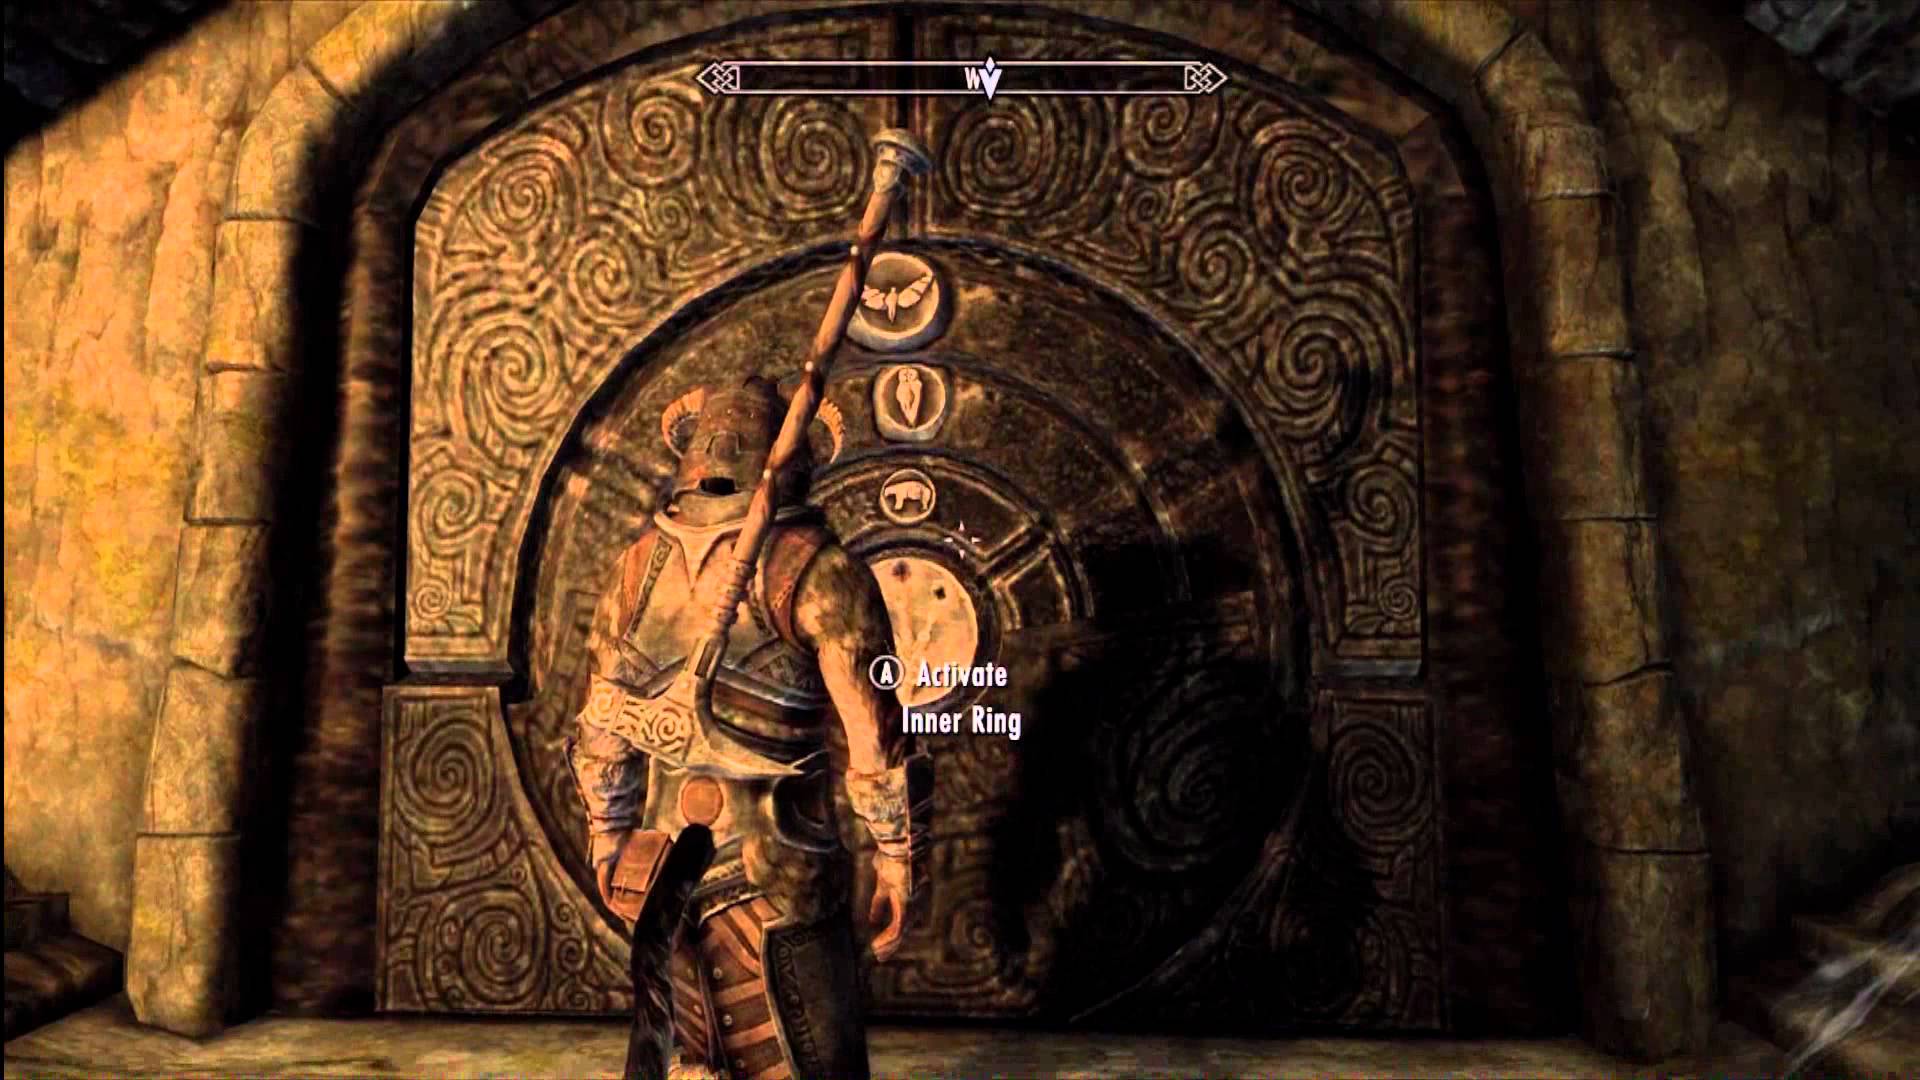
Skyrim was Tamriel’s northern region, littered with icy caves, snow-capped mountains, and rolling tundras. And yet so many quests were solving nordic puzzles with claws and movable rocks with snakes, foxes, and whales on them. Even if the landscape of the game is defined by one climate or topography, that doesn’t mean it can’t have some variety in its quest locations. What about a mission in the treetops, or during an avalanche, in a murky swamp, or underwater? It would breathe some life into the world and keep us excited to see where we the next quest takes us. We want more missions that look like this:

2. Better combat

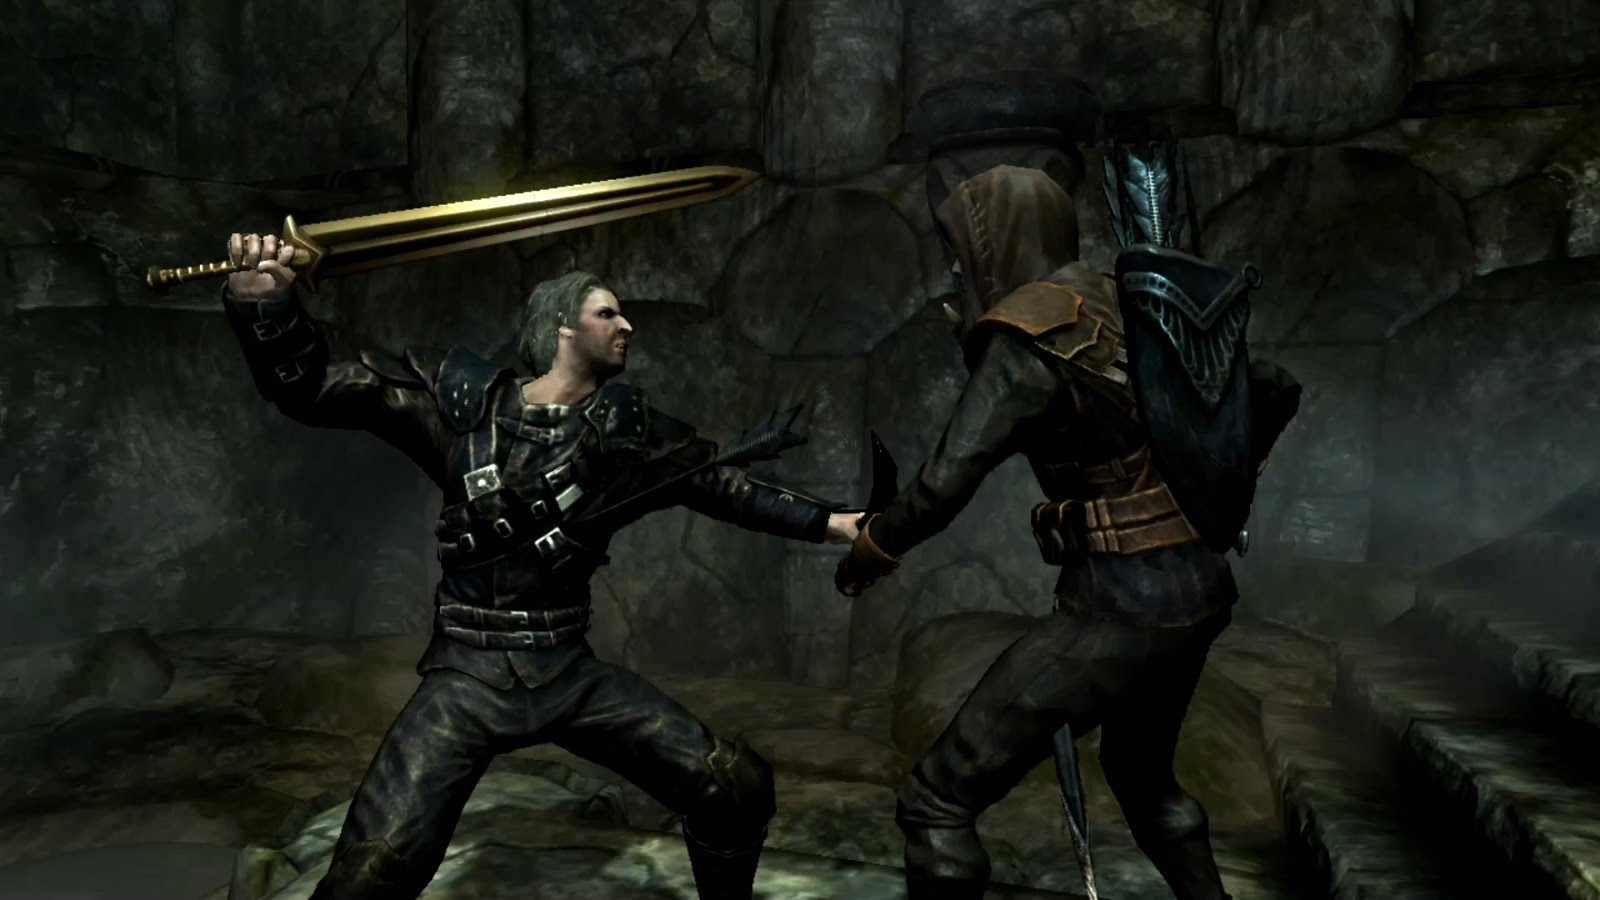
If free-roam exploration is the heart of Elder Scrolls, then combat is the blood and bone. Tamriel is a harsh place with bandit marauders, dwemer automatons, warring factions, vampires, werewolves, and skulking falmer. Go out in the wilds or into a cave and you won’t go 30 seconds without getting into some kind of tussle. And, uh … they don’t always look great.

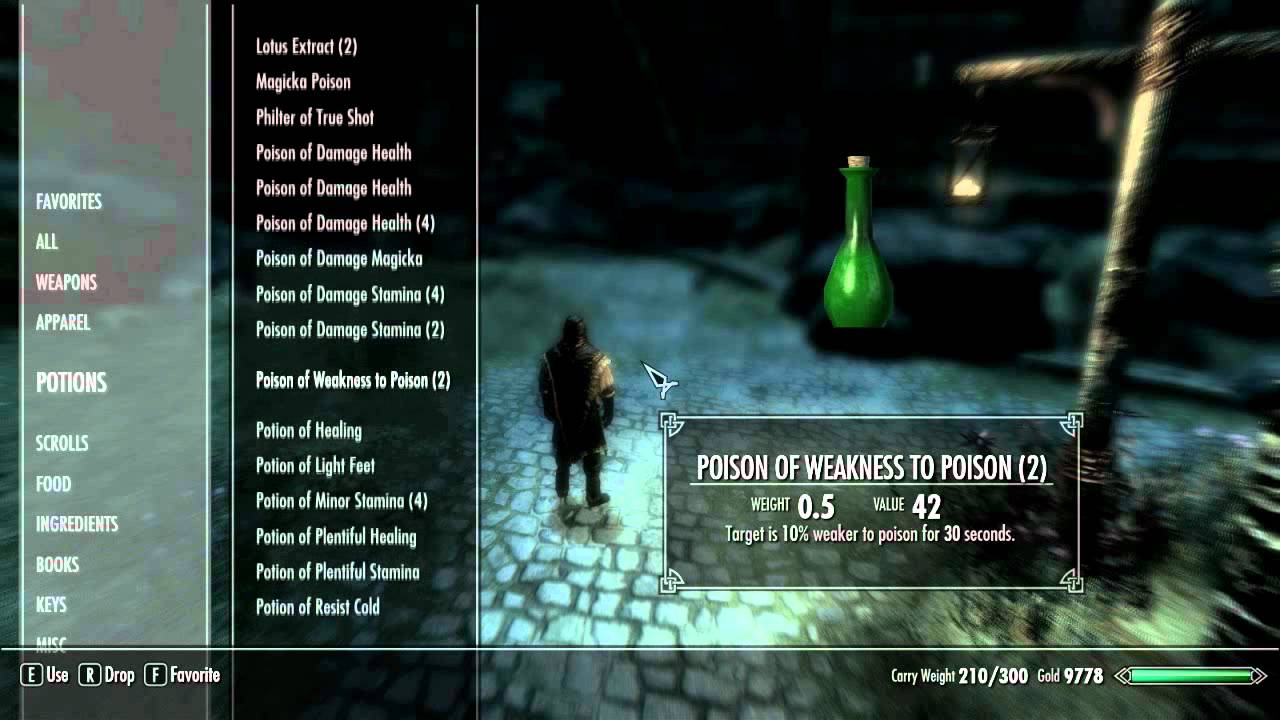
Skyrim’s combat isn’t clunky, but it isn’t exactly fluid. Not when compared to more recent games like Witcher 3 or Kingdom Come: Deliverance. On a controller, you’ve got right-trigger to swing, left to block, and then a bumper to run and a bumper to shout. The rest of your controls are basic mobility like jumping, crouching, or activating objects. If you want to change weapons or drink a potion to heal, you’ve got to open up your favorites menu, scroll down to the object you’re looking for, and activate it.

Elder Scrolls

Early on in the game when you’ve only got a few things in your inventory that you’d need in a combat scenario, this is fine. But if you’re playing as a late-game spellcaster you’ll more than likely end up with a favorites menu that scrolls on for a long time. Pausing in the heat of combat to switch spells, equip different armor, or drink a potion is not only unrealistic, but also breaks the game’s otherwise awesome immersion. Implementing a favorites wheel, hotkey allocation, or a press-and-hold vs. quick-press might help to speed things up.
1. Deeper approach to skill trees

The most integral part of a free-roam RPG is what your playable character is able to do, and how he (or she) is able to interact with the world they’re thrown into. That arsenal of possibilities is what helps to make the game so replayable and so exciting to explore and collect more loot, spells, and skill points in. In short, it’s the inherent variety that breeds personality in different play styles.

Elder Scrolls

The skill trees in Skyrim were what you’d need and what you’d expect – damage increases for martial skills, defense bonuses for armor or blocking, and increased efficiency with smithing, alchemy, or enchanting. There were some nice touches like silent casting under Illusion, Wax Key under Lockpicking, or decapitations under the One-handed and Two-handed. There were a great many skills in Skyrim that were not as exciting, though, or that weren’t worth getting at all. The Speechcraft, Alchemy, and Restoration trees come especially to mind.

Elder Scrolls

Aside from damage boosts, the martial perks in Skyrim weren’t overwhelmingly tempting. Of course, boosting damage is important, and so is increasing armor rating, but that’s not to say we couldn’t have also included more creative ideas. Increasing momentum while fighting, rewarding more accurate shield bashes, feints, clashes, shunts, and parries – imagine facing an opponent that could do all of these. Now imagine you’re the one tearing through a bandit camp with a plethora of new unlockable abilities and animations. Way cooler, right?

Elder Scrolls

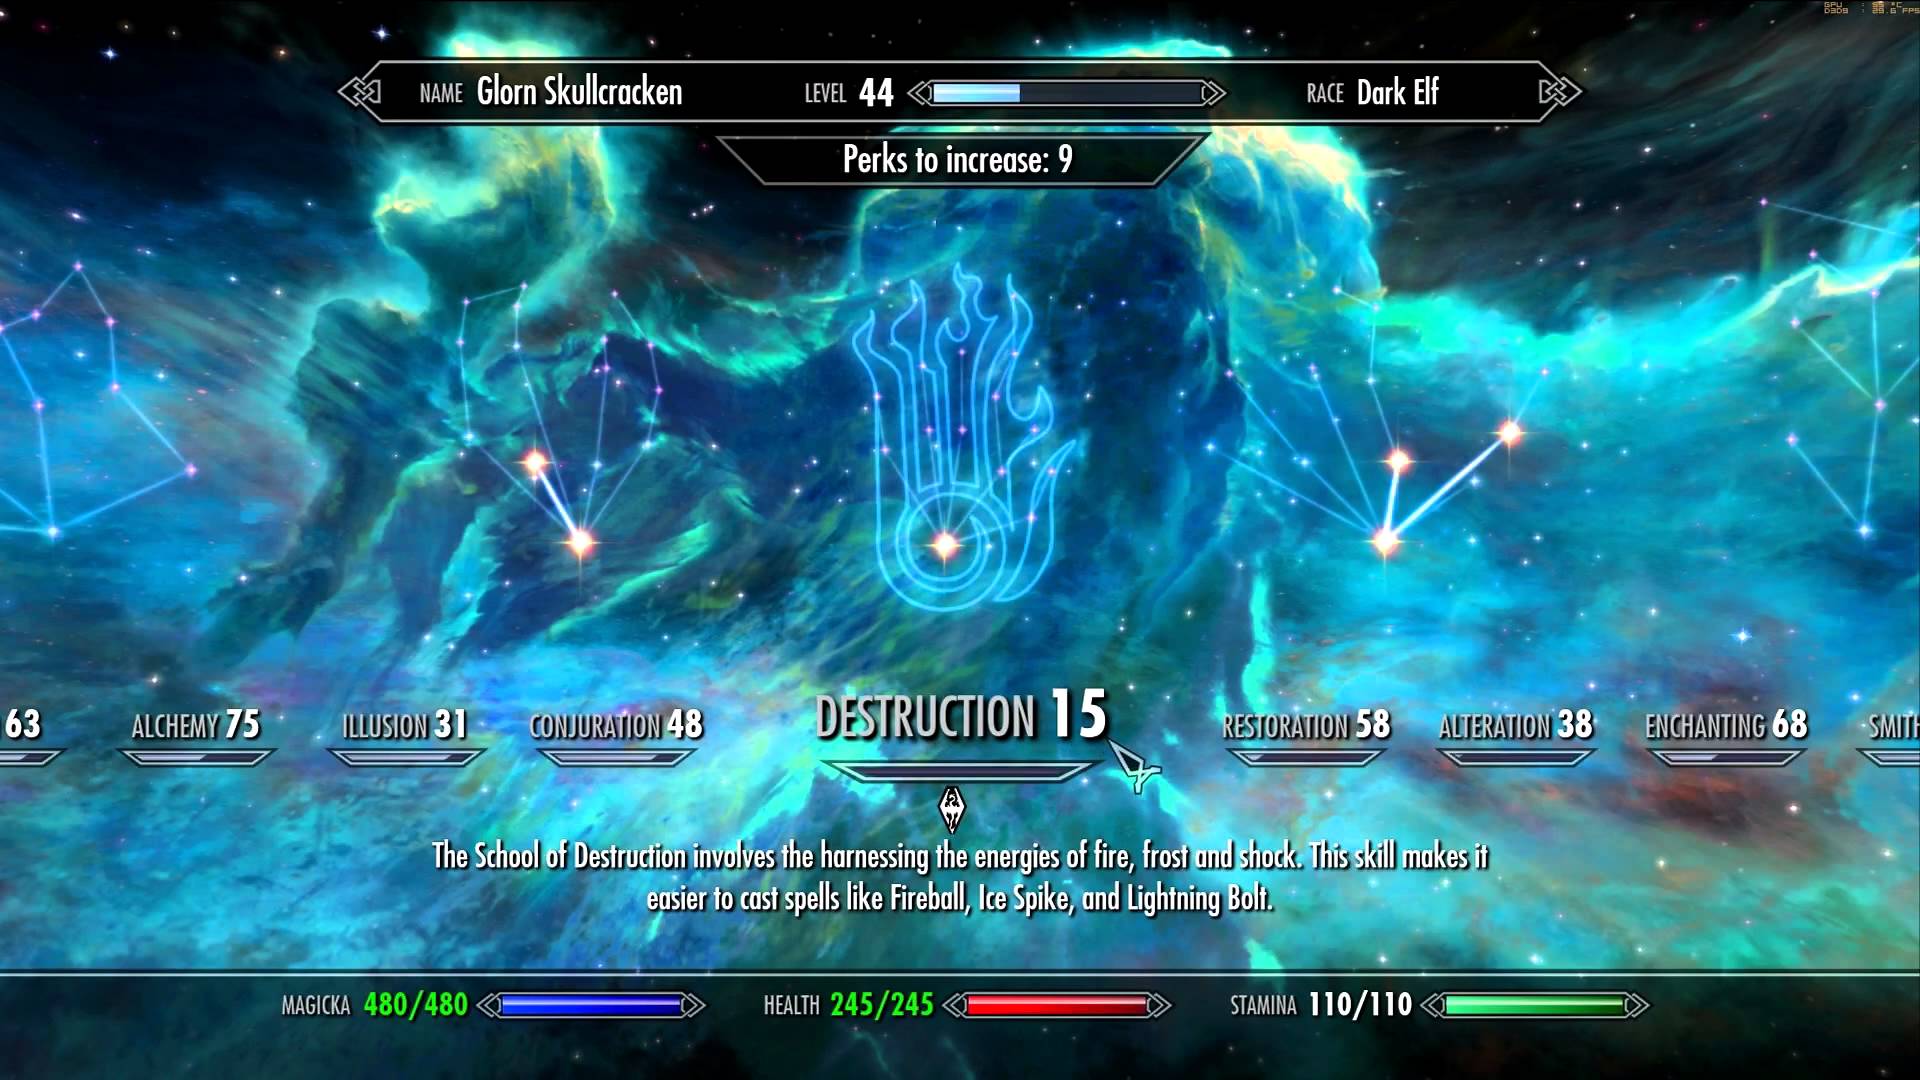
The spells in Skyrim take a definite back seat to swashbuckling and sword-wielding. Look at the Destruction perk tree, for example, and you’ll see damage boosts for fire, frost, and shock. There are still more damage boosts if you allocate points into dual-cast, and then there’s a branch that reduces the cost of more advanced spells. That’s it. Illusion magic is much the same with fear, calm, and frenzy, and conjuration is the same with bound, summons, and raising the dead.

Elder Scrolls

We’re not saying that running a mage in Skyrim isn’t viable – we’re saying that it’s going to end up looking pretty much the same every playthrough. Improving your ability with magic should be about so much more than just damage boosts and cost reductions. For ideas, Bethesda needs only look at the most popular mods out there for magic, and decide which ones to incorporate. Personally? We’d like our wizard to have a Familiar.

Elder Scrolls

If mages got second pick, thieves had it even worse in Skyrim. That’s not to say that the thief perk trees weren’t useful – they were – but most of these skills defaulted to just faster dungeon crawling, sneaking around monsters, or more successful pickpocket attempts. The thief trees could have been the most versatile of the lot, from cunning speechcraft to nimble sneaking to clever alchemy.

Elder Scrolls

Imagine a thief build where you brew a morphing potion, drink it, and then infiltrate the ranks of the Forsworn to try and talk their Briarheart leader into freeing the prisoners. Or a build where you’re a nimble cat burglar, dodging in and out of combat with city guards while throwing poisoned daggers, tightrope-walking and using a hook-shot to climb walls.

The possibilities here are really as limitless as Bethesda can think and program, and by now that’s an impressive degree. One thing’s for certain though: The more flexibility we have with our character builds, the more builds we can get. The more builds we can get, the more playthroughs we’ll do. The more playthroughs we do, the more hours we’ll want to invest in the next installment of one of our favorite series of all time: The Elder Scrolls.

Play Limbo and 60+ other games for FREE with Humble Monthly

PC gamers could have access to an incredible range of titles with Humble Monthly. Here’s why we think it’s worth the money.

For the uninitiated, Humble Bundle is an awesome distributing platform for video games (like GOG or Steam), but that also puts out products like eBooks, software, and various digital content. Making a Humble Bundle account is free, and users get to enjoy new bundles every so often – packs of as many as 10 games included in one semi-adjustable purchase.

Humble Monthly is the site’s paid subscription service, and in addition to providing players with monthly bundles of games and discount prices everywhere else, it also provides access to the Humble Trove.

For more information about Humble Bundle in general, check out our article here.

X-WingAlliancePic

Humble Trove might just be the best reason to get a Humble Monthly subscription – even if you cancel it right after. The Humble Trove is a subscriber-exclusive access area that’s got dozens of games, some of which are still pretty hot-ticket. All the games are DRM-free, and many of them are actually Humble Originals.

hitchhiker

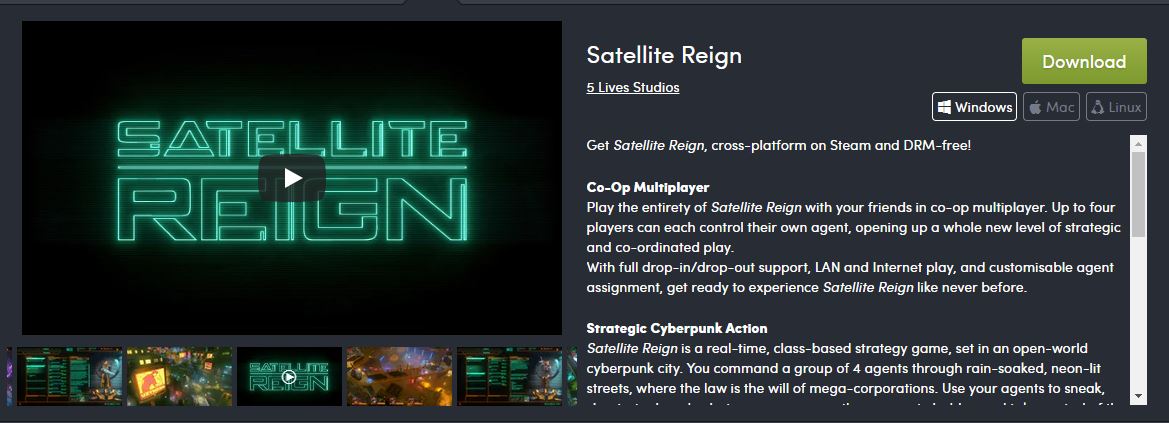
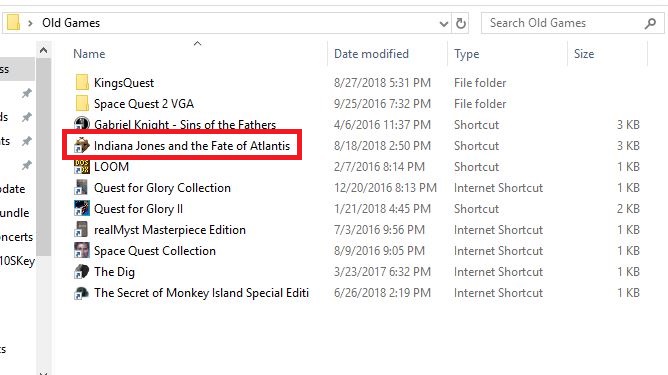
There are too many games in the Humble Trove for us to mention them all, but to name a few you can grab Amnesia, Limbo, X-Wing vs Tie Fighter, Bard’s Tale, Torchlight, Torchlight II, 140, The Sexy Brutale, and Indiana Jones and the Fate of Atlantis. And there’s a ton more.

HumbleMonthlyPrices

Once you make a Humble Monthly account ($12 for one month, $35 for three months, $67 for six months, or $132 for a full year), you’ll immediately have access to every game in the Humble Trove. It’s as easy as clicking on one you want and pressing the download button. Done.

Satellite Reign Download

The game will appear in your downloads folder by default (you can change it to wherever you’d prefer) and all you need to do is extract the files and you’re ready to play. We recommend using WinRAR and putting into its own separate folder somewhere easy to find.

IndyAtlantisPic

Once you’ve downloaded the game you want, you’ll have it forever, even if you cancel your subscription. If you cancel your Humble Monthly subscription, though, you’ll no longer be able to access the Trove to get new games, so if you do plan on canceling be sure to get all the games you want first. You can find the status of your account on Humble Bundle’s Account Settings page.

For more information about how to manage your Humble Monthly account, check out this FAQ page. In the meantime, get access to the Humble Trove today right here! Enjoy your new games!

Windows Defender: Can it protect your PC?

As malware evolves to be more malicious by the day, so too must the anti-malware tools we use to fight back and keep our data safe. Software like Bitdefender, Kaspersky, or Norton can keep your computer secure and virus-free. Some, such as Bitdefender or Avast, are available in both free and premium versions, with the latter provided wider coverage, less taxing processing power from your PC and more customization options. If you’re interested in checking out our top five recommended anti-malware tools, check out our article!

Haven’t upgraded to Windows 10? You can get it right here:

Windows 10 Download NOW ►
7

Windows Defender is one such anti-malware program, and it comes for free with the installation of Windows 7, 8, or 10. Since it’s free, users are often dubious as to how effective Defender actually is. This skepticism is justified, as reviews of Defender are mixed at best.

Most of the criticism directed towards Defender stems from its inability to detect and stop malware. Many threats seem to simply pass through its net. While this may have been largely true even last year, Microsoft has made significant improvements to Defender over the years to keep up with increasingly potent malware. The result has been a more scrutinizing product that may actually be worth your attention.

Windows Defender Free Download ►
7

Is it better in 2018?

Windows Defender continues to evolve, growing stronger with every revamp and update. What was a criticism last year may be a moot point in 2018. Check out this video to see the results:

How does Windows Defender detect and stop threats?

It’s important to understand what Defender does in order to compare it to other products on the market. Windows Defender uses basic signature-matching scanning to compare unknown files with its database of known threats. Essentially, it’s checking the file in question against a catalog of viruses. Defender also uses heuristic analysis, which monitors software behavior to catch malware or malware that rapidly changes its code to dodge detection.

It lacks the bells and whistles of Avast, Bitdefender, or Norton, but it is a semi-effective line of defense nonetheless.

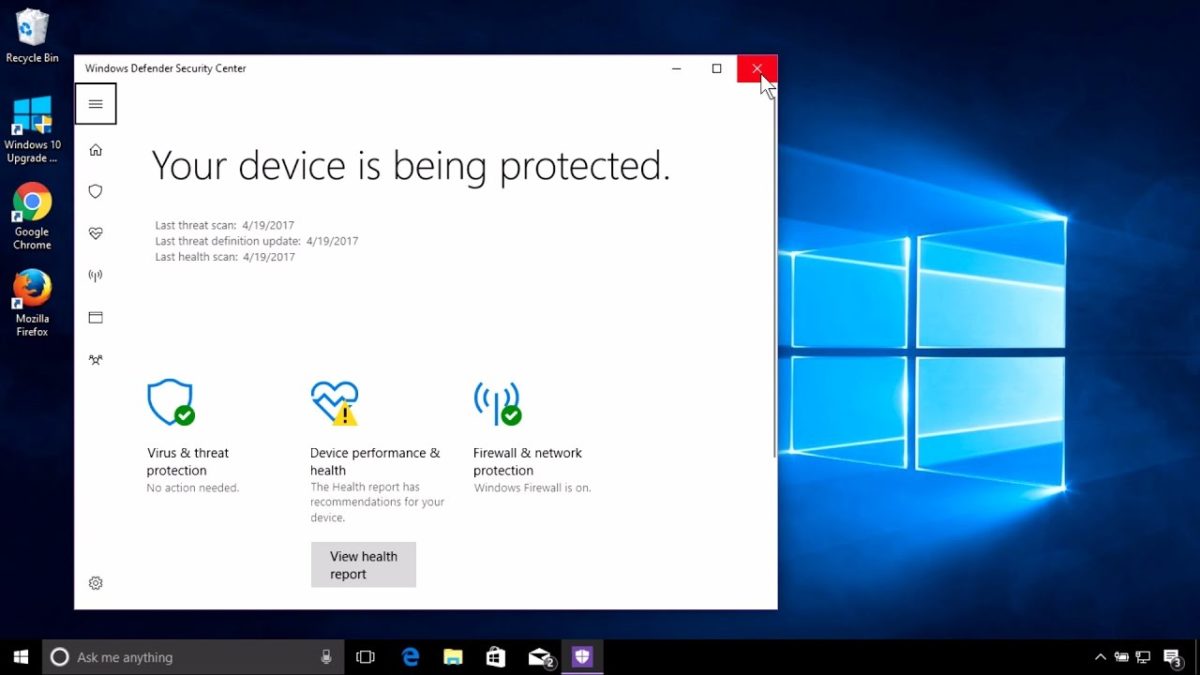
Windows Defender Security Center

“Windows 10 respects your freedom to choose AV products of your choice,” says Rob Lefferts, Partner Director of Windows & Devices Group. In this article, Lefferts accepts that people will frequently opt to forego Defender in order to use other software, and, in fact, encourages users to seek the “protection software and services that they like best.”

As of January 2017, the Windows Defender Security Center was introduced, bringing in new security features and controls. This included firewall and network protection, device performance and health, app and browser control, family options, and of course protection against viruses and threats.

The final consensus

Defender is steadily growing into a more reliable means for data protection, but it’s not there yet. Defender still has a long way to go before it can go toe-to-toe with powerful names like Bitdefender, Norton, or Kaspersky.

That said, considering that Defender is a relatively lightweight program that you get by default with Windows 10, you’re actually getting a pretty decent product. We recommend pairing it with something else for double the safety, such as Bitdefender. Set Windows Defender to run a scheduled quick scan every now and again, then do a full test with Bitdefender when you’ve got the time and processing power to spare.

How to order food with Facebook

Did you know you can order food through Facebook? Here’s how it works.

Hungry? Scrolling through your Facebook feed and someone just posted a food vid, so suddenly you’re trying to figure out what you want for dinner tonight? You might not know it, but Facebook can actually help you decide!

Facebook Download Free
8

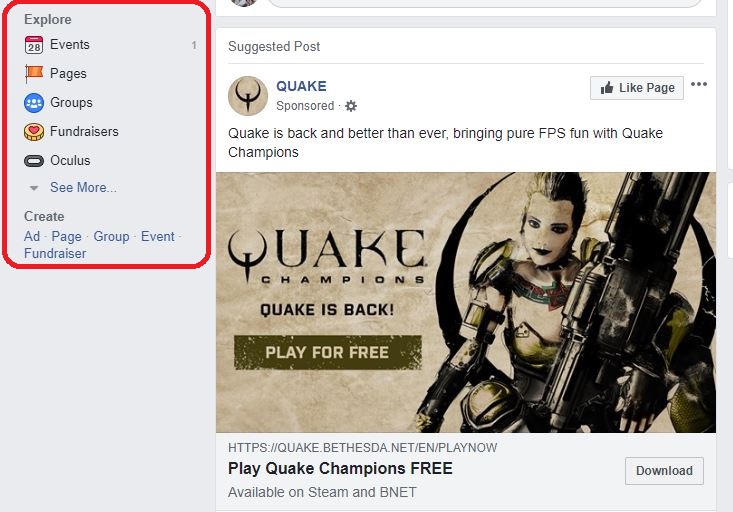
The reason most people don’t know about this little gem is that it’s usually tucked away under a bunch of other toolbar options. On your main feed, look over on the left. You should see a list of shortcuts and below that a cluster of features listed under explore. It’s where you’ll find options like events, groups, or fundraisers and will look something like this:

Facebook food

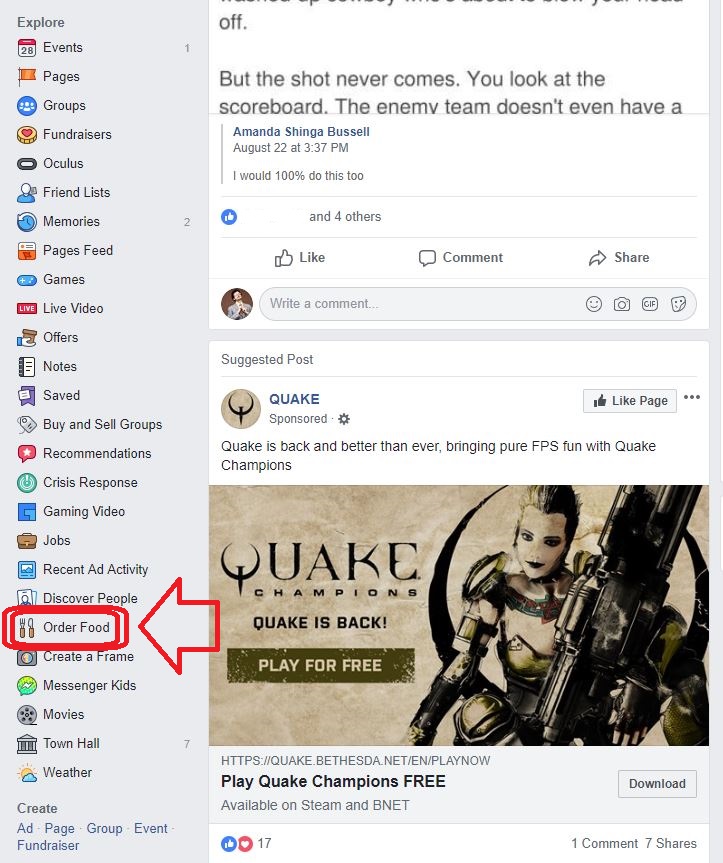
Click on that See More and suddenly you’ll see a ton more options that most people aren’t even aware of.

Facebook food ordering

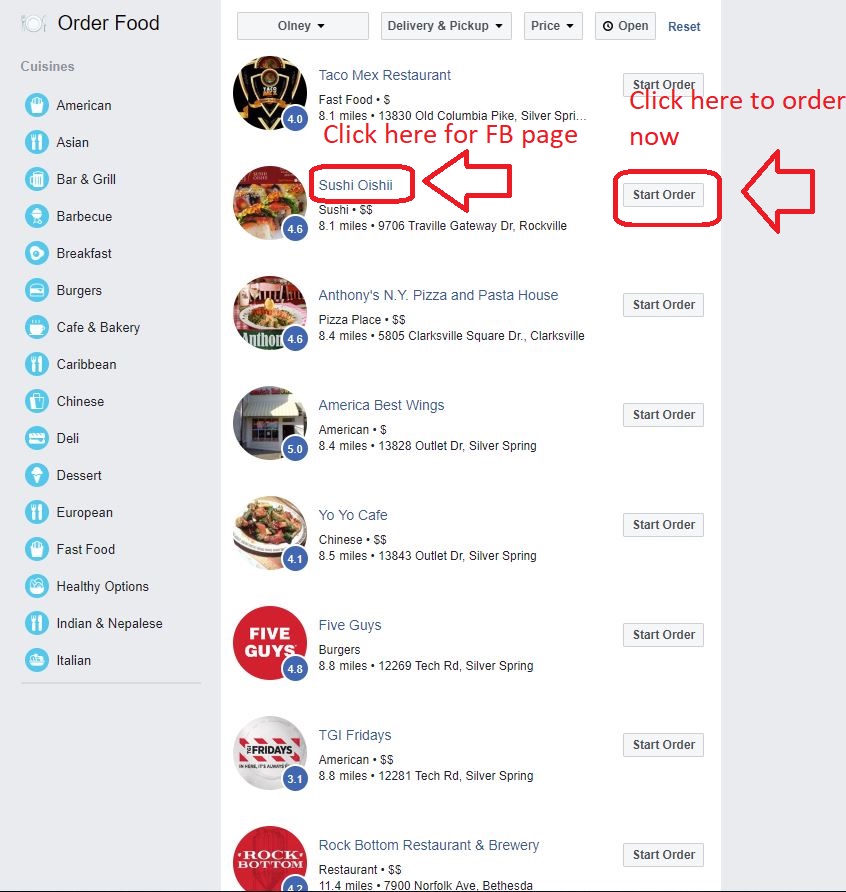
Among these hidden options is a cute little Order Food option. Click it and it will take you to this screen:

Facebook food options

The list goes on for a while, so keep on scrolling until you find something that jumps out at you. Alternatively, you can filter specific types of cuisine by clicking the options on the left. Facebook does a pretty thorough job of listing any place that’s available via online order. It even says how far it is from your current location if you’ve told Facebook where you are.

Clicking on the thumbnail or the restaurant link will also take you the restaurant’s Facebook page, which is useful if you want more about them, like phone numbers, reviews, or community info.

If you’re hungry now, go ahead and click on the Order Now instead. This will take you directly through a food ordering proxy like GrubHub or ChowNow. For restaurants connected to multiple online food ordering and delivery services, a window will come up that asks which you’d prefer to use. Pick, and then it’s just a matter of placing your order.

For more great tricks and tips on Facebook’s more hidden features, check out the above video. In the meantime, enjoy your meal!

What’s new: Fall update for EA Star Wars: Battlefront II

EA and DICE have finally released the first of Star Wars Battlefront II’s fall content, along with a (mostly) complete roadmap detailing what we can expect from now through the winter season. The updates are a wide mix of cosmetics, new content, updates to game economy, as well as some slight changes to gameplay and modes.

Fall update for EA Star Wars: Battlefront II

New skins

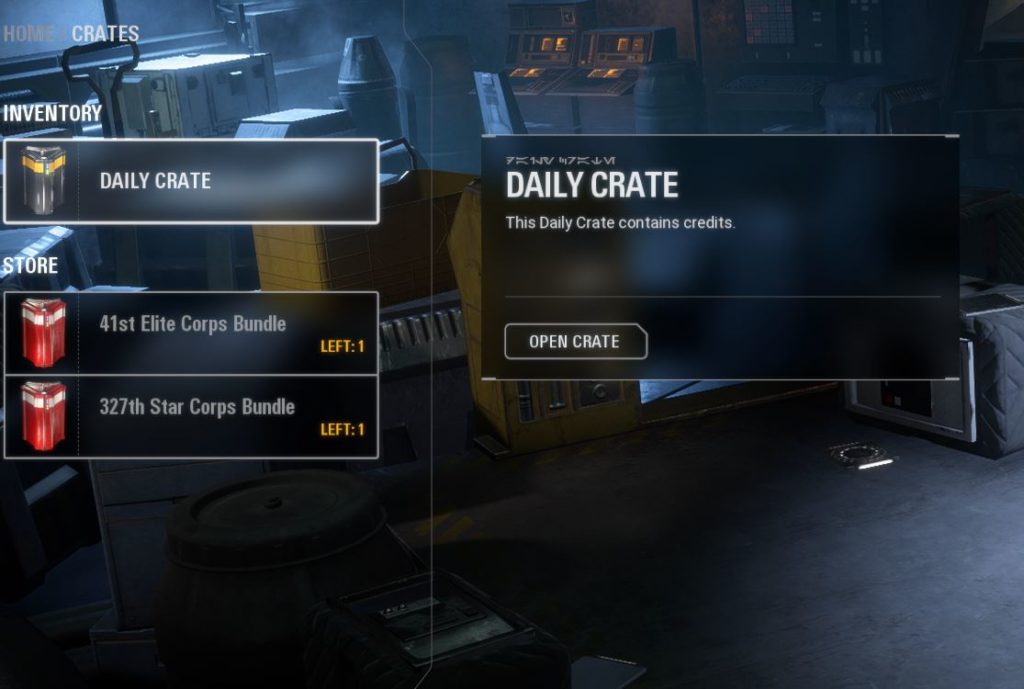
Star Wars Daily Crate

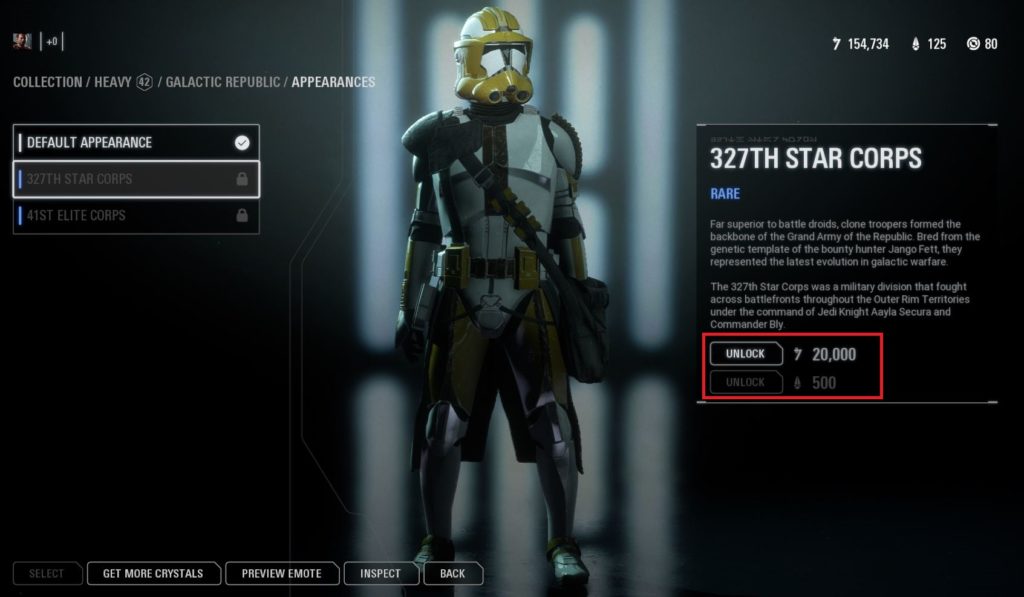
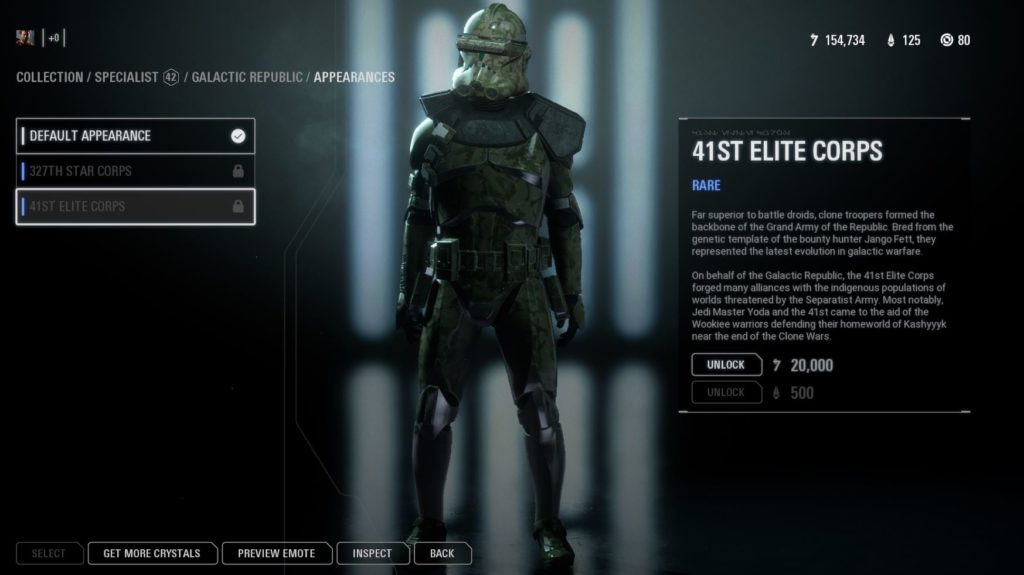
The big news for this week is the addition of new appearances for the Galactic Republic faction. This includes both 327th Star Corps skins and the 41st Elite Corps.

327th Star Corps skin

These skins are for clones only, and will only be applicable to the Heavy, Assault, and Specialist classes (the Officer will remain the same). To equip them, your best bet is to go to your crates and buy them both – it’ll cost a pretty hefty 40,000 credits for each crate, but considering that each skin separately costs 20,000 (500 crystals) you’re essentially buying two and getting the third for free if you get the crates.

41st Elite Corps skin

Buy emotes and victory poses

After EA removed all loot crates from Battlefront II, a big question has been how players can unlock new emotes and victory poses for their troopers and heroes. Today that question was answered: You can now purchase them with in-game credits and crystals.

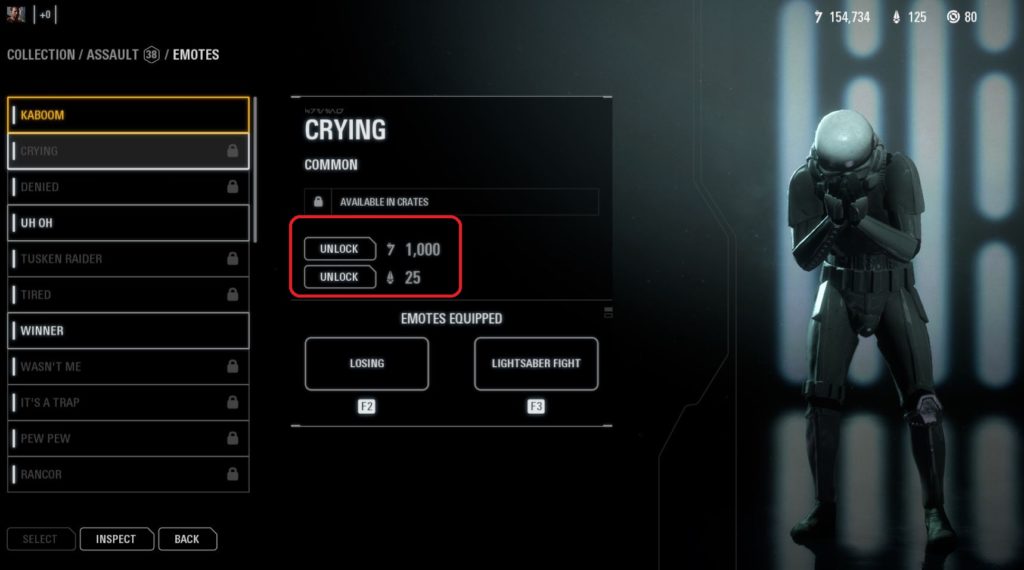
Crying emote

Any emotes for troopers will cost 1,000 credits or 25 crystals, and the same goes for victory poses. Our recommendation is to spend credits, as 1,000 credits is not hard to come by in Battlefront II, particularly if you complete the typically manageable daily challenges.

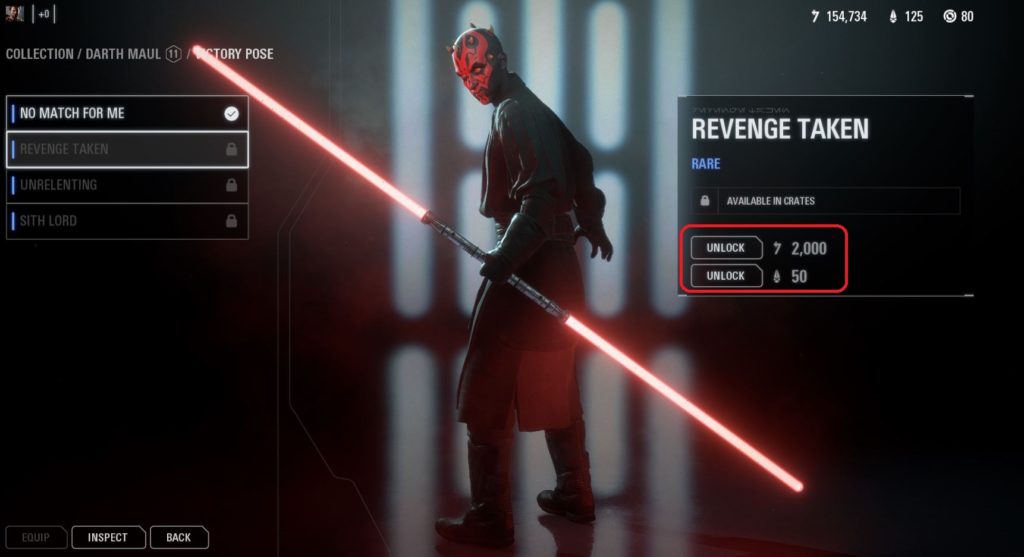
Darth Maul

Victory poses and emotes will cost double for Battlefront II’s array of famous heroes and villains, totaling 2,000 credits or 50 crystals. Is it worth it to hear Vader say he finds your lack of faith disturbing?

… Yes.

New modes

Ewoks

Not a whole lot has been added in the way of new game modes, but you can expect a ton more in the coming months. See below for more detail. However, the fan-favorite Ewok Hunt has been made a permanent addition to the roster of game modes, and can be found under the Operations tab. Unfamiliar with this terrifying mode? Check our run-down here.

Star Wars Battlefront

If you’re a fan of Heroes vs Villains mode you’re likely already familiar with this map. It’s not new to the game, but it’s now making its debut in both Blast and Custom Arcade, so if you frequent either of those, prepare to see this awesome location in the new lineup.

Star Wars battle

Changes to gameplay

Star Wars Battlefront II

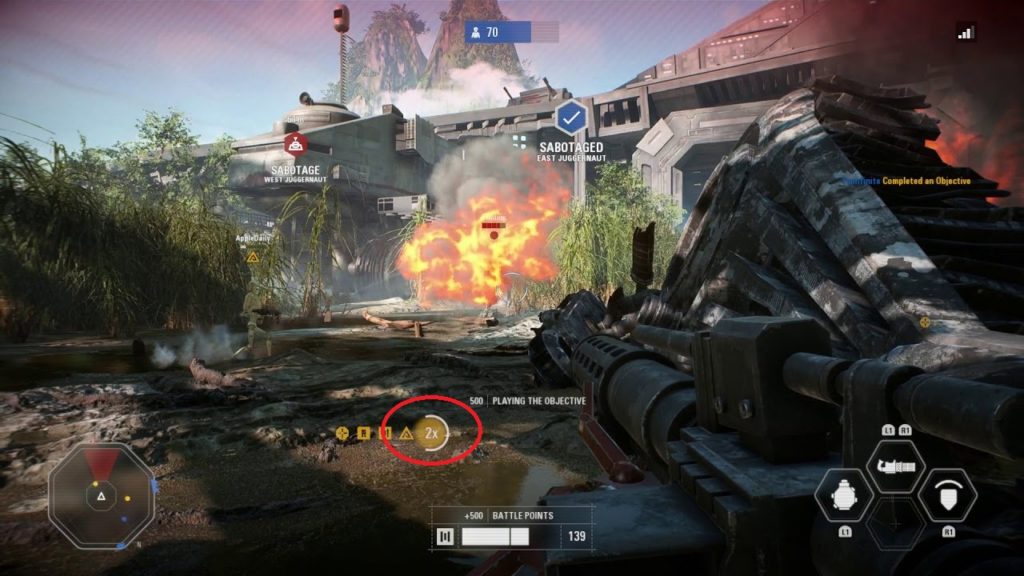
If you’ve been playing Battlefront II’s multiplayer lately, you probably noticed a couple bugs with the game’s scoring mechanic. Most obvious of these was the broken post-match stats screen, which at times would not display at all. You also may have noticed that the 2x multiplier that hovers near your reticle no longer lights up to indicate that you’ve acquired the boost.

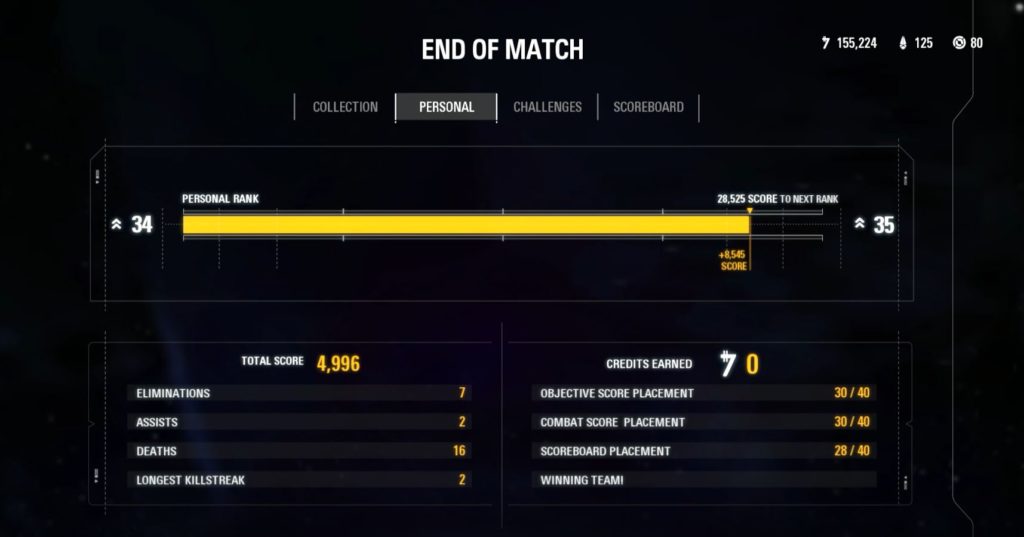
Star Wars Battlefront II End of Match

Fear not. The reason it was bugging out was because EA was working on adding some new info to your post-game stats page. Now when you play, it’ll look something like the above picture. As for the 2x, EA has removed that feature to be later reinstated and modified in the up and coming squad system (again, more on that in just a sec).

Battlepoint cost changes

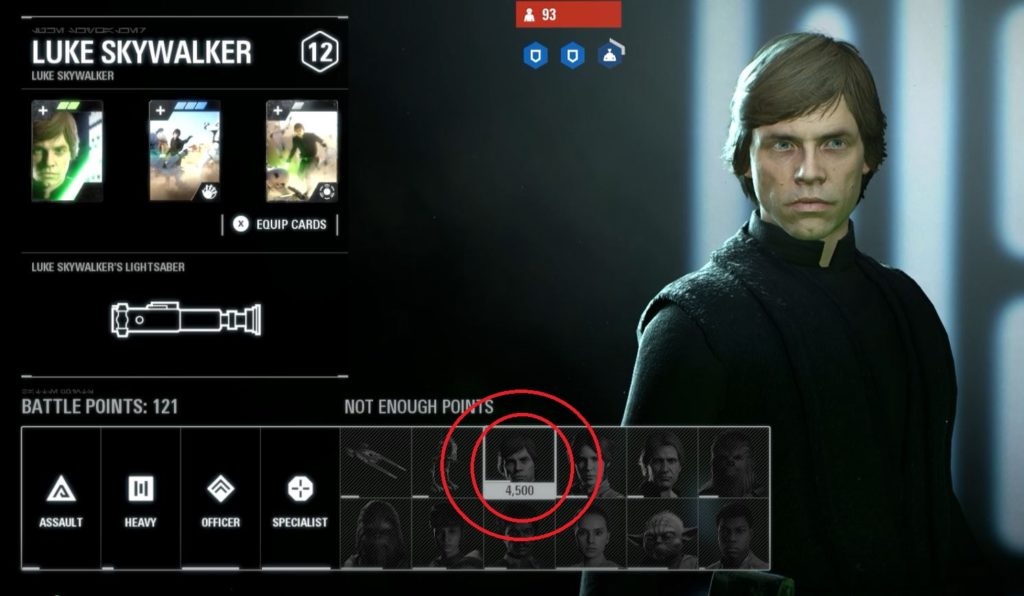
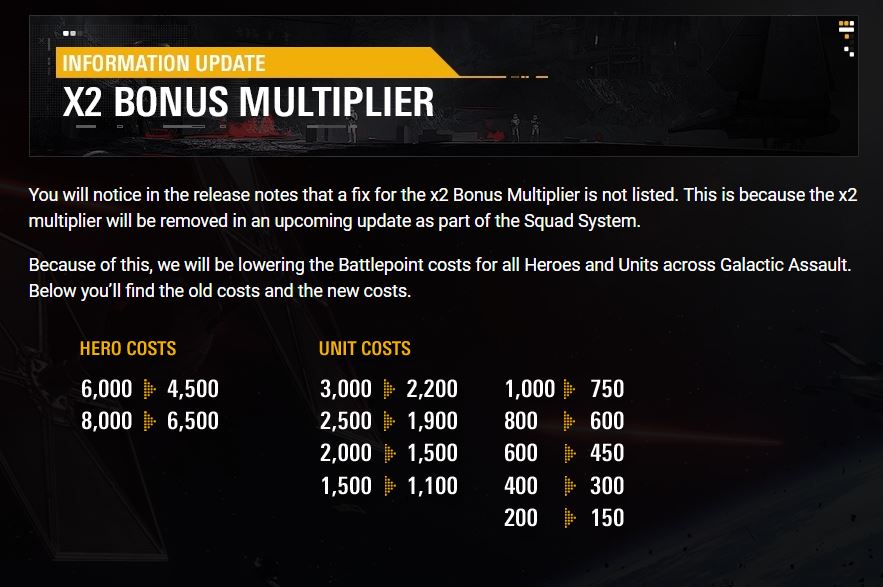
Again because of the squad system, Battlepoints have undergone a pretty big update. The bottom line is that everything’s about to cost a whole lot less. Heroes that used to cost 6,000 will now cost only 4,500 which is a pretty huge change. Enforcers are now 2,200 Battlepoints instead of the previous 3,000, and small vehicles that were once 200 are now only 150.

Battlepoints

While this means you won’t have to work quite so hard to play as your favorite heroes, keep in mind that other players will now have earlier access to them (and powerful vehicles) far earlier. In short, expect things to get way more chaotic way faster, and try to earn your points early!

Bonus Multiplier

What’s coming next

Everything we just covered is the tip of the iceberg; EA released their new roadmap today which highlights a bunch of new additions to the game that we can be expecting in the coming months. Here’s what we know so far:

Squad System

The new Squad System is EA’s way to help give more focus to playing team-based scenarios, the way the game was originally designed to play. “Aimed to encourage team play, the Squad System is an improved and streamlined way for players to stick together in Star Wars Battlefront II,” they explain.

Star Wars Battlefront II

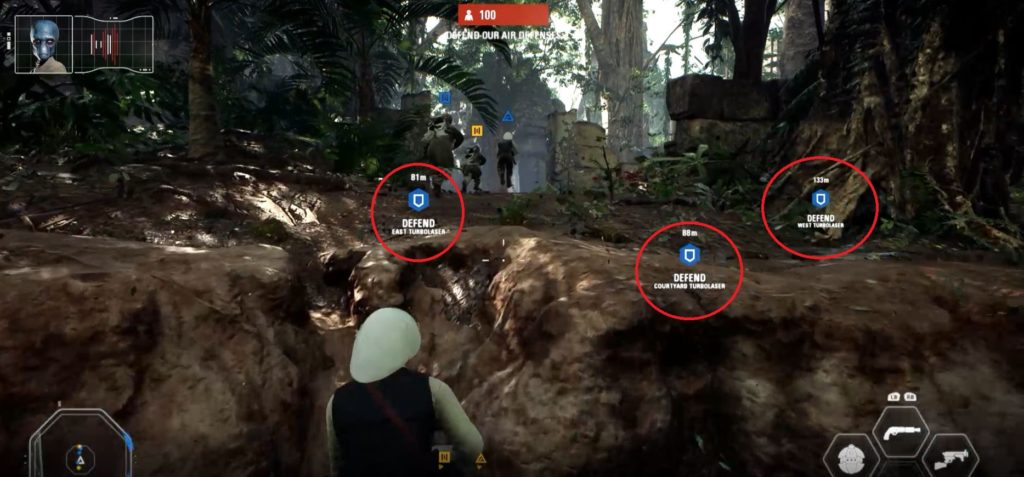
As for specifics, all we know so far is that this means players will now be able to spawn on squad members in modes like Blast, Galactic Assault, and Strike. How the new system will affect point scoring or balancing during capture and hold scenarios, we’ll have to wait for more information.

More heroes are coming

As EA announced this past spring, we will soon be getting four new heroes – General Grievous, Obi-Wan Kenobi, Anakin Skywalker, and Count Dooku – as well as a new Geonosis map, which they claim to be their largest map yet. What we didn’t know until today was exactly WHEN we’d be getting these new heroes, and how many in-game credits they would cost.

Obi-Wan and Anakin

Grievous will be landing in-game first, and should be showing up in October. Obi-Wan will be arriving the following month, and the Geonosis map will be coming along with him. As for precise dates for Anakin and Dooku, we don’t have those just yet, but EA says to expect them this coming winter. Once they’re added you can also expect some new skins for both Obi-Wan and Grievous.

The heroes will cost 35,000 credits each, which should be approachable given the space we have to wait between receiving them. “We came to this price by using our in-game telemetry data to determine the speed in which players are earning credits, as well as the average amount of credits that each player has saved up,” EA explains. “What this tells us is that for newcomers, or players with a credit balance of 0, it shouldn’t take too long to earn the credits needed and for veteran players, you most likely have enough credits already or are very close to reaching that amount.”

Large-Scale mode

Geonosis battle

EA also just teased the eventual arrival of a new game mode that they’ve simply referred to as Large-Scale. Likely taking place on the upcoming Geonosis, this mode will be a massive-scale “non-linear Star Wars sandbox experience” in which two teams will be duking it out over capture points and attempting to bring capital ships down from the sky.

Star Wars Battlefront II

This might end up looking something like the non-linear pushes in the Galactic Assault modes, where teams have to wrest control over specific locations in order to progress forward. It’d be pretty cool if there was some back-and-forth between the two factions, like an AT-TE that the clones could capture, but that the droid army could sabotage. It could make for some very organic, albeit long, matches.

EA have also said they have addressed and are continuing to address multiple issues with the game’s balance to be patched in later updates, and that we can expect more skins as we reach more landmarks – including favorites such as the 501st legion once Anakin arrives.

Until then, we’ll keep you posted on any news, or you can check EA’s Battlefront II site right here.

Twitter is about to look more like Facebook

Twitter co-founder Jack Dorsey tweeted that he is toying with two new features to add to Twitter – presence and threading. Here’s what that could mean.

Twitter has wisely been observing some of the key evolving features of today’s online networking and conversation. Namely, that means following the lead set by social networking titan, Facebook. On August 31, Twitter co-founder Jack Dorsey tweeted that he is toying with two new features to add to Twitter – presence and threading.

Presence And Threading

Presence

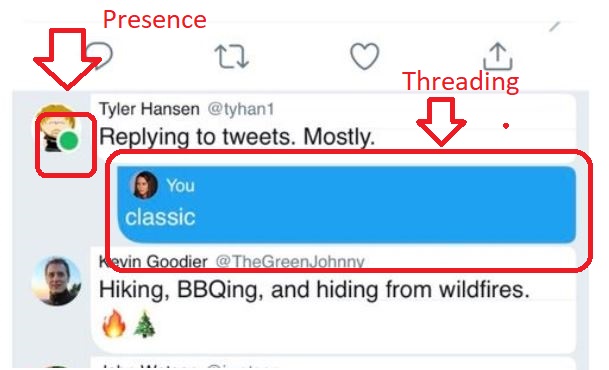
Twitter’s presence feature would see the introduction of the telltale green indicator below someone’s profile picture, signaling whether they are currently online. This feature can be seen on Facebook (both on computer and mobile devices) and Instagram.

Facebook People Are Online

The implication here is to encourage live back-and-forth, something that Twitter is often accused of minimizing or restricting. The hope is to have dialogue “feel more conversational here,” explains Director of Product Management, Sara Haider. It would also help to provoke response to tweets made longer ago; you may find someone responded to your tweet, but did so many hours ago.

MaybeYouWantTheIndicator

Ordinarily, responding might seem awkward given how much time has passed, but if you saw the person was online, it might change your mind. Haider also suggested that this feature would help to distinguish whether a person was simply going logging on to throw a quick tweet or scrolling out of boredom, looking for someone to talk to.

The danger of this feature was shrewdly pointed out the next day – an online indicator could easily open doors to unwanted conversation. While this complaint may simply seem antisocial to some, it could mean entirely different levels of discomfort for victims of verbal abuse and harassment.

The initial response to the presence concept was mixed-to-negative, with many of the mixed crowd saying they would be alright with it if the feature could be toggled on and off by the user. This seems a good idea that would help to further Haider’s hypothetical scenario of being on a train: It would mean that you can have your presence indicator set to “off” by default, but then switch it on if you’re actively looking to converse, or are actively waiting for a response from somebody.

Threading

Threading is the more straightforward, less divisive concept that Dorsey proposed. This would simply afford a more streamlined, readable visual for any conversations held on Twitter. Much like Facebook, it would color, indent, and nest responses, making for a cleaner, neater thread. Twitter  threads might soon end up looking more like this:

TheNewTwitterLook?

While this idea wasn’t met with abundant enthusiasm, it did not receive any of the backlash that the presence concept did. As such, you might expect to see the feature implemented some time soon. We’ve yet to get a date on when either feature will be added, but stay tuned because change is coming!

How to see your favorite musician live with Spotify

Spotify is one of the leading names in distributing and cataloging music, and you’d be hard-pressed to find a more versatile platform for making playlists of your favorite tunes. Spotify’s also got it when it comes to discovering new sounds and artists. With Premium you can take Spotify with you on the go, putting its massive library of music in your pocket or on the road.

With high quality mixes and remasters readily at your disposal, the only way to get a more lifelike sound would be to see the same artists performing live. Though most users may not know it, Spotify can help you do that, too.

Spotify Free Download
7

Though Spotify is best known for its huge catalog of streamable, downloadable music and podcasts, it has a number of features at your fingertips that you might not even know about, such as these. One such feature shows when and where your favorite artists will be performing live, and Spotify can help you get tickets at the press of a button.

If you are an artist who’s not sure whether Spotify is the best medium for you, this feature alone might be enough to reconsider; you’ll be getting a lot of followers and concert-goers!

See if and where your artist will be performing

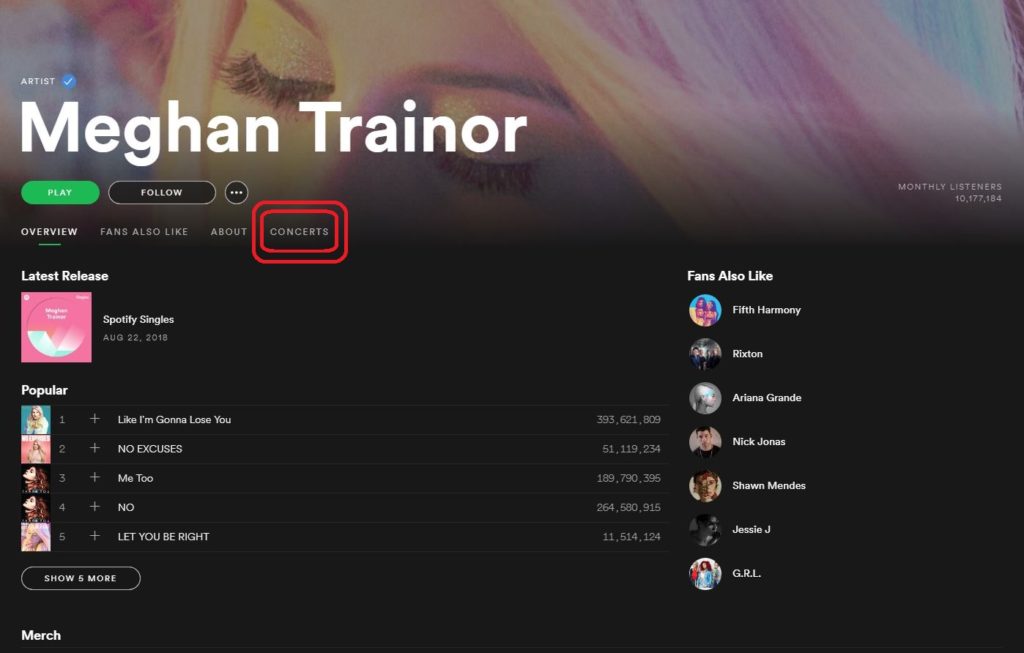
The first method for seeing whether your favorite artists will be performing live is to check out their page on Spotify. This is done simply by typing their name in the search portal on the top left of Spotify (if you’re on computer) or by searching their name under Browse on either computer or on your mobile device. Click on your artist’s name and you’ll instantly be transported to their page.

Spotify

Up top you’ll see four tabs: Overview (where you currently are), Fans Also Like, About, and Concerts. Click on the Concerts tab.

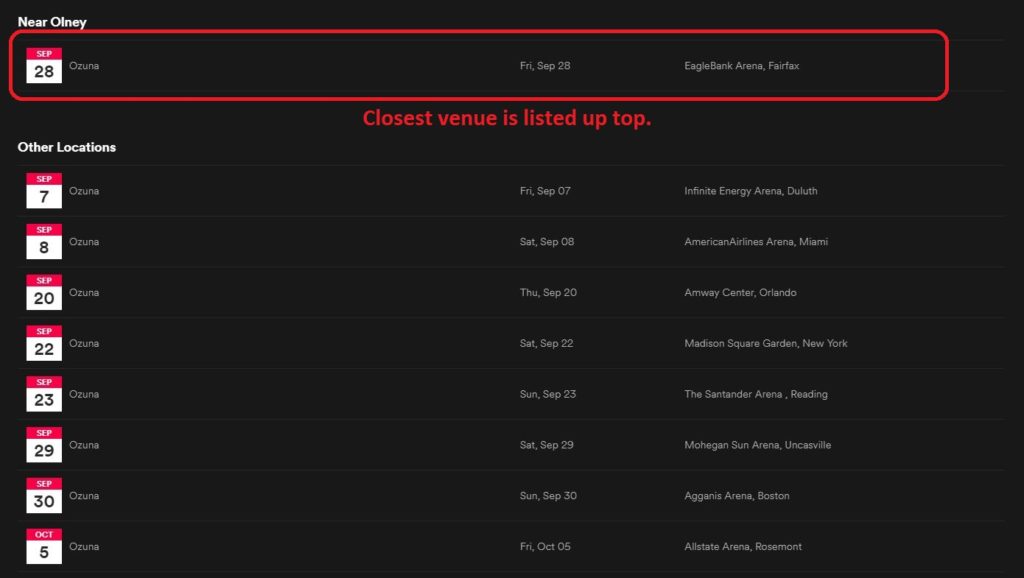
At the top of the list, it’ll show you the date and location of the concert that will take place closest to you. It will list the venue on the right.

Spotify

See all upcoming shows

This second method is our preference: If you navigate from the Browse menu you’ll be able to see a list of all artists who will be performing near you soon. If you’re not looking for a specific artist and just want to go see someone you like in a live show, this is the best way to do it.

Paul Simon

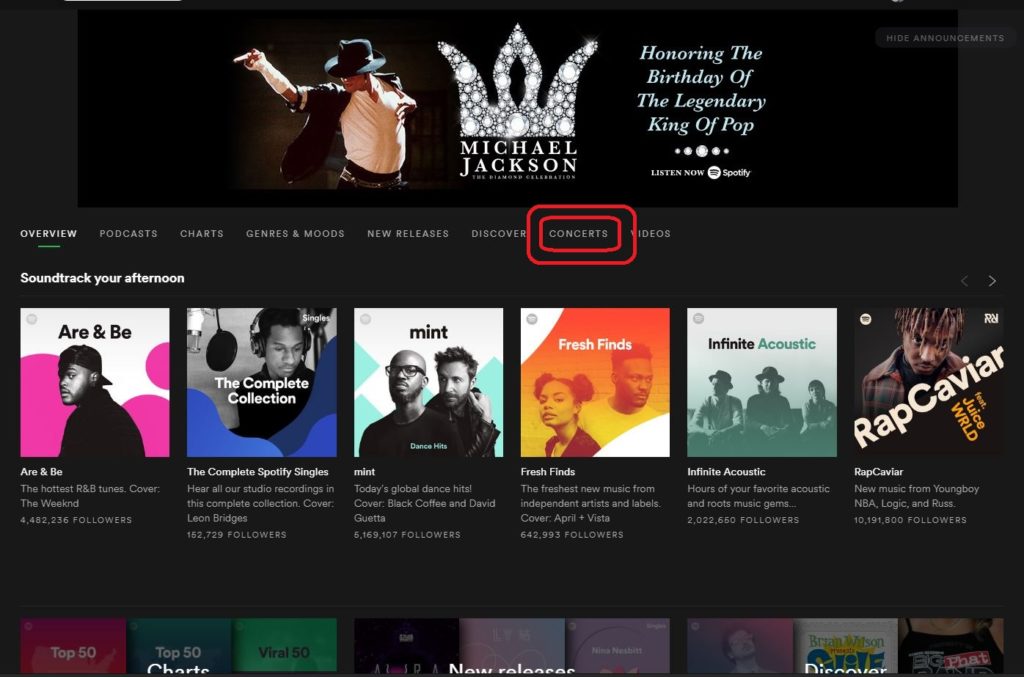
Click on the Browse tab again. Right up top, you’ll see a tab for Concerts. Go ahead and click it.

Spotify

You’ll see a list of artists that are recommended to you based on the music you listen to on Spotify, so if you listen to R&B you’ll be seeing mostly R&B artists. Listen to country, you’ll see mostly country concerts coming up nearby. Like before, you’ll see the artist on the left, the date, then the city and venue where the concert will take place.

Get your ticket

Spotify - Pat Metheny

Click on the concert of your choice and Spotify will take you to a concert page for that date and venue. It’ll even list the day of the week, the time, and the ticket cost. To get a ticket, click the Find Tickets bubble right up top.

Spotify - Stevie Wonder

Fun fact: If you click the ellipsis next to that bubble, you get a share option where you can post this concert to social media. Concerts are always better when you bring a friend!

Pat Metheny

After you’ve clicked Find Tickets, Spotify will open your default browser to a proxy website like Ticketmaster or Songkick where you’ll be able to buy your tickets then and there.

Enjoy your show!

How to add free sound clips to your audio project

Adding clips from Freesound.org to your audio composition might sound like it will take a lot of research, finesse, and interminable digging to find and reformat just the right music or FX. Thankfully this is not the case; the process is quite simple and 100% free.

All you’ll need is the help of Freesound, one other free site, and your choice of audio editing software. We’d recommend Audacity or Free Audio Editor as neither of them will cost you a penny.

How to add Freesound clips to your audio project

1. Select your audio

Free sound editing

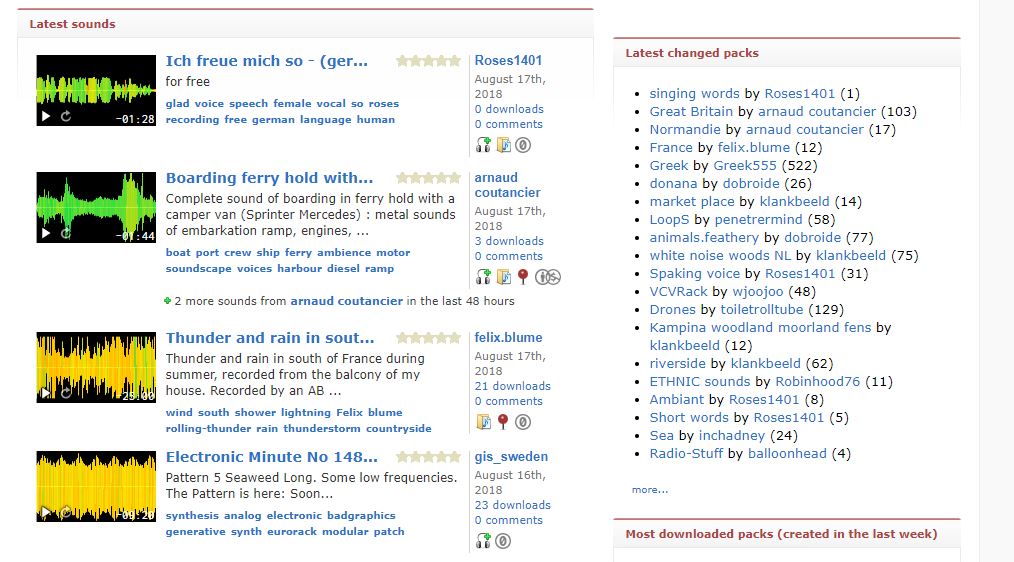
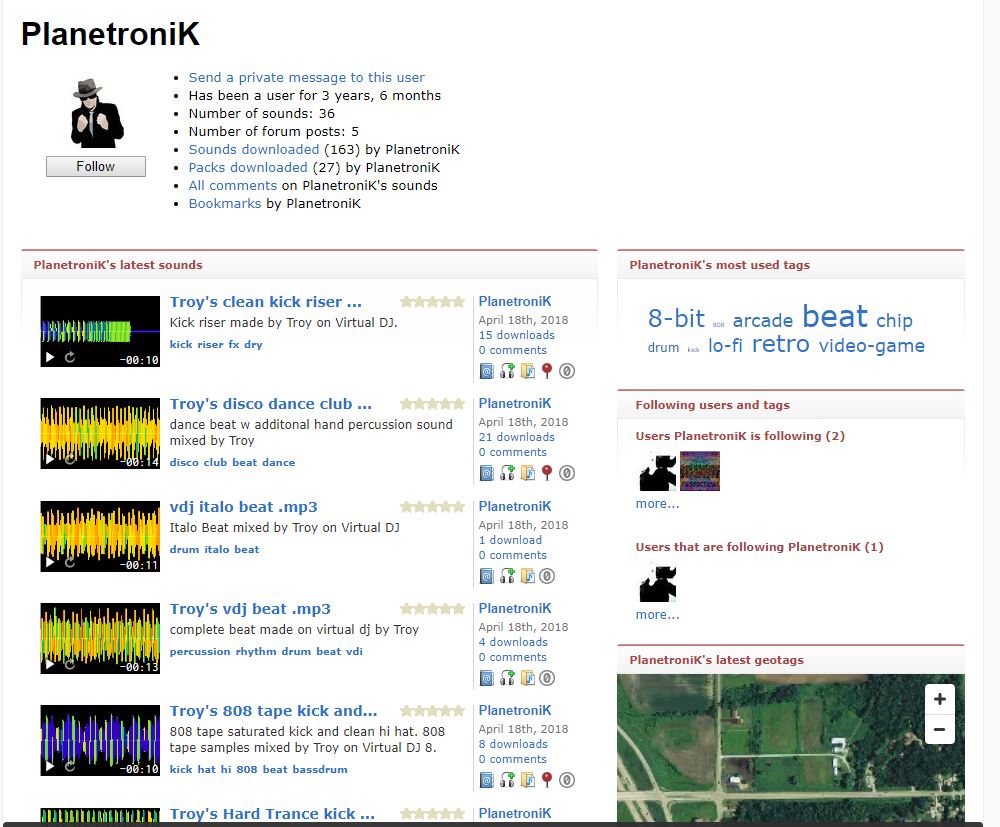
Straightforward enough! Once you’ve made a free account on Freesound, you’re free to browse and preview to your heart’s content until you find that perfect clip. Once you’ve got it, click on it and download it.

Be sure to put the file somewhere easily accessible, like a folder right on your desktop. Don’t forget to leave a ‘thank you’ comment on the uploader’s page, and to credit their work in your final product!

Adding sound to your project

2. Open your project

Boot up your choice of audio editing software. For the sake of argument, we’ll say you’ve chosen either Audacity or Free Audio Editor. Remember, they’re both free!

7
Free Audio Editor Free Download ►
7

3a. Import the new file with Audacity

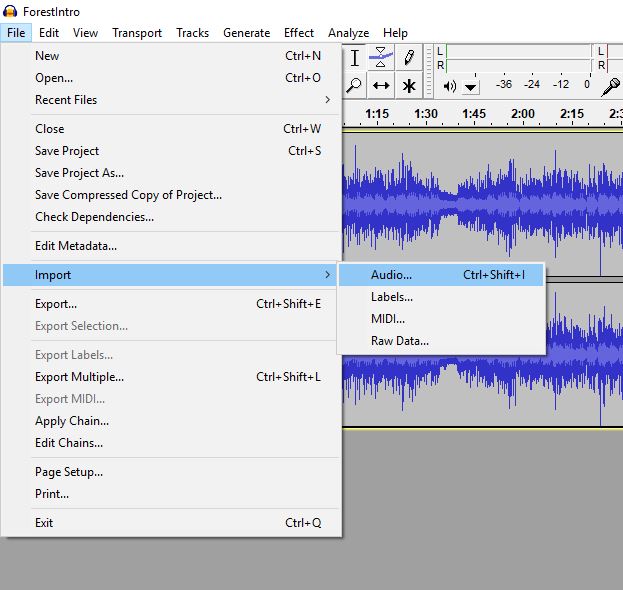
Audacity: If you’ve chosen Audacity, you’ll have a little more control over your work since you’ll be able to upload separate tracks. Once your main project file is open, go to File > Import > Audio and navigate to the folder where you dropped the new clip from Freesound. Just click ok and it will appear as a new track!

Editing audio

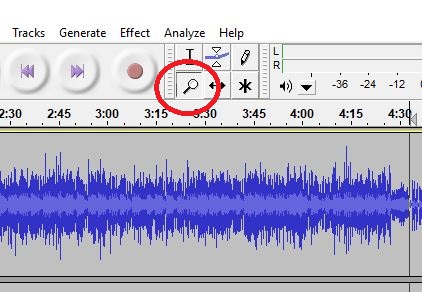
Lastly, you’ll need to line up your audio clip correctly with your main track. Find the precise spot on your main track where you’ll want the new audio to be. The zoom tool is your friend here, and can be activated by clicking the magnifying glass icon next to the record button.

magnifying glass

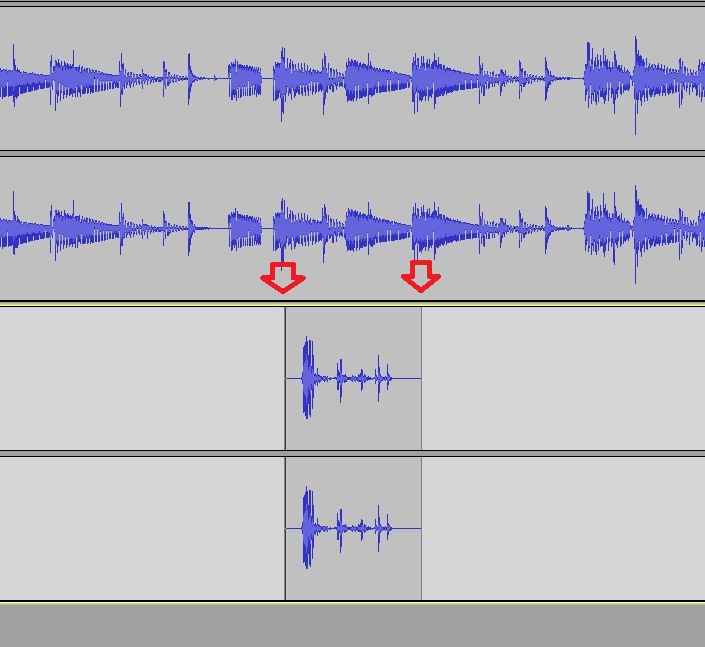
Now carefully move your cursor straight down to your new FX track. Click once. Then navigate to Tracks > Align Tracks > Start to Cursor. Now your clip will appear right at that spot.

waveforms

Another method is to simply copy or cut your Freesound clip, pasting it further down on its own track. With either method, be sure to check your work as you go to make sure it syncs up well.

3b. Import the new file with Free Audio Editor

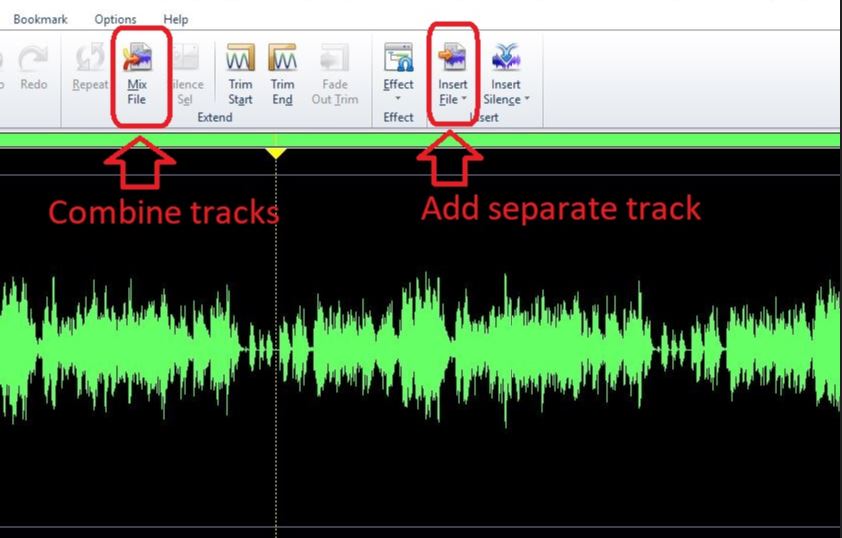
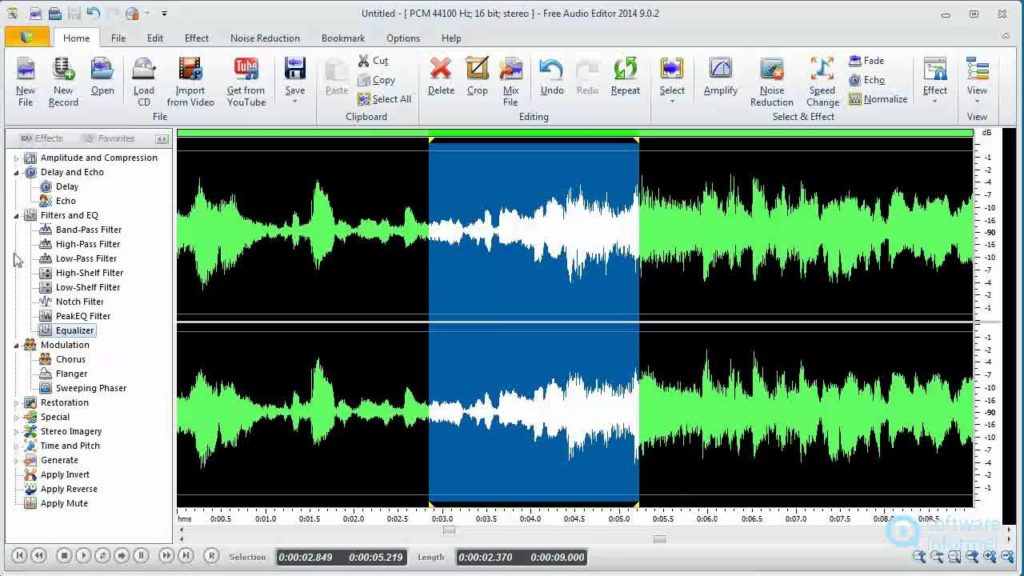
Free Audio Editor: Free Audio Editor will be slightly harder to work with given that you cannot add multiple tracks. Still, it’s easy enough if you’re willing to deal with some trial and error. Open up your main file and then open up your Edit tab up top. You’ll see two options here: Mix File and Insert File. Mix File will add your clip concurrent with the audio of your main track; the two will be playing simultaneously. Insert File will instead add the track by itself, squishing it between the audio around it. This is helpful if you want a complete break of your main file while the new track plays.

Audio editing

Find the right spot on your main file where you’ll want the new track to come in. Click there. Now choose whether you’ll want Mix File or Insert File and click whichever is better for your purposes. Navigate to the folder where you dropped your Freesound track, select it, and hit OK. Bam. Now it’s embedded in the main file!

4. Export your finished project

The last step is to export your master file after everything is edited. With either Audacity or Free Audio Editor, you’re going to run into a problem with this step: Both programs will only let you export as a .wav. Ugh.

Luckily there’s an easy way to convert your file format, and it’s totally free. Save your file as a .wav like it says. Be sure to save it to an easily-found location, like the folder where you placed the new Freesound clip. Now go to this free website. Media.io is a great free resource for changing file formats.

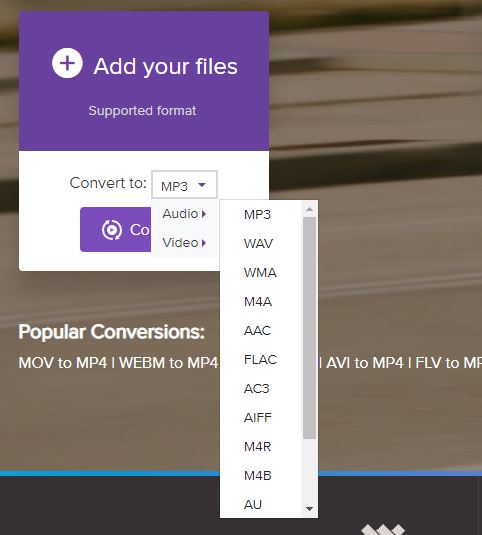
All you need to do is click where it says “add your files” and then navigate to the .wav you just saved. Select your file and hit ok, then choose what you want to change the file to via this drop-down:

Changing file formats

Hit convert and you’ll magically have your finished file in whatever format you like. This is especially useful if you want to send your file over email, for example, as .wav files are on the larger side.

And that’s it! You’ve successfully added a Freesound clip to your composition and saved it as a new format. Congratulations!