Born and raised in South Africa I am the mother of two busy kids and one loving husband. Since leaving school I immediately started working and have been involved in many different industries where I learned a wide range of skills. Some of my skills range from marketing to management and even teaching special needs children, particularly those with severe developmental delays. I am a self-proclaimed holiday nut, taking any chance I can get to decorate and celebrate major holidays such as Easter, Halloween and Christmas, often planning these months in advance! I have a wide range of passions that I persue (as often as I can) such as reading, writing, bonsai, crafting, creating natural beauty products, listening to music and playing games (prefered platforms being PC and Xbox).
Adobe Premiere Pro is one of the, if not the, most popular video editing software available. It makes up part of Adobe’s Creative Cloud, along with other popular programs such as After Effects, Illustrator and others. Premiere is a very robust editor with many features that make it popular amongst professionals and beginners alike.
During the video editing process, there will come a time when you need to clip or split specific videos. This can be done to shorten the length of your video, cut out unnecessary parts or improve the flow of your overall video. Let’s look at the steps you need to take to split video clips with Adobe Premiere Pro.
How to Split a Clip in Premiere Pro
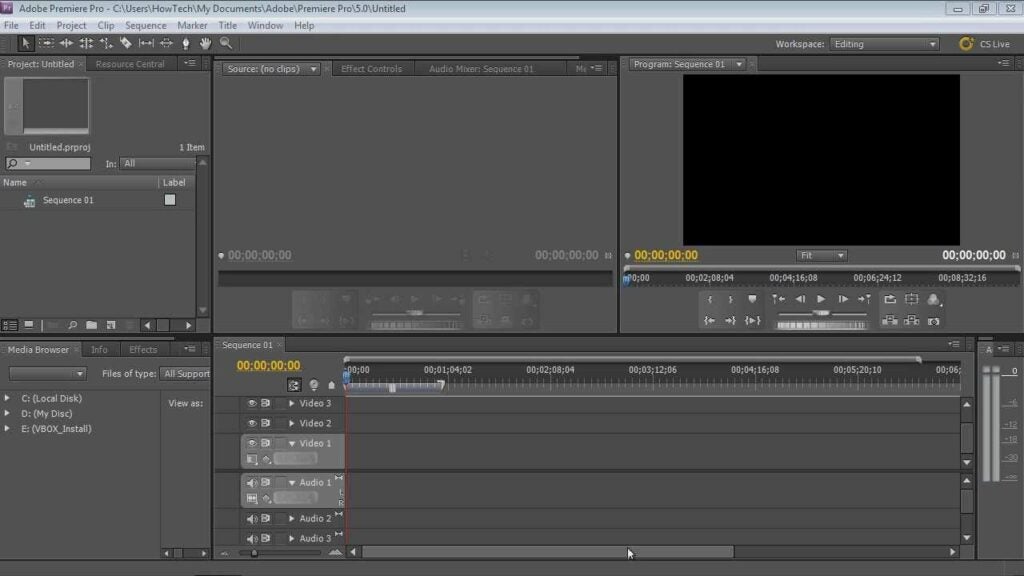
Place the Clip in Your Timeline
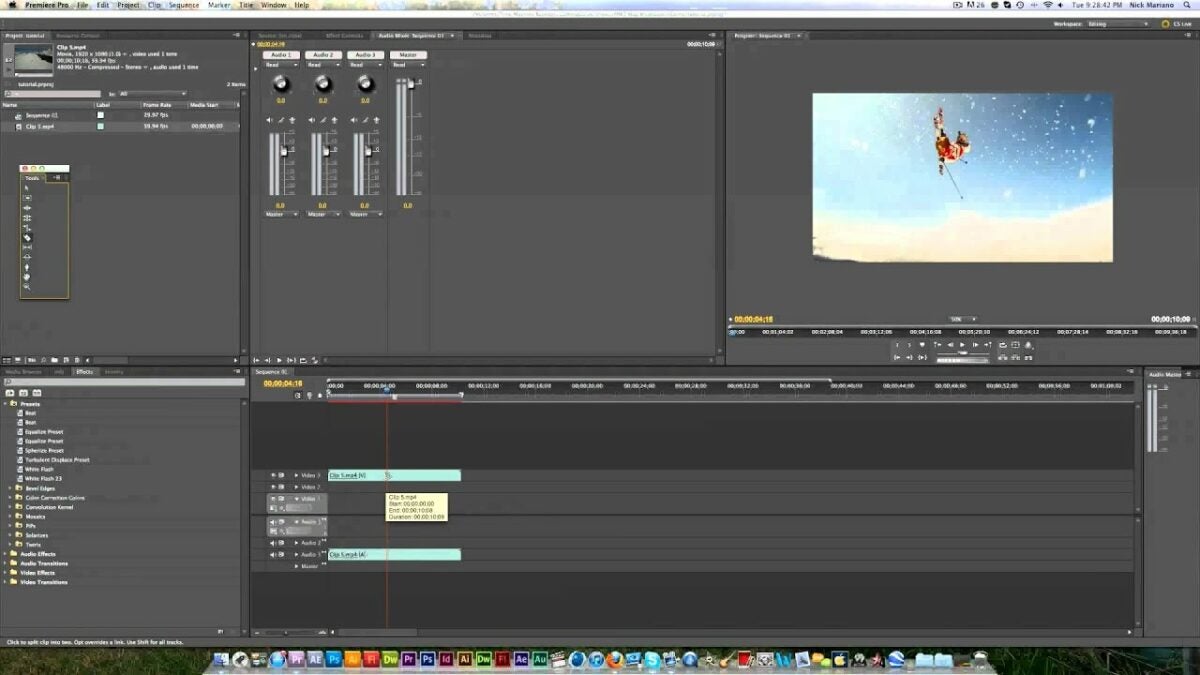
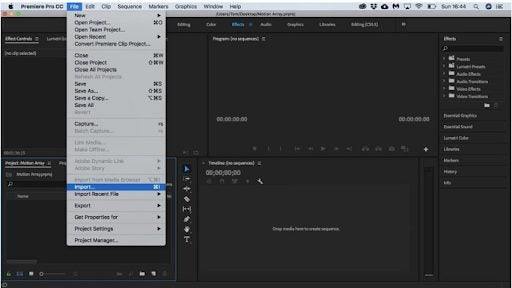
Before you can start editing anything, you first need to import the relevant clip/s into your timeline. You can do this by clicking on ‘File’ in the top menu and choosing ‘Import’. In the window that appears, choose the videoclip you want to split. Make sure to click on the videoclip in your timeline so that you can edit it further.
Select the Razor Tool
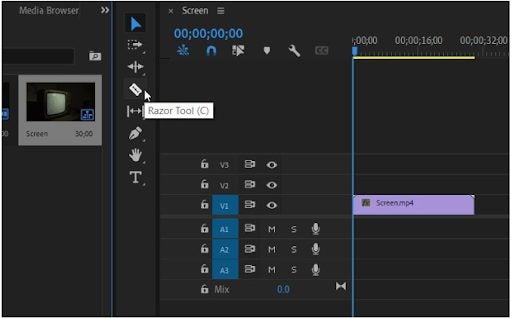
Look to the left of your timeline, here you will find another menu with tools. In this menu, select the razor tool by clicking on the icon that looks like a razor.
Tip: to make sure you split the video clip at the correct time, move your playhead to the exact position where you want the split to occur. This way, when you select your razor tool, you’ll know exactly where to split the clip. This is very useful for situations where it might be challenging to remember the exact time (down to split seconds) where the cut should occur.
Select the Spot Where You Want to Split Your Clip
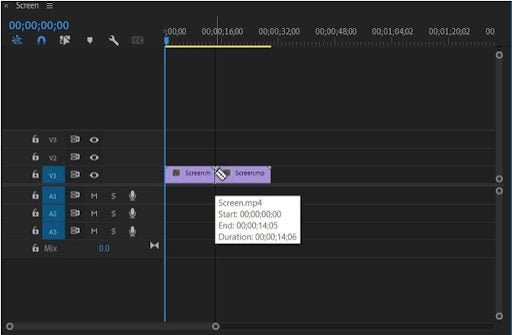
With the razor icon selected, you need to navigate over to the video clip in your timeline. You will notice that when you hover over the videoclip, your mouse pointer now looks like a razor. Click where you want to split the videoclip, and you will see the two parts separating.
Each part will now act as its own videoclip and can be edited as such.
Get to Video Editing Simple and Easily
Adobe Premiere Pro makes it very efficient to edit videos. The razor tool can be used to conveniently split video clips so that you can only use the sections you need or so that you can edit them independently from each other.
Adobe Premiere Pro is one of the choice video editing programs for professionals and beginners. Premiere is a comprehensive editing tool that can create a range of videos from television adverts, short stories to feature-length films.
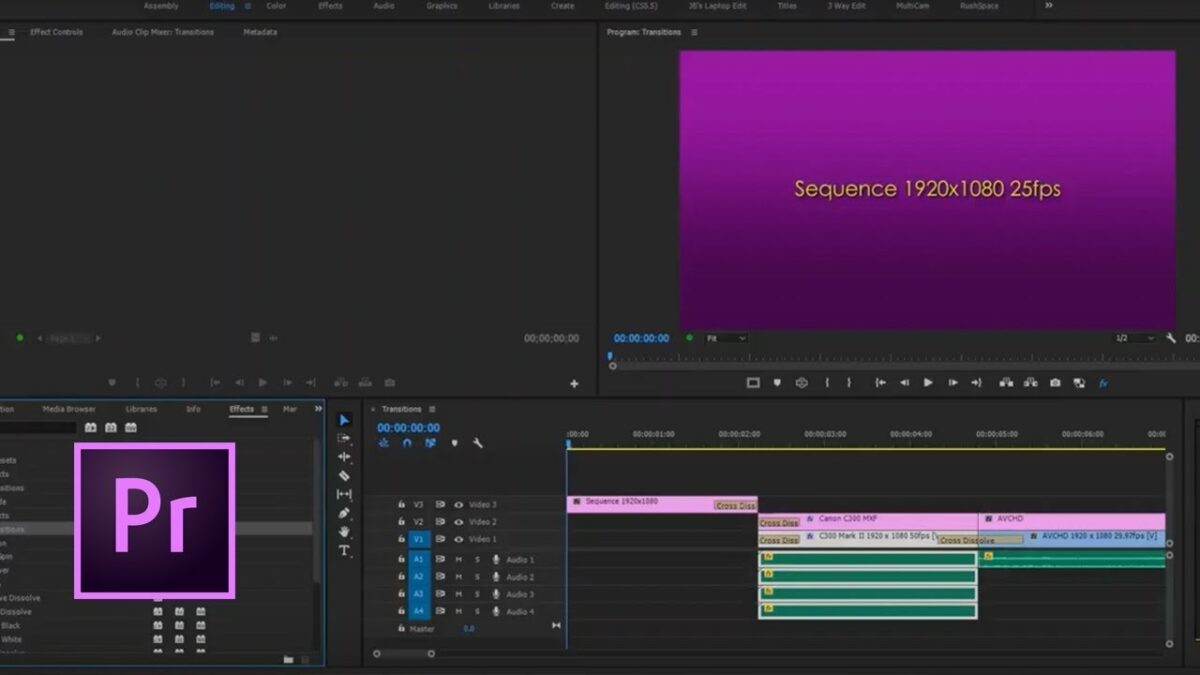
Transitions are a key element in any video. With the right transition, you can move seamlessly from one clip to the next. Transitions can also be used to create and improve the tone and mood of your video. Let’s take a look at how to add transitions into a video using Adobe Premiere Pro.
How to Add Transitions in Premiere Pro
Click on the Effects Tab
So, you’ve already added your clips into your timeline in Premiere Pro. You’ve arranged them in the order you want and clipped them where needed. Now it’s time to start adding transitions. You will need to select the ‘Effects’ tab found at the top of your screen.
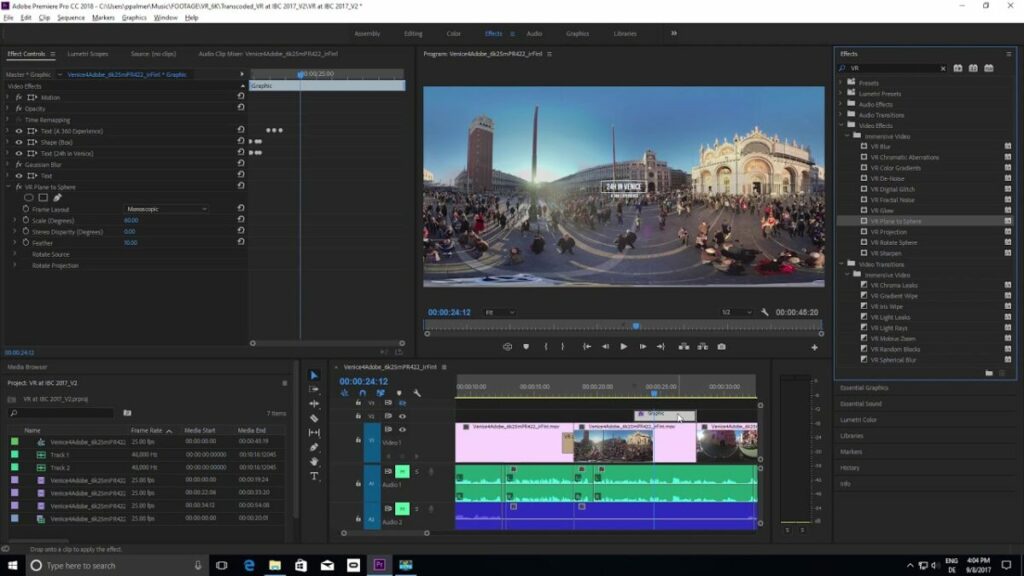
Click on the Arrow Next to Video Transitions
In the ‘Effects’ tab, select the arrow next to ‘VideoTransitions.’ This will open a drop-down list showing all the available videotransitions you can use.
Click the Arrow Next to the Transition You Want to Use
Select the arrow next to the transition you want to use in your video. The number of transition types you see will depend on your version of Premiere Pro and if you have any plugins installed. One of the most popular transitions to use is ‘Dissolve.’
Drag and Drop the Transition Into Place
Now you can drag and drop the transition into place in your timeline where you want to move from one clip to the next. Once you’ve placed the transition, you will see a yellow box appear over the two clips where it is placed with the transition name.
Alternatively, you can also use a shortcut and right-click the space between the two clips and click on ‘Apply Default Transition.’ The default is usually a cross-dissolve transition.
Click on the Transition to Adjust It
Select the yellow transition box in your timeline to start adjusting the settings.
Click on the Effects Control Tab
Select the ‘Effects Control Tab’ with the yellow box selected to start adjusting your transition.
Adjust the Transition
From here, you can set the alignment, the duration, the border, and you can even reverse the direction of the transition to give it the effect you need for your video.
Start Editing Videos Like a Pro
Using transitions effectively is a true skill when it comes to video editing. Lucky for you, with Adobe Premiere Pro, it is easy to add and adjust your transitions to get the mood just right.
Adobe Premiere is primarily a video editing software that forms part of the Creative Cloud. Along with other popular Adobe programs like Photoshop and After Effects, Premiere allows creatives and designers a comprehensive creation and editing space.
Adobe Premiere Pro is available for Mac and Windows computers, but you will need a subscription to use the program. Premiere Pro can be used to edit videos, commercials, films, and television shows. This program is fast becoming the video editing platform of choice among amateur and professional filmmakers.
What Is Adobe Premiere Pro?
Adobe Premiere Pro is the subscription version of the video editing software. Adobe changed to a subscription service in 2013. All versions of Premiere before then are available for free. However, these versions don’t receive updates, and there is no customer support available.
If you decide to go with the subscription-based Premiere Pro, you will have access to updates, which usually happen every three to six months. You will also have access to their customer support which is helpful whenever you get stuck.
Adobe Premiere is a comprehensive video editing program, which is why both amateurs and professionals alike use the program. Whether you are editing a short video or a feature-length movie, Adobe Premiere has the tools needed to edit the video.
Features of Adobe Premiere
Adobe Premiere Pro already has many features that make it a great tool to edit videos. Despite having your essential high-quality video editing tools, many other features make the editing process easier and more seamless.
Video Editing
With Premiere Pro, you will have all the basic video editing features that you’ve come to expect from a video editing program. You can import video, audio, and image files in a range of formats. You can also add effects, filters, titles, and more. Finally, you can export your completed video in a range of formats.
Cloud-Based Service
Adobe Premiere Pro has a cloud-based version, making it easier to use and lighter on system resources. Adobe is also very active in releasing updates for cloud-based products so that you will be receiving more frequent updates.
Fast Multicam
Adobe Premiere Pro allows you to sync files based on the audio. This is a great time-saver and especially useful for anyone who uses short DSLR (digital single-lens reflex) camera clips.
Audio Clip Mixer
Premiere now also features an updated audio clip mixer that gives you enhanced audio functionality. However, if you require advanced sound mixing capabilities, we recommend using Adobe Auditions in conjunction with Premiere.
Closed Captions
Premiere Pro now also lets you edit, change, and include closed captions in all your videos. Adding closed captions to your projects makes them more accessible, especially for those who have hearing issues.
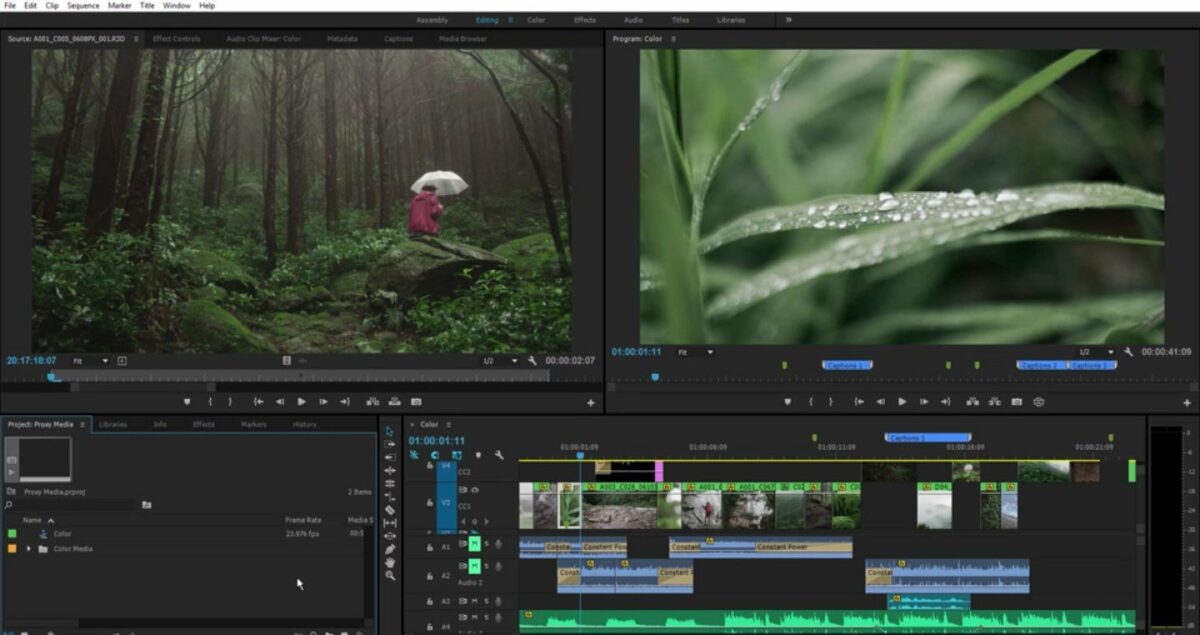
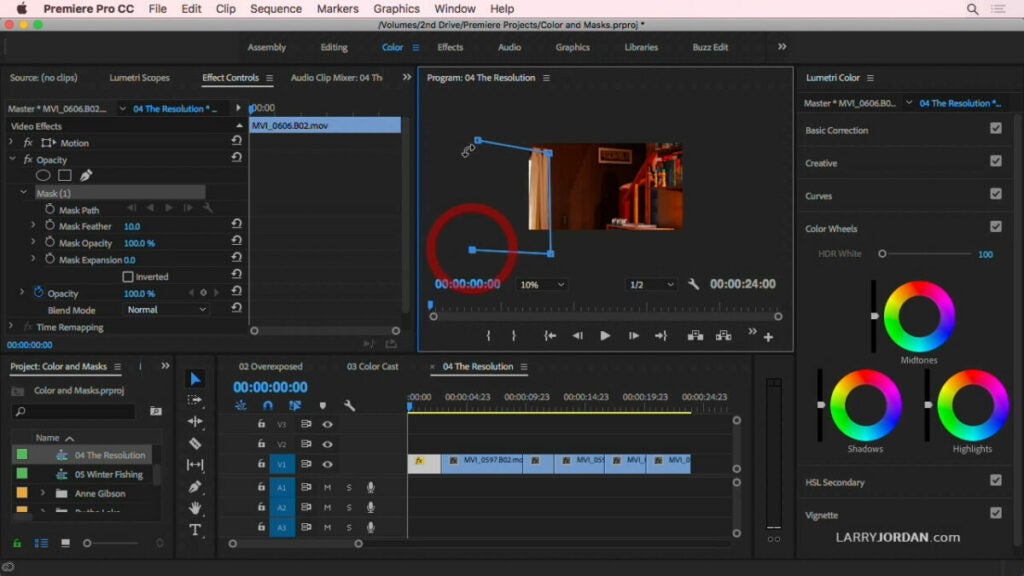
Color Correction
Adobe Premiere has a feature called SpeedGrade that you can apply to projects to create a consistent look and color correction. This is an essential feature to create seamless transitions in your video clips, especially if you combine clips shot at different times of the day.
How Does Adobe Premiere Work?
Adobe Premiere Pro does have a steep learning curve, but Adobe has many training videos and tutorials that can help you along the way. When broken into its most basic elements, the process to use Premiere is simple.
Get Your Video Clips Ready for Editing
Before you can start to edit a video, you will need to import all the video clips and files into your video editor. In the case of Premiere, you can just drag and drop the files from their original location to Premiere.
Sequence Your Clips and Trim Where Needed
Now you can start a new project by dragging and dropping the clips into the timeline in the order you want them to play. It may be necessary to trim some of the clips, and now would be a good time to do that. You can use the ‘Cut’ tool to remove sections of the clip (either at the beginning of the end) that you no longer need.
Start Editing Your Video
Now that your video is sequenced and trimmed, you can start with the real editing. Now you can start using basic correction settings such as exposure, white balance, temperature, saturation, and contrast to bring your video to life.
It’s important to remember that adjusting exposure in videos is much more difficult than still images. As such, you may find it easier to get the exposure right in-camera when recording your clips.
Add Transitions to Improve the Flow of Your Video
Transitions can change the look and feel of your video by changing how one clip flows into the next. Depending on the type of video you are making and the feel you are going for, you can experiment with different transition styles to create the effect you’re looking for.
Export Your Video
Once you are happy with your edited video, you can export it. The menu will provide you with a few different options for exporting. Some of these options are optimized for specific platforms such as Facebook or Instagram. It is good practice to always export videos in the highest quality possible, usually 1080p HD or 4K. It is helpful to remember that most social media platforms compress videos in any case, so rather, go for the highest possible quality whenever you can.
How Much Does Adobe Premiere Cost?
If you are interested in getting started with Premiere Pro, Adobe has two plans that you can consider. You can either pay a subscription fee of $24.14/month for only Premiere Pro. Alternatively, you can subscribe to the Creative Cloud All Apps, which includes Premiere Pro as well as Photoshop, After Effects, Illustrator, InDesign, and more for only $34.49/month.
Not sure if you want to take the plunge yet and subscribe for Adobe Premiere? Adobe offers a 30-day free trial so that you can try out the software before committing to a subscription.
More Helpful Guides
If you want to learn more about Premiere Pro and the Adobe Creative Cloud, here are some more guides, how-to’s, and articles to get you started.
Adobe Premiere has been around for a long time as it was first released in 1991. In this time, it has cemented itself as one of the best video editing programs available and has a very stable and loyal user base. It is a solid, professional-level application that is adequate for most video editing situations.
MacOS 12 Monterey is the latest version of the Mac operating system. This version was released on 25 October 2021, and despite being smaller than the previous version, macOS Big Sur, it still has many useful features.
Along with the new features, there are also many optimizations for existing functions of the operating system (OS). This includes widened capabilities for the FaceTime app, and even the Messages app has seen improvements.
It is important to note that with the release of the macOS Monterey version, Apple will no longer offer support for older Mac models released between 2013 – 2015.
What Is MacOS Monterey?
MacOS Monterey is the newest operating system. It has been designed to work seamlessly across all Apple products. It is more customizable than previous versions and lets users share content across iOS and iPad like never before.
Apple was reported saying that this latest version will provide users with new ways to connect, get more done and work seamlessly across all Apple devices.
What Are the Main Features of macOS Monterey?
Now that we’ve covered what macOS Monterey is, let’s look at some of the new features released in this version.
Universal Control
This is probably one of the most significant new features to be released. This feature was not available with the initial release of Monterey as it was still in beta, but we look forward to testing out this feature.
This feature will allow a single mouse, keypad, or keyboard to be used across multiple Apple devices. Users will also be able to drag files from one device to another with their chosen mouse. This feature is meant to increase productivity and let users work with fewer interruptions.
Airplay for iMac
This new feature will let you stream what is on your Mac to any other Apple devices, such as Apple TV, iPhone, or iPad. This means you can stream series, movies, or games from your Mac to your other devices seamlessly.
iOS Shortcuts App
Shortcuts were originally available on iOS and iPadOS 13, but the app is coming to macOS Monterey as well. You will then be able to use pre-installed shortcuts, or you can access the ones that you’ve already created on your iPhone or iPad.
This will allow you to also use shortcuts to communicate with your smart household products such as the Apple TV or smart kettle. You can also create new shortcuts to improve your workflow directly on your Mac.
Focus Mode
This feature is excellent for anyone who tends to get distracted easily or if you work from home. Focus mode lets you set up profiles on your Mac, where you limit the notifications and alerts that come through. This way, you can ignore the minor disturbances when you need to concentrate on specific tasks. Once you enable focus mode, it will also trigger other linked Apple devices like your iPhone and iPad.
There are preset modes already set up. These include ‘Do Not Disturb,’ ‘Commuting,’ ‘Driving,’ ‘Personal,’ ‘Sleep,’ and ‘Work.’ You are also able to create your own profiles. There is also a setting that will notify anyone in Messages that you have Focus Mode on if they try to contact you during this time.
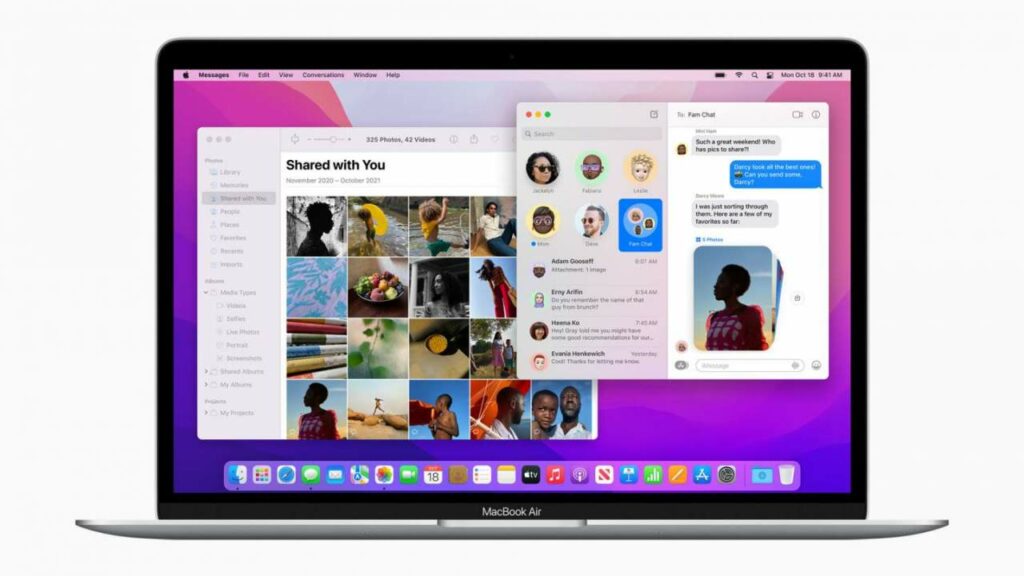
Shared With You
This is a new way to organize all the photos, images, and links sent to you. When you open Apple-specific apps like Messages, Photos, Safari, Apple Music, and Apple News, you will see a new spot called ‘Shared With You.’ This is where all these files will live.
You can now easily access and search for these files. They will also include the details of who sent it to you and the date you received it, making it even more convenient to find the files you are looking for.
Quick Note
Now you can easily access your Quick Notes by just pressing the ‘Globe’ + ‘Q’ key or clicking in the bottom right corner of the screen. With these notes, you can drop links, photos, files, and more.
You can also add other people to a specific note, similar to how Google Docs works. These people would then be able to make changes and adjustments to the note that is visible in real-time.
Safari Tab Groups
Aside from the other small improvements made to the Safari browser. Some of these include seeing more of the webpage as you scroll, the tab taking up the color of the webpage you are on, and simplifying where you find the toolbar and search field.
Aside from this, Safari can also group tabs. This is ideal if you work on multiple projects and need to navigate between them without losing your current tabs.
Live Text
This feature makes use of on-device machine learning to detect any text in photos. Once the text has been detected, you can copy and paste it into your Quick Notes or Messages. The feature will also identify phone numbers and ask if you want to call the number.
The feature will also identify website addresses and prompt you to open any links or websites shared. The feature will also identify addresses and prompt you to open your maps to the address.
What Devices Support macOS Monterey?
This latest version, macOS 12 Monterey, is available on the following Apple devices:
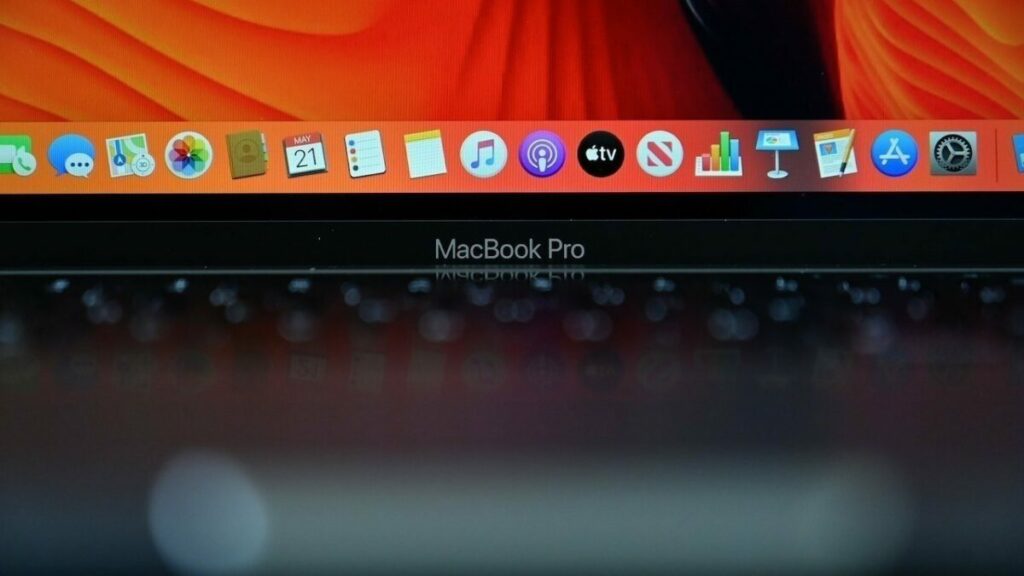
MacBook Pro (2016 and newer)
MacBook (2016 and newer)
MacBook Air (2018 and newer)
iMac (2017 and newer)
iMac (5K Retina, 27-inch, late 2015)
iMac Pro
Mac mini (2018 and newer)
Mac Pro
iPad Pro
iPad Air (third generation and newer)
iPad (sixth generation and newer)
iPad mini (fifth generation and newer
When and Where Can You Get macOS Monterey?
As we mentioned, MacOS Monterey was officially released on 25 October. This is also a free release, so if you have a Mac computer that supports this version, you can download and install it for free. You can download MacOS Monterey.
If you update from the Mac Sierra version or newer, you will need about 26 GB of available storage to install Monterey. If you are trying to update a version older than Sierra, we recommend having at least 44 GB of free space.
More Tips and Tricks for Using the macOS
If you want to learn how to use the Mac operating system like a pro, here are some more guides to help you learn the ins and outs of Mac.
The release of macOS Monterey is exciting as it is the biggest release since Big Sur in November 2020. Although there aren’t quite as many new features as its predecessor, the features we did get are good ones. They are ideal for improving productivity and workflow as well as integrating seamlessly with other Apple devices.
OnlyFans gained popularity during the covid pandemic and provided a means for many to create a source of income by sharing photos, videos, and other forms of content. Although it does have a reputation for adult content, this is not the only content you will find on OnlyFans.
Today, we’ll look at what OnlyFans is exactly, how it works, and the various functions you can use with your and others’ content.
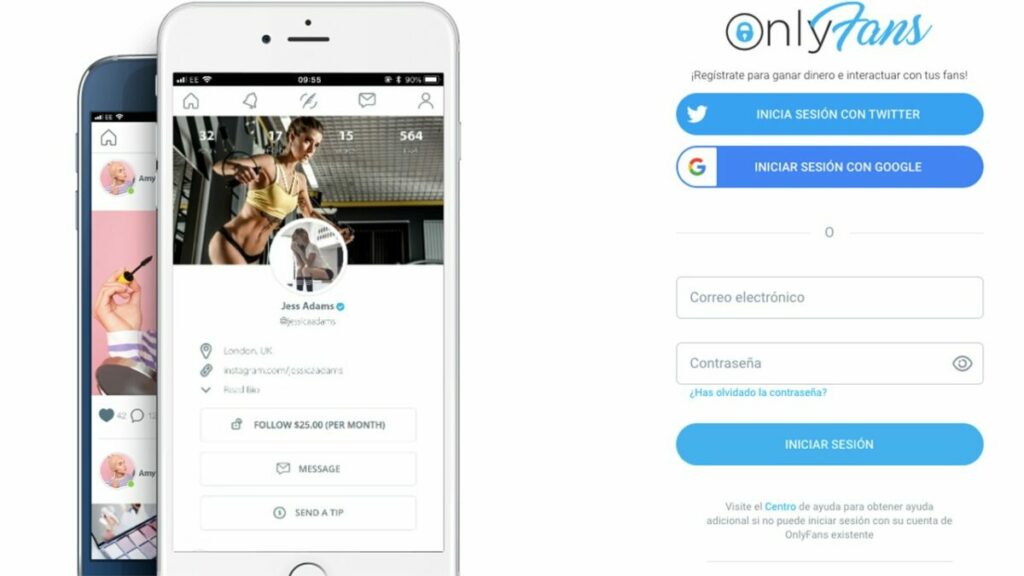
What Is OnlyFans?
OnlyFans is a social media platform where content creators can share various forms of content. Their subscribers or fans then pay a monthly subscription to get access to their content. Fans cannot see any content unless they’ve paid the subscription to that content creator. Aside from the subscription fee, creators can also sell other items through the platform. This can include paid tips and private messages.
OnlyFans provides a safe platform where these creatives can connect with their fans. OnlyFans has also reported a 75% signup increase since March 2020, and although this is mainly due to the pandemic, the platform hasn’t shown signs of slowing down yet.
How Does OnlyFans Work?
To start using OnlyFans, you will need to be older than 18, and you’ll have to submit a copy of your identification to prove your age. You will also need to pay a monthly subscription ranging between $4.99 – $49.99 to whichever channel (known as OnlyFans) you decide to follow.
There are five main pages on OnlyFans. Let’s have a look to see how each one works.
Home
This is your main feed on the OnlyFans platform. Here you will see a stream of content from the influencers you follow and are subscribed to. If you are not subscribed to a content creator, you will not see their content. At the top of the home page, you will find a search bar. You can use the search bar to find more influencers to start following.
Notifications
This is where you will see all of your notifications from the OnlyFans community. This includes any past interactions, posts you liked, creators you followed, any tips you left, and more.
Create
If you want to be an influencer on OnlyFans, this is where you will upload and create the content you will be sharing with your fans. From here, you can add various forms of media or polls to your posts and start sharing them with your followers. Remember that you will have to add bank details before charging a subscription for any content you post.
Chats
This is where you can start direct messages with your contacts and fans. Take note, however, that certain content creators charge for the opportunity to connect via direct message.
Menu
The menu slides out from the right of the screen. Here you will see your account details and the number of fans and followers you may have. You will also be able to see bookmarks, lists, settings, linked cards, banking details, and more from this menu.
Who Uses OnlyFans?
OnlyFans can be used by anyone who has content such as photos, videos, or voice recordings to share with their fans, and it is a great platform to interact with your fans. Currently, the platform is used to share the following types of content:
Adult content
Makeup artists
Food influencers
Fitness instructors
Comedians
Live Vloggers
Musicians
Artists
More
A few celebrities also use OnlyFans to share teasers of upcoming events and connect with their fans. Some of the stars with OnlyFans accounts include:
Cardi B
Tana Mongeau
Bella Thorne
Farrah Abraham
Blac Chyna
Dorinda Medley
Larsa Pippen
Bhad Bhabie
Aaron Carter
Tyga
Amber Rose
Jordyn Woods
How to Join OnlyFans?
Registering with OnlyFans is just as easy as signing up with any other social media platform. The only difference is that you have to be over 18 years of age, and you will have to link a bank account or card details, depending on if you want to use your account to share content and make money or support influencers by paying subscriptions.
For Creators
Influencers on OnlyFan can create their accounts for free. You can choose to create an account with Twitter or by using your email address and password. Once on the platform, you can customize it by adding a background and profile photo. You can also describe what your OnlyFans is about.
To set your subscription fee, you must add your bank details and confirm that you are over 18. Once this information is verified, you can set your subscription fee and start uploading content.
For Fans
For those who only want to stay fans and support influencers by subscribing, you can register an account for free by using either Twitter or an email address and password combo. Once you’ve verified your email address, you can log in to the OnlyFans platform.
Before you can start subscribing, you will need to link a bank card to your profile that will be used to pay the subscriptions. Since this platform also contains adult content, you will have to confirm that you’re over 18 years old before being able to use the app.
Bottomline
OnlyFans is a social platform where content creators and influencers can connect with their fans and share exclusive and private content. To see the content, users will have to sign up for a monthly subscription. Despite some negative connotations, the platform is growing in popularity and is being used by a wide range of content creators from various industries.
WhatsApp is a free, multi-platform messaging app that lets users send messages, voice recordings, and voice or video calls. WhatsApp has gotten so popular and is currently one of the largest chatting app globally because it was one of the first services that offered free internet-based messaging. This means you don’t have to rely on text messages that may charge you for cellular data usage.
To use WhatsApp, you only need to have a smartphone, an active sim card, the WhatsApp application, and an internet connection. You can download WhatsApp on most mobile devices such as Android and iOS. It is also available in your web browser and as a desktop version.
What is WhatsApp?
WhatsApp is a free messaging app that uses the internet to send text messages, images, audio, and calls (voice and video) that is owned by Facebook. Not only is the messaging app free to use, there are also many other features available that are lacking in the native messaging services.
WhatsApp Features
Free International Calls
WhatsApp can put you in contact with loved ones from all over the world via the internet. This means you can connect with those living near and far simply and easily without having to fear a huge telephone bill.
Easy Way to Chat and Call Over Most Platforms
WhatsApp is not device-specific and is available across all operating systems. This makes it easy to connect with other users who have a different operating system such as Android, iOS, or others.
Security and Privacy Protection
WhatsApp has many security and privacy features to keep your data secure. One of these features is end-to-end encryption. This encryption means that only the sender and recipient can see the information being sent. Not even WhatsApp has access to your messages.
Customization
WhatsApp offers users many different ways to customize the app. You can set individual backgrounds, notification tones, custom avatars, and ringtones. You can create groups where everyone can text together. You can also host group video calls with up to eight people. WhatsApp also released a business version, WhatsApp Business, which lets you add a catalog with product prices and more.
Desktop and Web Version
WhatsApp has a desktop and web version. The desktop version can be downloaded and installed on your computer and linked to your mobile devices with your WhatsApp account. Similarly, the web version also connects with your mobile device but works from within your browser.
Disappearing Messages
This is one of the newer features available. What are disappearing messages on WhatsApp? Just what the name suggests, these are messages that disappear after the recipient opens them. This is a great way to send sensitive or confidential information.
How Does WhatsApp Work?
To get started, you will have to download WhatsApp to your mobile device. You will then have to create an account with your name and phone number. Your phone number will be used as a username, and your account will be linked to your mobile number. So if you’ve ever wondered what is my WhatsApp number? It is the same as your cell phone number. If you don’t want to use your personal number, there are options to register the account without a phone number.
How Does WhatsApp Work on Your Phone?
Once you’ve created your account, you can use it by tapping on the app icon or a notification in your notifications window. From within the app, you will see all your contacts available on WhatsApp, your conversations, your groups, and more.
How Does WhatsApp Work on Your Desktop?
You can either download and install the desktop version or use WhatsApp Web. You will have to link your accounts by scanning the QR code on the desktop with WhatsApp on your phone (found under settings, then ‘Linked Devices’ and the ‘Link a Device). Now you will see all of your WhatsApp messages, conversations, and groups on Desktop.
The Basics of Using WhatsApp
Let’s take a look at some of the basics of using WhatsApp.
How to Send Messages in WhatsApp?
Sending messages in WhatsApp works very similarly to any other messaging platform. You will need to open the app on your device. Then scroll down to the person you want to message. If this is the first time you are contacting them, you will need to start a new chat by tapping on the green and white message icon at the bottom right of the screen. This will give you the option to start a group, add a new contact or choose the person you wish to message. Next, you type your message and tap on the green arrow to send the message.
How to Send Voice Recordings in WhatsApp?
To send a voice recording works very similarly, except that you press and hold down the mic icon instead of typing your message. While holding down the icon, you record your message, and when you let go, the voice note will be sent. If you’re unhappy with the recording or mess up, you can just swipe your finger right to delete it.
How to Make Calls on WhatsApp?
You can make both voice and video calls on WhatsApp. To make calls, you tap on the person or group you want to call. Once in the conversation at the top of the screen where the person’s name or group name is displayed, there will be a video camera and telephone icon. By tapping on the video camera, you will start a video call. Video calls are limited to eight participants at a time. If you tap on the telephone icon, you will make a voice call. Voice and video calls can only be made from mobile devices and not WhatsApp’s web or desktop versions.
What Does the Double Grey or Blue Ticks Mean in WhatsApp?
The ticks in WhatsApp represent the status of the message.
✓ – Message sent
✓✓ – Message received in recipients inbox
✓✓ – Message opened by the recipient
When you send a message, you will see one grey tick appear to show that the message has been sent from your side; another grey tick will appear when it lands in the recipient’s inbox. The ticks will turn blue once the recipient has opened the message. It is possible to deactivate this setting. In that case, the blue ticks that show someone reading/opening the message will not appear, and you will continue to only see the two grey ticks.
How to Backup WhatsApp?
WhatsApp has a useful backup feature so that you can save your conversations and restore them in case of an issue. This is also useful when changing devices as you can restore your WhatsApp from the backup. You can access your backup settings from the setting menu. Here you can manually backup or choose how often WhatsApp should automatically backup all chats.
How to Download and Transfer WhatsApp Data?
Your WhatsApp is linked to your cell phone number, this means that downloading and transferring data between an old and new phone (with the same operating system) is very simple. You just backup your WhatsApp chats on your old device. Now switch the sim card to your new phone. Download and install WhatsApp to your new device. When you open the app it will verify your number and ask if you want to restore your backup. Tap on this option and wait for the process to finish. Once done you will see all your messages on your new device.
Unfortunately, if you want to transfer WhatsApp data from an Android device to an iPhone, it is much more difficult as the cloud storage format of the backup files is different. In order to do this you will need to use third party software.
How to Block Someone on WhatsApp?
Sometimes you get to a point where you no longer wish to communicate with a specific contact. In certain cases, it might even be necessary to block that person completely. WhatsApp has an easy to use blocking feature.
All you need to do is go into the conversation with the person you want to block. Then tap on the three vertical dots to access the menu. At the bottom of the menu, tap on ‘More. Now you’ll see a new menu where you can tap on ‘block’. Once you’ve done this, you will receive no new messages or notifications from this contact. However, if you are still included in any groups with this contact, their messages will still show in that group chat.
Protecting Your Privacy on WhatsApp
If WhatsApp is used responsibly it is just as safe, if not more secure, as other messaging platforms. Since it has end-to-end encryption you can rest assured that no-one else will see the messages you send, except for the person you’re sending them to. Not even WhatsApp or their owners, Facebook, can read you messages. Despite this, there is certain personal information that is visible to everyone. This includes users seeing when last you were on WhatsApp, your profile photo and your ‘About Me’ information.
The only way to stay 100% safe is to be offline. While this is not always an option, there are other things you can do to protect your privacy. You can see and change the privacy settings from within the app. Simply go to ‘Settings’, and then navigate to ‘Account’. Now you can tap on ‘Privacy’ and see what the settings are. By default your ‘Last Seen’, ‘Profile Photo’, ‘About’, ‘Groups’ and ‘Status’ is visible to everyone. You can change these settings to increase your privacy on WhatsApp.
What Is the Difference Between WhatsApp and Regular Texting?
The biggest difference between WhatsApp and regular texting is that you need a mobile telephone account to use texting and will be charged for each text sent. WhatsApp uses the internet, so you won’t be charged as long as you have access to Wi-Fi.
Another difference and disadvantage of using WhatsApp are that regular texts can be sent to any device regardless of their messaging system. In contrast, you can only send WhatsApp messages to others who have the app installed.
Guides, Tutorials, and Tips to Get the Most Out of WhatsApp
Now that we’ve covered some of the basics, here are some of the top tips and tricks to help get you using WhatsApp and making the most of this popular chatting platform.
WhatsApp is a very convenient and user-friendly chatting app that is free to use as long as there is a Wi-Fi connection. We hope this guide to WhatsApp has helped you learn the basics of using this popular chatting app. Do you know of any other WhatsApp tips that we should add to the list? Leave us a comment and let us know.
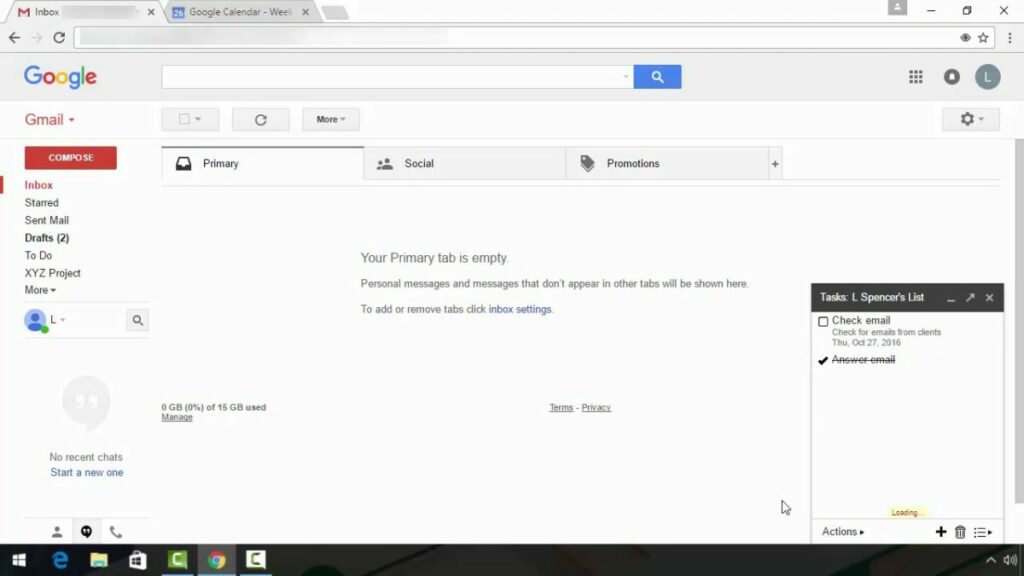
Gmail is a free email client provided by Google. It works similarly to any other email client. You can send an email, receive and respond to email, block spam and potential threats, create an address book and perform other email tasks. However, Gmail also offers quite a few other features that make it one of the most popular email clients around.
Gmail works from within your browser. You can log in to your Gmail account from most devices and browsers without needing specific requirements. However, users have reported better results in Chrome, Firefox, Windows Edge, and Safari browsers.
In this guide, we will be covering what Gmail is, how it works, and the features that make it such an excellent free email service.
What Is Google Gmail?
Gmail is used to send, receive and respond to emails. As such, it is an email client that not only offers basic email tasks, but also many innovations to make sending and receiving emails easier. You can also personalize your Gmail account for a nice touch.
Gmail Notifier is a handy little app that you can download on your PC. Once enabled, it will check for new emails every two minutes and notify you without accessing your browser.
Mail Fetcher
This feature allows you to fetch emails from up to five other accounts and download them to your central Gmail account. This makes it easy to stay on top of your emails if you have multiple accounts.
Contact Groups
What is Google Contacts?This is your address book in Gmail. Gmail has a handy feature that allows you to group contacts to send emails to the entire group.
Security and Spam
Gmail is very security conscious. Every email is run through a virus scan as it enters your inbox. Attachments are scanned twice. Suspicious emails are automatically sent to your spam folder. You may be wondering what is spam in Gmail? Spam is any unwanted sales, promotional, or potentially harmful phishing emails that you don’t want.
Parental Controls
Children under the age of 13 need parental consent to create a Gmail account. Parents can also set filters to block unwanted or inappropriate emails from reaching your child.
Gmail is used for receiving and sending emails via POP (Post Office Protocol) and IMAP (Internet Message Access Protocol). To start using Gmail, you will have to create a Google Account. This Google Account links you to all of Google’s services such as Drive, Google Docs, and YouTube. Signing up for a Google Account is free, and during the process, you will also create your Gmail email address.
The Basics
Sending an Email
Click on the ‘+ Compose’ button on the left side menu to send an email. A new email tab will open where you can start writing your email. Add the recipient’s email address and any other addresses you want to ‘cc’ (carbon copy) in the email.
You can also use ‘bcc’ (blind carbon copy) to include someone in the email but not have them visible to other recipients. There’s also an option to schedule an email in Gmail if you don’t want to send it immediately.
Receiving and Responding to an Email
New emails will come into your inbox and usually lie right at the top. To read a new email, you just click on that email thread to open it. At the bottom of the email, you will have the option to reply to the email or forward it to someone else. If you’re looking for a specific email, you can use search parameters to find it.
Using Attachments in Gmail
Attachments can be in the form of extra documents, photos, images, or other files. The attachment will usually show at the bottom of the email and can be clicked upon or downloaded.
To add an attachment, you click on the paperclip icon when composing your email. You can add up to 25MB attachments in Gmail, files larger than that can be sent as a Google Drive link. We have a trick for how to find attachments in Gmail.
Archiving in Gmail
What is an archive in Gmail? This is a way of moving emails you’ve tended to out of your inbox without deleting them. This way, they don’t clutter your inbox, but you can still access them when you need to. There are plenty of ways you can clean your Gmail inbox, and this is one of them.
More Gmail Guides
Now that you have a basic idea of what Gmail is and how it works, take some time to read some of our other guides:
Many people wonder what the difference is between email and Gmail. Email stands for electronic mail, whereas Gmail stands for Google mail. So basically, email is a form of electronic mail, and Gmail is an email client used to exchange these emails.
Emails are sent through email clients such as Webmail, Yahoo, and Gmail. Since its founding in 2004, Gmail remains one of the most popular free web-based email clients available. Just remember to keep it updated to take advantage of new features.
Adobe Illustrator is especially useful for creating high-quality vector images. Vector images are computer-generated and consist of points, lines, and curves based on mathematical equations. These image files are very flexible and can easily be resized without a loss in resolution.
It’s usually used as part of a larger design workflow. It allows designers to create single design elements and even complete compositions. Let’s take a closer look at what Adobe Illustrator is and how it works.
Guide on How to Use Illustrator for Beginners
Let’s take a look at some of the basics of how to use Illustrator.
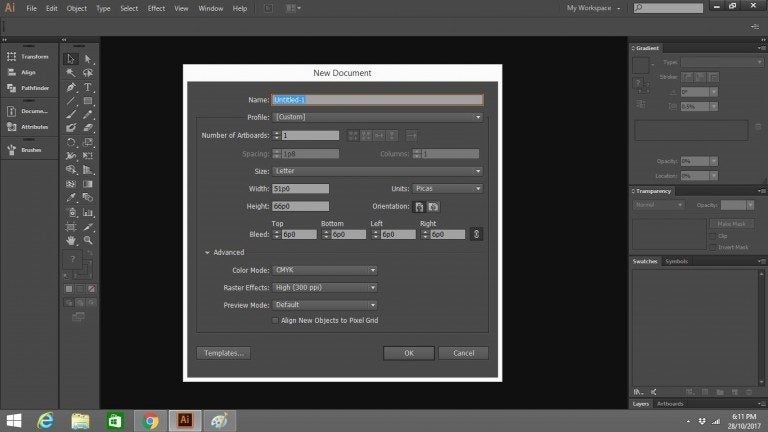
Create and save a new document
To start working in Illustrator, you will have to create a new document. To do so, open the program. The Work tab should open automatically. Select it if it doesn’t. Then click the Create new button. A new window will appear and ask what it is you want to create. Select the one you want (for instance, Web or Print), then choose a preset, and click Create.
Once you have created your document, you should save it. In the upper left-hand corner, go to the File menu and in it choose Save as. Name your file and decide where you want to save it (e.g. Desktop or Documents). Then go to Format and select the format you want to save it in. Save, and your document is ready for you to work on.
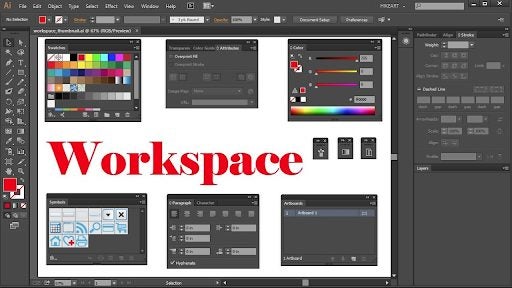
The Workspace and Tools
To use Adobe Illustrator to its best advantage, you need to know your way around.
Firstly, become familiar with the workspace to locate what you need to create your graphics. It would help if you also got to know the essential tools and what they’re used for. The Illustrator workspace is similar to those of other graphics programs like Photoshop. It’s a rectangular area containing all the tools you need and the space in which to create your graphics.
You’ll use the Tools panel on the left the most because it contains all the tools you’ll need for whatever task you’re undertaking. There are a lot of tools, but you don’t have to learn them all at once.
To configure the tool you’re using, go to the Control Panel at the top of the rectangle. The Panel Docking Area on the right holds color swatches, layers and other palettes, gradient settings and stroke options. Experimenting with all of these will help you become familiar with them. You’ll develop your own preferences as you become comfortable with the tools.
Creating Basic shapes
Most designs you’ll want to create in Adobe Illustrator will require that you start with basic shapes. The most useful tool for doing this is the Pen tool, which will allow you to draw a variety of lines, triangles, curves and squares.
These shapes can then be combined in different ways and built up to create a drawing that can be the basis of an icon or a logo, for instance.
The shapes can then be filled with color, from Illustrator’s extensive colour range using the Eyedropper, another valuable and popular tool. It allows you to pick up a color of your choice and drop it into a shape.
Illustrator also has a Swatch library. It offers an amazing range of patterns and textiles and stunning gradients and palettes of different skin colours. To find them, go to the Swatchespanel and into its drop-down menu. Choose Open Swatch Library and be amazed at the selection.
The Shape builder tool and the Pathfinder option can help you manipulate your shapes to draw your desired design. You can unite, exclude, divide and intersect your shapes to create your graphics or drawings The Appearance panel will allow you to add different effects to make your graphics really exciting. You’ll find it in the Window menu at the top of your screen.
Experimenting with the different tools in the Tools panel will help you learn many interesting ways to use them.
Creating a Logo in Illustrator
Illustrator is often used to create quality logos that can be resized and used in various other forms of branding such as letterheads, email footers, etc.
When creating a new logo, you’ll first have to set up your document before even starting with the design work. Once in Illustrator, click on ‘Create New,’ then choose the size preset for your project. You can use any recommended ones for your logo, but we prefer using ‘Letter.’ Click on the blue ‘Create’ button to get started.
Illustrator has different workspaces depending on what you need. To create a logo, we will be using the painting workspace. Click on ‘Workspaces’ in the upper right-hand corner of your screen, then choose ‘Painting.’
First off, start with the basic shape of your logo. You can use circles, squares, rectangles, and many other shapes. To draw the basic shape of your logo, click and hold the ‘Ellipse’ tool to see the shapes available. Once you’ve chosen a shape, click and drag with your mouse on the document to draw the shape.
Now you can start adding more elements to your logo. To add a color to your shape, click on the ‘Selection’ tool in your toolbox and then choose the color from the color swatches on the right side of your screen. You can also add more lines or shapes to give your logo some details.
However, remember that when you add a new image, you’ll have to create a new layer by clicking on the + icon in the layers menu. Working in layers will let you change one element without affecting the rest, which is very useful, especially in more complex designs.
Now that you have the basics of your logo, you can finally add the text. Click on the ‘Text’ tool in your toolbox. Then click on your document where you want to start adding the text and type. Once you’ve typed your text, you can change the font and size and move it if your placement isn’t correct.
Effects and 3D in Illustrator
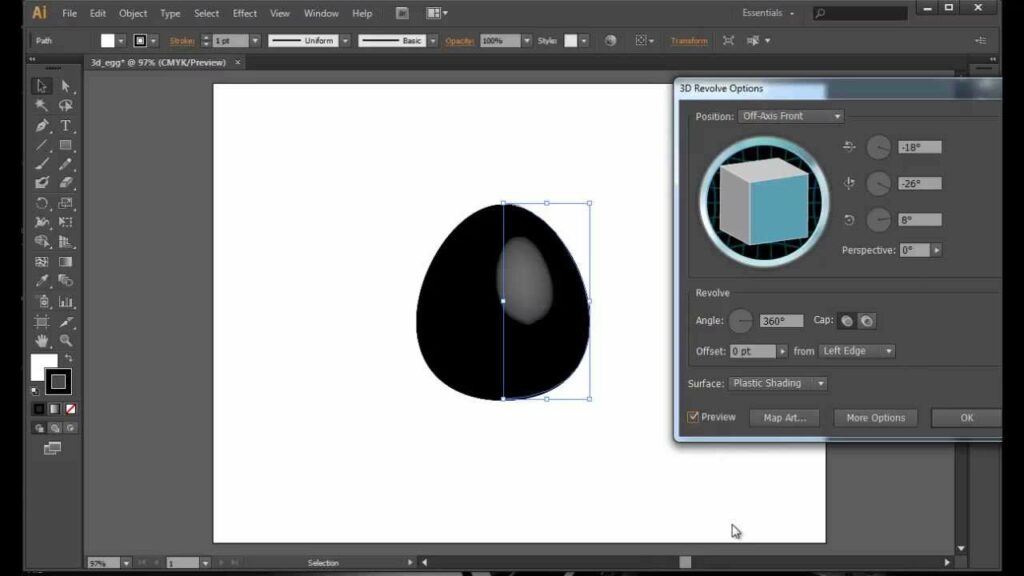
Using effects can sometimes completely transform your image or design. Adobe Illustrator has many different effects to choose from. To use these different effects on your images is quite simple. Let’s take a look at 3D effects in Illustrator.
Select the object in your image that you want to apply the effect to. Click on the ‘Effect’ tab in your menu. You will see many different options appear in the drop-down list. Click on ‘3D Classic’ and then choose ‘Extrude and Bevel.’ Now you can change the settings of your extrusion and beveling to get the desired look you’re after.
Practice Makes Perfect
There is a lot of information on using Illustrator on Adobe sites and others on the Internet. There are manuals that go into precise detail on all the program’s numerous features to guide you as your skills grow after you have mastered the basics.
You can also find videos that go into detail on different aspects of the program. There are forums where you can connect with experts and ask questions. Experienced users have written blogs and shared their history of learning the program, which is complex and can seem difficult to master at first.
There are add-ons for Adobe Illustrator that can enhance your work. Have a look at Envato Market, which provides many styles, textures, patterns, and brushes you can use.
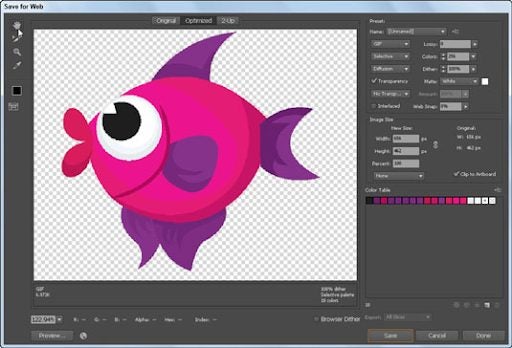
Saving Your Vector Art
You can create the best graphics in the world, but if you don’t save them properly, you’ll limit access to them. If you’re saving your work as a gif, jpg or png, you should also learn how to Save for Web. It’s a fundamental thing to remember to do with your vector graphics or artworks. It’s easy. Go to File > Save for Web, select your file type and save.
Illustrator Tips and Tricks
Let’s take a look at some Illustrator tips and tricks. You can also check out our guide on how to remove a background.
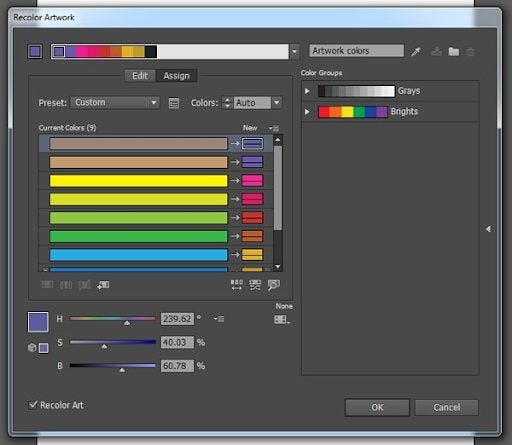
How to Find PMS Color in Illustrator
Open the file you want to know the PMS color from. Using the direct selection tool click on the part of the image where you want to identify the color. With the image selected, click on the color panel to the right of your screen. A window will pop out showing you the PMS color.
How to Get Pantone Colors in Illustrator
Open the file you want to get the Pantone color from. Select the colored area in the image that you need. Now click on the ‘Window’ tab in the top menu of Illustrator. This will open a drop-down list. Here you need to click on ‘Color and Swatches.’ This will open a new panel that will show the Pantone reference for the color you selected.
How to Use Typography in Illustrator
To add special typography characters to your designs in Illustrator, click on ‘Window’ in your top menu. In the drop-down list, choose ‘Type’ and then select ‘Glyph.’ Scroll through the available options until you find the symbol you want. Click on it to select it, and then double-click to insert it into your design. Adobe Illustrator will place the symbol where your flashing cursor icon is.
How to Use Font Effects in Illustrator
There are many different font effects that you can use in your design on Illustrator. To add a font effect, select the font in your design. Now, click on ‘Effects’ in the top menu. A drop-down menu will appear, showing all the available effects for your text. Choose the one that suits your design needs and add the effect to your text.
How to Use Pathfinder in Illustrator
To use the Pathfinder tools, you need to have two images overlapping. You can find the Pathfinder panel by clicking on ‘Windows’ and then selecting ‘Pathfinder.’ With the Pathfinder panel open, select your two images that are overlapping, and choose which function you want to apply. There will be options like uniting the two shapes, removing the front, just keeping the intersection, excluding the intersection, and more.
How to Use the Ruler in Illustrator
To view the rulers in Illustrator, click on ‘View’ in the top menu. A drop-down list with options will appear. From this list, select ‘Rulers’ then ‘Show Rulers’. Now you will see the rulers appear on your design, and you can use them for more precise sizing.
What is Photoshop? You’re not the only one who’s wondered about this. Photoshop is a very comprehensive photo and image editing tool for Windows and Mac computers. Many professional and beginner photographers use Photoshop to edit and adjust their photos after they’ve been taken.
Photoshop is part of Adobe’s range of products known as the Creative Cloud, and to use these products, you will have to buy a subscription. However, the features and tools included in these programs are well worth the price to use the software.
Another useful feature of Photoshop is adding and manipulating text to make your images even more striking or add context. Let’s take a look at how to add text to your photos in Photoshop.
How to Add Text to Images in Photoshop
Adding text in Photoshop is one of the more basic features to use. However, this does not mean it is limited in any way. There are many ways that you can adjust and manipulate the text to match the mood and feeling of your image.
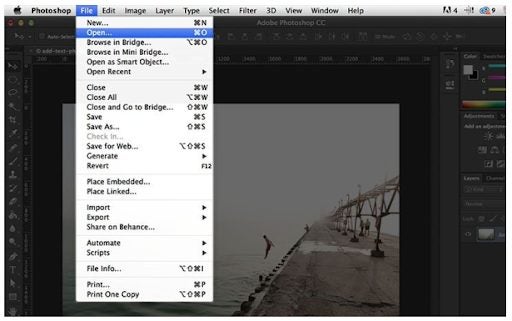
Open Photoshop and Import the Image
First, you need to launch Photoshop and then import the image you want to add text to. To import the image, you can click on ‘File’ in the main menu and then select ‘Open’ to select a photo you’ve worked on or ‘Import’ to select a new project.
Select the Text Tool
Now you can select the text tool from the tools panel at the left of your screen. The text tool is represented by a capital ‘T’ icon. With the tool selected, you can add text anywhere in the image that you click. You can also use the keyboard shortcut by pressing ‘T’ to select the tool.
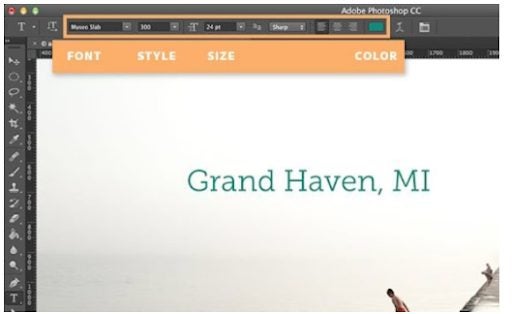
Set Your Text Settings
With the text tool selected, a new options menu will appear below your usual menu. Here you can adjust the different settings for your text. From here, you can easily adjust the font, font size, alignment and font color. If you want to use a font that is not included in Photoshop, you can upload new fonts.
Click on Your Image to Start Adding Text
Now you’re ready to start adding the text to your image. To do this, you simply click where you want to start adding text. Don’t worry if it’s not in the exact spot as you will be able to move the text if needed. You will see a cursor appear after clicking. This is where the first word will appear. You can now start typing your text with the keyboard.
How to Use More Advanced Text Techniques
There are also a few more advanced text techniques you may want to use in Photoshop.
Click and Hold the Text Icon for More Text Options
By clicking and holding the text button in your toolbox, you will see a list with more options appear. These options include horizontal and vertical type tools that change the direction of your text, as well as horizontal and vertical text masking tools.
Use the Paragraph and Character Menus to Change Line Spacing and More
For complete control over your text, you need to open the Paragraph and Character panels. To do this, you click on ‘Window’ in the menu and then select ‘Character’ and ‘Paragraph.’ With these panels open, you can change the line spacing, kerning and more.
Use Text Blending for Professional Effects
If you’re looking for more professional effects for your text, you can right-click on your text. Then in the drop-down menu, select ‘Blending Options. This will give you access to more text effects such as bevel and emboss, stroke, overlay and drop-shadows.
More Photoshop Text Tips
Here are a few more text tips that you can use in Photoshop.
To move your text, you’ll have to select the move tool from your toolbox. Then you can click on the text and drag it to the correct position.
By clicking and dragging a text box, you will create an area for your text to appear in. Your text will only stay in this area, and any text that is too big to fit the space will be cut off, and you’ll have to adjust the font size to see all the text.
If you cannot see the blending options after right-clicking on your text, you can try selecting ‘Layer Style’ first and then clicking on ‘Blending Options.
You can also edit text layers. To do this, you have to double click on the layer icon found in the ‘Layers’ panel. Once you’ve selected the layer, you can start editing the text, changing the size of the text box or choosing a new font or alignment.
More Helpful Guides for Photoshop
If you need some extra help with Photoshop, here are a few more helpful guides to get you started:
Sometimes as designers, photographers and artists, it is necessary to add text to your photos and images. With Photoshop, this is simple enough to do, and you have a range of text options available to make the text professional and striking.
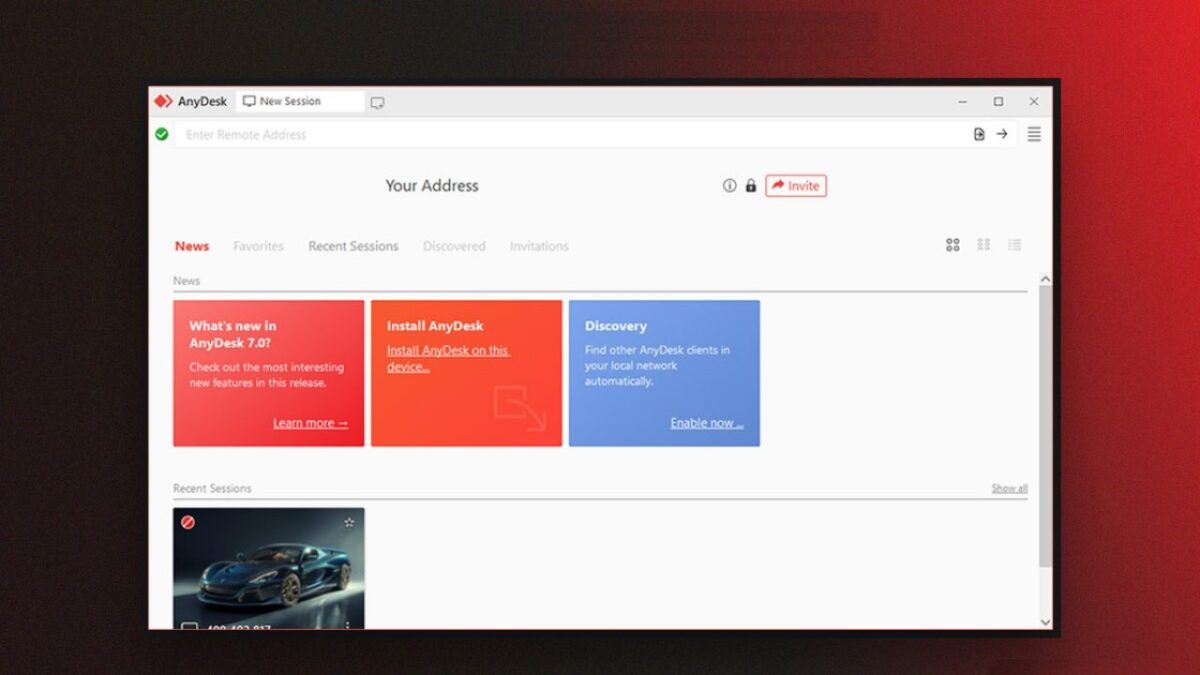
AnyDesk remains a popular remote desktop application that allows you to gain access and control over another computer remotely and record your sessions. This is great as these recordings can be used for various things, such as training support staff on fixing specific issues remotely.
You can download AnyDesk can be used cross-platform on Windows, Mac, iPhone, and Android devices, making it ideal for support services. But, how do you convert a recorded session to another file format?
Issues with converting AnyDesk session recordings
AnyDesk is able to record any session from both ends of the connection automatically. This is extremely useful if you work in the support industry and need to keep a log of your sessions or to use it for training. However, one problem is that the program only records these sessions in its native file format .ANYDESK.
Unfortunately, this limits users to only being able to watch recordings in the AnyDesk player, and most other players will show an error when trying to play the file. So, if a client requests a copy of the session recording, and you send a file with the .ANYDESK extension, chances are they won’t be able to watch it easily.
Another issue is that AnyDesk doesn’t have a built-in feature to convert the recordings file format to something more universally acceptable, such as MP3. This means users will need to make use of third-party software in order to convert the file format.
How to convert a recorded AnyDesk session?
Despite having to use third-party software, the process to convert a recorded AnyDesk session is still fairly easy.
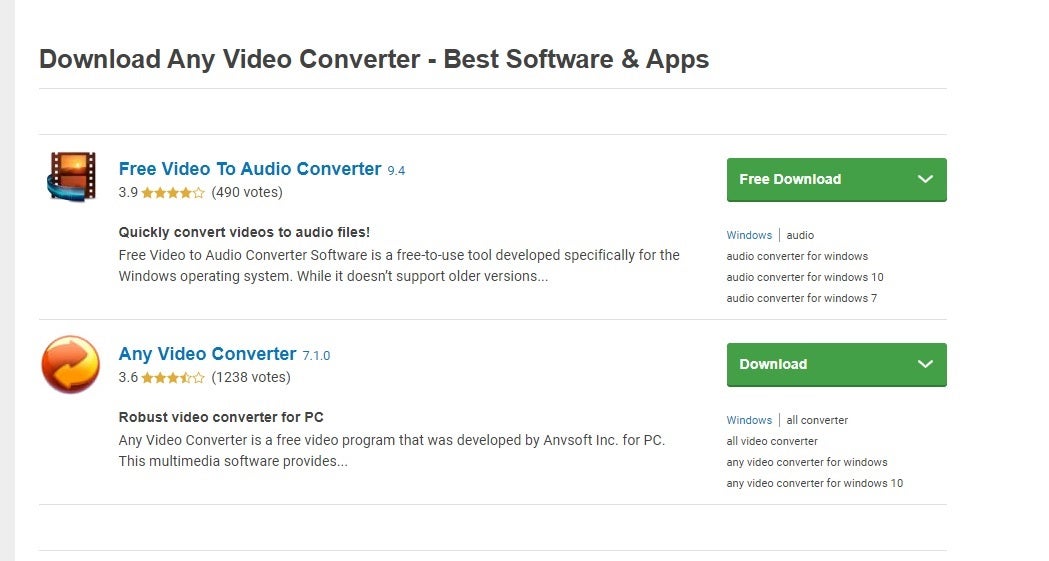
Download a Video Converter
You will have to download a video converter as AnyDesk does not have the option to convert recordings or save them in another format. You can search our website here for some options. Always make sure that you use a reputable site when downloading programs.
Before you download one of the suggested converters, always ensure that it supports AnyDesk sessions records. Take a look at which formats the converter supports, and check it against the saved file extension. You can also ready up reviews for the program to see if anyone else has successfully used it for the same purpose.
Install the Video Converter
Next, you will need to install the video converter. You can do this by running the executable files from the program you downloaded and following the installation wizard prompts. In most cases, this should run smoothly, and you only need to select a few options.
One of these options may be to indicate the storage location on your PC or an external hard drive. Remember, if you choose the latter, you won’t be able to use the converter if you remove the external device or it becomes corrupt. You can also create a shortcut to your desktop for easy access.
Upload Your AnyDesk Recording
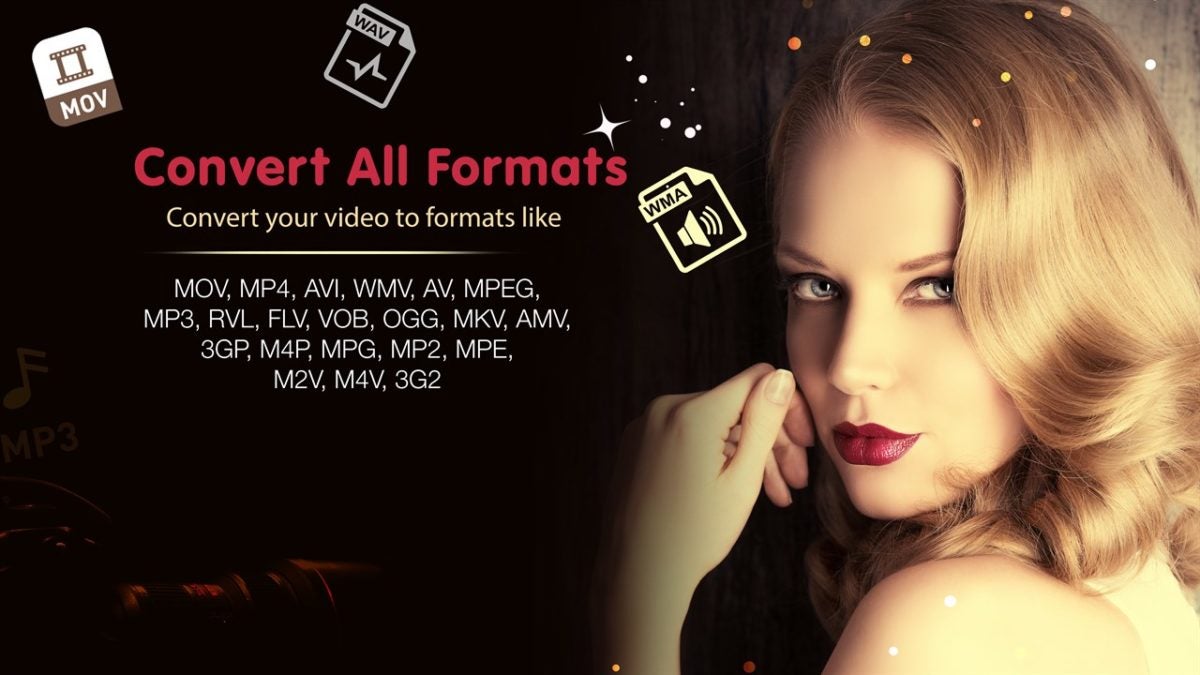
Launch the video converter to start converting your AnyDesk recordings. Upload your AnyDesk recording to the open file converter. You can find your recordings under “Session” and then “Recordings” in your AnyDesk folder. Choose which format you would like to convert your AnyDesk recording to, such as mp4 or avi. They are usually both good options as they are universally accepted by most media players. Now start the conversion process. Wait while the session recording is being converted.
If you don’t see the option to select the AnyDesk file, that means that the video converter you selected isn’t compatible with the format. When this happens, you’ll have to go back to step 1 and try with a different program. It’s best to only use free apps so that you don’t waste any money while trying to work out which is the best one.
When you succeed in converting your video, you can now watch it on any platform or share it with your colleague or meeting members. As a general rule, you can only watch AnyDesk videos on AnyDesk, so converting it for someone else is essential.
Changing session recording settings
You can change the default settings to start a recording as soon as a session starts, or only record when they are incoming or outgoing sessions. If you prefer to keep it off by default, you can just hit the record button found in the AnyDesk toolbar, when you want to start during an active session.
You’ll also need to keep tabs on how much storage space the videos are taking up and delete a few that aren’t needed or look at either cloud or storage backups if you’re required to log recordings for work purposes.
Convert Your Recordings and Watch Them Anywhere
Converting your recordings is an easy process when using a reliable file converter and will allow you to send and watch these recordings anywhere and through most media players. No more struggling with your recordings not playing as the file format isn’t supported.
Remember, you can find your AnyDesk recordings under “Session” and then “Recordings” in your AnyDesk folder. You can change the default settings to start a recording as soon as a session starts, or only record when they are incoming or outgoing sessions.