The first Minecraft ‘The Wild Update’ releases to Java Edition with snapshot 22w11a

The work on Minecraft is never done. Developers, Mojang Studios, and the Minecraft community are continually making improvements and additions to the popular game to keep players intrigued. Mojang Studio just released another screenshot to players in the Java edition, meaning the full release is getting closer.

We have been waiting on Minecraft’s The Wild update since the studio announced it in 2021. The first official snapshot has been released for Java Edition players to test. This is the first screenshot released to fall under the version 1.19 update umbrella.

The Wild update will be the first significant content release for Minecraft in 2022, following the release of Caves and Cliffs in 2021. The development team is now leaving Caves and Cliffs to focus their full attention on getting this new update released. 

Snapshot 22w11a introduces a brand new biome, Deep Dark, and new animals, blocks, and more. The new animals include frogs and tadpoles, which are exciting as frogs can eat small slimes, causing a slime ball to be dropped. Frogs can also eat small magma cubes dropping froglights in the process. Froglight blocks are new light source blocks, and the type of froglight dropped depends on the type of frog that ate the magma cube. Players will also be able to mine new decorative blocks called sculk.

While we are very excited about the new biome, animals, and blocks, these aren’t the only new content released with this screenshot. You can view the details of what’s included in snapshot 22w11a here. We look forward to the eventual release of The Wild update, and this latest screenshot brings us one step closer. For beginners to the game, you can read our complete Minecraft review.

Windows 11 will now feature a watermark on unsupported devices

Windows 11 shipped to new devices with greater hardware requirements than its predecessor. While this came as a shock to many users, the decision to increase the OS’s capabilities and performance with these stricter requirements make sense, given Microsoft’s recent increased interest in high-performance gaming. Most notably, the new OS requires at the very least an 8th generation processor in addition to Trusted Platform Module 2.0 (TPM 2.0) to be present in your device.

While there are ways around these stricter requirements, Microsoft has, with perfect clarity, made its position on the use of unsupported hardware known. The next update of Windows 11 is even expected to ship with a watermark alerting users that their hardware doesn’t support the use of Windows 11. 

This watermark has featured as an A/B test component in the latest versions of the Windows Insider program and is expected to become a standard feature across Windows 11 devices in the next major update. The watermark is expected to appear above the clock at the bottom right-hand side of the refreshed Windows 11 taskbar and reads ‘System requirements not met. Go to Settings to learn more.’ Should users heed the warning and open their Windows 11 Settings app, they will be greeted by an additional warning under the System banner. The ‘System requirements not met’ notification will repeat here, with a link to ‘learn more.’ 

The main reason Microsoft doesn’t condone using Windows 11 on an unsupported device is that it simply cannot provide the necessary support for said device. Unsupported devices don’t meet the requirements to run Windows 11; therefore, there are not devices the Microsoft team is likely to roll out support for. There is no wisdom in dedicating resources to developing support structures for devices not designed to run the operating system.

These support structures include safety protocols, antivirus and malware safeguards, and general system updates. Windows 11 also engages in far more information transfers and processes than Windows 10, meaning if your CPU is not up to the task, it could overheat, and you could lose your processor completely. 

There are cases in which your system simply isn’t supported but does potentially meet the hardware requirements. In these rare cases, you should be well within your system’s capabilities to run Windows 11 smoothly. Do your research to find out what processor you have and whether it and your GPU and any other critical components can support Windows 11 before you make the choice to follow a guide and bypass both the installation errors and the watermarks.

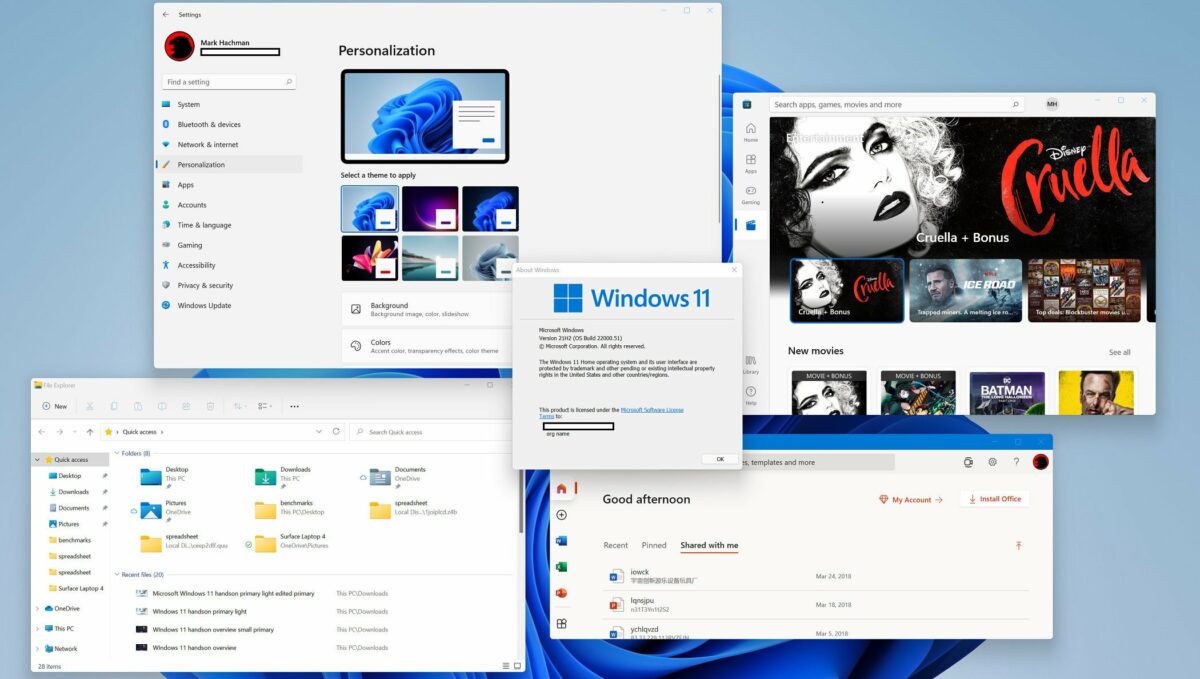
Windows 11 is an incredibly advanced operating system, and it represents the future of computing integration. If you’re having issues with movement, you can check how to increase cursor speed on Windows 11.

BitDefender Antivirus is now free for Windows

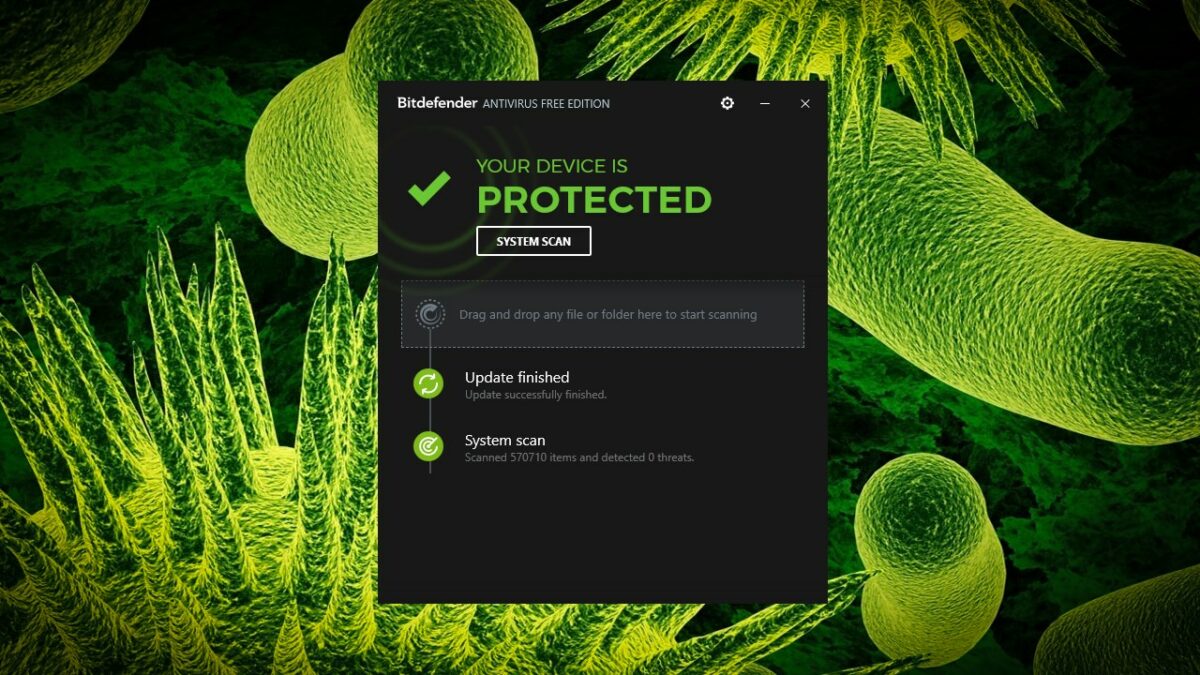
Following its announcement of the end of support for its free antivirus software in December 2021, BitDefender has released a brand new redesign of its antivirus software, free for Windows users. Offering enhanced functionality and new features, the new software lends itself well to a more integrated and comprehensive user experience. Included in these new features are email protection frameworks for Thunderbird and Outlook, giving users a much greater level of protection against malware. 

One critique of the old utility was that it was no longer optimized for modern cyber threat protection. To this end, instead of simply adding a few new measures into the existing software, BitDefender opted to rebuild the entire utility from the ground up. As widely available as basic antivirus is in the modern setting, BitDefender found that from a sample of 10000 individuals, barely 11 percent have enough security frameworks in place to be counted as secure. The survey classified respondents’ defensive measures in case of a cyber-attack according to their online behaviors, the number of accounts they held, and the frequency with which they reuse old passwords. 

In a subsequent statement, the Vice President of BitDefender’s Consumer Solutions had the following to say: “The attack surface continues to grow with an increasing number of devices used by consumers at home and on the go that need basic protection. We completely redesigned BitDefender Antivirus Free for Windows to provide a powerful first line of defense against modern threats that is also intuitive and easy to use.

While our new free version doesn’t include many important features for complete security protection, it helps stop attacks at the door while giving users a good way to test out BitDefender technology, finding out first hand why we continuously lead independent tests for threat detection.” 

The new utility makes real-time responsive and combative measures against cyber attacks a possibility for all Windows users. While we expect the utility to be ported or rebuilt for other operating systems in the future, there has been no confirmation of such endeavors by BitDefender. For more news on malware, check out this malware that hides inside seemingly innocent Android apps.

India’s famous Kirana Stores could see a 21st century Whatsapp-based revamp

WhatsApp has long been a champion of business and industry. Its dedicated WhatsApp Business utility has been around since 2018 and has created a more integrated ecosystem for small business owners and their clientele. A user on Medium, however, believes much to be desired for WhatsApp Business to truly be an invaluable asset to local small businesses. The user, Saptarshi Samaddar, went as far as to develop a concept for a new user interface and experience on Whatsapp Business that specifically caters to the local mini-markets and corner stores known as Kiranas. 

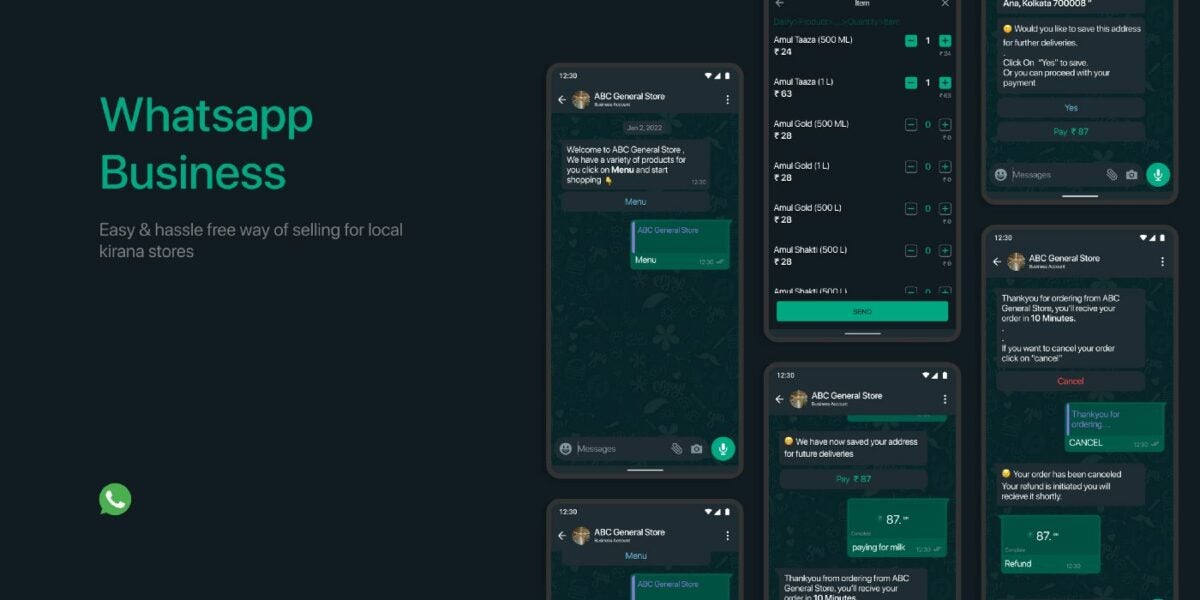
As part of the interview process for a position at Razorpay, candidates were asked to design a shopping experience function for WhatsApp. Drawing inspiration from his surroundings, Samaddar created a proposal for a UX innovation integrated into Meta’s popular messaging platform that enables users to browse, order, and take delivery of various goods from the local Kiranas without leaving their homes. The problem, according to Samaddar, is that one Kirana can stock over 39000 items divided into multiple categories. For WhatsApp Business to work for Kirana owners and clients, he needed to develop a way to display items while working within the constraints of WhatsApp’s design environment. 

Samaddar acknowledges that WhatsApp Business does currently have a product list interface but that the list can only contain 30 items. He, therefore, proposes a nested list system wherein the original 30 items become categories, and each category has a nested list of items for users to choose from. He also included numerous dialogue triggers and responses, and buttons that would streamline the process. He notes that people buying from Kiranas typically develop a rapport with the owners, leading the owners to deliver goods to them within reason. The inclusion of delivery options and utilities would, therefore, simply be an evolution of a system already in place. 

Even though the interface was developed for Kirana owners specifically, Samaddar has said that in the market research phase, many owners saw no benefit in tailoring the WhatsApp Business experience to their particular business models. However, he also found that many of the owners would like to break into the emerging local e-commerce market but simply don’t know how. 

While this is still just a concept, it does provide food for thought about smaller businesses in what Samaddar calls third-tier cities and what their role in the modern e-commerce age could be. WhatsApp certainly has revolutionized communication between small businesses and their clientele; why not revolutionize the entire industry? If you like this piece, why not read our comprehensive guide on how to use WhatsApp to be more productive.

Poppy Playtime finally hits mobile

MOB Games has officially announced that its highly sought-after PC horror title Poppy Playtime is now available on mobile devices. Poppy Playtime was initially released in October 2021 on Steam and quickly became one of the most popular games in its genre. Almost immediately after its release, the app stores were populated to the hilt with mobile imitations, but finally, after months of waiting, Android and iOS gamers can enjoy Poppy Playtime with an official mobile client. 

Poppy Playtime follows the story of an employee of the Playtime Co. toy factory. At the start of the game, the factory is abandoned and has been that way since some assumedly horrific event caused all of the staff to leave. Throughout the short but impactful episodic game, the player must solve various puzzles to move deeper within the toy factory while avoiding a character that has become more of an icon than Freddy Fazbear from FNAF; Huggy Wuggy. 

The game does what most horror games do; it poses many questions concerning its own nature and the experiences contained within. Cleverly though, it never gives up more than a few hints. Hints that, in turn, lead to more questions. This incredible attention to detail on the part of the writers and game designers has inspired a massive subculture of Poppy Playtime fans trying to discover the hidden lore behind experiment 1006 and, of course, the appearance of the titular character Poppy Playtime. 

Poppy Playtime coming to mobile, of course, means a whole new breed of gamers finally has the chance to pick up the famous grab pack and delve into the mysteries and jump scares deep within the heart of the now-iconic toy factory. We can expect to see the mobile version make as big an impact on the mobile gaming scene as the PC version did on its platform and all the media of content transmission surrounding it. 

Stay tuned to keep up with the latest on this and other incredible gaming titles, including our expert playthrough reviews, news, and how-tos. In case you missed it, the sequel is confirmed! Read everything we know about the follow-on episodic horror game and why we think Poppy Playtime Chapter 2 might take place outside.

How to get rid of viruses on Android that return after a factory reset

A little over two years ago, a brand new type of malware burst onto the Android scene. The story of this particular piece of malware first appeared in the news cycle over at Android Police. In an article released in April 2020, AP explained that the malware, named xHelper, was able to survive even the most thorough Android factory resetting regimen.

Unfortunately, such malware still roams the internet, hidden within unmonitored APKs and as overlays of already suspicious websites. It lies there, patiently, waiting for a user to click on the wrong webpage or download the wrong APK, and then it strikes. Luckily, we’re about to break down what researchers found out about malware like xHelper and how to deal with it so that it cannot return. This is your crash course in one of the most ruthless examples of Android-focused malicious software the world has ever seen. 

What is xHelper?

xHelper is malware that came about in early 2020 and infected a vast majority of Android 6-7 devices. A Kaspersky researcher discovered that the malware operates by downloading a rootkit. A rootkit is basically an application, in this case malware, that can grant itself root privileges on your Android device. Once this software has root privileges, it can install additional malware onto your device. The worst is that it doesn’t install any additional malware to easily accessible directories that you can clear from your OS; anything it installs attaches directly to your system partition. 

Once malware gets into the system partition it immediately becomes an even bigger task to remove, and it won’t just disappear with a factory reset. Worse still is that the system partition isn’t even a part of your phone you can access under normal circumstances; it’s a read-only file that you cannot mess with. 

Here you’re probably thinking that some Android users are more resourceful than others. In fact, some users have root access, which means they can manipulate root files. Surely these Android elites can remove rootkits? Unfortunately not. This malware is so pernicious because it roots itself so deep into your device, it’s in the same place all your other components are, where no amount of Android root know-how can pose any threat.

As hopeless as the rootkit situation must seem, there is indeed light at the end of this Android malware tunnel; We’re about to show you how to remove rootkits, no matter how deep they’re buried.

How to remove rootkits on Android

Here’s the kicker; you’re going to need a third-party app. Yes, our system guides usually focus on how to do things without downloading external software, but this time you can’t go it alone. We suggest enlisting the help of Avast for this one. Not only is Avast one of the top names in antivirus protection for all your devices; unlike some rivals, Avast offers a free rootkit scanner and remover. You read that right; Avast and Free in the same sentence.

  1. Find Avast’s free rootkit scanner and remover
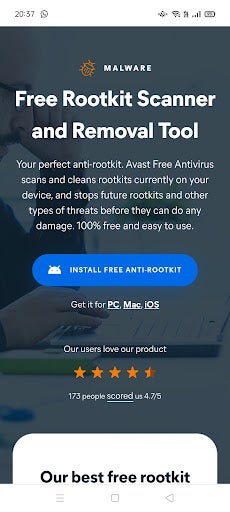
    How to get rid of viruses on Android that return after a factory reset

    You can get the app directly from Avast by typing ‘Avast free rootkit scanner and remover’ into your browser. On the Avast website, you’ll see a blue Install free anti-root kit button. Give in to temptation and click it.

  2. Download the root-kit

    How to get rid of viruses on Android that return after a factory reset

    Next, you’ll be redirected to the download. Click install and wait for the app to finish downloading. Once downloaded, click open. 

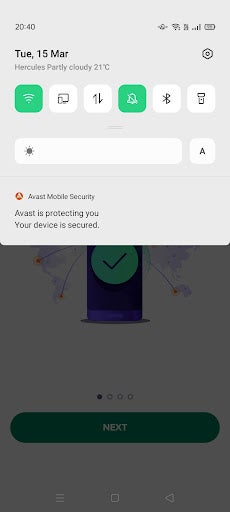
    Hit the green Get started button as soon as Avast opens, and take a quick look at your notifications, You should see a banner from Avast reading Your device is secured.

    Avast is a company, and like most companies, they want you to end up purchasing their wares. Feel free to hit Continue with free on the next page you see.

  3. Your very first scan

    How to get rid of viruses on Android that return after a factory reset

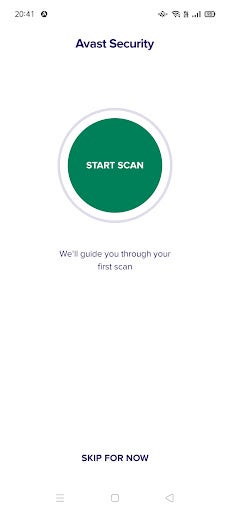
    Avast immediately teleports you to the scan interface. This is to make quick work of getting your device secure, and to give you a general lay of the Avast land so that you know what’s going on. You can skip this for now, but we recommend doing the first scan.

    When the scan is complete, you’ll see a short summary of what Avast did. On our test device for example, it scanned 291 apps and 22 files, checked 11 security settings, and resolved one vulnerable setting.

  4. Deep scan

    How to get rid of viruses on Android that return after a factory reset

    The first scan is a good way to check up on your device’s security status, but one scan does not a secure Android make, as the adage goes. Next, hit the green scan button once more, and then you’ll be prompted to choose between a regular scan and a deep scan.

    Choose use deep scan. This will take longer than a regular scan, as it scans your entire device from root to tip for vulnerabilities. You’ll notice that with the deep scan, the number of scanned files jumped from 22 to 2349; this is how you know how deep the deep scan goes. It scans system apps you didn’t know you had, files you can’t get to, and system directories not even shown on your phone.

Rootkits aren’t so scary if you’re protected. 

With the appropriate protection, malware loses power. Yes, there are still virulent trojans and droppers out there in the vastness of cyberspace, but with an app like Avast, you at least stand a chance. Better still is that companies like Avast provide perfectly usable free versions of their antivirus software, meaning you don’t need to pay an arm and a leg for proper protection. That said, you’ll definitely have to deal with a few ads.

How to change the speed of your cursor on Windows 11

Your mouse looks like the most minor and inconsequential bit of your entire Windows 11 experience. However, as small and simple as the mouse looks, when your pointer or cursor doesn’t work precisely as you want it to, it takes a toll on your productivity.

We love productivity, and so to that end, we’ll teach you how to tweak your mouse to perfection! Here’s how to change the speed of your cursor on Windows 11.

How to change the speed of your cursor

  1. Open your mouse settings

    How to change the speed of your cursor

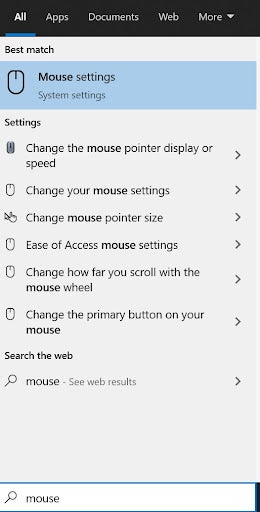
    You can go through the entire process of clicking on settings and navigating to mouse settings, but it’s far easier to simply type ‘mouse’ into the Windows search box. This will bring up a list of actions regarding your mouse. You could follow that up by clicking on Mouse settings, but it would be faster to scroll to the option you need; In this case, change the mouse pointer display or speed.

  2. Adjust the slider

    How to change the speed of your cursor

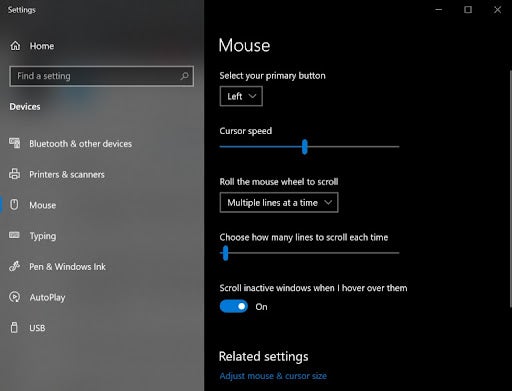
    Next, you’ll see a slider with the heading Cursor speed. All you need to do is move the slider to the left or right at your discretion. By moving the slider to the left, you’ll decrease the sensitivity of the mouse, and by moving it to the right, your mouse’s sensitivity will increase. 

    Now, this is technically the end of how to change your cursor speed, but we like doing things the comprehensive way. To that end, here are a few more settings you can tweak and play around with to further optimize your experience using a mouse with Windows 10 and its younger contemporary, Windows 11.

Other mouse configuration options

Besides changing the cursor speed, there are other settings you can change on your mouse.

Buttons

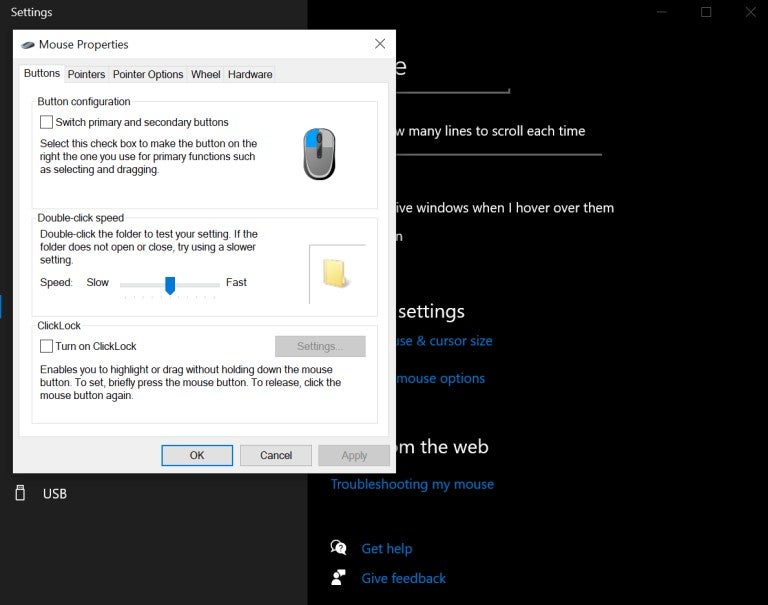
The button configuration interface below lets you tweak all sorts of aspects of your physical mouse. This is particularly handy to gamers, and anyone who is constantly moving their mouse and needs pinpoint accuracy, speed, and access to more comprehensive settings. Here is a list of all the changes you can make from here:

  • Switch left and right: Sometimes, it’s necessary to switch the left and right buttons on your mouse. You can now do this directly from your mouse settings! Now both left and right-handed people can use the mouse more comfortably. 
  • Change the double-click speed: This is particularly handy. With this slider, you can adjust how much delay to allow between clicks before your operating system decides that double-clicking wasn’t your intention. This is handy for people with fast reflexes who tend to accidentally double-click a lot. 
  • Enable ClickLock: ClickLock lets you make extensive selections without having to keep your finger on the mouse button permanently. With ClickLock enabled, you simply click once to initiate it, drag out your selection, and then click once more to end your selection. 
How to change the speed of your cursor

Another feature of this handy interface is the test folder to the right of the box. If you make a change, click on the folder to see how your mouse performs, reacts, and feels, and then confirm the change or tweak it a bit more. 

Pointer configuration

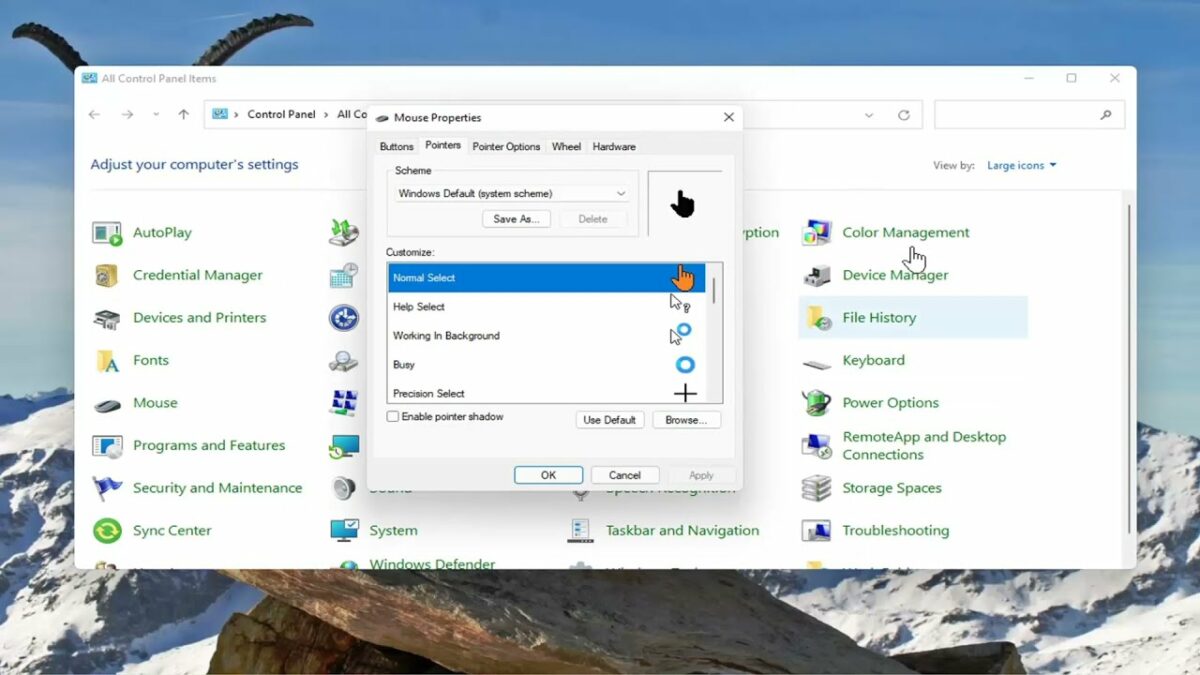
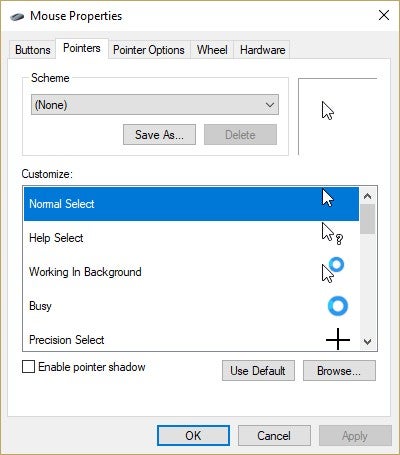
When tweaking your mouse’s settings, you can go as far as changing what your pointer looks like. Take your pointer to the top of the mouse properties window, and click on Pointers next to the buttons tab where we just were. You can change the way your pointer looks from here. 

How to change the speed of your cursor

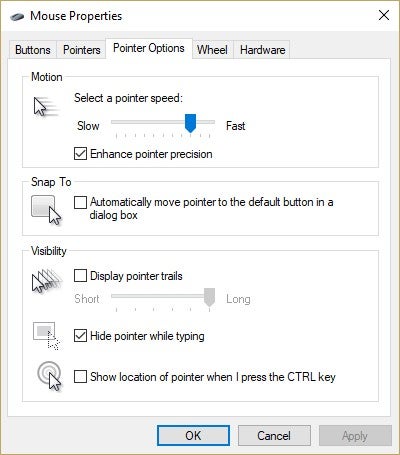
But what we’re more interested in are the pointer properties you can play with to further optimize your mouse. From the Pointer options interface, you can change the speed of the pointer, whether the pointer automatically snaps to an available button on your screen and various visibility options for your pointer. You can give your pointer a blurry trail, choose to hide your pointer while you type, and even choose whether to show the pointer’s location when you press the CTRL-key. 

How to change the speed of your cursor

So many options, such a small asset

We often underestimate assets like the humble cursor. If you explore each panel, window, and interface in your Settings app, you’ll likely find out a lot of interesting things about your PC. The most interesting aspect to someone who digs and delves into PCs and their capabilities all day is how truly customizable these machines are.

Ultimately, even with an asset as small and simple as a mouse pointer, there are so many ways to change how assets operate to make them easier to live with and more convenient to use.

Windows 11 File Explorer might be getting ads

Ads in File Explorer. You read that right. According to a Windows 11 Insider, Microsoft might soon be making ads a part of the Windows 11 File Explorer experience. The user of the Windows 11 Insider build, and notable Insider MVP, shared a screenshot that clearly shows an advertisement placed prominently above the list of files and folders within the Windows 11 File Explorer app. File Explorer is Windows 11’s default file manager, but the inclusion of ads might be more of a deterrent than the enticement Microsoft seems to be going for. 

The ads in question aren’t random products or services from companies who’ve bought advertising space from Microsoft. In fact, we highly doubt Microsoft would turn one of its most essential Windows 11 apps into a virtual billboard. It does, however, seem that Microsoft is using the dedicated space to advertise products and services from within its own stable. So you would expect to see such ads as how to ‘write with confidence across documents, email, and the web with advanced writing suggestions from Microsoft Editor.’

While this type of internal marketing is not much different to companies highlighting features of an app within the app or including guides on how to use a program inside the program itself, there is still concern amongst users that this could sully the Windows 11 experience. It’s an experience that, up until now, has focused on streamlining and decluttering the modern operating system interface. 

Windows 11 File Explorer might be getting ads

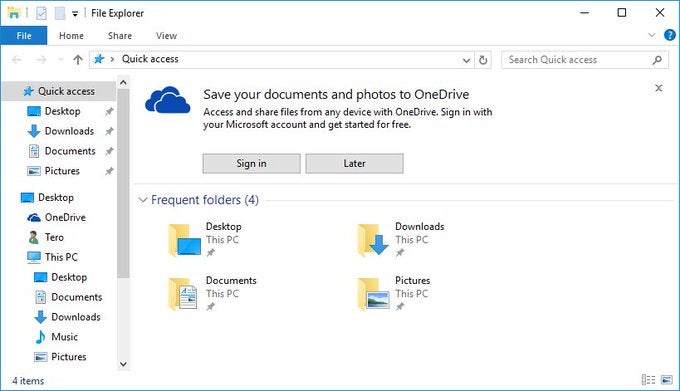
Critics point out, however, that Microsoft is no stranger to self-promotional ads within its operating systems. Such was the case with Windows 10 in 2016 when Microsoft added promotional content for OneDrive directly in the File Explorer window. Microsoft is even guilty of trying to push its free Office online functionality suite within the menu bar of Windows 10’s Wordpad. 

It is also pertinent to mention that not all Insider users experienced the same feature. While this could mean Microsoft is testing the feature on a smaller scale within its Insider build, it could also mean it’s a purely Insider feature for a certain percentage of users and might not even be considered as a feature of the official software. 

While you wait for Microsoft to bring a little clarity to this potentially upsetting situation, why not check out what’s new in the latest Windows 11 build? We assure you, there are no ads in this one.

Sony to reveal exciting Hogwarts Legacy gameplay

‘Wands at the ready’ according to Sony as they announce an all-new State of Play broadcast event for Hogwarts Legacy, the new Harry Potter-inspired fantasy game for PlayStation. It’s been two years since the game was officially unveiled, and now, finally, the time to once more roam the halls of the iconic school of witchcraft and wizardry is upon us. 

‘Wands at the ready for an all-new State of Play focused on Hogwarts Legacy, featuring an extended first look at gameplay this Thursday, March 17 at 2 PM PT.’

Sony went on to say that the trailer for the new game attached to the post has already had well over 28 million views since its initial reveal over on PlayStation’s official YouTube channel. According to Sony, the Hogwarts Legacy State of Play event will include no less than 14 minutes of dedicated gameplay. This is sure to whet fans’ appetites as well as entice any newcomers to the Harry Potter fantasy world to give the game a try when it releases. Sony also mentioned that the project is something they’ve been looking forward to greatly: 

‘This is an incredible moment we’ve been building towards. We can’t wait to show you what we’ve been working on.‘

After the reveal, set to take place on Thursday, March 17 at 2 PM Pacific Time, Sony has said they will publish a post on PlayStation’s official blog to bring the events of the live stream into context and provide further information on the upcoming game. We have not as yet received any new information as to when the game will officially release worldwide. There is, however, a rather prominent rumor that the game won’t be in stores until the theatrical release of Fantastic Beasts: The Secrets of Dumbledore next month. 

We’ll keep you updated as far as possible as to the launch of the game and this week’s State of Play live stream. Want to play Harry Potter games on your smartphone? Check out our news on Harry Potter: Magic Awakened heading to mobile.

How to use Notion for productivity

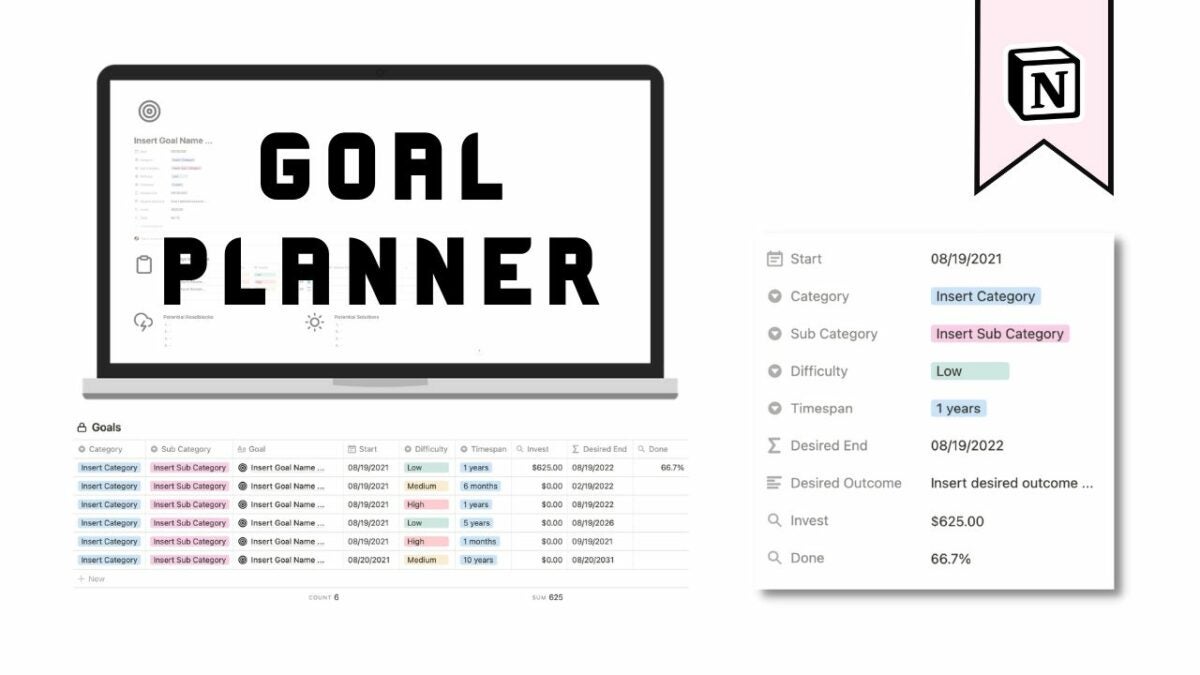
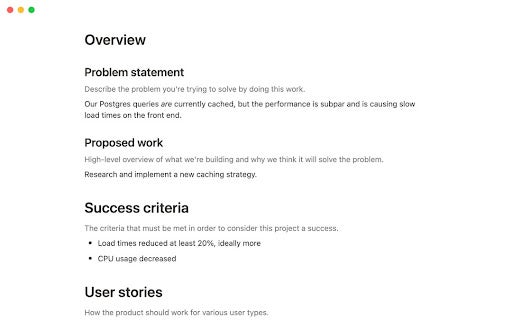
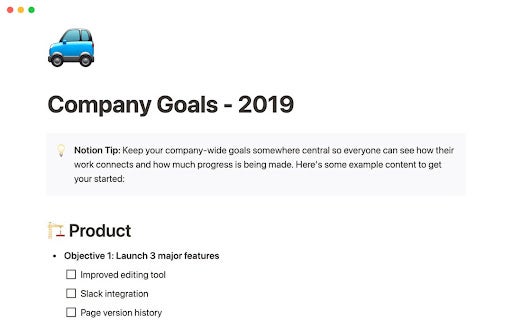
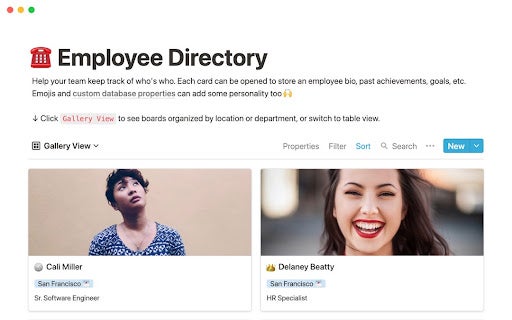
Notion is a breakout new all-in-one productivity tool. We live in a time where the daily grind has become the daily hustle and where a nine-to-five has morphed into cramming as many projects, functions, opportunities, and time commitments into the day as possible. In a world that virtually never stands still, people from all walks of life need as much help as they can get to remain organized. 

Many apps take care of one aspect of modern organization, such as notepads, text editors, to-do list apps, and virtual workspaces, but why use five apps when you can use one. That is the notion that led to the creation of Notion, pun intended. We’ll take you through the ins and outs of getting started with Notion. It’s easier than you’d think, and it’s bound to save you time and keep you organized. 

  1. Add and edit content

    How to use Notion for productivity

    Notion is like a grown-up take on your favorite childhood building blocks but geared toward productivity. All content in Notion is referred to as a block. There are over 50 blocks at this stage, with more inbound. Each block is entirely customizable, meaning the options for the content you put into each block are endless. To add blocks into Notion, hover over the left-hand side margin and click the plus icon. From there, scroll through all the types of content you can add. 

    Text is one of the most commonly used blocks in Notion. To add text into Notion, all you need to do is place your cursor anywhere you want and start typing. The Notion content editor is like any other content editor you’ve used, except that endless features for every aspect of content the editor can process aren’t cluttering up your workspace. Notion takes a different approach to features; they’re only around when you need them. For instance, only when you highlight text does the formatting menu pop up. From here, you can perform more tasks more efficiently than your current text editor:

    – Add comments

    – Bold, italicize, underline, and strikethrough text

    – Add links

    – Add formulae

    – Tag team members

    – Make notes

    – Highlight and manipulate text color

    What’s more, in terms of formatting, Notion gives you a quick drop-down list of different formats to apply to your text. By clicking on Text, you can turn your text into:

    – A new page

    – To-do list

    – Bulleted list

    – Numbered list

    – Code

    – Quote

    – Callout

  2. Set up your workspace

    How to use Notion for productivity

    Notion makes it easier to organize your entire workflow, from start to finish. The most significant difference between Notion and other productivity software is that Notion uses pages instead of folders. This has a number of advantages. Pages make it easier to link relevant content together. Instead of numerous folders on your home interface, Notion has a context ribbon on the left of the screen that lists all your pages. 

    Each page can contain infinite blocks, and each page can also contain other pages. This works like a directory path. You’ll see your primary pages first, and you’ll be able to expand these into their subpages. Pages, like blocks, can be dragged and dropped to reorganize content and can even be dropped into each other to become subpages. 

    Your workspace will be organized into two sections on the left-hand side of your screen; Workspace and Personal. This way, you can keep track of every aspect of your professional life, as well as your personal life, from one easily navigable interface. Your professional workspace will be accessible to other members of your team, provided you add them to it, but your private space is all yours to do with just as you please.

  3. Collaborate with your team

    How to use Notion for productivity

    With Notion, you can say goodbye to all the other team collaboration and messaging apps you’ve used before. Notion makes staying in touch and on top of productivity even more manageable in the modern professional landscape. 

    To share information on your workspace with your team members, to the landing page or subpages you want to share, hit Settings & Members, and then copy the invite link to distribute to your teammates. You can also invite users to individual pages by selecting a page, heading to the top of the screen to Share, hitting Add People, and then adding people via an email invitation. 

    To further integrate other users into processes, you can use the comment function on any and all blocks. Simply click on the six-dot icon next to the block, select Comment, and then type your comment in the dialogue box. If you want to grab someone’s attention, use the @ sign in the comment, followed by their name. When your comment is ready, hit Send. 

    You can also hover near the top of any page and hit Add Discussion to start a thread on that page. From there, you can mention members to get them involved in the discussion. You can essentially provide members with information, assign tasks, conduct reviews and even just engage in general workplace discussions on any page.

Say goodbye to productivity as you knew it

Notion is limitless. There is no limit to how many functions, blocks, or pages you can work into your workspace. There is also no actual limit to what you can do. No matter your industry, Notion is likely to become the new face of seamless productivity in the new virtual workplace.

With Notion, there is no more need for external word processors, timekeepers, schedule apps, communication apps, or workflow management apps. Notion does it all, and it does it so much better.