Best 10 coupon Chrome extensions

Coupons help shoppers save money and businesses advertise their products, gain new customers, and increase revenues. They’re especially popular right now with prices increasing and many people trying to save money in a less robust economy. You can also receive discounts when browsing online stores on Chrome.

This guide tells you how to get coupons as Chrome extensions when you shop online and use them on those sites or retailers like Walmart, Target, WinCo, Food 4 Less, and more.

Why get and use coupons on Chrome?

Here is a list of the best Chrome extensions to get shopping coupons to use either online or at stores countrywide. If you’re a shopper, you can save thousands of dollars over time by using coupons. Suppose you’re a retailer prepared to allocate a certain amount of money to attract new customers. In that case, coupons can be a more effective and less expensive way to do so than advertising.

Coupert – Automatic Coupon Finder & Cashback

Coupert is an automatic coupon finder that gives you the best cashback rate for thousands of online stores, including top retailers like Walmart, Booking.com, Macy’s, Forever 21, eBay, and Finish Line. 

Using it means you won’t have to search for coupon codes because it does the work for you. It easily finds the best promo codes online and automatically applies them to your purchase at checkout, which is why a million people use it! The Coupert Chrome extension uses Google Analytics. You can opt-out by going to http://tools.google.com/dlpage/gaoptout.


Coupert DOWNLOAD
Best 10 coupon Chrome extensions

Cently (Coupons at Checkout)

Formerly called Coupons at Checkout, Cently will automatically apply coupon codes for you every time you shop online. Whenever it finds an empty Coupon Code box at an e-commerce store, it searches the web, finds all that retailer’s latest coupon codes, and applies the best one! It’s featured on Mashable, LifeHacker, VentureBeat, and CNET’s best money-saving tips! 

You can earn cashback and rewards at your favorite retailers across the web using the latest version! It’s a free Chrome add-on that supports thousands of stores in several countries.


Cently DOWNLOAD
Best 10 coupon Chrome extensions

FatCoupon Cash Back & Promo Codes

With FatCoupon, you can earn cashback at more than 5 000 stores on Chrome. They have a full-time team testing codes to make sure they work. You just add it to chrome, and it automatically applies the best coupons when you shop online. It even creates price and in-stock alerts for Walmart, Amazon, and Best Buy. 

You can get extra savings at holiday sales like Black Friday, Memorial Day, Cyber Monday, Labor Day, etc.! FatCoupon works very fast. It won’t slow down your web browser like other coupon extensions.

FatCoupon Cash Back & Promo Codes DOWNLOAD
Best 10 coupon Chrome extensions

Moolah – Automatic Coupon Hunter

The Moolah engineering team calls themselves a bunch of geeks who are passionate about helping people save money. After installing the Moolah free Chrome extension, it will test coupon codes and apply the best one or even two stacked if the shopping site you’re visiting permits it. 

It does all this automatically, so you don’t have to. Moolah browses the whole internet with artificial intelligence, so it won’t miss any codes that can save you the most money and add them to your shopping cart.


Moolah DOWNLOAD
Best 10 coupon Chrome extensions

Juice – Amazon Coupons Finder

This free Chrome extension is designed to find products that offer discounts on Amazon as easily as possible. Juice is a great option for Amazon buyers. Based on your searches, it will show you all the discounts available. 

You’ll find discounts only on what you’re looking for and not random products you might not be interested in. It allows you to sort results by discount, price, reviews, and rating. Install juice to help you find the best and most appropriate discounts on Amazon.


Juice - Amazon Coupons Finder DOWNLOAD
Best 10 coupon Chrome extensions

CouponsHelper

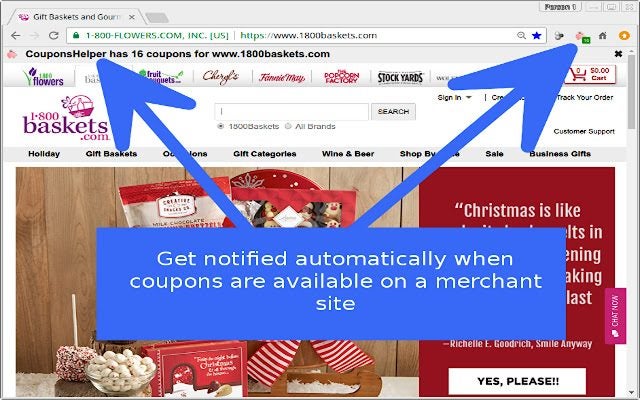
CouponsHelper retrieves coupons while you’re busy browsing shopping sites. It helps you save money right away. Visit one of the thousands of online merchants it supports and gets coupons right in your Chrome browser. You’ll know it has found some when its pink piggy flashes! 

It supports a large number of notifications to inform you when there are coupon codes on any shopping site that you’re visiting at any moment. CouponsHelper finds coupons you can use, so you’ll never miss the best deals for you.

CouponsHelper DOWNLOAD
Best 10 coupon Chrome extensions

Harbor Freight Coupons

Harbor Freight specializes in selling high-quality tools at the lowest possible prices. To help you save even more money, they automatically find and display Harbor Freight coupons on their website from the hfqpdb.com database for the best coupons on Chrome. 

The coupons are displayed by item number next to the retail price while you browse Harbor Freight’s website. Using these coupons means you need never pay the full listed price for these excellent products again.


Harbor Freight Coupons DOWNLOAD
Best 10 coupon Chrome extensions

Sendoso for Chrome

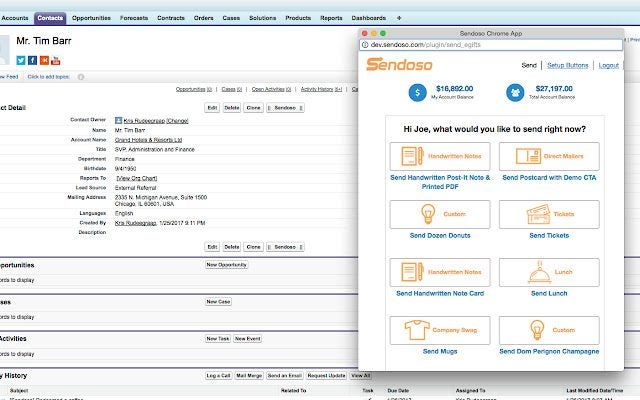
Sendoso is a free Chrome Extension that allows users to measure the effects their business efforts are having from Salesforce, Outreach, Amazon, and SalesLoft. It offers new and innovative e-commerce solutions to help companies drive and improve their revenues. 

Sendoso assists companies with scaling their marketing programs and connecting with their customers. As a result, it gives businesses the ability to increase their revenue by improving their whole customer experience from the start of the engagement to the final transaction.

Sendoso DOWNLOAD
Best 10 coupon Chrome extensions

The Coupons App®

The Coupons App free Chrome extension finds coupons for you. It automatically applies promos when you shop online. One click will find the biggest savings and apply them to your shopping cart. It could not be easier. You can use the app on your phone like millions of people have done since 2008. 

You can also use it on your desktop computer and start saving. Taste a really sweet shopping experience that will really help you get the best deals on anything you want to buy anywhere online.


The Coupons App® DOWNLOAD
Best 10 coupon Chrome extensions

Coupon Cat for Chrome

Pon is a cute coupon cat that will help you find coupon codes on Chrome on whatever web page you are shopping on. You won’t have to look endlessly through different search engines or other websites. Pon will know exactly which pages have the best coupon codes and bring them to you in seconds. 

Pon will also apply your coupons to ensure you get maximum savings on whatever you buy. Just look out for the magical rainbow button when Pon is ready to go to work for your best savings!


Coupon Cat DOWNLOAD
Best 10 coupon Chrome extensions

Get your discounts on Chrome!

If you’re a discount hunter, you now have several of the best coupon extensions on Chrome you can use to your benefit. Remember to check out all the deals before you engage with them, as there may be some stipulations you need to be aware of first.

If you enjoy using add-ons on your browser, be sure to check out the best VPNs for Chrome.

15 Best VPNs for Chrome READ MORE

Best chrome extensions for tab management

There’s a reason Google Chrome is the world’s most popular internet browser. Using it ensures you can do anything you need to efficiently. Among its best features is managing and organizing tabs, and there are many apps that offer specific ways to do so.

Google Chrome DOWNLOAD

Using these top Chrome extensions for tab management will help increase focus and improve productivity. You’ll know where everything is, and you can organize them in different ways.

Top tab management extensions for Chrome

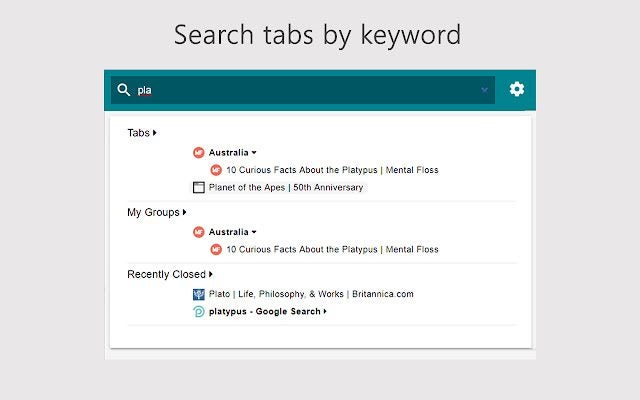
Tab Manager Plus for Chrome

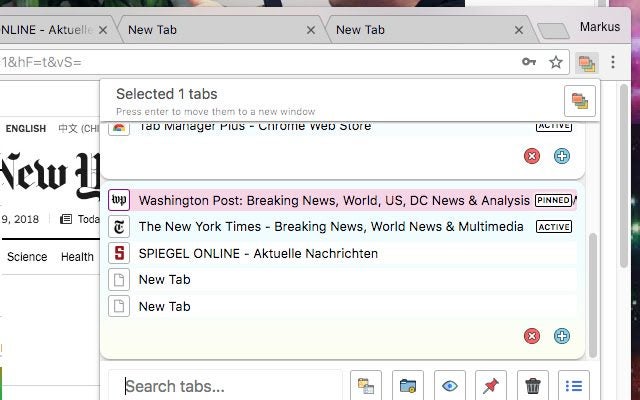
Considered by some to be the best tab manager out there, Tab Manager Plus for Chrome allows you to create new tabs and windows. You can also find open tabs quickly, find duplicates and limit the number of tabs per window that you can see at once.

This is a helpful app to keep tabs organized by filtering, moving and re-arranging them, and switching between them with the main focus on speed. It also supports incognito mode if you decide that you want to enable it.

Tab Manager Plus for Chrome DOWNLOAD
Best chrome extensions for tab management

Tab Manager: Productivity & Tab Management

Tab Management is a collection of tools that enhance your web browsing experience. It has many outstanding features. Among them are: 

  • Tab Terminator that automatically closes unused tabs;
  • Auto-Lock that prevents tabs from being closed accidentally;
  • Manual Lock or Unlock that allows you to lock and unlock tabs yourself;
  • Pin Lock that secures your tabs with a 4-digit pin to secure them;
  • Web Browser Pin lock, that secures your browser from unwanted usage;
  • Lock on your URL list to prevent unwanted closure of those tabs.   
Tab Manager: Productivity & Tab Management DOWNLOAD
Best chrome extensions for tab management

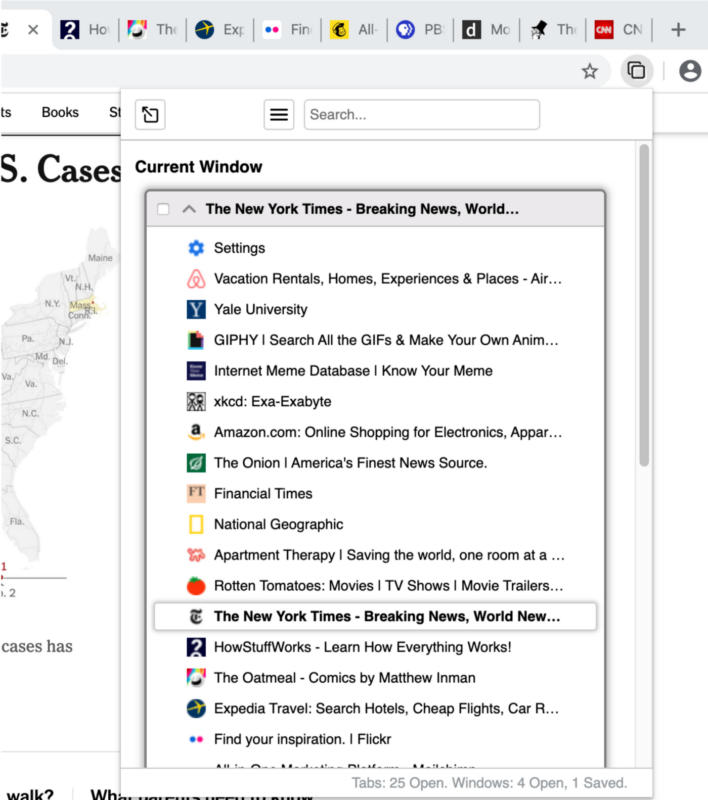
Tab Manager

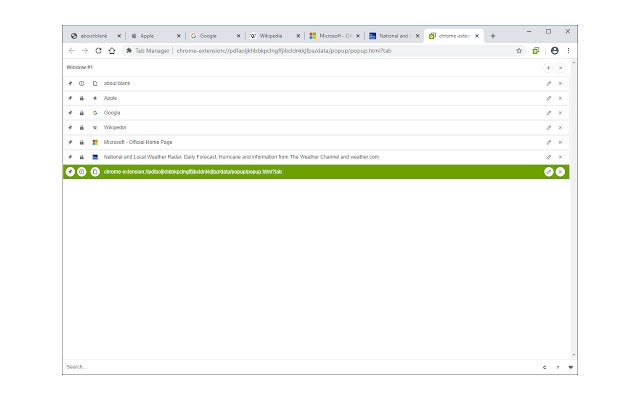
This extension organizes tabs from your toolbar pop-up. You can also open the UI for the extension in a standalone pop-up window or a new tab. Tab Manager supports multi-window and incognito mode. 

To use this add-on, open the UI and manage your tabs. You’ll see a search bar and a list of open tabs. There are two buttons on the right for editing or removing the current item. In the UI, you can drag all tab items. Once you drag one, it will re-positioned the tab.

Tab Manager DOWNLOAD
Best chrome extensions for tab management

Tab Organizer

The Tab Organizer is an app that allows you to find and organize all your tabs quickly. It makes it easy to find and manage all your tabs. Just click on the icon at the top right to open a pop-up that lists all your windows and tabs. 

Then you can choose and close tabs. You can drag tabs in the window or move them to another window. Power users can make tedious tasks like moving or closing tabs much easier by using macros.

Tab Organizer DOWNLOAD
Best chrome extensions for tab management 12

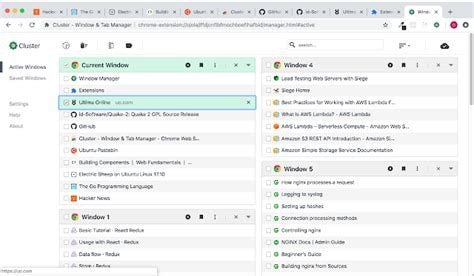
Cluster – Window and Tab Manager

Cluster helps you manage multiple open tabs and windows using very few system resources. It also has tools to navigate windows and tabs quickly and a tab project manager to save windows and tabs as working projects you can return to.

You can undo tabs or windows you have removed, launch the manager using a keyboard shortcut, easily move tabs between windows, etc. Cluster is fast and simple to use. 

Cluster - Window & Tab Manager DOWNLOAD
Best chrome extensions for tab management

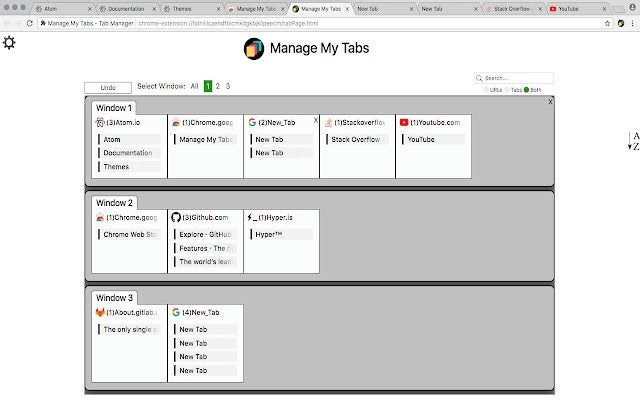
Manage My Tabs – Tab Manager

Manage My Tabs gives you a simple way to manage tabs. It groups tabs by website name that you can search for and customize. It lists tabs and tab groups numerically or alphabetically. You can close tabs individually or by group and easily navigate to tabs.

It updates when tabs are opened or closed. In your settings, you can alter the number of columns, get tabs from all windows, and search for tabs by website name.

Manage My Tabs - Tab Manager DOWNLOAD
Best chrome extensions for tab management

Tabli

Tabli is an easy-to-use but powerful tab manager. It provides quick switching between windows and tabs and allows you to save and restore them. Tabli runs as an extension in Google Chrome. It does not send any data to any extension, cloud service or external application.

Tabli makes it easy to see open windows and tabs and switch between them. Saved tabs in Tabli are similar to bookmarks. But they’re easier to organize, find, and maintain. The add-on is free.

Tabli DOWNLOAD
Best chrome extensions for tab management

ProTABS – The Tab Manager for Pros

ProTABS is an intelligent tab manager that’s especially useful when you’re dealing with large numbers of tabs. It will allow you to browse and work much more efficiently. It enables many powerful workflows such as:

Pinning your frequently used tabs (like email!) so you can see notifications at a glance. Creating groups from tabs and windows and arranging them by topic.  Saving tabs or groups of tabs so that you can find them later.

ProTABS - The Tab Manager for Pros DOWNLOAD
Best chrome extensions for tab management

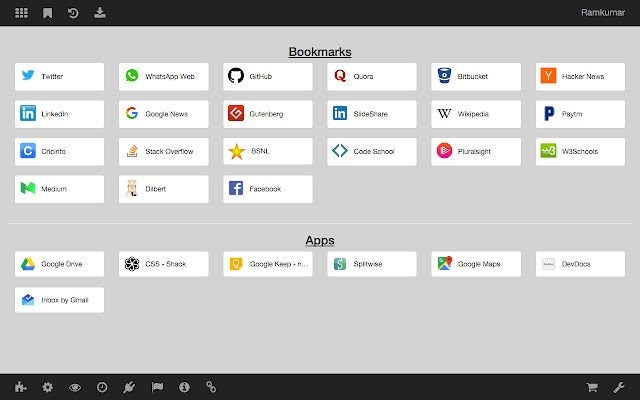
New Tab

This extension replaces Chrome’s New Tab page with a minimalist version that shows a blank white page and an imitation of the Bookmarks Bar. Bookmarks are the most important things in your browser apart from passwords. View them on your New Tab page instead of searching for them in the super small bookmark bar.

The page increases your productivity and customizes your browser. You can customize your name displayed on the page, change your background and add or delete files.

New Tab DOWNLOAD
Best chrome extensions for tab management

Close all Tabs

The Close all Tabs extension adds an option to your Chrome browser that closes all the open tabs in the active window. It allows you to close all open tabs, including pinned tabs and incognito tabs, using the toolbar button, keyboard command (alt + w) or the context menu options.

You can change the default setting for the toolbar button and open a particular URL after closing all the tabs.

Close All Tabs DOWNLOAD
Best chrome extensions for tab management

Mute Tab

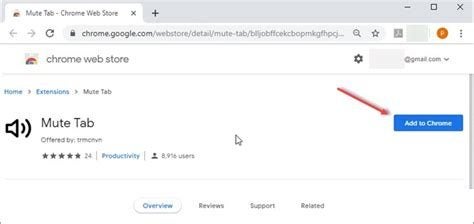
Google Chrome 71 removed the option to enable audio muting per tab. The Mute Tab extension helps you quickly mute all tabs with just one button. Or you can do it by using the extension icon.

The toolbar button behaves like an ON|OFF switch. If you press it, the icon will change color and shape. If you want to unmute a single tab, right-click on a tab and click Unmute Tab. Please visit the options page if you want to mute all the tabs except the active one. 

Mute Tab DOWNLOAD
Best chrome extensions for tab management

Tab Auto Refresh

Tab Auto Refresh is a Chrome browser extension that helps you reload (refresh) the tabs of your choice. To use it, you have to open the toolbar pop-up UI while visiting a website. There you set a time interval in seconds (like 100 sec). The tab will reload at the time interval you have set.

To stop the reload, press the stop button on the top left of your toolbar pop-up UI. Or you can press reset (top right, which will clear the reloading task for all tabs.

Tab Auto Refresh DOWNLOAD
Best chrome extensions for tab management

Divider Tabs

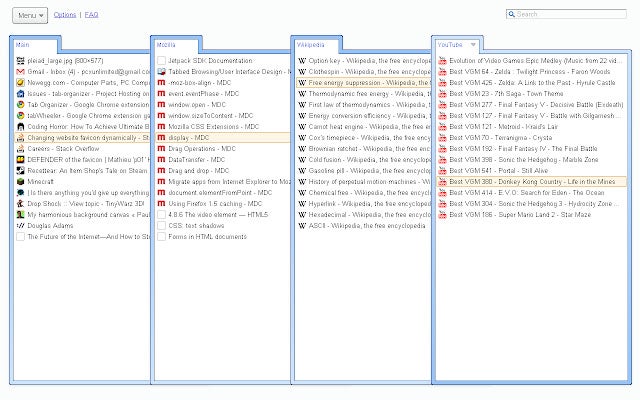
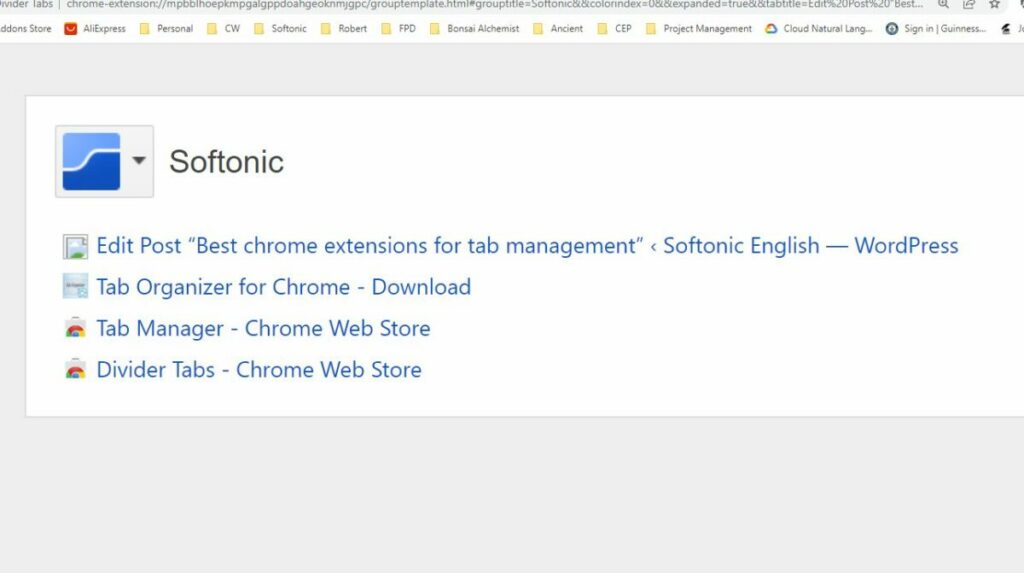
Divider Tabs is a Google Chrome extension that allows you to manage a lot of tabs by using what is modelled on a 3-ring binder: To work it, you click the Divider Tabs icon next to the address bar to insert a named, color-coded Divider Tab to separate groups of related tabs.

The extension contains an index of all the tabs in that group. You click the colored chip on a Divider Tab to close all tabs in the group. And you click again to restore them.

Divider Tabs DOWNLOAD
Best chrome extensions for tab management 13 cropped

Home – New Tab Page

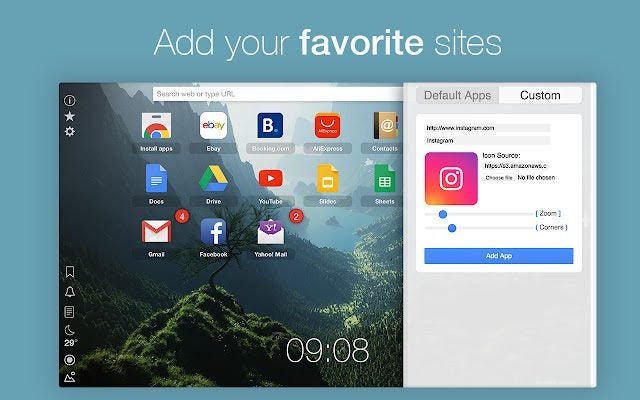
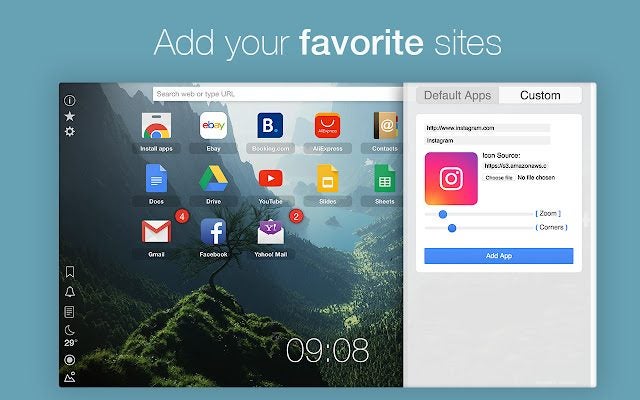
This Google Chrome extension replaces your New Tab page with a customized dashboard. You will love this page! Your beautiful new Home will show notifications, badges, closed tabs, notes, a calendar and favorite sites, weather and more.

You can make it personal and get inspired with improved speed and the ability to hide elements you don’t want to see. It has a beautiful built-in background gallery that you can customize.

Home - New Tab Page DOWNLOAD
Best chrome extensions for tab management

Auto Tab Discard

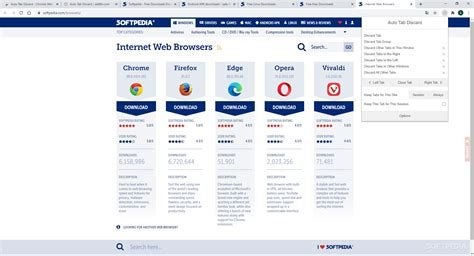
Auto Tab Discard is a lightweight Chrome browser addition that reduces the memory load of inactive but open tabs. This also helps to save battery life on portable devices.

It speeds up your browser and allows you to discard tabs you no longer need. The extension lets you list tabs you don’t want to discard. You can also reinstate discarded tabs with all their information remaining. This information can include the scroll position or content of the text in the tab.

Auto Tab Discard DOWNLOAD
Best chrome extensions for tab management

The 5 best Mac file comparison and diff tools

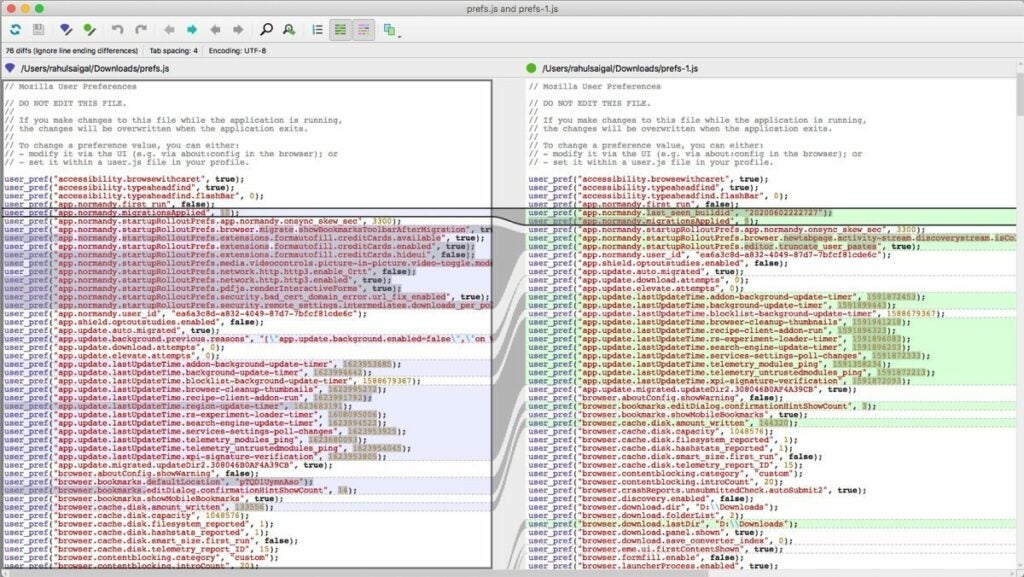
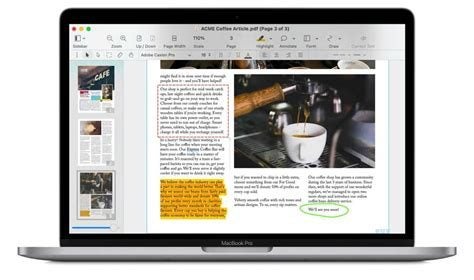
File comparison or diff tools are very much the same things. They compare similar files quickly to find out exactly what the differences are and show them to you by placing them side-by-side for you to look at easily. They even highlight the differences in Mac files for you. 

Comparing Mac files can be necessary for many reasons, including ensuring that academic work is accurate and not plagiarised and looking for legal issues and mistakes or duplications in statements or other types of files. It takes the tedious manual work out of comparing files. Different software can compare text, images, symbols, video, or audio files. 

What can be compared in Mac files?

You can only make comparisons between the same file types. For instance, you cannot compare a text file to a picture with text unless the text has been extracted by an OCR (optical character recognition) process. Text also cannot be compared to spoken words unless the words have been transcribed into text so that they are the same type. 

Text in different languages also cannot be compared unless one of them has been translated so that they are in the same language. You can also compare whole directories or folders. 

Top 5 Mac file comparison and diff tools

Here is a list of 5 of the best comparison or Diff tools, some paid and some free, with free trials available.

Meld

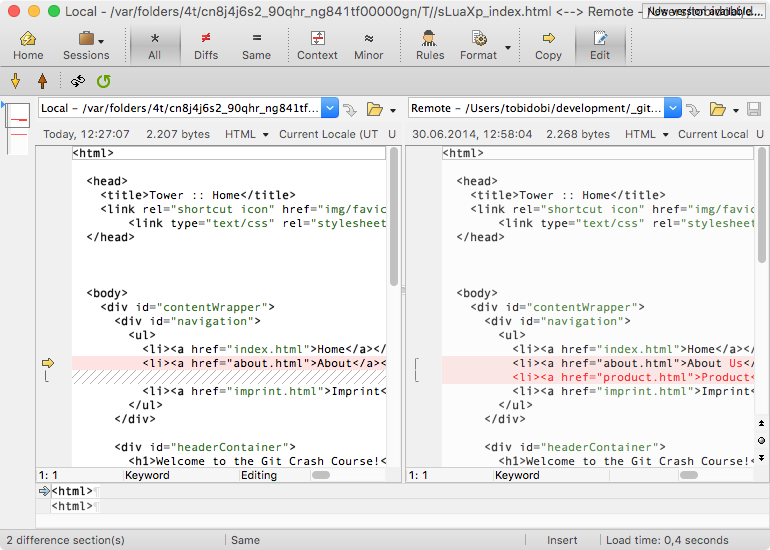
Meld is a free diff and merge tool that makes file and folder comparisons on a Mac quick and easy. The software displays the files you want to compare side-by-side and conveniently highlights the differences between them. Meld does a three-way comparison of files and folders and updates any changes you make in real-time. 

This means you can see exactly what the effects are of any changes you might find necessary to make. You can also merge the files you compare once you have eliminated all the duplications. 

Meld for Mac DOWNLOAD
The 5 best Mac file comparison and diff tools

Kaleidoscope for Mac

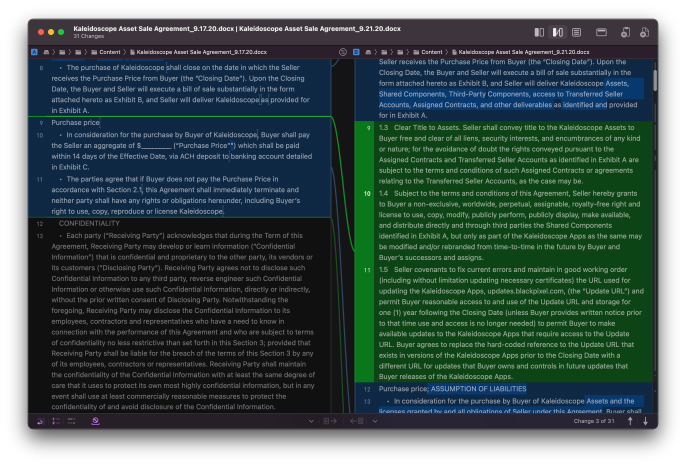
Kaleidoscope compares text documents (including source code) as well as images. It can read a large variety of files including .psd, .txt, .png, .jpg, and .html. It’s paid software available for Mac OS but you can get a 15-day free trial. Kaleidoscope 3 has been redesigned completely. The app now supports Silicon-based Macs. 

It has a new darker appearance, and there’s a new reader view that hides everything apart from the text so that you can look at the content without any interference. The comparison engine is designed to give you the clearest view possible.

Kaleidoscope for Mac DOWNLOAD
The 5 best Mac file comparison and diff tools

Beyond Compare

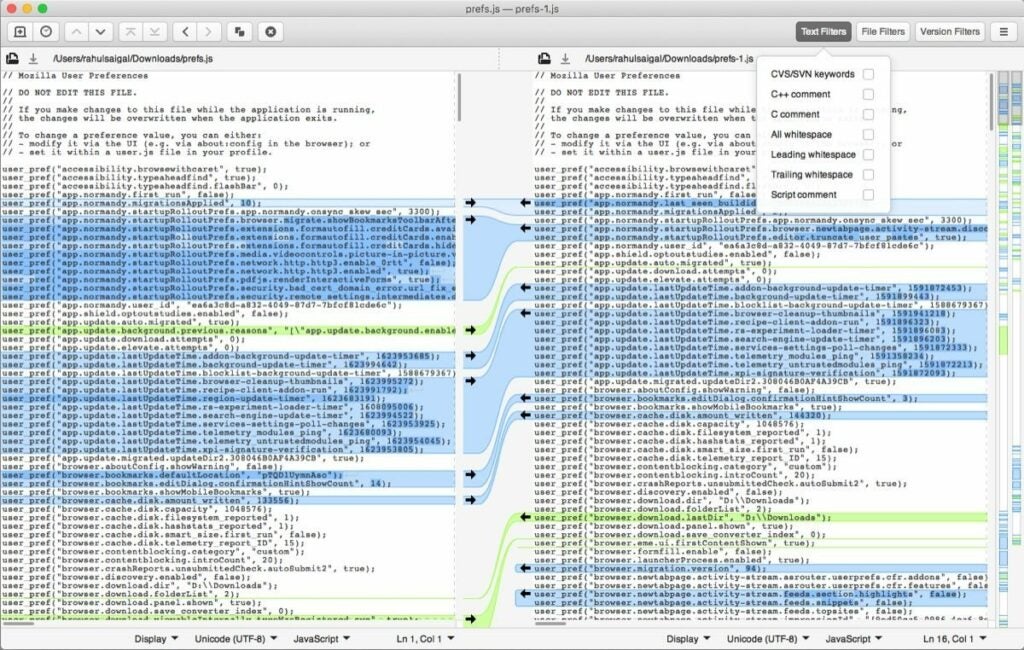
Beyond Compare is paid software originally designed for Microsoft Windows. Now it’s available on the Mac platform and can be used with Dropbox, Google Drive, OneDrive, and S3. A free trial is available. You can include/exclude file types, apply filters during comparison, and compare file/folder structures. It goes further than merely comparing simple text and allows diffing of Word and PDF files. 

It has an easy-to-use interface and colorful buttons to make your tasks more fun. Beyond Compare places the files you are comparing side-by-side and then uses red text for highlighting significant differences and blue for minor ones. You can adjust the colors to suit your taste. 

Beyond Compare for Mac DOWNLOAD
The 5 best Mac file comparison and diff tools

Helix Visual Client (P4V)

Helix Visual Client (P4V) is free for up to five users and 20 workspaces. It works differently from other tools of this type because it’s enterprise software. P4V is the client for the Helix core server that hosts your data in a depot. You open the files in your workspace and edit them, and put them back in the depot when you’re done. 

P4V integrates with the P4 Diff and merge tool that compares and merges source files, images (PNG, JPEG, GIF), web pages, OS code, manuals, etc. It highlights areas that are identical in gray and those that are different in yellow.

Helix Visual Client (P4V) DOWNLOAD
The 5 best Mac file comparison and diff tools

Araxis Merge

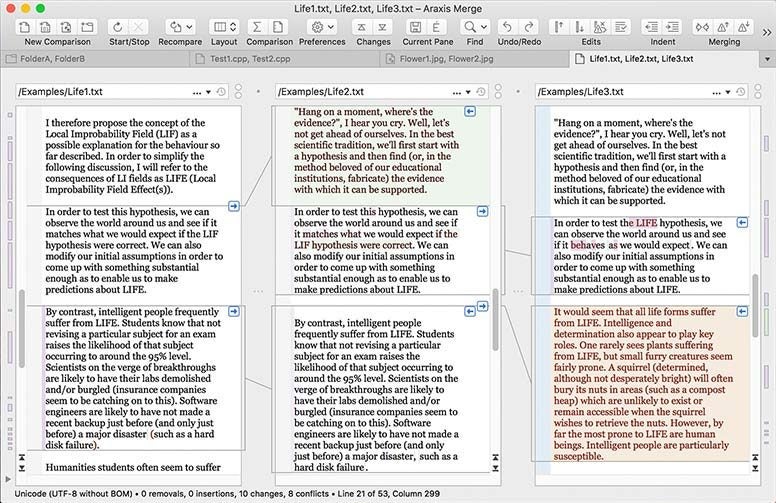
This Diff tool works across macOS and Windows platforms, and a single license is valid for both platforms, which is a plus. It also works with more than text and image files. The app lets you compare office documents (like MS Word, Excel, Powerpoint, or ODF). It comes in standard and professional editions. 

Araxis Merge uses formatting tools and text extraction filters to help you see changes more clearly. You can see a summary of changes in the status bar. There are vertical and horizontal layout options to suit your preferences. It has a two- or three-way file comparison.

Araxis Merge DOWNLOAD
The 5 best Mac file comparison and diff tools

Compare, change, merge, or discard Mac files

Comparison and Diff tools are very useful. Many are available, but some have earned a good reputation for ease of use and reliability. Those are the ones we have featured here to guide you on what they can do and how to use them. Some are free. Some are paid, and some have the option of free trials. Take your pick and see what they can do for you.

How to use Automerge on NotePad++

Notepad++ is a Powerful Text Editor, ideal for creating plain text files and editing plain text. It’s mostly used to write code for programming. Although it seems similar to a Word Processor, such as Microsoft Word and Google Docs, it isn’t one.

Notepad++ DOWNLOAD

Word processors offer different fonts, text colors, and other features to make your documents look good. But code must be written in plain text and be able to handle many coding languages, like HTML, JavaScript, CSS, PHP, Python, and Ruby. For that, you need a Text Editor, especially when working out how to use automerge on Notepad++.

Why use Automerge on Notepad++ 

Notepad++ is not new. That it’s still around and millions of people download it speaks volumes for how useful the code editor is to have stood the test of time. It has multiple features that simplify coding, including syntax highlighting and folding, search/replace, multi-document editing, PCRE (Perl Compatible Regular Expression) auto-completion, zoom in and zoom out, macro recording and playback, WYSIWYG printing, bookmarks, and more. 

The issue comes in when you have different lines of data that you want to merge into one line of code so you don’t waste time. The Automerge feature assists in this regard, but you may need to play around with programming to get it right. It’s almost similar to using a function in Excel to bring data from a range of cells into one block.

Using Automerge on NotePad++

  1. Install a plugin

    How to use Automerge on NotePad++

    The automerge feature in Notepad++ remains the same in the upgrades. The Notepad++ text editor supports plugins for various features, including automerging two or more texts. The plugin is called Combine. Download the plugin and copy the combine.dll file to the Notepad++ Plugins folder. Restart Notepad++

  2. Merge files

    How to use Automerge on NotePad++

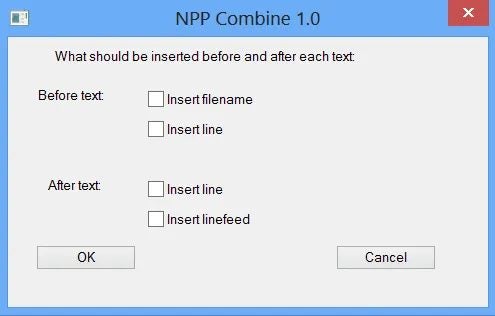
    The plugin works on all open files in Notepad++, so only open the files you want to combine. Open the files you want to merge in Notepad++. Click on Plugins-> Combine-> Start. It opens a pop-up, as shown below.

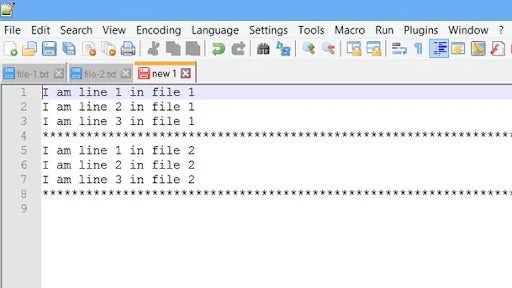
    Once they are merged, you’ll see the content in the new window.

Alternatives to Notepad++ for Mac users

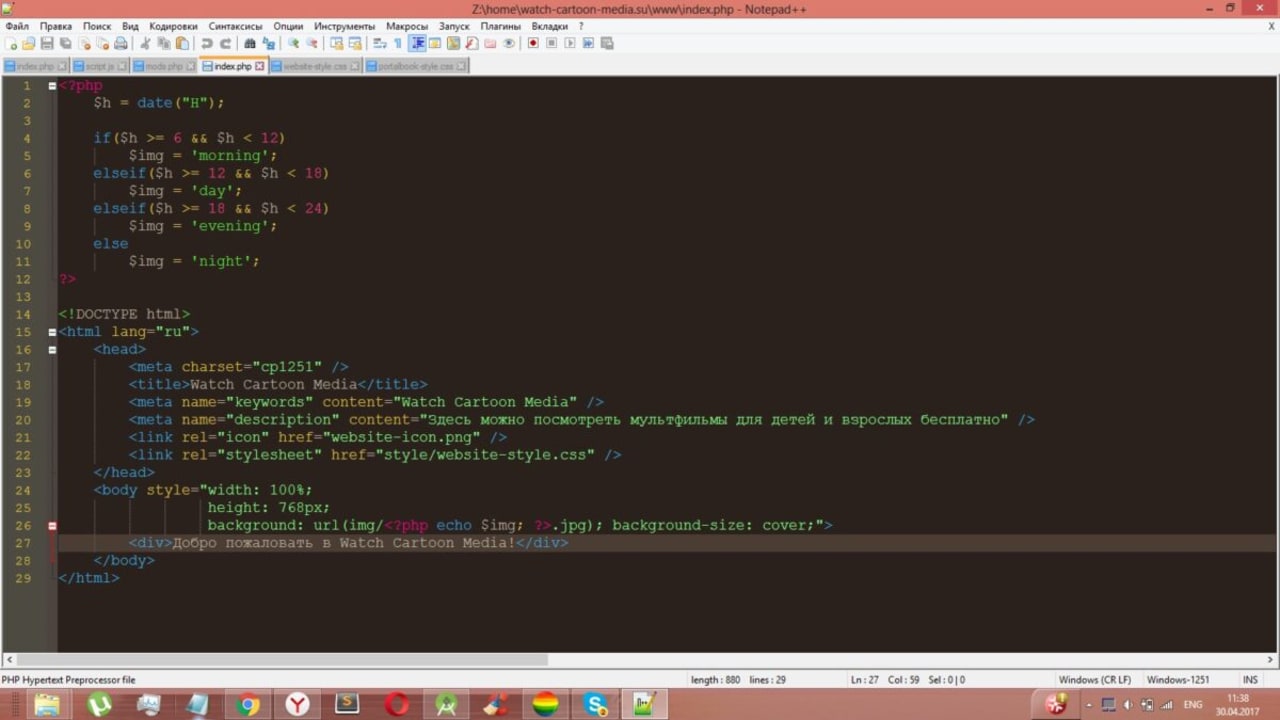
You can run macOS on your Apple Mac devices by using Wine or VMware, but many people have found alternatives that they prefer to use instead. Among them are Mac applications Brackets, Textmate, Atom, and Sublime Text

Be sure to our complete guide for the best alternatives to Notepad++ on Windows.

Best 5 alternatives to NotePad++ on Windows READ MORE

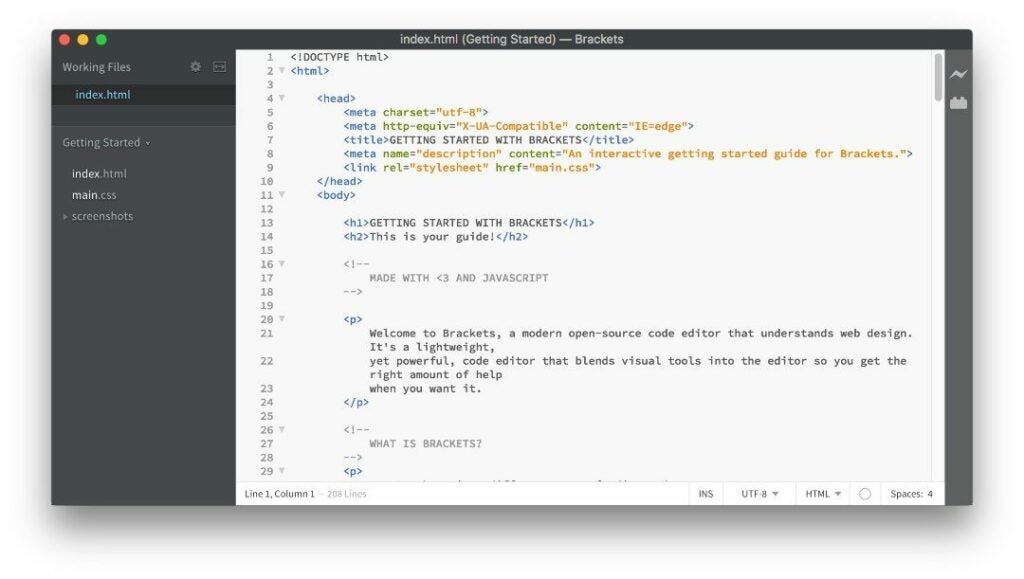
Brackets

Brackets is a modern, open-source, free text editor popular with web developers. It’s very lightweight, so it runs very well even on older Macs. With its live preview, you can see changes to HTML and CSS files so that you can work on your code without pop-ups interrupting you.

Brackets DOWNLOAD
How to use Automerge on NotePad++

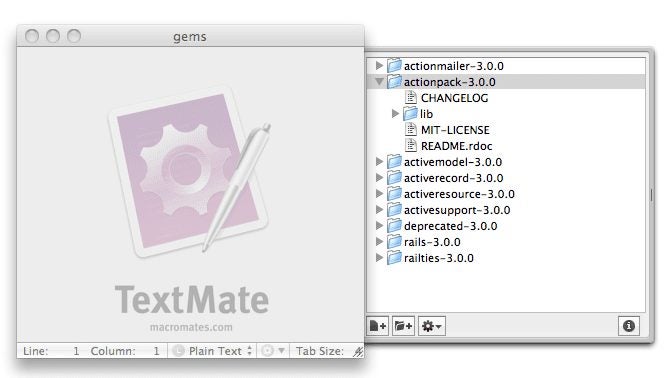
Textmate

Textmate has many features, including searching and replacing text, auto-indenting, clipboard history, foldable code blocks, and allowing users to work easily with multiple files. Textmate also has macros, snippets, and a scoping system,

Textmate DOWNLOAD
How to use Automerge on NotePad++

Sublime Text

Sublime Text runs on macOS, Windows, and Linux. It supports split editing, customizable key bindings, menus, snippets, macros, and completions. You can download it for free, but you must buy a license to carry on using it. Despite this, it’s very popular with users across all operating systems.

Sublime Text DOWNLOAD
How to use Automerge on NotePad++

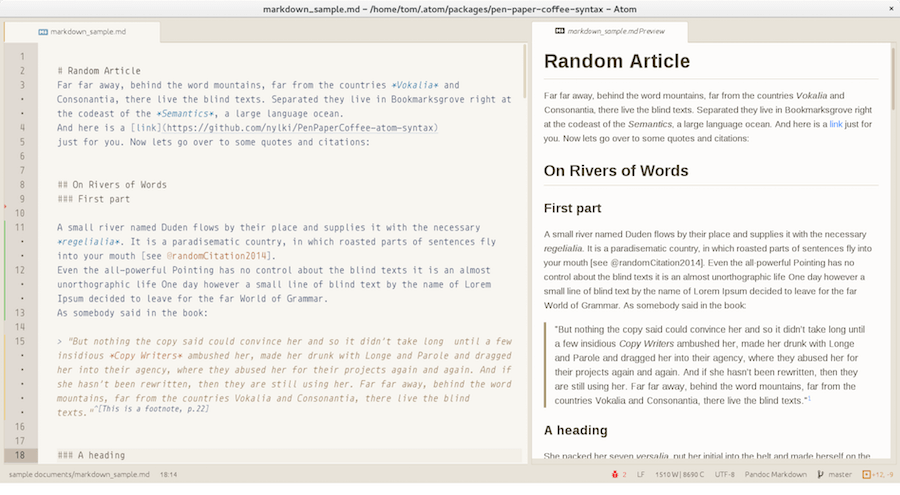
Atom

Atom has a big following when it comes to text editing. You can download it and all its customizable features from the Mac Store and use it to edit anything. You can even export your copy from it as pure HTML and then paste it into a document or blog post. 

Atom DOWNLOAD

Notepad++ offers a lot 

Notepad++ is free, open-source software released way back in 2003 by Don Ho. It’s written in C++ (hence the plus signs in its title.) Based on the editing component Scintilla, it was written for Windows but can be used on Mac operating systems. Its primarily used for writing code, and its library contains many features that assist code writing and editing, including error indicators, line numbering, and markers that serve as code breakpoints.

Because it’s free, has many unique features, and supports 84 languages, Notepad++ has been voted as the most-used text editor globally. Of 26,086 survey respondents on Stack Overflow worldwide, 34.7 percent said they used it daily.

How to install and use MX Player on your Android

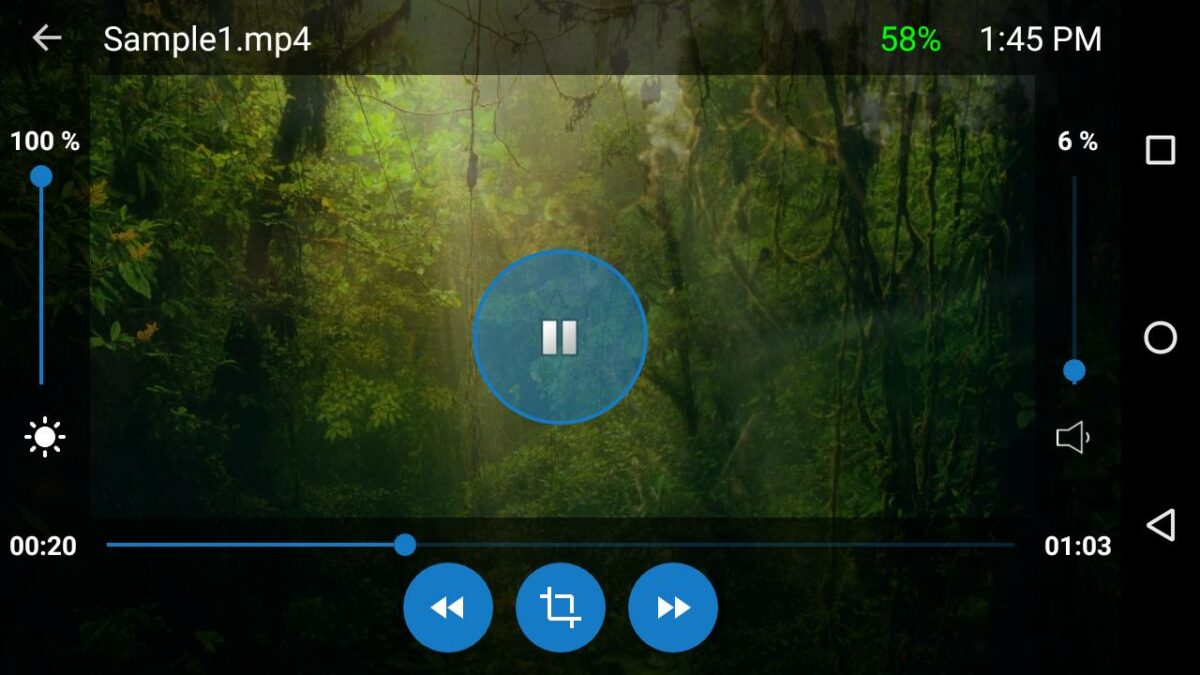
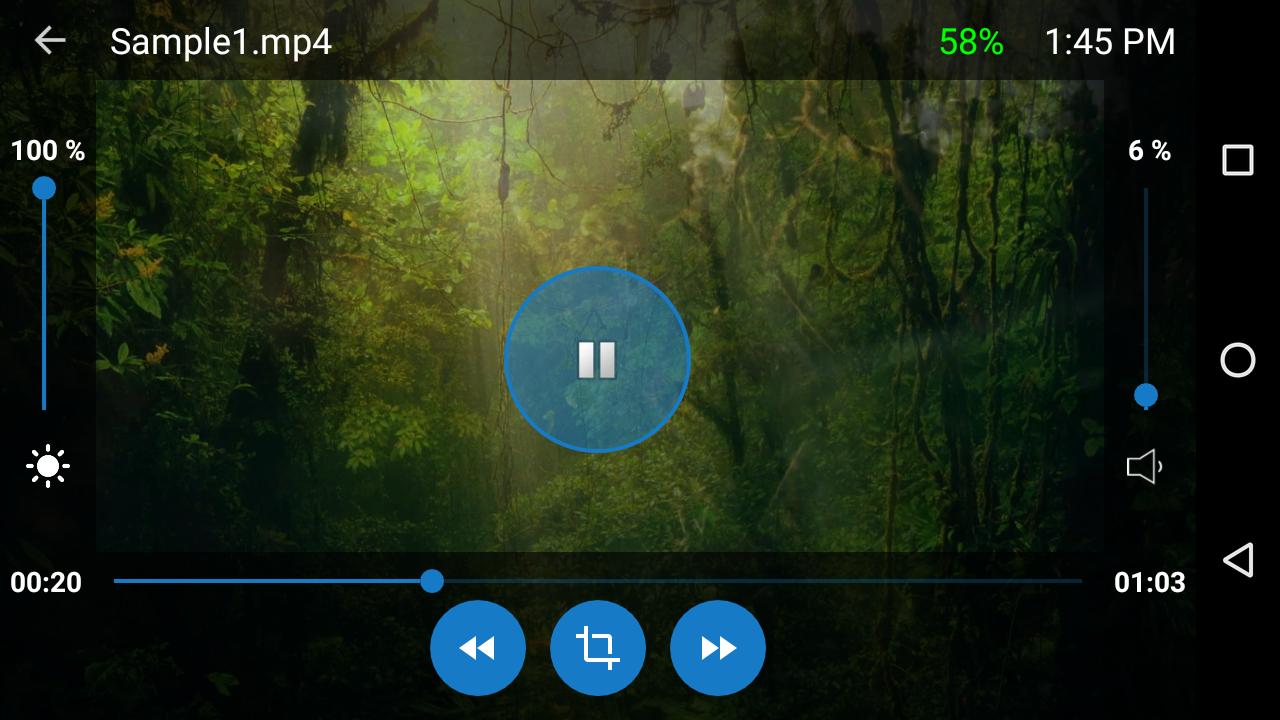
MX Player is an app developed by MX Media & Entertainment (formerly J2 Interactive) for watching videos and listening to audio on your smartphone or PC. It’s so popular that more than 280 million people use it worldwide. It’s free to download and supports nearly all video formats, so you won’t have to install multiple media players to watch videos made in different formats.

MX Player DOWNLOAD

Once you’ve downloaded MX Player, you’ll be able to watch videos from streaming sites downloaded from the internet or your own videos that you’ve shot with the camera on your phone. An extra bonus is that you’ll be able to share them with others.

  1. Download and install

    How to install and use MX Player on your android

    Head to the MX Player download page and click Download to prepare it for installation on your Android phone. Once the app has been downloaded, install it on your Android phone. You’ll be asked to give various permissions (listed below in this article) while downloading. There are quite a lot but don’t skip them. You need to give the permissions for the app to work properly on your device.

  2. Move around

    How to install and use MX Player on your android

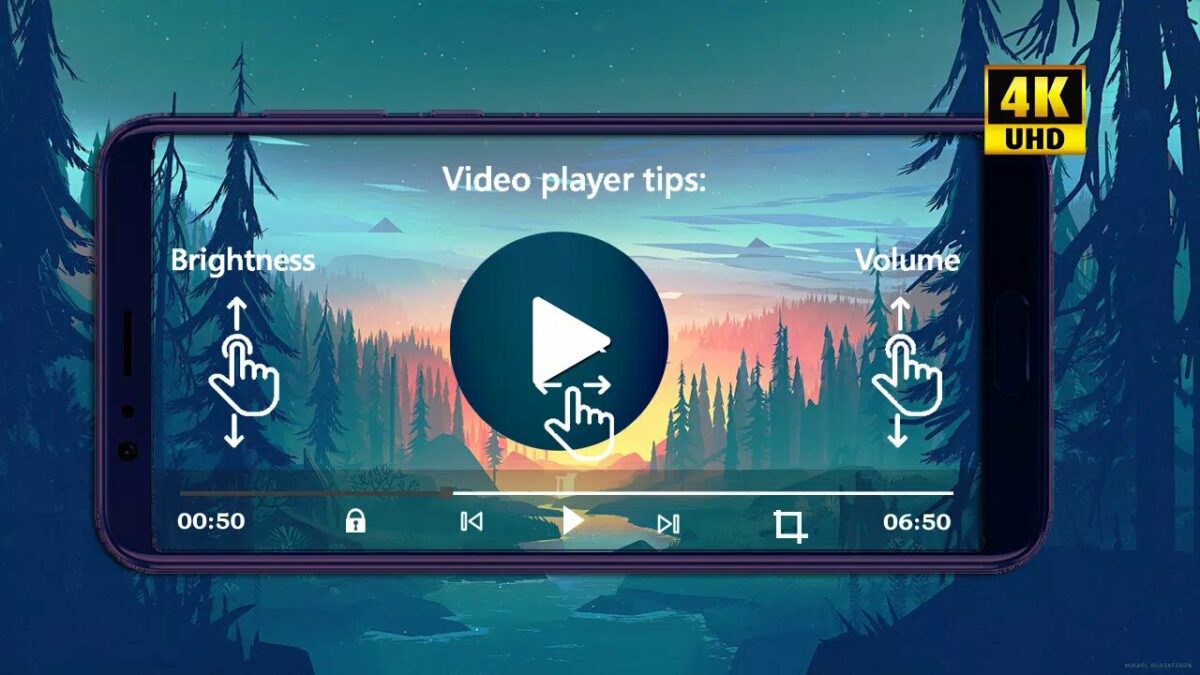
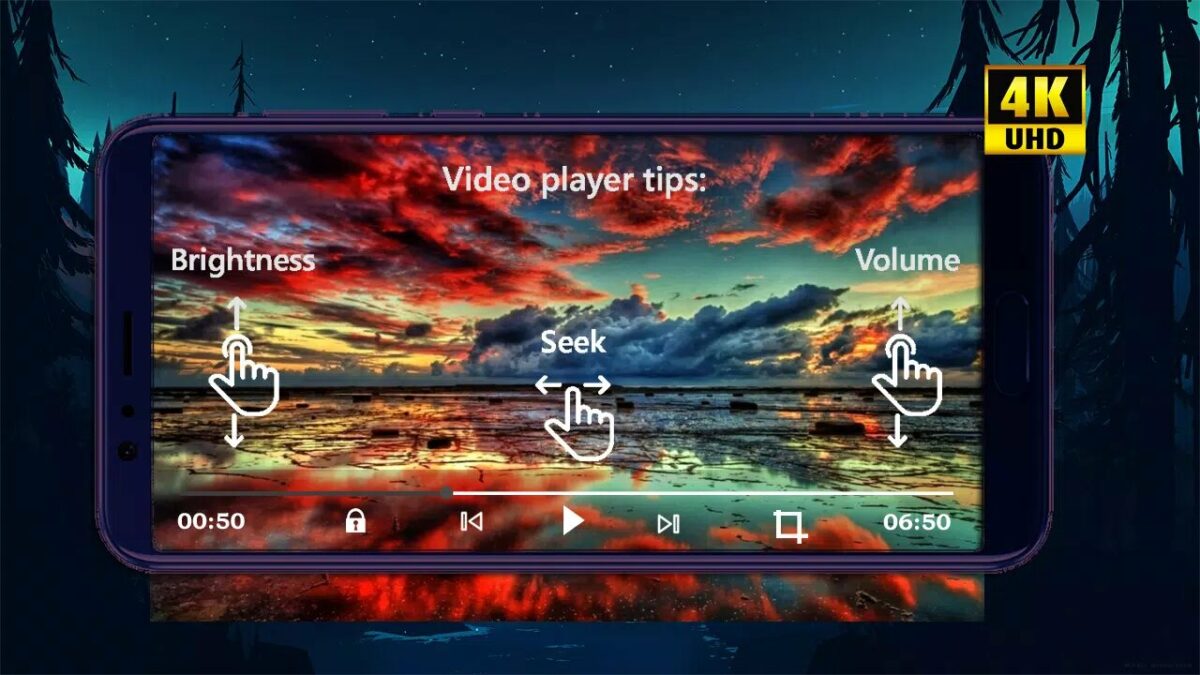
    Easily zoom in and out by using your finger to swipe across your phone’s screen. You can also pan and scroll forward or backwards to move to the next or previous text or move text up or down. You can also zoom in or out to change the size of the text.

  3. Watch content

    How to install and use MX Player on your android

    Relax and enjoy the exciting range of videos that will be available to you without worrying about the format they’re recorded in.

Features of MX Player

MX Player has many features that make it the most popular video streaming app for Android phones. Here are some of them:

  • It’s a powerful video player with advanced hardware acceleration and subtitle support.
  •  It can apply hardware acceleration to videos with its HW+ decoder.
  • MX Player is the first Android video player that supports multi-core decoding, which works up to 70% better than single-core decoding.
  • Zooming in and out is easy.
  • It allows the fast transfer of files without using mobile data. You can share files, music, and video.
  • You can change the size of the text.
  • There’s a child lock to prevent children from touching other applications.

Subtitle formats included

Subtitles come in many formats and MX Player can handle most of them, including  DVD, DVB, SSA/*ASS* subtitle tracks, SubStation Alpha(.ssa/.*ass*), and SAMI(.smi) with Ruby tag support, to name a few. It means you can easily view subtitles when watching your favorite videos. 

Permissions required during download

When you download MX Player, you will be asked for many permissions, which some users find irritating. But don’t ignore them. They are necessary to ensure that the app runs properly. Here is an explanation of what they are and why you need them:

  •  READ_EXTERNAL_STORAGE: to read media files in your storage areas.
  • WRITE_EXTERNAL_STORAGE: to rename or delete files and store downloaded subtitles.
  •  LOCATION: to find nearby friends for file transfers.
  • NETWORK and WIFI: to get network status for activities like licence and update checking. Wifi is also used for faster file transfers.
  • BLUETOOTH: to improve AV sync when Bluetooth is connected for file transfers.
  • CAMERA: to scan QR codes for file transfers.
  • INTERNET: to play internet streams.
  • VIBRATE: to control vibration feedback.
  • WAKE_LOCK: to stop your phone from sleeping when you’re watching a video.
  •  KILL_BACKGROUND_PROCESSES: to stop MX Player services used in background play.
  • DISABLE_KEYGUARD: to prevent secure screen lock when Kids Lock is on.
  • SYSTEM_ALERT_WINDOW: to block some keys when Kids Lock is on.
  •  DRAW OVER OTHER APPS: to block system buttons when input blocking is activated on the playback screen.

Why install and use MX Player?

This video player is popular for a very good reason. It runs really well and is easy to use. It opens up a wealth of video material to you on your phone for maximum enjoyment and easy accessibility. It’s vastly superior to the standard app your phone comes with for watching videos. It’s also free unless you want to upgrade to a paid version with no ads.

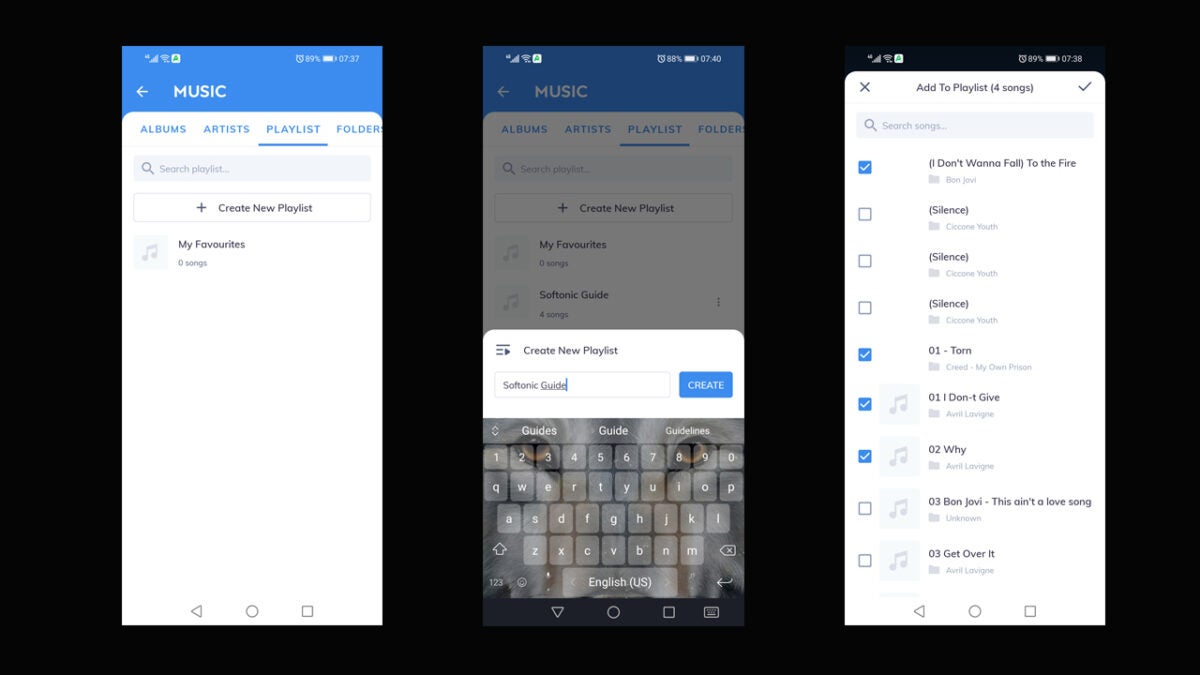
You may also want to make a playlist for your top tunes. Here’s a quick guide on how to create a list on MX Player.

How to create lists on MX Player READ MORE

How to use Live Text in macOS Monterey

The latest Apple desktop computer operating system, macOS Monterey, introduced many exciting new features. One of the most useful is Live Text, the Apple version of OCR (Optical Character Recognition)

macOS Monterey DOWNLOAD

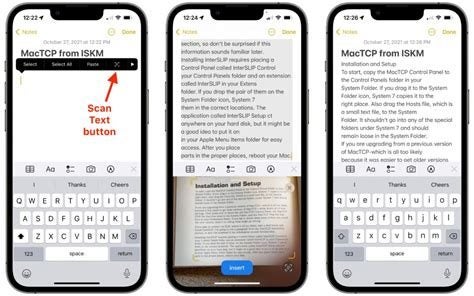
Instead of writing down the text, you find on a picture, note, or screenshot, you can copy and paste, translate, share, and save it on your clipboard. Live Text can recognize any type of text, including places, numbers, and addresses. This quick guide will show you how to use Live Text in macOS Monterey.

Where can you use Live Text?

To run Live Text on your Mac computer, you will have to have an Apple silicone chip and be running macOS Monterey. That is the operating system it was designed and introduced for, but you can also use it on an iPhone or iPad that runs iOS 15 or iPadOS 15.

Live Chat also works with Apple apps like Photos, Quick Look, Preview, and Safari, although not all features might be available in the search engine. 

How to use Live Text in macOS Monterey

Here’s how to get texts from images. You can copy it and then place it elsewhere.

  1. Open image with text

    How to use Live Text in macOS Monterey

    Launch the app you want to use and open an image with text.

  2. Move cursor

    How to use Live Text in macOS Monterey

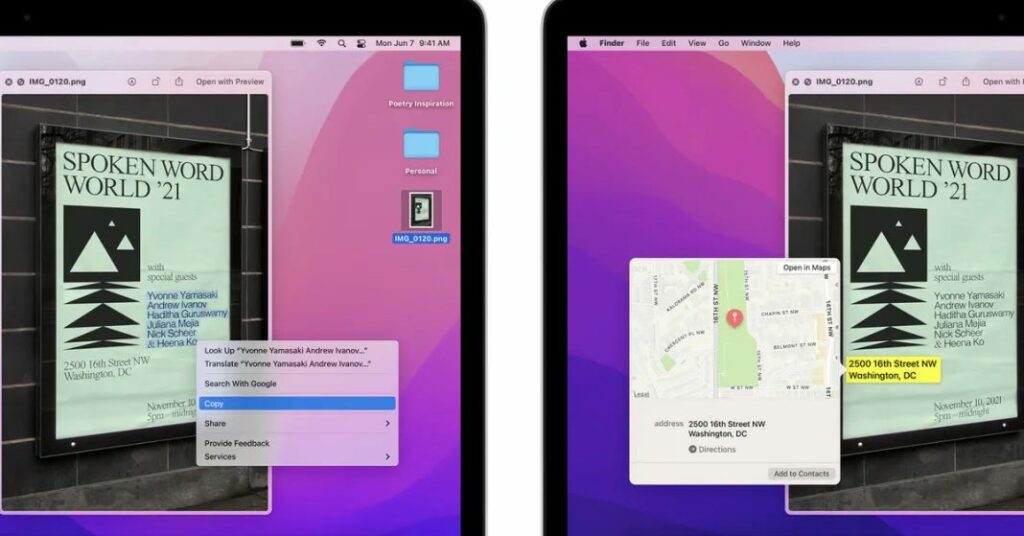
    Place your cursor above the text in the image. The cursor will switch to the text selection tool. If you want to select a word, double-click. To select the whole sentence, triple-click on it. To make your selection manually, drag the cursor over the whole paragraph or as much text as you want to copy.

  3. Access Context options

    How to use Live Text in macOS Monterey

    Right-click or Control-click to open the Context menu, where you can access options for what to do with the text you have selected, like Copy or Look Up and Share.

What Live Text can do for you on macOS Monterey

Live Text gives you many options for easily getting texts from images. Here are some of them:

Copy text from photos

Press Command+C or right-click on the text and select Copy. Open the desired destination and paste it. If you have enabled the Mac Universal Clipboard, you can even paste the text onto an iPhone or iPad.

Drag and drop text between Mac apps 

You can drag the text you have selected from an image and drop it into another supported app or text field. You can even drop the text on the desktop, and Mac will create a .txt file for it. However, if your text is in Safari, you can’t drag it to another app but will have to copy and paste it manually. You can drag and drop text and photos across apps on your iPhone using iOS 15

How to use Live Text in macOS Monterey

Look up text from images with Live Text 

When you right-click on the text, the Context menu will pop up. There you can Select Look Up “text” to learn more about it. Siri knowledge, Siri suggested websites, dictionaries, news, and movies can pop up to help you learn more about the text you have selected. 

Translate text in images in macOS Monterey

From the Context menu, select Translate “text”. The translation, in the system’s default language, will pop up in a new window. If you want to change the language in which the text will appear, you can click the drop-down icon and change it to one of the other languages available.

How to use Live Text in macOS Monterey

Search the web for selected text 

You can also search the web using Safari to find more about the text you have selected from the image. Select Search with Google from the Context menu. A Safari tab with search results will open immediately.

Share the text in images with others

You can message or email the text you have selected to someone or save it to Notes or Reminders. Select Share from the Context menu and select the preferred option. 

How to use Live Text in macOS Monterey

Make a call, or send an email

If the image has a number, postal address, email ID, or website, you can add it to your contacts, call it, text, get directions, send an email, or visit the website. You don’t even have to select the text to do this. You can take the cursor near it and click the down arrow that will appear. Click it, and the Context menu will show where you can select what you want to do.

Speak the selected text in macOS Monterey

Safari mixes its default Speech feature with Live Text. It can then convert the selected text to speech. From the Context menu, choose Speech and select Start Speaking

How to use Live Text in macOS Monterey

Live Text makes text easier to work with

Apple’s Live Text removes all the hassle of getting texts from images. With the new feature, you can save or use the texts in many ways afterward, which is bound to become a very popular feature among the many offered by Apple’s versatile new operating system, macOS Monterey.

How to merge an interrupted recording with Audacity

Audacity is an award-winning, free, open-source digital audio editor and recorder. It can run on Windows, GNU/Linux, macOS, and other operating systems. Even if you’re a complete beginner, you can do lots of things with Audacity. You can record live audio using a microphone or mixer and import, combine and edit sound files. You can digitize recordings from other media and export recordings in different formats. If you’re not happy with something you’ve recorded, you can undo and redo as many steps as you need to. 

You can remove extra noises from your recording or filler words in a voice-over. And there should be no problem understanding anything in Audacity because it offers the interface in more than 30 languages!  

Plug-ins and sound quality

Audacity supports many plug-ins to enhance your recordings, including LADSPA, LV2, VST and Audio Unit. Nyquist effects can be modified using a text editor. 

 When it comes to sound quality, Audacity supports 32-bit, 24-bit and 16-bit equipment. You can convert rates and formats using quality dithering and resampling. 

File formats supported

Audacity supports many different file formats, including FLAC, OGG, MP3, AIFF, WAV, MP2, and more. Some plug-ins will also allow you to use MP4, M4A, as well as AC3. Audacity can also convert some file types.

How to merge tracks in Audacity

Merging different audio tracks into one is among Audacity’s best features. It’s not at all difficult. This is how you combine tracks.

  1. Open Audacity

    Open Audacity or download it if you don’t already have it installed on your computer.

  2. Drag and drop audio files

    How to merge an interrupted recording with Audacity

    Drag the audio files you want to merge into Audacity’s window. Each of them will show as a track.

  3. Cut one track

    How to merge an interrupted recording with Audacity

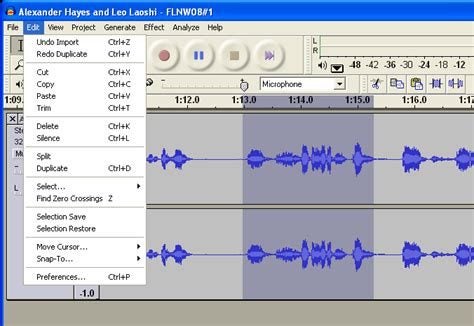
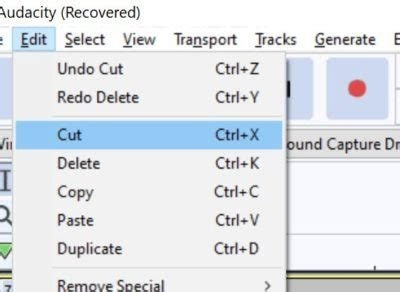
    Select the track you want at the end of another one and choose Cut from the Edit menu. Or cut that track by using Ctrl+X.

  4. Paste track

    How to merge an interrupted recording with Audacity

    Click at the end of the track you want to run first when they’re combined, and click Paste. Or press Ctrl+V to insert the audio you’ve cut at the end of the other one.

    Play the combined track and see if you’re happy with it. If you are, export or save it as you wish.

Creative uses of Audacity

Audacity can enhance any creative projects you might undertake. Here are some ideas:

Record music

Audacity’s multi-track music recording ability is legendary, and some professional musicians use it for all their recordings, including whole albums! It’s ideal for recording backing tracks for singers.

Record your ideas

You can record story ideas if you’re a writer or song lyrics if you’re a musician. You can even record a shopping list so you don’t forget what you must buy when you get to the store.

Make a karaoke backing track

If you’re into karaoke and want to practice at home, record some backing tracks and sing to them, so that if you decide to do it in public, you’ll know exactly how you’ll sound.

Practice a speech in Audacity

You can record yourself making a speech, giving a toast or making a presentation. Practice makes perfect, and by listening to a recording of yourself, you can ensure you sound perfect.

Record audiobooks

If you have a good voice, you can record audiobooks. You can do this for your family, friends, or children or offer them to groups that provide audiobooks for visually impaired people. 

Learn a foreign language

If you want to learn a foreign language, Audacity can help. You can record yourself speaking or reading to practice and play it back to check your accent and pronunciation.

Create a podcast

Because of its multi-track capabilities, you can import audio, fade in tracks or add sound effects and music to enhance the dialogue in your podcast to make it really interesting.

Versatile Audacity makes sound easy

It’s hard to think of another software program that allows you to do as much as Audacity when it comes to recording and playing back just about anything. That’s why it’s so popular, not only with people playing around and enjoying audio but with professional musicians and writers. There’s so much you can do, so give it a try!

How to use Simontok on your phone in 3 easy steps

If you’re searching for a free VPN app that you can download on your smartphone to protect your privacy and your IP address, Simontok could be just what you want. The app can connect you to numerous servers in different countries that keep your device protected when you’re on the internet or using public Wi-Fi and other insecure connections. As a user, you can be assured that your data cannot be tracked and shared on the internet if you use this VPN. 

You will also be able to access content not usually available or sites blocked in your area via one of the many IP addresses Simontok offers users. The app can also unblock sensitive sites and bypass games and other apps if you don’t want to see them. Best of all, even people who have never used a VPN before will find Simontok very easy to use on their phones.

Installing Simontok VPN on your Android phone

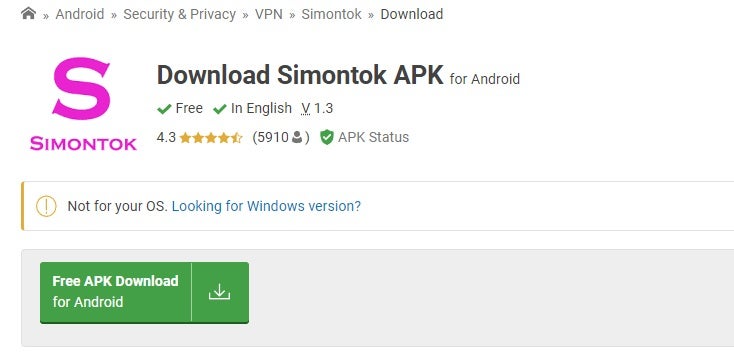
  1. Download the app

    How to use Simontok on your phone

    Head to a reliable source and click on the Download button to start. Once the download is complete, the app will be in Downloads on your device.

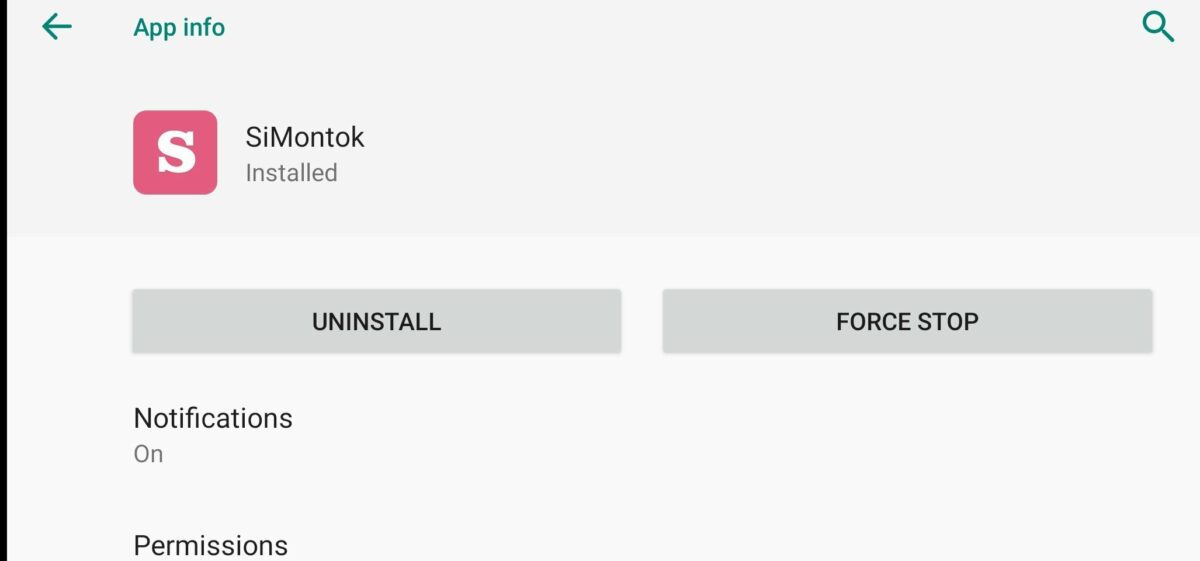
  2. Install Simontok

    How to use Simontok on your phone

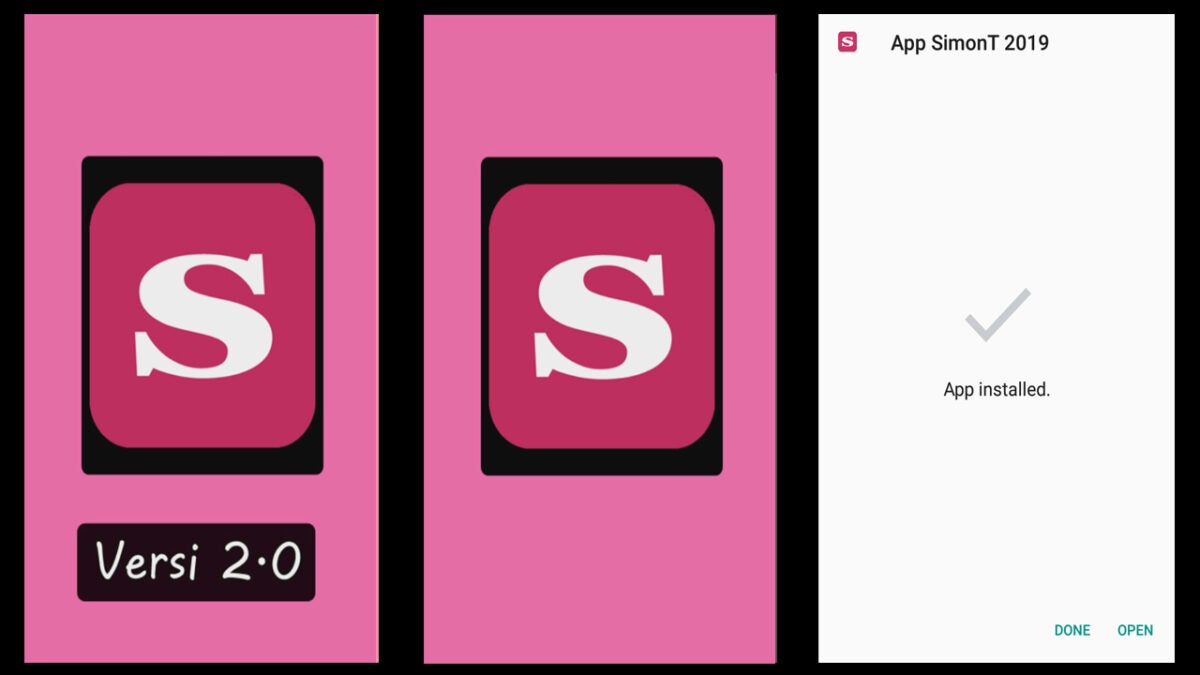
    Once Simontok is downloaded, go to the Download file and tap it. An installation prompt will appear and tell you how you can complete the installation. You won’t have to pay to do so because it’s completely free.

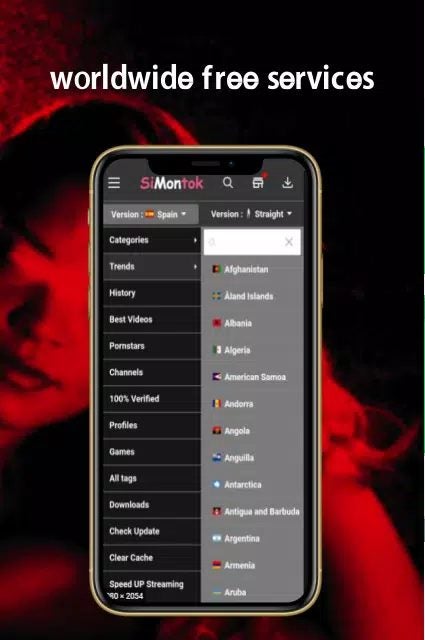
  3. Using the app

    How to use Simontok on your phone

    Once the installation is complete, you can use the app to browse safely and securely on the internet without anyone being able to trace your location or track your history.

Why download Simontok?

There are many advantages to using Simontok VPN. It’s completely free and extremely fast, and there’s no registration process. It’s unlimited, so there are no restrictions on bandwidth. Your data, privacy, personal information and internet browsing history are secure when you use the app, so you are completely anonymous. Simontok does not log or track your browsing history, so this will never be available to anyone else, which is another way of increasing your security.

One tap connection

One of Simontok’s best features is that you only have to tap a button once to connect to it. Using Simontok VPN is easy. Once you’ve downloaded and installed it, it only needs one tap of a button to connect to the nearest of its many servers available to you. Or you can connect to any of the servers because they’re listed under the server button. Just click on the server you choose, and you’ll be connected to it at once. 

Speed test

You can also check the speed of your connection in the Simontok app. You use the speed test to check how fast the server you are connected to is working. You might have to do this because not all the available servers have very fast connection speeds. Some might also sometimes have connectivity issues. That’s why the app allows you to check the speeds of all the connections available to you and switch to another faster one if you want to.

Simontok for video streaming

Apart from giving you VPN access, Simontok is also one of the most popular video streaming apps. It’s one of the lightest applications for carrying video content, so it works well on low-performance or high-resolution smartphones. It’s completely free while offering access to millions of videos on many different subjects listed in a directory. Unlike most video streaming apps, there’s no subscription fee to access the videos. You just have to download and install the app on your smartphone and watch as many videos as you like. You can also watch movies and TV shows. Please note that Simontok offers adult content as well, so it might not appeal to you. 

How to use Simontok on your phone

System requirements

To use Simontok for video streaming, you need Android 6.0, a fast processor, 150MB of storage and 1GB of Ram.

Download audio files

Simontok also allows you to download audio files and keep them on your phone to watch later without having to go onto the internet. You can build up a library or a playlist or search for videos according to a playlist you get from somewhere else. The app is compatible with many devices and supports different languages. You can even adjust the quality of the video you want to download depending on your device and the connection you have. 

Simontok is versatile and free

You can’t go wrong by downloading Simontok. It’s not only free, but it’s versatile. It offers a fast and secure VPN service as well as video streaming that gives you access to millions of videos, movies, and TV shows that you can even download if you want to watch them later. Give it a try. It can only make your phone more interesting to use!

How to Create Your Own GIFs in the Twitter iOS App

You’ve known for some time that you can post GIFs in your Twitter tweets. But would you like to be able to create your own GIFs using the Twitter iOS app or on your iPhone? Well, now you can. It’s fun and convenient. And it means that you can post GIFs on Twitter that are unique and not copied from somewhere else.

The feature can only be used on iOS at the moment but should become available on iPadOS and Android in time.

What is a GIF?

GIF means graphics interchange format. GIFs are short animated pictures that you can post and share on many platforms. They’re popular because they can convey a huge range of responses and emotions, and they’re easy to use because they allow you to create animations without shooting a video.

Create GIFs for the Twitter iOS app

  1. Create a GIF in the actual Twitter iOS App

    How to Create Your Own GIFs in the Twitter iOS App

    Twitter’s iOS app has a new in-app camera that you can use to create your own animated GIF to post in your tweets. Apparently, these GIFs have to be Tweeted and can’t be saved on your iPhone. Here’s how you make and post your own GIF. 

    – In Twitter, tap the big blue plus button to start writing a tweet.

    – Tap the camera icon.

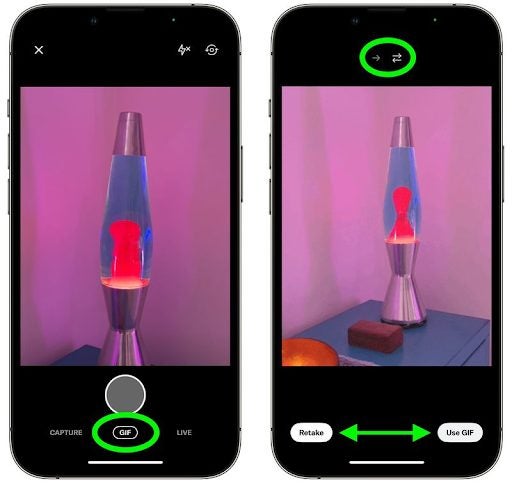
    – Select GIF below the shutter button.

    – If you want to create a short GIF, tap the shutter button. Suppose you want to make a longer GIF, long-press the shutter button.

    – Use the arrow icons above the viewfinder to set the GIF to repeat from the start. Or you can get it to change direction and play backward as well.

     – If you’re happy with the GIF you have created, tap Use GIF and tweet it.

  2. Make GIFs in the Twitter App on Your iPhone

    How to Create Your Own GIFs in the Twitter iOS App

    – First, you must open the Twitter app on your iPhone.

    – Tap the Compose Tweet (+) button on the lower right.

    – After doing that, tap on the image icon and select the camera button.

    – You should see a GIF option at the bottom of the screen.

    – Tap on the GIF button and the Record button.

    – The Record button should record a small clip (of a few seconds), which you can then use as a GIF.

    – Once recorded, tap on the single arrow or double arrow to choose what type of GIF you want. The single arrow will only play the GIF forward, while the double arrow will play it forward and then backward.

    – If you’re happy with the result, tap Use GIF. You can tap Retake if you want to re-record it.

    – When the clip is recorded, you’ll see a single arrow and double arrow to decide the type of GIF you want to create. The single arrow plays the GIF forward. The double arrow plays it forward and backward.

    – Then tap on Use GIF to post it on Twitter.

    – The GIF will automatically be saved into your Photos folder. This means you can use it somewhere else too.

  3. Use the third-party method to create a GIF

    How to Create Your Own GIFs in the Twitter iOS App

    There are other ways to create your own GIFs and add them to Twitter or other social media apps. Here’s how to create your GIF using third-party apps like GIPHY.

    – Download the Giphy app on your iPhone.

    – Sign up on GIPHY and tap Create on the top right.

    – Tap on the arrow to create your GIF.

    – Now, you can tap on Upload in GIPHY and add tags so you can search for and find your GIF. 

    – Now go to Twitter and tap Create Tweet. Then tap on the GIF button. Enter your GIF’s name in the search box, and it will appear.

Have fun making GIFs to liven up your tweets

GIFs are everywhere. They’re fun and also very expressive. You can use them to comment on anything because they can portray or comment on just about anything in a serious or amusing way. They can say anything you want them to and express anger, joy, amusement, disgust, wave in greeting or do little dances, to name just a few. They have certainly become the preferred way for people to communicate in many apps, including Twitter.

How much more fun can they be, and how much more accurately can they express what you want to say if you can create your own. Now you can see how little effort it takes to make your own, either in the built-in Twitter app on your iPhone or using Giphy or another third-party option. You can also have a look at how Twitter may be releasing an unmention feature update.

How to mix multi-channel input device and down to mono

A multi-channel recording is recording more than two channels of audio on the same computer simultaneously. It requires specific drivers, hardware, and recording software for the platform you’re using, for instance, Windows 10, macOS, or Linux.

Most audio you hear is in stereo, but you can get your computer to mix sounds from different channels to mono so that you can play the combined sound through both speakers or in one speaker if you prefer, for example, if you have trouble with your hearing in one ear. Here’s a quick guide for what you’ll need to mix multi-channel input devices and down to mono.

Hardware

To do multi-channel recording, you’ll need a sound card or external audio interface with sufficient Analog to Digital Converters (ADCs). You might have to replace your sound card if it has only one pair of stereo ADCs to switch between when recording different audio inputs. 

Drivers

Your drivers might be a problem because most computer sound interfaces were designed before multi-channel recording was possible. Your driver must allow you to record more than two channels simultaneously, so you might need a new one.

Applications

The application you record with must be able to support recording multiple channels of audio.

Successive Windows versions came out with different sound interfaces:
Windows MME (Multi-Media Extensions) came with Windows 3.1. But it’s not suitable for multi-channel recording. 

DirectSound was introduced after Windows 95. It allows multi-channel recording on some devices.

ASIO was introduced by Steinberg to improve audio playback. It bypassed MME, but only one application can use its audio interface at a time.

WASAPI application programming interface (API) was introduced with Windows Vista. It allows a few multi-channel devices to work. But direct hardware access is limited.

How to multi-mix input channels on different platforms

  1. Windows 10

    How to mix multi-channel input device and down to mono

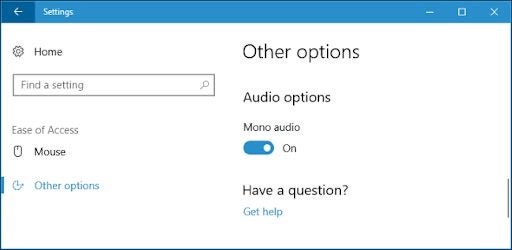
    Windows 10 can mix multi-channel inputs to mono. You can play everything combined through both speakers or use one earbud. The mono audio option is built into Windows 10 settings.

    To find this option, click the Start button and select Settings. Then, click Ease of Access in Settings.

    Click Other options in the sidebar. On newer versions of Windows 10, select Audio under Hearing in the sidebar. Scroll down, and you’ll find Mono audio under Audio options. Turn it On. Turn it off if you want to disable this and go back to standard stereo audio.

  2. Windows 7 and 8

    How to mix multi-channel input device and down to mono

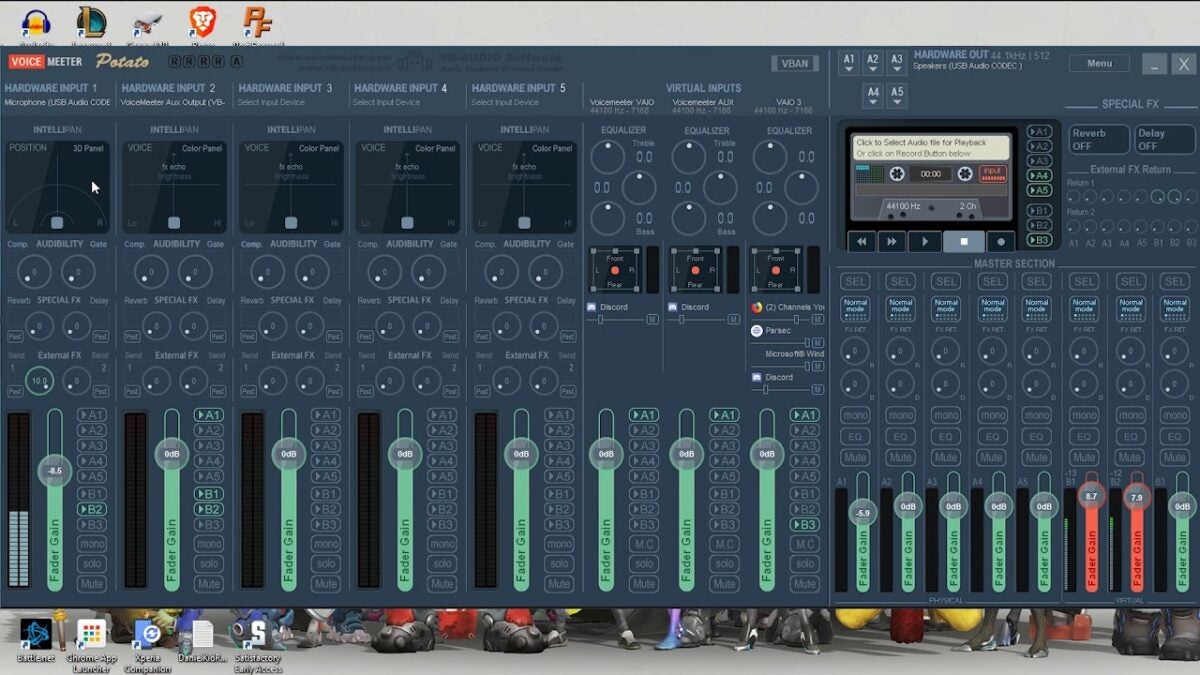
    Older versions of Windows, including Windows 7 and 8, can’t mix both stereo tracks to mono without third-party software. You can use VoiceMeeter free on any Windows version.

  3. macOS

    How to mix multi-channel input device and down to mono

    macOS is standardized on the Core Audio sound interface. 

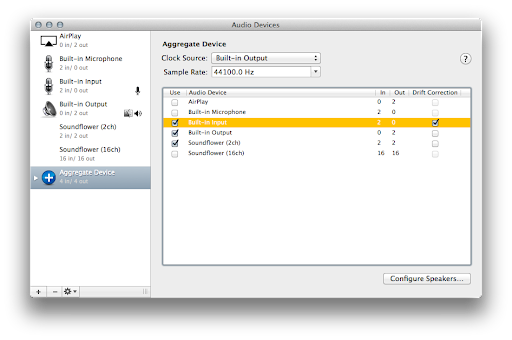
    Another way to do multi-channel recordings is to set up an Aggregate Device. It will allow you to use audio inputs and outputs from different devices simultaneously with Logic Pro, GarageBand, MainStage, and other Core Audio-compliant applications. An Aggregate Device combines inputs and outputs from multiple devices, so they appear as a single device in an app. One way to set it up is with Soundflower, Audio MIDI, and Audacity

    Step 1 

    Go to System Preferences -> Sound

    You can use the internal mic as your input and headphones as your output to record. 

    Step 2

    Start Soundflower. 

    Click the menu bar, and choose Audio Setup from the popup menu. You’ll need a DAW (Digital Audio Workstation) application for multi-channel recording. We installed Ardour. Download and open it. 

    You will then see the Audio MIDI setup application. From here, create an Aggregate Device by clicking on the + icon on the bottom left.

    Step 3

    Set your input as your Aggregate Device, and pass that as output to Soundflower (2 Ch). 

    Step 4

    Start Audacity and select Soundflower as the input. This should move your audio inputs into Audacity, where you can funnel multi-channel audio to mono.

  4. Linux

    How to mix multi-channel input device and down to mono

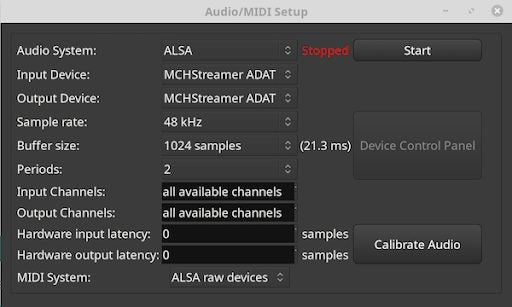
    Most new development for Linux uses ALSA as a sound interface rather than the older OSS. You can also do a multi-channel recording with a DAW (Digital Audio Workstation) application like Ardour in Linux Mint. You must connect your miniDSP device via USB. 

    To start Ardour, find it in Sound & Video in the main menu (your version of Linux may differ). When Ardour starts, set the following parameters.

    On the next screen, type 8 for Create Tracks and click OK. Press the record and play buttons. Ardour will record all 8 input channels. Mix and export it in mono.

Multi-channel to mono on computers

Recording multi-channel audio and outputting it as mono is not impossible on your computers running on different operating systems without using external devices. There’s always more than one way to do anything, and a bit of research and experimentation will show you the best approach to suit your equipment and preferences.