No, that traffic cone on your buddy’s desktop doesn’t mean his computer is under construction.
It means that your friend is using VLC, the best free tool for playing and capturing video!
VLC plays most media files as well as DVDs, CDs, VCDs, and many streaming protocols. This tool really comes in handy. More often than naught, your device’s default video player is less than optimal. Once the program finally opens, you have to wait for it to load the video, and then play it. This only works if your video player can even play video in that format in the first place. VLC can play just about anything, and it does so quicker than most other apps.
How to use VLC
Use VLC to play audio/video files
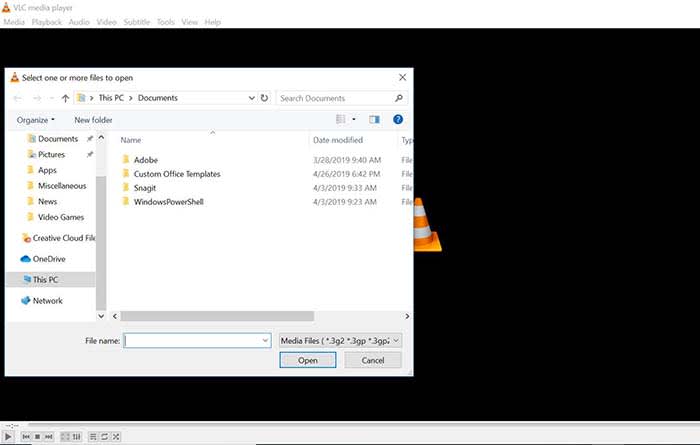
Playing a file with VLC is a lot like opening a photo in Photoshop. Either manually open the file by going to Media, and clicking Open File, or drag just drag the file onto the VLC window.
Keep a library of videos
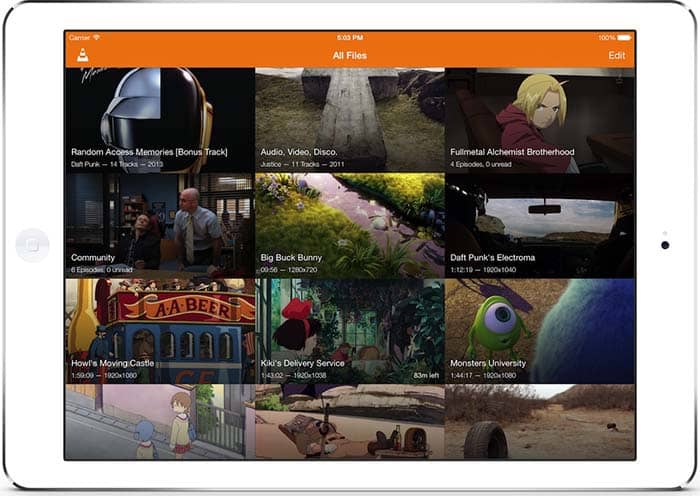
If you watch multiple videos on VLC, you have the option to keep a library of them to finger through at your leisure. Once you have several files loaded into VLC, you can organize them under All Files. Do you have a huge collection of anime? Organize them with VLC! Do you have a digital version of every movie in the MCU? Create a specialized folder for them!
Stream yourself
If you want to take a picture of yourself or record a video of yourself with a webcam, your device probably already has some built-in tools. However, it probably doesn’t have tools that help you stream yourself.
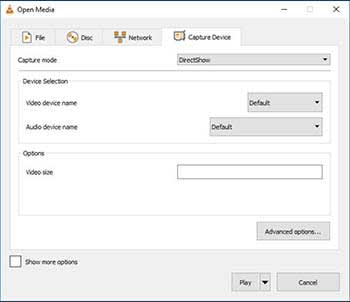
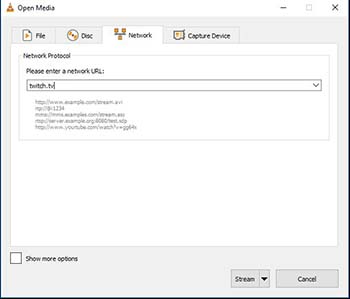
Go to Media and click Open Capture Device. Choose your preferred settings from here, and click the play button to start recording yourself. If you want to stream yourself, Go to Media and click Stream. A new window will pop up with streaming options.
You can even throw in a URL to the website you will be streaming to.
Record your desktop
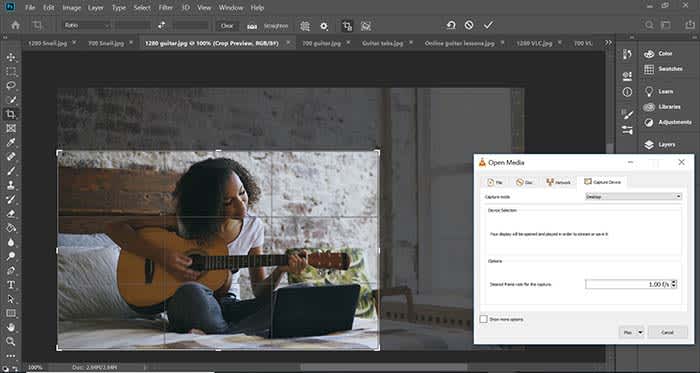 Let’s say you’re a content creator and you need to record your desktop. VLC has the answer. Go to Media and click Open Capture Device. Now you can record your desktop and do it in whatever FPS rate your computer can muster.
All of a sudden, you have an option for recording your next “let’s play” or that Photoshop tutorial you were making for your YouTube channel.
Convert files
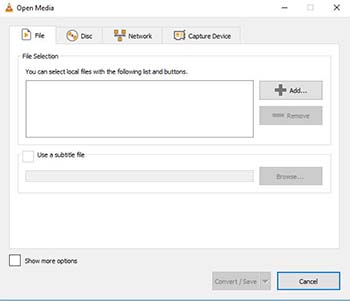
If you have an old video or music file that is in some weird format, you can actually change the format with VLC. Click on Media and choose Convert/Save. From here, you can add files and change their format with the option at the bottom of the window. Finally, those weird videos from high school that you recorded with an off-brand video recorder can be converted to MP4. Sure, you might’ve wanted that cringey video you made for a class to die, but now you can share the video with them on Facebook!
Edit audio/video files
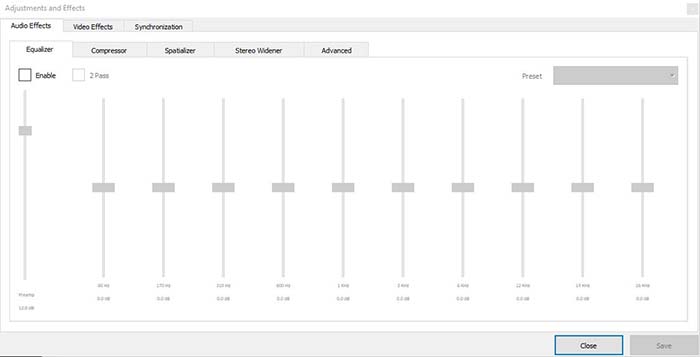
Ever take notes in class, but you can’t hear them because of background noise? Have you ever recorded a video of your friend, but it turned out too dark? VLC has tools to fix these issues and more! Go to Tools, and from there click on Effects and Filters. Here, you can edit audio and video files to make them as you see fit.
A quick note on the legality
VLC is meant to be used for audio and video files you legally own. It is not meant to be used for movies you illegally download or torrent from piracy sites. Also, the capture mode should not be used to rip videos from other sites.

Is it legal to rip your own DVDs and Blu-Rays?
Read now ►Wrapping up
If you have a huge collection of video files that you want to watch/catalog, VLC is your best option. If you are looking for an easy to use program for streaming yourself, and recording your desktop, VLC is your best option yet again! It’s free to use, and a quick download. Basically, there’s no reason why you shouldn’t download it!