Is your slow computer driving you crazy? Try out these tricks to make it run faster!
When you’re just trying to get some work done, or blow a few hours surfing the web, a slow-moving computer can throw a wrench in your plan.
Before throwing your computer out of the window in a fit of rage, try out these tips. There are plenty of quick, free, and easy methods to make your computer run faster.
How to fix a slow computer
Restart your computer/check start-up programs
Although this advice is annoying, there’s a lot of truth to it. It could be that your computer has been on for too long, and it needs to restart. Shut down your computer and start it back up. About 99% of the time, this will solve your problem.
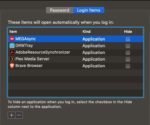
If your computer is still running slow, it’s time to look at what programs automatically start when you log into your computer. It’s pretty common for antivirus programs and messaging apps like Skype to open automatically. Essentially, while you’re trying to open up something like your web browser or a program for work, your computer is too busy trying to open five other programs.
Here’s how to check your start-up programs on Windows 10:
Go to your Start menu and type “run.”
Choose the “Run” app.
In the window that pops up, type “msconfig” and hit “open.”
In the next window that pops up, you’ll be able to see what programs start automatically, and disable them.
This is also a good opportunity to reinstall Windows. All versions of Windows get regular updates unless they’ve been discontinued, so updating or reinstalling periodically will keep your computer running smoothly.
Regularly scan for viruses
Maybe you downloaded something you shouldn’t have downloaded. Maybe you went to a shady website. Maybe you clicked on something with malicious intent. Whatever happened, there’s a good chance that you have a virus.
Luckily, most of the time, getting rid of a virus is both quick and free. Download an anti-virus program like Malwarebytes and scan your computer.
Malwarebytes will scan your computer entirely and will quarantine off everything that might be harmful.
To be completely honest, you should run a weekly virus scan anyway. A lot of the time, there are viruses that are running in the background of your computer. They are stealing personal information like passwords and are sending them to hackers. Weekly virus scans can solve this problem easily.
Check to see how many programs are running
Your computer is capable of running all sorts of programs, but it can be difficult to run multiple programs at once, especially if you have an older model.
If you have a Mac, go to Force Quit (under the Apple menu in the upper left corner) and you’ll see every program you have open. If you run Windows 10, hit Ctrl+Alt+Delete and open the Task Manager to see everything that’s open.
If your computer is running Steam, Photoshop, Google Chrome, Microsoft Word, InDesign, Microsoft Excel, and VLC all at once, you should probably close some of those.
Check your computer’s storage. If you are full or nearly full, it can cause your computer to run a little slow. If you can’t or don’t want to delete anything, find a cloud service to store your files. You can also use Google Drive! If you REALLY want to, you can buy an external hard drive, but why do that when there are free options!
If you have a bunch of small photos from your trip to Cancun or Word documents from your English 105 class, those probably aren’t going to slow down your computer.
Your computer probably has a minimum of 100 gigabytes of storage, so deleting a file that’s 20 kilobytes is not going to make a difference at all.
However, if you have a lot of huge game files, HD video files, and a ton of useless programs, you might want to consider dropping some of those. Don’t worry about temp files; worry about large files and your drive space.
Run disk defragment and disk repair
Disk defragment and disk repair can keep your computer running properly and make it run quicker.
To run disk defragment on Windows 10, follow these steps:
Go to “This PC.”
From there, right-click your hard drive and click “Properties.”
Go to “Tools.”
Click “Optimize,” and then click “Optimize” again.
Mac doesn’t have a built-in tool for defragment, but a third-party app like this one can help you!
Although expensive, computers are very disposable.
You can buy a pricey, fancy-schmancy computer and it could be considered low-tech garbage in just a few years. If you’ve been using the same computer for a few years, it might be time to put some money aside to get a new one.
Yeah, yeah, yeah. That’s easier said than done. If you need some help managing your money to buy a computer, that’s a whole different story.
Wrapping up
Hopefully, by the end of this article, your computer is running faster. If you tried something else and it worked, let us know in the comments below!
The default voice on GPS apps like Waze can get grating. If you’re on a long road trip, you might as well listen to a voice that isn’t driving you up a wall.
Well, there’s a way to do it! Soon, you will be guided down the road by Cookie Monster, Buzz Lightyear, Woody, and even DJ Khaled.
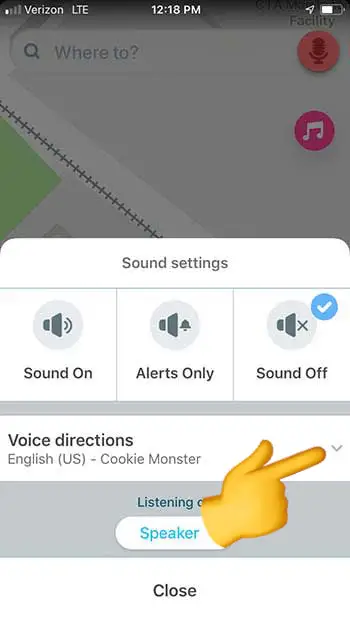
Step 2: Click on the sound settings (the speaker icon)
Step 3: Click on the drop-down arrow next to “voice directions”
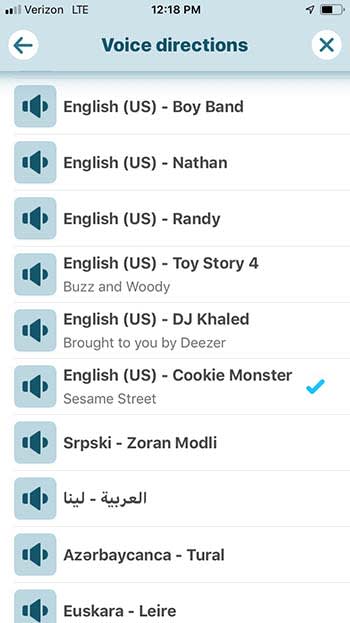
Step 4: Choose the voice you want
You can also choose to hear your directions in a different language in this option.
Record your own voice
If you want something done right, you have to do it yourself.
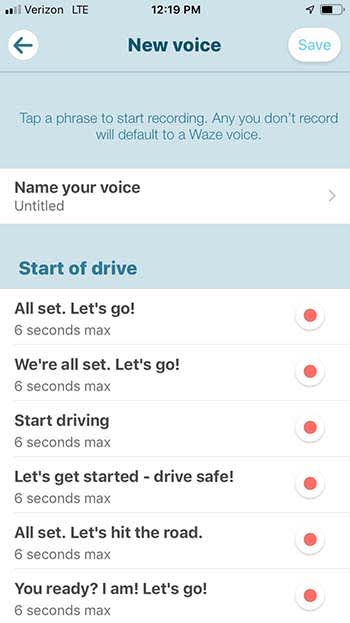
Waze also gives users the option to record their own voice for GPS directions. If you do it, it’s going to take you a bit of time to record every option Waze has available, but you could have some fun with it. Rather than recording what Waze tells you to, you can technically say whatever you want. Obviously, you should say “turn left” when it tells you too, but non-directional options are yours to mess with! You could even record your girlfriend’s voice to have her nag you the whole way to your destination!
Wrapping up
No matter which option you go with, remember to be safe on the road. Also, if you choose Cookie Monster, remember to pack a few cookies just in case he gets hungry.
Games are hard. That’s the not-so-secret reason a YouTube channel like LetsPlay has 3 million subscribers, or why Fortnite tournament champions can bring home millions of dollars. Sure some games are easier than others, but you can usually tell the difference between a novice and a veteran gamer no matter what title they boot up or what controller is in their hands.
Even if you can win every Fortnite match, dominate the Mortal Kombat leaderboards, or build Minecraft castles in the sky, you still might not be the greatest when it comes to beating Riddler in Arkham Knight, winning races in Forza, or leading a nation in Civilization 6. Gaming has grown into a huge umbrella, and it covers a lot of ground. No matter what game you pick up, though, there are some universal tips that will always start you off on the right foot. Here’s our list:
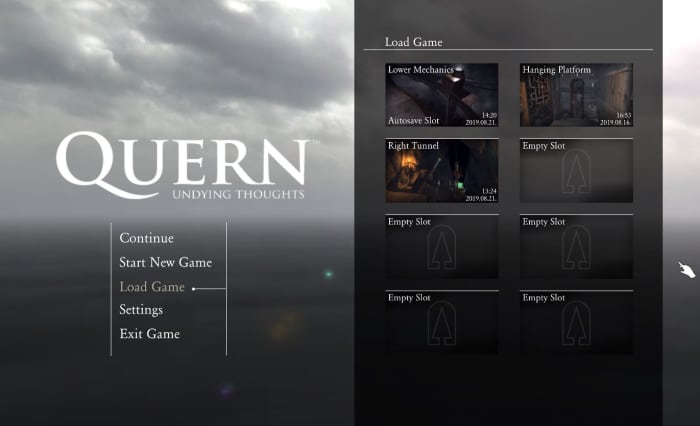
1. Save often, use different slots
Mostly gone are the days of classic Sierra-style point-and-click adventure games like Quest for Glory or Gabriel Knight. You know, games that punish the crap out of you for forgetting to save your progress. Most games use auto-saves or checkpoints nowadays, but take it from a guy who grew up with the classics: If there’s an option to manual save, do it often. It can save you hours of having to replay the same territory.
Use multiple save slots to set up a safety net
Saving in different slots is also smart. You may make a decision that you regret, like overspending your resources, killing a character, entering a place before you were ready, choosing a poor team for the job – the list goes on. We recommend having at least three saves that you go between. That way you have a safety net in case you royally screw something up.
2. Everything is rock, paper, scissors
Rock, paper, scissors is the most basic game of all time (besides maybe Pong) and yet it permeates everything. Hilariously enough, it’s usually even praised for making games complex. The idea is that for everything there is a counter. We can’t stress how important it is to take that into consideration no matter what game you’re playing. It’s the foundation for RTS titles like Total War or Battle for Middle Earth (spearmen –> horses –> archers –> swordsmen –> spearmen), but rock-paper-scissors can apply to practically any genre.
Total War: Three Kingdoms – Complete beginner’s guide
Look at fighting games (who’s the best match for Braniac in Injustice 2?), RPGs (when should you use ice spells instead of fire in Skyrim?), and even shooters (when will an SMG beat a shotgun?). If you find that your usual tactic, your favorite character, or your best weapon isn’t getting the job done like you expected, it’s time to consider a new tactic.
3. Read the manual
We know what you’re thinking. ‘I don’t need to read a manual! That’s for wimps!’ Well then it’s time for a personal story: One of the first games I ever played was Jedi Knight: Dark Forces II. In the sixth level (ugh, I still remember every detail of this game) there’s a room with a bridge that has to be manually extended in order to progress through the room. The catch is that the extension controls are quite far from the bridge itself, and the bridge doesn’t stay extended long. Bottom line: You have to run across the bridge really quickly before it pulls back in again. It went something like this:
I was stuck at this part of the game for seven months because I kept trying to walk across it as fast as possible. Because I didn’t know there was a ‘run’ button. Call me dumb, but since this was one of my first games I didn’t know that was standard practice. If I’d read the manual I would have known this right off the bat and saved myself monthsof frustration. It pays to know the tools in your toolkit. Read the manual. Don’t be like me.
4. Hotkeys are your friends
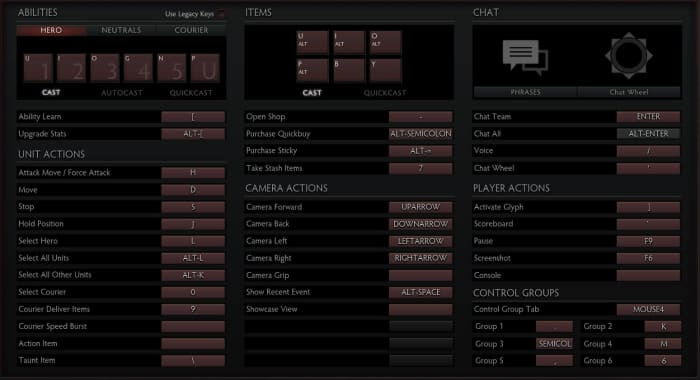
If you’re a console player this tip isn’t quite as important, but for all you PC players looking to up your game this is huge. Any level where you’re on the clock (and we’re not just talking about racing games like Need for Speed. If you’re playing a shooter you need to react quickly.) you need to be able to do a lot of things in a short amount of time. Hotkeys might take some extra memorization, but trust us; it’s worth it. You’ll be able to do so much more, so much faster.
With a bit of practice and the right hotkeys set, you can operate as fast as you can think.
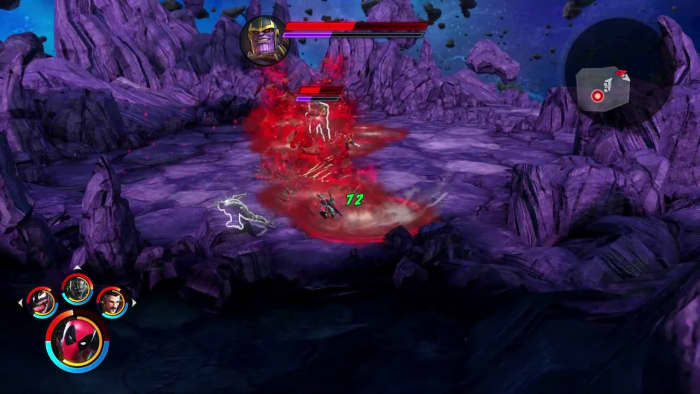
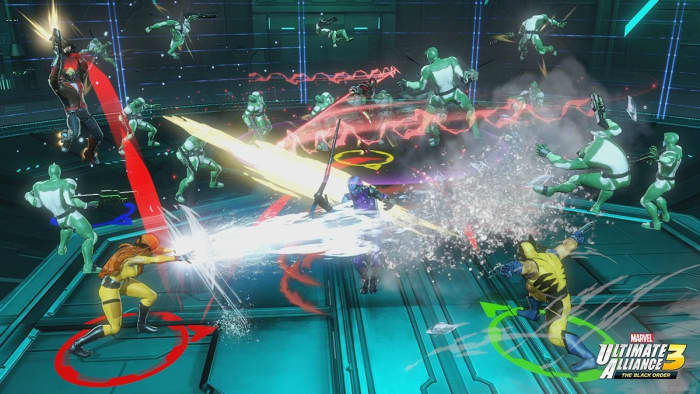
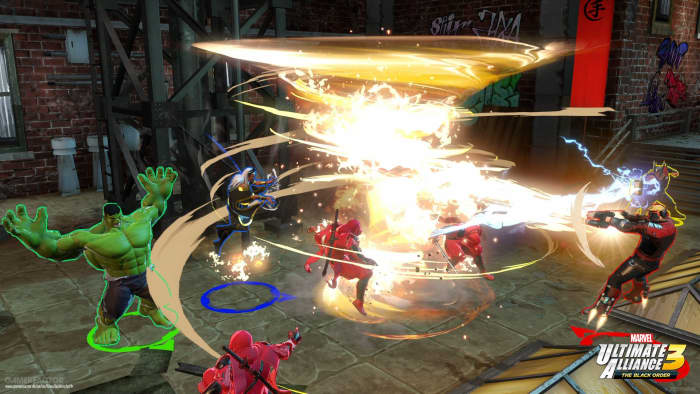
Some games let you set the hotkeys yourself, which means your experience will play as intuitively as you choose. You can even look at a new console game like Marvel Ultimate Alliance 3. If you’re having trouble adjusting to the gameplay (like we did) you can change the control scheme right in the Options menu. You can also re-assign powers to different buttons if you don’t think it makes sense where they are. If the controls don’t make sense to you, look to see if you can change them.
If it feels like you’re running into a brick wall, it might be because you are. How could the game designers be so cruel? Why would they make a level unwinnable?? Odds are, that isn’t the case; you’re just not approaching it the right way. Attacking from a different angle can make all the difference. A melee brawl with a tough opponent might spell death, but a sniper shot to the back of the head? Can’t argue with that! Sometimes it’s like Sam Fisher instructs, you’ve got to “re-position and reacquire:”
This doesn’t just go for single-player games either. If another player in an FPS game seems untouchable, try and undermine him. Go at him with strategies he doesn’t expect. Use equipment that your teammates discarded. Get around the obstacles, flank him, and hit him where he least expects you. Be patient and, to quote Napoleon Bonaparte, “never interrupt your enemy when he is making a mistake.”
6. Everything is min/max
Remember when we said that everything is rock, paper, scissors? That only works if your rock is heavy, your scissors are sharp, and your paper is … uh, it’s not a perfect metaphor. The point is that when you’re trying for an specific build, strategy, or angle in a game you need to push it to its fullest extent. There’s an important balance you need to consider: Do you want to create a loadout or character that’s a jack of all trades? Or would you rather make a specialist who’s unmatched in one category, but vulnerable in another (a la rock, paper, scissors)?
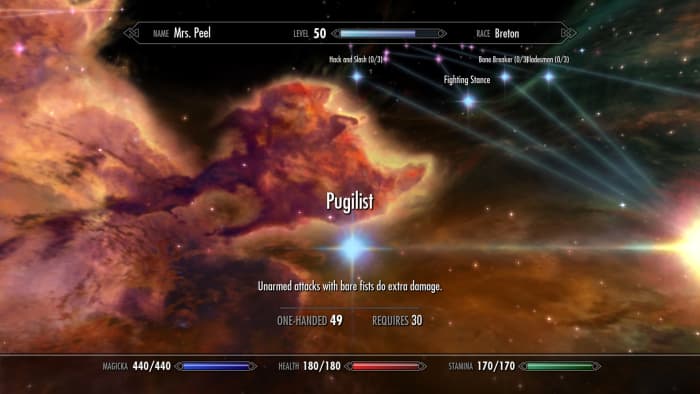
Don’t even TRY an unarmed Skyrim playthrough without investing in this perk.
While it may be tempting to raise the HP of a weak character, or beef up someone who’s not doing much damage, remember that teamwork makes the dream work: Operating as a cohesive unit of properly min/maxed characters ensures that no matter what you go up against, you have a solution for it. In RTS games that means moving units with stacked bonuses. In shooter games that means teammates are covering all the angles in a firefight. In an RPG that means leveling up the right skills and traits.
7. DODGE!
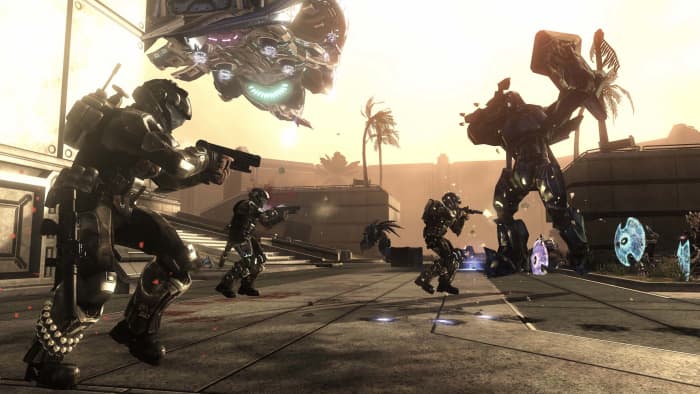
A good player can roll with the hits, but a pro player doesn’t get hit to begin with. In the words of Piccolo, the most valuable skill you can learn is to dodge. This applies to literally every game: When you’re under fire there’s a spot where you’re safe and there’s (usually many) spots where you are decidedly not safe. Dodging in video games is an art, but it’s also a test of patience. Defensive playing can keep you alive long enough to get that coveted weapon in Halo, elude that persistent zombie horde in World War Z or outlast that infuriating Dark Souls boss.
It’s usually clear where to stand and where NOT to stand.
This tip also extends to using cover properly in a game like Mass Effect or Dragon’s Dogma. Silly as it may seem, trees, pillars, and rocks are usually indestructible, so dipping behind them will shield you from mightier aoe attacks and buy you valuable time to heal or plan your next move.
8. Retread old ground, but remember your current objective
Going back to explore old territory might sound boring if you’re itchy to move along in a game’s plot, but it’s often worth doing. Sometimes a place you’re stuck actually is unsolvable unless you go back to investigate earlier ground with a little more scrutiny. This is especially true in puzzle games like The Room or Myst where being observant is half the battle. Maybe there’s a subtle clue you overlooked. In RPGs like Dragon Age backtracking is a good way to save characters who would otherwise have died or complete easier quests, and in shooter games it’s a great way to hone your skills in a controlled environment.
Having trouble winning online Halo matches? Practice in Firefight.
On the flip side of the coin, if you’re stuck at a difficult juncture in a game don’t just endlessly replay easier points. It may not be fun to hammer away on a tough boss in Street Fighter 2 for hours, or sit there stumped trying to beat a difficult stealth section of a game like Shadow Tactics, but we promise – you’ll beat it eventually. You just have to keep grinding away. Never give up, never surrender!
9. Tinker
If a game has a place to tweak your equipment and tools, it’s always worth doing. Whether its smithing your weapons and armor in an RPG like Kingdoms of Amalur or Witcher 3, managing your ISO-8 in Ultimate Alliance 3, upgrading your Mother Base in Metal Gear Solid V: The Phantom Pain or memorizing those multi-hit juggle combos in Injustice, practice makes perfect and every little bit counts.
If you’re really trying to fine-tune your experience, the same goes for the often-ignored Options menu. Small tweaks here can have a huge impact on your gameplay, like raising your joystick sensitivity. In Call of Duty that will open a ton of doors. Even something as small as changing the reticle color in Apex Legends could make an unexpected difference in your performance. Trial and error might lead to an adjustment you didn’t know you needed.
10. The Internet already did it
Last but probably most obvious: It’s 2019 and “if it exists, it’s on the Internet.” That goes for strategy guides, tips and tricks (like this article!), video walkthroughs, Twitch streaming, and even Facebook groups or companion apps for certain games. If you’re struggling with a point in a game, we swear you’re not the first. Look to the gigantic network of players and you’ll undoubtedly find someone who’s gotten past where you’re stuck.
Hopefully these tips will help you up your gaming skill in whatever franchise you’re currently enjoying, and that you’ll tackle the next milestone with a bigger bag of tricks.
Let us know in the comments below if there are any universal gaming strategies that you’ve used, and stick with Softonic for more gaming tips and tricks!
Fight with your favorite superhero! Here’s how to unlock them all.
There’s nothing quite as liberating as running around the X-Mansion as Deadpool, slicing Sentinels to pieces while munching tacos and hurling insults at Juggernaut. Or maybe you’re more of a Sorcerer Supreme who prefers spending time meandering through the mystic miasma of the deadly Dark Dimension. Heck, maybe you want to play as Thanos. It was inevitable.
You heard right: You can play as Thanos in this game.
Regardless of who your favorite Marvel character happens to be, Marvel Ultimate Alliance 3 is at its most fun when you can, y’know, play as that character. With a cast of over 35 characters already available (and a dozen more to drop in coming months via DLC), not everybody is unlocked right off the bat.
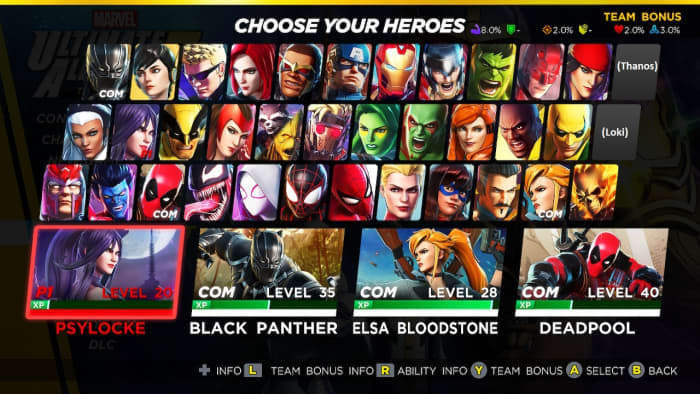
Here’s a list of every character in the game, and where/how to unlock them. For simplicity, we’ll just follow the order they appear on the Hero Select screen:
Black Panther: Unlocked in Chapter 8 (Wakanda) at the third SHIELD Access Point, right after the cutscene where Klaw destroys the bridge.
Wasp: Available in Chapter 4 (Avengers Tower) at the third Checkpoint. She helps you clear out a bunch of bots before being available at the SHIELD Access point.
Hawkeye: Available right after defeating the first phase of the Ultron battle. You need to clear out a landing zone for the Quinjet and then he joins your team for the brawl up to Ultimo.
Black Widow: Available in Chapter 2 (the Raft) right after beating Sandman.
Falcon: Available in Chapter 2 (the Raft) right after beating Sandman.
Captain America: Available in Chapter 2 (the Raft) right after beating Sandman.
Iron Man: Available in Chapter 2 (the Raft) right after beating Sandman.
Thor: Available in Chapter 2 (the Raft) right after beating Sandman.
Hulk: Available in Chapter 2 (the Raft) right after beating Sandman.
Daredevil: Available in Chapter 3 (Shadowland) just before you hit Checkpoint 3. He’ll help you navigate a hall filled with traps.
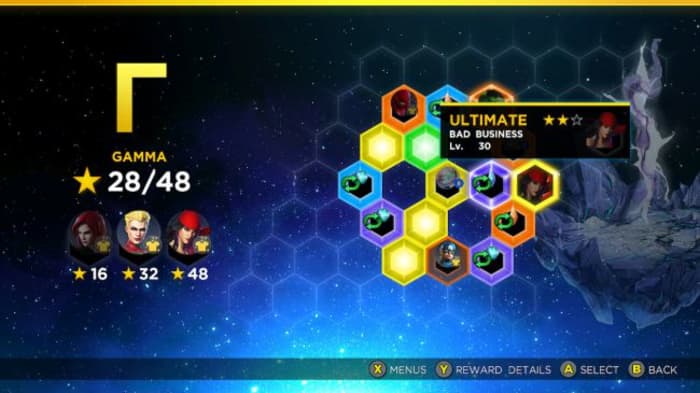
Elektra: Unlocked as a reward for completing the Bad Business challenge in the Gamma Rift.
Unlock Elektra by completing this Rift challenge.
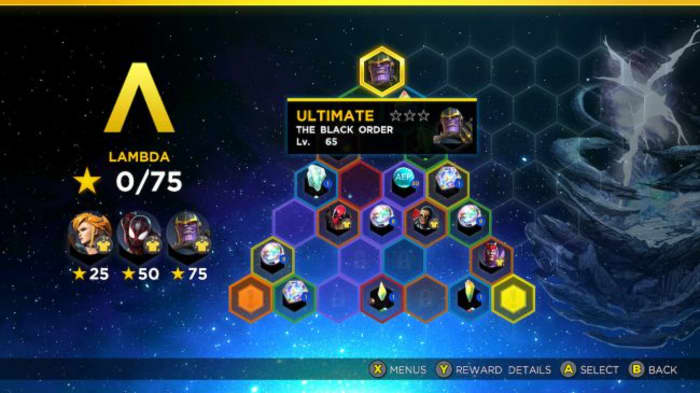
Thanos: Unlocked as a reward for completing The Black Order challenge at the top of the Lambda Rift.
Unlock Thanos by completing this Rift challenge. Best of luck!
Storm: Available in Chapter 8 (Wakanda) after helping her defeat a group of AIM soldiers. She joins you right at the second SHIELD Access Point.
Psylocke: Available in Chapter 5 (Xavier Institute) right after the first fight: Clearing out the front courtyard with Colossus and Cyclops. Nightcrawler joins her.
Wolverine: Available in Chapter 2 (the Raft) right after beating Sandman.
Scarlet Witch: Available in Chapter 2 (the Raft) right after beating Sandman.
Rocket/Groot: Available right at the start of the game. They’re on the first team you get.
Star-Lord: Available right at the start of the game. He’s on the first team you get.
Gamora: Available right at the start of the game. She’s on the first team you get.
Drax: Available right at the start of the game. He’s on the first team you get.
Crystal: Available in Chapter 2 (the Raft) right after beating Sandman.
Luke Cage: Available in Chapter 2 (the Raft) once you’ve defeated Venom and Electro. He’s right in the next room and you can switch to him at a SHIELD Access point.
Iron Fist: Available in Chapter 3 (Shadowland) just before you reach Checkpoint 2. He’ll help you clear out a bunch of ninjas guarding the main door.
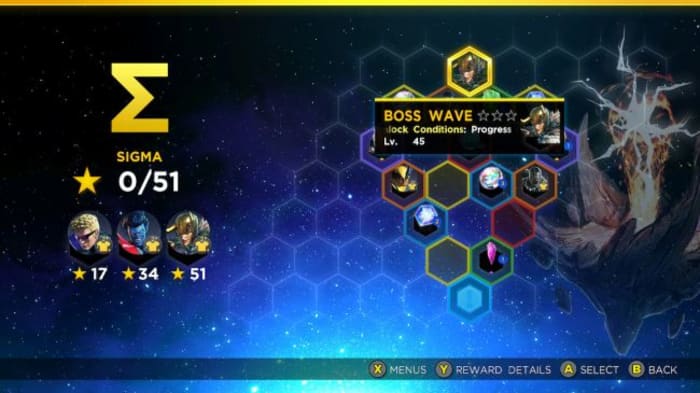
Loki: Unlocked as a reward for completing the ‘defeat Ebony Maw & 4 bosses’ challenge at the top of the Sigma Rift.
Unlock Loki by completing this Rift challenge.
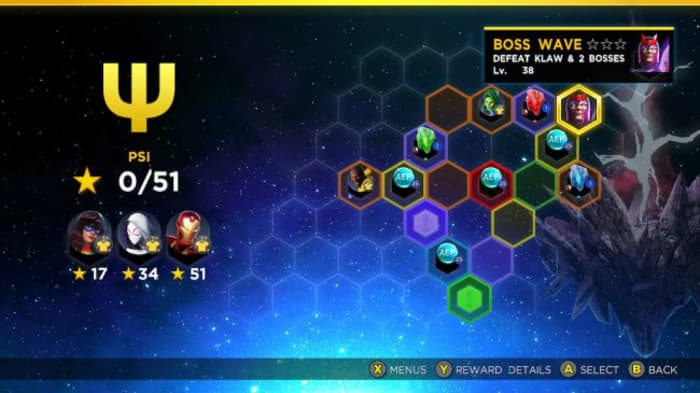
Magneto: Unlocked as a reward for completing the ‘defeat Klaw & 2 bosses’ challenge in the Psi Rift.
Unlock Magneto by completing this Rift challenge.
Nightcrawler: Available in Chapter 5 (Xavier Institute) right after the first fight – clearing out the front courtyard with Colossus and Cyclops. Pyslocke joins him.
Deadpool: Available in Chapter 5 (Xavier Institute) right after facing off against Magneto, Mystique, and Juggernaut behind the mansion. The battle takes you inside where Juggernaut ruins poor Deadpool’s taco night. He joins you in a quest for revenge. (Alternatively, you can unlock Deadpool and his chef outfit earlier by purchasing the Season Pass!)
Venom: Available in Chapter 2 (The Raft) after defeating Electro and him right past Checkpoint 4.
Spider-Gwen: Available in Chapter 2 (the Raft) after defeating Mysterio. Comes with Miles Morales and Ms. Marvel.
Miles Morales: Available in Chapter 2 (the Raft) after defeating Mysterio. Comes with Spider-Gwen and Ms. Marvel.
Spider-Man: Spider-Man’s joins your party early on in Chapter 2 (The Raft). He’ll be available via Shield Access Point right after you beat Sandman.
Captain Marvel: Available in Chapter 2 (the Raft) right after beating Sandman.
Ms. Marvel: Available in Chapter 2 (the Raft) after defeating Mysterio. Comes with Spider-Gwen and Miles Morales.
Doctor Strange: Available in Chapter 6 (Dark Dimension) after defeating him in a (rather difficult!) two-stage boss fight. Talk to him at the SHIELD Access Point after the fight and he joins your team.
Elsa Bloodstone: Available in Chapter 6 (Dark Dimension) after helping her fight off a bunch of Mindless Ones. The second SHIELD Access Point is right after completing this fight.
Ghost Rider: Available in Chapter 6 (Dark Dimension) after helping him defeat a horde of Mindless Ones. He’s hanging out right above the third SHIELD Access Point.
Didn’t see your favorite character in the list? You’ll be happy to hear that Cyclops and Colossus are being added on August 30 as a free update! You don’t even need the Season Pass to get them.
The Season Pass
If that’s still not enough characters for you, there are three upcoming DLC packages (with four characters each) only available through purchasing the game’s Season Pass. The Marvel Knights DLC drops this Fall and will feature Moon Knight, Punisher, Blade, and Morbius.
These guys will be joining the cast just in time for Halloween!
The X-Men DLC will come out later this year and features four more X-Men (separate from Colossus and Cyclops). Team Ninja has not specified which X-Men these will be, but considering they’ve already got character models we’d guess it’s Beast, Juggernaut, Mystique, and a mystery character (Jean Grey?).
They’ve already got character models and attack animations!
Lastly, Team Ninja also announced an upcoming Fantastic 4 DLC that should be landing in 2020. It’ll be a ways from now, but we can’t wait to play as Human Torch, Mr. Fantastic, Invisible Woman, and Thing.
Let us know your favorite character in the comments below, and stay tuned with Softonic for more news, strategies, and tips on Marvel Ultimate Alliance 3!
Since Marvel Ultimate Alliance 3 hit the shelves last month, we’ve barely seen the sun. It’s been a decade since Ultimate Alliance 2, so we were understandably thrilled when we heard the title was making a comeback, and that Koei Tecmo’s Team Ninja was at the helm, and the game was being published by Nintendo.
This time the story kicks off with the Guardians of the Galaxy!
While the game is fairly intuitive (especially if you played the earlier games in the series) there are still a number of things we wished we’d known going in, like the best way to prioritize leveling up characters, manage the complex ISO-8 system, or minimize grinding before tackling the game’s tougher encounters. There are definitely a couple of spikes in difficulty, so we put together a list of 10 tips to help get you started off on the right foot. If you don’t own the game yet, you can buy it here.
1. Adjust the camera and controls
First things first, the game’s an isometric top-down hack n’ slash. You’re going to spend a lot of time trying to keep track of the character you’re currently playing amidst a screen full of enemies, colorful explosions, and walls and objects that the camera likes to get stuck behind. Needless to say, navigation is difficult. Angry Joe explains it best in the vid below (and he explains angrily, so NSFW warning):
If you’re playing couch co-op with your friends you’re going to be fighting over control of the camera often; it’s inevitable (cue Thanos’ “I am inevitable”).
There are two things that can help: If you’re playing the game by yourself you can switch over to “heroic camera,” which keeps closer to the character you’re playing instead of hovering in top-down. The second thing you can do is play the game online, since that allows you and the other players to move further apart before the camera gets confused.
Wait, where’d my character go?
If you’re new to the Nintendo Switch, there might also be a learning curve for using the controls. The Options menu has three different configurations you can cycle between, though, so at the start of the game find the one that feels most intuitive.
2. Use multiple save slots
This is a really general video game tip, but it’s one that bears repeating here: There are five save slots available in Ultimate Alliance 3, and you should be cycling between at least two of them.
“But the game auto-saves, like, all the time,” you might say. This is true, but it might also auto-save after you’ve made a really, really bad decision. Trust us, you don’t want to be stuck with a save where you accidentally deconstructed the wrong ISO-8 crystals or spent your limited resources on the wrong upgrades or characters.
Additional save slots provide you with the opportunity to experiment. Is it worth enhancing this ISO-8 crystal? Will giving Wolverine ALL of our XP cubes really get us through this harder fight? If it wasn’t worth it, this way you’re not 100% committed to risky decisions.
You’ll thank us later.
3. Use synergies. Like, a lot.
Right after the prologue mission, the game teaches you about using synergies, Ultimate Alliance 3’s take on the fusion system introduced in Ultimate Alliance 2. Essentially this involves two characters using their abilities in tandem to enhance the damage, increase the effective radius, and/or reduce the cost of their abilities.
As you unlock more abilities, you character can perform more synergies off of more teammates.
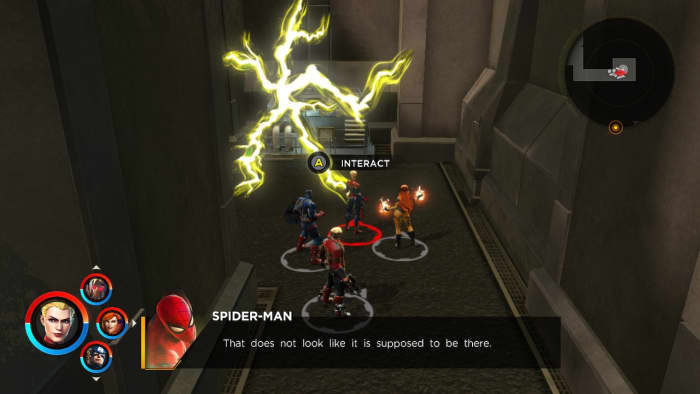
You can activate these abilities in two ways. You either initiate (by performing an ability with ZR instead of R) and the AI joins you, or you can respond to a synergy request by pressing B when the option arises (it’ll cue you in with a flashing button, visual, and a sound effect). Synergies fill up the extreme meter quicker, deal more damage, and stagger larger targets more effectively, so don’t be shy to use them often. Characters can also use synergies to open certain blocked paths or secret doors, so keep your eyes peeled.
Like synergies? Play the game that introduced them!
4. Beating the stagger meter
One of the new features implemented in the series is the stagger meter – that purple bar under a boss or mini-boss’s health meter. You can do damage to the boss even if they aren’t staggered, but you’ll do way more if they are. Take down that purple bar and then hit ’em with the best stuff you’ve got to drop them more efficiently.
You can still hurt bosses even if their stagger meter is full; it’ll just damage them less.
While the most intuitive tactic is to use your synergies or extreme attacks when the meter is down, you might actually be better off using them just before the stagger bar depletes. Some bosses regen their stagger meter really quickly, so in order to maximize damage and hit them before they can escape, trigger these moves just a hair early. Later on in the game, you might also find ISO-8 that does extra damage to this meter, so outfit your team with that in mind.
Guide to Marvel Phase 4: Everything you need to know
While we’re on the topic of beating the stagger meter, nothing does the job quite like a forklift thrown at the bad guy’s head. For whatever reason, thrown objects dish out a ton of damage to enemies, especially to their stagger gauge. If you spot an object you can throw, it’s there for a reason.
6. Time your extreme attacks
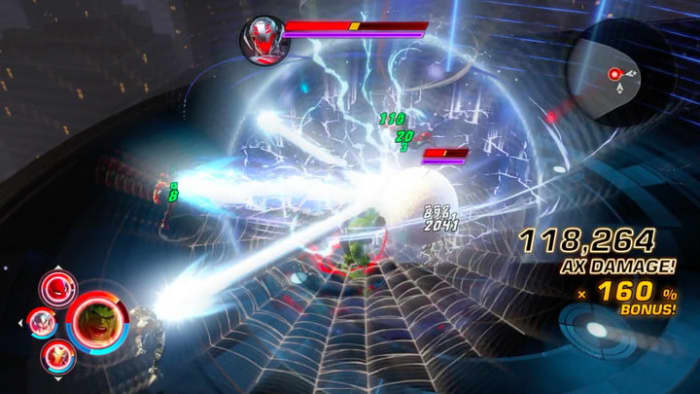
Extreme attacks are the strongest move in your character’s bag of tricks, and they can only be done once your attack momentum reaches a peak threshold. It may be tempting to use it right away, but the smart move might be to save it for when you really need it (like that boss fight around the corner).
Ultimate alliance extremes are the most powerful tools in your arsenal
Extreme attacks (even when just one character does it) are usually enough to topple the stagger meters of a crowd of mini-bosses, so don’t spend all four needlessly (unless you’re trying to maximize your damage for a rift challenge or something). Maybe try one or two at a time and see how much damage you can dish out. The only time you’ll really need all four is when you’re up against a tough boss. Then every bit of damage counts.
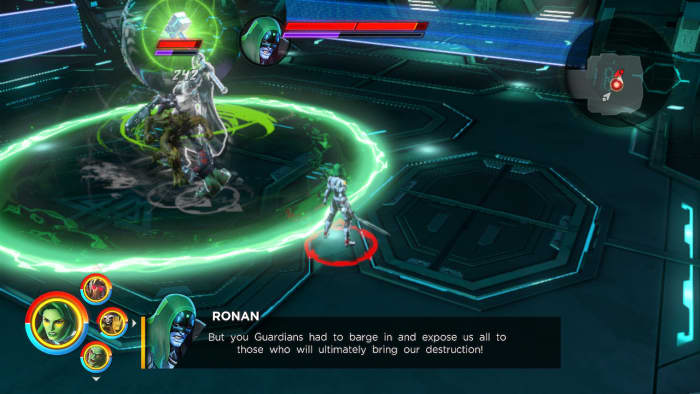
Lastly, boss fights are often split into multiple stages. If you look carefully at an enemy’s health bar you can see where the partition hits. Don’t perform your extreme attacks if they’re about to bump to the next stage of the fight; all that damage will be wasted.
See the partition in Ronan’s health bar? Wait until phase 2 before you hit him with the best stuff!
7. Manage your team bonuses
Earlier games in the series would put in fun names for specific teams of four (‘bruiser brigade,’ ‘energy corps,’ ‘femmes fatales,’ or ‘classic avengers.’). Ultimate Alliance 3 altered the formula a bit and made it both more flexible and more approachable.
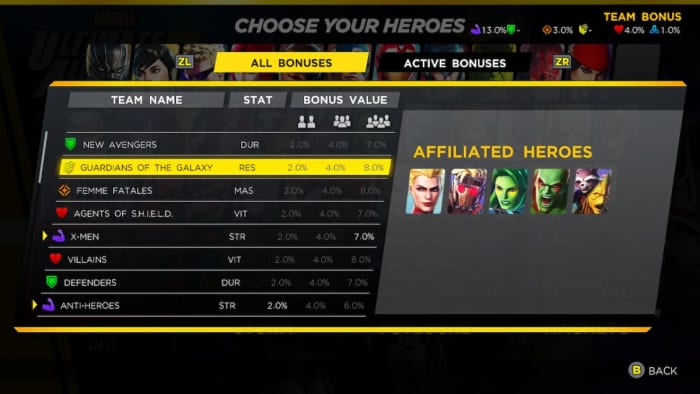
First off, now it only takes two characters with matching affiliations to provide a bonus for your team, and the specific percentage increase it rewards is displayed at the top of the screen.
Second, you can press L to see the affiliations every character has on the hero selection screen. That way you can stack your bonuses more efficiently.
See which heroes are in which teams. Stack your bonuses accordingly.
This opens up two avenues of play: You can either put together a team that’s weak in one area, but stack them with team bonuses to make up the difference; or you can stack one specific bonus really high, providing a really noticeable change to, say, your energy output or your durability. Don’t forget ISO-8 bonuses stack on top of that!
8. Use the Lab
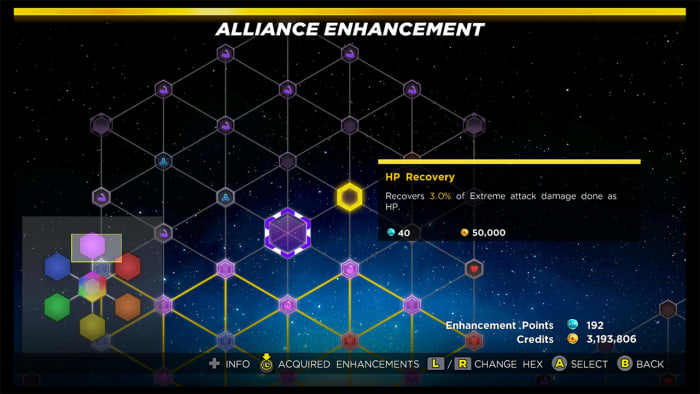
A lot of your team’s success will take place behind the scenes. The Alliance Enhancement network and ISO-8 management are key components towards buffing your characters, negating weaknesses, and even unlocking entirely new facets to your game, like extra revives, faster XP gain, or health regen.
ISO-8 can add wholly new effects to your character
If you’re finding a particular juncture of the story is suddenly way harder than expected, it’s probably time to check out the lab (accessible from a SHIELD point once the feature is unlocked) and pick some upgrades. Once you’ve stretched the first portion of the Alliance Enhancement network out to the edges of the shape, it’ll unlock entire new sections to explore, each one with a focus towards one attribute (strength, mastery, durability, energy, health, and resilience). Max out a section and you’ll unlock a powerful unique bonus.
Every section caps out with a special shared bonus. Decide which ones to prioritize.
9. Manage your ISO-8
ISO-8 is probably the most complex part of this game, so we’ll spare you the nitty gritty details. If that’s what you’re after, check out this in-depth video.
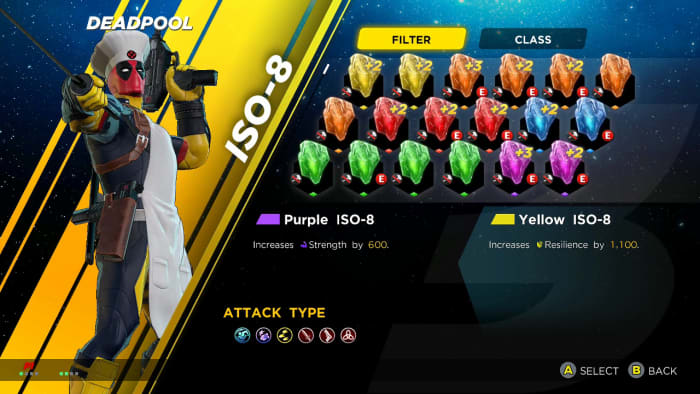
Fundamentally, these are crystals of varying rank and color, and they can be slotted into your characters on the Team menu (accessible via SHIELD access point or even just the base game menu). As you level up you’ll unlock more ISO-8 slots per character, and the fourth slot is unlocked by filling out all of the 100,000-cost ticks in the Alliance Enhancement menu, which will probably take a few playthroughs.
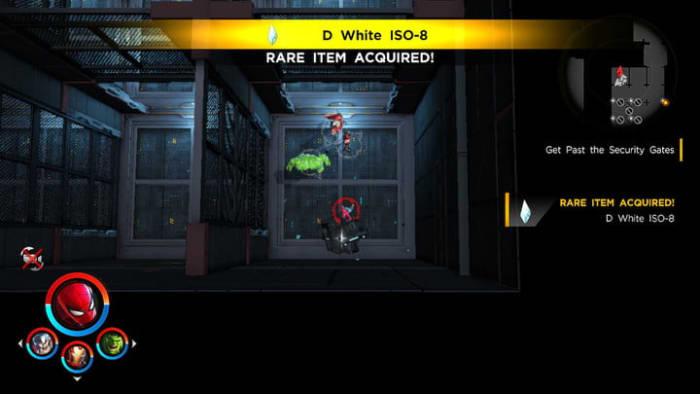
D level ISO-8 is probably better off deconstructed than equipped.
What’s important to know right up front is that you can swap ISO-8 between team members any time you like, so we recommend giving your team a once-over every time you bring out new characters. This also means you can keep swapping them between characters whenever you switch up your squad.
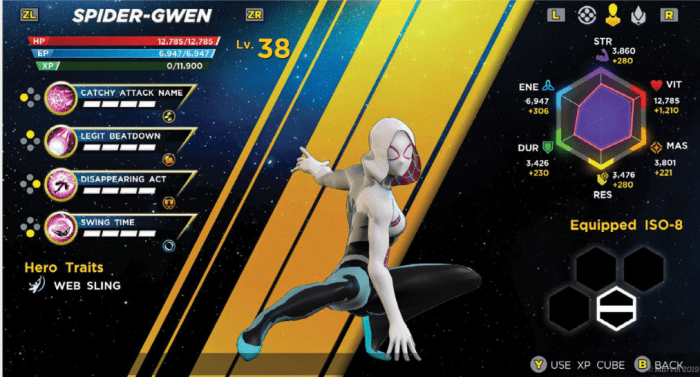
When it comes to deciding which ISO-8 to give to which team member, check out specific strengths and weaknesses on their character screen. Does this character use mostly strength-based attacks? Then give them a purple strength ISO-8 to boost their damage. Does this character have health regen? Then give them a red ISO-8 to synergize with that trait so they passively heal even faster.
Look carefully at a characters’s stats before you decide which ISO-8 is best for them.
Lastly, we recommend deconstructing any ISO-8 below C grade. It takes a LOT of ISO-8 to build a crystal towards any noticeable bonuses, so these weaker crystals are better ground up and fused with crystals that are already powerful.
Keeping your characters at a comfortable level is one of the most challenging aspects of the game, and it can be discouraging when the game hands you a new level 30 character that blows your current team of level 14 characters out the window. There are a few things you can do to keep your team strong enough to tackle the game’s increasingly difficult scenarios.
Infinity Rifts are challenging, but optional
Rifts can be grindy, but there’s no better place to level up your characters, especially in Wave modes. The caveat is that you have to beat the challenge for the rewarded levels to stick, so be sure you don’t bite off more than you can chew. Rifts are also great places to find the second best way to level up quickly – XP cubes.
Complete Infinity Rifts to level up, earn XP cubes, costumes, and even new characters.
XP cubes can be found in scattered boxes throughout the game (usually hidden behind breakable synergy walls or secret panels), but they’re more frequently obtained through rift challenges – especially the harder ones. One trick we found was to take a powerful team (comprised of the higher-level characters the game rewards you with around mid-game) and sending them to complete the harder challenges in the first rift. Then we went back and distributed all the XP cubes to our weaker characters to balance out our team.
We hope these tips help you get a strong start in Marvel Ultimate Alliance 3. Let us know if there are any other strategies you’ve found, and stick with Softonic for the latest in tactics, guides, and upcoming DLC for the game!
Marvel Munchkin is the card game every superhero fan needs
Are some of your apps running slow, or are they behaving weirdly? Clearing the cache can help!
Though it may sound a bit drastic, clearing your phone’s cache might be a good idea for a few reasons. The cache is where your phone stores data associated with the applications that you have installed, such as images, so you don’t need to wait as long for the app to load when you open it.
That said, if an app starts behaving strangely, clearing the cache might be one way to get things back to normal. You may also want to clear your cache to free up some more memory on your phone. Whatever the reason may be, here’s how to clear your Android phone’s cache in a few quick and easy steps.
How to clear your cache on Android
First off, there are apps that you can download to clear your cache for you. You can download one of the best ones for the job below. However, you can also do it manually yourself, so we also have the following step-by-step instructions.
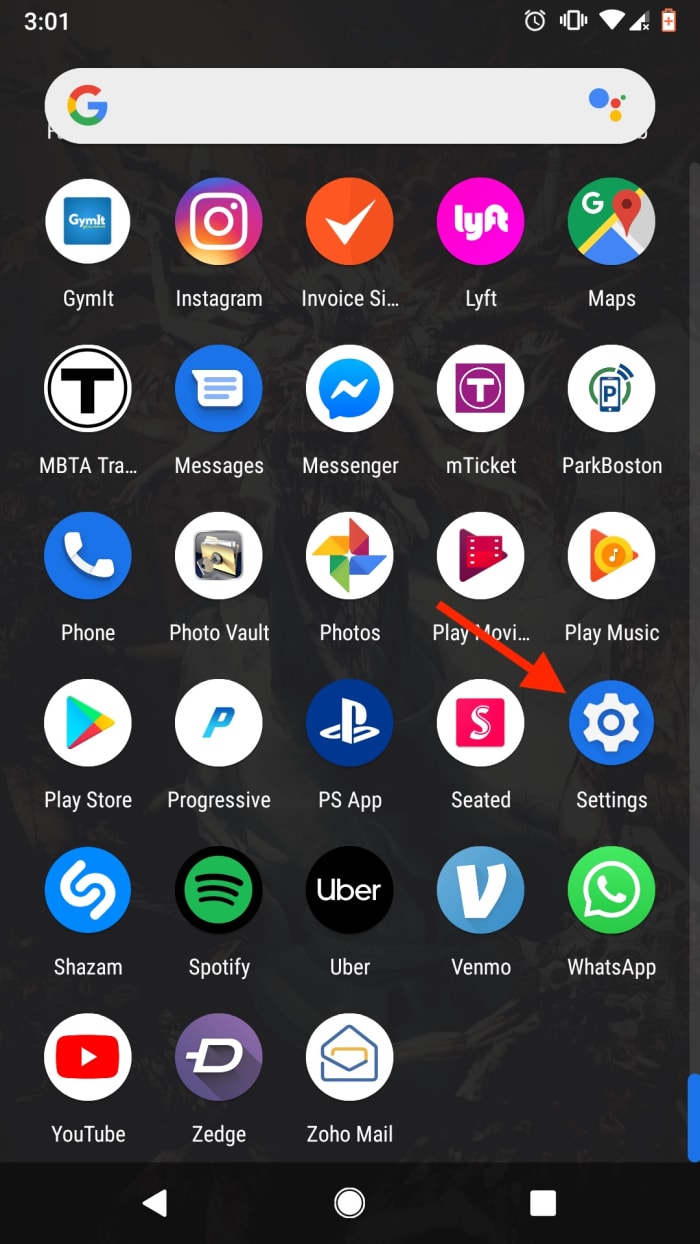
From your phone’s home screen, head over to the Settings menu. This usually appears as a small gear icon in the top right corner of your phone’s dashboard, and can also be accessed via an icon in the app menu.
2. Open the Storage menu
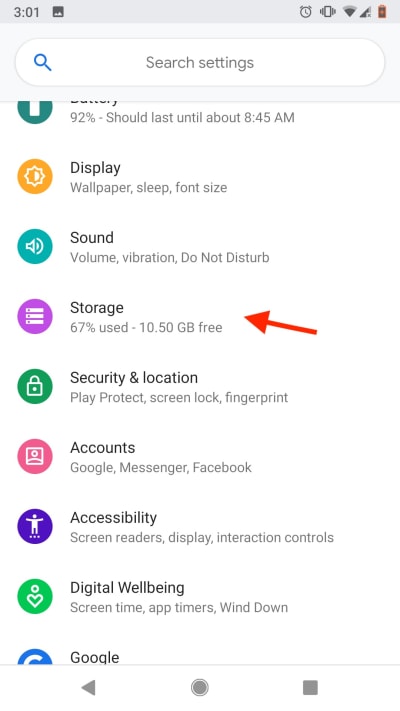
Once in the Settings menu, you’ll see a variety of options.
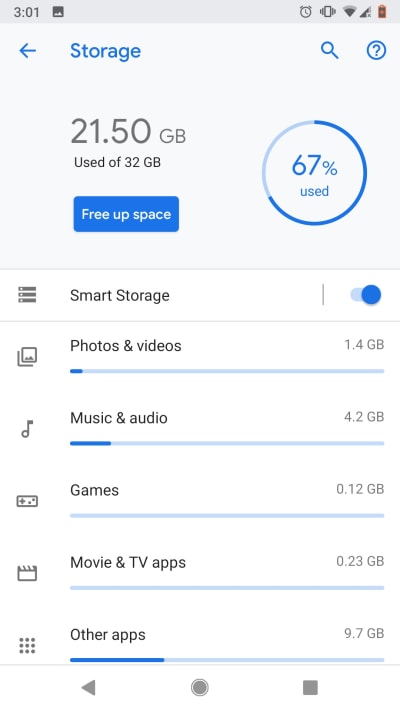
Scroll until you see the Storage menu, then tap it to access it. Here, you’ll see a detailed breakdown of exactly how your phone’s data is allocated. You’ll also see your installed apps broken down into different categories based on their function, such as “Games,” “Movie and TV,” or “Other apps.”
From this top menu, you’ll also see a shortcut labeled “Free up space.” If you want to quickly free up some of your phone’s memory, tapping this key will automatically purge any cache data that your phone considers to be unnecessary.
This can be a great option if you’ve noticed that your phone’s acting a little sluggish or if you just need to make a bit more space. If you’re having problems with a specific app or you want to have some more control over what data gets cleared, head to Step 3.
3. Choose your category
As stated above, all your apps are subdivided into certain categories. In general, most apps can be found in the “Other apps” tab. Click through the different categories until you find the app that you want to clear, then select it.
4. Choose how much data you want to clear
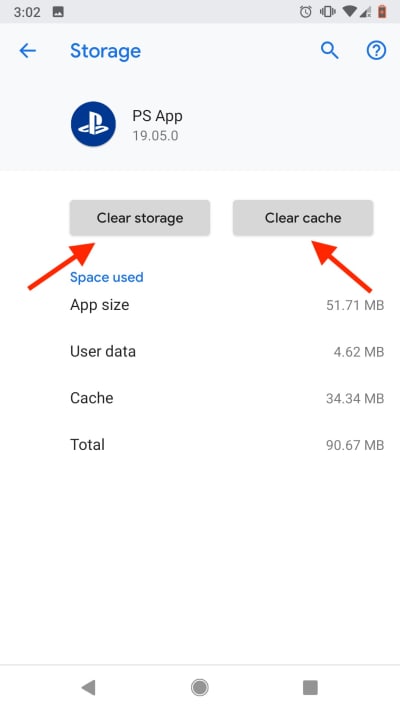
Once you’ve selected the specific app, a new menu will open displaying cache data pertaining to the app you’ve selected. At the top of the menu, you’ll see two buttons: “Clear Storage” and “Clear Cache.”
Tapping “Clear Cache” will get rid of any cache data associated with the app. This includes images and other saved content, meaning that the next time you use the app, it will need to connect to the internet to re-download any content it needs to function.
Usually, clearing the cache and re-downloading data like this will solve any problems if you notice an app behaving strangely.
“Clear Storage” will get rid of any and all data associated with the app, including data such as saved passwords or, in the case of mobile games, save data. If you have dozens of things unlocked in a game like Knife Hit, this probably isn’t the best option.
Wrapping up
Whatever the reason may be, clearing your cache is easier than it sounds. Whether you’re trying to clear space or fix a problem app, following these quick steps should clear things up in no time.
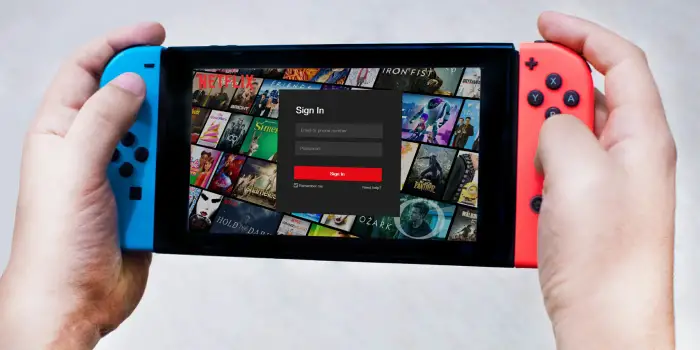
Now you can watch Netflix on your Nintendo Switch!
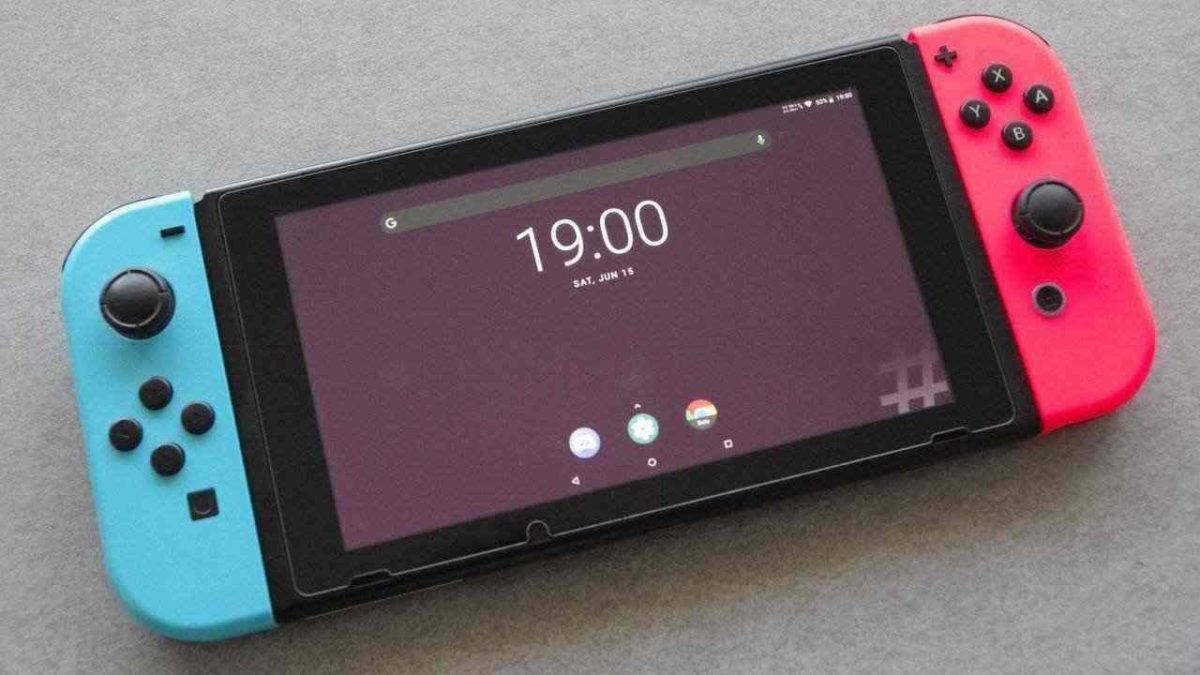
Developers at XDA have brought the console to new levels of awesomeness by (unofficially) integrating Android 8.1, which offers a host of features that can now be accessed right on the portable gaming platform, including Netflix, streaming, and emulators to play games that otherwise cannot be played on Switch. Examples include Minecraft, Portal 2, The Simpsons Hit and Run, Pokemon Platinum, and CSR 2.
If you’re worried about Android monopolizing your device, don’t fret; you can seamlessly dual boot between the Switch’s OS and Android at any time, so there’s really no reason why you wouldn’t want to install it – except perhaps due to the bugs.
Play all the non-Switch games you couldn’t before!
By bugs we’re referring to how you can’t take proper screenshots, the Tegra X1 not being the greatest of chip sets, and some spotty issues regarding Wi-Fi and charging detecting (the Switch is probably charging fine even if it’s reading otherwise).
Lastly, the Switch still doesn’t have any kind of mic or camera, so any Android apps that rely on them will obviously have some issues. Again, this integration is unofficial, so some drawbacks are to be expected. If Nintendo seeks to legitimize this neat feature we can expect both a ton of fixes and ton of new utility out of the console.
Stay updated with Softonic to find out if they make it official!
Find out what God Mode is and how it can make Windows even better.
If you spend as much time clacking away at a keyboard as we do, then you’ll be glad to learn any tricks of the trade to speed up your work. A fast operating system is one thing, and there are several ways you can speed up your actual computer, but speed is also user-dependent, and there’s nothing quite like wielding the might of Windows God Mode.
The latest and greatest version of Microsoft's operating system.
What is Windows God Mode?
“God Mode” is one of the lesser-known quirks of the Windows OS, and no, it doesn’t give your operating system super powers or unlock any hidden features. Rather it’s a way to super easily lump a ton of commonly-used processes into one convenient window.
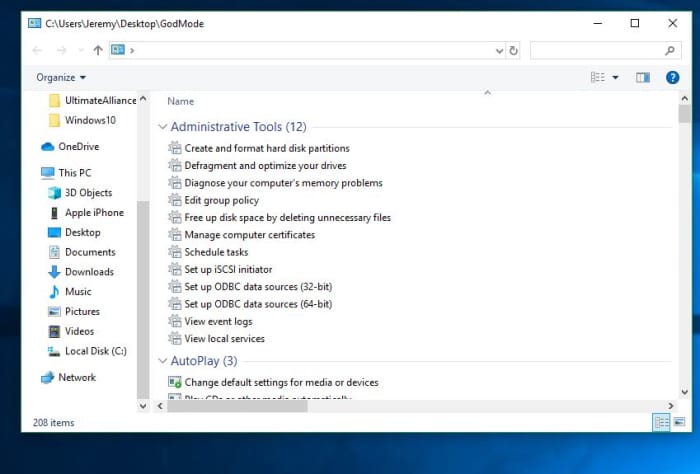
The window will let you quickly access all manner of backup and restore options, administrative privileges, and other handy management settings. With God Mode, you won’t have to search beneath a dozen default folders and windows settings just to find a simple function like “connect to a network” or “uninstall a program.”
Here’s how to set it up in 3 extremely easy steps:
Enabling god mode in Windows
1. Create a new folder
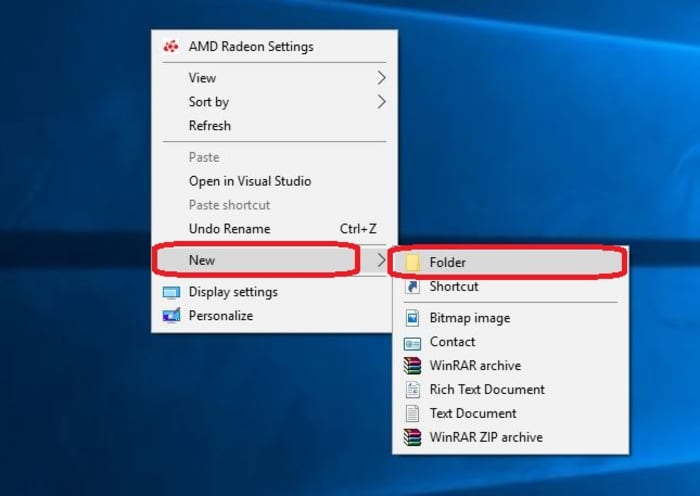
For a function called “God Mode” it sure has humble beginnings. To start, create a new folder. Right-click on your desktop and select ‘folder‘ under ‘new‘ and an unnamed folder will pop right into view.
2. Name the folder
The key to creating God Mode is simply in the naming of the folder. Copy and paste the following right into the folder name:
GodMode.{ED7BA470-8E54-465E-825C-99712043E01C}
Once you’ve renamed the folder you should notice that the folder icon will change to a control panel icon immediately. You can place this new windows master control panel shortcut wherever you like.
Rename your folder and the icon will immediately change
3. Open the folder
Double-click the god mode folder and it’ll open a window with a ton of utility tools. The categories are all listed in alphabetical order, so it should be easy to find whatever you’re looking for.
A new omniscient view
Congrats! You now have a special folder that serves as an incredibly useful shortcut for accessing all manner of tools and programs within your version of Windows. You can also drag-and-drop any of the shortcuts from the list right onto your desktop. This lets you access your most-used programs on the fly. Enjoy your new streamlined Windows 10 experience!
Let us know in the comments below whether you’ve found God Mode as useful of a feature as we have, and stick with Softonic for the latest in Windows tips and tricks!
Experts say that in the last 100 years we have had more technological advances than in the whole history of humanity. However, that entire history has led up to this moment: fast charging.
What is fast charging
The “what” always comes first. To put it simply, fast charging is a new technology that current mobile phones have to charge your battery quickly.
The manufacturers of smartphones realized that as you add more active apps on your phone, it’s going to run out of battery more quickly.
If they knew how to drain a battery quickly, they should figure out how to charge one quickly as well!
According to the studies carried out, the fast charger is capable of charging up to 30% of the smartphone in just 5 minutes. The times may vary, but it will always be faster than the usual method.
Everything you need to know about fast charging
How does it work?
Fast charging uses basic principles of physics and chemistry to fulfill its purpose.
Fast charging uses more voltage and amperage, – thanks to precisely better battery technology – to streamline the process. To give an example, it is as if you were filling a pool with a fire hose instead of a conventional one.
Are all models fast charging?
Now comes one of those key questions: do all devices on the market have a fast charge? The answer is “no.” In general, the models launched during 2017 or earlier do not include this technology, but those that have been sold during 2018 do.
There is some concern for whether or not fast charging will deteriorate your battery. However, this does not happen. The hardware adapts to the requirements requested thanks to the software it uses. It’s that simple
Wrapping up
Normally, fast charging is not linear, but only affects a percentage between 1 and 80%. The idea is that the user can have the phone out of low power as soon as possible. Hopefully, this article was insightful for you in your ever-growing fight against your phone’s battery.
Edit audio like a pro for free with these Audacity shortcuts!
If you’ve ever done any kind of audio editing you’ve probably at least heard of Audacity – that free program that covers the basics but probably isn’t as good as a more pricey DAW like Pro Tools, Logic, or Ableton. While a heavyweight DAW like Ableton can get the job done like a champ, don’t overlook Audacity just because it’s free. Spend some time with the program and you can work absolute magic with it. People will hear your final mix and be absolutely shocked that you made it with freeware.
One easy way to take your Audacity skills to the next level is to familiarize yourself with its many keyboard shortcut commands. This will allow you to work faster, gain a more discerning edge over your audio product, and fine-tune your tracks more accurately and meticulously. Here’s a list of 34 different shortcuts you can use as you work:
Universal commands
Starting with the absolute basics, these are general Windows commands that seamlessly translate over to Audacity for ease of use. You’ve probably used many of these before in a program like Microsoft Word or Photoshop, and Audacity conveniently keeps the paradigm.
CTRL+N New project
CTRL+O Open project
CTRL+W Close project
CTRL+S Save project
CTRL+Z Undo
CTRL+Y Redo
CTRL+X Cut
CTRL+C Copy
CTRL+V Paste
CTRL+A Select all
CTRL+D Duplicate
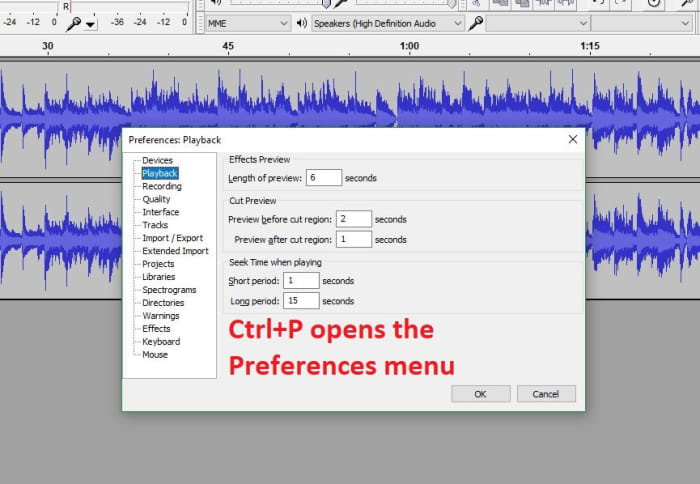
CTRL+P Preferences
Playback commands
Audacity shares similar audio playback functionality as other digital audio workstations (like Pro Tools, Reaper or even Finale). If you start using Audacity more consistently you’ll be using these functions a lot. These shortcut commands will save you a ton of time:
Space Play/Stop
Shift+SPACE or L Loop
P Pause
R Record
1 Preview for one second
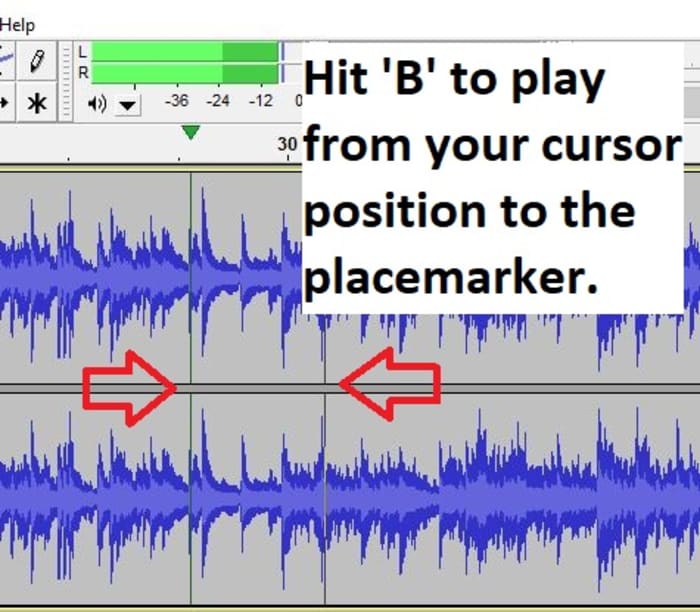
B Play from cursor to selection
Navigation commands
Editing audio is a lot of zooming in and out, selecting parts of the file, syncing tracks, and picking just the right nanosecond where you want to start that Fade Out effect or modify the volume a touch. Navigating your project is a cornerstone of using the interface, and getting a grasp of the relevant keyboard commands will grant you more finesse, maneuverability, and precision.
At its heart Audacity is free editing software, and that’s what the program’s all about. The following edit commands are what you’ll probably be using the most, to avoid having to keep clicking on obscure toolbar buttons or hunting through menus. Get used to these and you’ll be able to add effects, switch tools, and remove unwanted noise on the fly.
Switch to the right tool for the job.
F3 Editing tool
CTRL+R Repeat previous effect
Delete or CTRL+K Delete
CTRL+L Silence
F2 Envelope tool
F5 Timeshift tool
F6 Multi tool
D cycle tool forward
A cycle tool backward
For editing audio on a budget, you can’t do much better than Audacity. While it does suffer a few shortcomings (such as an inability to import WMA, AAC, AC3, or proprietary file formats), you’re getting a program that can keep up with other digital audio workstations, and that does it all for free. Other Audacity functions include multi-track mixing, vocal reduction and isolation, MIDI playback, and even full cross-platform operation.
We hope these helpful shortcut commands save you time! Stick with Softonic for more Audacity tips and tricks.