Share your story with the world and maybe even have it made into a movie with Wattpad!
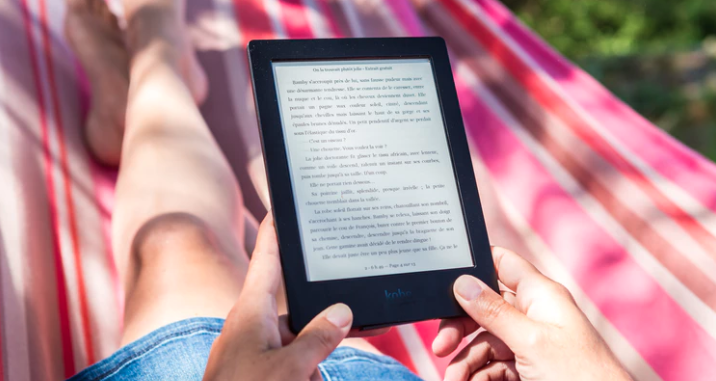
Every top selling author has to start somewhere, and Wattpad is home to some of the most creative and immersive stories around. Read chapter after chapter of a ton of different story genres, or have your work published for the world to enjoy.
Wattpad started as a hub for fanfiction, but in the last 10 years has gained increasing popularity due to some of the most popular pieces being adapted into films, like “The Kissing Booth” on Netflix, and the feature film “After.” That’s right, both of those films originated as stories on Wattpad. Ready to get started? Here’s how to work your way around Wattpad.
Reading
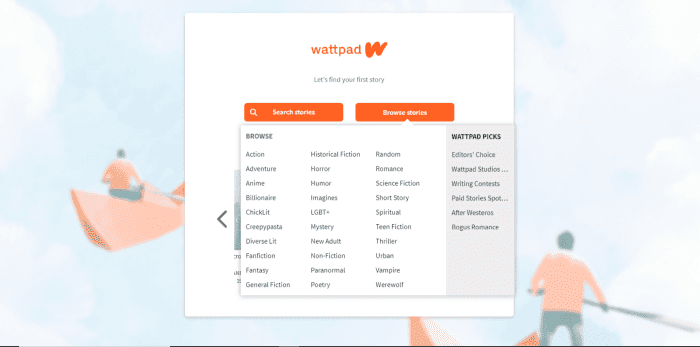
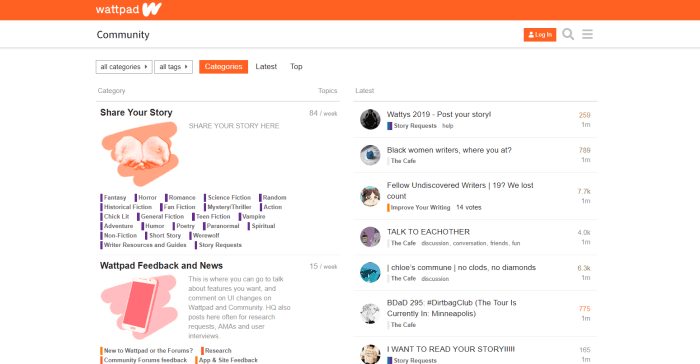
Once you create an account, you can search for a specific story or by genre. After you’ve selected a genre, you’ll see all the stories that fit, but you’ll also be able to narrow your search by selecting more tags.
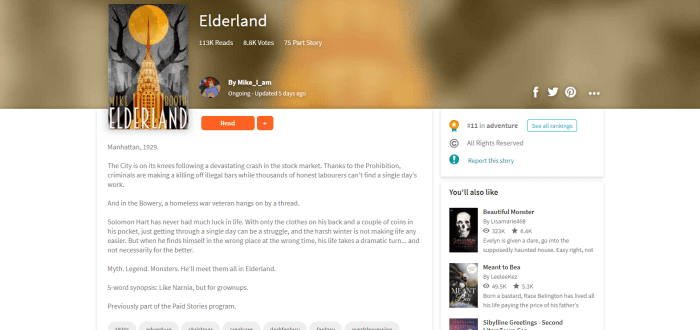
If something looks interesting, you can preview it before reading. On the story’s main page, you can see more information like the author, if it is free or paid, how many times the story has been read and favorited, how many chapters it has, and if the story has been ranked by other readers.
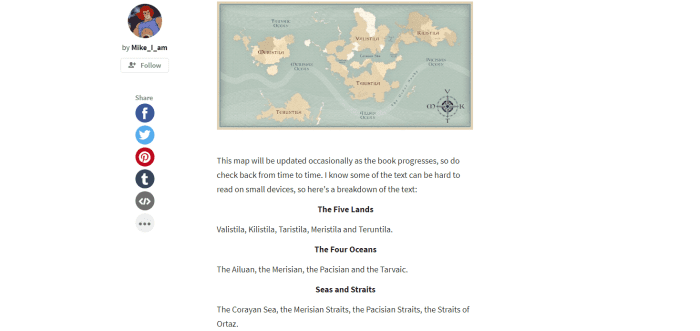
If you’d like to check it out, click read and begin. Free stories jump right into the text, and a lot of authors choose to add photos to help fuel your imagination. If you’re enjoying the chapter, feel free to add a comment at the bottom, where other readers and the author can respond.
To save the story for reading later, click the plus symbol and add it to your private library or to a list that you can share with others.
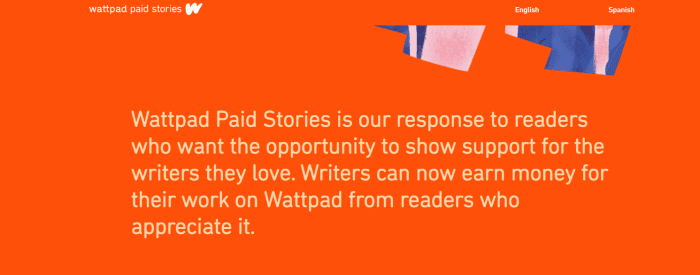
Paid stories are different. Once you click on a paid story, the author will most likely have left an introduction introducing you to Wattpad Paid Stories. Essentially, this is a new feature that Wattpad is testing where stories are selected by Wattpad that will require you to purchase coins in the coin shop to access the rest of the story after you’ve finished the preview chapters. These coins are converted into money that is used to pay writers for their content. At the moment, coin bundles are only able to be purchased through Wattpad’s mobile app and range from nine coins at $0.99 to 230 coins at $7.99.
Another cool part of Wattpad is the forum. In the forum, you can chat with other readers about your favorite stories, or if you’re a writer you can get tips on what will make your next chapter a hit.
Writing
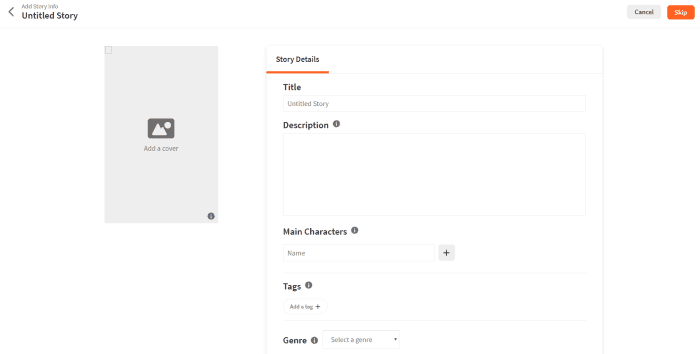
Writing a story on Wattpad is super simple. Click on the ‘write’ tab and then ‘create a new story.’ The first page you’ll create is the title page, where you’ll name your story and add everything that’s necessary to give readers an idea of what it’s about. Upload cover art, add a description, tags, the genre, and more.
Make sure you look over the ‘copyright’ tab – you might want to lock in your story so others can’t edit, change, or repost it somewhere else. Wattpad has a page specifically for outlining what the copyright options do and don’t protect.
Once the title page is out of the way, get to writing! You can save each chapter as you go along, and once you’re ready to push the story out of the nest, click ‘publish’ and your story is officially on Wattpad for others to read. You can always go back and edit your story if you would like, so take a deep breath and leap!
Premium
If those ads are really getting on your nerves, upgrade to Wattpad Premium. Not only will the ads go away, but you’ll get a new theme to read stories on, and it’s available on both the desktop website and on mobile. Purchase monthly for $5.99 or pay $59.99 for a year.
With Wattpad, the sky is the limit, and depending on the story – maybe not. There are so many exciting stories to read and write, and thousands of Wattpad users all over the world to connect and share with. Wattpad could be your daily guilty pleasure or it could lead to that big break that you’ve been dreaming about. What are you waiting for?
If you’ve written your own book, here’s how to get an audience to pay attention.
When self-publishing a novel, promotion is everything!
On the traditional publishing path, literary agents will provide numerous opportunities to raise awareness and your publisher will likely have well-traveled paths for advertising in place.
When you’re on your own, it’s up to you! Everything about promotion, the factor that will partly determine the success of your novel, is in your hands. That should sound both scary and exciting!
To make sure you can rest easier and enjoy the process as much as possible, we’re glad to provide help, insight, tips, and tricks on the topic of…
How to promote your self-published novel
Planning
So many promotion steps work best if they happen beforehand! The question is: how far beforehand?
Years
If you’re still thinking of writing a book, or plan to wait for a long, long time to publish the novel (perhaps you’re creating the entire series first), you have lots of time to prepare!
Well done! Few people think about promotion this early!
It’s possible to make small changes that will help later on. First, tell others about your passion for writing. Second, to develop credibility and expand your horizons, look for other writing opportunities. Pick up a related job or join a writing group. In the process, you might just discover a knack for journalism, comic development, or another form of literature!
During all that, explore your writing style; where you like to write, what you like to write, and your goals (if you want to create any at the time). This is all about positioning: you don’t need to bend over backward to imagine a writing lifestyle, and make small preparations.
Months
Months beforehand, it’s likely you’ve climbed the mountain of novel writing: the nth draft has been completed, you’re reading through it with friends, family, or editors, and you’ve probably even considered the traditional publishing path.
You know you have a good story. You want it to be seen!
At this point, start thinking of the ways you can reach out, advertise and connect. Start creating goals. And in the beginning, don’t worry about developing a solid plan: brainstorm and put down any crazy idea without any judgment.
Next, when you’re done brainstorming for a while, run back through them and see what’s doable, what looks good. Let the judgment begin! From here, you can begin to research and arrange the promotional steps.
(Also, while you’re at it, make another list of all the people you want to thank, from family and friends to your favorite English teacher. It’s never a bad idea to brighten someone’s day with a little gratitude!)
Weeks/Days
By this time, the plan should be in place. If you started long ago, you’ve likely positioned yourself and begun to build credibility as a writer. Others know about your vision and are excited for what you’re ready to publish.
Start taking those steps.
In the moment and after
Sometimes you don’t seriously consider promotion until your first novel appears on Kindle Direct Publishing, and then you have to figure everything out in the heat of the moment. If that’s the case…
Don’t panic! Take a deep breath and get ready: while these pathways work best with foresight, there’s still time to get the word out!
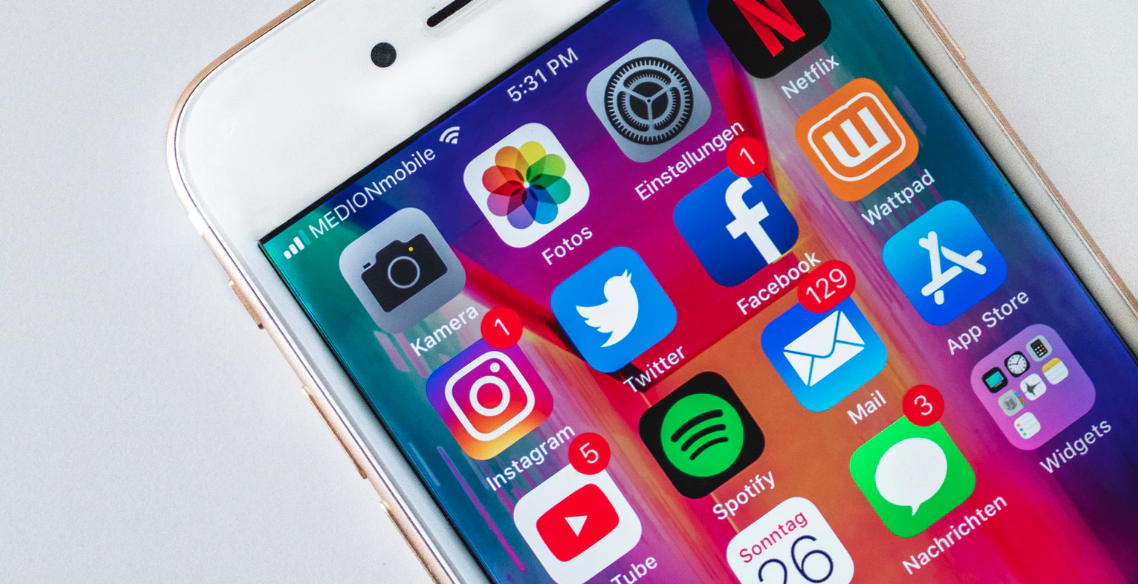
Social Media
Social Media is one of the most powerful tools for individual creators to let others know about the newest developments in their work.
Of course, most people know that by now.
So, rather than say “social media sites are great”, we’ve put together a nice breakdown of what you might expect from a few major players!
(REMEMBER: in this category, be wary of your “promotion.” Social media is meant to be SOCIAL, so focus on letting others hear about your masterpiece. Don’t “sell” to your friends or family, and don’t anger the Reddit mods!)
More than many other sites, Twitter loves writers!
Twitter posts are generally comprised of short literary snippets, possibly with a link and a small picture. The focus lies on the wit and skill of the writer.
Here, many authors show off their ability to write clever, thoughtful, harrowing, and humorous thoughts. If you find your crowd, it can be the perfect place to get excited about your upcoming book publication!
However, starting can be difficult. If you’re new to Twitter, you may have to spend time in the program: get involved in other conversations, repost, and use other mediums to direct people here.
Again; planning and preparation can greatly improve your chances!
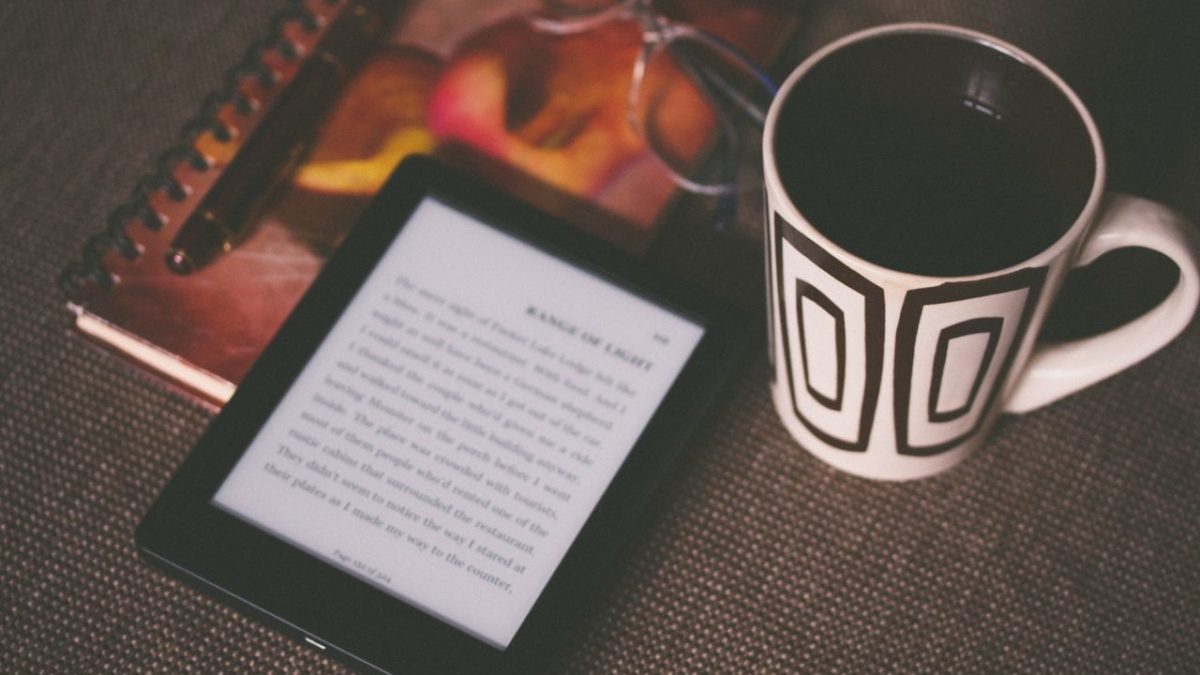
Most people go to Instagram to see quick snapshots of what’s new. For your novel, consider taking a picture of your writing setup or buying a few copies of your book beforehand – if possible – and taking a picture with it.
Honestly, the joy of holding a copy of your book is well worth the price. Make sure to look at other photos to get an idea of what looks good!
How to use the Kindle Direct Publishing cover creator
The site focuses more on updates like Instagram, but has an enormous range of extra features. For one, Facebook allows for more words in the text of a post. You may be able to spend more time discussing the plot of your novel, or the process of completing it, while still including a great picture!
Also, you can far more easily create events on Facebook. If you’re planning on having a release day, consider giving the book’s release an official date.
Miscellaneous
There are tons more sites that love writers!
As always, you could try our old friend, Reddit. The subreddit r/selfpublish has great community resources, but make sure only to announce your novel in the weekly self-promotion thread! If you’re looking for shameless self-promotion anytime, try r/selfpromotion. But we’ll be honest: there’s no telling who goes there, looking for what… Good luck!
Discord also has a number of popular venues for discussion. Just remember: the rules for posting are different for each. Make sure to read what they are!
Search the internet: there’s always more, and no way to be sure if something specific will be your golden ticket.
First of all, when creating your book in KDP, there is an option to set the date your book gets published. This will allow you to prepare your promotions before the book gets published.
(However, we do recommend a “cheat”: publish quietly beforehand and buy a copy of your book. This lets you check the print quality and take a few pictures with a printed novel! Cherish those first copies, friends.)
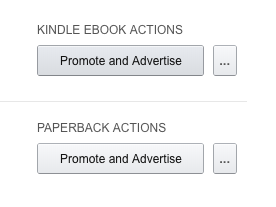
Second, when your novel is approved, you can select “Promote and Advertise” from the main screen, for both Kindle and Paperback:
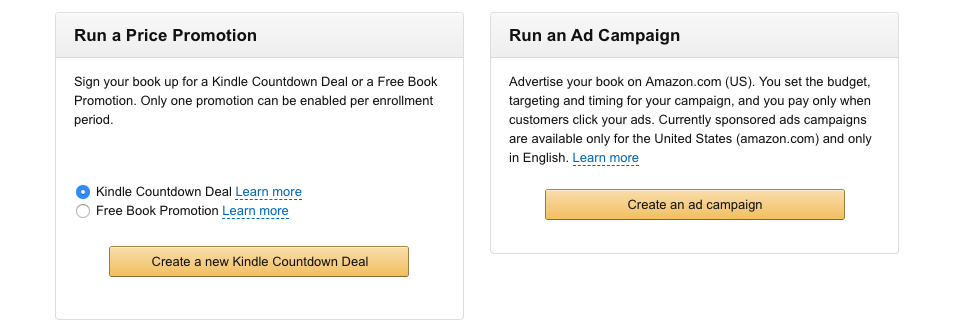
This opens a new page of opportunities! We’ll discuss the main two: price promotion and ad campaigns.
With a Price Promotion, you can reduce the price of your book for a time, by a certain amount or completely. If you know your novel will blow readers away, allow the first few to try it out and then let them bring word to others!
Ad Campaigns will bring your book up on Amazon in your region. You only pay when someone clicks the ads, and the cost won’t go above the budget set. Not a bad option if you’re willing to personally invest!
Local Opportunities
There are always local opportunities.
Talk to friends and use word of mouth advertising. If you’re in school, ask a teacher or professor what might be available. And most of all, remember that most places have a system in place for such things at:
Libraries and bookstores
Did you know: libraries often have entire days dedicated to published authors from the community? If your library works like ours, there’s even a “writer of the month” chosen, and their work goes on a poster for all to see!
On the other side of the coin, many bookstores have great potential. Being more inclined toward selling rather than just announcing, they may also be interested in making space for your work on the shelves!
Seriously, we’ve never failed to be amazed at the hidden possibilities these places hold. What’s near you?
Conclusion
At first, you may be worried there aren’t enough places to promote a novel. In the end, you’ll probably realize there are too many!
Plan ahead. Brainstorm. Write down the ideas, sort ’em out, and narrow them down. If you do these things, you’ll have a much easier time of discovering and making steps for the ideas that work best for you, your area, and your novel. Good luck, and we hope this advice helps your novel take off!
Whether you write for fun or for a living, these great apps will supercharge your workflow.
We can’t speak for everyone, but life as a writer can feel like a constant race to get things done. We’re either going full speed ahead, banging out a few pieces of content last minute or trying to combat our worst time-wasting habits.
One second, you’re trying to come up with your latest greatest blog post and the next, you’re looking at socks on Amazon and skimming articles.
And look, there are somanyproductivitytools out there, but for writers, many of them present more distractions than they aim to destroy.
What makes a great app depends on several factors: your process, the type of writing you do, where your productivity challenges lie. Are you a blogger, a novelist? Are you writing a company handbook or trying your hand at a passion-fueled screenplay?
Here, we’ll look at some of the best apps for writers – be it a distraction-free digital space or a better way to work out your big ideas.
Best productivity apps for writers
Things
The Things app is probably the best to do list app, at least in our opinion. It’s a paid app, and it’s a little spendy for a lot of folks — but if you need a task manager that can do it all, this is a good choice.
The reason Things is a good thing for writers is — it’s not complicated.
In fact, it kind of feels like a mashup of Google’s tools and the apps that come standard with your Mac — you know, Notes or iCal. The benefit is, Things brings the basics together in a central hub — so you can track your deadlines, write down new ideas, and turn your notes into checklists.
What’s more, Things comes with a searchable archive, as well as the ability to set long term and short-term goals — that’s more important than one might imagine.
Scrivener is a favorite among the screenwriter set, as well as those taking a crack at a novel.
The productivity benefits you’ll find here are primarily formatting oriented. You can use the platform to create comprehensive outlines, break your writing into scenes or chapters, and move full sections around without the risk of messing up your masterpiece-in-progress.
This isn’t necessarily the best tool for bloggers or those writing shorter pieces of content. But, if you’re writing academic content, this app is a real lifesaver.
They’ll help you stick to Chicago or AP guidelines, no problem. And Scrivener takes care of your formatting woes. When you start a project, you’ll select a template that matches the pilot episode, nonfiction book, or whatever creative project you’ve got up your sleeve.
Ulysses is a writing environment app with a cloud-based component. Basically, it’s a clean digital space that seeks to eliminate distractions while you strive to meet that word count minimum.
And while there are a lot of “writing environment” apps, this one brings more to the table than some of the others we’ve encountered.
Honestly, it looks like a better version of Apple’s Notes. And it also syncs your content across all devices — so you can work on your laptop, make some edits on your phone, and review your work from the iPad.
iA Writer is a distraction-free writing app for iOS, Android, Mac, and Windows. The app offers several features that help users get more done. iA writer supports full markdown language and makes it easy for bloggers that need to translate their final draft into Medium or WordPress. What’s more, the app allows you to embed images and tables into the document — which any web writer knows can be a real time-waster.
iA Writer is a minimal tool — offering few distractions and a few handy tools. Syntax highlight highlights specific parts of speech, while focus mode highlights one paragraph or sentence at a time.
MindMeister is an online tool that allows you to capture and work out ideas as a visual map. While it might not sound like a writing tool at first glance, this tool is a great way for users to work out just how they want to tell a story.
This tool works on Mac OS, Windows, and Linux — or you can just keep things in the web app, download-free. MindMeister is sold with a collaboration bent, but we envision this as being just as useful for solo brainstormers as the whole team.
There are several features built in, but we liked that this tool comes with an online storage system for all inspirational materials — like Evernote, but connected to the mapping feature.
Unpaywall
Ever spend way too much time cruising the internet for reputable sources — only to find reports that cost like $200 just to review? Yeah… us, too.
Unpaywall comes in to provide a workaround. It’s a digital library of 50,000+ journals and open-access repositories. Their goal is to bring scholarly articles to everyone — whether they’re writing an article or have a school project due.
Okay, Unpaywall isn’t really an app — rather it’s a free Chrome extension. How it works is, you’ll conduct your research as usual. And when you come upon a paywalled research paper, the extension looks for a free version posted on another site. If something is available, Unpaywall displays a green icon on the right side of your screen — click it to read the article, free.
Now, it doesn’t work on everything, but it will make your life easier, especially if you need to find some stats that make your article all the more credible.
The best writing tools aren’t necessarily a choice between whether you prefer Scrivener over Google Docs or Microsoft Word.
Rather, the goal is to develop a productivity stack that works for you.
We’ll say this from experience — little tasks like formatting and finding good sources can eat up a lot of time, on par with surfing the internet when we should be working.
Your novel is complete. Now you’re ready to share it with publishers. Here’s how to set up the proper format in Google Docs.
Hello, writer! If you’ve been following our articles on using Google Docs for novelists or simply want to turn your online book into a fully-formatted manuscript for literary submissions… we have just the thing for you!
Preparing a novel in manuscript format using Google Docs
First things first, if you simply want to read about manuscript format, check out this one-stop guide from Kelly Hart on Scribophile!
However, we plan to focus on the easy step by step process for fulfilling those requirements in Google Docs. At the end, we’ll include a few helpful notes on exporting the completed files!
Approach
Prepare yourself for the easiest system possible: top down! We’ll begin with everything that can be done inside Google’s top bar, move on to the title page, and end with the novel’s body.
There are some huge benefits to going in this order! Title page spacing and chapter orientation won’t need readjustment later if you make sure the page dimensions, font, and letter size are in order.
Top Bar
A good number of details can be cleaned up in just moments using the top bar, which looks like this:
Let’s go down the checklist:
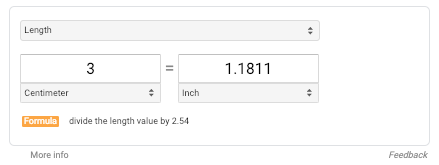
1. The margins. Now, you shouldn’t need to worry about margin size. Why? Margins should be 3cm, which translates to about an inch… the normal setting for Google Doc files! *fist pump*
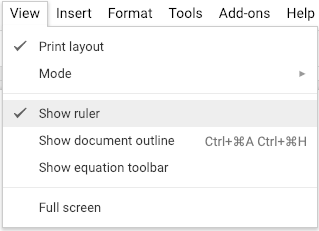
Even if you changed the margins to something else, there’s a quick fix: open the “View” menu, and choose “Show Ruler.” Manually adjust the arrows on the ruler back to the proper margin setting:
The arrows in question.
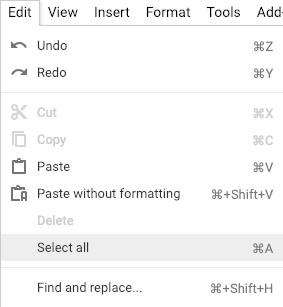
2. For steps 3-5, select the entire document. Go into the “Edit” menu, and find “Select All.” Or, if you have a Mac, simply hit “Command ⌘-A.”
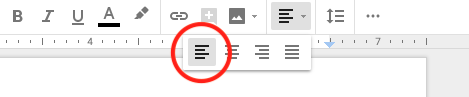
3. Align your document to the left side only. This helps maintain continuity in spacing. Allow your document’s right side to run ragged.
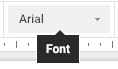
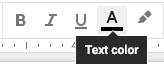
4. Font: type, size, and color:
Arial, Courier, and Times New Roman font only! Google Docs automatically puts all documents in Arial so you should fine… STILL, hit one of the options anyway, just to be safe. If you ever pasted any text – quotes or whatnot – they may have an improper font.
(There are exceptions to this rule. For example: an “insert”, those short clippings meant to resemble handwritten notes or articles, can be different. Still, you might want to use an accepted fonts until the manuscript has been bought.)
Size: 12-point. Google Docs set the default to 11-point font for some reason! This may become normal for manuscripts in the future, but until that change becomes official, stick with classic 12-point.
Color: black font. Please, no reds, blues, or greens. Especially not green, Rita Skeeter. Keep it professional!
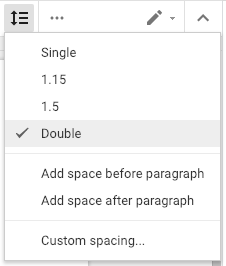
5. Double space. This helps readability and leaves room for markup. Since most submissions are electronic, there’s also no need to worry about hurting the environment with a huge printout. Thank goodness!
6. (Extra) Indent the entire document. Remember the margin arrow? The small rectangle above it can be manipulated separately to ensure new paragraphs and lines of dialogue indent perfect. Aim for one centimeter or half an inch:
Title Page
The all-important title page. Now that your manuscript settings are in order, you’re prepared to tackle the beast! Let’s continue, going top to bottom:
1. Place agent details at the top left. When you start sending to publishers, this lets them know which agency represents your work.
2. The Middle: title, “By”, your name, and word count rounded to the nearest hundred. Here’s an example:
Wynden’s Legacy
By:
Trevor Hutchins
Approx. 92,800 words
(To find Word Count, head into the “Tools” menu. Or, if using a Mac, hit “Command ⌘-Shift-C” which can be used to find the word count of a highlighted area.)
3. Place contact info at the bottom right. We recommend: your name, your email, your phone number. If the manuscript was printed, your home address might be a good idea. Might be.
4. Copyright info… isn’t necessary. But if you want to include it, double-click the lower 1-inch margin of your Google Document. This will activate the footer section.
The Body
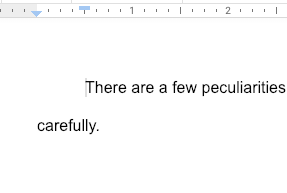
There are a few peculiarities about a manuscript’s body that must be dealt with carefully!
First, start each chapter a third of the way down your page. To do this, we suggest carefully adjusting your first chapter. Then, choose one of two paths:
1. Copy the blank space, line up the next chapter with the top of a page, and simply hit “Paste.” Or-
2. Mentally tally how many times you hit “Enter,” then manually move every chapter into position.
Unfortunately, we’re unaware of a Google Document function that can make this process easier. The good news? It doesn’t take that long anyway! At most, probably around 15 minutes.
Finally, place either a hashtag or “The End” at the bottom of your document. This lets the reader know your novel has ended (while simultaneously providing you with a huge sense of relief).
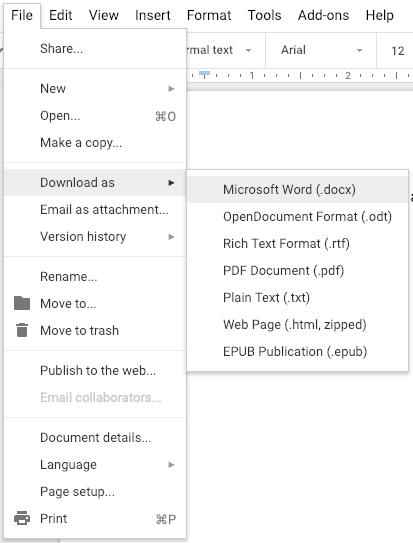
Exporting
Once all else has been completed, remember that Google Documents can be saved in a huge range of types with the “File” menu. If you need a Word Document, PDF, or webpage (seriously), there’s an option just a click away!
Congratulations
There are many points along the path of novel writing that bring an immense feeling of joy: the completion of a draft, the conclusion of an edit, the sending of query letters. Crafting a fine-looking manuscript for submissions should come with that same sense of pride. We hope you enjoy the result: proper formatting is like the bow on a well-packaged present!
Ready to start an ongoing publication with Medium? Here’s how.
Got opinions to share? Axes to grind? Stories about your life? Or a 12-part sci-fi saga about an alien war brewing on the far edge of Galaxy 17? Medium.com is a simple and easy platform for sharing your writing. It’s very similar to typing up something in Google Docs, except once you hit the “publish” button, the whole world can discover it. Ready to dive in?
How to create an ongoing publication on Medium
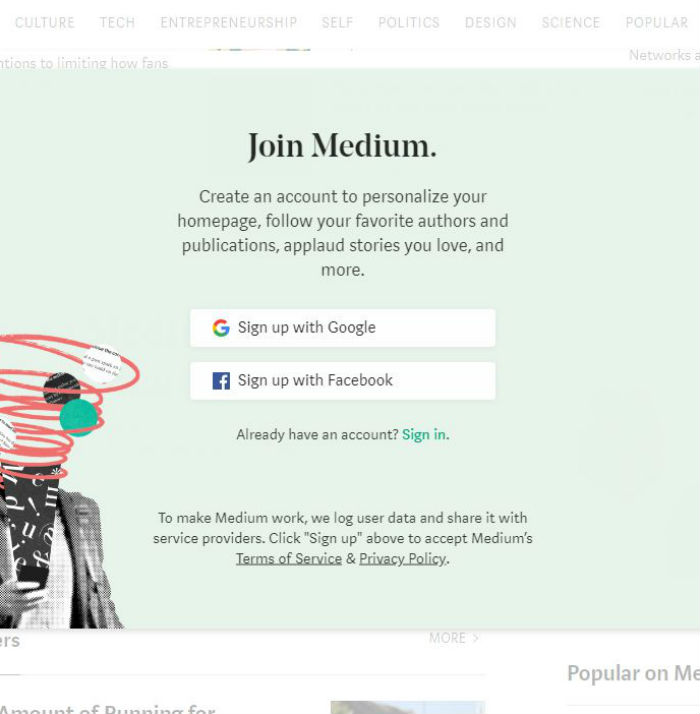
To write and start your publication, the first step is to create a free account. Sign up with Google or Facebook.
Easy, right? Now that you’ve made an account, it’s time to dig in. From a PC or laptop, click on your avatar and then click on the option for publications.
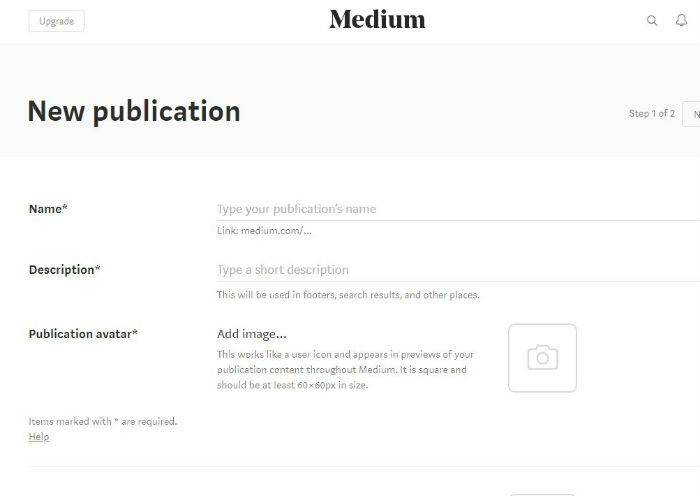
A new screen will open. Click on the “New Publication” button near the top.
Now, let’s fill in the blanks.
Name your publication. This is the medium.com/XXX web address your readers will use to find you. If you already have an established brand, use it. Medium will let you know how many characters you have to play with.
What is your publication about? Fill in the description space to let potential readers learn more about what to expect.
Gather up your logo, your avatar, and consider your header. Let’s add personality to this page. Upload a publication avatar. You’ll want to use a square image at least 60 x 60px. Each time you write an article or leave a comment, your image will follow. Make sure you choose a clear and memorable image.
When someone lands on your articles, they will now see a header image. This space represents your brand, so make it good. Upload a transparent 600px wide and 72px tall image.
Social networks and tags are just as important to the growth of your publication on Medium as they would be on any other content management system. Fill in your email address, as well as your Twitter and Facebook usernames.
You can use your email address to sign into Medium. The social network additions allow your readers to follow you beyond on just Medium.
Next, work on your tags. Medium allows each publication to choose five different tags to describe its work. As you begin to type, Medium will share suggestions.
Choose the terms that best describe what you plan to create or what you are importing from a previous website.
Is your publication a solo gig? If so, you can skip the People section. Otherwise, this is the space where you can add in your editors and writers. These jobs have different roles.
Editors can go over submitted articles, edit articles, and publish drafts submitted by themselves and others. Writers, on the other hand, can only submit stories and drafts.
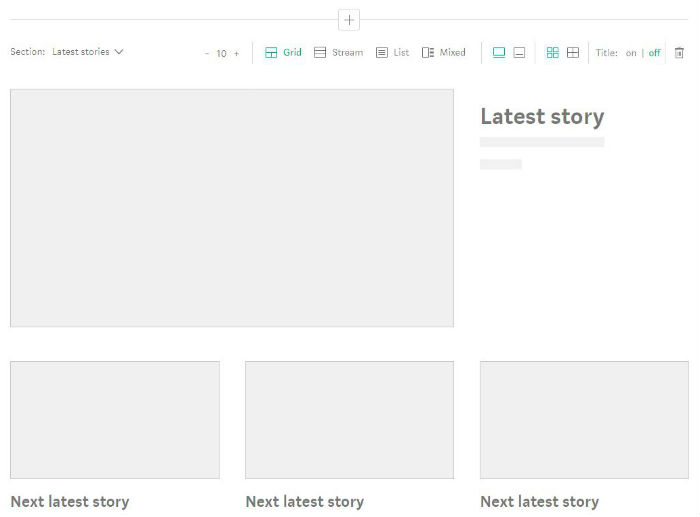
Your homepage would be boring without the next step. Upload a background header image or use a text headline. For an image header, you can change the size or click on where you want the image to center by clicking on the background image drop-down menu icon.
Add in your title and your tagline. You can play with the header size for these items too.
Jump down to the first content section, which is set to “Latest stories” by default. How do you want your content to display on your home page? Choose between grid, stream, list, and mixed content, and decide how many items should appear on your homepage.
Make your selections and then click “Create” to make it happen. Ta-da! You’ve just created your first Medium publication. The more you publish, the more readers you’ll attract, so get typing!
You’ve finished your book. Now here’s how to get published.
Many novelists will eventually arrive at the same place: they have a fantastic book, which possibly took hundreds of hours to complete. They endured the daily struggle of writing, had friends and family members read their masterpiece, and want to finally become published…
The answer might just be a literary agent!
A good agent can provide invaluable help by suggesting professional editors to review your work. They can direct your future plans to prepare you for a literary career. And, of course, they may have personal connections to publishers interested in your genre of writing!
Finding an agent takes courage…but if you’ve made it this far, you’re ready.
How to find a literary agent for your novel
The Traditional Process, Bare Bones
First off: we have the traditional path to finding an agent. Here are the three very basic steps:
1. Find agents and create a list. Your writing will define what you search for. If your novel is a fantasy romance targeted at Young Adults, you can narrow down your search (and trust us, narrowing is good).
2. Research and organize the options! Many resources will tell you a lot about agencies; however, once you have a solid list in place, visit their websites. Everything from the design to the agent descriptions will let you know if the business works for you!
3. Send query letters. Lots of query letters. And make sure they’re all personally addressed to individual agents! Again, if you’re not sure which agent to contact, or how to reach them, the website probably has the answer. Let it be your guide.
So, if you’ve written your query letter well, selected the right agents, and have a product that’s right for the current market…you still may hear “no” multiple times before someone takes a bite! Don’t worry: have your manuscript ready, keep writing on other projects, and wait to see what happens. If an agent asks to see your work, they’ll have instructions on how to move forward. Congratulations!
In the meantime, let’s go back through the process in more depth:
If you’re not sure what literary agents are around, start here!
At this moment, Writer’s Market 2019 can be found on Amazon.com. The section on Literary Agents provides a large list of professionals, from A to Z, alongside a good deal of info: contact info, member agents, what they represent, how to contact them, and the representation terms (to name the most important points).
Use the guide however you like! Our method went something like this:
Go through the agents alphabetically. Before reading an agency’s name, check what they represent to make sure it includes your genre – in our case, this had to be “Young Adult” at the very least, with bonuses for “Fantasy”, “Action”, and “Adventure.”
Once you confirm an agency represents the right genre, check if Writer’s Market mentions the specific agents interested in those fields.
At this point, categorize the agency/agent as “Definitely,” “Yes,” or “Sure, why not?” If you’re wondering, we reserved the latter section for agencies without much info. But as long as they had Young Adult listed, who knows if it’s a gem in disguise?
You have the list, you’re pretty sure you know which agencies are good. Visit the website and make sure it’s true!
Surprise, surprise: one of your top picks may have a sketchy website. On the other hand, the agency with a brief description may have a minimalist website used by super-agents who prefer to rely on their contacts and industry knowledge. You never know!
At this stage of the game, you have three goals only:
1. Finalize your agency list. You now see the online faces of the agencies, so decide what’s what! And don’t fret too much: you’ll probably query most of them anyway, the order simply dictates which come first.
2. Check submission policies. Different agencies will ask for specific things. One representative might want a logline, a one or two-sentence description of the entire story. Others may ask for a two-page treatment, your biography, and the first three chapters!
(Alright, we admit: that note may belong in the “Forming Query Letters” category below. But then again… if a good agency makes you jump through a thousand crazy hoops to submit, you may want to factor that in!)
3. Choose specific agents, figure out how to contact them. This will make your life easier in the long run!
Forming/Sending Query Letters
There are many good resources for writing a great query letter, such as the explanation from NY Book Editors, titled, “How to Write a Darn Good Query Letter.”
The simple version goes like this: put your best foot forward in a one-page letter that conveys your novel’s plot and purpose. The soul, abbreviated.
For time reasons, we’d like to share a few technical details that may influence the art of querying: the online form, letters, and emails. These are three large categories of querying we’ve encountered!
Online form
Online forms are easy! And weird.
The gist is: many agencies now ask that querying authors complete pre-set forms. The process feels like an Indeed.com or Brassring job application: just fill out the sections and hit “send!”
While it may feel a tad impersonal, don’t miss the blessing in disguise! Online forms tell you exactly what the agency wants, but you can still make every part of the submission shine.
If the idea of a form doesn’t sit well with you, no worries! Table the agency at the moment, and come back later.
If, on the other hand, you crave a simple formula, you might even be tempted to submit when first visiting the website. Convenience isn’t always a bad thing if appreciated and used properly!
letters
The rare, ancient ancestor of modern queries!
Perhaps in the interest of saving copious amounts of paper (and time opening letters), you won’t get the chance to send letters too often. Good news? Agencies that want physical submissions might be dedicated businesses looking for similarly dedicated writers, who are willing to put in the effort of constructing a real package. Might be.
emails
Emails take up a huge portion of query letters now, thanks to their speed and environmental sustainability. How does this affect you?
First, when sending emails, most agencies will not open attachments. Those that do will probably ask for them specifically, such as a Microsoft Word document for chapters. If this isn’t the case, we recommend putting everything into the email.
(But what if they ask for the first three chapters? Yep, even then! Attachments have long been used to spread viruses, businesses have to be wary.)
Second, don’t fall into the trap of sending one email to multiple agents. We’ve said it multiple times but it bears repeating: every query letter should be personally addressed to the agent you wish to query unless their information is unavailable (some agencies operate this way).
Tips and tricks for writing a novel in Google Docs
First off, wait! We’ve had agencies respond days, months, and even a year later. No lie. There’s no telling if they’ll respond in time. On that note-
Be very careful about checking in with agencies! Some will state a response time, such as “three weeks,” and advise you check in after that. Others say nothing, and it may be best to wait in those situations.
Finally, if you’re hearing “no” across the board, we have a few suggestions:
1. Don’t get discouraged! Denial happens to most successful writers, often hundreds of times.
If you’re like us, however, you may not be discouraged by the rejection as much as the wait. In that case, keep yourself moving. Keep writing, work, spend time with family, enjoy life. Emphasis on “keep writing.”
Find a nice place to kill time, eh?
2. Never assume the reason. The agent you contacted may: not be perfect for selling your book, have a lot on their plate, or even decided on quitting the business to become a Twitch streamer. Who the heck knows?
Admittedly, your novel could need work. It may not be timely. It may be targeted at a niche genre, or a saturated genre.
The very best response for a true writer? Keep writing. Build experience, develop new projects, or perfect old ones.
Conclusion
A bit of personal advice: we found the writing and querying process to be an empowering experience even when a book doesn’t touch base with agents. You still feel the pride and accomplishment of displaying your work boldly, and the experience makes you sure of success in the future. Best of luck!
KDP allows anyone to upload their work on Amazon.com. Then, every time a purchase happens, books are made to order, manufactured at professional quality, and shipped within weeks…or less! We’re not exaggerating: with Amazon Prime, our full-length novel was printed shipped in just two days!
So, if you want to circumvent traditional publishing, are targeting a super-niche crowd, or simply want to try Amazon’s printing program, we’re here to help!
Tips and tricks for writing a novel in Google Docs
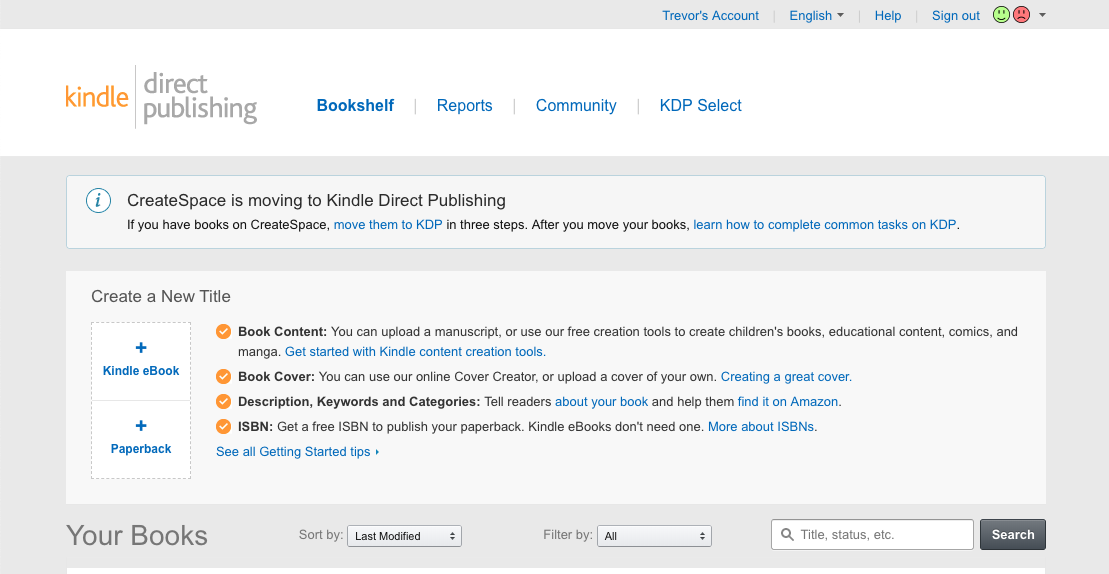
Follow this link and follow the usual startup procedures. When that’s done…welcome to the website! It will look something like this:
From this page, you can start creating new paperback novels (and eBooks), or check what projects have already been started in the “Your Books” section below.
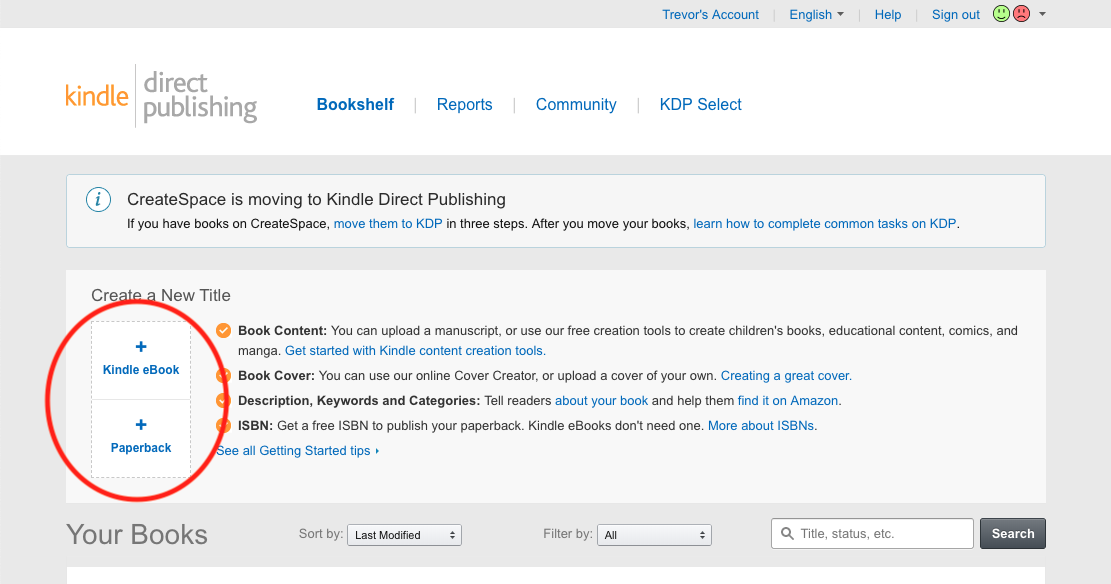
Of course, since we’re creating a novel, head into the creator studio! If you want to create an eBook later, you’ll be able to use transfer paperback settings easily.
Here, we have the three main steps:
We’ll discuss how to complete each one. During this portion, work carefully but don’t stress too much: even if you submit the novel for review, most details can be altered after being accepted.
(And if a few copies are printed with errors? Who knows, they might be really valuable once you’re a popular novelist!)
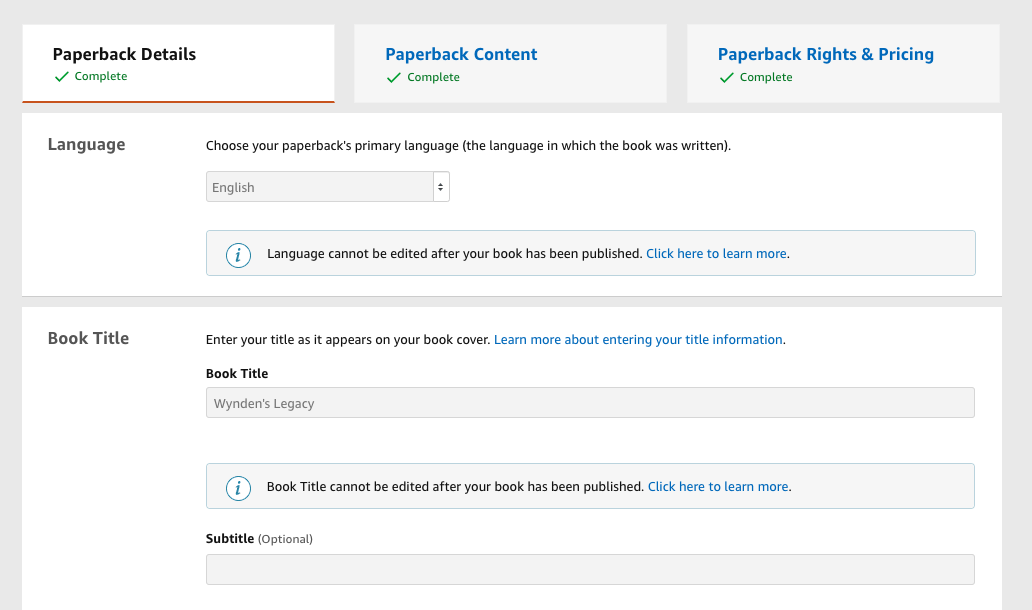
Step 2: Paperback Details
These details go quickly! Anything that can’t be changed after initial publication will be marked with (*) hereon.
Language*. The dominant form of writing within the novel.
Title info*. If you haven’t considered a subtitle, now’s the time.
Series. Writing a trilogy? If it has a name, put it in!
Edition number*. This can be left blank.
Primary Author*. You!
Contributors. Who helped? And how?
Description. Write a good, gripping introduction with your main characters, the antagonists, the setting and the plot. How would you inform and interest your friends?
Publishing rights. If you wrote the book, you have the copyright.
Keywords. What words might Amazon users search when looking for your novel?
Categories. What’s the genre?
Adult Content. Be honest. If your novel’s got it, mark it!
Step 3: Paperback Content
Here, we get to the real intricate stuff! You may need to use trial and error to get some parts right, but trust us: it’s worth it. This section brings the novel together, so we’ll take it slow.
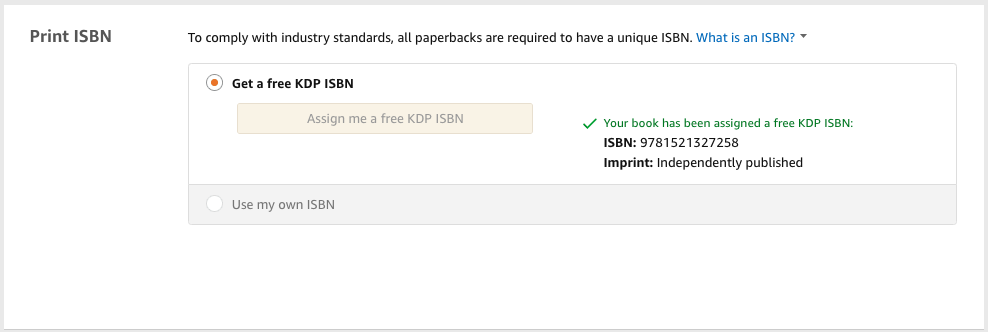
1. Print ISBN. If you don’t have an International Standard Book Number, Amazon provides one for you!
2. Publication Date. Leave this blank if you’re printing for the first time, or put in the original date. Easy as that.
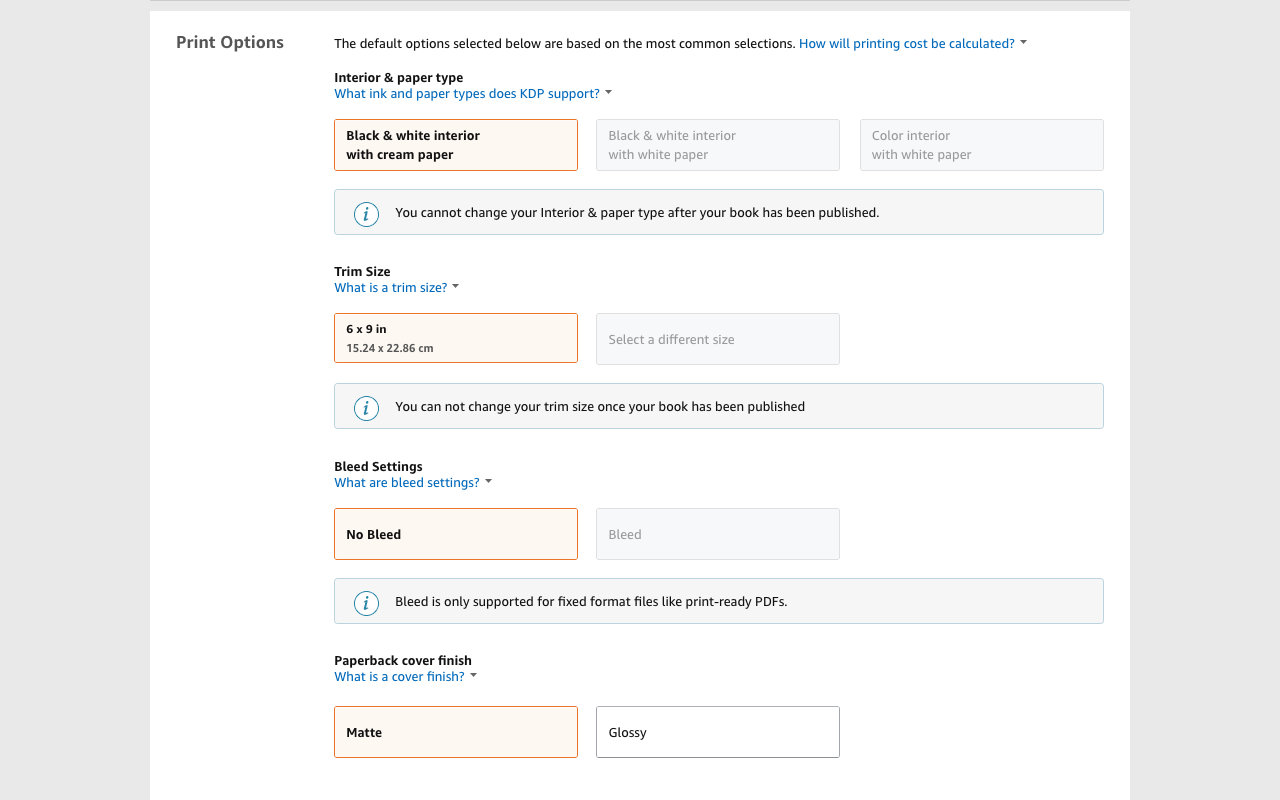
3. Print type*. You must choose between options for the Paper Type, Trim Size, Bleed Settings, and Paperback Cover Finish.
Paper type dictates what color the page will be: we went with classic black and white text on cream pages (white pages are available too), but a visual novel or comic book may need fully colored pages.
Trim size determines the book’s dimensions. Many novels use the classic 6×9 inch cut, but your novel might lend itself to a different size. If unsure, find some books and measure them.
Unless you have a good reason for the pages to run off the edges, hit “No Bleed”.
The cover finish determines if the cover will be shiny (Glossy) or not (Matte). We chose matte for our project because fingerprints show up more easily on glossy covers.
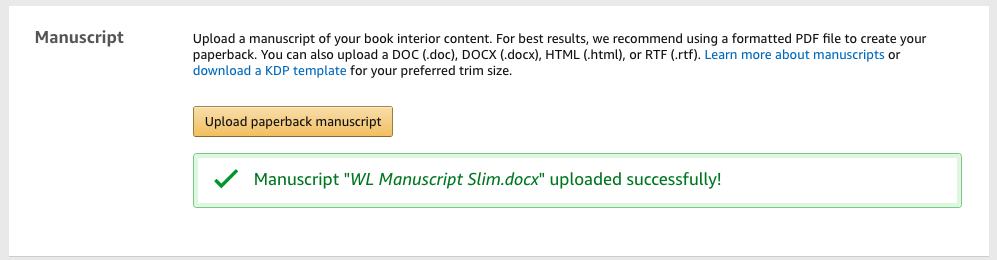
4. Manuscript: this is a biggie. To create the body of your book, Amazon takes your document and puts every page into their printer preview. The intro section appears like this:
After hitting “Upload”, you select the document file from your device.
PDF files work best because the images can be resized easily to your desired trim.
In contrast, the average Word document will need to be resized beforehand from 12.5 x 11-inch paper (the default setting) to fit Amazon’s specifications. This means you may have to alter your manuscript itself; a change in size can mess with such things as chapter spacing.
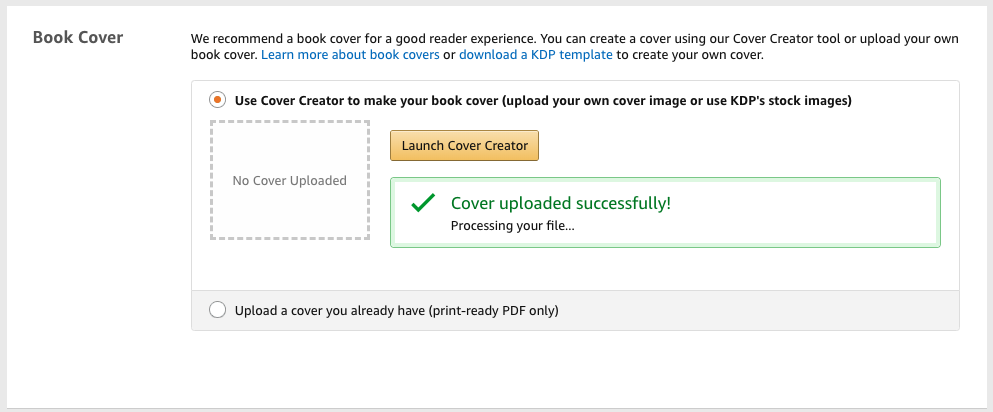
5. Book Cover: another biggie! You can use a full, ready-to-print PDF. However, most users will probably rely on the Amazon cover creator instead:
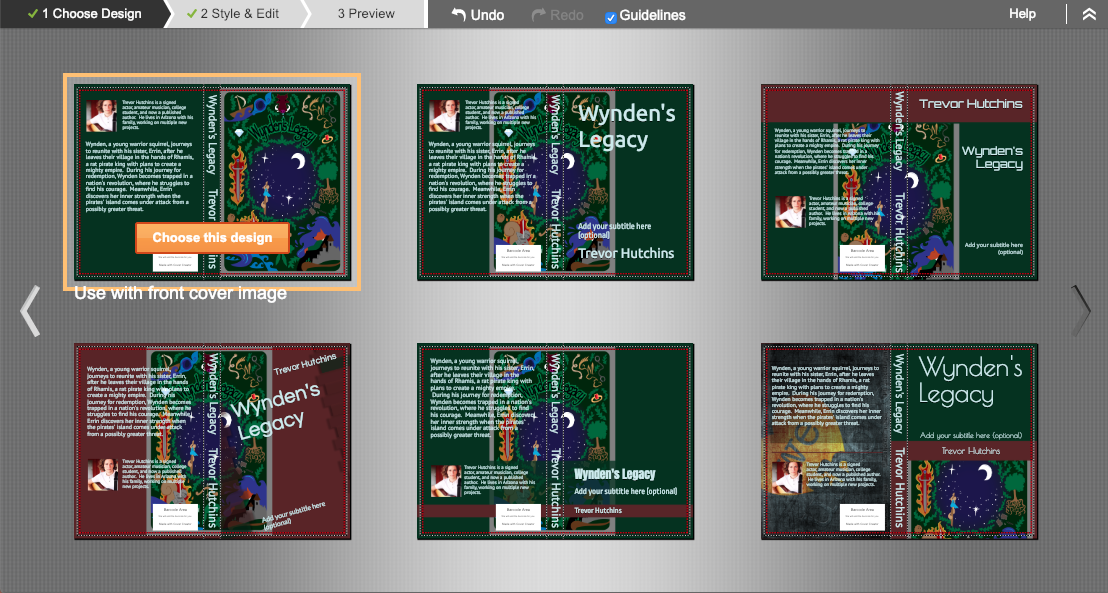
Opening up the cover creator will take a minute. At the end, you’ll see something like this:
Take it step by step! The first tab, “Choose Design”, allows you to find a good template. When you select one, it moves to”Style and Edit,” where the cover art, spine information, back description, author details, and more can be freely manipulated. Finally, “Preview” shows an overview of the work!
(As you can see, we chose the design that allowed our cover art to be featured on the front page.)
6. Book Preview. Finally, you get a chance to review your novel from start to finish!
Make sure the pages are set and the cover wraps appropriately. If KDP discovers a problem or you want to change a detail, head back and fix it before moving on. You’re almost there!
Step 4: Paperback Rights and Pricing
The steps in this area won’t take long at all.
Territories. If you wrote your own book, smash “All territories” and ride on.
Pricing. Amazon provides a minimum price based on their printing and shipping costs, and a maximum cost based on common sense (our novel capped at $250). When you choose your cost (based on what readers will pay, your desired profit per book, what price will look good on a novel, etc)., Amazon automatically adjusts the number for other markets and their currency. You may need to readjust if printing and shipping costs are higher in another area.
Terms and Conditions. By hitting publish, you agree to Amazon’s terms. Within 72 hours, your novel should be available for purchase on their website!
What Comes Next?
First off, plan some kind of celebration! You’ve made a huge accomplishment that many will never experience. Have friends and family over, eat a nice meal, play some video games. Keep writing and reading!
Whenever you’re ready, we recommend ordering one of your own books: make sure the printing turned out well and enjoy holding the physical copy in your hands! It’s a good feeling.
Finally, consider finding ways to promote your novel. Local libraries often have days for community authors. Post on your social media platforms: you’ll be surprised how much support you’ll receive! Get creative, and the sky’s the limit!
Use these tools to master grammar, punctuation, and more!
Whether you’re a professional writer or simply writing for fun, writing assistant tools are useful for virtually everyone. From mobile apps to browser extensions, there are hundreds of tools out there, each with its own unique uses. Here are some of the best ones for making your writing more professional.
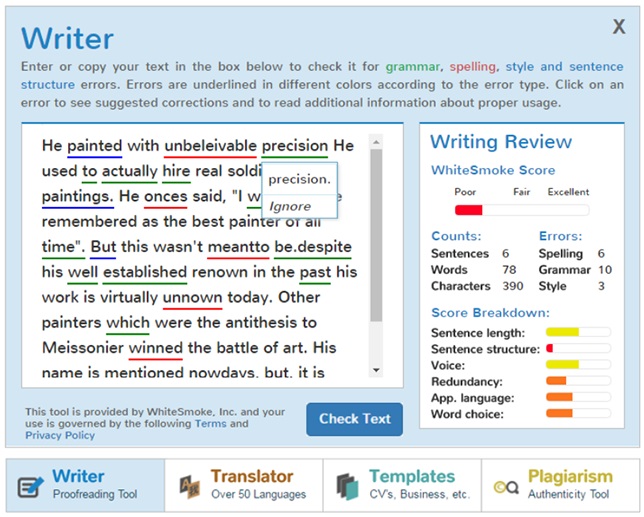
Whitesmoke works as an extension to your word processor, and essentially an upgrade to the basic grammar check that is pre-built into the processor. While most grammar checks simply tell you what’s wrong, Whitesmoke is a sophisticated program that will help you rewrite your work to create sentences with more substance. Their website also contains educational videos on various grammar subjects to improve your overall writing skills.
Have you ever struggled through a mountain of windows and browser tabs, looking for a little note you wrote down? This extension lets you have your notes right next to your work as you’re writing. This means you can keep track of multiple things without needing to sift through a variety of tabs and windows to look at all of them.
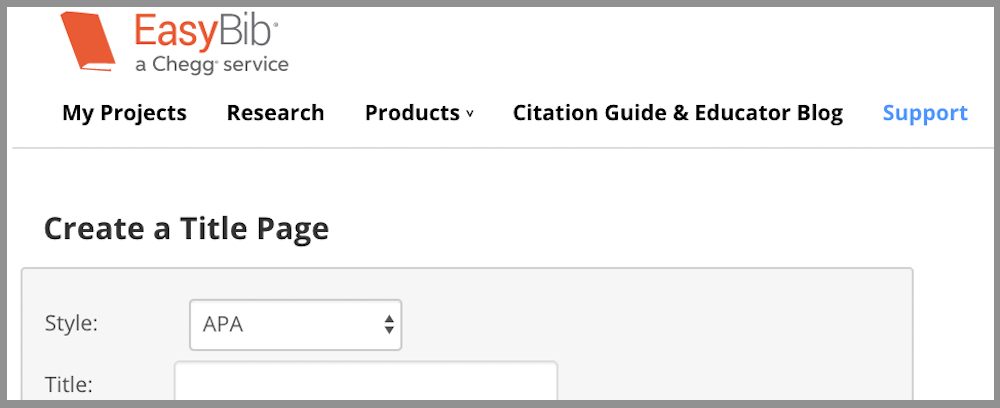
While this app is perfect for students, it can be used by anyone who finds themselves struggling with citations. This is a great app for avoiding plagiarism, as it helps you create in-depth bibliographies for your work. While you may not always need citations in your writing, it is important to make sure you’re not stealing someone else’s work.
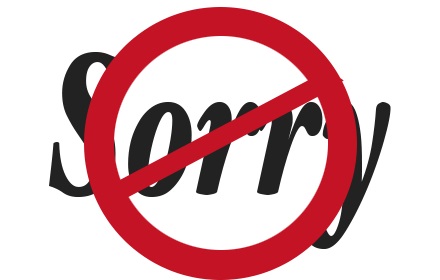
A Gmail extension specifically created for professionals. If you find yourself using words like “just,” “very,” and “sorry” too frequently, then this extension is a great way to change the tone of your emails, so you don’t sound unprofessional. It finds synonyms for these common fluff words, so you aren’t overusing them.
Similar to Whitesmoke, Grammarly is a browser extension and mobile app that will help check your grammar and spelling in your everyday life. It is a natural upgrade from autocorrect that anyone can use, as it will also check the grammar of your sentences, instead of just the spelling. We use it here at Softonic, and it’s saved us from some embarrassing situations.
LibreOffics is a free alternative to Microsoft Word that comes in both desktop and mobile forms. This can really save you a lot of money if you don’t want to pay for Word. It contains virtually all the same functionality (besides being able to run Word documents themselves), without the pesky fee.
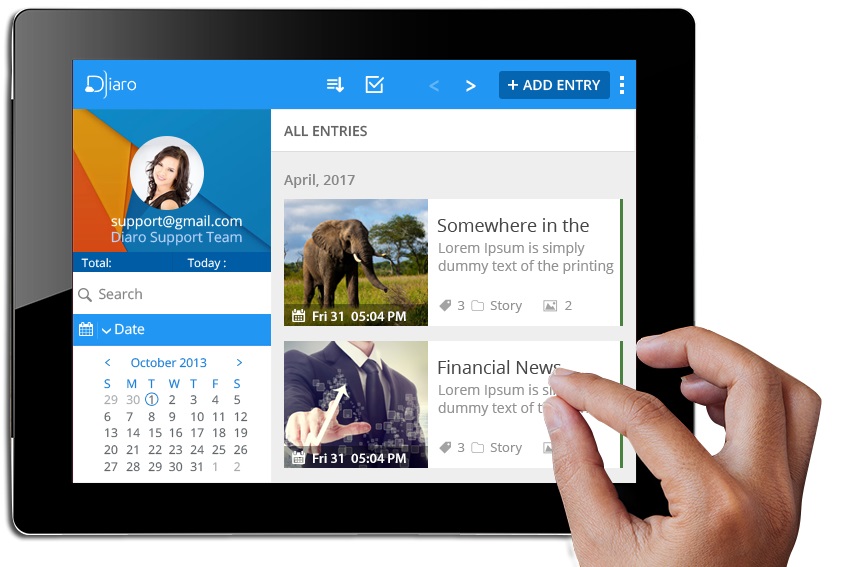
This journal app works similar to a mobile version of Evernote, as it is a perfect way to keep track of any information you have, pulling it up on short notice. It allows for an easier organization format than the pre-built notes app. As the name implies, you can also use this app as a virtual diary, making it easy to document important parts of your day and life.
While many of these are their own application, a good portion of them work as extensions to everyday programs like Microsoft Word, and Google Chrome. These aren’t the only great extensions out there, so be sure to check out our list on the best Chrome extensions to improve all aspects of your browsing experience.


 Title Page
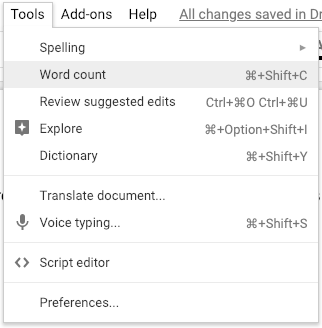


 A new screen will open. Click on the “New Publication” button near the top.