I live in South Africa, Cape town, as a father of two children. I've been gaming almost all my life, with plenty of experience writing reviews and articles on the latest titles. With 15 years of experience in local government performing Facilities Management functions, I moved towards becoming CEO of my own company, Celenic Earth Publications, which serves to publish author's books, including my own. I'm a published author of horror and fantasy novels, while I also dabble in game and movie scriptwriting.
How many of you know that the websites you visit save small files on your device called cookies? These cookies enable faster page loading when you visit the site again.
If you’re like us, you’d prefer not to let these files remain on your device, specifically if storage is low or there are issues with accessing site content. Here are a few tips on how to clear and manage cookies in Chrome.
How to manage cookies on Android
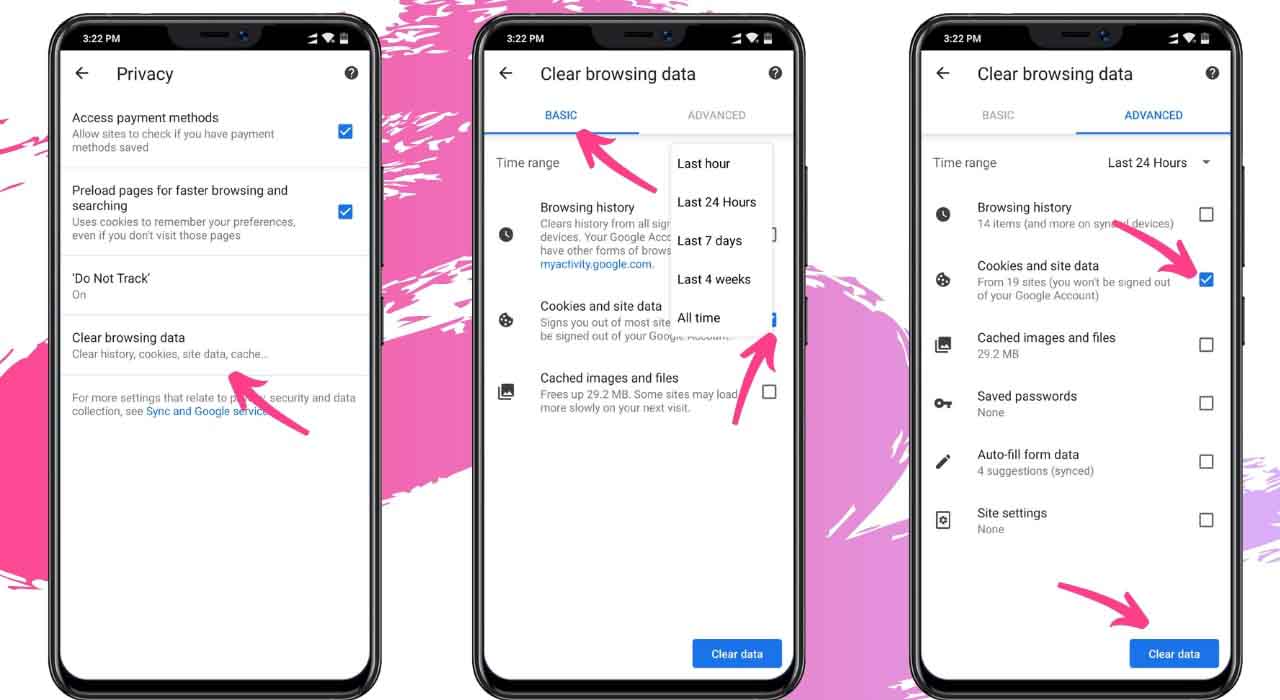
Here are the detailed steps for clearing your browsing data for Google Chrome on Android devices:
Open the Chrome application;
Next to the URL bar, tap ‘More’, ‘More’, and then select ‘Settings’;
Tap on ‘Privacy’, followed by ‘Clear browsing data’;
Pick one of the time ranges, such as ‘All’ or ‘Last Hour’;
Select ‘Cookies, media licenses and site data’;
Ensure that all other options are deselected;
Choose ‘Clear data’ and then press ‘Clear’.
Of course, you may also want to decide whether to allow or block cookies. You’ll need to head into the settings again, select ‘Site Settings’, ‘Cookies’ and then turn the feature on or off.
How to manage cookies on iPhone/iPad
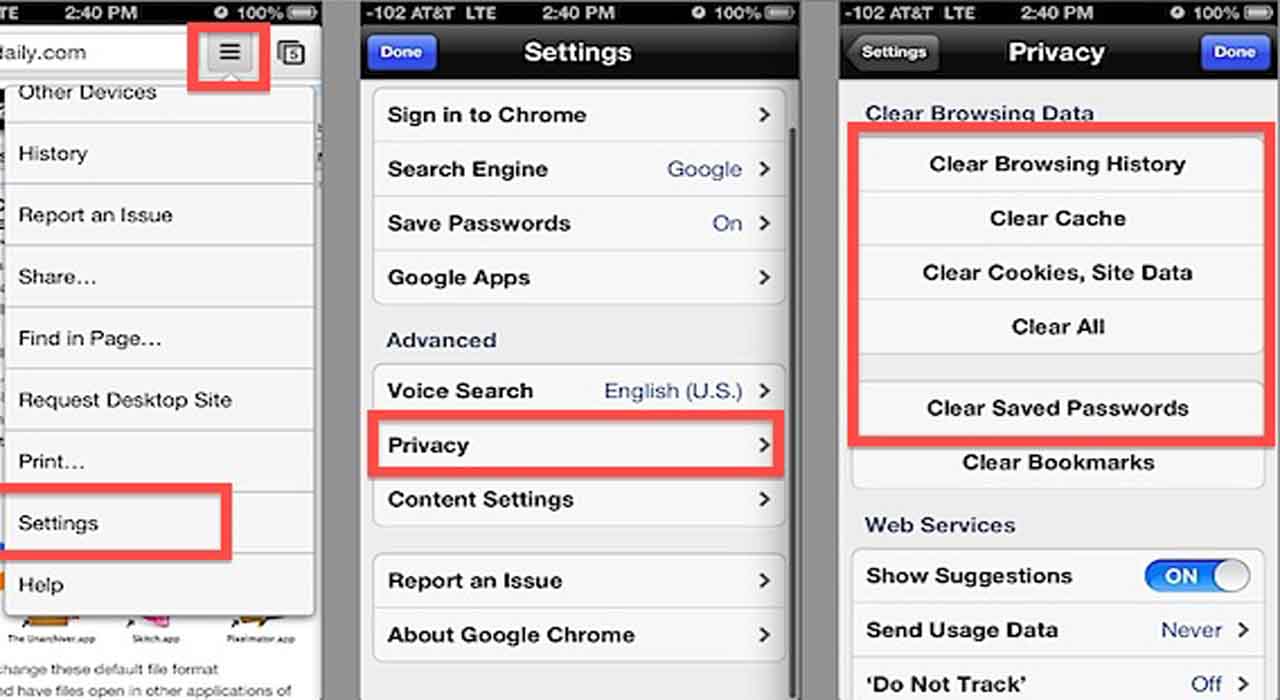
If you Chrome on iPhone or iPad, the process is pretty similar. You’ll follow the same first three steps like Android, but the procedure changes after selecting ‘Clear browsing data’:
Select ‘Cookies’, followed by ‘Site Data’;
Pick ‘Clear browsing data’ in the new menu;
Choose ‘Clear browsing data’ again;
Press ‘Done’.
How to manage cookies on Windows and Mac
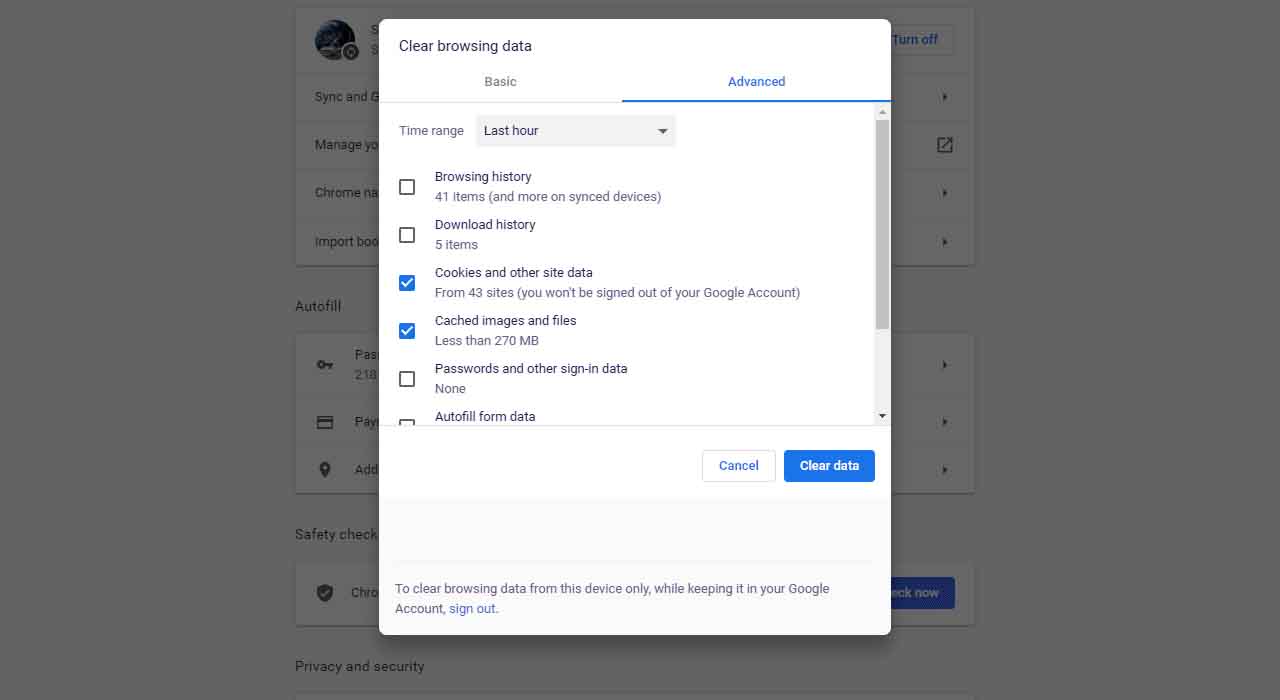
Whether you have Google Chrome on Windows or Mac, the web browser handles the same for both. The steps are slightly different, so let’s take a quick look at the process:
On your Mac or Windows computer, open the Chrome app;
On the top right section, select ‘More tools’, and then choose ‘Clear browsing data’;
Pick ‘Advanced,’ and select ‘Cookies and other site data’;
Confirm this selection by selecting ‘Clear all’.
Manage your cache and cookies well
If you’re running other browsers like Safari, Firefox, or Opera, you should know that they also store browser data in the same way. Ensure that you also clear the cache and cookies on these apps from time to time.
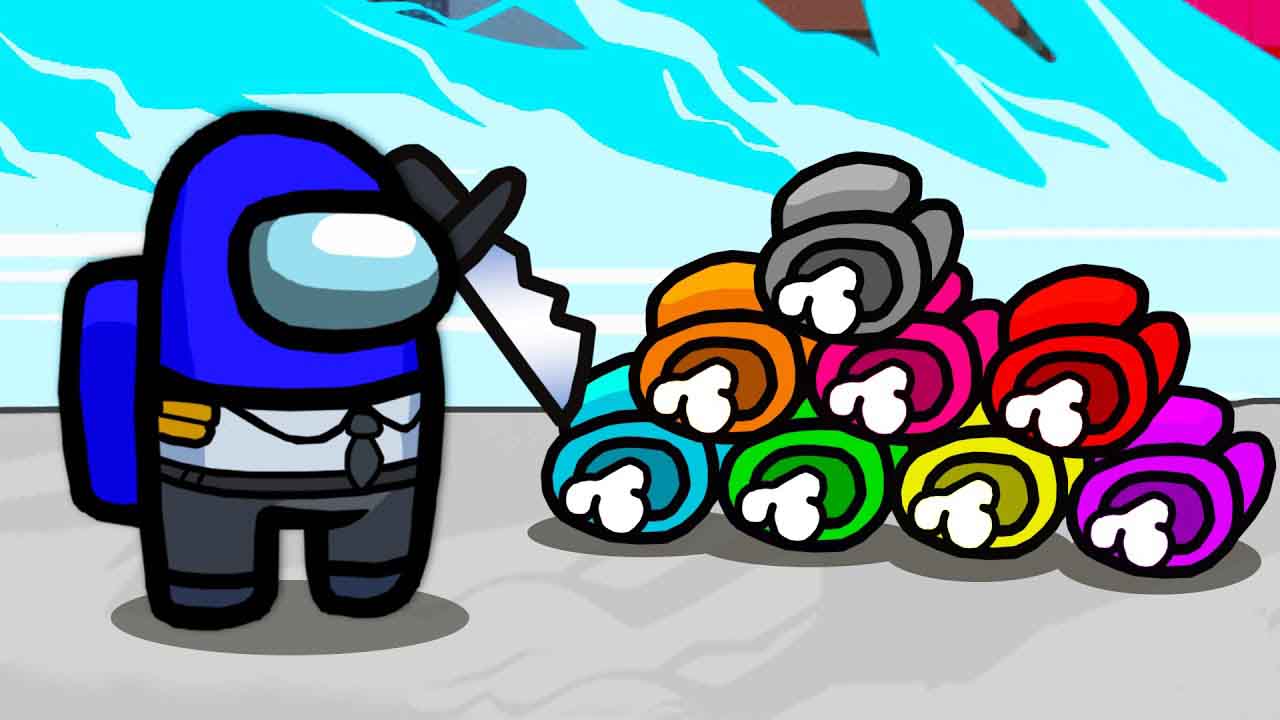
Among Us has had several months on the charts as one of the best social media deduction games for mobile devices. While it’s free for Android and iPhone, Steam players will have to pay a small price to play as a crewmate or impostor on PC. Of course, that’s only if you haven’t discovered the secret we’re about to share with you – and yes, it’s completely legal and above board.
If you’re a beginner and still need to learn the ropes, don’t miss our handy guide on how to play Among Us online. For now, here’s a tip on how to download, install, and play Among Us on PC for free.
How to download Among Us for PC
Your best bet to obtain this exciting, suspense-driven game for PC is to install an Android emulator. The one we recommend is Bluestacks, mostly because we find it reliable in terms of performance. One you have the application, you can link your account to the Google Play Store and find your game in the search bar.
How to install Among Us for PC
Fortunately, the Among Us file is small, so you won’t have to worry about it taking up too much storage space. Of course, we’re assuming you aren’t an avid gamer like us with a hard drive full of action and adventure titles. If you’ve followed the step before by downloading the game via Bluestacks, the emulator will install Among Us on your PC on its main dashboard.
How to play Among Us on PC
Are you wondering how different it is to play Among Us on PC compared to mobile? Well, it pretty much works the same, except you’ll click on the screen prompts and motion controls with the mouse instead of your finger. To start the game, you’ll need to head to the Bluestacks library, find the title’s icon, and hit the Enter button or double-click.
In summary, here are the steps to download and play Among Us on PC:
Obtain and install the Bluestacks emulator
Sign into or create a Google Play account
Find Among Us in the store
Select the install option
Open the new Among Us icon
Play with your mobile friends
Can you survive the mayhem?
Now that you can play Among Us on PC or your laptop, don’t forget to grab some Christmas hats for the silly season. We’re looking forward to hearing all about your holiday exploits with your crewmates.
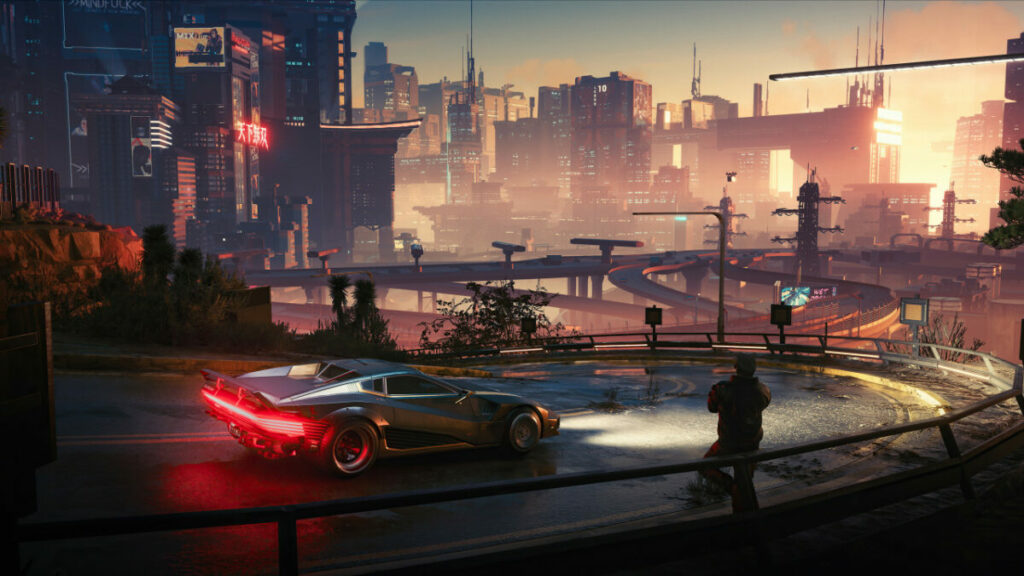
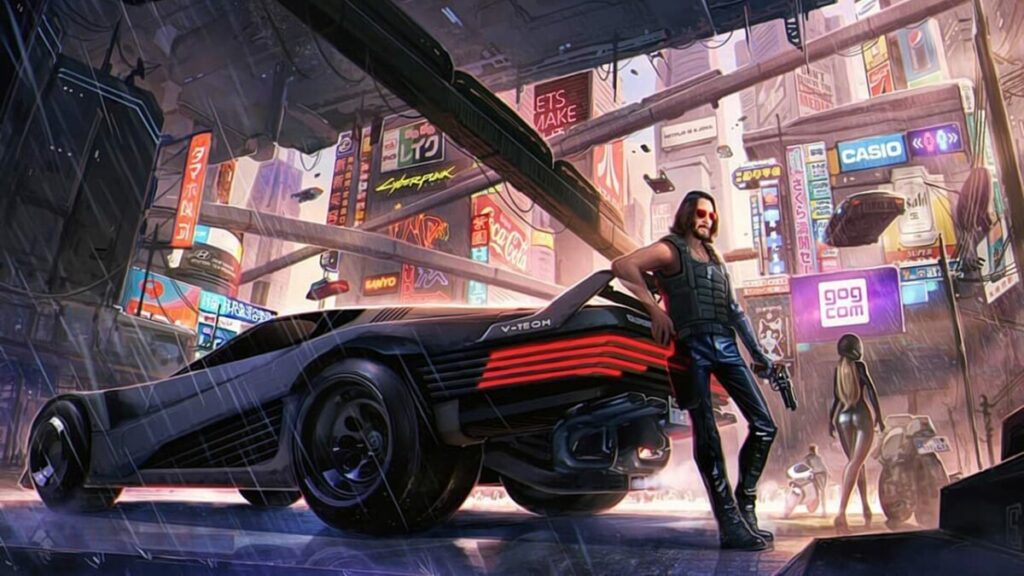
Cyberpunk 2077 is a game for Windows set in 2077 in a fictional metropolis called Night City. Wars and climate change have devastated the world. Nearly all the wildlife is extinct. Food and water are hard to find, so survival is difficult. Cyber attacks are common, so humans rely on body modifications like implants, including one that allows you to live forever. The city is occupied by a range of humans, including wealthy business people, celebrities, criminals, drug dealers, and mercenaries.
You can start the game as a mercenary known as V, who gets hired for missions that increase his property and ability to survive. Or you can be a nomad or a street kid trying to succeed in the city or a corporate employee trying to regain his old position.
How to play Cyberpunk 2077
Start by ensuring there’s enough space on your hard drive because it takes about 70GB at launch Cyberpunk 2077. Also, look at your graphics driver to ensure that you have the latest update. Once you’ve downloaded the game, you’re given an option to choose your background or life path to customize your character.
It begins with shaping your looks, including your face and body. Pay attention to your reflexes, intelligence, technical ability, and cool factor. Learn terms like mantle, cover, dodge, the radial menu, and weapon swap. Make the right choices before you head into Night City.
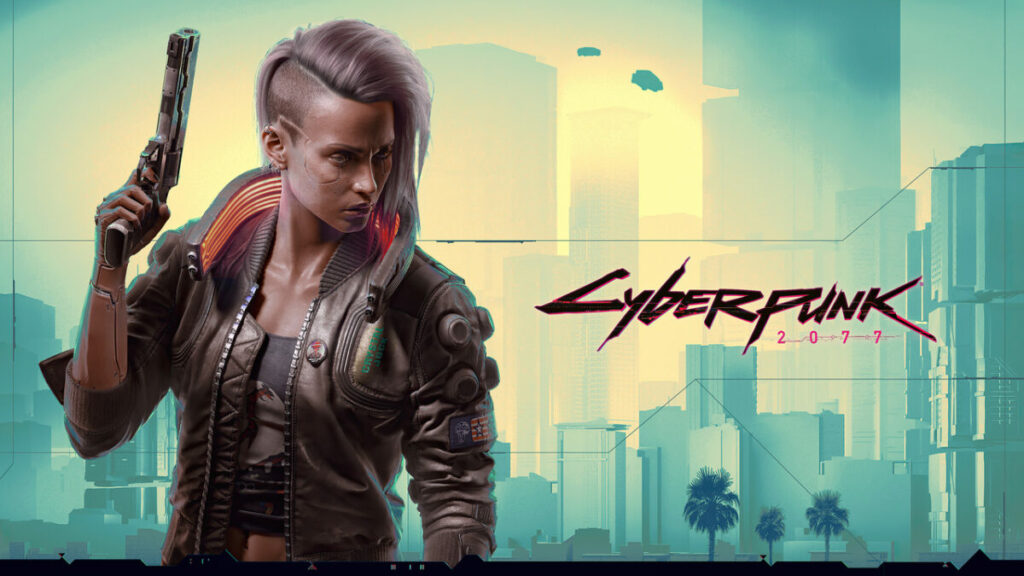
Create your character
Before you start working out how to play CyberPunk 2077, you’ll need to build your character. While it begins with shaping the face, body, and looks, you should also pay attention to the five attributes for Body, Reflexes, Technical Ability, Intelligence, and Cool. These points will set the tone for leveling up later in the game, so make the right choices before you head out into Night City.
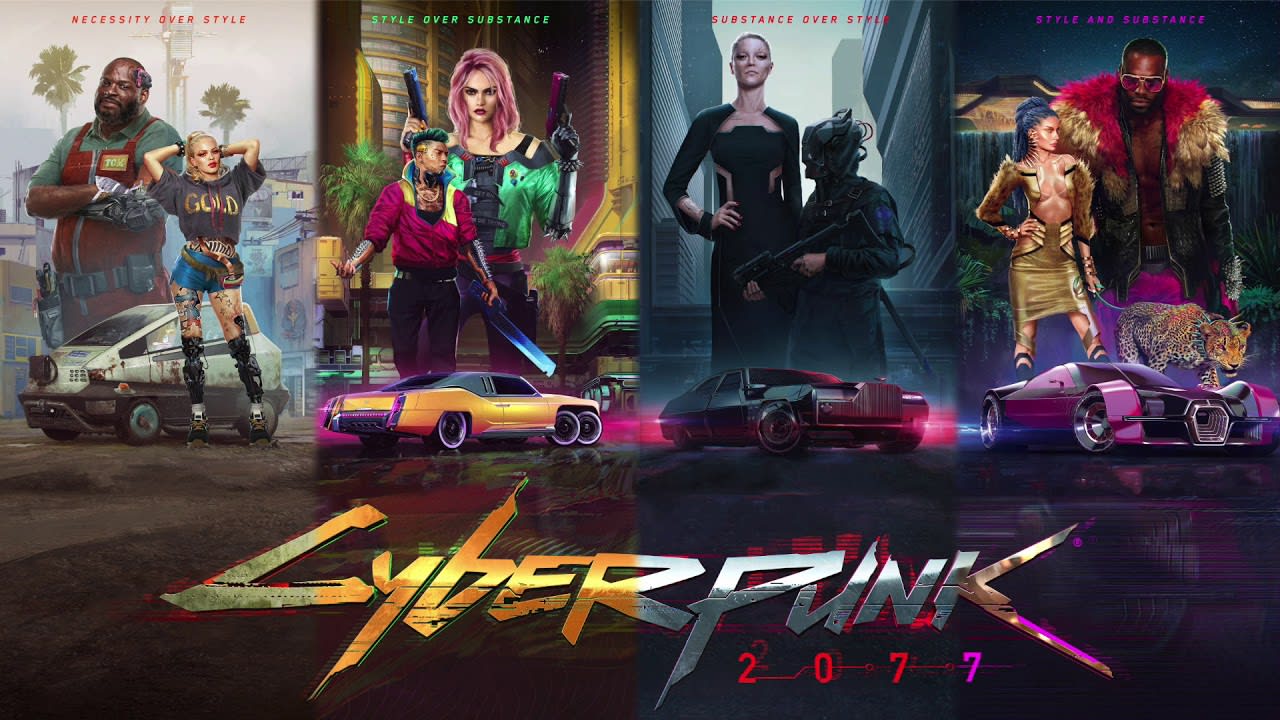
Choose your Lifepath
The next part of CyberPunk 2077 is selecting your Lifepath. You have a choice between Nomad, Streekid, and Corpo. Don’t worry about whether this choice will have severe consequences in the game. It may affect dialogue choices and a few side missions, but ultimately, the story and progression remain the same.
Learn the gameplay mechanics
We won’t judge you if you feel intimidated when you first see the button layout for the keyboard or controller. There’s a lot to get used to, but we promise that you’ll get the hang of it soon enough.
Take your time learning the most useful functions first, such as mantle, dodge, cover, weapon swap, and the radial menu. These mechanics are vital for surviving the first few hours of gameplay.
Study your gear and items
After your first few hours of playing CyberPunk 2077, you’ll learn how valuable your inventory is. You’ll find useful items, such as components, ranged and melee weapons, attachments, clothes, and grenades. We made the mistake of being too hasty to get into the action and missed how significant it is to sort through the backpack and cyberware upgrades – don’t make the same mistake.
Level up
While running around in Night City and completing missions, you’ll earn attribute points and experience. There are three categories to level up: Street Cred, your Character Level, and your individual Skills. There’s even a skill tree for each attribute, so ensure that you apply your points wisely.
Exploring Night City
You get a free vehicle early in the game that you can summon to go anywhere, anytime. There are cars to buy from your inbox or at the side of the road. You can steal one too, for free!
You can also use the speedier teleport option. There are teleport points in parts of Night City. You have to visit a point and manually unlock it. Then you can teleport back to your base or to somewhere else in the city.
Undertaking missions
Players are offered missions to complete to earn rewards that they can use to buy body enhancements, armor, food, and other useful things. There are story missions, cash missions, and side missions. Each adds to the storyline to build up the unique ending.
Story missions push the storyline forward. Cash missions depend on how much money you have available to earn more. Side missions are an excellent way to get money, equipment, and weapons. The rewards can be very good for players who complete their side missions.
Upgrading your body
You can upgrade every part of your body in Cyberpunk 2077. You can enhance your vision with the optic mod. The leg mod makes you run and jump better. You can even upgrade your arms so that they can fire ammunition! You have to earn money to buy enhancements.
Tips and Tricks
Now that you understand how to play Cyberpunk 2077, here are some handy tips and tricks
Set the game’s level of difficulty
Cyberpunk 2077 is quite a challenging game with exciting visuals that make it interesting. It will appeal primarily to advanced players. For newbies, it offers a setting where you can lower the level of difficulty and change it up as your skills improve.
Walk the talk
Your conversations with other characters are meaningful and affect the game’s progress.
Learn all about the three Cs: Conversation, and Choice, and Consequences. You’ll talk almost as much as you fight in Cyberpunk 2077. Your character is given dialog options, sometimes just things you want to know about other characters. But an answer could put you on a different path. The choices you make determine the game’s ending.
You need to know a few things about conversations:
Lifepath icons link to your attributes
Blue options provide more intelligence
Yellow options advance dialogue
Timed replies have consequences
You can pause to access your skill points
Don’t upset the factions
Several factions inhabit Night City. There are three in the MegaCorporations and 10 gangs. You can’t join them, but you can undertake missions for them and avoid running into trouble if they don’t like what you’re up to.
Check your messages
Interacting with other players is an essential aspect of Cyberpunk 2077. You’ll get texts and calls offering you a car you can buy or details of missions you can go on, or even from friends you’ve made in Night City. Responding to messages builds relationships, including options for romance. So don’t ignore your messages!
Head out into the nightlife
Now that you have a better understanding of how to play CyberPunk 2077, go out and conquer. There are about 30 hours of gameplay to enjoy and plenty of trophies to achieve. If you’d like a specific guide on achievements or completing missions, let us know in the comments, and we’ll make a plan.
Roblox has been the highlight for adults and children in the world over the last few years. There are so many servers and games you can enjoy, the fun never ends.
If you’re new to this gaming platform, we’ll show you how to play Roblox by creating an account and avatar before joining any of the available rooms.
What is Roblox
Roblox is a real paradise for both avid gamers and novice developers who want to create their first video game. This free multiplayer platform has everything it needs to please both kinds of users: an unlimited catalog of free video games and all the tools you need to create your own game.
If you’ve never used this platform, you’re probably itching to check it out. And it’s no wonder that you’re curious, seeing as how Roblox has more than 150 million active users every month. In the end, with apologies to Fortnite, this is the most popular video game platform to hit the market in recent years. But… do you know how to use Roblox?
Today’s article is a basic guide that will walk you through all the steps to play a game or create your own title on Roblox. We hope you find it helpful!
First steps to use Roblox
Before you can learn how to play Roblox, there are a few things you need to do first. You won’t be able to enter any of the game servers without these initial steps.
Download and install the Roblox client
Whether you want to play or create a video game on Roblox, the first thing you need to do is download and install the client on the device you want to use. It barely takes up space, just 2 MB, so you’ll have it on your PC in no time.
You download the Roblox client quickly and easily below.
Roblox is also available for Mac and Xbox One consoles. You can download the client from the console’s online store.
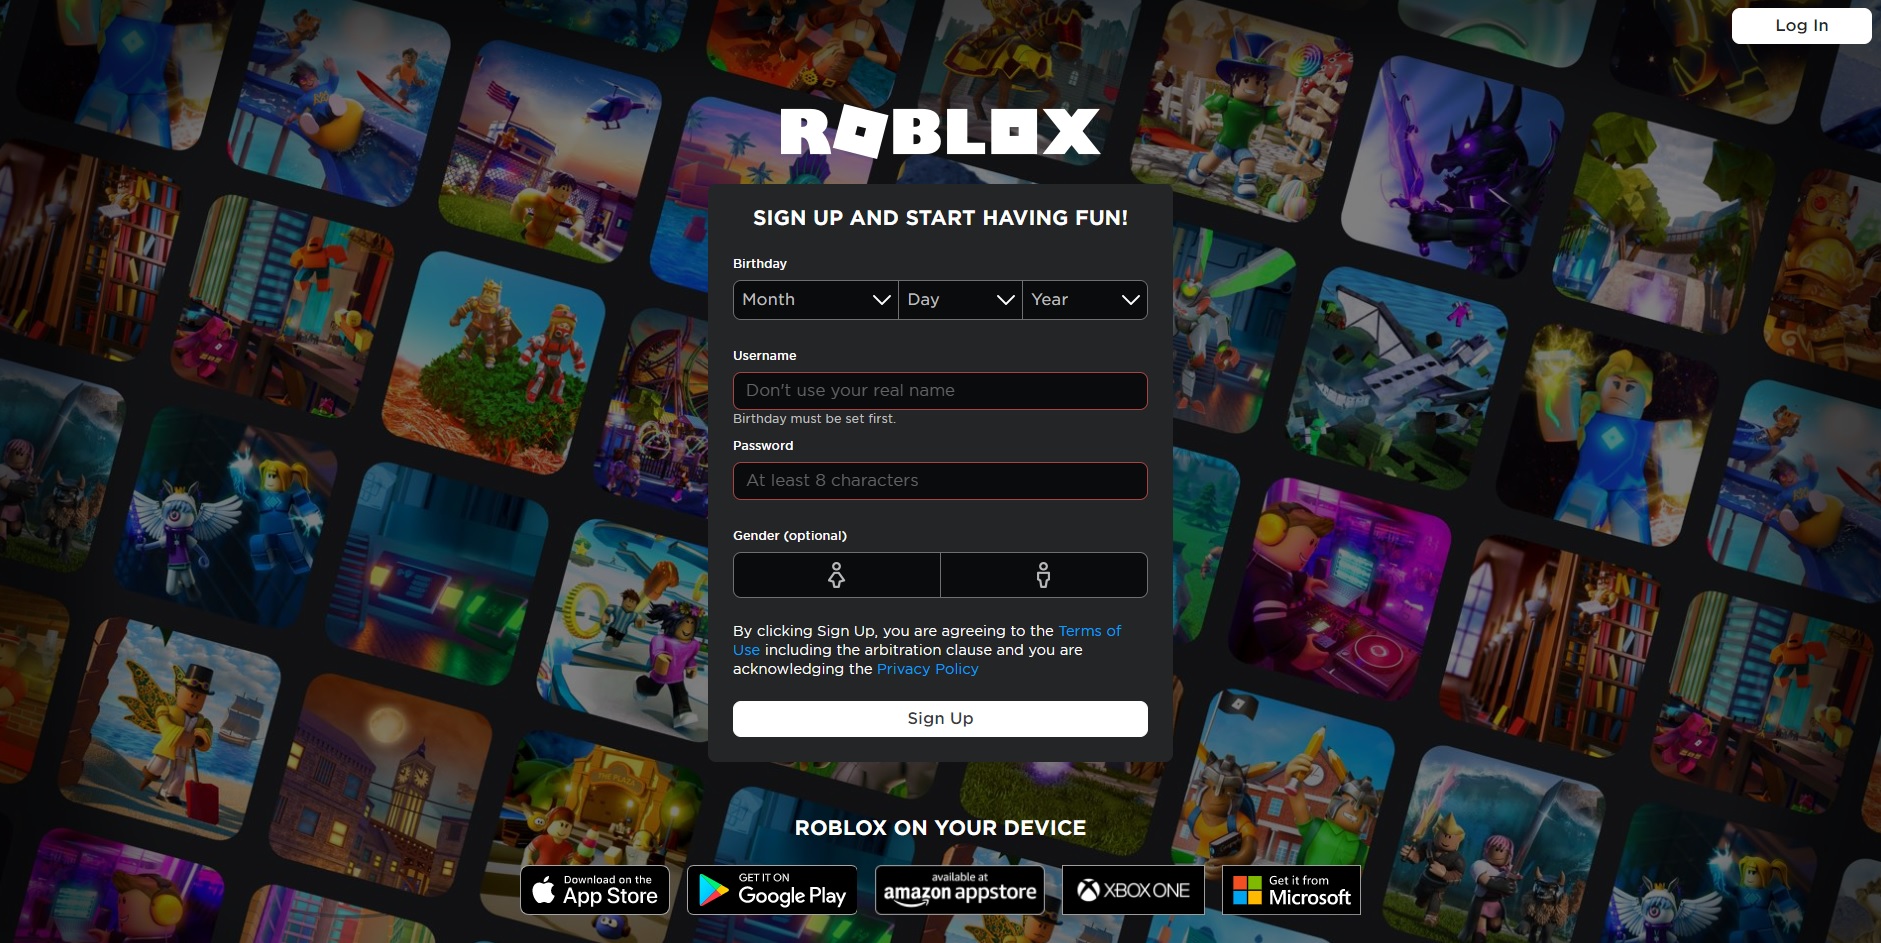
Sign up on the official website
Now that you have the Roblox client installed on your computer, you need to register on Roblox official website in order to use the platform.
On the site, just fill in the form that appears on the screen. You’ll need to enter your date of birth and choose a username and password for your account. You can also select your gender, although this is completely optional.
Now that you have your Roblox account, you can log into your session on the platform. After you do this, it’s a good idea to go into your account settings and add an email address in case you forget your password in the future.
How to play Roblox games
Now that you have a Roblox account and the client installed on your computer, you can play all the free games you want on this platform. To do so, follow these steps:
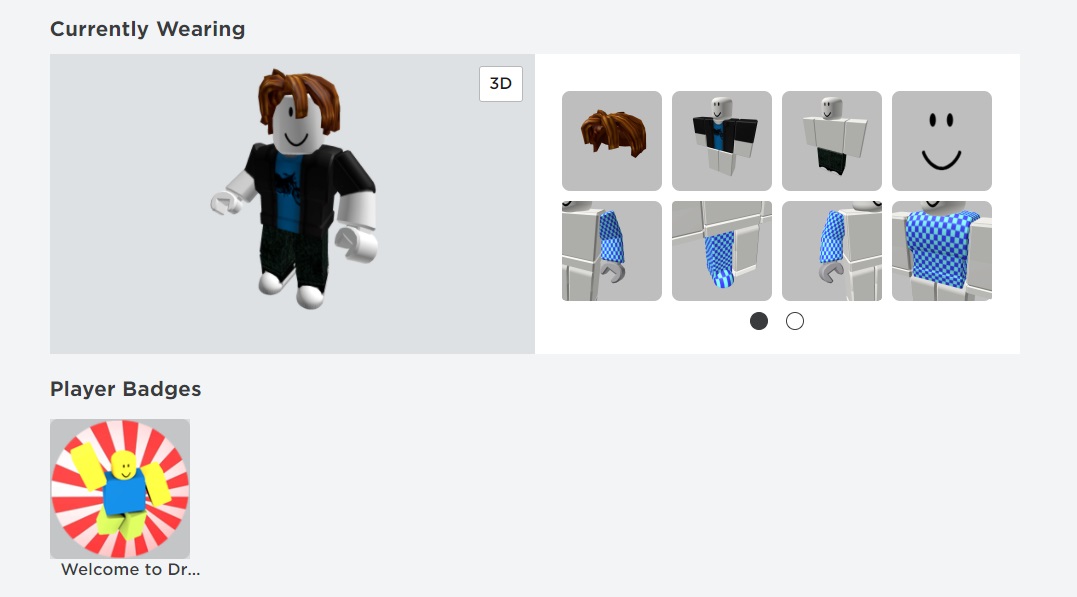
1. Create your avatar
Step one is to create your avatar on Roblox. This will be your character in all the games you play on the platform, so make sure that you like the way that you look!
To edit your avatar, simply click on the icon with three horizontal bars in the upper right corner of your screen. Once the drop-down menu opens, select the “Avatar” option.
On the next screen, you’ll have hundreds of options to customize your character. You can choose their gender, body type, clothing, hair, face, animations and a host of other options. If you can’t find anything you like, don’t worry! Just click on the “Get more” option in the upper right corner of the editor.
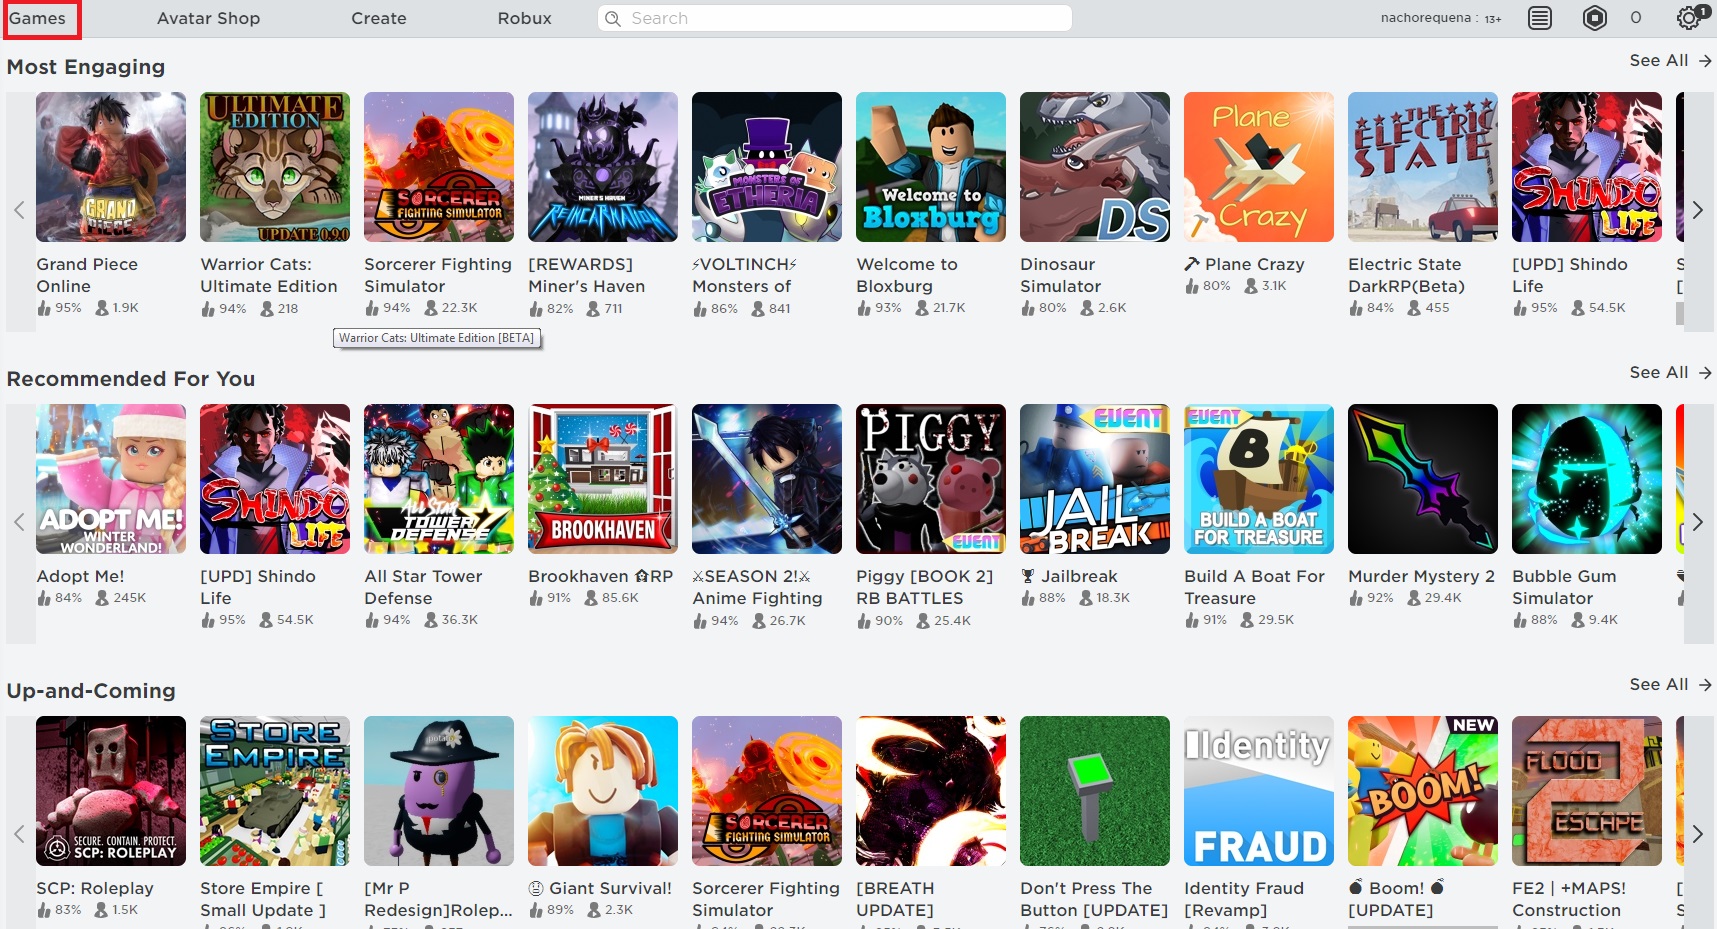
Now that you’ve created your avatar, it’s time to play. To do this, click on the “Games” option in the top menu on your screen. Then the extensive Roblox catalog will be displayed with different categories.
Browsing the Roblox catalog can be frustrating at first, as there are so many games available. If you know the name of the game, just type it into the search bar at the top of the screen. Once you find the game, click on it.
If you’re not really sure what to play, we suggest checking out the article below, which features a roundup of the best games on Roblox in 2020.
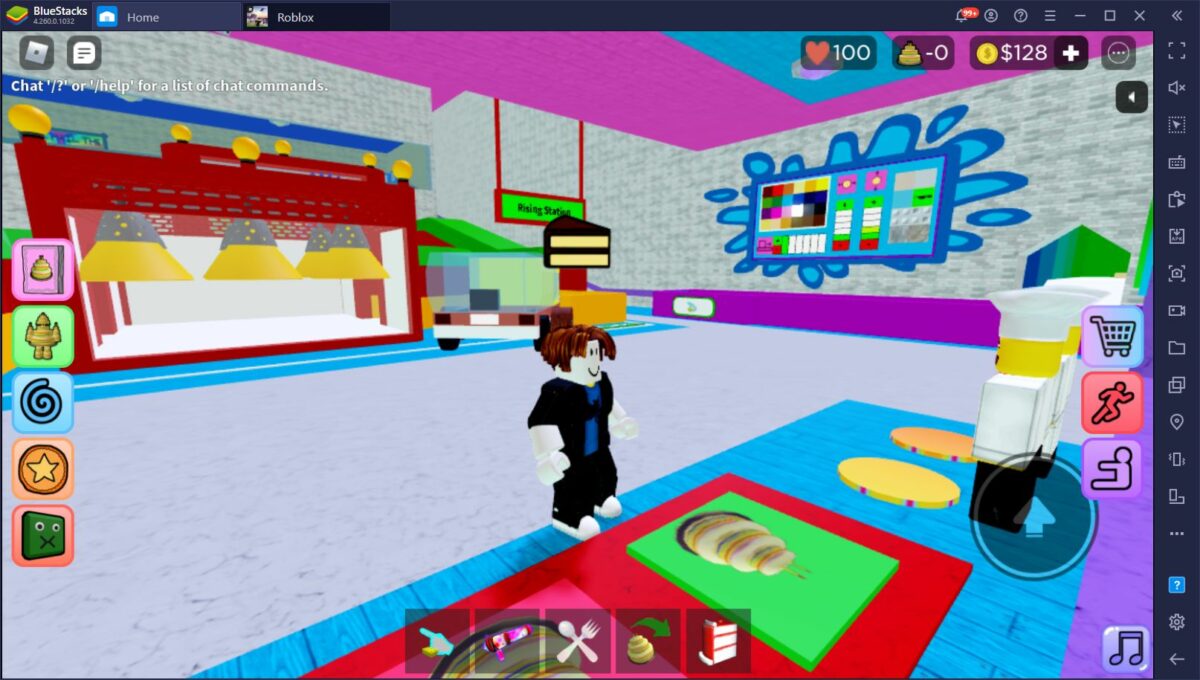
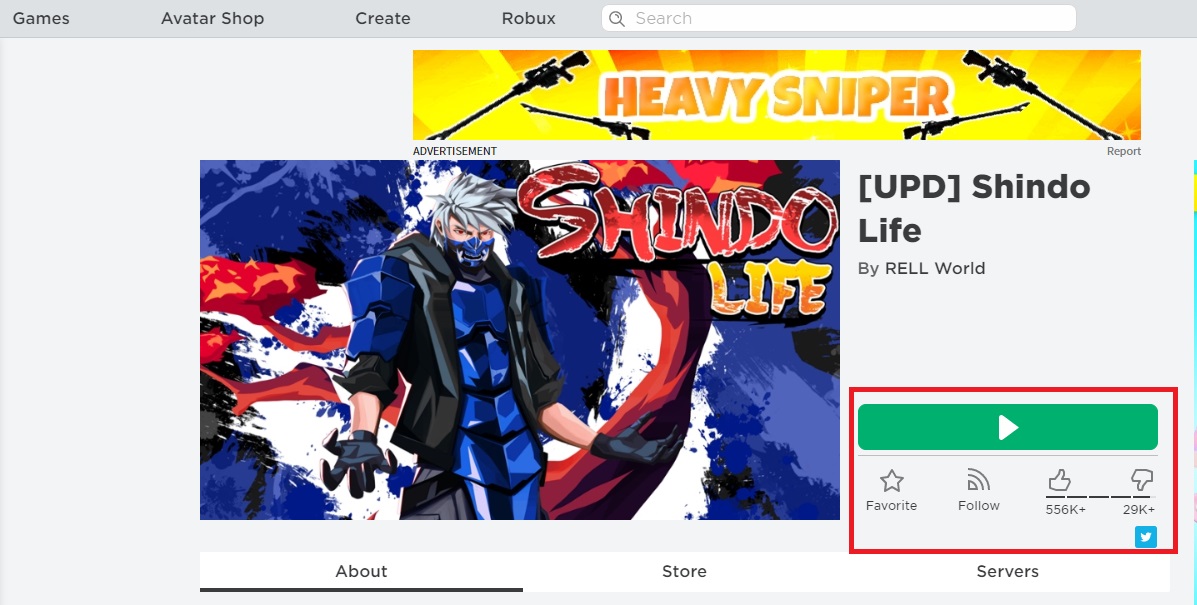
When you click on the title you want to play, a new window will open with a description of the game. Normally each title has several screenshots and even promotional videos so you can be sure it’s what you’re looking for.
If you’ve found the game you want to play and installed the Roblox client, just click on the green button with the “Play” symbol on your screen. In a matter of seconds, you’ll have loaded the game and will be ready for some fun on Roblox. It’s as simple as that!
Here are some handy tips for learning how to play Roblox:
Now that you know how to play Roblox, it’s time to check out some tips and tricks we have for you. These pointers will aid you when it comes to joining friends on multiplayer or spending some Robux.
How to add friends on Roblox
Don’t forget that Roblox is a multiplayer platform, so it’s important to know how to connect with your friends. Fortunately, it’s easy to add friends on Roblox with the following steps.
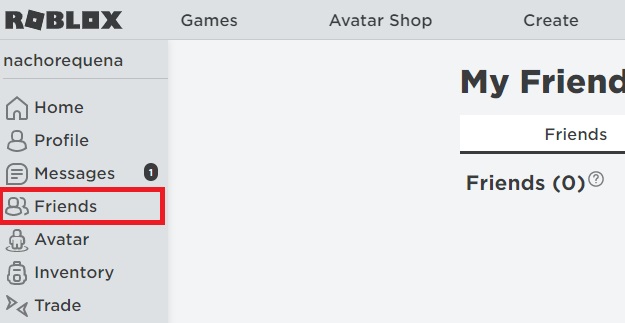
First, click on the icon with the three horizontal bars in the upper left corner of the screen. Then select the “Friends” option. In the new window, add your friend’s username in the search bar at the top of the screen. Make sure the search bar says “Find username in Players.”
Then you’ll see a list of players who are an exact match or similar to the username you entered. Select the “Add friend” option to send a friend request and wait for your friend to accept it. Done!
How to buy Robux
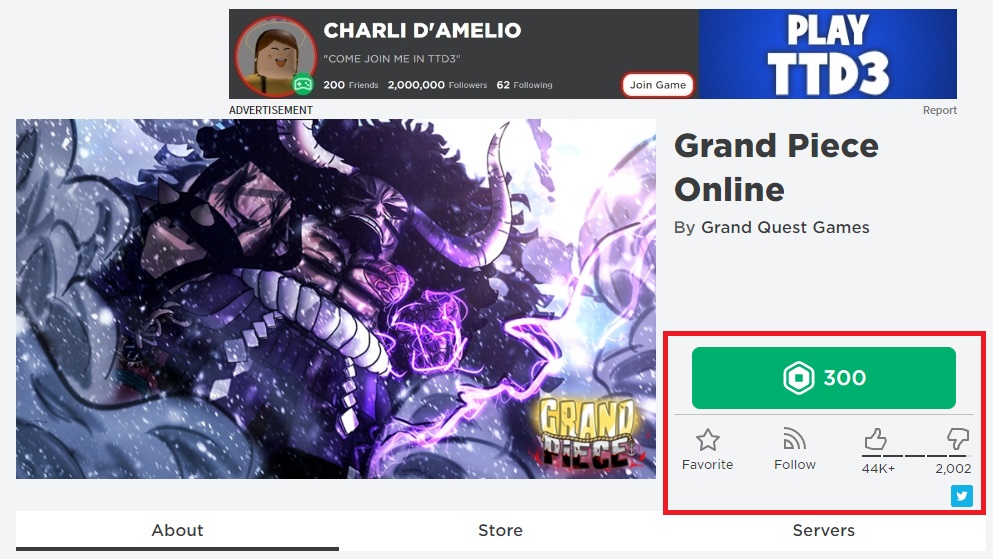
While browsing the Roblox catalog, you’ve probably come across some games that, instead of the “Play” button, display a hexagon symbol with a number beside it. These are the so-called “Robux,” the Roblox currency that lets you access premium services, such as the beta versions of certain games.
To buy Robux, just click on the hexagon-shaped icon in the upper right corner of your screen or the “Robux” button. Then choose how many Robux you want to buy.
Once you’ve selected your chosen amount, it’s time to pay real money to get your Robux.
Dealing with errors in Roblox
As with all games, you’ll come across several errors when playing Roblox. It shouldn’t happen regularly, but technology can be funny sometimes. We’ve compiled a list of articles to help you resolve any of these issues:
What has caught your eye about Roblox, rather than its vast catalog of free games, is probably the fact that it lets you create your own worlds. Keep reading for some tips on how to do that.
1. Download Roblox Studio
The Roblox client will be useful to test the games you have created, but to make them, you’ll need to have “Roblox Studio” installed.
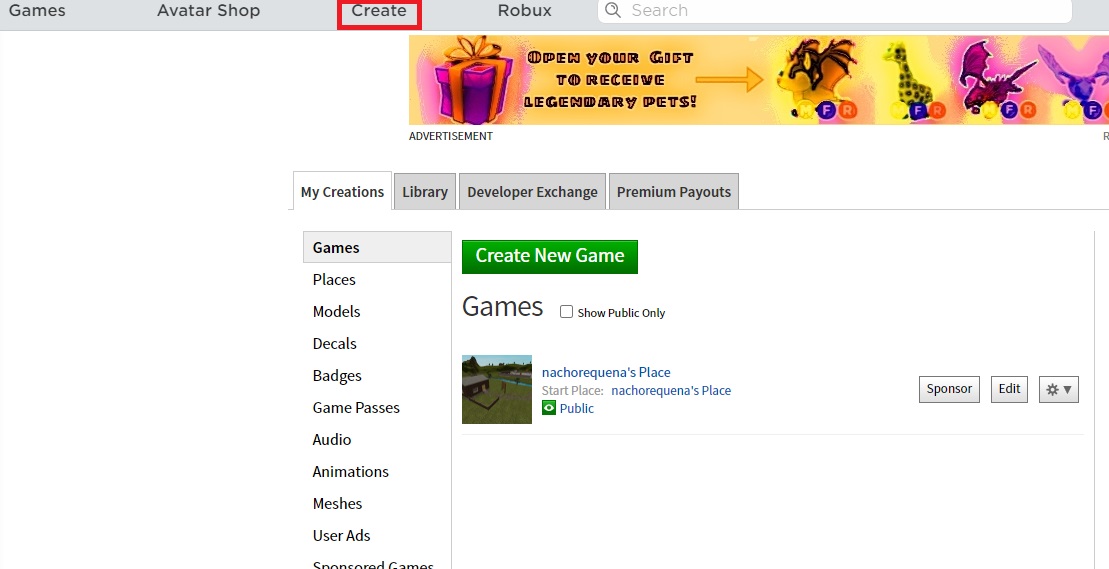
To get this tool, simply click the “Create” button at the top of the screen followed by “Start Creating.” Then you can download the program from the official website.
If you prefer to speed up the process and have Roblox Studio installed from the get-go, you can download it quickly and securely from Softonic below.
After you install the tool, the video game creation environment will start automatically.
2. Create your own game with a template
When you open Roblox Studio, you’ll see an interface very similar to the one in the photo. There you’ll have access to a selection of templates where you can choose your game environment. The options include templates of cities, towns, pirate ports, etc. Just choose the one you want.
Depending on the type of template you’ve chosen, it will display different game mechanics. For example, if you choose a race template, you’ll see the race start and finish points by default for you to edit.
In each of the columns on the left and right sides of the screen, you can edit the game however you want. For example, by clicking on the lighting option in the right column, you can change the environment’s lighting by indicating the time of day you want it to represent.
Since it’s a template, we recommend exploring and testing the different options on the tool to become familiar with them. Once you have finished creating your game, simply click on “File” and “Publish to Roblox” so that your game goes live.
3. Create your own game from scratch
We’re not going to lie to you: creating a Roblox game from scratch isn’t easy, and you’ll need to put in hours of work before it takes shape. Of course, it’s entirely possible and far simpler and more intuitive than using the usual programming methods.
If you don’t feel like using a Roblox template and want to create a totally innovative game from scratch, we recommend checking out the Roblox Studio tutorials as your starting point. They’re truly comprehensive and cover all the topics and questions that Roblox developers should know about.
If you need more guides on making a Roblox game, check these out:
We hope our basic guide for how to play Roblox has been helpful to you. Do you have any questions about concepts on Roblox that we might help you with? Tell us about them in the comments section!
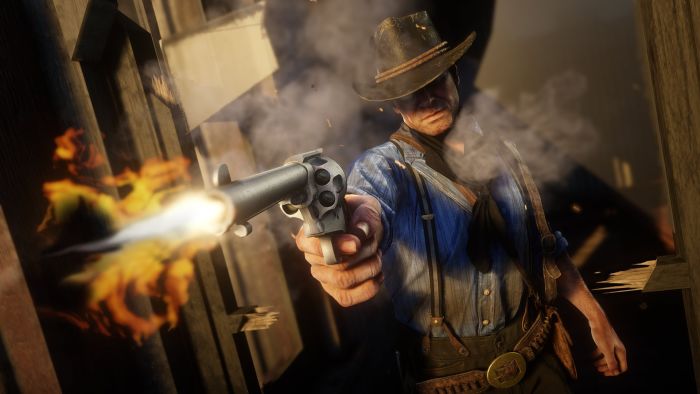
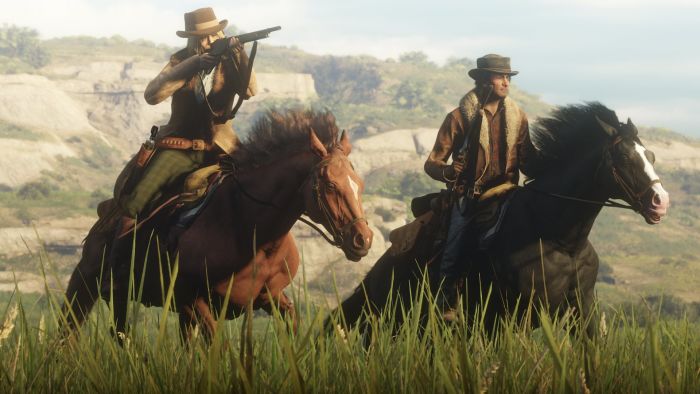
Here’s everything you need to dominate Red Dead Redemption II.
Red Dead Redemption 2 is an incredible ride through the Old West, filled with wildlife, outlaws, and shady characters. Softonic is here with some tips, tricks, guides, and maps to help you dominate the game!
Be sure to bookmark this Red Dead Redemption 2 guide as we will continue to update it with more articles.
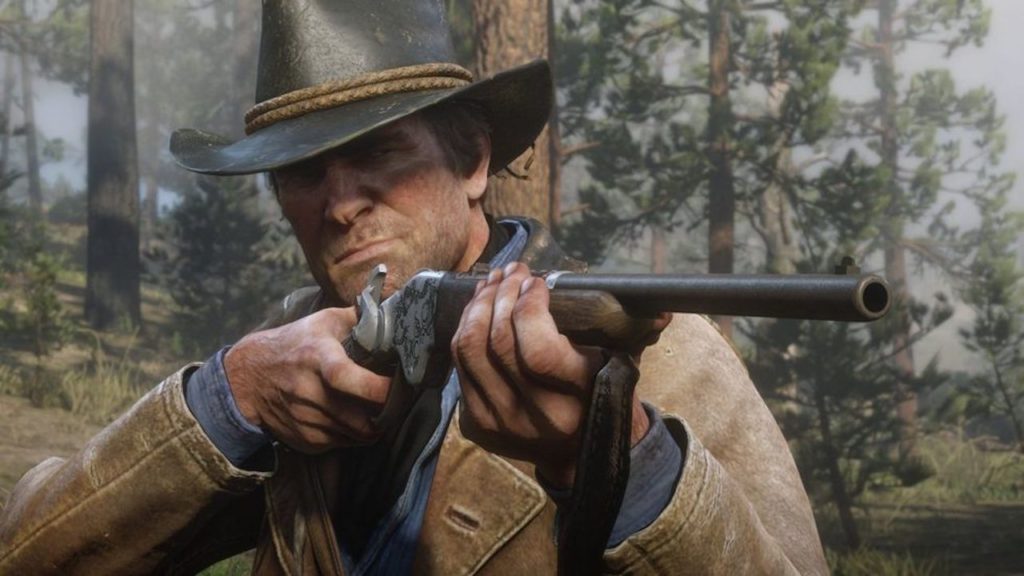
How to play Red Dead Redemption 2 Online – RDR2 tips and tricks for beginners
If you’re a beginner, you’ll need to learn how to play Red Dead Redemption 2 online. We have several tricks in store for you that will make you one of the fiercest gamers in the wild west.
General Game Tips
It’s always essential to know the basics, as it will assist you to progress further into the game. We have some RDR2 hunting guides, while you’ll also see some tips on locations and weapons.
When it comes to the main and side missions, there are many that can be challenging to new players. We made sure to include some tips for Red Dead Redemption that revolves around some of these quests.
If you want to master the game quickly, you’ll need to learn how to play Red Dead Redemption 2 with all the available weapons. Fortunately, we have a few guides that will help you along the way.
To end our segment on how to play Red Dead Redemption 2, we want to share some gaming news we found along the way. It’s always intriguing to see what’s happening with RDR2, and maybe one of these articles will pique your interest.
As you can see, we’ve put a lot of time and energy into showing you how to play Red Dead Redemption 2. We hope these articles have helped you learn how to master hunting, weapons, and fishing. We wish you the best of luck with this exciting game!
When you delete a message or email in your Gmail account, it usually stays for 30 days. Once that period is over, it vanishes from the Trash section permanently. That could be an issue if you’ve accidentally deleted a message that you urgently need access to, especially if your employer needs it.
Fortunately, there are a few ways you can recover your deleted emails in Gmails. We’ll cover four ways that it’s currently possible. We’ll also show you the difference between deleting and archiving messages so you can see which one is best for your situation.
Recover deleted Gmail emails easily
Recover deleted emails from your personal Gmail
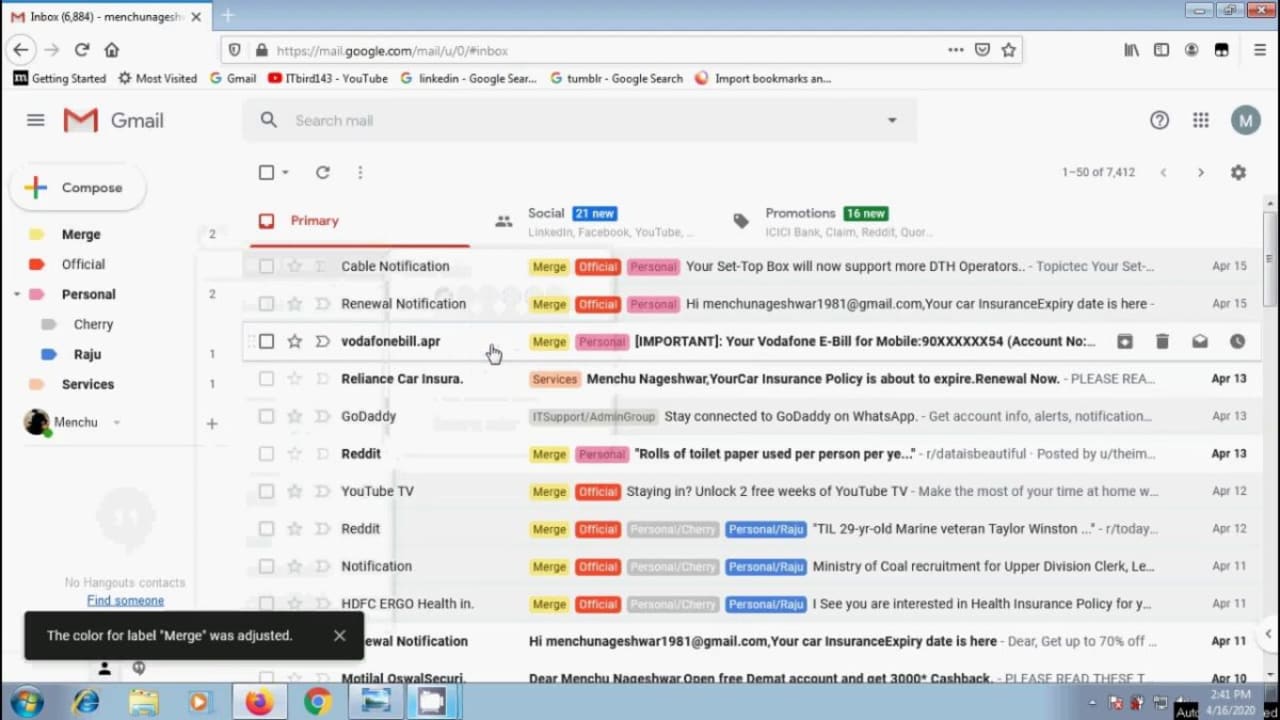
If you have a personal, free Gmail account, all your deleted emails go to the Trash. Finding all your deleted emails is as easy as looking at the options in the left pane, clicking on More, and then locating Trash.
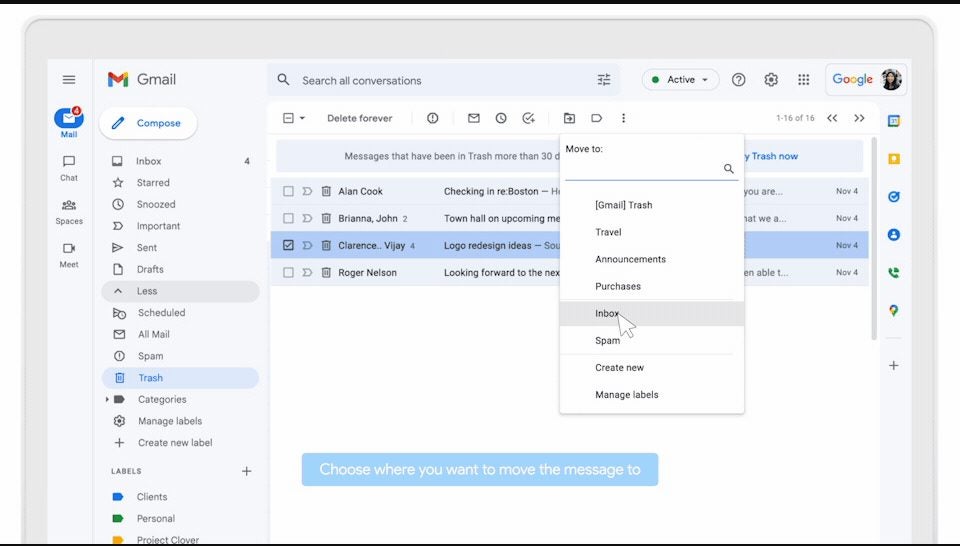
When you select the Trash icon, you’ll see all the emails you’ve deleted in the last 30 days. You can select one or many messages with the small check boxes to the left of the emails. Once you choose the email you want to recover in Gmail, simply click on the “Move to ” label at the top. You can select the Inbox or any other folder you created.
Restore Gmail messages with Admin Console
If the Gmail account forms part of a corporation’s package, there’s a good chance the IT team can use the Admin Console to recover Gmail messages. You have 25 extra days over the initial 30 days before the system permanently deletes the emails.
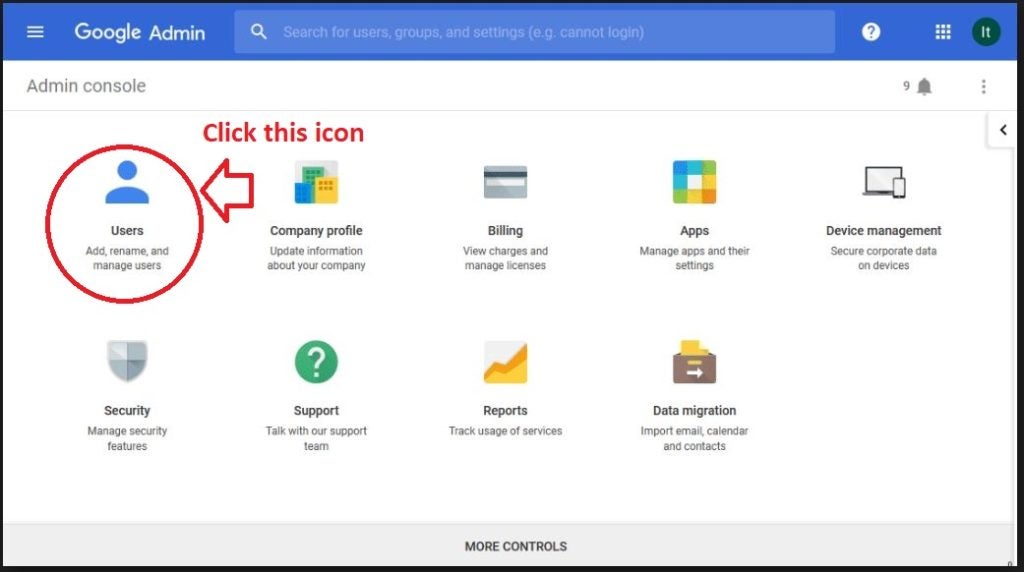
From the administrator’s account, log into the Admin Console. Head to the User sections, and then locate the specific user account for the emails. When you find it, select the user’s name, then click on More Options > Restore Data.
You can select the emails with the check box or search for a specific range to help you locate the messages. You should also tell the system you want to restore emails for Gmail, and then click on Restore.
There will be a message asking you to confirm that you want to restore the selected data. When the process begins, it may take a few days before the user sees the messages back in the Gmail inbox.
Retrieving data with Google Vault
If emails are older than 30 days, and then the extensive 25 days thereafter, the final solution you have for recovering deleted emails in Gmail is using Google Vault. The admin team will need to create an account for GVault first before they can begin using it, linking it to the Admin Console account for the organization.
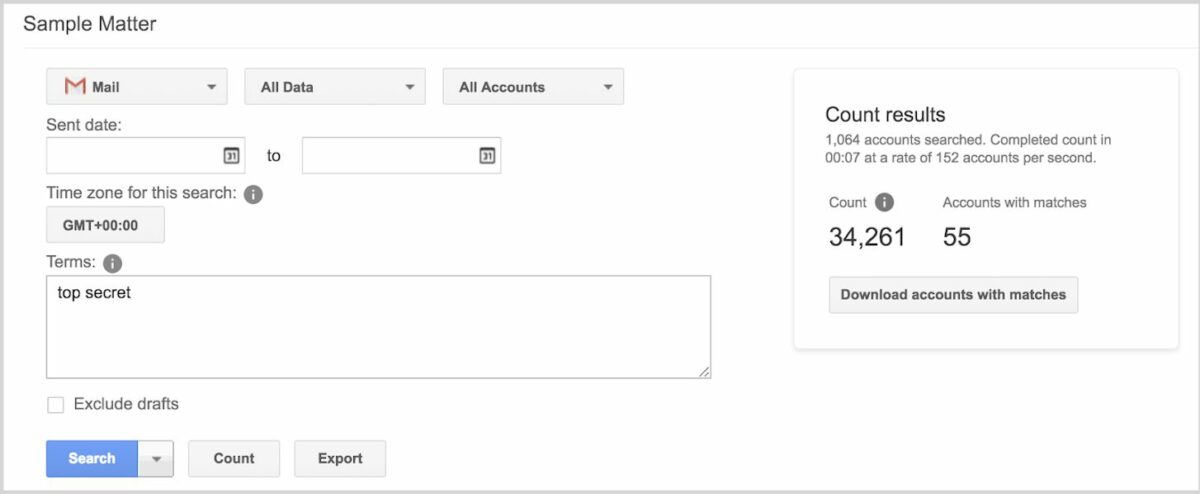
Now you can sign into Google Vault with the relevant Google Workspace account. The next step is creating a Matter, which will help you search for and then export the specific content. Once the Matter is established, you can open the search tab.
There are various factors you can search for. These include content type, content text, user names, ranges, and specific phrases. You can also exclude drafts if you only want to see emails actually sent via Gmail.
To make sure you don’t go through too many results, be sure to refine your search. You can also preview the results to find a specific deleted email much quicker. If you want to perform the same search in the future, make sure you save the search query in the Vault.
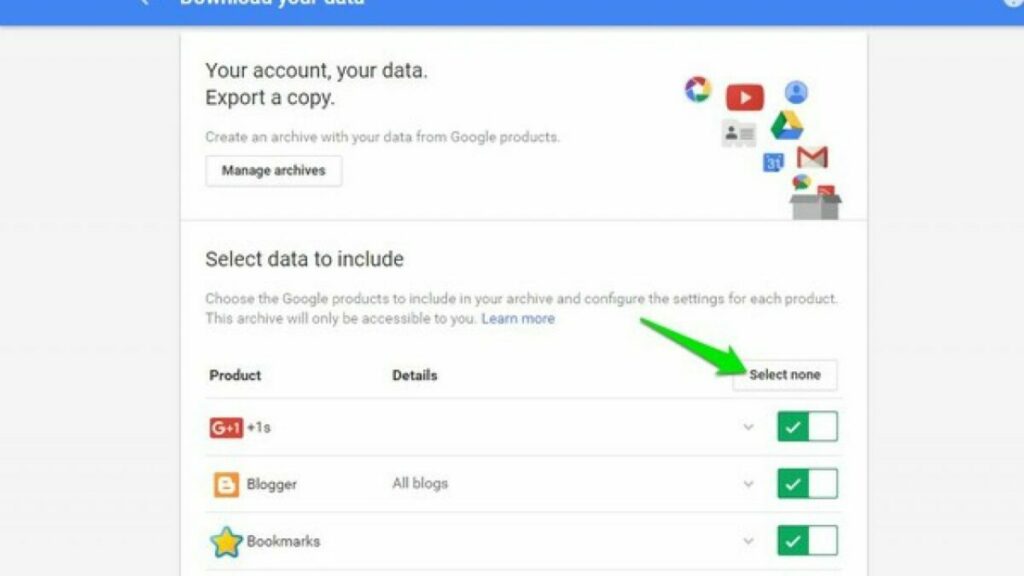
When you’re finally done and found the deleted emails you want to recover from Gmail, just select the Export button. You’ll receive a compressed file with all the metadata and content of the email, downloaded to your computer. It won’t return to the user’s Gmail account.
Difference between deleting and archiving messages in Gmail
To avoid the hassle of recovering deleted emails in Gmail, you should rather archive messages if you feel you may need them again. By doing so, you’re simply hiding emails from your Inbox of folders so you can declutter them. It’s one of the top ways to be productive when using Gmail for work.
10 Gmail add-ons to enhance email productivityREAD MORE
Here are some examples of when to delete or archive emails in Gmail.
When to delete emails
You don’t ever intend on reading or using these emails ever again
Removing spam emails from your Gmail Inbox
To clean storage space when you start getting the message that your Gmail account is almost full
When to archive emails
To keep emails you intend to retrieve sometime in the future
Save your sensitive data or content you don’t want to lose (consider moving them to GDrive)
After finishing a conversation in an email thread, but you may want to continue it another time
Cleaning your Inbox without losing important information or messages
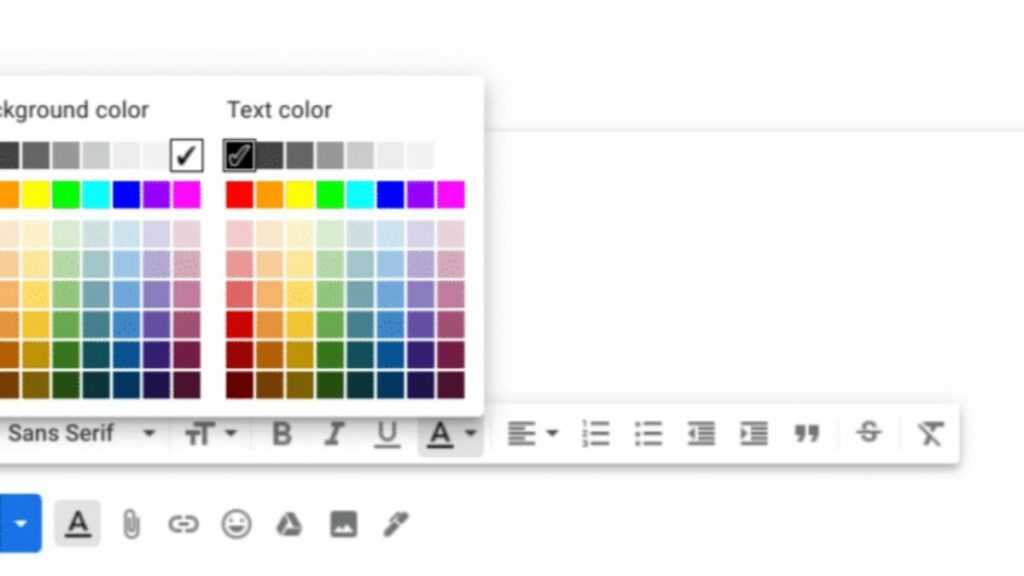
Organize your emails with color-coded labels
Another way you can avoid deleting important emails in Gmail is by using color-coded labels. By doing so, you’ll have a quick view of which messages you need to keep and which can go. Organizing your emails in this way also means you won’t need to recover emails in the future unless you make a mistake.
There’s a vast array of colors you can use, and we recommend you find a system that works for you. If you’re part of a team, you can discuss which colors to use for specific categories. It’s excellent for collaborating, and you’ll also know where all your pertinent information is. If you want to take it a step further, you can even create a label for emails you want to check before you delete them.
Read our complete guide on how to color-code Gmail labels.
Organize your inbox with Gmail color-coded labelsREAD MORE
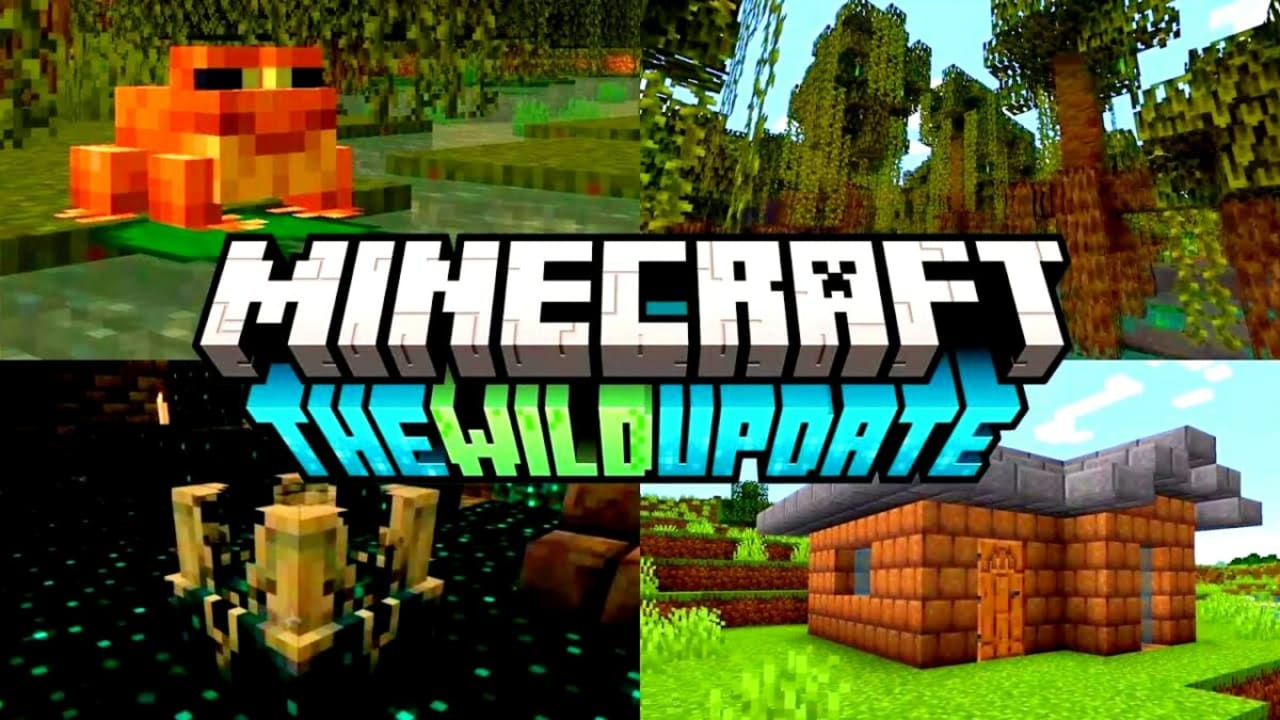
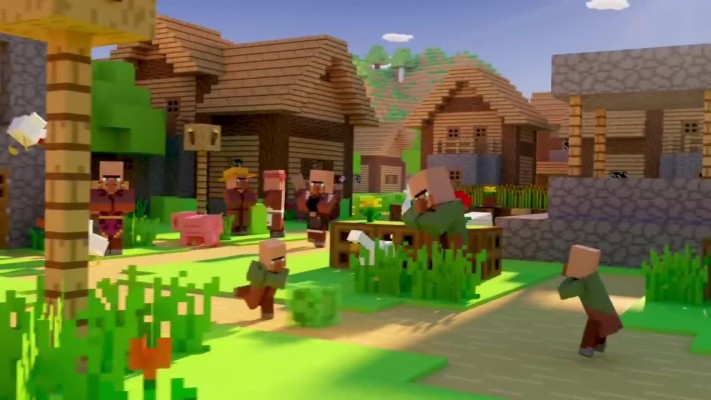
Minecraft has been around for more than a decade now, and we’ve seen so many changes since then. The latest updates were Caves & Cliffs and The Wild, introducing massive dungeon and cave areas with plenty of new items and mobs. Mojang has ensured that we remain fixed to our screens with all the latest content.
No matter how long you’ve been playing, we’re sure there are many cool things you didn’t know you could do in Minecraft. Some of them are basic and make your virtual life easier, while others are more advanced. Let us know how many of these secrets you already knew about and how many were new to you.
Candles on crafting tables
I remember the first time I tried to place a candle on a crafting table in Minecraft and failed. The issue is that the place-object and open-object buttons are the same. So, when you try and put the candle down, the crafting table opens. Here’s a tip: crouch down and then place the candle. The game understands you’re trying to put the candle on the table.
If you’re new to making items, check out our guide to crafting in Minecraft.
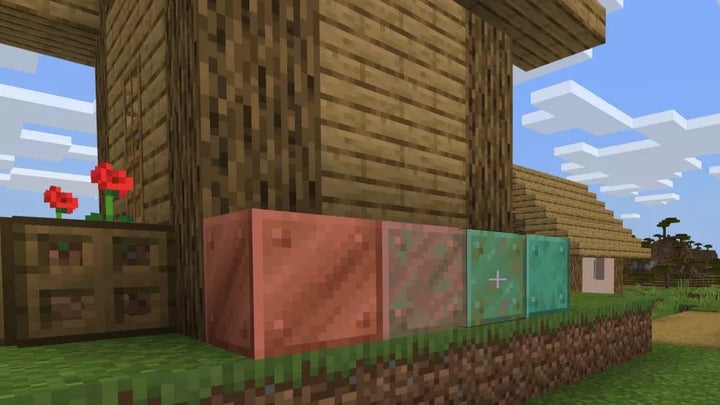
Coal is sometimes challenging to find when you need it the most. I usually head to the closest caves and chop until I find a cluster. However, you may be in a panic and need a fuel source quickly. The different types that work are sticks, tree logs, charcoal, and lava (from a bucket). Each type burns at a different speed, so you’ll need to use them for the right occasions.
Once you get the hang of using the smelter, here’s a guide for what you can do with copper in Minecraft.
What Can You Make with Copper in Minecraft?READ MORE
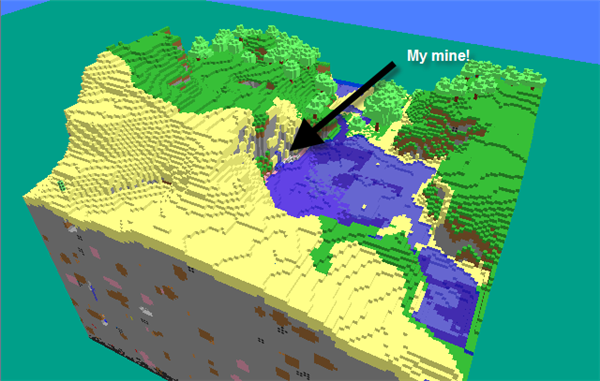
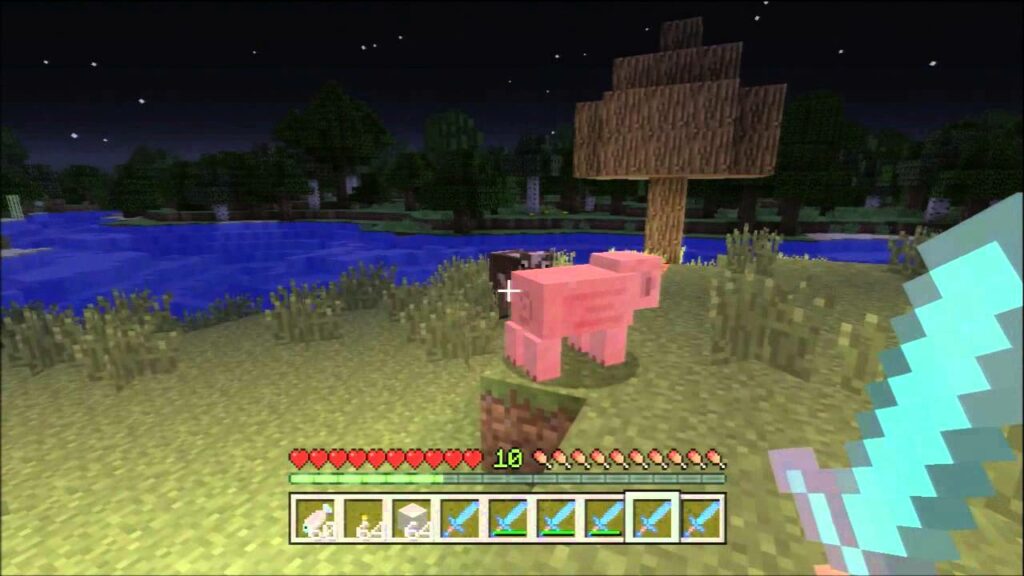
The Mushroom Biome is a safe-zone
Tired of running from the mobs at night, but you still want them to appear so you can fight them one day? Instead of changing Survival Mode to peaceful, see if there’s a mushroom biome nearby. For some reason, the mobs don’t spawn during the night in this area, which means you can mine, farm, and build as you wish.
Now that you can explore in peace, you may want to see our Minecraft mining guide.
Water, as in real life, is a valuable resource in the game. While you won’t be drinking it, you’ll certainly use it for farming in Minecraft so your crops can grow strong and healthy. You can also place a water block on the top of a cliff and use the resultant waterfall to drop down or climb up. For the more advanced player, water is essential when mixed with lava to make obsidian blocks. Also, don’t forget your potions!
Since you need water so much, it’s helpful to have an endless supply near you. All you need to do is dig a 2 x 2 hole that’s only 1 level deep and place two buckets of water diagonally from each other. They’ll fill the other two holes endlessly. When you take water into a bucket from one space, wait until it fills again before you take another one.
Light up your home with chandeliers
Why settle for normal candles and lights when you can make a chandelier for your home? All it takes is configuring a chain or block from the roof, with an assortment of fences or glass panes constructed in a way that’s appealing to you. You can then use different light sources to light up your abode. The glass panes tend to reflect the light, making your chandelier deliver more light.
Crafting Minecraft bodyguards
You don’t have to defend your homeland by yourself! There are two active mobs you can create that will walk around and battle any enemies they find. The first is an iron golem, made from four blocks of iron and a carved pumpkin as the head. You can also have a Frozen experience with a Snow Golem, stacking two blocks of snow with a pumpkin head.
Keeping Creepers at a safe distance
If you’re new to Minecraft, Creepers are those green mobs with no arms that explode as soon as they are close enough to you. They can destroy entire homes and structures, leaving you in tears. Fortunately, Creepers hate cats. So, fill your home and farm with these adorable kitties, and you and your home will be safe.
Of course, you’ll need to learn how to tame a cat in Minecraft if you want to succeed at this goal.
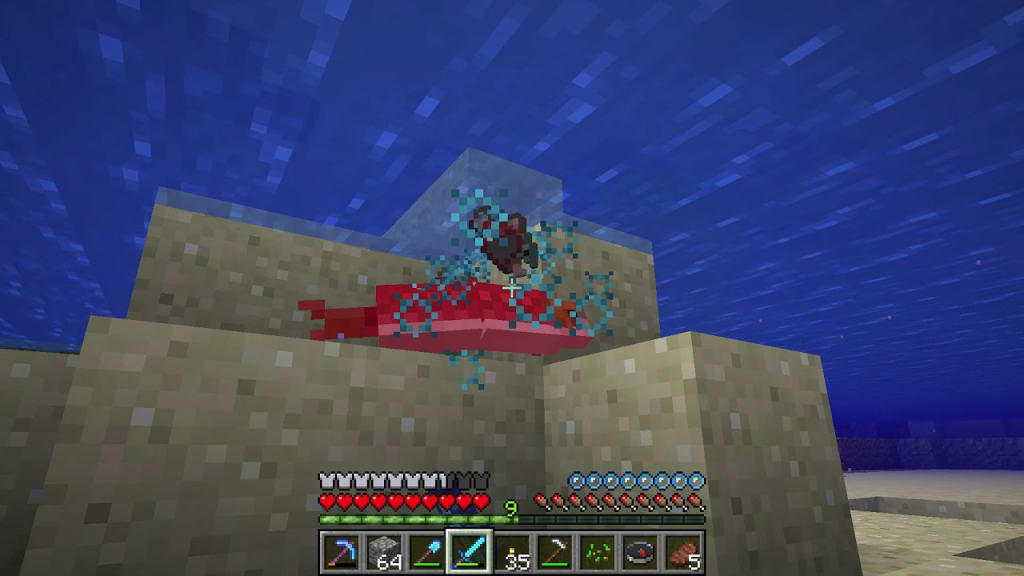
When you defeat a Blaze in the Nether, they drop glowstone dust. This resource is handy for making glowstone blocks, which is another source of light. You can also make powerful potions. However, the Blaze can be challenging to defeat if you use standard weapons. We recommend making snowballs from the snow in the Overworld, as they’re weak against them.
I also recommend you learn how to make a shield in Minecraft to protect yourself from damage until you defeat the Blaze.
If you’re like me, you’ve tried to make tall castles and walkways in Minecraft. The problem most of the time is stepping too far off a block and tumbling to your death. Did you know that crouching can save you from this dilemma? If you crouch, you can move slightly off the block and attach other blocks without falling.
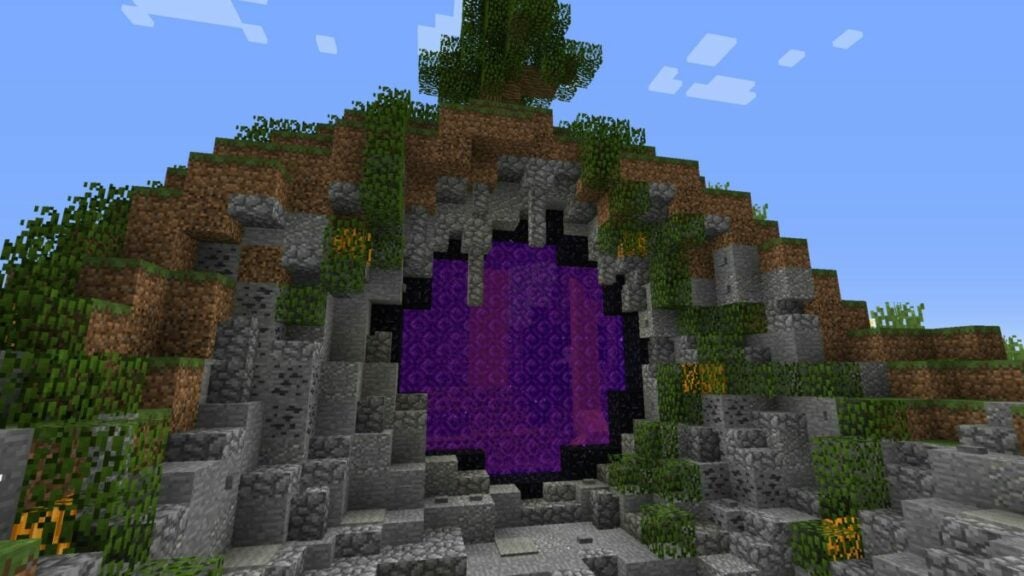
Teleporting with a portal
Here’s a trick I’ve used to quickly travel far distances in the Overworld. Distance isn’t the same in the Nether, which is where two Nether portals or more come in handy. If you place two close to each other in the dark underworld, you’ll reappear at a longer distance in the Overworld. It’s a fun trick to use when you’re traveling across several maps.
To create a Nether portal, you’ll need to chop obsidian blocks and arrange them in a specific way. So make sure you learn how to find diamonds in Minecraft, as you’ll need a diamond pickaxe for the task.
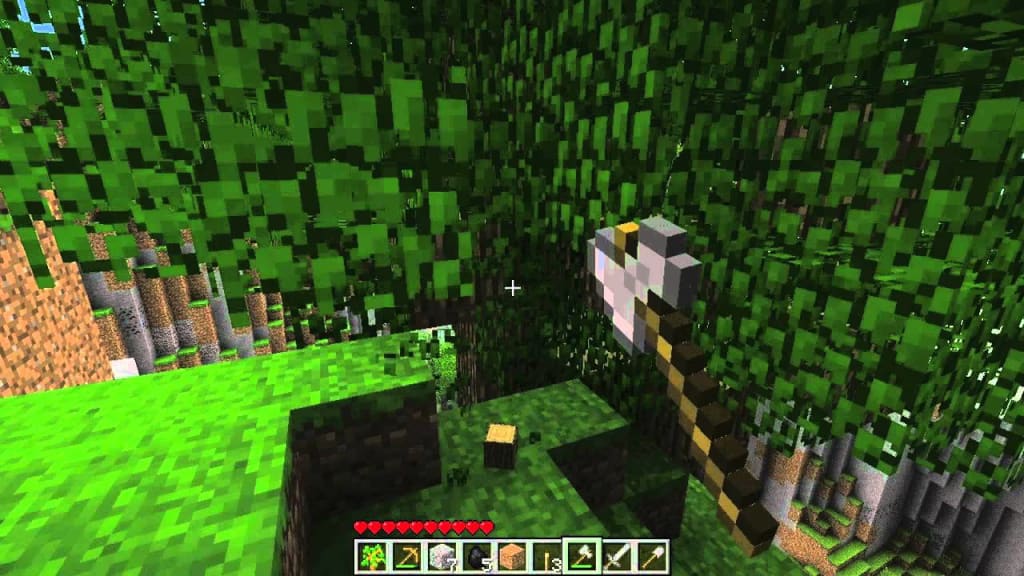
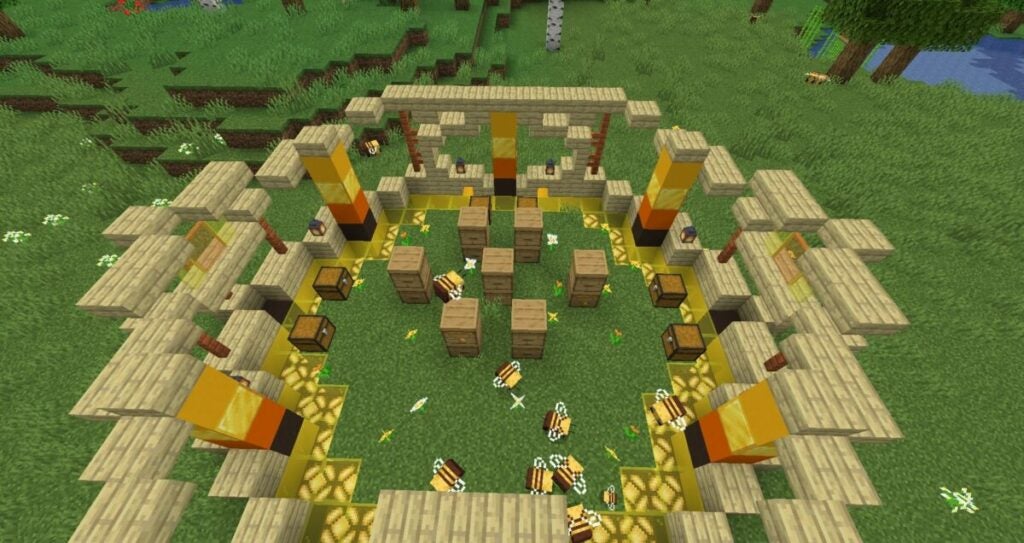
When the bee update appeared in Minecraft, players went mad taming and collecting them. Well, I did, anyway. The only issue is that they tend to fly away to the closest flowers to produce honey. If you want to keep them nearby, there’s a simple trick.
Build glass walls up to about nine blocks. Make sure you have flowers on the grass within the perimeter, and there’s no harm in having a tree or two nearby.
The bees will try to head back to their hive when they’re done collecting. I recommend you make a hive box and place it on a tree or glass block. The bee will immediately move towards it, transforming it into a home. You’ll see honey dripping from it eventually.
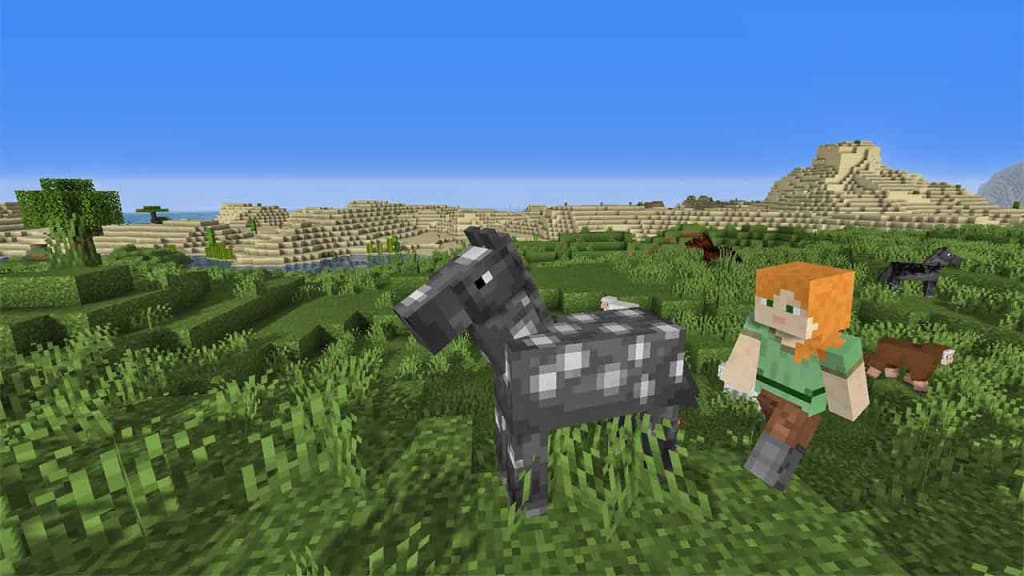
Horses have different speeds in Minecraft
I know what it’s like to become attached to the first horse you find. It’s a lovely feeling when you tame a horse in Minecraft, and you never want to let go. Did you know that different horses have different speeds and health? Try to tame as many as you can until you find the fastest one to cross the terrain quicker.
Let’s get back to me creating a castle. I spent days in Survivor Mode mining and making castle walls around the boundary of my land, making sure no one else could get in. Thanks to a Minecraft book I bought, I learned you can make a portcullis gate that actually works. How it works is there are sticky pistons at the bottom that lift and drop the gate, with loose gravel at the top. To make this work, you’ll need to study our Minecraft Redstone guide.
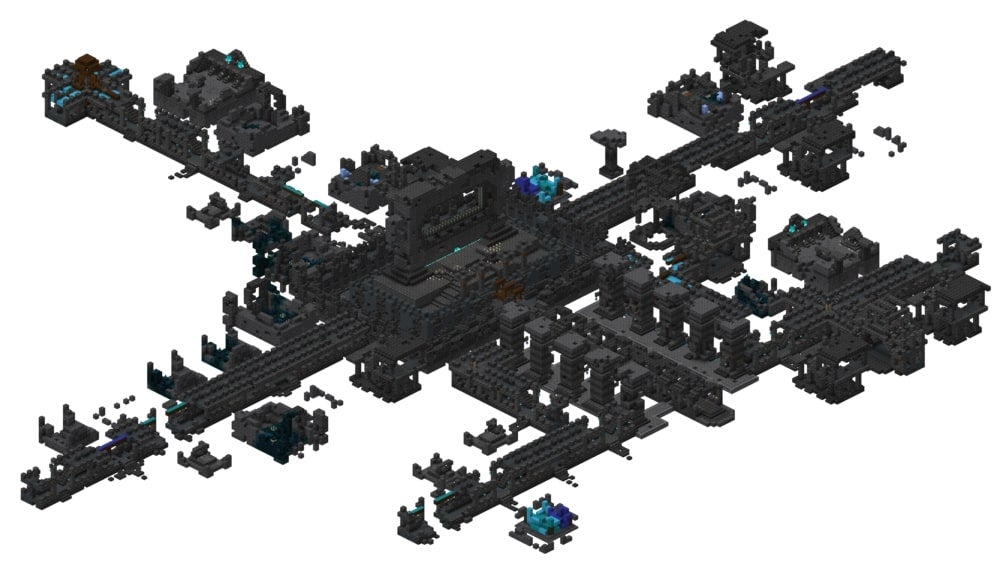
When The Wild update was released for Minecraft, we were all excited about the new mobs that appeared. One of the more obscure items you’ll have to hunt for is called Ancient City. It’s usually located at level -52, which means you’ll need to dig quite far down to find it. It has a vast layout and design, and you’ll spend hours investigating its halls and loot.
The first Minecraft ‘The Wild Update’ releases to Java Edition with snapshot 22w11aREAD MORE
iTunes gives you an easy way to create playlists with your Apple music library so that you can group songs you like in specific categories. You can have folders for work focus, studying, exercising, painting, and any others that your heart desires. If you’re a newcomer to the app, it may be challenging to work out how the playlist feature works.
In this short guide, we’ll show you how to create a playlist on iTunes on various platforms. Also, there are some tips at the end on how you can customize them, so stay tuned!
Is making a playlist on iTunes useful?
Listening to random music can be entertaining, but sometimes, you hit those tracks that you just don’t want to hear at the time. When you create a playlist in iTunes, you set the mood for the rest of the day, getting you exciting for the heavy workload ahead. You can also organize them per theme, depending on the inspiration you need for the day.
With the latest iTunes 12, you can also group your songs in a playlist folder to burn to a DVD, CD, or USB. There’s a Smart Playlist feature that quickly adds songs that matches the criteria you choose. Finally, the Genius Playlist adds similar tracks to the ones you’ve placed in the folder.
How to create a playlist on iTunes
There are different platforms you can use to create your playlist on iTunes, namely, iPhone, iPod, and a Mac computer. We’ve provided steps for each of these devices here below. Remember, you need to be signed in to your Apple account to perform these functions.
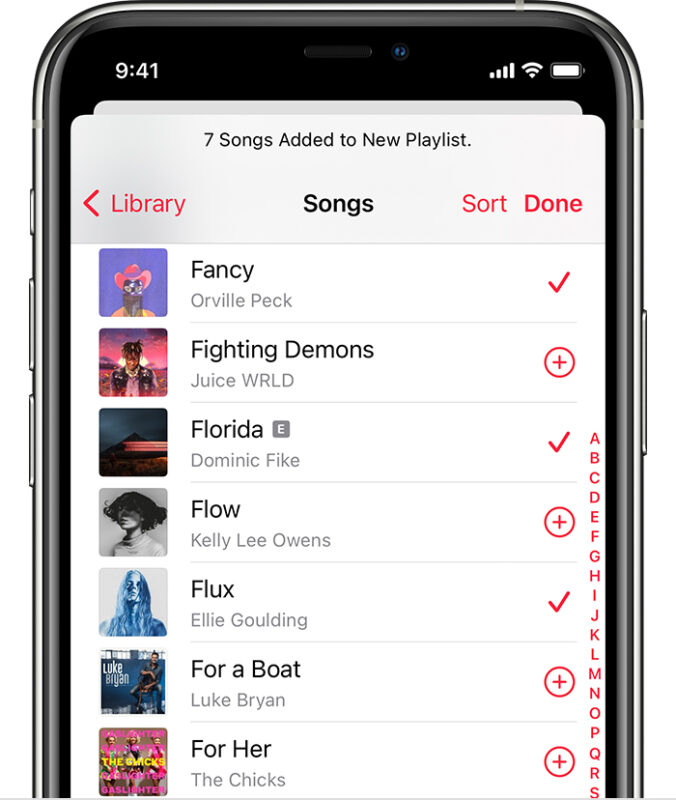
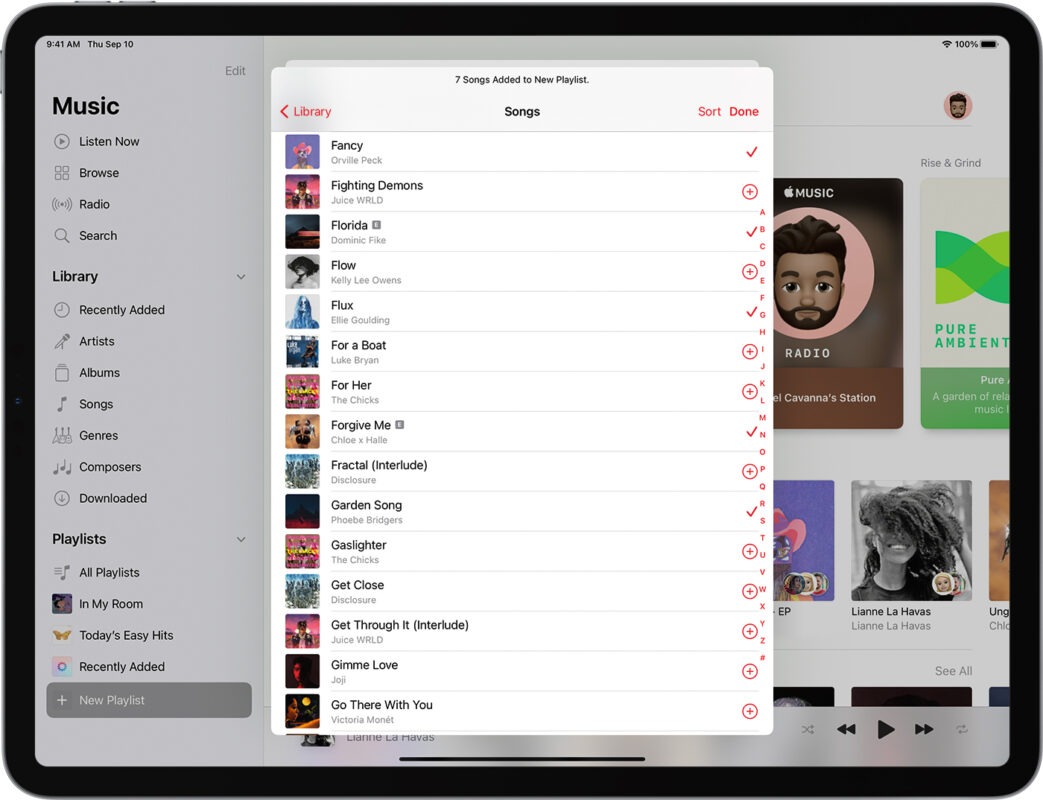
Make an iTunes playlist on your iPhone
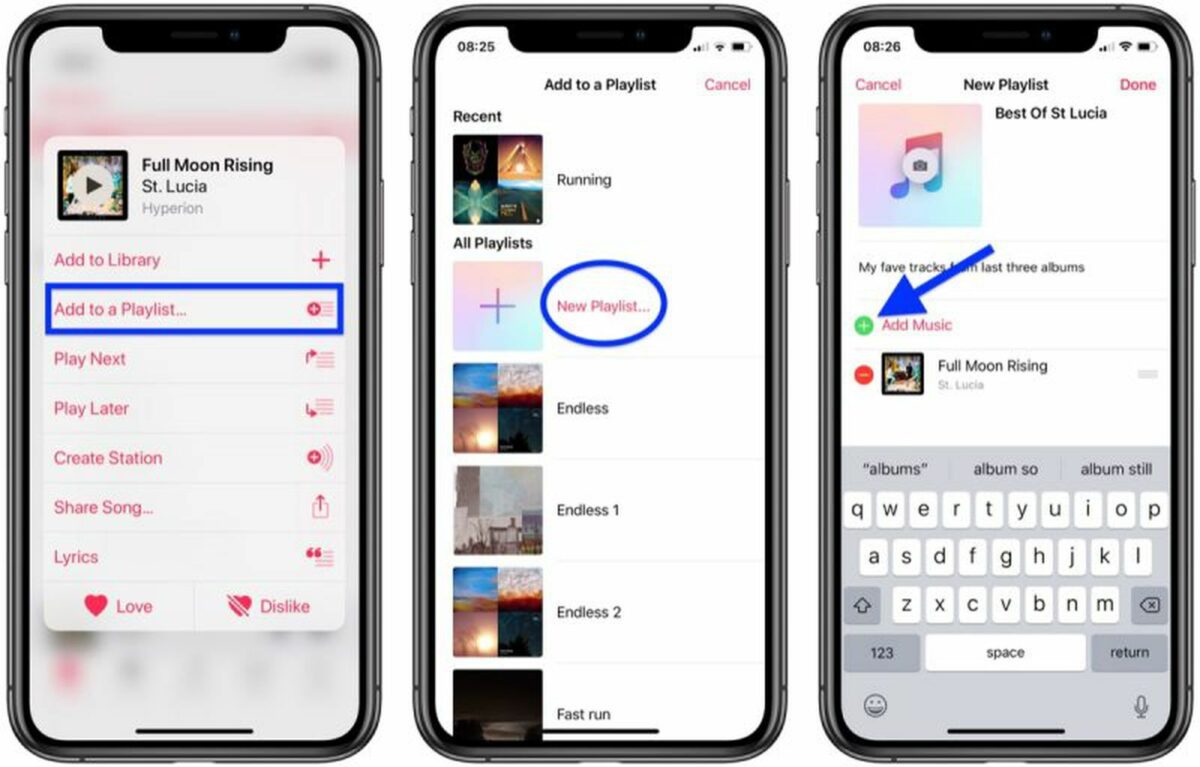
Firstly, open iTunes or the Apple Music app on your iPhone. If you look at the bottom of the screen, you’ll see the Library icon. Tap on it and then head to Playlists and then select New Playlist. You’re now ready to create a playlist for your iTunes library.
Give your new playlist a name you’ll remember for a specific event, such as Work Music. When done, tap on the Add Music button. You’ll now need to work through your iTunes library to see which songs you want for that playlist. When you have all the tracks loaded, select the Done icon.
If you already have a playlist created, you can hold your finger on any song in your library for a new menu to appear. You’ll be able to add tracks to your playlist that way going forward.
Make an iTunes playlist on your iPod
The menu is slightly different for your iPod. When you open your Apple Music app, you’ll have a sidebar in the menu. Head down to the bottom until you find + New Playlist. As before, you’ll need to give it an appropriate name and then start selecting the songs you want.
You can also use the long-hold feature on songs once you have a playlist created. This time, your iPod will show albums and playlists in a sidebar. To move the song to a specific playlist, you only need to drag it over to the folder.
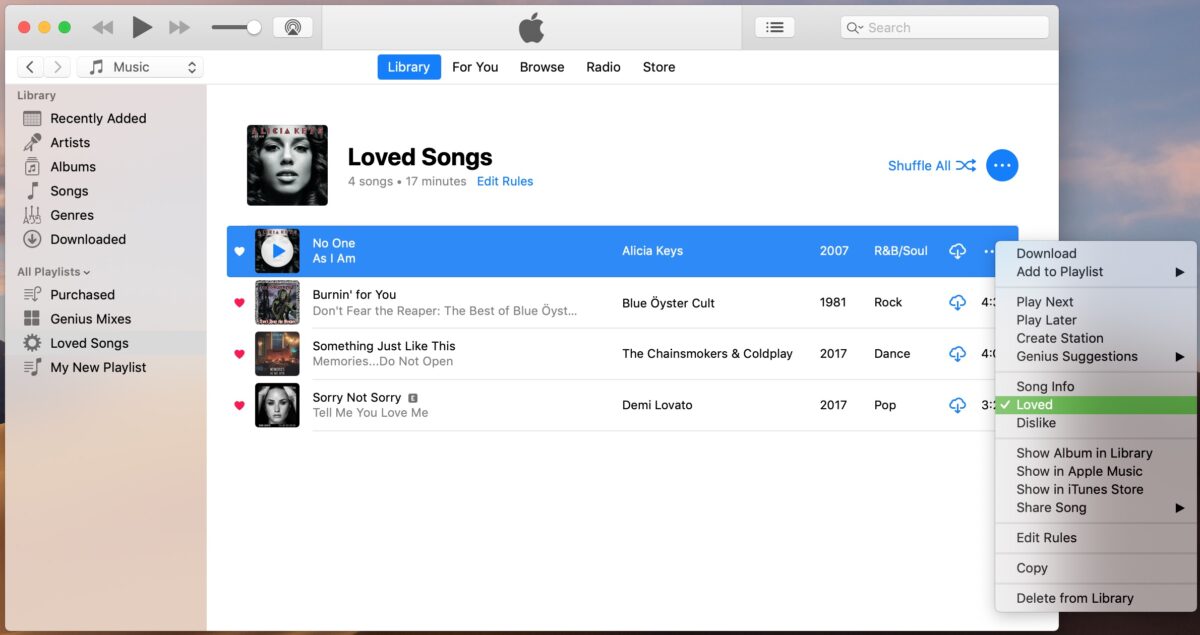
Make an iTunes playlist on your Mac computer
For your Mac computer, you’ll have a similar process for creating a playlist on iTunes with minor differences. Once inside your Apple Music app, head to the main menu bar. Select File, then click on New. One of the options that appear is Playlist, which you’ll need to choose.
After you give your playlist a name, the process of placing songs in the folder is different. You’ll see your tracks appear, and you’ll need to click, hold, and drag them over to the playlist. After that, you can just use the same drag-and-drop function to add music to it.
Customizing and removing a playlist
It doesn’t matter which device you’re using to create a playlist on iTunes. You have the power to customize and edit the contents at any time you want. Just access the playlist on your device to make the necessary changes.
Here are the top ways you can edit your playlist on iTunes:
Rename: change the playlist name to something else
Reorder: move songs around so you can listen to them in a different order
Remove a song: delete the track only from your playlist and not your Apple Music library
Delete the playlist: remove the playlist completely if you’re no longer interested in it
And there you have it, the basics to adding a playlist to iTunes. If you want to take it a step further, you can check out our master guide to iTunes playlists. There’s also a way to add podcasts to your library if you enjoy listening to them.
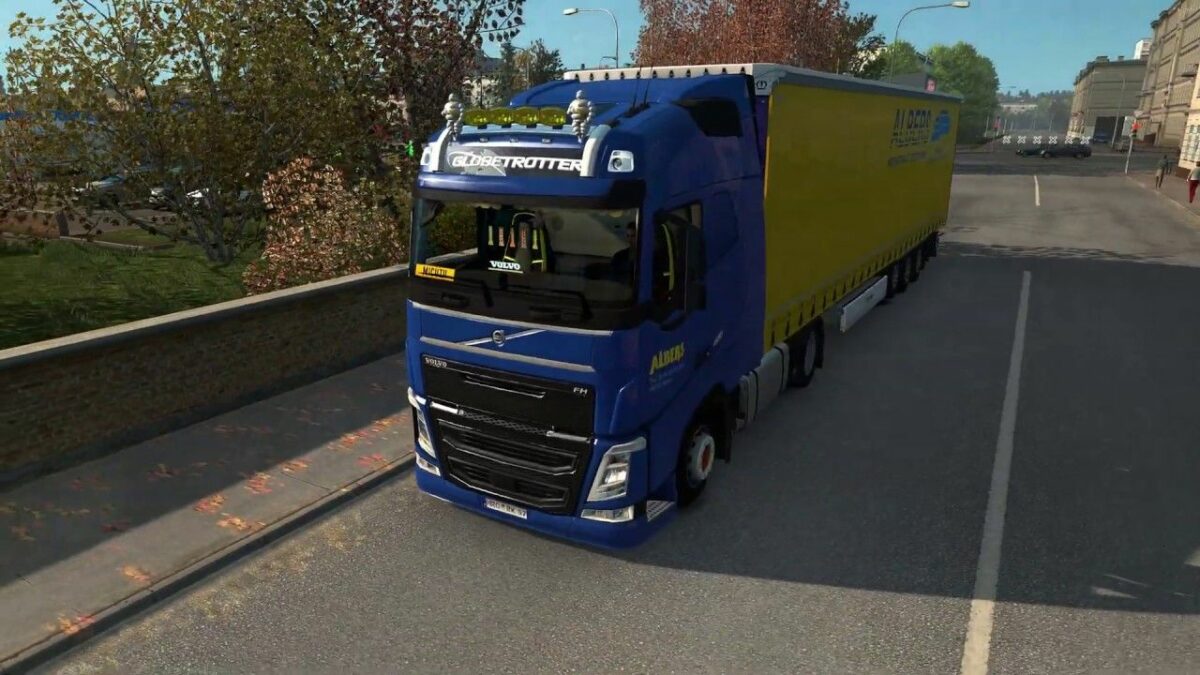
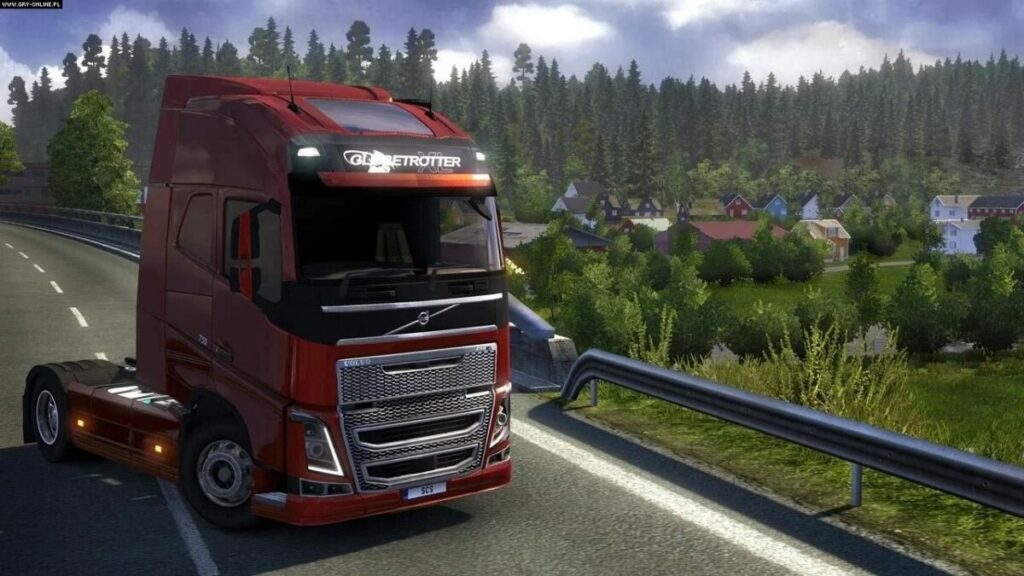
Euro Truck Simulator 2 initially launched in 2012, but there have been plenty of DLC packs since then. What started in the UK has eventually stretched into France, Germany, Poland, and so many other European countries. ETS2 is so well loved by the gaming community that many developers have made mods to improve some game mechanics and add items.
If you’re like me, you’ve probably never modded a game in your life, as you prefer the original version. However, you may have stumbled upon a mod that looks quite interesting. If it’s your first time, here’s a details guide on how to install mods for Euro Truck Simulator 2 and where you can find them.
What do Euro Truck Simulator 2 mods do to the game?
Like most mods, the ones for ETS2 change the way you play the game or add items not available in the original version. For instance, you’ll find new trucks and vehicle customization parts, or perhaps some skins. Others add local radio stations when you enter a new city or country. There are also improvement mods that upgrade visuals, sound, or movements for more realism.
Where to locate and download mods?
There are a few locations where you can find Euro Truck Simulator 2 mods. The official method that works the best is via the Steam Workshop, which we’ll explain in the step-by-step guide below.
There are also websites that collect ETS2 mods that you can download and install, such as https://ets2.lt. Softonic also has a few mods you can try out:
How to mod the ultimate trucking game, Euro Truck Simulator 2
Once you’ve found the mod you like, here are the steps to install mods for Euro Truck Simulator 2.
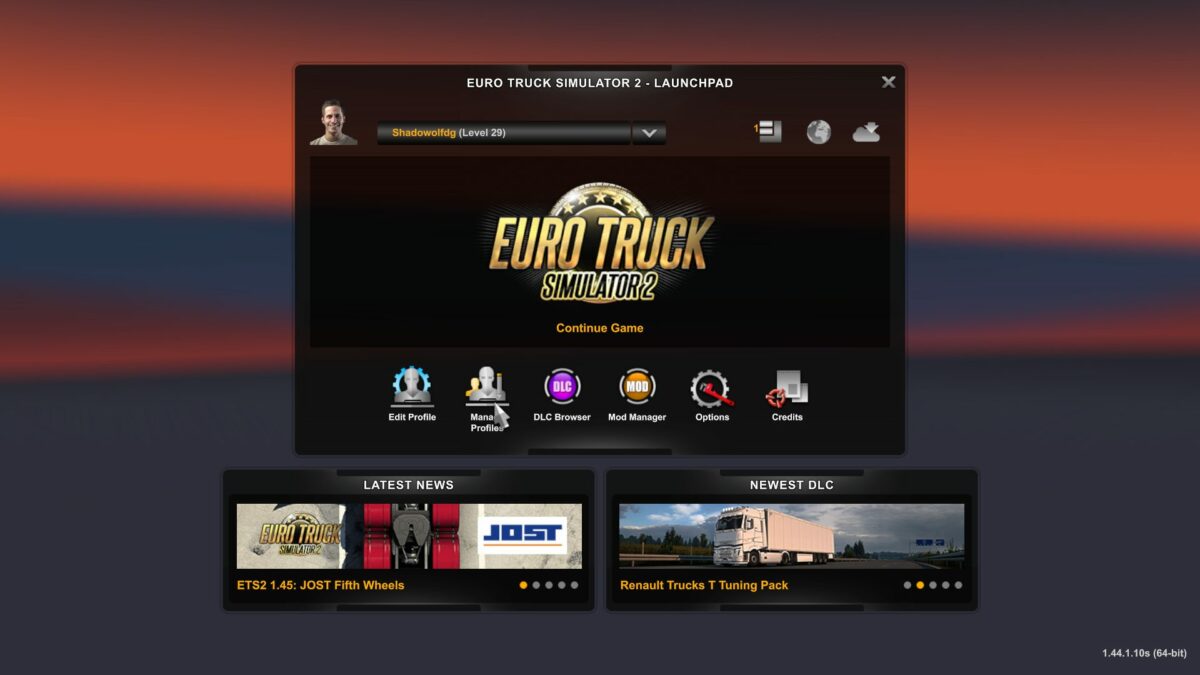
Open ETS2 and Manage Profile
The first step you’ll need to take is opening Euro Truck Simulator 2 from your Steam platform. Wait for the game to load, and then look at the options underneath your profile. You’ll see Edit Profile and Manage Profile. You’ll need to click on the second one.
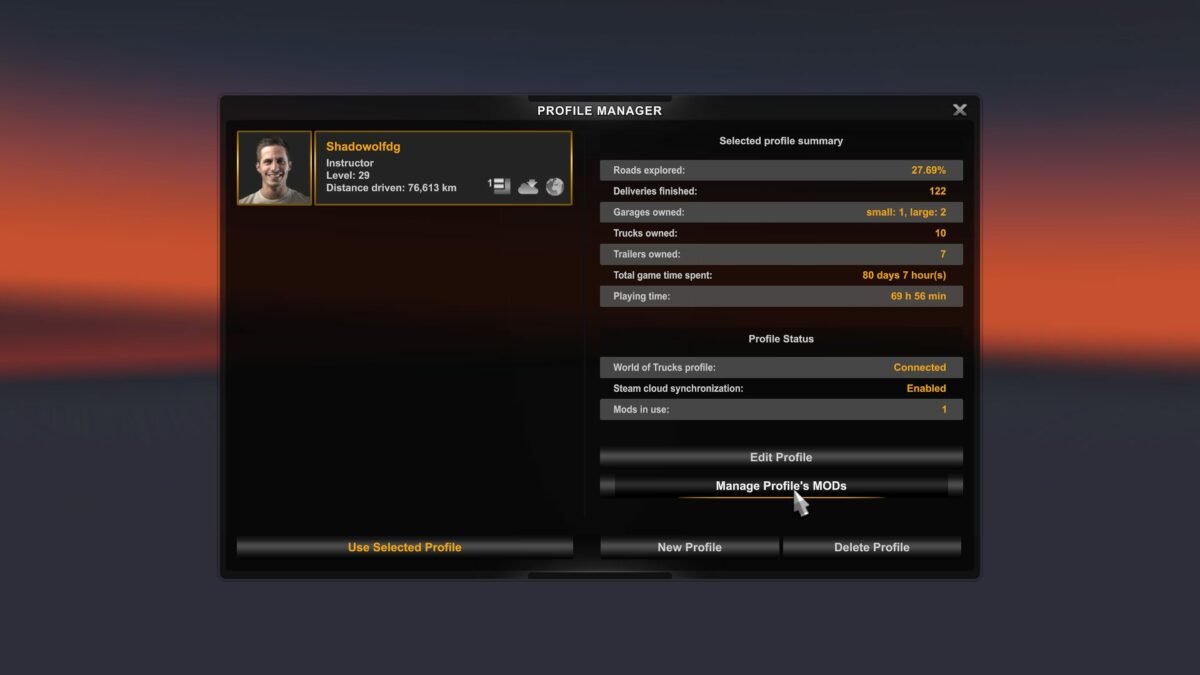
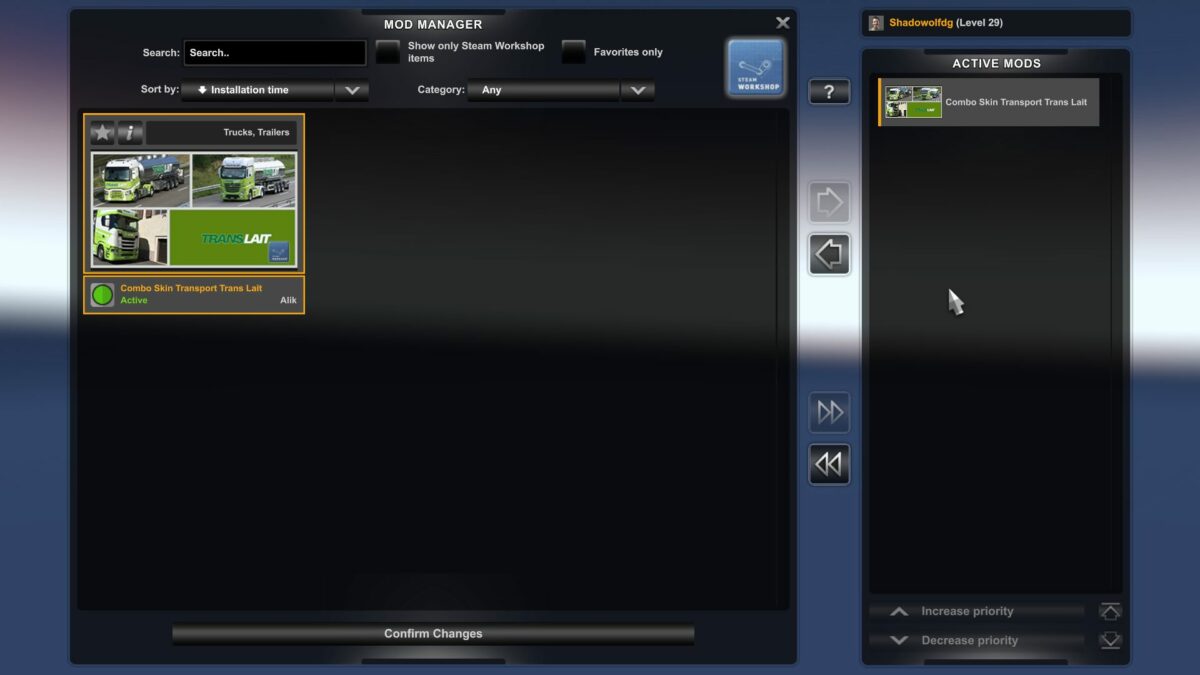
Open the Mod Manager
With your profile open, you’ll see a few buttons on the side. The one you’ll aim for is Manage Profile’s MODS. Just above that, you can actually see if you have any mods available at the moment.
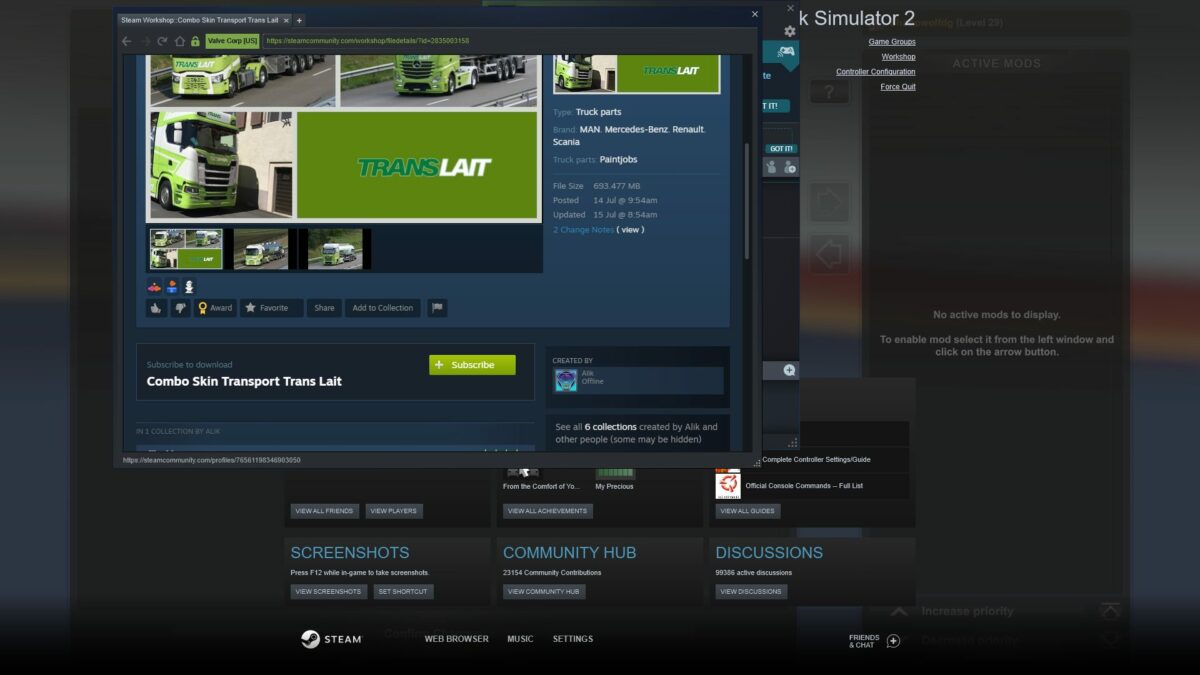
Click on Steam Workshop
You’ve now entered the Euro Truck Simulator 2 mod manager. If this is your first time installing a mod, this space should be empty. Take a look at the top right corner of the screen. You’ll see a Steam Workshop logo. Click on it to head directly to the ETS2 mod store.
Subscribe to a mod
You’ve landed on the haven for Euro Truck Simulator 3 mods. You’ll see various categories, such as popular or hottest, as well as a few select skins and vehicles. These are recommended mods that work well with ETS2. When you’ve found the one you like, simply click on the Subscribe button. A message will appear telling you the mod has been added.
Activate and confirm changes
When you’re done adding all the ETS2 mods you want, head back to the Mod Manager. You’ll need to select them in the window on the left, then click on the arrow in the center. Once done, click on Confirm Changes at the bottom. You can now play with your new mods. If you ever want to remove them, head back to the Mod Manager and deactivate them.
Alternative way to install mods on Euro Truck Simulator 2
The above way is the recommended method for installing mods for Euro Truck Simulator 2. However, you may come across mods not available on the Steam Workshop that you like, such as those mentioned from Softonic. The steps to follow are completely different, and you’ll need to know how to extract files and find folders.
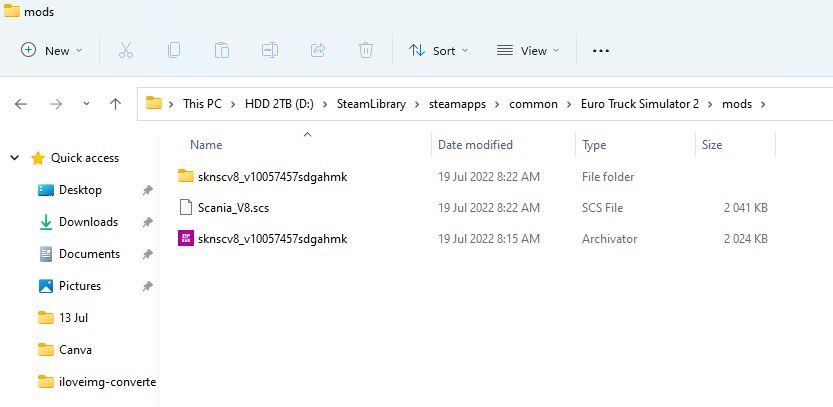
Go into Steam, right-click on the game, select Properties, head to Local Files, and click on the file location.
Create a mod folder if there isn’t one present.
Move the downloaded zip mod folder to your ETS2 mod folder.
Extract files to the new mod folder
Enabling or activating the downloaded mods
You can now open Euro Truck Simulator 2 and head to the Mod Manager as explained in the steps earlier. If you did it right, you’ll see the new downloaded mod available for you to activate. Feel free to select it and enable it.
Why is my ETS2 mod not working?
There may be a chance that the Euro Truck Simulator 2 mod you downloaded and installed isn’t showing. That means the mod isn’t compatible with the latest version of ETS2, or the mod file is faulty. That’s why I prefer the Steam Workshop method, but it’s still worth a try. All that will happen is you’ll delete the mod file that doesn’t work.
Can you play ETS2 with mods online?
Yes, the developer of Euro Truck Simulator 2 permits using mods even in the online mode. Of course, it needs to be compatible with the online version so that it doesn’t cause any issues with the server or network. Some mods are primarily designed for the multiplayer version, especially if you join a convoy or virtual trucking company (VTC).
Be sure you check the mod manuals
Some ETS2 mods are trickier to install than the ways mentioned above. Sometimes, you’ll find a mod manual you can read within the downloaded folder or on the Steam Workshop. It will guide you in any additional steps you need to take for the mod to work properly. It might even contain details for connecting to a VTC server, which is essential for logging trucking jobs.
Minecraft has been around for a long time, with thousands of gamers enjoying the game with its easy playability and exciting features. Still, there are many that don’t know anything about the sandbox title and wonder what is Minecraft and how it works.
In this guide, we’ll explain to you how to play Minecraft if you’re a beginner, helping you in the first steps you need to take. We’ll also show you some handy tips and tricks to make the experience more enjoyable.
What is Minecraft?
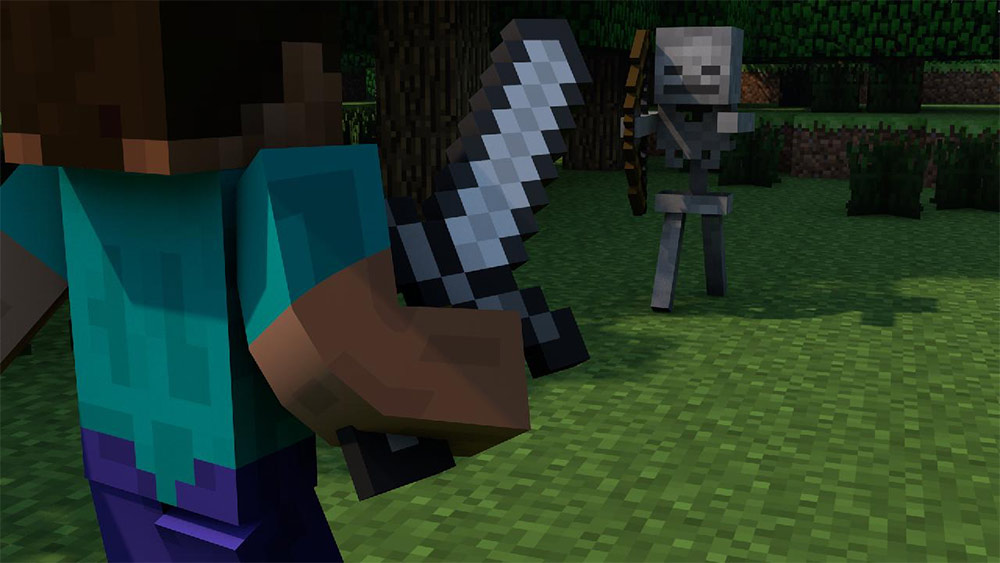
In essence, Minecraft is a sandbox video game where you can craft and demolish blocks in an open world. There are several biomes you can travel in, while you’ll come across friendly or deadly mobs specific to each location. You can either choose what to build in Minecraft Survival or Creative mode, as each setting works differently.
How to play Minecraft
Before you can play the casual video game, you need to download Minecraft for your specific platform. As soon as you have it set up, you can run it from the launcher and choose between Survival or Creative mode. There are also mini battles you can enjoy against other online players, but you may need to purchase packs to enable them.
If you select to play Minecraft Creative mode, you can choose from any of the blocks, tools, and resources to build as you wish without mining or crafting. Minecraft Survival mode has a more adventurous tone, and you’ll need to survive against the monsters of the night. You can also set it on easy mode if you just want to build without creatures attacking you.
You don’t need to play Minecraft alone. There’s also a multiplayer version where you can play with others online or join in mini-battles. You can also add mods from other players to enhance the game. Here are a few guides on how you can set it up:
Now that you have a brief idea of what Minecraft is and how it works, we have some tips on getting started. We’ll cover some of the key features here so you can get a better idea of how to play it.
What to build in Minecraft?
The number one question most players ask when starting is “What should I build in Minecraft?” You have so many options, the choices are almost endless. You can create castles, skyscrapers, volcanoes, ships, bridges, floating bases, lighthouses, and so much more! The only limit is your imagination. There are various resources you’ll need to mine to craft items, such as copper, iron, and gold.
Here are some guides pertaining to resources and crafting in Minecraft:
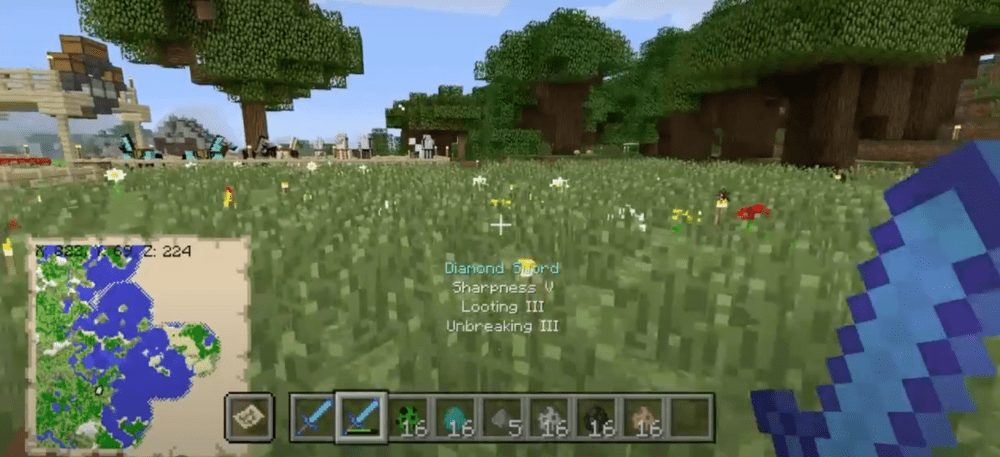
When you reach the stage of crafting weapons in Minecraft, you can apply smite to axes or swords. You’ll earn experience (XP) for crafting and fighting enemy mobs, which you can use to then enchant your weapon of choice. Smite will increase the damage dealt, making you a more powerful adversary to the creatures of the night.
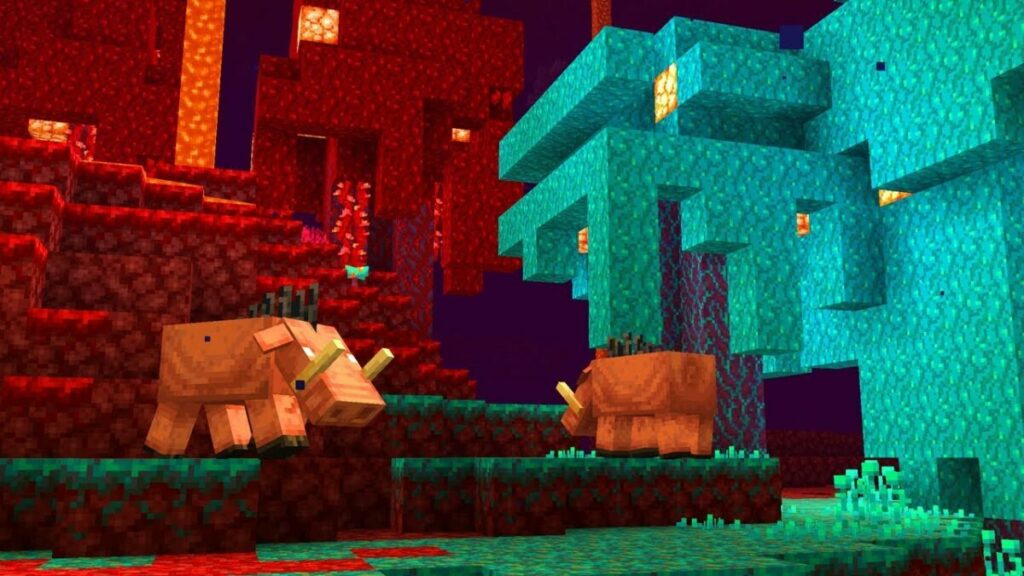
What is the Nether in Minecraft?
The normal dimension in the sandbox video game is called Overworld. You can build a portal to a hellish underworld called the Nether in Minecraft, where you’ll find lava, Netherrack, and various other creatures you’ve never met before. As soon as you need more advanced resources, you’ll need to make a base in this location to collect them for superior weapons and tools.
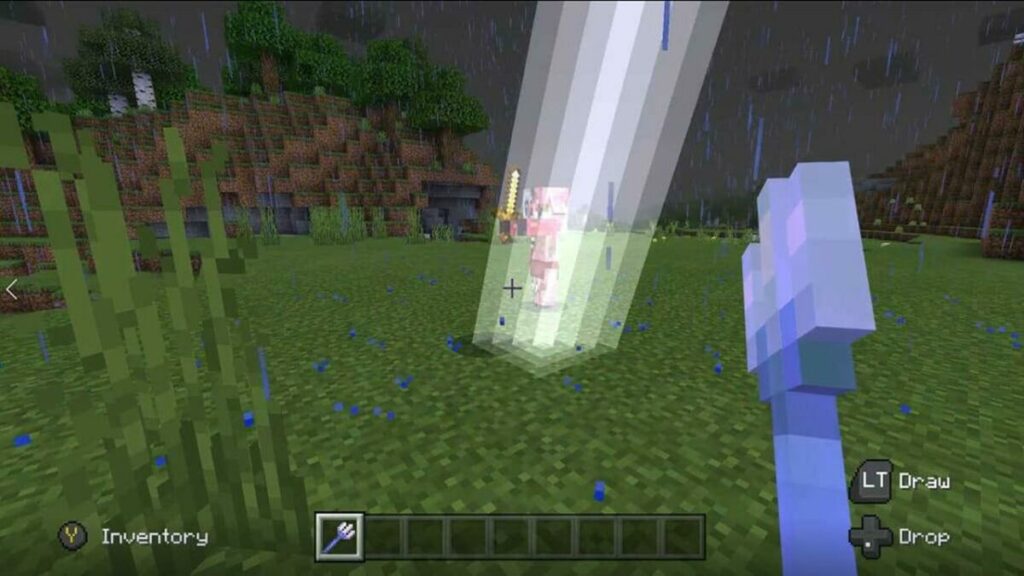
What does Channelling do in Minecraft?
If you own a trident, you can use the Channelling enchantment in Minecraft on your weapon during a thunderstorm. When it hits a creature after you throw it, a lightning bolt will emerge from the skies to strike the monster down. You’ll need open skies for it to work, and it won’t connect with the beast if you’re in an enclosed area.
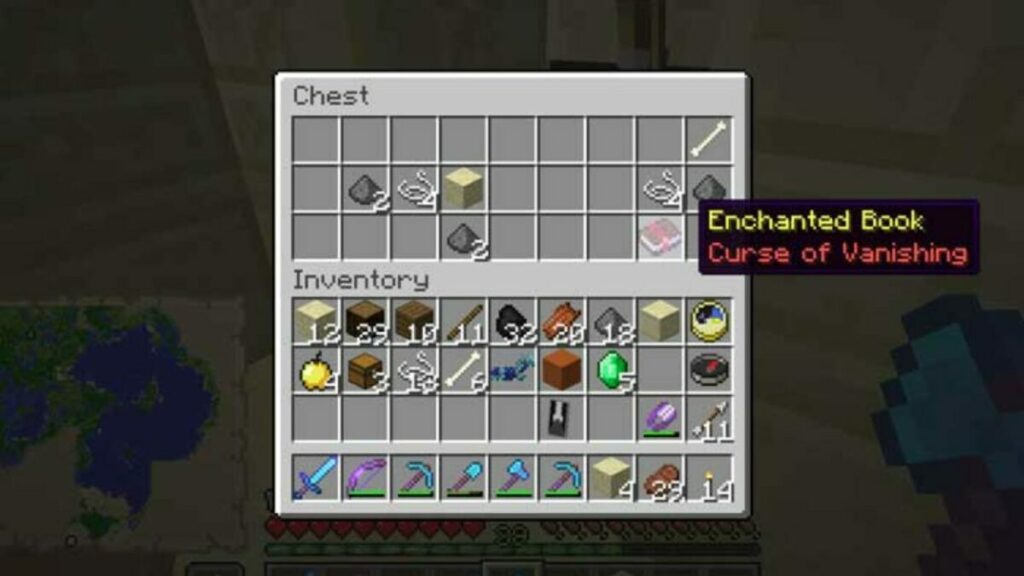
What does Curse of Vanishing do?
When playing Minecraft in standard mode, you can change the settings to enable your items to remain with you when you die. However, the Curse of Vanishing is an enchantment you may find on weapons or tools that forces them to disappear when you die. However, it only applies if you have it in your inventory upon death.
What is Unbreaking in Minecraft?
All tools and weapons wear down as you use them. You’ll see a small line under the item which indicates its durability. When it reaches zero, the item break. Unbreaking in Minecraft reduces how quickly the equipment breaks down, with longer life in higher levels of enchantment.
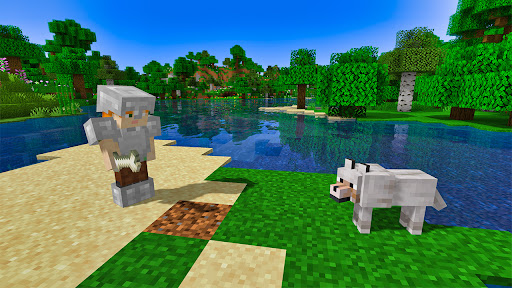
What can you tame in Minecraft?
There are plenty of animals you can tame in Minecraft, which adds to the fun of the game. They’re either for decoration around your home, or you can use them for resources or traveling. For instance, there are sheep for wool, pigs for meat, cows for leather, horses for riding, and axolotl, cats, and foxes that are just fun to have as pets. You can even breed them.
If you’d like more information on how to tame and breed animals in Minecraft, you can read these guides:
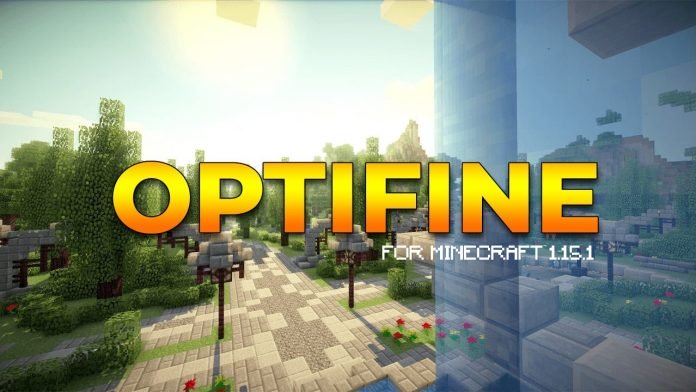
When you’re ready to enhance your gaming experience, you can download Optifine for Minecraft. It’s a utility mod that lets you customize the graphics and textures to look more realistic. You can also change some of the gameplay elements, such as running faster or causing more damage.
More Minecraft Tips and Guides
There are plenty more ways you can enhance your gaming experience after you learn how to play Minecraft. Check out these additional guides for some more advice:
Now that you know what Minecraft is and how it works, you can set out on your adventure and start building! There’s so much to do, you’ll spend years crafting your masterpieces. Once you’re done, be sure to show it off to other players or let them join you in local or online multiplayer.