5 smaller social media platforms that are challenging Facebook and Instagram

Sick of Facebook and Instagram? Ready to try something new? Check out these alternatives.

social media

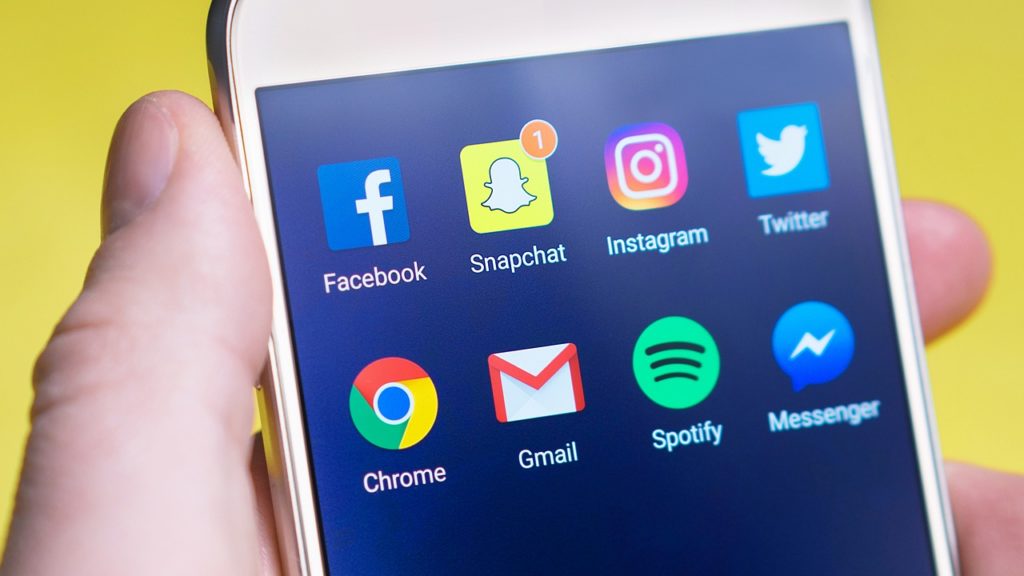
You probably already have a Facebook account and an Instagram account. But sometimes the same old news feed can get old. Ready for a new frontier? Head over to one of these smaller social networking websites. You will find a lot of familiar features (and maybe even some familiar faces), but you’ll enjoy fun new ways to connect and play.

5 smaller social media platforms that are challenging Facebook and Instagram

1. Medium

Do you have a story to tell? Or do you want to read the stories others are telling? Whether fact or fiction, poetry or images, you’ll find content galore on this fast-growing site. The emphasis here is on community. Create a free profile, follow your favorite writers and publications, and “applaud” pieces or comments you find particularly amazing.

2. Ning

Why use a social network when you can build your own? That’s the thinking behind Ning, a social networking platform that allows its users to make a community of their own. Your social network can be public, private, or for members only. You can choose the type of access you want to allow to your website and determine what members are allowed to do within your site. Everything on your site, whether it was uploaded by you or one of your members, belongs to you.

3. hi5

Are you tired of seeing the same old thing on your social network feeds — the familiar faces and the constant complaining? Do you want to meet someone new? This social networking site boasts an impressive number of users. The site states you will make new friends “through games, shared interests, friend suggestions, browsing profiles, and much more.” Meet others by sorting through age, location, and more. They say it’s a place to “meet, chat, and flirt.” If you are looking for a different kind of social network, give hi5 a try.

4. Snapchat

You’ve likely heard of Snapchat. If you love taking pictures with your phone, this app is up your alley. Take a photo or shoot a video and send it to one of your friends. After they view your content, it disappears. To save photos, users would need to take a screenshot. Otherwise, it’s a great way to send something funny that may not be worth keeping around forever.

Snapchat Download Free
8

5. Kik

It doesn’t matter what device you and your friends have — on Kik, everyone can chit chat together, one-on-one, or with a bot. What do we mean by bot? Well, on Kik, bots offer up quizzes, advice, the latest news, fashion tips, and they even play games with your friends if you want to allow a bot in your group chat. If you aren’t into the whole bot idea, no problem! Gifs, emoticons, stickers, and images are allowed on Kik to help you add that extra little something-something to conversations with your friends.

Make new friends and keep the old

These smaller social networks could be your next favorite way to spend the day. Sign up, log in, and see what you think. Then, take a look at these other social networking sites to see where you fit in.

How to set up parental controls for Netflix

kid watching netflix

Kids watch Netflix. A lot. You probably don’t even want to know the screen time statistics for hardcore Netflix-lovers. We can’t blame them, though. With a regularly updated library featuring hundreds of TV shows, movies, and documentaries, there’s something for everyone in the family.

Of course, the shows that you love might not be appropriate for your kids. Even the most open-minded parent probably doesn’t want their little one checking out the latest episodes of “Orange Is the New Black,” for instance. Thankfully, Netflix has made it even easier to protect kids from seeing the wrong content with updated parental controls. Follow this easy guide to set them up.

How to set up parental controls for Netflix

Setting up PIN protection on Netflix

Netflix lets you create a unique personal identification number (PIN) that allows you to lock younger viewers out of mature content. Doing so is quick and easy. Start by logging into your desktop account.

1. Click on the pull-down arrow displayed next to your profile icon (located at the top right of your screen) and select Account.

2. Scroll down to the Settings section of the page, and click on Parental Controls. You’ll have to enter your account password to proceed.

3. Next, you’ll be prompted to create a PIN for your account. The PIN must be four digits. Try to choose a series of numbers that will be easy for you to remember but difficult for your kids to guess.

netflix parental controls

4. Now, you’ll have a couple of options. First, you can restrict content by maturity level. Choose your threshold, and anyone who wants to view content beyond a certain level will have to enter the PIN to gain access.

5. Alternatively (or in addition), you can restrict content by title. Just enter the names of the programs you want to restrict, and they’ll be PIN-protected, too.

8

Setting protections by profile

Instead of setting protections for the whole account, you can adjust the parental controls for each profile. This is helpful if you have kids of different ages in the house since your teenager’s favorite show might not be suitable for your preschooler. Here’s how to do it.

1. Click on the profile icon in the upper right corner of the screen. The “Who’s Watching?” screen should come up, displaying all of the profiles on your account.

2. Click on Manage Profiles, and then choose the profile you want to edit.

3. From the pull-down menu labeled “Allowed TV Shows and Movies,” select the desired maturity level for that profile.

Understanding Netflix maturity ratings

As you set parental controls, you’ll come across Netflix’s maturity level settings. Here’s how they work.

Netflix assigns maturity ratings to all of its content. These ratings are generally determined using local programming standards, although sometimes they are set by Netflix. The rating system breaks content into four maturity categories, each representing the overall maturity level of the programming. Keep in mind that maturity settings for ongoing programs reflect the series as a whole and are not assigned to each individual episode.

  • Little kids: Only shows programs that are suitable for all viewers, with ratings G, TV-Y, and TV-G
  • Older kids: Includes content rated PG, TV-Y7, TV-Y7-FV, and TV-PG
  • Teens: Allows programming rated PG-13 and TV-14
  • Mature: All programming, including content rated R, NC-17, and TV-MA

According to Netflix, it can take up to eight hours for your updated parental control settings to take effect. Logging out of your account and then logging back in may help to speed up the process.

3 e-commerce sites that are perfect for your wedding registry

You’re engaged! Here’s how to knock out your wedding registry in no time.

wedding registry

A wedding requires an abundance of planning, coordination, and attention to detail. And even if you do all of that, some estranged great aunt is going to try to crash the party with 24 hours notice. Breathe, brides and grooms. Breathe.

One of the most fun things about planning the big day is creating the wedding registry. However, this can also be a long (and sometimes stressful) process.

Luckily, many e-commerce sites have made this process simpler. You can knock out your entire registry while sitting on your couch. And your guests can buy everything for you while they sit on their couches. It’s a win-win for everyone who enjoys the couch.

3 e-commerce sites that are perfect for your wedding registry

1. Amazon

Amazon is the 400-pound gorilla in the online shopping industry, so it naturally makes for a terrific choice for a wedding registry. As the top registry choice across almost half the nation (24 states) it offers a wide range of advantages.

First, Amazon offers the most options in all categories. Also, the company offers world-renowned customer service, which is great in the case of questions or a snafu. Additionally, Amazon Prime’s free shipping makes it convenient, and Amazon is known for keeping items in stock.

This is a guest favorite, too, because it’s a site that virtually everyone is familiar with and has used. Finally, this platform allows the bride or groom to write personal notes about different items they registered for in order to explain why they make the cut.

2. Zola

Zola is relatively new to the registry scene, but it’s a strong contender. Here, couples register on the central hub of Zola. Almost-married couples can add items from virtually any site.

There are many benefits. Zola offers a clean and easy-to-use aesthetic that the couple and guests love. Zola offers notifications when items are purchased and allows the couple to choose delivery times. The company also offers a simple exchange policy.

3. Wayfair

A home store giant, Wayfair is another excellent choice for a wedding registry. Couples love it because the company offers virtually everything anyone could want, all in one place, featuring thousands of items and brands.

Additionally, this platform allows guests to chip in to buy joint gifts, which is great for big-ticket items.

These sites are all fun to use and make registering that much easier and more fun for couples. Give your guests a break and go e-commerce — they’ll thank you!

How to use Google Keep to take notes while you work

Never used Google Keep? Here’s why you should.

Keep track of your life with Google Keep

How many times do you browse the internet, find something interesting, and then (within a matter of minutes) forget all about it? If you ever thought you needed a simple way to take notes, you’re not alone. That’s why Google Keep may be just what you’re looking for.

How to use Google Keep to take notes while you work

What does Google Keep do?

Google Keep is a simple tool, but that’s what people love about it! Once you download it, you can create a title and start taking notes. It really is this simple to use.

You may have heard about it previously (or its biggest rival, Evernote). But, Keep is a bit unique in the features it offers, and the tool makes it possible for users to easily create and track notes.

You can use it on your personal computer and any device using iOS or Android. If you use it with your Google account, it will sync to your account for easy access. Do this through this Chrome extension.

Google Keep Download Free ►
8
7

So what can you do with it?

Once you download Google Keep and open it, you’ll find it easy to get started. But how can you benefit from it? Use it for just about anything, including planning your to-do lists, meals, work ideas, project notes, and so on. Once you start using it, you’ll appreciate how easy it is to make it work for you.

For example, in a matter of seconds, you can color-code your notes. That way, you can easily move through them to find exactly what you are looking for. Keep allows you to change the color easily so you can just link similar topics. For example, you can keep all of your meal ideas in one place with a single color. You can also label your notes, which then allows you to browse through all notes with the same label.

Google Keep is full of other features, too. For example, you can create a to-do list for a project with little boxes next to each item. Check them off as you go — and you can even share them. Why not send that to-do list to your spouse so they’re on top of the tasks?

This feature is also fantastic for work collaboration. Plus, you can set up reminders, so you’ll receive a notification when something needs to be done. You can also customize your notes with images, memos, voice messages, and much more.

As you can tell, this is the type of note-taking you want to do but don’t have time to do. Google Keep is simple, and you’ll love using it once you get started.

8 ways sellers can make the most of Facebook Marketplace

Increase your chances of selling your stuff on Facebook. Just follow our guide!

online selling

Facebook is more than a social tool: It’s also a great place to make some extra cash! Selling items on Facebook Marketplace has never been so easy, and its popularity continues to grow. To simplify the sales process and help you put more green in your pocket, we’ve rounded up the top eight tips for making the most out of the selling platform. Read on to learn the ropes.

8 ways sellers can make the most of Facebook Marketplace

1. Spruce up your items

Your items should be in their best possible condition before you list them for sale. Clean them thoroughly to ensure they’re appealing to buyers and worth their money!

2. Take high-quality photos

The photo of what you are selling has the power to really grab a buyer’s attention! When you take photos, ensure the item is well lit and minimize background clutter. Also, get the entire item in the shot, perhaps from different angles. Try to show the size of the item in the photo.

3. Price your items high

You definitely need to turn a profit. One easy technique is to price items on the higher end to prepare yourself for negotiations. If you mark up your item, then you have more wiggle room to make buyers happy!

4. But ensure your prices are reasonable

Although you want to mark up your item to turn a profit, you also want to ensure that you don’t go overboard. Do your research to see how much the product sells for online (both used and brand-new). Stay in the ballpark to ensure you offer a deal that will actually appeal to buyers.

5. List items individually

When you have a large number of items to sell — perhaps from a move — it’s easier, in theory, to post them as a group. However, that may not prompt the most sales. Instead, list each item individually with their own photos and details.

6. Be forthcoming and honest

If you’re listing anything with problems, defects, or imperfections, be honest about the condition of the product. This will help your reputation as a seller and will make you more trustworthy on the Marketplace.

7. Respond to potential buyers quickly

You don’t want to sit too long on inquiries from buyers. Reply within 24 hours to ensure that they don’t lose interest or take their business somewhere else.

8. Mark categories appropriately

The selling categories exist for a reason! You don’t want to mark every category under the sun just in the hopes of making a sale, as it’s a bad look for a seller. Mark them appropriately to get the most out of the platform.

These tips are easy to follow and will be effective in helping to make stellar sales. Happy selling!

How to customize the Control Strip on your MacBook Pro

If you have a MacBook Pro, make that toolbar your own! Just follow our guide.

Did you know that customizing the Control Strip on your MacBook Pro can greatly improve your internet experience? You can edit the Control Strip to make it look however you want it to look! Just follow these simple steps to customize the Control Strip on your MacBook Pro.

How to customize the Control Strip on your MacBook Pro

1. Open System Preferences

First, you will need to click the Apple menu icon that is located in the upper-left corner of the screen of your MacBook Pro. Then, once you’ve opened the Apple menu, you need to click on the System Preferences option.

2. Select Customize Control Strip

Now that you’ve selected System Preferences, click on the Keyboard option. After that, simply select the Keyboard tab. Now that you’ve gotten this far, you can select the Customize Control Strip option toward the bottom of the window. Once you’ve done that, your screen will briefly become blurry, and the customization panel will appear. In addition to that, the buttons on the Touch Bar will also enter jiggly mode.

3. Customize your Control Strip

If you want to customize the tools in the collapsed Control Strip, then you will click the Collapse button that’s located far left of the Touch Bar. If you choose to customize the full Control Strip, then select the Expand button that is found directly left of the tools in collapsed mode. You would do this if you want to move a tool from the screen into the Touch Bar to add it directly to the Control Strip. Just drop the tool into the Touch Bar and it will appear there.

4. Remove unwanted tools and finish

If you want to remove a tool from the Control Strip on your MacBook Pro, you can move the cursor into the Touch Bar and select a tool to remove it from the Control Strip. Simply click on a tool on the Controls Strip and drag it to a new location on the Touch bar to rearrange the order. Finally, once you’re finished with customizing your Control Strip, click Done and your changes will be saved.

3 easy ways anyone can access Bitcoin

Want to earn some Bitcoin, but aren’t sure how to do it? Here are 3 easy ways.

bitcoin

Intimidated by Bitcoin? Don’t be. Earning or investing in this relatively new currency doesn’t have to be a difficult or overly risky task reserved for the select few. There are many ways that you can get involved with Bitcoin without being an expert on the subject or assuming too much risk. Here are some of the easiest ways you can get the cryptocurrency right now.

3 easy ways anyone can access Bitcoin

1. Download an investment app

Robinhood is a popular user-friendly investment app. Their mission is to prove that anyone can seek investment opportunities, no matter their skill set or financial status. The best part? Robinhood now supports cryptocurrency trading, making it even easier — for anyone at all — to invest in Bitcoin.

Robinhood Download Free ►
8

With an investment app like Robinhood, you won’t have to worry about handling private keys or storing your bitcoins in a virtual wallet (which is a lot more complex than it may sound). They will take care of it all. All you need to do is create your account and get started. So, if you’re looking for an easy way to get started with Bitcoin, consider investing with Robinhood Crypto.

2. Earn bitcoins while you shop online

Ever wish you could get paid to shop? With Lolli, you can earn bitcoins automatically just for shopping online. Lolli is a cash-back reward system that has partnered with more than 500 retailers to give you bitcoins for making a purchase on one of their sites.

Simply download the Lolli extension for your browser. Whenever you’re on one of their partner sites, Lolli will notify you. You’ll then activate Lolli on that site and start shopping as you usually would. After you’ve made your purchase, you’ll receive your bitcoins. It’s as easy as that.

Lolli currently partners with retailers such as Groupon, Forever 21, Hotels.com, and Macy’s, among many others.

bitcoin

3. Get paid to complete small tasks

Another easy way to earn bitcoins is to get paid for completing small — but time-consuming — tasks online. These tasks won’t often yield a lot of bitcoins, but they’re one of the easiest ways you can earn them. For example, some sites will pay you in bitcoins to visit a website or view ads.

Other sites like Coin Tasker or CoinWorker will pay you in bitcoins to complete a variable number of tasks. Sites like these might ask you to complete surveys, test programs, and files, or organize photos in exchange for bitcoins. However, it’s important to note that you probably won’t make that much money with any of these options. Even if you complete tasks all day, you likely won’t earn more than the equivalent of $5 to $10.

What are your favorite ways to get your hands on cryptocurrency? Let us know in the comments below!

4 super useful templates in Google Docs

Want to whip up a professional looking document in a hurry? Here are 4 ways Google Docs can help.

google docs

There are so many things you can do using Google Docs. Sure, the program can’t make you breakfast or walk your dog (yet). However, Docs offers users so many helpful services. One of the best tools is the variety of handy templates, all free to use. You can see all the templates here, but we’ll take a look at four of the most popular and useful templates.

4 super useful templates in Google Docs

1. Resume

The job market is competitive. For many people, just getting a foot in the door can be overwhelming, with so many candidates vying for positions. A solid resume is the first step toward landing the job you want.

Today, most companies use automated resume-sorting software. This means if your resume is strangely formatted, doesn’t have the right keywords, or contains any mistakes, it will probably get tossed aside before it ever gets on a hiring manager’s desk. Having an impeccable resume is an absolute must. Thankfully, Google Docs gives you an array of fresh, modern templates to help you build one that stands out in the right ways.

2. Newsletter

If you’re tasked with creating a company newsletter or putting one together for a class project, Google Docs is here for you. Save yourself plenty of stress by using the handy newsletter templates. Choose from several snazzy styles, and add your content to the customizable fields. Your work will look sharp and professional, all with minimal effort on your part.

3. Legal documents

Ah, legal documents. Nobody likes them, but everybody needs them. If you own a business, run a website, or do almost anything else out in the world, you might find yourself in need of a legal document. Google makes this unappealing task a little more palatable by giving you pre-made templates for commonly used legal documents. Options include terms of use, software licensing agreements, and privacy policies.

4. Reports

If you’re a student, you’re likely going to have to write a report at some point. Depending on what you study, you may even have to write many, many reports. While you’ll have to do the writing and researching part on your own, Google Docs has the tools to make it all look good when you’re done. Choose the appropriate template, and it’s that much easier to impress your instructor with a polished report.

Snapchat’s lens explorer feature lets you explore thousands of customer-built lenses

Upgrade your Snapchat game and check out these great snaplenses.

The best part of Snapchat has always been the different filters or lenses that can be applied to your face or background. But did you know that you can now create your own lenses? Not only can you be a creator, but you can also view lenses created by thousands of different artists and everyday people.

Find out more about the new customer-built lenses below.

Snapchat’s lens explorer feature lets you explore thousands of customer-built lenses

How to use them

So where can you find this Lens Explorer feature? Basically, Lens Explorer will appear in the row of lenses that pops up when you tap the camera screen. In previous versions of Snapchat, this is where you would normally find the filters and lenses that you wanted to apply to your picture. But now with the addition of Lens Explorer, you will have access to more than 100,000 lenses.

8

These lenses work just like the normal Snapchat lenses that you’re used to. If you’re scrolling through the thousands of new Explorer lenses and find one you like, you can simply swipe up on the one that you choose and it will be unlocked for you to use in your future snapshots.

Personalized lenses

Snapchat will use your location information to show you lenses that are customized to your current location. These are very similar to the location filters they have, only there are many more options now.

These lenses may also be personalized based on previous lenses that you have used. Snapchat may try to show you lenses similar to the ones that you already like, which will make it quicker to scroll through the hundreds of thousands of lens options.

No sponsored content

A problem for some people is that many of the latest Snapchat filters available have been sponsored by big brands. However, for now, Snapchat promises that none of the Lens Explorer lenses will be sponsored. All the lenses will be created by individual creators from across the globe.

Only available on iOS

As cool as this new feature is, it’s not for everyone: Snapchat announced that for now, it will only be available on iOS (and not Android). However, if this new feature becomes popular, you can expect it to arrive on Android in the coming months.

Overall, the new Snapchat Lens Explorer sounds like it will revitalize Snapchat and make using lenses even more fun. Why not download the app and check it out for yourself?

Switching smartphones? Here’s what you need to know

Ready to trade up for a new phone? Here’s how to move all your stuff to the new one.

phones

Your smartphone holds all kinds of information you don’t want to lose. That’s part of the reason that upgrading to a new phone can be intimidating. What if all of your important data disappears? Don’t worry. Getting your new phone ready to go may not be as difficult as you thought.

If you already use Google or Apple for your contacts list, your calendar, and your email, you are halfway there. Here’s a step-by-step guide.

Switching smartphones? Here’s what you need to know

1. Look to your system’s backup settings

iTunes

Open your iTunes account and connect your iPhone to your computer. Or, go to your new phone’s settings page, click on your Apple ID name, and choose iCloud. Select the items you want to keep under “APPS USING ICLOUD.”

If you choose to transmit personal data, such as passwords, select “Encrypt iPhone backup” to keep your info secure. Either way, your selected apps are safe and sound and are ready for transfer.

Android

From Android, go to Settings and then System, and then pop into Backup. Is the setting enabled? If not, click it and make the change.

Scroll through the list of items available to back up. What content do you want to move over onto your new phone? Check the boxes and press the button to back up your data.

2. Restore from your backup

Auto backups are a great start, but you aren’t quite finished yet. Grab your new phone and sign in.

When you first turn on your new phone, you will need to set it up. You’ll be asked for details such as your country and your Wi-Fi network. As you make your way through the process, a prompt will appear asking if you would like to restore your data from a backup. Yes, you do.

Select the most recent backup (if given the option). Like magic, your phone will suddenly look a bit more familiar. Your contacts, email, and calendar will be ready to roll.

3. Check your favorite apps

What’s a smartphone without apps? Some of your apps may have made the transfer. Hooray! Visit your must-have apps to see if they have been included too. Is anything missing?

If you have favorite games, productivity apps, or anything else you don’t want to lose, click on the app on your old phone. Is your information saved in the cloud? Dig in and see how and where the developer saves your information.

A successful smartphone switch

Before you wipe your old phone clean, go through your pages of programs and apps. Did you save everything you need? If you are missing anything, click on the app, and see how the app stores your information.

Once you’ve installed your apps and restored your information, you may want to take a look at ways to keep your phone secure. After that, it’s time to enjoy your new phone.