MCreator review | Minecraft modding fun

MCreator is a free Minecraft modding platform that lets you create blocks, textures, armor, and other items for the open-world sandbox game. Pylo originally created and released it for modders, while the content creators develop the actual mods. The developer first launched the program in 2012.

MCreator DOWNLOAD

It’s the first time I’m creating mods for any game, so my MCreator review comes from the perspective of a beginner. You’ll be able to see how easy it is to use and whether you need to learn programming. Also, there’s a fun insert about whether or not kids can use the platform to learn how to mod for Minecraft. Stay tuned for more exciting information.

MCreator: A beginner’s adventure

Using MCreator as a beginner modder was definitely a thrilling experience, but I had some intense moments where I wondered if I followed the guidelines correctly. There are definitely some valuable lessons to learn, so let’s hop into this review.

How to set up MCreator

First things first, you need to download the correct, updated version of MCreator. Last week, I downloaded it so I could prepare for testing the platform for this review. Pylo released a brand new version a few days later, which the platform recommended updating. Since I was only using it for this review, I smartly decided not to update it.

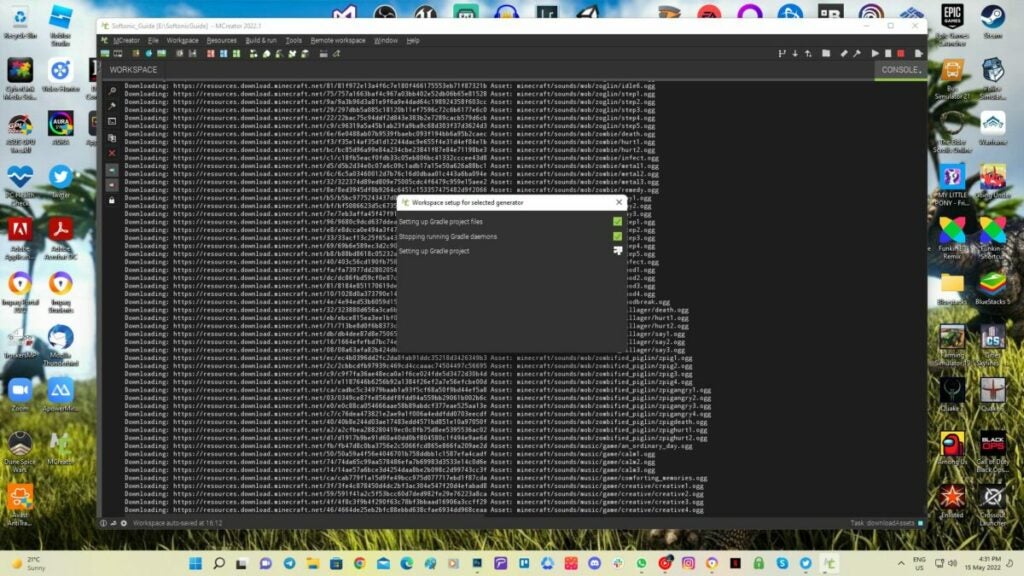
Sadly, I discovered that I couldn’t create a workspace in MCreator. Well, the platform did try, but I kept getting the same error message: Gradle cache corrupted. Since I was determined to make my first Minecraft mod, I looked for possible solutions. I even wondered if MCreator works on Windows 11 at one stage.

After clearing caches, removing folders, and trying again, I finally decided to listen and update MCreator. Guess what? That did the trick. Once I asked to create a new workspace, the Gradle was installed properly, and the dependencies were corrected. Now I could finally use the platform properly.
MCreator review

Initial choices

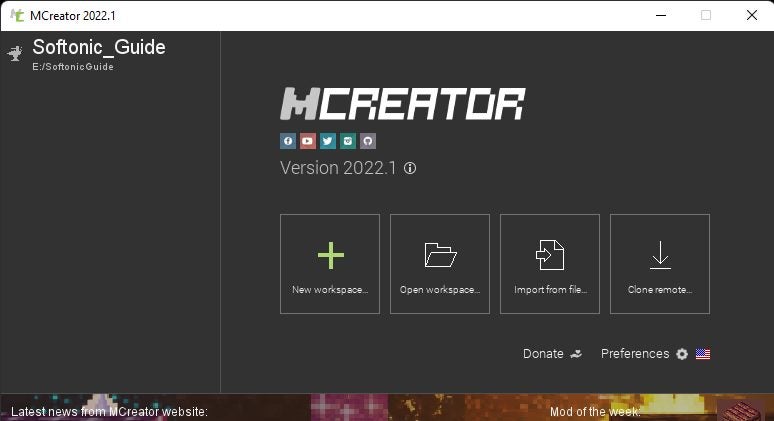
MCreator gives you four options when the initial window appears:

  • Create a new workspace
  • Open workspace
  • Import from a file
  • Clone remote workspace

For the purpose of my MCreator review, I made a new workspace and then later opened it. You can download workspaces from other creators, but you’ll need their permission to use or replicate the items. If you’ve developed a remote workspace, you can quickly clone it. We’ll get to this last option later.
MCreator review

Creating the first Minecraft block

When I was finally able to create a workspace in MCreator, I became quite excited. You’ll need to name your workspace and save it in a folder you’ve made specifically for your Minecraft mod projects. It’s essential that you remember where you save it for later.

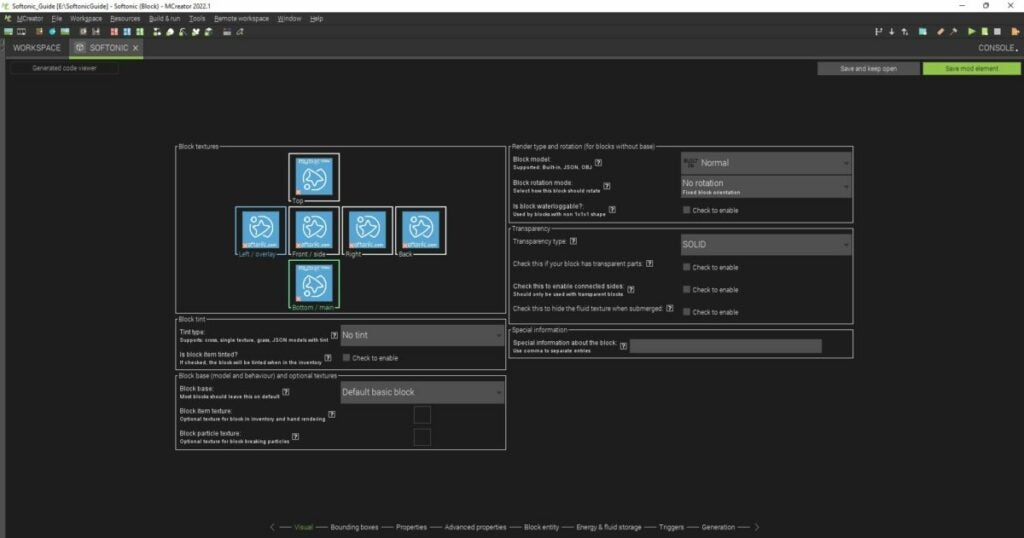
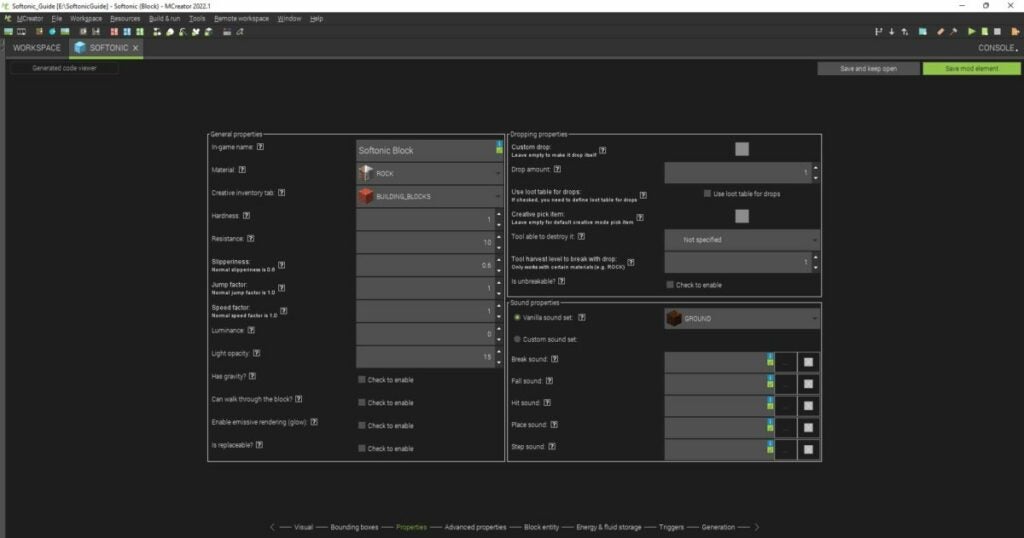
I’m steering away from turning this MCreator review into a guide, so I’ll simply highlight my experience with making a block. You’ll find several windows that appear in various steps. It’s clear what you need to do with each one, as there are panels with names and question marks.

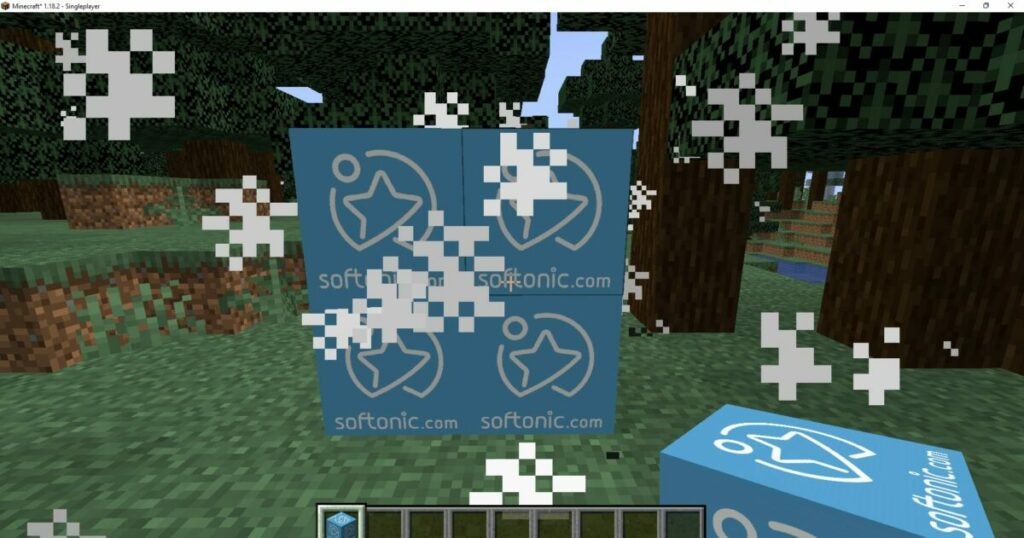
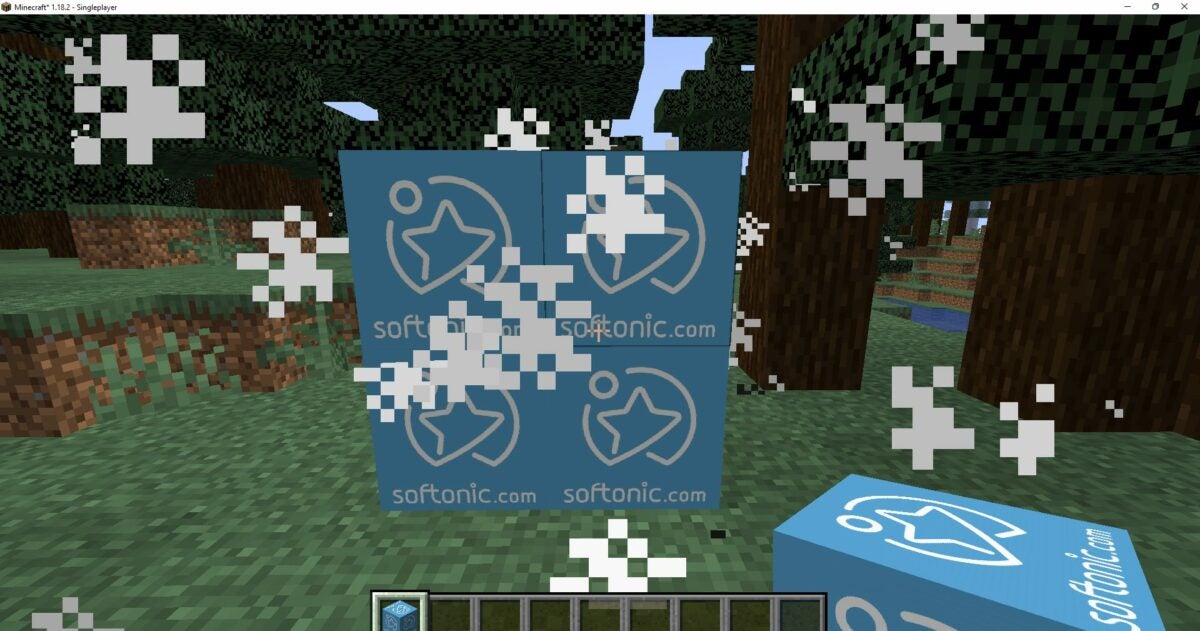
When you click on a question mark, an info panel appears to tell you what it means. You’ll find drop-down boxes to change specific variables. It helps if you’ve extensively played Minecraft, as many of the options will make more sense.  I decided to use the Softonic logo for my initial design.
How to play MINECRAFT READ MORE
MCreator review

How long to create a Minecraft block in MCreator

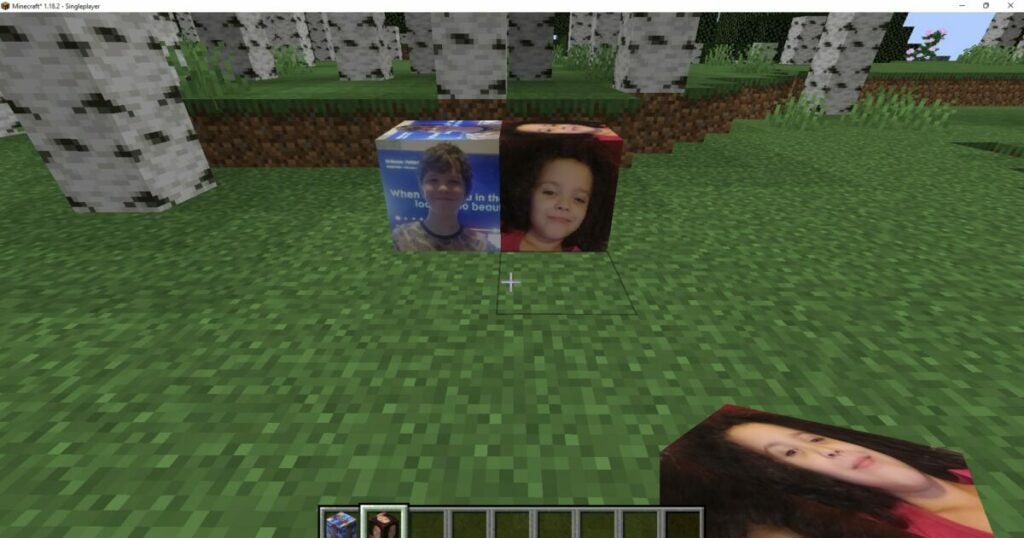
As a beginner, it took me more than an hour to create my first block. I was learning from a tutorial how to use MCreator while studying every aspect of making the item. However, once I got the hang of it, I made the next block in about 5 minutes. There’s really nothing to it once you know how the platform works. Here you can see I added my children for the next blocks.
MCreator review

Is MCreator discontinued?

In 2020, Pylo announced that MCreator version 2020.5 would be the last one to receive new updates from the developer. The news stated that the community would still continue with uploads and further development. The version I used for my review is 2022.1, so it’s clear that it hasn’t been discontinued.

Is MCreator good for kids?

MCreator is excellent for teaching children how to create modded items for Minecraft. They can use the interfaces to make objects without any coding experience. The platform shows them how variables are used to make an item behave in a specific way. It’s a fantastic introduction to modding.

Is MCreator for Java or Bedrock?

You can use MCreator for both Minecraft Java and Bedrock editions, as long as the version you’re using permits mods. I have Minecraft on the Xbox Games Pass, which doesn’t have a section for accessing modified packages. I recommend running the Java edition on Windows 10 and 11.

Navigating MCreator’s exciting features

Now that the basics are out of the way, let me delve deeper with my MCreator review. There are plenty of other features besides creating new blocks. I’ll also show you how importing and exporting items works.

Learning how to mod in MCreator

If it’s your first time like me, you’ll be happy to know there’s a massive knowledge base for MCreator. Not only will you find video tutorials for making different items, but you can read about common errors you may encounter. The best part is that there are handy tooltips on the platform that will guide you with every step.

The Workspace elements

When you’re working on a MCreator Workspace, there are so many elements available. Instead of doing a detailed breakdown of each one, here’s a quick summary of what you’ll find:

  • Adding mod elements: Choose what you want to create, such as blocks, armor, tools, fuel, storage, and so much more
  • Resources: Import or create new textures for the mod elements
  • Variables: Adding new variables that don’t currently exist in MCreator
  • Localization: Changing to a new language or localization
  • Remote workspace: Saving an online version that you can access from a different device

For the final option, you’ll need to save a GIT repository and provide the URL. You can also have others help you develop the workspace this way, which is excellent for collaborations

MCreator review

Neat structure in the file browser

One aspect I really love about MCreator is that it has a file manager you can open and close on the side. It keeps all your elements in different categories, such as sound, resources, structures, and more. You can easily find the related files in each folder with a simple click.

Importing Minecraft mobs and other items

You may want to use mobs and elements created by other modders. MCreator lets you import them in every section where it’s applicable. To use this tool, you’ll need to download the textures and resources from reliable sources and then import them from the saved folder on your PC.

How to add plugins in MCreator

As with most programs, you can add plugins in MCreator to add more functionality. For example, the localization tool and integration with Minecraft Forge are both built-in plugins already available. If you want to add more, you’ll need to head to Preferences and Manage Plugins. There’s a small icon at the top that lets you load more.

Minecraft Forge DOWNLOAD

Exporting your mods to Minecraft

Here’s the fun part. You’ll want to see your modded items within Minecraft. Once you’ve developed the elements, there’s a quick export button at the top right. It saves the elements in a .jar file that Minecraft uses in the Java Edition. Remember where you save that file, as you’ll need to make a copy and move it to your mod folder in the Minecraft folder on your PC. When you launch the game, you’ll see your new package in the Mod section.

Be sure to check out this guide on how to install mods on Minecraft.

How to Install Minecraft Mods in 5 Easy Steps READ MORE

How to write codes in MCreator

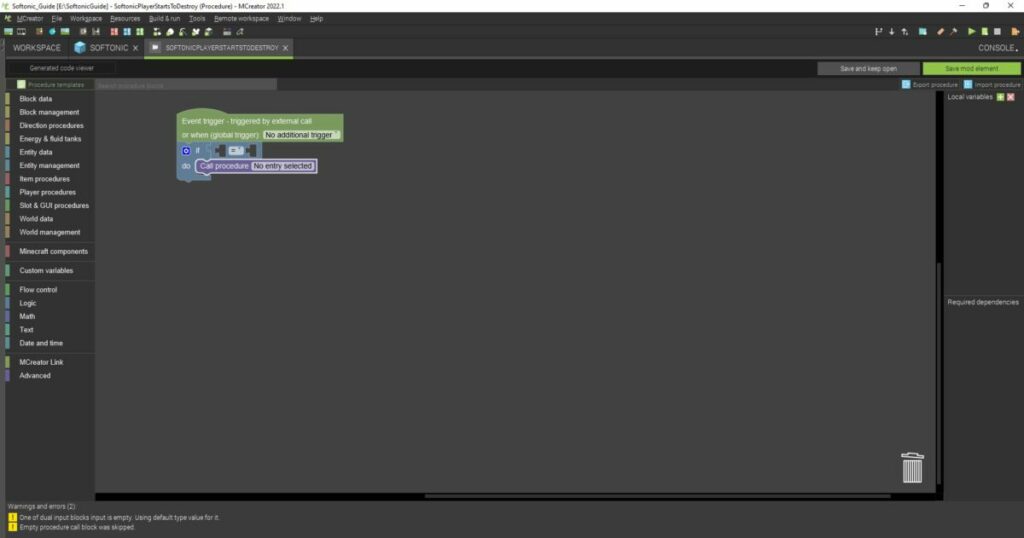
If you love writing codes, there are specific sections that let you do so. For instance, you can create parameters with specific conditions when the player hits the block. You can also edit the code for many of your elements. I enjoyed moving the logical if-then statements with different parameters just to see how it affected my mod elements.
MCreator review

What you need to run MCreator

MCreator needs a decent computer to run MCreator’s resources and packs. I didn’t experience any performance issues on my side, but you’ll need this recommended setup to avoid issues:

  • Operating system: Windows 10+,  Linux Ubuntu/Debian, Mac OS X 11+
  • System: 64-bit architecture
  • Memory: 8GB RAM
  • CPU: 4 core Intel/AMD
  • Storage for installation: 2 GB 
  • Reliable internet connection

The internet connection is essential if you want to create a workspace, import and export files, or work on your remote workspace. 

Sound and visual elements of MCreator

There are so many other features and tools you can use in MCreator, but I think I’ve covered the most significant ones in my review. The last aspect I want to cover is dealing with the visuals and sounds. 

Impressive user interface

I want to go out of my way to state that the user interface is impressive. It’s easy to navigate the main menu, file browser, and the other smaller menus per section. It may be overwhelming at first, but you’ll soon get the hang of it.

Working with resource packs and textures

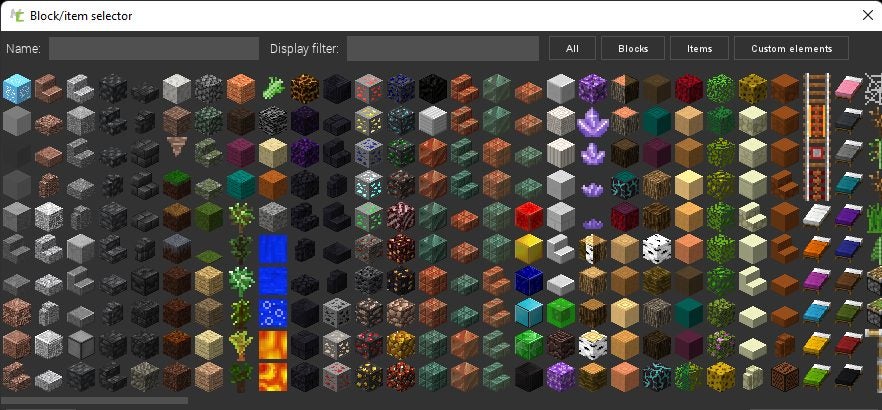
When you open the resources, you’ll see every element available in Minecraft. There are skins, ore packs, items, and tools. I’m not referring to simply seeing the names of these items, but a visual representation of what they look like. You can even replace specific items to make your own Minecraft resource pack.
MCreator review

Playing around with sounds

MCreator has a library of default Minecraft sounds already included. Not only do you have the noise from placing the block, but also what it sounds like when someone hits it. Furthermore, you can download and use other sounds not included in the game.

Final verdict of MCreator

As a beginner modder, I absolutely love MCreator. This review is only the start of my modding adventure for Minecraft, and I plan to do so much with it. The interface makes it so easy to create items, and I don’t even need to code if I don’t want to. Fortunately, I have enough experience in Blender and Unreal Engine that I can do some programming if needed. 

If you haven’t played the game yet, be sure to read our detailed Minecraft review for what to expect!
Minecraft review | Crafting exploration adventure READ MORE

Pros

  • Easy to navigate the user interface
  • Impressive functions and tools
  • Has built-in Minecraft Java Edition launcher
  • Resources and textures look outstanding
  • Educational for children and adults
  • Includes coding if needed
  • Most of the interfaces do the coding for you

Cons

  • Only works on moddable Minecraft versions
  • Might not install properly the first time
  • Needs the updated version to work

Developer: Pylo

Publisher: Pylo

Top Features: Built-in Minecraft launcher, easy to learn and use, educational factor

Platform reviewed: Windows 11

Poppy Playtime Chapter 2 review | Intense horror puzzle

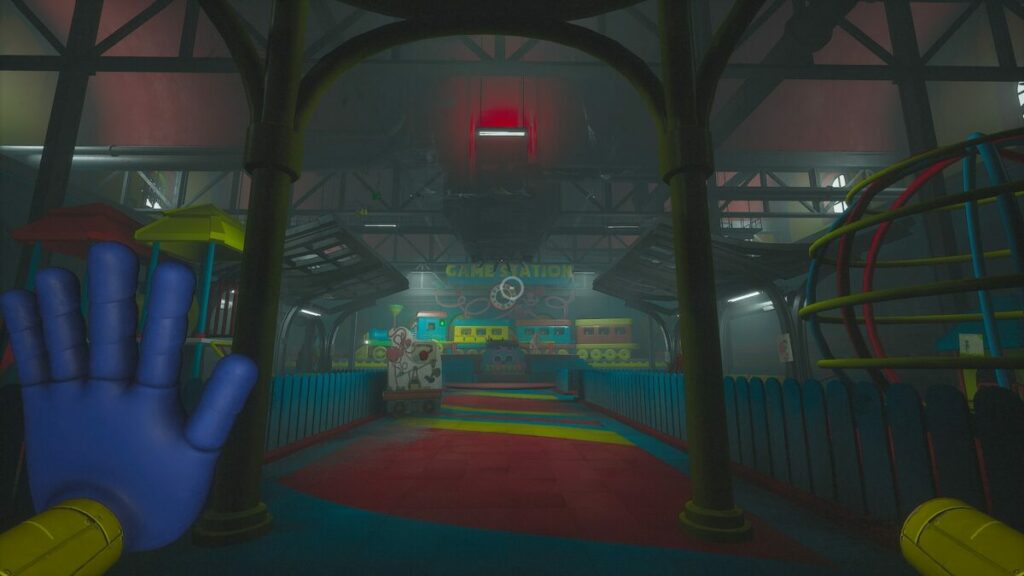
Poppy Playtime Chapter 2 is the exciting sequel developed and published by MOB Games, launched on May 5, 2022. Entitled “Fly in a Web,” it continues your horrific adventure in the abandoned toy factory. With Huggy Wuggy defeated, a new monster follows you in an attempt to take your life. Its name is Mommy Long Legs

Poppy Playtime Chapter 2 DOWNLOAD

What happens in Poppy Playtime 2? Are the puzzles more intense, and will you need to keep the lights on while playing? These are some of the questions I’ll answer in this exhilarating game review, so stay tuned!

The horror story continues in Poppy Playtime Chapter 2

Let’s begin with my favorite element in any game: the story. If the plot doesn’t grab me from the beginning, there’s little chance I’m going to enjoy the rest of it. I need suspense and thrills when it comes to a survival horror puzzle game. Let’s see if Poppy Playtime Chapter 2 lives up to my expectations as a horror fan.

What you missed in Poppy Playtime Chapter 1

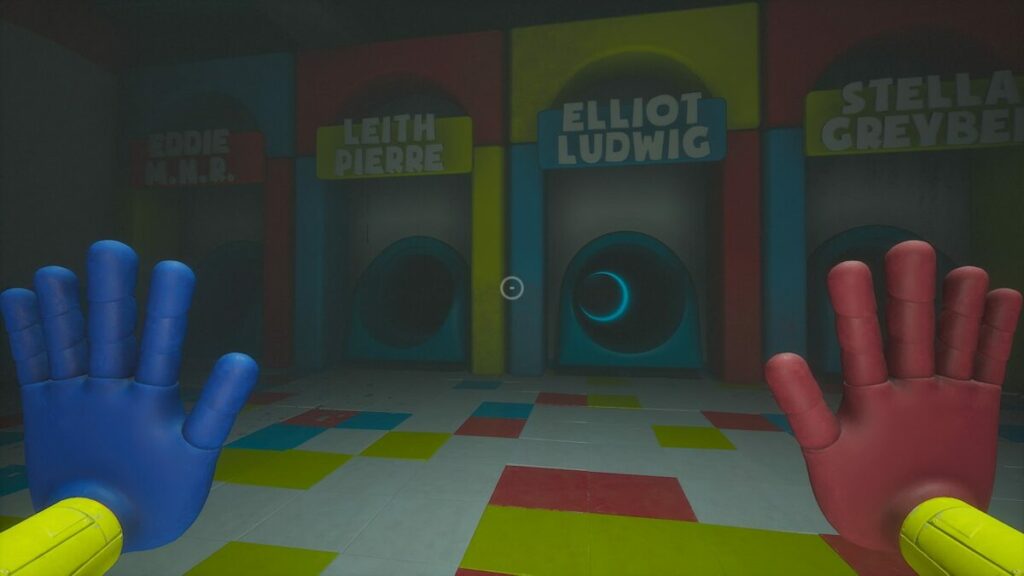
In case you missed my review on Poppy Playtime Chapter 1, you entered an abandoned toy factory to find out what happened to it. You found an item called a Grabpack that gave you two mechanical hands to solve puzzles and help you make your way around the building.

In the horror scenario, a toy called Huggy Wuggy followed you around, intent on killing you near the end. Through quick wits, you managed to escape through the vents and eventually caused it to fall to what seemed like its death. You thought you made it out alive. You were wrong.

In the end, you found yourself in a small room with an Annabelle-like doll locked in a glass cabinet. As if the horror movies weren’t enough warning, you opened the door. The lights went dark, and you heard her voice. When the lights returned, she was gone.

Investigating a new area

Poppy Playtime Chapter 2 continues from that scene. When you make your way back out the door you came in, you make your way into a brand new area through a door that was locked before. The game presents a brand new location known as The Train Station.

The main purpose of the sequel becomes clear. If you can find the code for the train, you have the promise of escape. Even Poppy says she’s there to help you, but it seems suspicious. What you do find along the way is a massive toy called Mommy Long Legs that just wants to play with you…before she kills you.

Poppy Playtime Chapter 2 Expert Review

Someone’s out to get you

The threat of Mommy Long Legs is visible in most of the scenes, but she’s not the only toy ready to end your life. She uses various entities in puzzle rooms, which you’ll have to escape if you want to continue. The ending lets you face off against the giant spider toy, which feels very similar to the vent-running experience with Huggy Wuggy in Chapter 1.

However, there’s a greater threat that becomes a foreshadowing effect for future sequels. It seems there’s a larger toy or entity pulling the strings in the background. Poppy Playtime Chapter 2 also keeps referring to you as a prototype, which makes me wonder if we’re also a toy. The videotapes keep talking about a toy that gained some sense of sentient intelligence. Is that us, or is that the main villain that keeps appearing behind the scenes?

Overall, the story in Poppy Playtime Chapter 2 is exciting and keeps you wanting to investigate further. There are plenty of clues as to what’s coming next, which sends chills up your spine. The plot in the sequel is more thrilling and mesmerizing than the first title, that’s for sure.

Poppy Playtime Chapter 2 Expert Review

How long is Poppy Playtime Chapter 2 to play?

Some of the puzzles are more challenging than they should be, so you may sit playing the game for a couple of hours. If you manage to run through Poppy Playtime Chapter 2 with no difficulty, the game takes about 50 mins to an hour to complete. For me, I ended up with just over two hours due to the punch-a-Wuggy challenge taking me much longer than expected.

Surviving Poppy Playtime Chapter 2 

Next up in my Poppy Playtime Chapter 2 review, let’s look at the game elements. While some of it remains the same, there are new features and ways to play the enticing horror game. I enjoyed several of the updated touches on previous mechanics.

Is there a tutorial in Poppy Playtime Chapter 2?

As with the first game, you’ll find no actual tutorial for Poppy Playtime Chapter 2. What you find along the way are videotapes and posters giving you hints at how to use the new mechanics. It’s up to you to figure it out, and some rooms can cause you to waste so much time if you miss a small clue.

Moving around the abandoned toy factory

Heading from location to location remains the same. You’ll need to investigate each area and unlock the hints and puzzles to make your way to the next scene. It’s like a massive escape room, except there are toys ready to kill you if you don’t do it the right way.

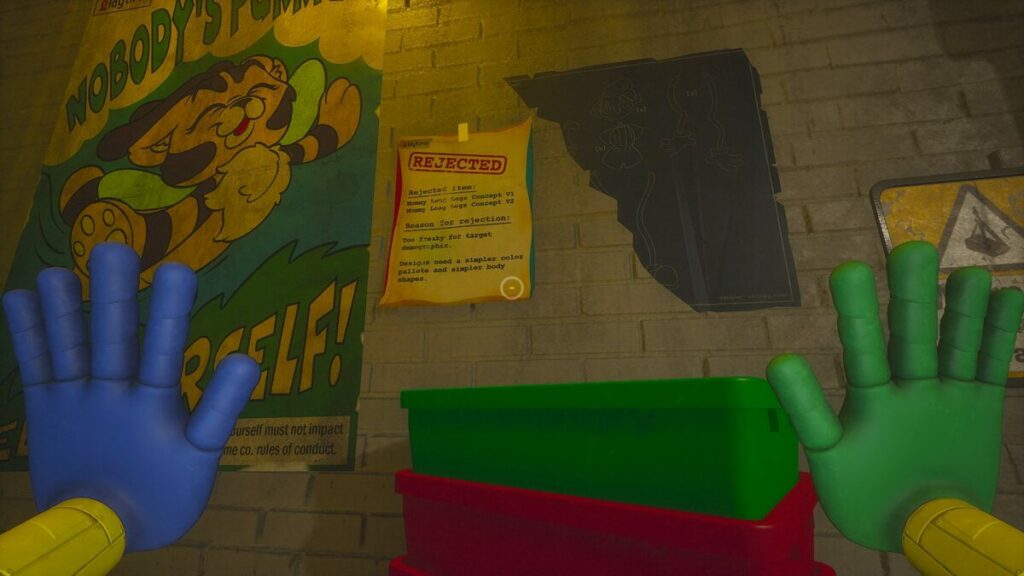
One of the new mechanics is a bar that lets you swing across gaps with your Grabpack hand or grapple up to higher floors. Now sadly, adding this item slightly takes away from the logic of the story. Why would there be random bars all over the factory, especially when no massive gaping holes existed on floors before? Also, who put them there? Was it Poppy?

Perhaps a better approach would have been to place more naturally occurring items to grapple across with or hike up to the higher levels. I understand the purpose is to quickly see the bars when Mommy Long Legs is pursuing you. However, their random existence confuses me, if only slightly. At least with Mirror Forge, the presence of helpful items made more sense, at least in that game world’s context.

Poppy Playtime Chapter 2 Expert Review

New hand mechanics

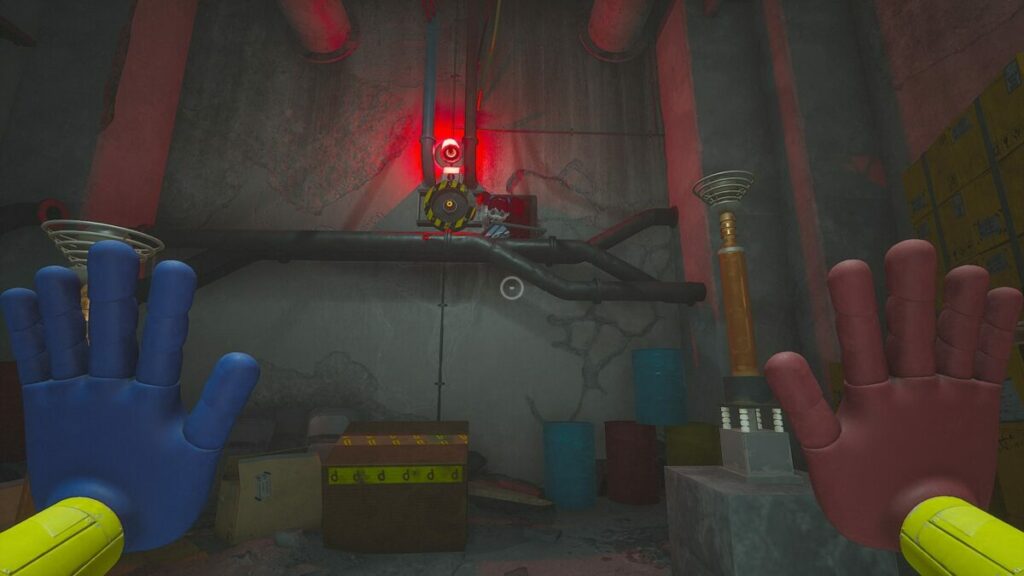
Gone is the red hand that helped you in the first game, and enter the green hand in Poppy Playtime Chapter 2. The purpose of the new mechanic relates to transferring electrical power for a few seconds. It’s a new feature that makes the power rooms more interesting to solve, especially when closing doors can now kill you upon impact.

Poppy Playtime Chapter 2 Expert Review

Puzzles are more challenging

If you’re a fan of the puzzles in Resident Evil 7, you’ll love the challenge presented in Poppy Playtime 2. As in the CAPCOM horror game, every room is a puzzle you need to solve. You need to investigate every area and item to see if there’s anything that will assist you in reaching the next location.

There’s also the overall puzzle of the whole game. You’ll collect several objects along the way that will eventually solve the final challenge. If you’ve already played Poppy Playtime 2 completely, you’ll have the solution for the next playthrough, so it isn’t randomized like other horror games I’ve played. This mechanic reminds me more of Obduction

Poppy Playtime Chapter 2 Expert Review

Still no combat

There’s still no proper combat in Poppy Playtime Chapter 2. You’ll use your environment to survive and escape to new arenas, while the final boss battle ends in Mommy Long Legs hurtling into her own demise, much like Huggy Wuggy. The Grabpack hands are the only items you have to defend yourself, which you’ll do in some of the puzzle games.

Finding collectibles

Videotapes make a comeback in this horror game sequel. You’ll collect various color tapes and insert them into the corresponding machines. If I’m not mistaken, there are more than there were the first time around. Also, you can now find small toy statues as keepsakes, but perhaps we’ll need them for Poppy Playtime Chapter 3?

Poppy Playtime Chapter 2 Expert Review

What are the Poppy Playtime Chapter 2 PC requirements?

The one significant change in Poppy Playtime Chapter 2 over its predecessor is that it’s almost three times as large. Most of the other requirements remain the same, as you’ll see here below:

  • OS: Windows 10
  • Processor: Intel Core i5
  • Memory: 8 GB 
  • Graphics: Nvidia GeForce GTX 1060 / Radeon RX 580
  • Storage: 20 GB 

The game played perfectly without any lagging. I managed to smoothly transition from scene to scene, and the performance remained perfectly fine. I did need to increase the brightness, as some of the rooms were just too dark to see what was happening.

Thrilling themes and effects in Poppy Playtime Chapter 2

For the final part of my Poppy Playtime Chapter 2 review, let’s look at the visual and audio effects in the game. I felt the same atmosphere as in the first chapter, but it became more chilling as I proceeded further into the story. Here’s what I experienced.

Environments and scenes

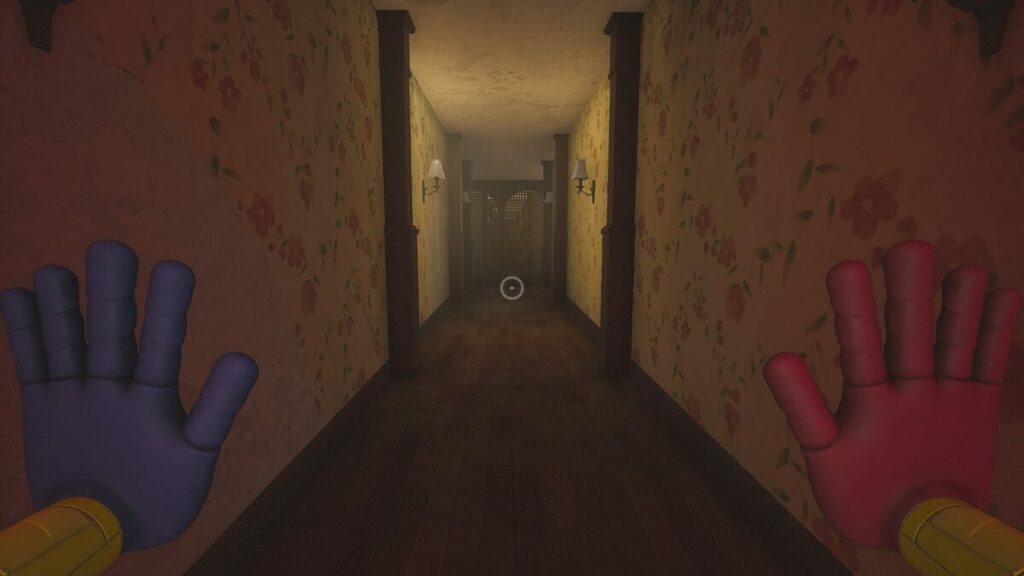
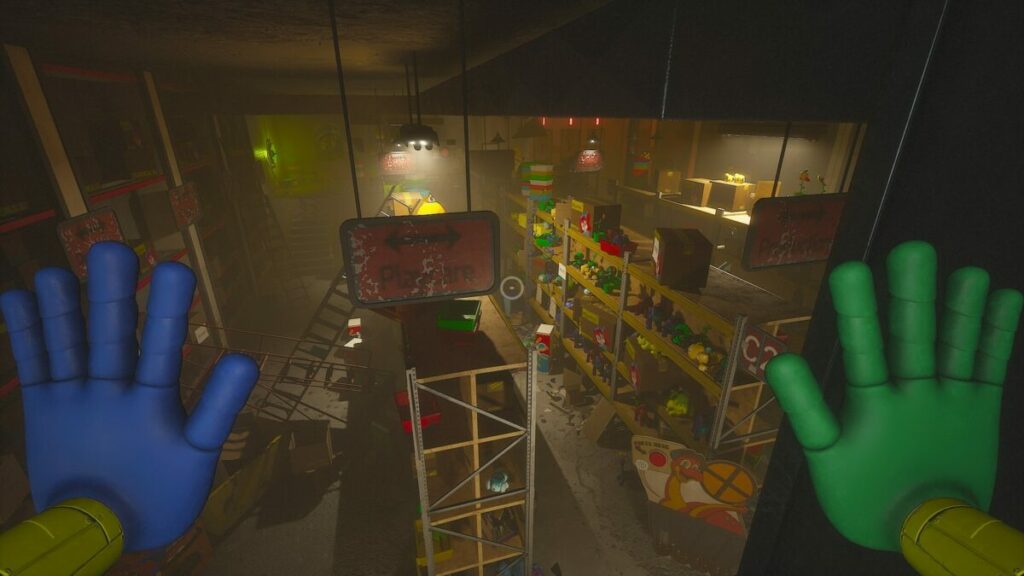
The visuals are once again absolutely superb. Each environment has a story to tell if you’re willing to spend some time looking around. What I loved the most is when there were small hints of what was to come, like blood splatters here and there and the posters on the wall.

Poppy Playtime Chapter 2 Expert Review

Animations and effects 

The effects work the hardest at causing jump scares now and again, but there are also elements that make you wonder whether or not you’re in danger. Some of the animations are simply creepy for no reason at all other than to scare you. 

Puzzle elements

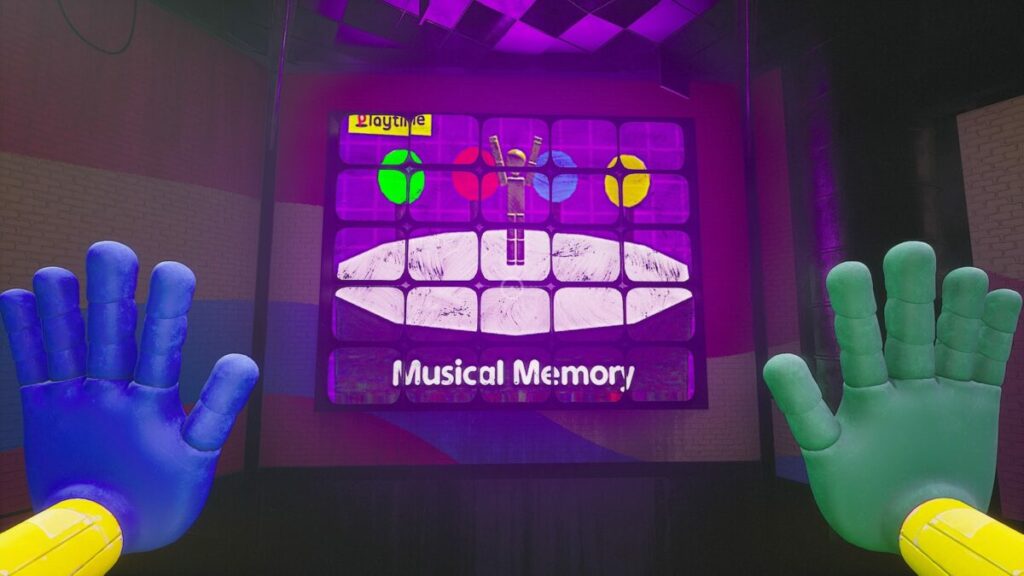
Much like Myst V: End of Ages, you’ll need to check every visual quality for clues to solve the next puzzle. You never know what will be useful for the next area you’re about to enter. I loved the massive puzzle rooms where you need to work with enormous machinery to escape. However, I’m really not a fan of that punch-a-Wuggy room, where your survival (and game completion time) depends on how quickly you can hit the appearing Wuggy toys.

Poppy Playtime Chapter 2 Expert Review

Creepy sound atmosphere

The chilling sounds return in Poppy Playtime Chapter 2 to send the hairs on your neck on end. There’s soft music now and again, while you’ll have your heart racing to the fast beat during chase scenes or puzzle battles. There are also cardboard posters now with voice boxes where the toys speak a few lines that make you want to just run back the way you came.

Poppy Playtime Chapter 2: A Fly in the Web

Poppy Playtime Chapter 2 lives up to the hype of being a fantastic sequel to the first chapter. The new boss is outstanding and scary, while there are other toys to haunt you along the way and not just one. I thoroughly enjoyed most of the puzzles, while there’s one the game can do without. Overall, it’s a thrilling experience that lives up to the horror puzzle genre. Let’s bring a baseball bat as a mechanical hand in the next one, or a chainsaw as in The Evil Dead.

If you enjoyed this guide, be sure to check out our Mirror Forge review and opinion on Weird West.

Mirror Forge preview | Intense horror game READ MORE
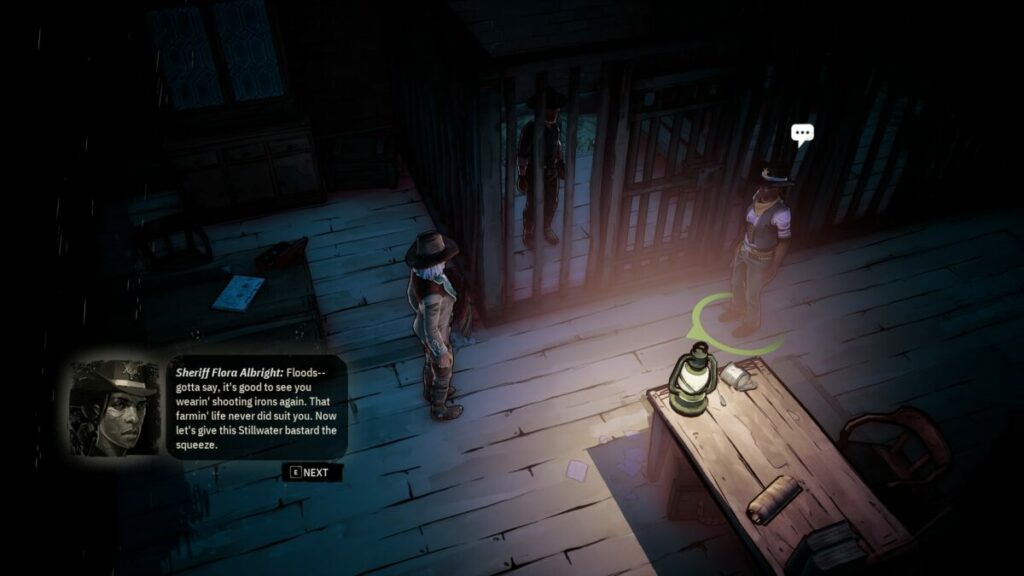
Weird West review | Dark fantasy adventure READ MORE

Pros

  • Exciting horror adventure
  • More than one evil toy to defeat
  • Several puzzle locations
  • Brilliant visuals and colors
  • Enticing story in the Playtime saga
  • Fantastic cliffhanger ending

Cons

  • Some puzzles are annoying to complete

Developer: MOB Games

Publisher: MOB Games

Game Modes: Story 

Platform reviewed: Windows 11 – Steam
Premiere Pro review: where does Adobe’s video editor shine?

Adobe Premiere Pro is the raw video editing app from Adobe’s Suite. Its timeline-based interface, organized workspaces, and powerful editing tools, effects, and motion graphics are loved and lauded by some of the most innovative directors and content creators around the world.

It can take a while to get to know all its capabilities, but that’s only because Premiere can really do just about any video editing task imaginable. The app has been used to edit everything from Hollywood blockbusters and Super Bowl commercials to humble YouTube sketches and video podcasts.

If you’re a beginner, you’ll be able to understand the basic features and start editing with Premiere Pro after reading this article or watching a few brief tutorials. If you’re a professional video editor, read on to find out where Premiere shines and where its weakness starts to show.

You can no longer buy the Premiere Pro app outright; it’s only available as a subscription service with monthly or yearly payments. If you’d like to try the demo version, you can download a free seven-day trial of Adobe Premiere Pro.

Adobe Premiere DOWNLOAD

How does Premiere Pro compare to other video editors?

Compared to other video editing apps, the subscription price is pretty expensive. How much Adobe Premiere Pro will be worth it to you depends on your budget and what kind of video editing you’ll be doing. Although there isn’t a single standout alternative to Adobe Premiere Pro, it does have a few interesting competitors.

Premiere Pro is currently the most popular choice in the general video editing world, but there are several groundbreaking apps that can perform certain specialized tasks better or work more efficiently in different operating systems. Alternatives to Premiere Pro include:

Final Cut Pro has a lot of the same features but is optimized for macOS users.
DaVinci Resolve is cheaper and more focused on color correction.
Adobe After Effects has better visual effects and motion graphics tools; however, Premiere Pro is better at overall video editing and assembly.

Adobe Premiere Pro’s system requirements

If you use a PC, you’ll need the 64-bit version of Windows 10 or 11 to run the latest version of Premiere Pro. If you use a Mac, you’ll need at least macOS 10.15.

Make sure your CPU is at least a sixth-generation Intel or an AMD Ryzen 1000 Series or better with a minimum of 8 GB of RAM. Premiere now also has full support for Apple’s Silicon M1. Your display’s resolution should be a minimum of 1920 x 1080.

Adobe Premiere Pro main modes are import, edit, and export

A look at some of Premiere Pro’s newest upgrades


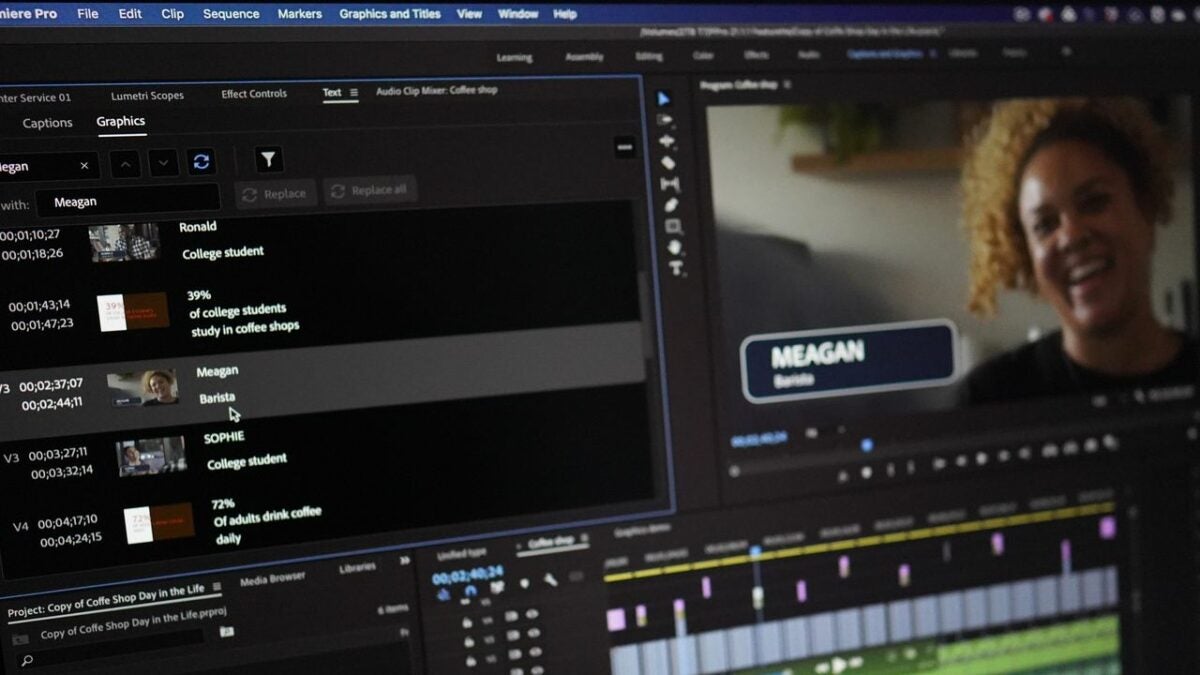
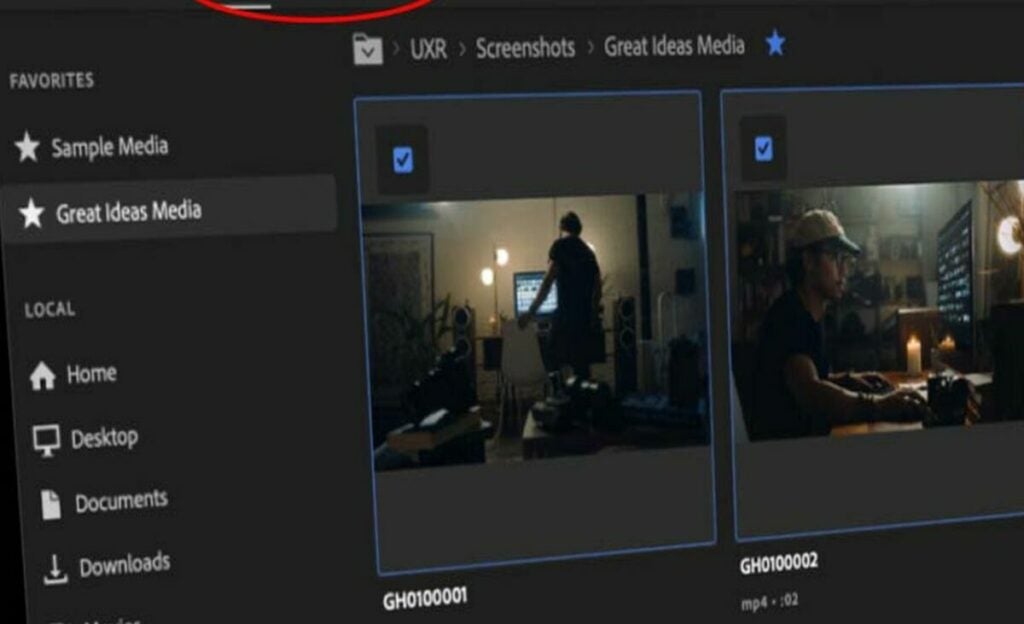
Older versions of the app had workspaces for Assembly, Editing, Titles, Audio, Effects, and Color. Now, it’s been simplified to just three main modes: Import, Edit, and Export.

The welcome screen now has a Learn option that can guide beginners through the workflow or show experts all the latest upgrades. The app comes with eight built-in interactive tutorials that demonstrate how to import clips, add titles, use color correction, edit audio, etc.

Many features and graphics now come with ready-made templates and animations. For instance, you can select one of the available animated motion graphic templates and just replace the default text with your own message or logo to make an instant intro.

The captioning workflow has been overhauled to allow for easier formatting and editing of your captions. There’s also a new automatic captioning feature that is currently in beta.

If you upload your videos to various social media sites, you may have to export to a different aspect ratio for each site. Premiere now has an Auto Reframe feature that uses AI to identify the most important things in your video and crop it to various aspect ratios, whether horizontal, vertical, or square, without losing sight of your subject. Auto Reframe also lets you adjust the keyframes it automatically creates in case you want to make some manual corrections. Final Cut Pro also recently released a similar feature it calls Smart Conform.

When you subscribe to the Adobe Premiere Pro service, you now get a free online video sharing account at Frame.io with 100 GB of space. The service includes a web viewer and reviewer that allows your collaborators to check out your beta project and give you notes without having to install Premiere Pro.

Import practically any format

Premiere Pro can import video footage from pretty much any device that can record it. This includes practically any raw format from any professional camera, smartphone, or DSLR with resolutions up to 8K. With the right cables, you can even import video from tape with the timecodes intact.

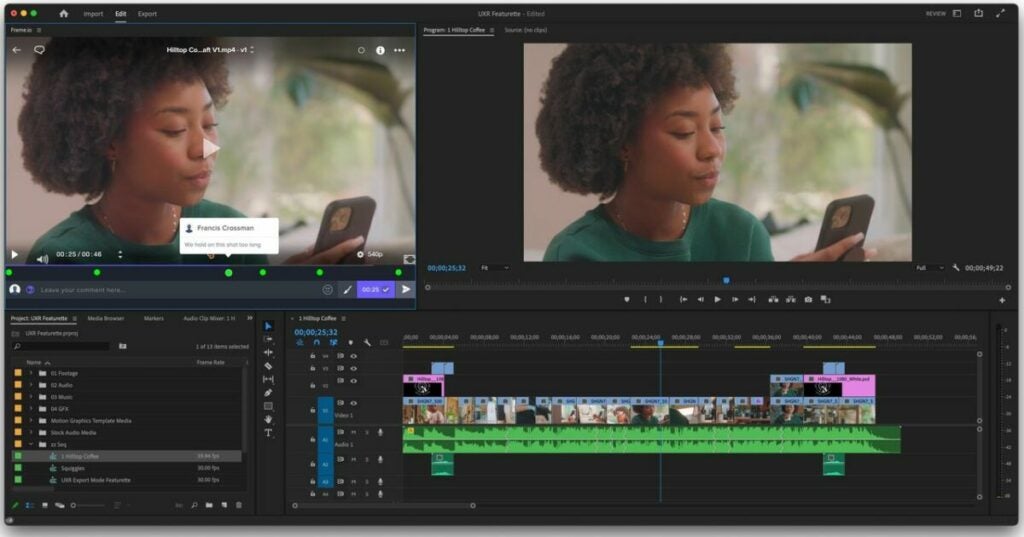
Altering a video in Adobe Premiere Pro edit mode

Premiere’s editing layout is intuitive and adjustable

Once you’re in Edit mode, the workspace shows you four panels. If you like, you can undock these panels and move them around or remove them and add different ones.

  • Previews and thumbnails of your source footage are at the top left
  • A preview of your project video is at the top right
  • Your project’s assets are at the bottom left
  • Your track timeline is at the bottom right

Your track timeline has two separate sections to help keep you organized. All the audio tracks are placed in the bottom section, and all the video tracks, including images and graphics, are in the top section.

If you want to skip the Import screen, you can just drag and drop almost any type of media file from any file explorer straight into your timeline. Premiere Pro will automatically create separate but linked video and audio tracks and place your media in them so that you can jump right into editing. The app will also automatically save your project at regular intervals to make sure you don’t lose too much if the power goes out.

The basic editing tools are easy to learn

Premiere Pro offers four classic editing tools that sound like they might feel at home in a waterpark: Slip, Slide, Roll, and Ripple. These give you different ways to trim or shift clips quickly while preserving the length of the project or adjacent clips. You can edit tracks even while the project preview is playing.

The app also has a regular Trim mode that trims without shifting, which you can access by double-clicking on either end of any clip. In Trim mode, your preview window will split to display the outgoing frame of the clip you’re editing as well as the incoming frame of any adjacent clip. This mode gives you easy options to make adjustments one frame at a time or add transitions.

Adobe Premiere Pro’s transitions

Premiere Pro comes with a large library of transition effects, and you can find plugins online with many more. Once you have at least two clips in your timeline, you can search for a transition in the assets panel at the bottom left and then drag and drop it to where the clips meet.

Transitions are just as user-friendly as clips. You can drag the edges of a transition in your timeline to change its length or select the transition and delete it. Selecting a transition will also open a transition control panel beside your project preview panel where you can dig in and change even more details.

Lots of highly maneuverable effects

The app comes with hundreds of video and audio effects, all of which are searchable from a search box in the assets panel. These include toolkits for

  • Lighting
  • Colorizing
  • Keying
  • Warping
  • Stylizing

Premiere Pro lets you drag and drop any effect onto any track to apply it directly. You can also go to File > New > Adjustment Layer to create a new adjustment layer on your timeline. When you add an effect to an adjustment layer, it affects all the tracks below it.

You’ll find the Effects Control window in a tab in the top left panel. When you select any clip or adjustment layer, you’ll be able to tweak any effects you’ve applied to it here. That includes adjustments to the opacity, speed, position, scale, rotation, anchor point, and Lumetri colors of the clip. This window is also where you can apply time remapping to any effect by using keyframes.

Premiere’s built-in effects are user-friendly and powerful enough that they’ll work for most home content creators and even many professionals. If you’re making the next “Avatar” or you need advanced tools like automatic motion tracking masks, you may need a more powerful engine like Adobe After Effects.

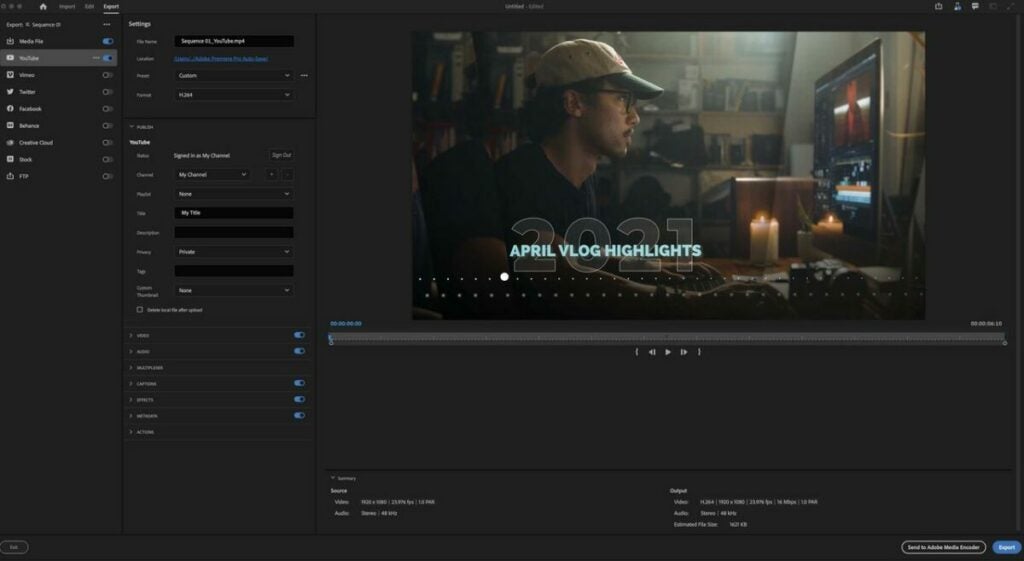
Use export mode in Adobe Premiere Pro to choose custom templates

Export as simple or advanced as you like

When you’re happy with your project, you’ll move seamlessly to the Export workspace. The Export mode gives you a list of handy export templates you can pick, from common social media sizes to high-quality media files. You can also select various formats together to export to all of them at once.

If you want to get into the details, Premiere gives you dropdown menus in plenty of advanced categories so that you can tweak your export specs to taste. If not, the interface lets you breeze past the specifics and just export your video.

Final verdict: Adobe Premiere Pro is the king of raw video editing

Whether you’re a novice video editor or a demanding pro, Premiere has the best for both worlds. Its large professional-level toolkit has plenty of simple entry points for newbies. The app runs and renders quickly on most computers and fits into an expansive ecosystem of products and services that let users create and collaborate easier than ever.

Ready to try out some of the features of this video editing software? Check out our guide on how to color correct amazing nighttime videos with Premiere Pro.

Pros

  • Drag-and-drop media and effects
  • Detailed transition editing
  • Subscription service gives you regular free updates
  • Easy integration with full Adobe Suite

Cons

  • Steep overall learning curve
  • Unsatisfactory 3D graphics editing

Developer: Adobe, Inc.

Publisher: Adobe, Inc.

Top Features: Timeline-based video editing

Platform Reviewed: Windows PC

ClipGrab review: A free download manager with one job

ClipGrab lets you download your favorite YouTube videos or even videos off sites like Facebook. The open-source software makes it easy to convert file types, as well.

Let’s review the program’s main features and compare them to competitors.

ClipGrab Download Now
Download Now

What is ClipGrab?

The video download manager is totally free to download and use. As donationware, it operates thanks to the work of Philipp Schmieder Medien and any donations users wish to provide.

Originally launched in 2007, the download manager uses the GPL v3 license and is available in English, French, and German. It can be used on Linux, macOS, and Windows devices. While users can download media from multiple websites, the sites Dailymotion, YouTube, Facebook, and Vimeo work best.

Being able to copy and paste the video link is a fan-favorite feature.

What is “donationware”?

The term “donationware” simply refers to any software that runs on donations from users. The software is free to use and the donation is optional, but encouraged, and always stipulated by the user. It can also be considered “freeware” as it does not require purchasing a plan to get more features.

Is ClipGrab safe?

Some security programs might ping ClipGrab as unsafe but it is totally safe to use. As an open-source program, it is free to use for anyone who can download it.

Some anti-malware products mark ClipGrab as malicious due to installCore getting marked as a “potentially unwanted program.” However, there is a download option that does not use installCore available.

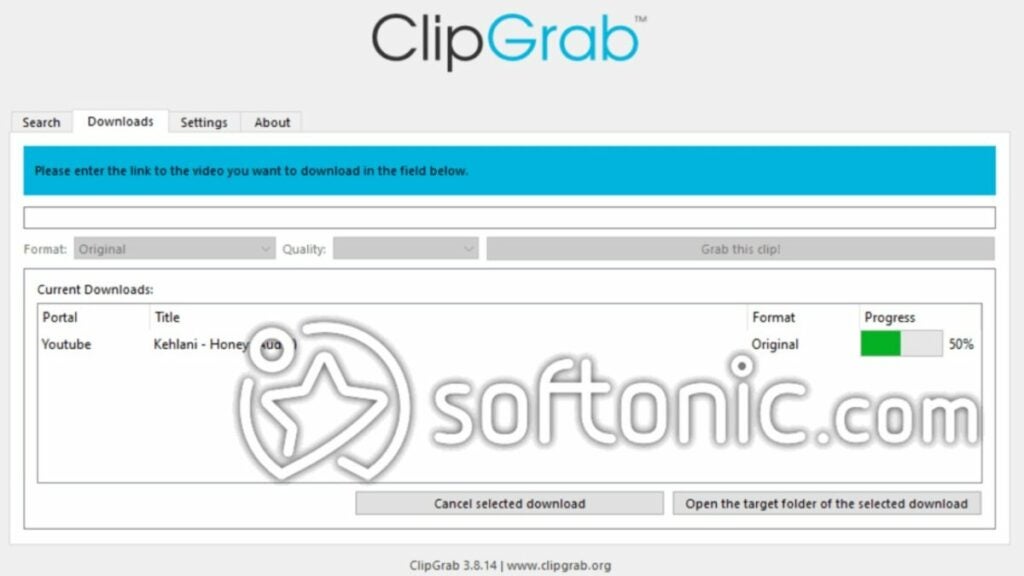
image of ClipGrab interface

How do you use ClipGrab?

Using ClipGrab is almost easier than using a web browser. The interface is very simple with just four tabs at the top left as you can see in the image above. All of your downloads will be listed to view along with the file format and download progress.

Users can select which quality to download the video in such as low, high, or standard definition. You can also convert videos into various files such as:

  • OGG Theora
  • WMV
  • MP3
  • MPEG4

The “Search” tab allows users to find specific files more quickly. Then, you can just copy/paste the link or URL into ClipGrab. After a short moment of analysis, the program will prompt you to select a file format before downloading it.

image of ClipGrab competitor logos

ClipGrab competitors

There are many video download managers available (though not all of them are free). Some are restricted to specific operating systems, as well. Here are four direct competitors to ClipGrab.

Youtube-DLG

Some users have called Youtube-DLG the “best free YouTube downloader” available. It has a very similar interface to ClipGrab with the following tabs:

  • General
  • Formats
  • Downloads
  • Advanced
  • Extra

This tool does offer more supported audio and video formats. However, it does place limits on how many things you can download.

4K Video Downloader

4K offers many tools for multiple platforms. For instance, they have an app for downloading TikTok videos or Instagram Stories. But 4K Video Downloader focuses on Youtube and other websites.

Users can also download YouTube playlists or extract subtitles and get videos of 4K quality. But it does place limits on playlist downloads and it is not totally free to use like ClipGrab, but a “freemium” program. Typically, the full suite of features costs around $20 US; however, you can usually find it on sale.

yt-dlp

This command-line program works to download videos from YouTube and other sites. It works across multiple platforms and comes with significant Reddit support.

Anyone interested in a community around video downloading and management may consider this option.

Video DownloadHelper

This cross-platform program offers a freemium experience for downloading videos in web browsers on sites that use HTTP. Created by Michel Gutierrez, Video DownloadHelper now ranks as the third most popular extension in the Firefox browser.

The Premium registration costs $16 USD, but grants additional features such as:

  • Converting videos directly to mp3 files
  • Support for the conversion feature
  • Removal of Download Helper QR code on converted videos
  • Removal of HLS download restrictions

While the licensing fee is a one-time payment, ClipGrab does offer some of these features for free.

image of the Facebook, ClipGrab, and YouTube logos

Verdict

ClipGrab is an easy-to-use and totally free file manager that lets you download videos off sites like YouTube and Facebook. It’s great for that simple task — especially if you have a good internet connection.

Beyond that basic task and the useful integrated YouTube search function, ClipGrab can be limited. Download it today to start cataloging your favorite videos.

PROS

  • Totally free to use
  • Includes a search function
  • Compatible with multiple websites and media types
  • Supports file conversions
  • Easy-to-use interface
  • Ability to select the download quality
  • Support for proxy servers

CONS

  • Slow download speeds for large files or across unstable internet connections
  • Not all files maintain the same quality
  • Can come with installCore, a potentially unwanted program

Developer: Philipp Schmieder Medien

Publisher: Philipp Schmieder Medien

Top Features: Multimedia download manager

Platform Reviewed: Windows PC

Adobe Express review: App replaces Spark as an easy design solution

E-commerce now reigns as the new normal, and small businesses and digital advertisers need simple, inexpensive creative solutions to help target niche audiences and market their products quickly. Adobe has stepped up to meet the burgeoning demand for a fast and easy-to-use design product in its largely template-based Creative Cloud Express, the graphic design software company’s revamped version of Adobe Spark.

Initially released in December of 2021, Adobe Creative Cloud Express (also known as Adobe Express and CC Express) utilizes simple drag-and-drop technology within a unified task-based app that works with mobile devices and PCs. The software enables non-designers to swiftly generate polished, original multimedia content for their social sharing accounts. Digital marketers like Creative Cloud Express as an affordable solution for creating marketing materials like brand logos and web banners.

One of the latest additions to Adobe’s renowned assemblage of digital design apps, Creative Cloud Express is an inexpensive, user-friendly alternative to competitors like CanvaPicsArt, and the software company’s own Illustrator. While many claim Adobe Express is just a rebranded update to Spark, developers at Adobe have implemented several noteworthy changes.

Here are the features Adobe added to CC Express in April 2022:

  • Color palette creator: This feature generates palettes with suggested color combinations.
  • Font recommendations: Under More Fonts, there’s a tool for suggested font pairings.
  • Mobile video quick actions: These include quick actions for cropping, video speed, and more.
  • Generate QR Code quick action: This tool simplifies the process of creating QR codes through Adobe.
  • Convert to SVG quick action: This tool now supports SVG along with other file formats.

With these additions, Creative Cloud Express finds a comparatively wider audience than Spark and other content creation tools like Photoshop Express and Premiere Rush. The app is not, however, aimed at seasoned creative professionals who can render original design results with traditional tools like Illustrator. Instead, Adobe Express adopts several core features from multiple dedicated applications from Adobe and their AI tools to make the software more accessible and easier to use.

Creative Cloud Express is an an efficient software solution for beginners and busy creative professionals alike.

Adobe Express is made for fast design solutions

Adobe Express is an optimal design solution for students, online advertisers, and small business owners who routinely create anything from social media posts to promotional videos and self-branded logos. The software retains its simple interface by utilizing a template-first approach that is far more intuitive and simple to access than the individual creative apps discoverable in Adobe’s full Creative Suite.

Adobe’s extensive library of drag-and-drop templates and Sensei machine-learning technology translate to a well-streamlined user experience for beginners with little to no design experience. The general idea behind the app is that it is the perfect tool for people trying their hand at graphic design for the first time and small business owners who want to avoid the extra overhead of a professional design service. Moreover, the continuous access to Adobe’s updated Creative Cloud libraries and the suite’s collaborative and sharing features are among the app’s several top advantages.

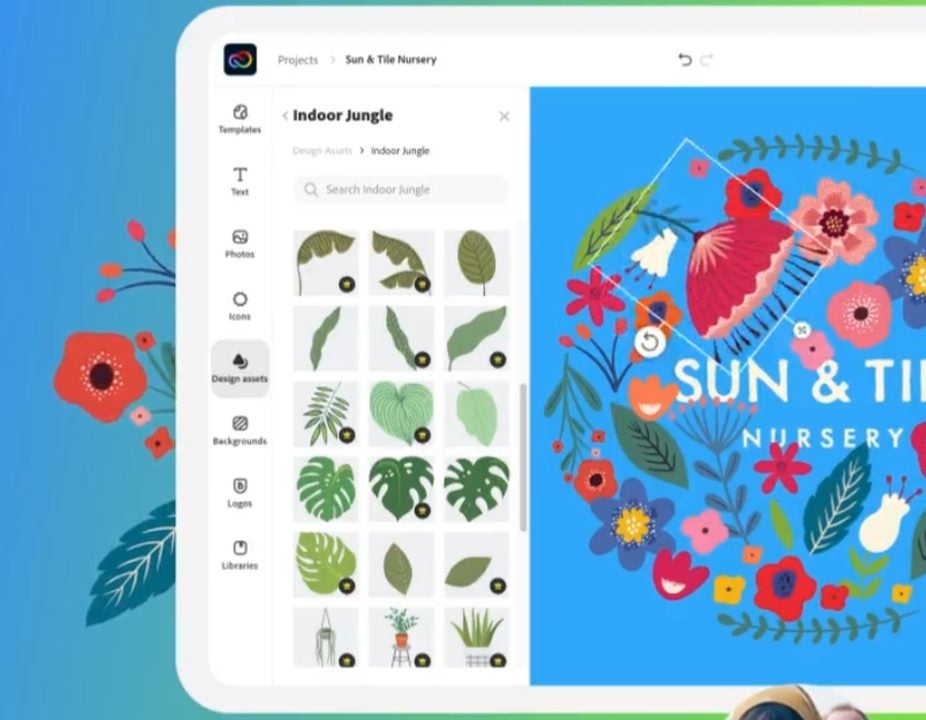
Adobe Express offers a vast library of highly customizable templates for unique multimedia creations.

How does Adobe Creative Express work?

Adobe developed Creative Cloud Express to be quick and easy to start using, even if it is your first time trying graphic design software. It is a web-based application, and all you need to launch the program is a desktop PC or mobile device and a stable internet connection. Before you get going, you must create an Adobe account to access the freemium edition or sign in to your existing profile. The app delivers itself via the Cloud, and you can access mobile versions of Adobe Express that replicate the web edition of the software.

While Adobe express is a template-based app, you can tailor it for your specific design needs. Some templates are laid out for Instagram stories, while others lend themselves best toward materials like YouTube thumbnails and advertising fliers. By clicking Show All, you can reveal the available categories. Housed within the specified categories is an impressive library of template options associated with the type of media you wish to create.

If you’re working with the free but limited version of Adobe Express, you will notice the Adobe premium template offerings mixed in with the free samples. The welcome filter allows you to separate the two products easily, however. As you grow more comfortable with the software, it’s easy to create your own templates from scratch and save them. But most users find that the advanced features in Creative Express tend to negate the general purpose of the app, which is to help speed the creative process along. If you do feel like indulging your creative senses, the app allows you to customize existing templates for a more original design.

Customizing your creations

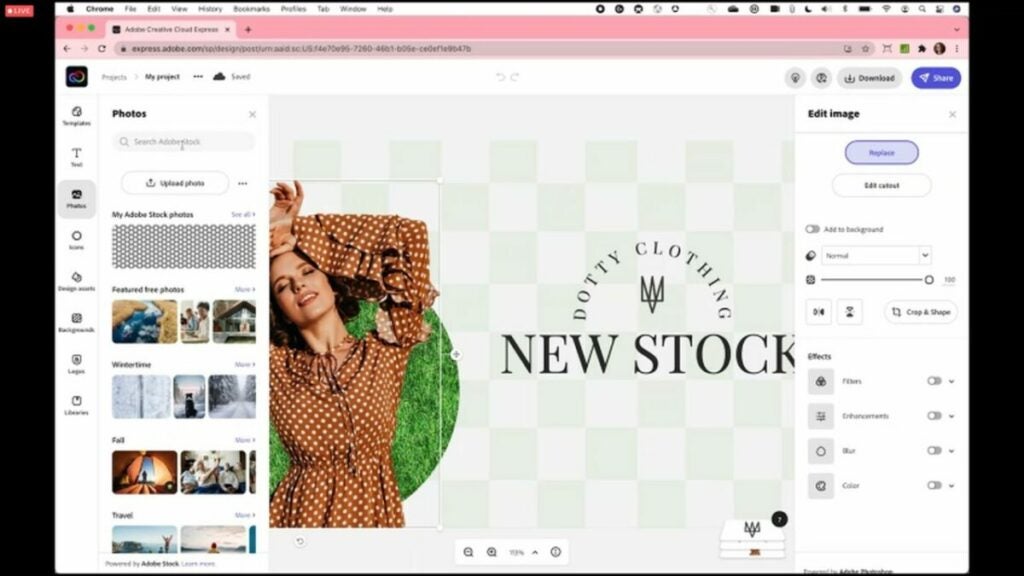
Once you’re in the app, you’ll find a well-organized editing space. Off to the left, there are a set of graphics that you can add to your design image. This section contains text toolsAdobe Stock images, a vast selection of black and white icons, backgrounds, and more features. Off to the right of your display are the pre-set color palettes, several layout options, and all the necessary tools to bring your design to life. The middle of the page gives an accurate preview of your work in progress.

After you select the object you are working on, the right side of your workspace displays an Edit Image sidebar. This advanced menu feature gives you the option to remove the background from your canvas automatically, an impressive function usually reserved for more heavyweight applications like Illustrator or Photoshop. Not unlike those two apps, you may have to work with it, and the success of the edit depends upon factors like high image contrast and the type of background you have.

Edit Image also lets you play with functions like image opacity, cropping and masking, and other rudimentary digital photo edits like background blur, color filters, and general image enhancements. When you click on a text field, a set of text editing tools automatically replaces your current sidebar display. While limited compared to the Adobe professional software design packages and apps, this toolset is sufficient for making sharp-looking edits quickly.

As with Photoshop, its more advanced counterpart, image editing in Adobe Express assembles your projects in layers. The process is ostensibly more simplified in the sense that you’re just arranging objects on top of each other. You can, however, track the sequences of edits in layers at the lower right of your canvas and rearrange them according to your desired results.

Creative Cloud Express uses Adobe Sensei AI to streamline the workflow of seasoned creative professionals.

Is Creative Cloud Express just for beginners?

As you can see, Adobe’s Creative Cloud Express accomplishes a lot with a rather limited toolset. It’s not just for students and entry-level creatives interested in familiarizing themselves with basic design software. While the app is undeniably a great starting point for beginners, its powerful image and photo enhancement features allow you to pull off Illustrator and Photoshop-like projects in a fraction of the time.

The creative expediency of Adobe Express is a fantastic value-add for experienced design professionals who work with visual images in high volumes and need to deliver their messages quickly. Professional tools like Illustrator and Photoshop lend themselves well to virtually limitless invention, but most digital marketing agencies, for instance, simply don’t have the time or resources to build a unique vision with every post.

For those who don’t obsess over the deeper elements of their multimedia content, Creative Cloud Express offers a capable and effective set of editing tools and design templates. Some functions like undoing edits and object selection may not be as accessible and accurate as more robust creative applications from Adobe, but Adobe Express is undoubtedly the most affordable product for generating professional-looking multimedia content quickly and with minimal effort overall.

An excellent value for the money

Creative Cloud Express won’t replace professional design tools like Illustrator and Photoshop, but it’s a hugely accessible app for beginners and an outstanding tool for busy creative professionals who need to turn polished Web content around quickly. Enjoy Creative Cloud Express for Web Apps at no cost today. Looking for Adobe Express alternatives? Check out our guide to using Canva.

Pros

  • Practical and powerful image editing
  • Free version provides 2GB of storage
  • Affordable, professional-grade graphics
  • Template-based for faster workflows
  • Easy-to-use, comprehensive software
  • An affordable option for beginners
  • Powerful social media creation tool
  • Access to Adobe Stock Images and template library
  • Compatible with most major social sharing platforms

Cons

  • Object selection is somewhat lacking
  • Unintuitive to full Adobe Creative Suite users
  • Clunky and unpredictable menu function
  • Templates can vary from mobile to PC versions
  • Lacking features of a dedicated app

3utools review: free all-in-one iOS device manager

3uTools offers a free way to manage your data across iOS devices. When it comes to Mac hardware, finding high-quality third-party software that’s also compatible and free to use can be difficult. In addition, finding something that further adapts Mac’s data privacy features isn’t easy either.

If you want more control over your data or if you want to jailbreak your device, the free software program 3uTools is a great option. Let’s review it based on features, issues, and competitors.

3uTools Download Now
Download Now

What is 3uTools?

This app serves as a free iOS file manager, but it has other features, too. On top of helping you organize your data, you can make use of its virtual location service. You can even use it to back up or restore data. Thanks to its robust suite of features, it is an all-in-one iOS manager.

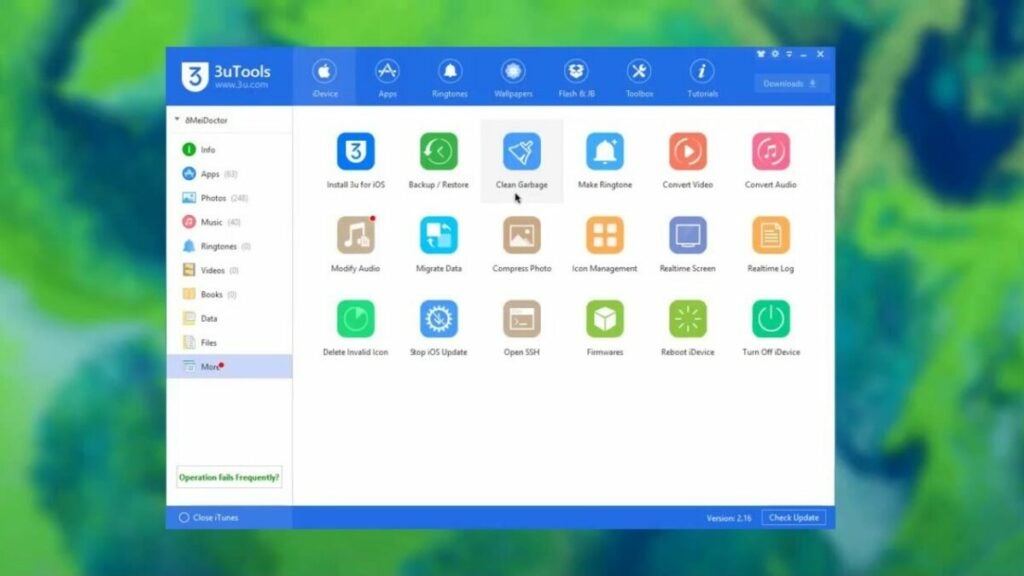
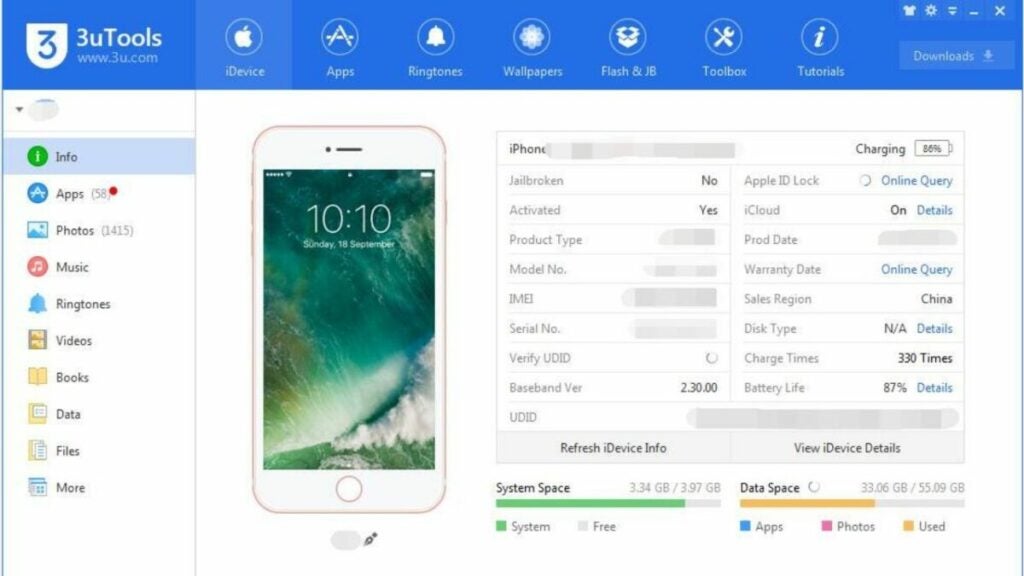
image of the 3uTools interface

What are 3uTools main features?

Device customization

Everyone loves to have a custom phone wallpaper of their significant other, pet, or favorite superhero, right? Instead of endlessly scrolling through images to find one or finding a ringtone, 3uTools keeps you organized. It’s also very easy to convert audio and video files, compress photos, and even make ringtones.

You can view your device’s images, apps, music, videos, ringtones, and other files using the software’s UI. Consider it an alternative to the App Store. The program also facilitates sharing of files between iOS devices like computers and iPhones, as well.

File management

Not only can 3uTools backup and restore data files on iOS devices, but it can also help you maintain your phone’s storage. Simply clean up old junk files to instantly add more space for music, TikToks, and more.

While you can customize the data backup, it does have its limitations. You cannot back up the following data types:

  • iCloud photos
  • “Health” reports
  • “Active History” information
  • iTunes media
  • touch ID settings
  • “Keychain” content
  • Apply Pay data

Connectivity and virtual location mode

This program lets you connect portable devices to your computer via WiFi network or USB cable. However, the lightning cable offers the best connection. But perhaps more exciting is the program’s virtual location mode.

It allows you to imitate a different location on your device that allows for unlocking region-specific content. It’s easy to engage the mode and then restore your true location in the UI. Just remember that you’ll need to manually type in the longitude and latitude of your virtual location.

Real-time event log

This unique feature lets users record any and all behaviors and/or operations on their devices. While this may not seem like a useful feature on the surface, however, anyone concerned about hacking can benefit from it.

Additional features

Some features don’t fall into one category but are still worth mentioning such as:

  • iCloud lock
  • SHSH backups
  • baseband upgrades and downgrades
  • DFU mode
image of the 3uTools jailbreak tab

3uTools Jailbreaking features

“Jailbreaking” an iPhone means that you modify the device in a way that removes any restrictions placed by the manufacturer, Apple. Users opt for this to use software that might not normally run on iOS devices.

3uTools offers an easy way to do this with the “Flash & JB” tab in the UI. You don’t need to be a developer to jailbreak your device anymore! It may also help you to avoid data loss or other issues when jailbreaking your iOS device.

Is 3uTools safe?

Though many third-party apps can carry suspicious or even malicious code in them, 3uTools is a tried and true software program. It is not malware, so it will not install harmful things onto your Apple products.

The company offers troubleshooting via Twitter, forums, and email. There are even many tutorials on their website on program features, as well as general Apple tutorials for their many products.

Verdict

As far as free programs go, 3uTools is an excellent bang for your non-existent buck. You get tons of features in a straightforward and easy-to-use UI from a company that provides troubleshooting and consistent updates.

PROS

  • Intuitive and no-nonsense interface
  • Normal and advanced modes
  • Jailbreak and flash activation
  • Virtual location mode
  • No in-app advertisements

CONS

  • Lacks cross-platform capabilities
  • somewhat limited data backup file types

Developer: 3uTools

Publisher: 3uTools

Top features: device management

Platform reviewed: iOS

BrickLink Studio review | All about the new LEGO Digital Designer

Formerly called Lego Digital Designer, BrickLink Studio 2.0 is a useful and entertaining program. This virtual Lego builder lets you explore a digital library of Lego bricks. You use these bricks to build your own Lego creations on the computer. This free program is essential for Lego enthusiasts, but it’s also remarkably fun for casual fans.

Whether you want to figure out which bricks you need for a massive project or just tinker with some fun ideas, BrickLink Studio is a fascinating app to work with. Recent updates to this iconic Lego program add even more functionality and building options.

How does BrickLink Studio work?

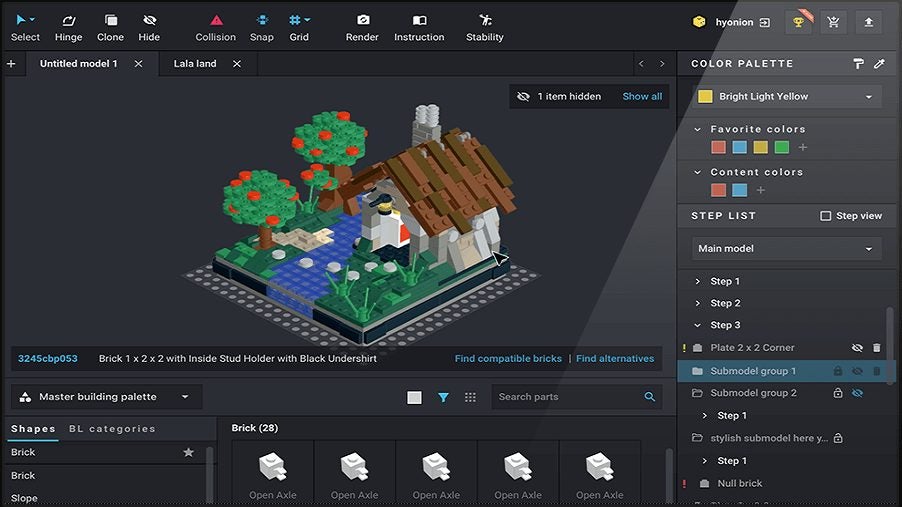
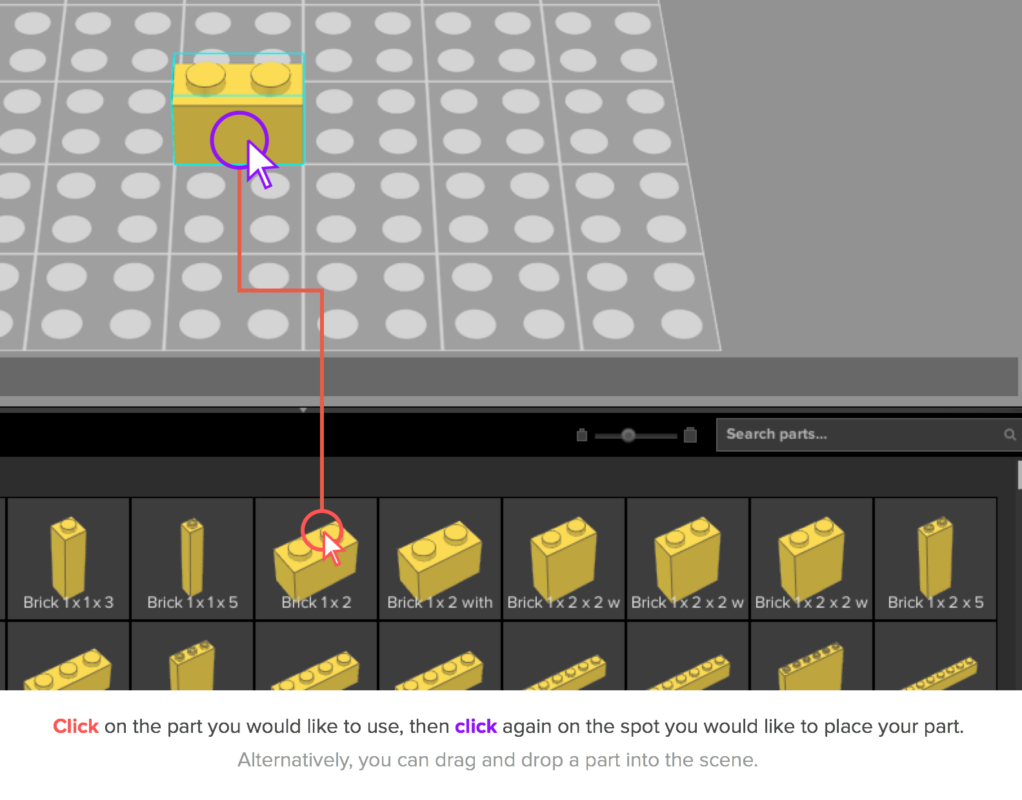
BrickLink Studio 2.0 essentially lets you build with Lego blocks in a virtual world. When you open the program, you enter a build space with a Lego grid. You browse a library of Lego blocks to select pieces and then place these pieces wherever you want.

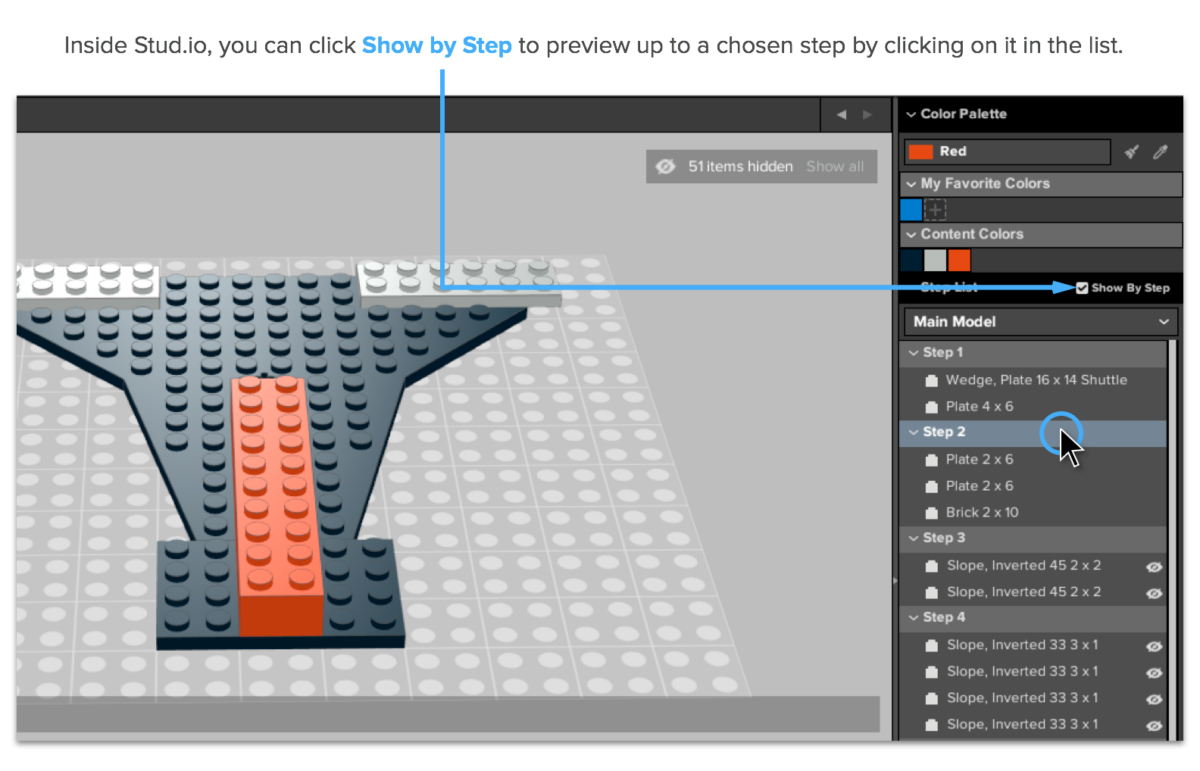
The Lego Digital Designer system includes the options to work with premade templates or choose your own design. As you build, the program generates steps. These steps are useful for either editing your build or making notes before you mimic the build with real-world pieces.

Features

BrickLink Studio 2.0 adds several useful features to the basic Lego Digital Designer program. Snap-to functionality lets you watch bricks clip to each other. The program automatically detects compatible connections and lets you run physical stability checks on virtual designs.

BrickLink Lego builder also includes photorealistic rendering. Based on FFmpeg code, the rendering is crisp, realistic, and fairly bug-free. The program is integrated with the BrickLink catalog, so you see information and prices on the real-world counterparts of your virtual blocks.

Community

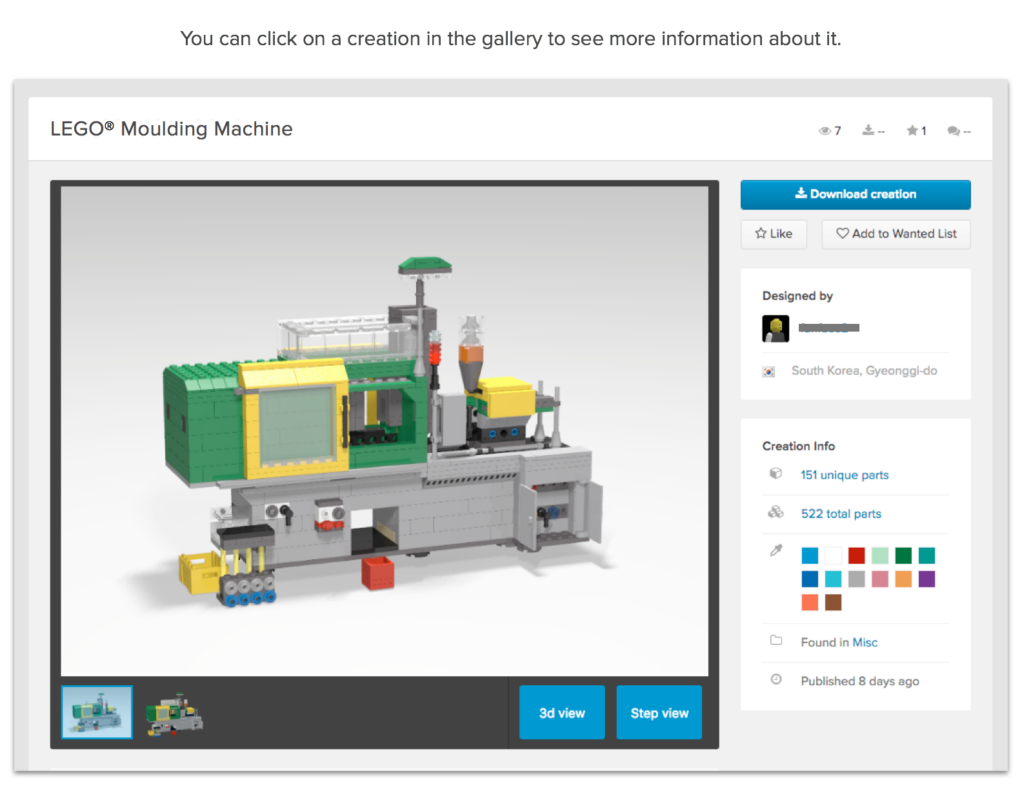
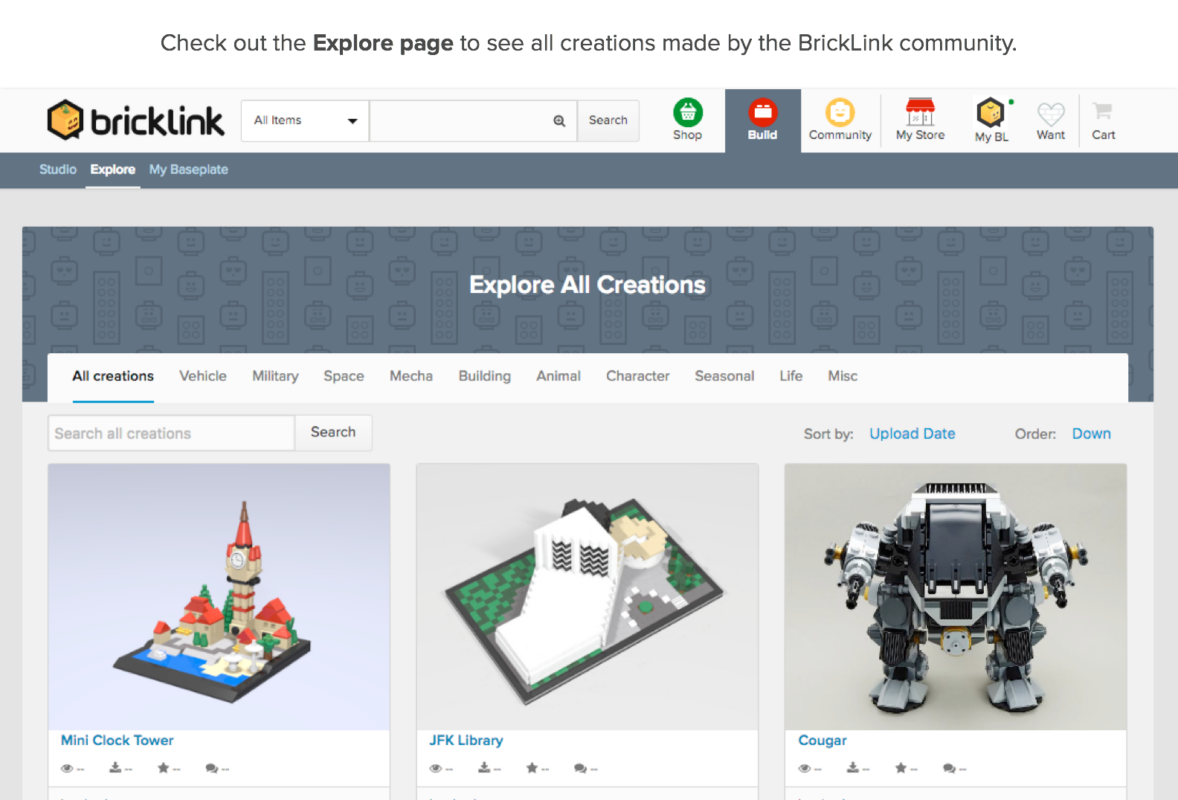
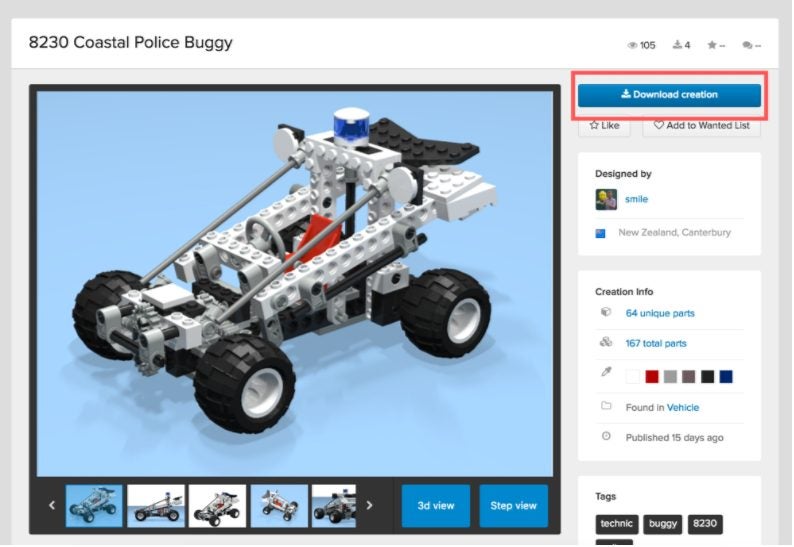
One of the interesting parts of this program is that it connects Lego users from around the world. You have the option of posting your builds for others to look at. People may also post build templates that others download and copy. Furthermore, there’s a forum where you get to discuss builds and ideas with users.

How did LEGO Digital Designer become BrickLink Studio 2.0?

This program got its start in 2004 as part of the Lego Design byME service. Though originally just intended to help users design custom Lego sets, the program quickly developed an enthusiastic following. In 2012, Lego moved away from the “Design your own set” model to focus on virtual building instead. The app continued to flourish for years, but in 2016, Lego officially defunded it.

Though Lego Digital Designer downloads still existed, there wasn’t any new content for a while. This changed in the early 2020s. Lego purchased BrickLink, a popular digital Lego building community that had existed since 2014. They integrated BrickLink features with the Lego Digital Designer program. The modern version of Lego Digital Designer, known as BrickLink Studio 2.0, has a lot of exciting functionality.

Is BrickLink Studio 2.0 easy to use?

So how easy and enjoyable is it to actually use BrickLink Studio 2.0? First of all, the controls are very intuitive. Mouse controls let you quickly select and place bricks, and an identical brick hovers over your cursor after you place a selected block. Blocks are quickly removed by pressing either Escape or Delete keys. Keyboard controls also let you rotate blocks or copy blocks with the arrow keys.

Finding blocks is also very easy. You have the option of browsing pieces by shape or searching for the name of a specific piece. Lego lets you toggle your controls to either only view the actual colors available for a piece or use any color with any piece. If desired, users have the option of selecting pre-built sections to copy, rotate, or delete.

User interface

The Studio 2.0 UI is decent but not perfect. At a glance, it does a solid job of putting essential features in obvious and easy-to-reach spots. However, the UI is a little crowded. There’s just so much detail and so many features that your screen may look busy. Until you get used to the program, it may be hard to recognize various icons and informational figures.

One of the biggest user complaints about this program has been its visual design. There’s nothing technically wrong with it, but the black background might look jarring to those who were used to Lego Digital Designer. The good news is that you can adjust this. Once you go to the Preferences section, select Appearances to alter the background color.

Minimum system requirements for BrickLink Studio 2.0

This program is available for both Windows and Mac computers. It does require Windows computers to have Windows 7 SP1 or higher, and Mac computers need OS X 10.13 or higher. There’s not an app version available for smartphones yet.

You don’t need a particularly good computer to run the program. It works even on very basic computers with limited processing capabilities. Just keep in mind that your image rendering runs slower if your computer has a weaker GPU or CPU.

Importing and exporting files

Studio 2.0 allows you to import .LXF, .LDR, .MPD, and .DAT files. This makes it very easy to integrate your old Lego Digital Designer content with your new BrickLinks content. Studio 2.0 also allows users to upload XML files from third-party software like Mecabricks. You’ll also be able to download files and open them with BrickLinks Studio 2.0 or other programs.

Just keep in mind that there are occasionally some bugs when converting other files to Studio 2.0 standards. The main issue seems to be that random bricks are converted to other brick types because different virtual Lego builders have slightly different software.

Final Thoughts

Ultimately, Studio 2.0 is a solid upgrade to the traditional Lego Digital Designer program. The newer version is targeted at adult builders instead of kids ordering Legos, so it’s a little more complex. However, once you get used to the controls and layout, BrickLinks Studio 2.0 is a very rewarding program to use.

This virtual Lego builder is a nice addition to your computer. It’s fun for the casual user who wants to play with Legos for a couple of hours, and it’s also very useful for a serious builder who wants to plan out a massive creation. Download the free program and let us know about the designs you create!

Pros

  • Extensive range of features and building options
  • Very realistic looking rendering
  • Seamless integration with real Lego parts catalogs
  • Simple yet effective controls

Cons

  • Slow renderings on older or budget computers
  • Requires internet for full functionality
  • Doesn’t always work well with XML files

Snagit review | What’s new with this screenshot tool?

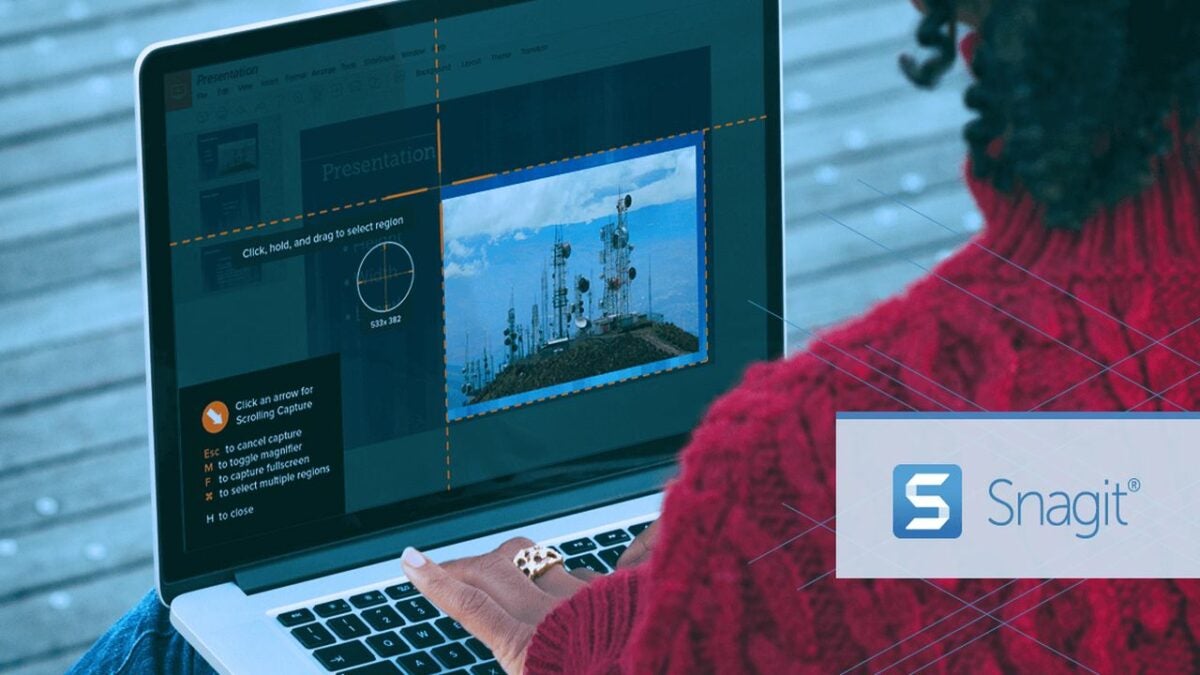
The basic free screenshot tools that come included with your operating system undoubtedly get the job done. But for business presenters, forum posters, bloggers, journalists, and meme creators, Snagit’s enhanced screen-capturer from TechSmith offers so much more. TechSmith is known for developing streamlined, reliable, and user-friendly software with countless easy-to-understand features. This latest release of Snagit is no exception.

Snagit’s revamped toolset exceeds any reasonable expectations you can have about a screen capture utility product. Most screen-capture tools do not let you do much more than just clip the entire screen (or segments of it) before saving the image as a PNG or JPG file on your desktop. The majority of users won’t need much more than these basic functions. However, if screenshots make up a regular part of your workflow, Snagit allows you to do significantly more than just screen-capture.

Snagit - Screen Capture and Recording Software Buy Now
Snagit - Screen Capture and Recording Software

What makes Snagit so unique?

If you’re a working digital creative professional, Snagit is a must-have utility. Several premium screen recording features from TechSmith make screen capture more flexible and versatile. Despite costing more than some of its competitors like Droplr and Windows Snip & Sketch, it delivers a more streamlined and polished interface along with an advanced toolset. This makes Snagit one of the best values in the current market.

While screen capture is Snagit’s main feature, what distinguishes the software from other similar screen-recording utility products is that it allows you to capture webcam video and audio. Loyal users of the application appreciate it for its simple, yet streamlined editing tools that can be used to develop a diverse array of content. Now, let’s take a detailed look at how the screen capture tool and comprehensive file editor work and what kind of media you can generate with them.

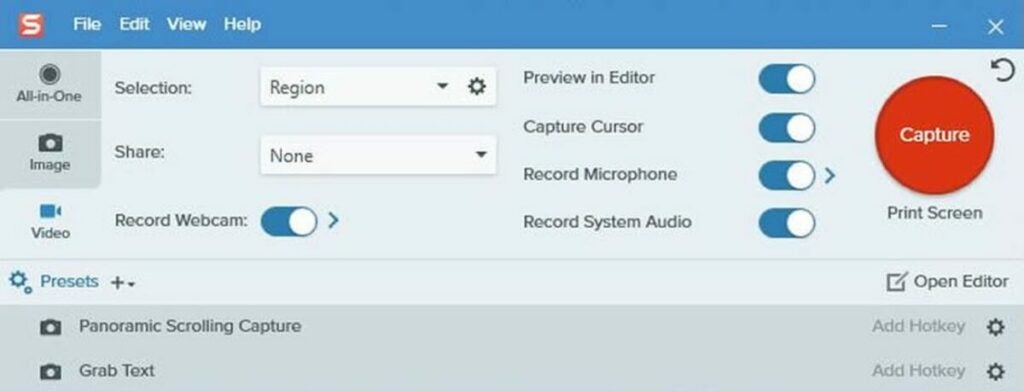
Snagit's easy-to-understand interface displays its unique screen-capture features.

How Snagit’s screen capture tool works

Snagit’s simplified interface consists of two main elements, the screen-recording tool and an advanced editor that lets you get creative with the media you capture. TechSmith continually updates its software to supply you with an endless string of improvements while revamping existing features. At first glance, it might seem like any other screen-capture utility, but the ease of editing, notating, and highlighting your screengrabs makes it distinct.

Unlike other screengrab utilities, Snagit allows you to create and edit videos and GIFs from your captured media. You can give life to your screenshots by animating your image recordings while adding audio and text at the same time. Snagit’s picture-in-picture recording feature lets you capture your computer screen and your own face simultaneously. More visual aids mean business presenters can explain their graphics more readily while spicing up their recordings with more creative originality.

Snagit recently enhanced its Cloud sharing capabilities for both Windows and macOS. The software still lets you select your preferred storage service, and any edits you create and save are more stable in the current release. When you open the content with a different operating system or PC, the image presentation is more consistent, making the app more flexible and adaptable than its competitors.

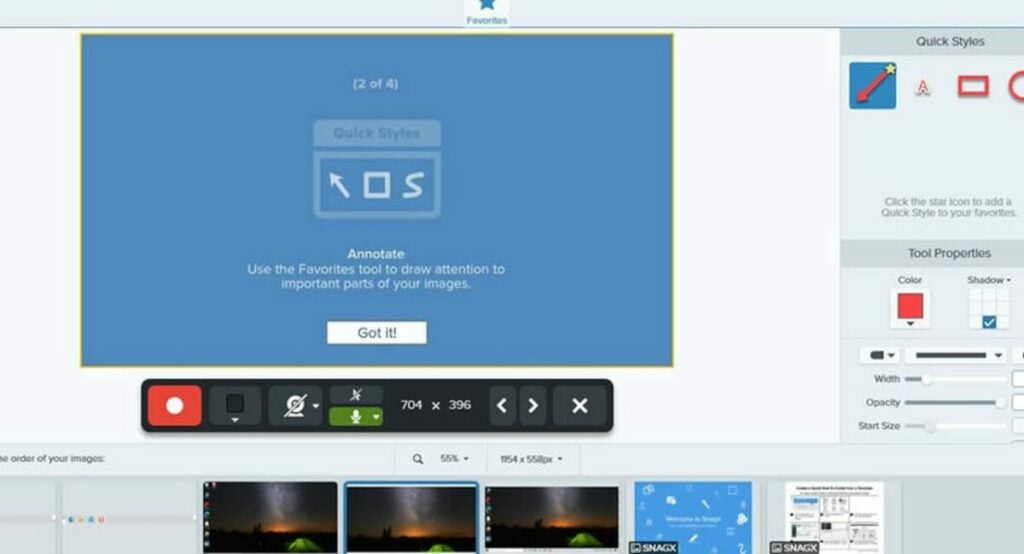
Annotate your screenshots with Snagit's versatile toolset.

Using Snagit

When you launch the application, you’ll see a small control box at the top corner of your display. The large red icon is for taking screenshots, and you use the smaller buttons to control your settings. The red screen-capture icon is only one of the multiple ways to generate a screenshot. To capture your screen, Snagit uses the default PrtSc key as a shortcut, but you can create your own shortcuts.

To record a section of your display, you simply drag the crosshairs across the screen to select a given area. After highlighting a segment of the screen, Snagit lets you either clip the image or engage the app’s unique panoramic scrolling mode. This feature simplifies the process of capturing images that are either too tall or too wide to fit on your screen by allowing you to scroll horizontally or vertically to clip the exact image you want. This tool makes it easier to clip items from infinite-scroll sites.

Snagit supports up to 4K resolution, and you can preset your crop aspect ratios to 4:3 or 16:9. Most other screen-capture utilities lack this feature, and you’re not likely to encounter one that can record cascading menus and content that isn’t directly visible on your display. The software offers another original function in its delay counter. Instead of the standard three or four seconds of delay, you can set the delay counter to your preferred interval, up to 60 seconds.

With Snagit, you can access a range of image filters and special effects like grayscale, text, arrows, and borders. For users who capture a lot of screengrabs, these features are particularly convenient because they do not have to import the image into another application like Adobe Illustrated or Photoshop to apply effects. Snagit lets you record video, but you can also insert previously recorded audio tracks from an external interface or your computer’s microphone.

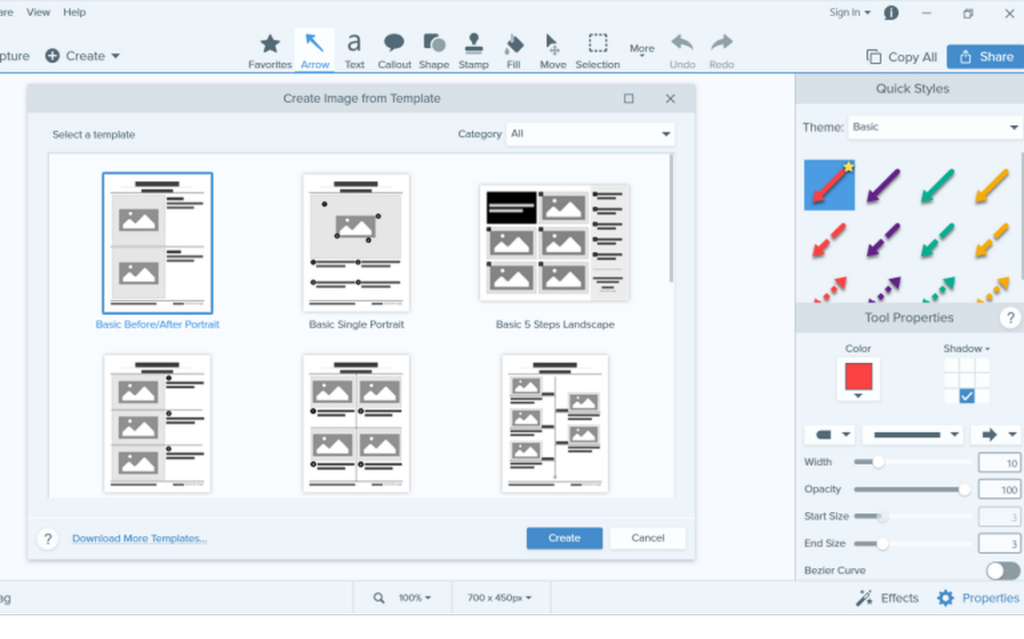
Sangit's templates and special effects ensure your business presentations look professional.

Accessing, editing, and saving files

Snagit’s editing tool is simple to use and serves two primary functions. Foremost, you use the editor to open all your captured screengrabs. Secondarily, the editor houses all your screenshots. The nice thing about managing your files with Snagit’s application is that all your screenshots are retained in the program cache, just in case you forget to save one of them. Other applications have this same feature, but Snagit’s straightforward interface allows you to access the files much quicker.

The image editor gives you the option to save your screenshots in 19 different file formats. The application supports all the major formats, including JPG, GIF, PNG, and PSD. Snagit even has its own format, SNAG. You can add hotspots that serve as hyperlinks when you save your images in PDF, SWF, MHTML, or SNAG. Competitors like Ashampoo and Snip & Sketch support fewer image file types. Ashampoo interfaces with only nine file formats and Snip & Sketch from Windows only supports PNG, JPG, and GIF.

Access all your files from Snagit's enhanced editing tool.

Video recording and file sharing with Snagit

Snagit used to record exclusively in AVI format, but versions 11 and beyond capture in MP4. Other competing applications let you save in WMV or AVI, while programs like Sketch & Snip do not offer video recording features at all. Snagit, however, has adopted advanced video capture functions that let you shift between different feeds. You can switch your recording between your main display and webcam or capture the two simultaneously.

Not unlike your screen grabs, all your videos are previewable in the video editor. Once there, you can create freeze frames and trim your video down to eliminate any unwanted segments. Each piece of video you capture is sharable to popular web applications like Dropbox, Google Drive, Camtasia, TechSmith Relay, and YouTube. Shared images give you more options with the ability to export them to PowerPoint, Word, Clipboard, Excel, and as email attachments.

Snagit: A top screen capture and communication tool

Snagit’s real value is determined by how much you intend to use it. If you are only creating occasional screenshots at home and do not have any special format requirements, then using default tools should work just fine. However, if you’re looking for a robust creative tool that lets you work wonders with your captured media, consider trying Sagit out for free.

Pros

  • Lightweight software
  • Cloud-sharing feature
  • Supports 4k
  • Simple, user-friendly interface
  • Picture-in-picture screen recording
  • Panoramic scrolling

Cons

  • Lacks advanced editing functions
  • Too many features for some users
  • Application is buggy at times

Developer: TechSmith

Platform reviewed: Windows, macOS

Syberia: The World Before – steampunk Lara Croft

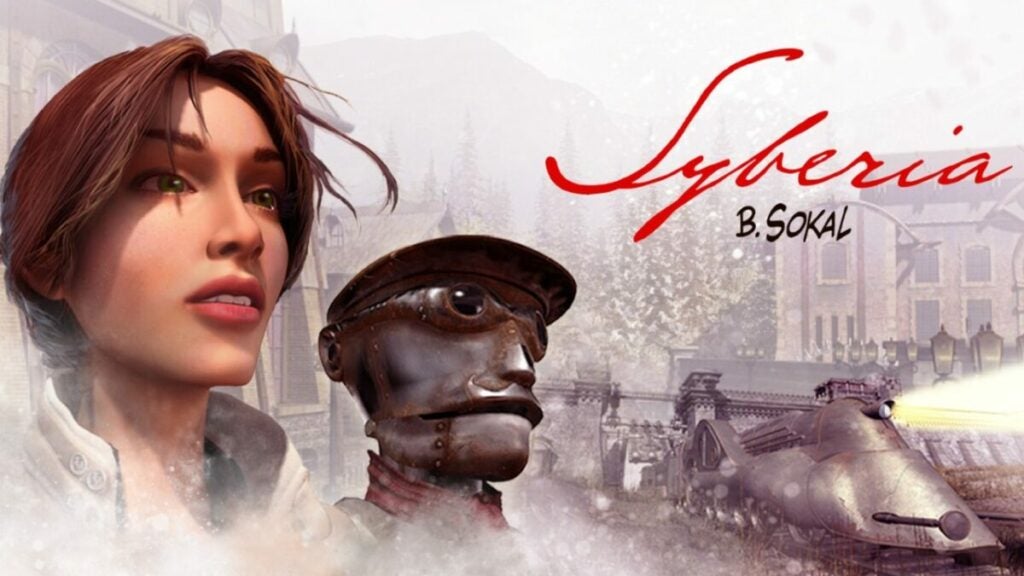
Somewhere at the intersection of Tomb Raider, Bioshock, and an H.G. Wells novel sits the Syberia series of games. Conceived by Benoît Skoal and written by Catherine Perot, a small team at Microïds brought the first game to life. The series follows protagonist Kate Walker as she unravels a mystery about the family behind automatons.

The series has taken on such a rich life with regard to its world-building and storytelling. Though the game lacks more complex mechanics, the point-and-click nature of the game only serves to reinforce the narrative focus. So what is Kate up to in Syberia: The World Before? More importantly, what connection does Dana Roze, a pianist in the 1930s, have to Kate in the early 2000s?

Let’s explore the game’s story, world, sound, character design, mechanics, and performance for an overall review.

Syberia series background

This game series is known for its immersive storytelling and follows Kate Walker in her journey. Here’s a quick summary of what happens in games 1, 2, and 3:

Syberia 1 (2002)

  • Kate Walker, a lawyer, is sent to Valadiène, a fictional French village, to address a spring-automaton toy factory corporate takeover. She must get the approval of the last remaining family member, Hans Voralberg, encountering an automaton named Oscar on the way.
  • She travels east with Oscar, collecting things important to Hans until she reaches a Communist-era mining complex called Komkolzgrad to retrieve Oscar’s hands.
  • After a long adventure involving an old opera singer and an accidental murder of an obsessive, autocratic mine manager, Kate rides a special train with Oscar to Hans. He signs the papers and Kate prepares to go back to New York City, only to change her mind and stay with Hans and Oscar and search for mammoths.
promo art for Syberia game

Syberia 2 (2004)

  • Kate’s old law firm has hired a detective to locate and retrieve her. In Romansburg, a made-up Russian town, Kate assists Hans in locating mammoths by prepping his special clockwork train. Kate deals with two criminals, Ivan and Igor, who tried to hijack the train but abscond with Hans instead.
  • Trying to confront the thieves, Kate falls through the ice below a statue of a Youkol village hidden underground. She finds Hans here receiving treatment and the local shaman sends Kate into his dreams to wake him up. By removing but preserving Oscar’s heart, Hans is placed inside him as the automaton acts as a life support system.
  • They set off in search of Syberia (inspired by Wrangel Island in our own Siberia) with a Youki partner only to be attacked by Ivan again. He gets fatally attacked by penguins while Kate, Hans, and Oscar reach Syberia and find mammoths. Kate bids Hans farewell and the detective sent to find her calls it quits since he can’t seem to locate her.

Syberia 3 (2017)

  • Kate awakens in a clinic with a young Youkol named Kurk and Doctor Efimova. Unable to leave, she explores the clinic only to find evidence that Efimova and the Russian military plan to poison the Youkol’s water source and take their land.
  • She escapes alone, warning the Youkol who will relocate but not without Kurk. A U.S. private eye slows Kate down, but she eventually rescues Kurk and gets Oscar’s heart back.
  • The Youkols and Kate embark on their journey and fight a Quinak before finding an abandoned amusement park constructed by Hans. Kate revives Oscar by inserting Oscar’s heart into automaton bodies around the park.
  • Kate and Oscar distract the Russian military as the Youkols escape. Efimova captures her and Oscar’s heart is removed.

Setting & tone

It’s difficult not to fall in love with the world of Syberia games. The charm of a world with automatons, trains, and that retro sci-fi feel is undeniable. What’s more: this game shows those things in their fully operational beauty. But the dark side of the story lies in the inclusion of the Brown Shadow faction who are akin to Nazis from our own history.

Overall, the mood for Syberia: The World Before is reserved with moments of levity. Kate is going through PTSD on top of finding herself trapped in a brutal labor camp controlled by military zealots.

Dana Roze inhabits a fictional 1930s Central European country called Osthethal. Her parents own an art shop and she is the top student at the music academy. Her family becomes a target of the Brown Shadow faction for being ethnic minorities.

Story: Dana Roze is the star

This story has everything: abandoned WWII era trains, a tragic romance, rumored-to-be mythical creatures, long-lost family members, and, of course, a memory-triggering melody. Past Syberia games are known for their weaving, enmeshed stories and this one is no different.

Without spoiling the plot entirely, it’s safe to say that fans of point-and-click games will enjoy the story of Syberia: The World Before. The separate and then converging storylines feel a bit hamfisted, but not in a way that pulls the players out of the story.

While Kate is the protagonist everyone knows, it is Dana’s story that shines the most in this game.

How long to beat Syberia: The World Before

Since it is an immersive point-and-click game, players can take as long or as little time as they want to beat it. There are also lots of optional objectives players can choose to complete or dismiss.

Main story: ~11 hours

Main story with side missions: ~13 – 17 hours

image of Kate Walker and Dana Roze in Syberia: The World Before

Syberia: The World Before performance

The series shifted from the Virtools engine to Unity in Syberia 3, so this is a return to the same engine. Many fans of the series were not pleased with this shift, but the fourth entry in the series feels more polished and at-home in Unity.

The game handles shadows and light very well with skin and clothes textures look great, too. That said, there can be stuttering here and there with some clipping or z-fighting (a flashing of different textures or meshes). Character mouth movements also appear a bit stiff in normal gameplay.

Overall, this does not detract much from the experience, and the cutscenes are very smooth.

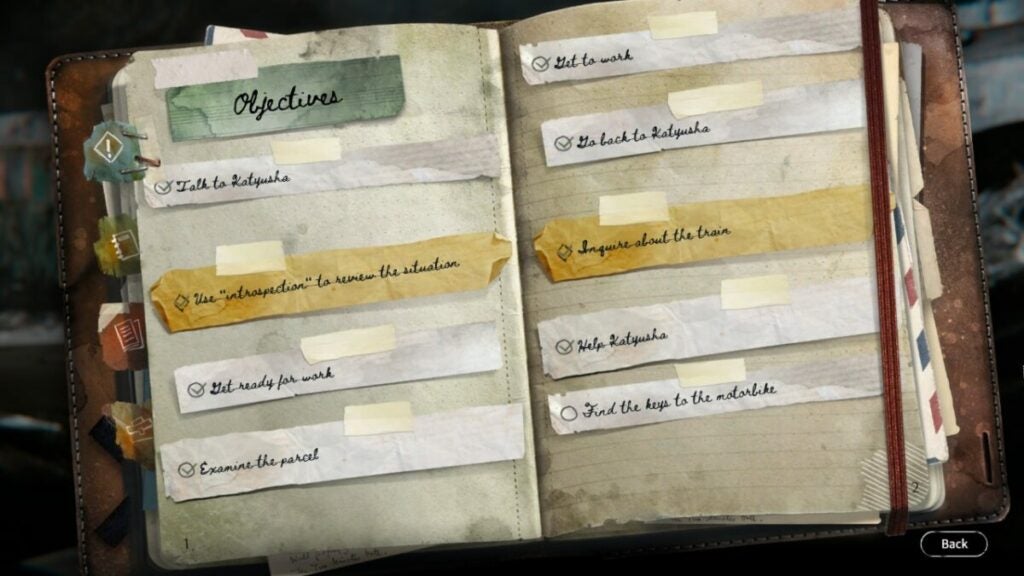
image of Syberia: The World Before UI

Syberia: The World Before gameplay & functions

This isn’t Fortnite or League of Legends; there won’t be any epic battles or action sequences. But that doesn’t mean this game lacks mechanics or excitement. With such a pensive and at times somber tone, players feel incentivized to explore and really soak in their surroundings.

The minimal UI reinforces that while the “Introspection” feature offers players another option to enhance immersion.

UI and interface

As you can see in the image above, the UI is as simple as it has been before. Players can access one of four tabs: inventory, journal, objectives, and documents.

Controls and mechanics

There isn’t much to the controls of this game. You point and click to move your character and interact with objects using left-click and drag. When you need an object like a key for a lock, a wheel pops up from which you can choose inventory items to try out.

Beyond that, however, there are two mechanics for players to be aware of:

  • Introspection – This allows Kate to take a moment to assess various situations. At times, it can feel like an honest moment of Kate catching her breath, but it mostly feels like an unnecessary feature
  • Hints – The question mark symbol on the upper right-hand side of the screen has a gauge. Once filled, players can use it to provide hints as to what they should be doing to complete their current objective
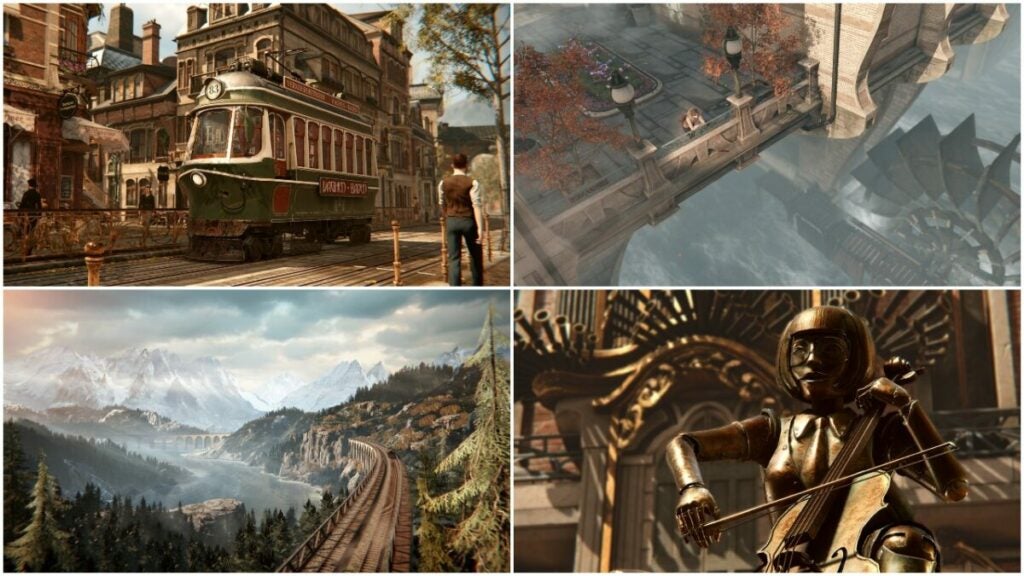
images of world design in Syberia: The World Before

World, sound, and character design

As with other games in the series, the world of Syberia appears wonderfully lived-in across the game’s fourth entry. The sordid history of the Brown Shadow faction foils the idyllic nature of Vaghen in both timelines.

Moreover, the game’s score enhances emotionally impactful moments, such as one big moment very early on in the game involving Kate’s cellmate Katyusha. However, the game’s stiff character design lets down all of its wonderful aspects.

World design: immersive and inventive

As with all Syberia games, the world in which the story takes place is breathtaking. The steampunk style of the automatons still active in the 1930s captivates while the starkness of a decrepit society in the 2000s roots players in reality.

During cutscenes, the camera work also serves to show off the world in a way that feels as if you are truly experiencing it. For instance, in the opening sequence, as Dana performs, we see automaton musicians emerge from the streets and buildings in such a way that it feels immersive.

This attention to detail can be found throughout most cinematics of the game.

image of Kate Walker and inkeeper of Vaghen in Syberia: The World Before

Character design: in-theme, but limited

There isn’t a ton of difference in character modeling of the main characters. After all, they are supposed to be related, which makes sense. However, the variation among all characters feels a bit limited overall.

What’s more: the voice-acting in the game feels forgotten. The innkeeper, seen above, is British in a town known for speaking German. Katyusha’s Russian accent is hit or miss, as well, but this kind of note is not new for Syberia games. Reviews for past titles question the choice to have many characters be British or speaking English vs. German or Russian.

Sound design: music with pedigree

Inon Zur has composed many recognizable video games, films, and shows. From Escaflowne and Power Rangers to Star Trek games, Dragon Age: Origins, and the upcoming Starfield, his music is everywhere. He also composed the music for Syberia games 2, 3, and the latest title.

For a game with such a focus on story and emotions, the music must be a character unto itself. Zur ensures that at times minimal and at times sweeping score. It makes a beautiful addition to the immersion of the game.

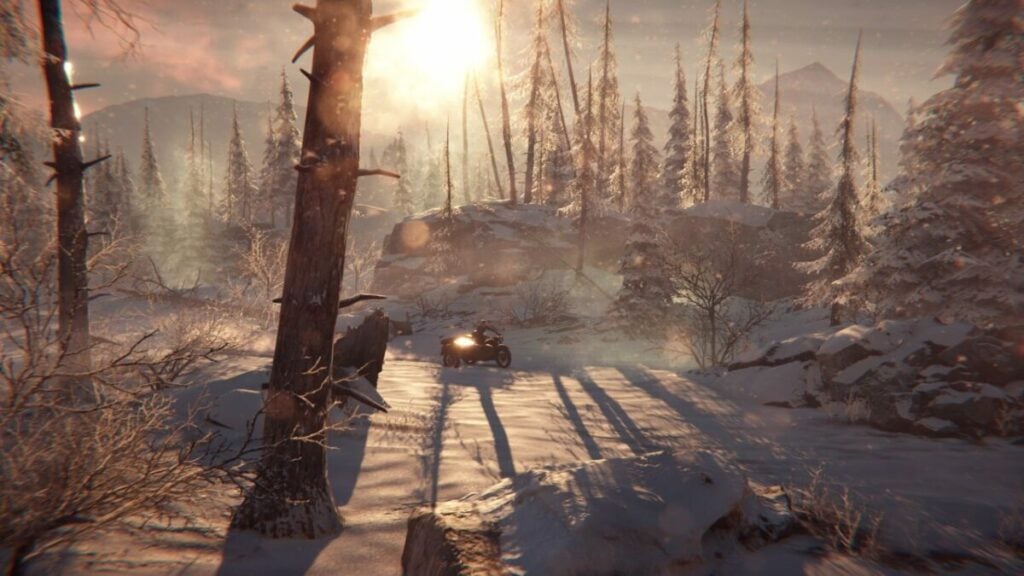
image of Kate Walker riding through snowscape on a motorcycle in Syberia: The World Before

Verdict: an adventure worth having

Despite some technical hiccups, scaled-back character diversity, and a very simple control schema, Syberia: The World Before shines in a video game landscape filled with bloated or content-shallow titles.

The cinematography of the experience indeed places you in the shoes of both protagonists. Playing detective has also never been more fun as you explore abandoned trains, history-filled streets, or spoofy snowscapes.

If you’re a fan of story-rich experiences, pick up this game. That’s the bottom line.

PROS

  • Incredible narrative storytelling
  • Established game series
  • High depth of variation depending on player choices
  • Beautiful soundtrack and visuals
  • Point-and-click mechanics make for a more casual gaming experience

CONS

  • Lacks complex mechanics and true combat mechanics
  • Puzzles feel a bit thin compared to similar style games
  • Somewhat limited character model diversity
  • “Introspection” feature feels like a bit of an afterthought

Developer: Microïds Studio Paris

Publisher: Microïds

Game Modes: Single-player

Game Engine: Unity

Weird West review | Dark fantasy adventure

Weird West is a dark fantasy action-adventure game with a new take on the wild west theme. It was developed by WolfEye Studios and published by Devolver Digital, with a release date of March 31, 2022. You play between five main characters, while there are plenty of hours to keep you busy.

The controls can be tricky at times, but you shouldn’t have a problem if you’re used to dual-stick gameplay on a controller. The camera perspective gives you a stunning view of the landscape, which you’ll need for the stealth options. If this game is the type that gets you excited, continue reading my Weird West review for more details.

The wild story of Weird West

When you start playing Weird West, you’ll notice that the story is one of the primary game elements. There’s a lovely video at the beginning that sets the scene, after which you’re on your way to make a stand in the desert county. Here are some elements to enjoy.

Heading out in the West

The story of Weird West begins with the first hero’s husband that goes missing. As you go search for him, you realize that bandits and other gunslingers have taken over and are killing people. It doesn’t stop you as you follow the trail to discover what happened to your partner.

As the plot progresses, you’ll meet NPCs that unravel what’s happening around you. You’ll run or ride through unforgiving terrain as the quests take you deeper into the story, with strange fantasy creatures that appear. It’s clear there’s more to the husband’s disappearance than meets the eye.

There are four other heroes you’ll also get to play with, each with unique abilities. Besides the main campaign, there are side quests to complete that will help you unlock skill points.

Weird West Review

Choices have consequences

Weird West isn’t as simple as obtaining quests and completing them. There are occasions where you’ll speak to NPCs as part of the investigative mechanic in the game. You’ll notice that there are choices you need to make, which also have an effect on your reputation and what will happen next.

Including this form of gameplay means you can replay Weird West several times to see what the various outcomes are. It’s similar to Silent Hill 4: The Room where the decision to keep or discard an item makes the difference between easy or more challenging gameplay. In this case, the choices are mostly restricted to dialogue questions and responses.

Weird West Review

A narrator to guide you

As you travel between towns and stores in Weird West, you’ll hear a male voice speaking over and to you. It’s a mixture of telling the audience what’s happening and guiding you through what to do next. There are some hilarious and snide comments that make the narration fun to listen to, but you may want to take the hint once in a while.

How long is Weird West to play?

If you play with all five characters through all the story beats, Weird West will take about 40 hours to play. That’s excluding taking on side quests and exploring every part of the map. Also, it depends on how quickly you manage to master the controls and abilities, which leads us to the next section of my review.

Embracing Weird West features and abilities

Let me start this segment of my Weird West review by saying that its gameplay style isn’t for everyone. There were intense moments of frustration that led me to rage quit more than once. However, I was still determined to get back into action, which led me to the following discoveries.

Is there a guide in Weird West?

As you play Weird West, there will be a short text guide with each new action you discover. When you find a secondary weapon, the game will show you how to switch between them. Found a new dynamite stick? A side window will appear showing you how to aim and throw it.

I love games like this that teach you how to play as you’re playing. There have been many titles where I did a lengthy tutorial first, only to forget what I learned when the actual game starts. One example is Diplomacy is Not an Option.

Weird West Review

Which control type is best for Weird West?

When I play a game on Windows 11 for the first time, I prefer to start with my Xbox Controller. The controls are easy to manage, with one trigger letting you aim and the other one shoot. The left stick is for running around, while the right one shows the line where you’re looking while aiming. There’s also quick access to medicine, abilities, and other items.

After a few hours on the controller, I switched to the keyboard so I could compare. The mouse buttons help with moving, shooting, and aiming, but there are specific keys for all the other functions. If you’re not used to keyboard gameplay, you’ll need to look down to see where the key is first, which can become annoying. 

At least Weird West auto-switches between keyboard and controller buttons icons on the screen, unlike Death Stranding Director’s Cut where you need to manually change it in the settings.

Stick to your guns

The primary combat elements are firearms. You’ll find an array of guns in Weird West, which one would expect from a wild west game. You can only switch between two at a time, but when you hold the weapon button, a wheel appears where you can alternate one of them with others you’ve found.

The line of sight helps you see where your bullets will fly when you shoot. If there’s an object in your way, you’ll notice a small interaction icon revealing what will happen. So, if you’re targeting a TNT barrel, the game will show you that it’s likely to catch on fire or explode.

Weird West Review

Stealth kills

A small note is that shooting enemies when surrounded can be incredibly challenging. Aiming at them and blasting away while they’re shooting at you almost means certain death. It’s best that you don’t place yourself in these situations, as you’ll most probably die within seconds.

That’s where the stealth mechanic comes in. The small map at the top corner reveals where enemies are and where they’re looking. You can use this as a guide for where to quietly move and hide, before you sneak up behind them and perform a stealth kill.

Weird West Review

Using your environment

As part of the stealth mechanic, you can hide behind boulders or within bushes, much like in Assassin’s Creed: Valhalla. As long as they can’t see you, you’re safe from danger. However, I did find an issue with this mechanic a few times. Sometimes, I was hiding in a bush with someone approaching, when they suddenly saw me and started shooting. I’m still not sure if it’s because they were too close or because my character was wet, but I was not pleased.

Weird West Review

Trouble along the way

Each stage is an element on its own, so you won’t have an open-world setting. Instead, you’ll need to find exit points to move from one place to another. When you do, you’ll see a beautiful map showing you the next location. A word of warning: there may be some trouble along the way stopping you as you proceed, which becomes a small mini-quest that adds to the fun.

Weird West Review

Collect everything you can

Your hero can freely search barrels or dead bodies in the hopes of finding valuable items. With how quickly my ammo ran out, I was always in desperate need of locating new loot. The best objects are those that contain medkits or full boxes of ammunition. Don’t ever leave an area without first checking everything that’s available.

Weird West Review

Unlocking abilities and perks

Your heroes wouldn’t become more powerful if they didn’t gain new abilities. There’s a definite sense of progression as you obtain new perks on your journey or upgrade skills. You can also find unique objects on your maps that will boost your weapons and strength. It’s up to you to choose wisely how you want to apply the perks.

Weird West Review

Playing with different characters

As mentioned before, you’ll start with one hero, but there are five you’ll play throughout the story. Each one has a different personality and ability, which you’ll need to learn to master if you want to finish Weird West. The main controls remain the same; it’s all about how you make the best use of your skills and weapons.

What are the Weird West PC requirements?

Weird West doesn’t have heavy PC requirements, so you’ll be able to play it with a decent machine that can run Windows 10. The storage is quite high but still doesn’t match the likes of other modern titles, such as Call of Duty: Warzone or Mortal Kombat 11.

  • OS: Windows 10
  • Processor: Intel Core i5-2380 / AMD FX-6100 
  • Memory: 6 GB 
  • Graphics: GeForce GTX 650 Ti (1024 MB) / Radeon HD 7770 (1024 MB) 
  • Storage: 16 GB 

I didn’t notice any performance issue on Windows 11, and the game played smoothly without any glitches.

The wondrous effects of Weird West

Let me end my Weird West review with a discussion about the graphics and sound. The music is so impressive, that you can purchase the soundtrack on Steam as an add-on to the game. It’s a pity the developer didn’t go as far as offering a digital artbook. It would have suited the game’s theme.

Camera perspective and world design

The camera perspective provides a top-down view, similar to what you’ll find in Diablo III. What I enjoyed about using the keyboard in this instance is that you can tilt the camera to get a better view of the upcoming landscape. I loved how the map opens up as you travel, and each stage has a beautiful design.

Weird West Review

Impressive characters and creatures 

There’s a slightly cartoonish effect to the characters, but it’s only slightly noticeable. Character movements and actions perform splendidly on the screen, and I enjoyed the visual design of the fantasy creatures you’ll discover later in the game. Even the perks and info pages have absolutely beautiful appearances.

Weird West Review

The dark fantasy realm in the wild west

Dark fantasy is a mixture of horror and fantasy. The Diablo franchise is a splendid example of what dark fantasy games are like, and Weird West delivers as promised. There may not be as much gore in the beginning, but wait until you progress later into the story. The scenes are stunning.

Enjoyable music score and sound effects

The sound effects will make you feel like you’re in the wild west. The guns sound like they’re from a cowboy movie, plus you’ll hear it in many character accents. I enjoyed that there was voice-acting for most of the dialogues, and the music was outstanding. The effects all add to the ambiance in the game, making you feel like you’re part of the action. Of course, the narrator’s comments were the best element.

Weird West: You better have good aim, partner

Weird West is a fun adventure in the wild west with plenty of fantasy elements to make it exciting. You may find moments where fighting several opponents becomes annoying, but that’s when you need to hone your stealth skills. There are times when you’ll replay stages more than five times just to get it right, so it depends on your endurance and how long you’re willing to play. Overall, it’s worth playing if you’re into dual-stick combat, fantasy, and cowboys.

Since I mentioned the games, why don’t you go have a look at my Death Stranding Director’s Cut review and Diplomacy is Not an Option review?

Pros

  • Exciting wild west theme
  • Lengthy, details storyline
  • Feature five heroes
  • Unlock several abilities and perks
  • Kill in stealth mode
  • Stunning fantasy elements
  • Outstanding music and sound
  • Map and travel mechanic

Cons

  • Combat is challenging when surrounded
  • Many frustrating stealth moments
  • Shooting at objects sometimes fails

Developer: WolfEye Studios

Publisher: Devolver Digital

Game Modes: Campaign

Platform reviewed: Windows 11 – Steam