How to download and install Grammarly to improve your writing

Never make a typo in a work email ever again with Grammarly!

Grammarly

If you haven’t tried Grammarly yet, we highly recommend it to everyone who uses a laptop or PC!

You’ve probably seen the advertisements while browsing YouTube: Grammarly wants everyone to know they’ve become the go-tool editing software for millions of user devices. And guess what? They earned it with a combination of powerful, non-invasive editing tools.

On the off chance the insane number of Grammarly commercials annoyed you into deciding never to download the app, please give it a chance! Even the best writers make mistakes. This program will catch them, giving you a sense of security when sending out written documents for absolutely no charge!

Grammarly for Chrome Download free ►
10

Let’s dive into…

How to download and use Grammarly

Gramm

Downloading Grammarly takes very little effort.

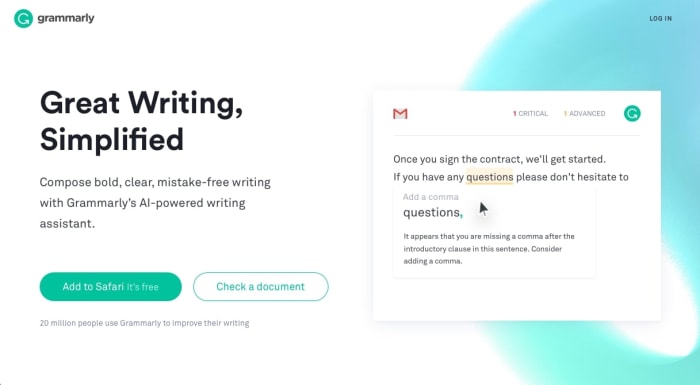
First, head over to the Grammarly website. When you arrive, the green button at the bottom right should be specifically optimized for your current browser. Click it and you’ll add it as a web extension!

Using It

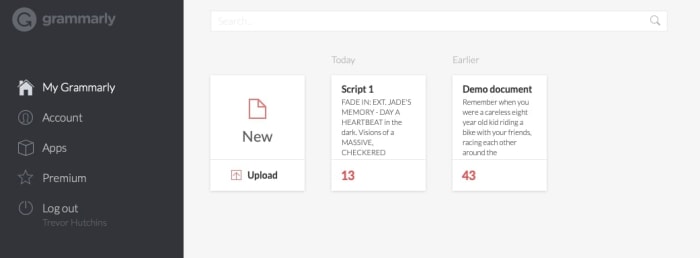
Docs For heavy-duty projects, you’ll want to visit the full Grammarly website or downloaded app. There, you can upload documents in the window seen above and have the program check throughout your entire project for grammar, spelling, and punctuation!

If you made sure to add Grammarly as a browser extension, you don’t even need to load your writing into the program, an editing widget will appear in most programs! Specifically, Gmail will have a highly useful option that provides suggestions when you begin a message:

Email

Mobile

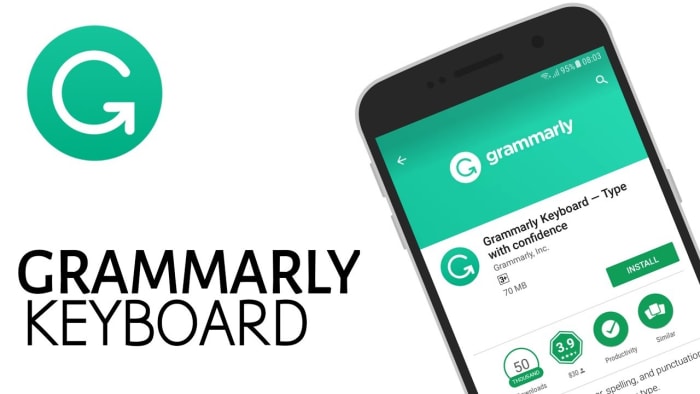
KeyboardOn mobile devices, you’re going to want to look for “Grammarly Keyboard” instead. We recommend either the Apple or Google Play stores.

Grammarly Keyboard Download now ►
10

It’s hard to work with documents on a mobile device, so this program works much like the browser extension. Once you download the app, you’ll go through a few setup steps, after which Grammarly will appear in your messaging environment, Slack chat, and more!

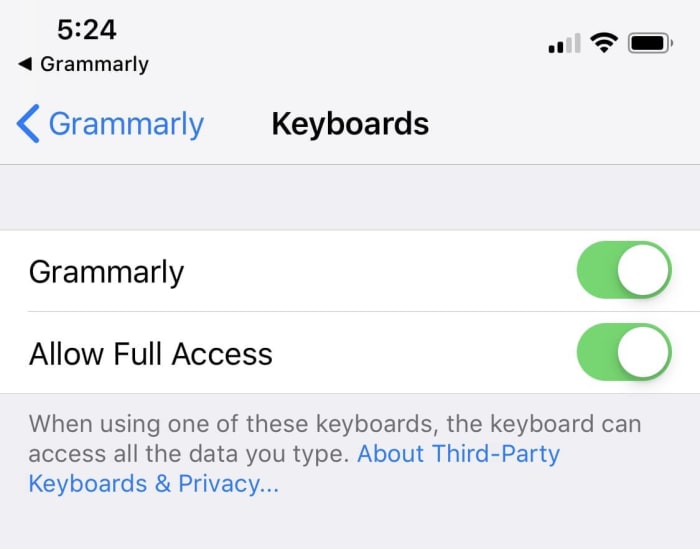
After downloading the app, you’ll have to sign in. Then, to activate Grammarly, go into your settings, find the app, and choose the “keyboard” menu within. There, activate Grammarly across the whole device:

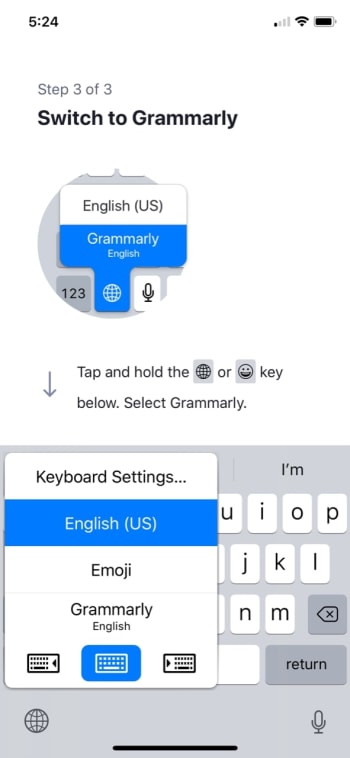
Turned OnFrom there, you’ll need to return to the Grammarly app and switch your normal phone’s keyboard over:

GrammStart

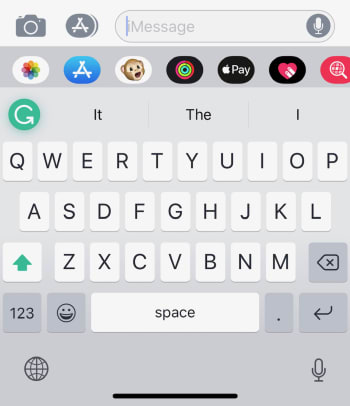
After that, your keyboard will be completely changed. From here on out, it will look something like the picture below. It will also give you all the suggestions and help expected of the Grammarly program!

Keyboard

What is Grammarly Premium?

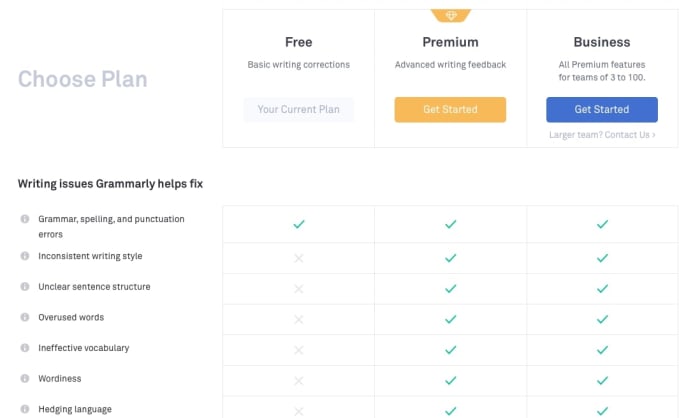
Grammarly Premium offers a greater range of editing tools and will check for things such as plagiarism, insensitive language, and an inappropriate tone. While these may be great tools, we’ve found the vanilla version to be adequate at the very least.

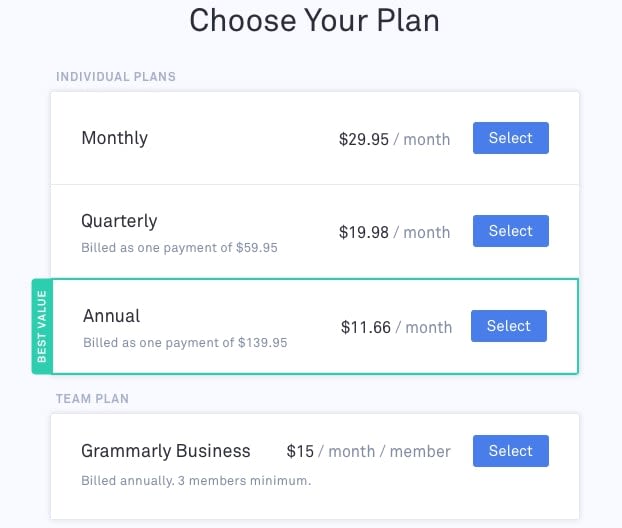
If you’re trying hard to make sure your writing is professional in every regard, this option may be perfect for you. Just be aware of the cost:

PremiumCost

Final notes

Grammarly isn’t without fault: the English language is radically diverse, and no tool will ever be fully in touch with the enormous range of personal choices that writers can employ. In this very article, the program told us the words “downloaded app” should be “downloaded AN app.” Why? Because it hadn’t logged the possibility that “downloaded” would be used as an adjective! Weird, right?

Still, despite a couple of snags here and there, we’ve found Grammarly to be an excellent companion app and we hope you will too!

How to easily put an iPhone app in a folder

Sick of apps flailing across the screen when you try to stick them in a folder? Here are a few tips to make it easier!

Apps

Let’s be honest, sometimes it’s really hard – infuriating, even – to get Apple apps to land in a folder on your phone. Try as you might, the folder you’re aiming for keeps juking away from the program you want to move: it slides onto the next page, goes up a line, moves aside, and falls back. Every. Time.

Yeah, this gets us all super frustrated.

If you’re tired of this issue and want to get your app to its destination a little quicker, we’ve got a few suggestions for you; tricks that will make it far easier to work with, and save time (every time).

How to easily put an iPhone app in a folder

How editing works

If you’re wondering how to work with iPhone apps in general, here’s the quick rundown on how to get started:

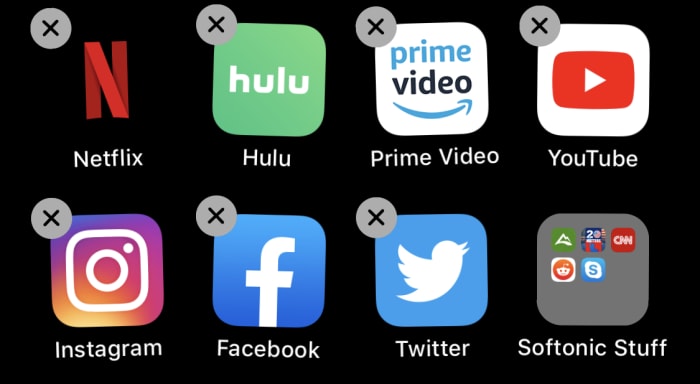
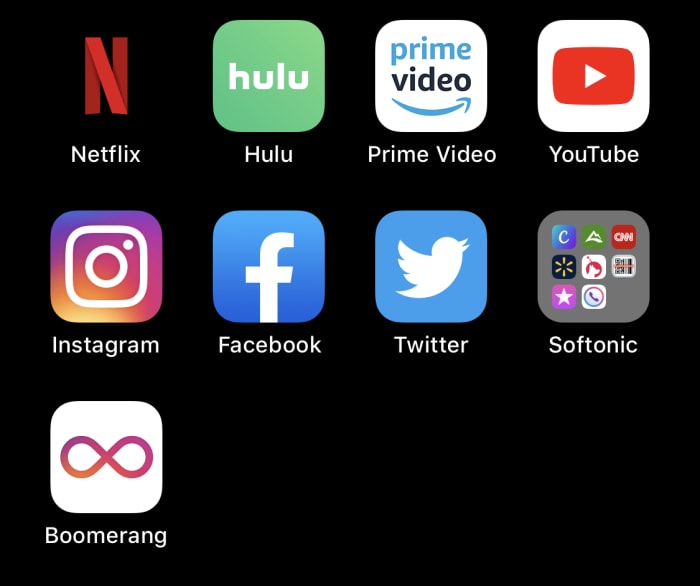
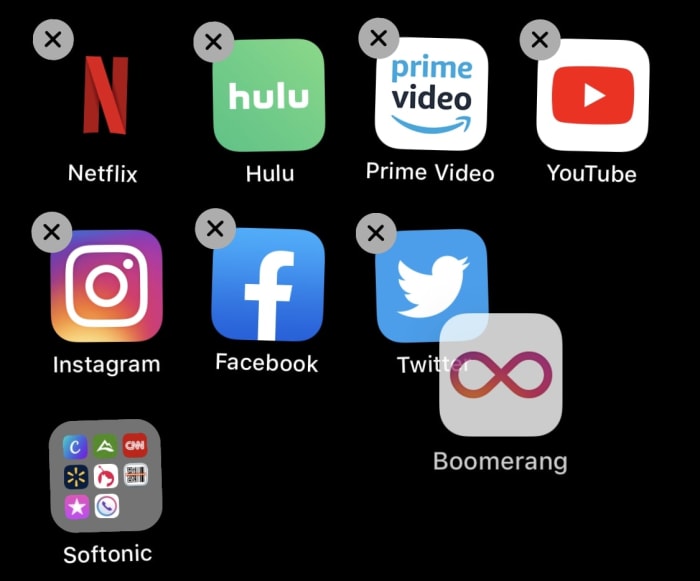
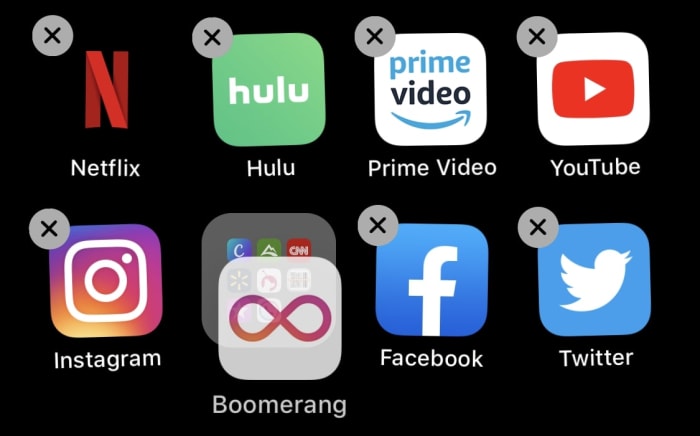
To begin moving/deleting apps, hold your finger down on any app for a few seconds. Soon enough, gray “x”s will appear beside your apps and they’ll begin wobbling:

Wobble

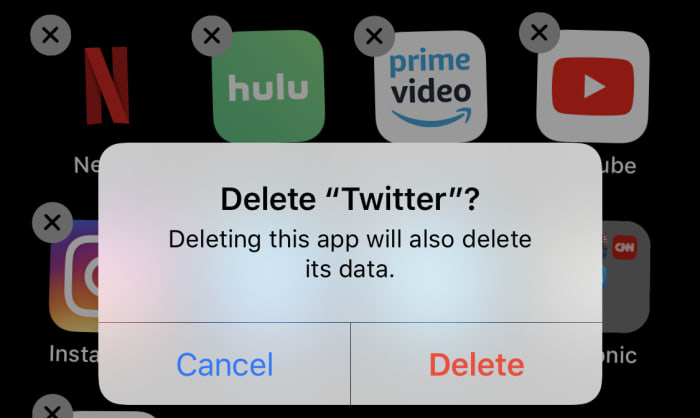
Now, you can tap any gray “x” to delete an app, simple as that:

Delete

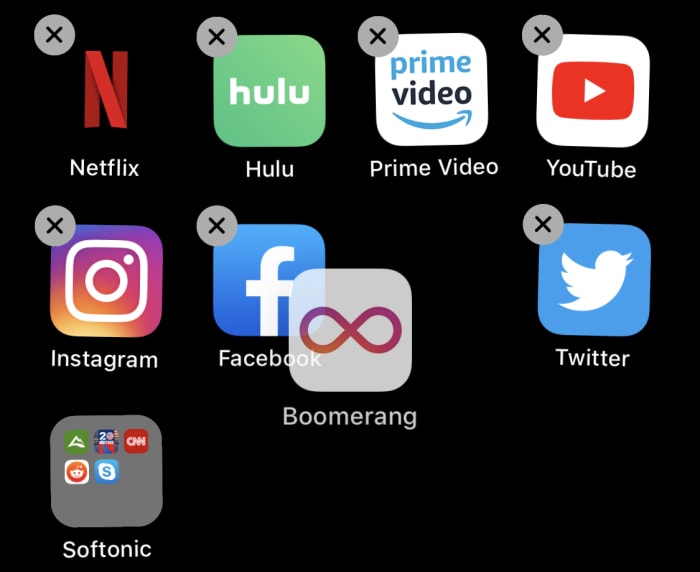
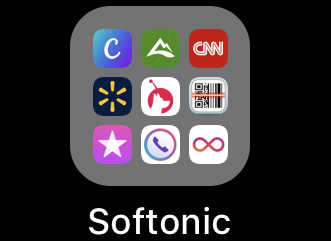
You can also move apps by holding onto them (we’re sliding Boomerang around). If you put it over another app, you’ll create a folder. If you put your app over an existing folder, it’ll join the stack:

Moving

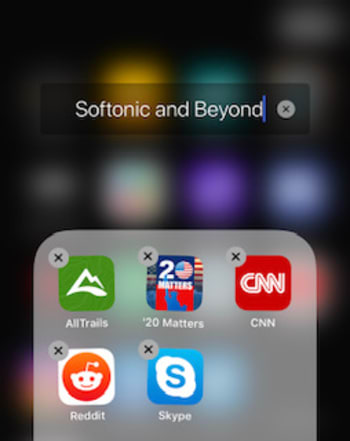
And finally you can rename their folders while this mode is activated:

Rename

To end the app editing mode, click the home button. On newer iPhones, this requires swiping up at the bottom of the screen. Congratulations: you’re now briefed on how to use the app editing mode!

Now, let’s get back to the main event: issues with folders.

Method 1: Move other apps first

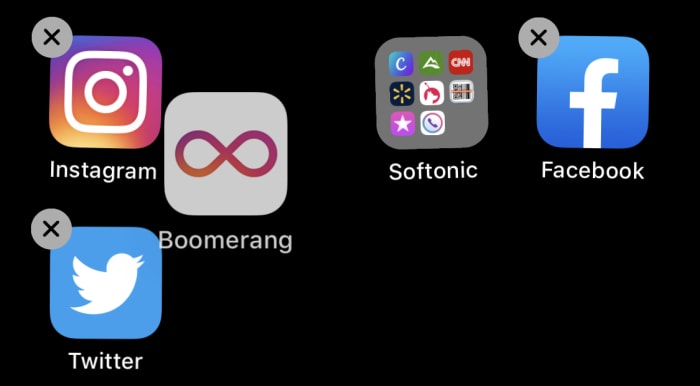
As we’ve said: while in editing mode, you may often find it hard to put apps into folders. One of the main issues can be the location of the folders themselves:

FolderEdge

When a folder lies at the edge of its row, you may continually displace it down a level while fruitlessly trying to get your app to land inside. This problem will be multiplied greatly if you have it located at the bottom of the entire page. In this situation, the folder can jump back and forth erratically:

Erratic!

To make things easier, go into the app editing mode and move it to the center of its row, preferably second from left. Now that it can’t jump very far, it shouldn’t be too difficult to land the app after some trial and error, even if the folder eludes you for a while:

Centered

Of course, if you want to make things even faster…

Method 2: The angle of approach

Modern technology occasionally plays by interesting rules. Apple folders, for example, measure their spacial relationship with the app you’re moving to judge whether they should accept the incoming program or move away and make space.

Here’s the secret: it will always move away if your app comes from the side.

Instead, bring your app on top of the folder by approaching directly above or below; this greatly increases the odds that your app will be absorbed!

DownDone!

If you can use this method alone, we recommend it: you’ll save a lot of time when organizing your iPhone’s pages. Of course, if more help is needed, use both methods in conjunction to ensure painless efficiency.

Conclusion

These concepts are simple, which could be part of the problem: Apple probably assumed a small detail such as this wouldn’t be worth a footnote. However, modern users often have multiple pages of apps to personalize, which means little issues like this can become far more annoying than expected. But now? You now have a quick guide to fix it!

11 hidden Spotify tips and tricks

Make Spotify even better with these 11 features!

Spotify

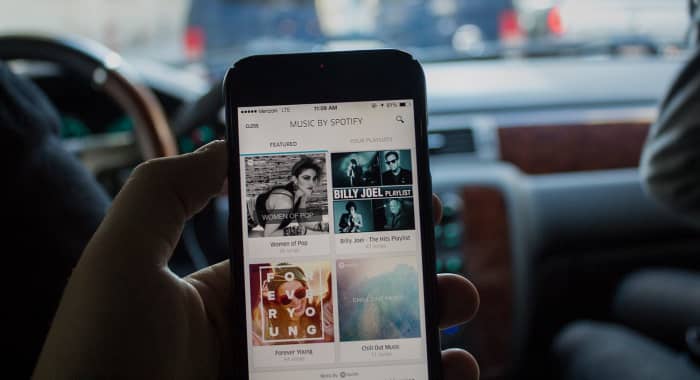
Having a hard time requesting a song while driving? Or maybe you want to preview a song without playing the whole thing? What about when you can’t find a particular song? Spotify is an awesome for listening to (and for teaching) music, and while it doesn’t take a music degree to create a new playlist or put your library on shuffle, there are some handy tricks to the app that are a little more under the radar. Check out these 11 tips that will add utility and ease to the software:

8

1. Quality vs Data

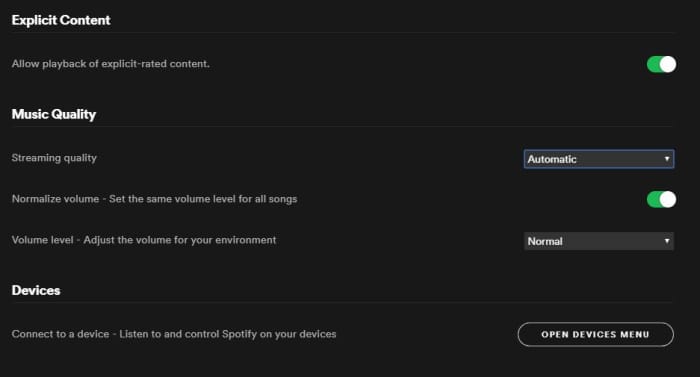
On both desktop and mobile you’ve got the option to either stream or download music on Spotify. By default, this process strikes a balance between fidelity and data, but through the Settings menu you can actually tweak which gets priority.

To do so (on Desktop) open the Settings menu from the drop-down under your profile picture. Scroll down until you see Music Quality. Use the ‘streaming quality’ drop-down to manually select either normal, high, or very high quality for your streaming.

You can use this function via mobile, too; just open Settings from Your Library and find it under Music Quality. On iOS specifically, you can find it under the Streaming Quality menu.

Spotify Settings menu Music Quality

2. Keep tabs with Last.fm

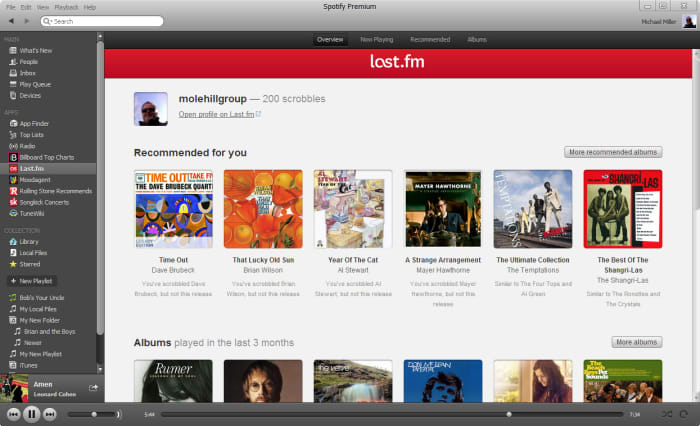
Spotify is integrated with Last.fm, a service that lets you track and discover new music. If you make an account with Last.fm (which you can do right here) it can connect directly to Spotify and you’ll be able to browse through the records it keeps of all the tracks you’ve been listening to on any of your devices. It’s even free!

Spotify Last.fm integration

3. Sing along with the lyrics

How does the second verse to “Tiny Dancer” go? Whether it’s because you’re trying to sing the song on the fly, or simply because not knowing what the singer is saying has always bothered you, it helps to have the lyric sheet handy.

Spotify might have the lyrics up for you already – all you have to do is tap on the album picture while the track is playing. Spotify is partnered with Genius and certain songs have the lyrics integrated right in. Alternatively, you can switch this feature to “Behind the Lyrics” mode which tells information about the song alongside its lyrics.

Spotify Genius lyrics

4. Set up the queue

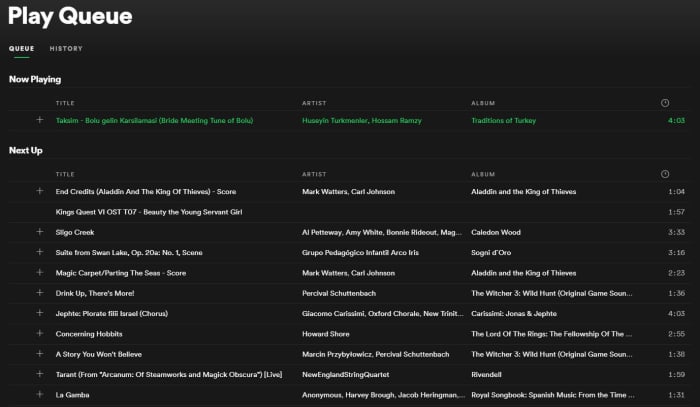
One of our favorite features for Spotify is that you can set multiple tracks in a queue, and they’ll play one after another. Doing so is very easy; on mobile all you need to do is select the song and press the ellipsis. From here you can do all sorts of things (view the album, check out the artist, add it to a playlist, or go to the radio), one of which is “add to queue.”

Once the current song is finished playing, it’ll start the next one in your queue, and then afterwards it’ll go right back into whatever playlist you were in before. It’s especially useful when you’re in something like a “classic rock” playlist but are hankering to hear one specific jazz tune before resuming.

Spotify Queue menu

You can also view the default queue of songs as well as your song history at any time by pressing the “queue” button on the bottom right (on desktop) or by looking through the queue menu on mobile.

5. Preview a track

If you’re a fan of instrumental music, you might not recognize a song by its title (since there are no lyrics to go by). Or maybe you just can’t remember how a song starts.

A neat trick on mobile is to press and hold the song title for a quick preview. That way you can navigate away from the page, check out other music, or show your friend a quick sample without committing to the whole track.

Spotify preview track mobile

6. Follow artists

It’s always exciting to find a new artist you like, and Spotify makes it very easy to look up more tunes, more information, or even upcoming concerts from artists in its huge roster.

Next time you’re listening to a song on Spotify, click on the artist’s name (or find it via pressing the ellipsis on mobile) and it’ll take you right to their page. Here you’ll see their most popular tracks, albums they’ve put out, and even recommendations for other similar artists.

Spotify artist page

7. Crossfade tracks

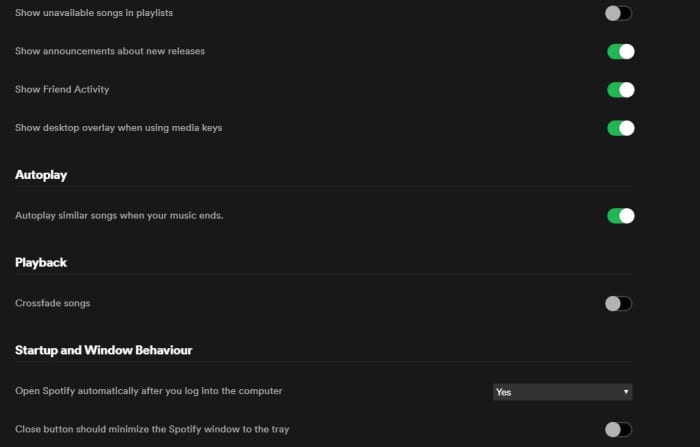
If you want your Spotify experience to sound extra fancy, you can set it to seamlessly blend from song to song using crossfades between tracks.

To engage this just go back into your Settings menu and look for “Playback.” Enabling the crossfade feature is the only option here; just toggle it on.

If you’re on desktop you might find this option under “Advanced Settings” instead. Just scroll down and you’ll see a button for it.

Spotify Settings Playback crossfade

8. Request tracks via voice command

Texting and driving is a terrible idea, and that’s why it’s illegal. If you use Spotify on mobile, there’s a good chance you listen to it while driving, too. Sometimes, there’s a song we really want to hear and it’s tempting to scramble during a red light to try and put it in queue – but there’s actually a much safer, more convenient way.

Spotify can recognize voice commands, so just hit the mic button on your smartphone and tell it the song you want to hear. Tap it and it’ll start to play immediately. It’s faster and nearly hands-free!

Spotify mobile driving voice command

9. Make a collaborative playlist

Planning a road trip with friends? Maybe trying to organize a list of songs for your band to cover? Maybe your friend’s getting married and you and the other bridesmaids are in charge of making a playlist.

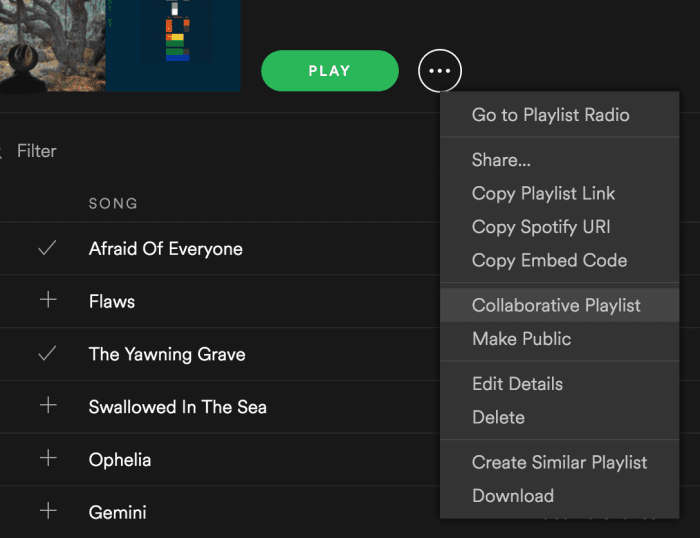
Start making a new playlist and then right-click on it. In the drop-down you’ll see an option to “make it collaborative.” Select this and then select any friends with whom you’d like to share the monumental task of picking the most appropriate music.

Good luck with that.

Spotify drop-down collaborative playlist

10. Recover deleted playlists

There’s definitely a moment of panic when you think you’ve accidentally deleted an entire playlist. Fear not; there’s a way to fix it.

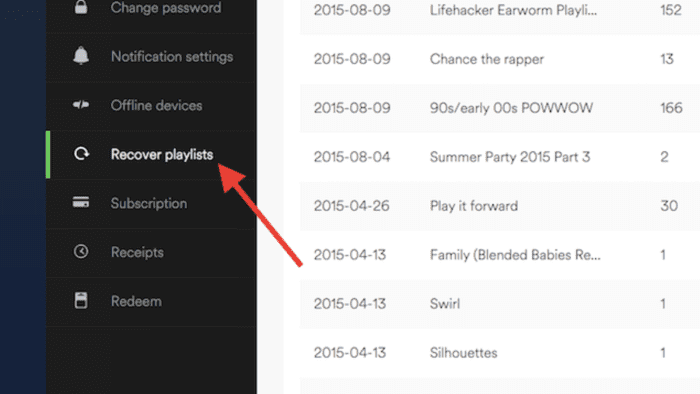
Go to Spotify’s website right here, log in to your profile, and there’s a Recover Playlist option right there. You’re welcome!

Spotify website recover deleted playlist

11. Add music that isn’t on Spotify

Spotify’s got thousands of tracks out there, but there’s still the odd outlier that you can’t find in their massive library. If you’re willing to take a few minutes, there’s a way you can add your own local MP3s to your playlist.

All you have to do is access your Local Files via the Settings menu, add a source (giving Spotify the path through your File Explorer), and then sync it up with whatever playlist you like. Check out our full walkthrough of the process for details!

We hope these tips and tricks will make using Spotify easier and allow you to use it more effectively.

Let us know in the comments below if there’s one that we missed, and stay tuned with Softonic for more Spotify news and info!

How to make VLC your default video player on Windows 10 and Mac

Tired of your videos opening in your device’s shoddy video player? Here’s how to switch to VLC!

VLCThere’s not much more annoying than watching your computer try to open a video with its shoddy default video player. As your PC sputters to try to make it happen, you can’t help but wish that your computer would just play videos through VLC by default.

Luckily, there is a way to make that happen, and, better yet, we can tell you how!

How to make VLC your default video player

If you have Windows 10

  1. Open your settings
  2. Click on Apps
  3. Click “Default Apps” in the left rail
  4. Scroll down to your default video player
  5. Click on it, and switch it to VLC
  6. That’s it! You’re all done!

If you have a Mac

  1. Right click on a video file with Finder
  2. Choose “Get Info”
  3. Go to where it says “Open With”
  4. Change the current program with VLC
  5. Click the button below that says “Change All”
  6. A new window will pop up. Click Continue
  7. All video files with that extension will now open in VLC by default
  8. If you want to do this to multiple types of files, you will need to do it to each type of file

Wrapping up

Once you are done, you will be able to use VLC to open almost all of your videos by default. VLC can open pretty much any type of video file, and it is your best option for viewing obscure formats.

VLC for mobile Download now ►
8

Must-read tips for first-time dog owners

You might want to think twice before adopting your first dog. These tips can help!

Puppies!

As soon as you move out of mom and dad’s house into your first apartment or starter home, you might get puppy fever.

Symptoms of puppy fever include:

  • Urge to scratch bellies
  • Lack of cuddles
  • Spending hours at a time looking at pictures of dogs on Instagram
Instagram Download Now ►
7

Becoming a first-time dog owner is a big step, and you should not take it lightly. There is a huge knowledge gap you need to hurdle before you even consider finding a furry friend. Luckily, we have some must-read tips for you to help you determine whether or not you should get one. Not only that, we have some tips to help you care for your pooch if you do!

Must-read tips for first-time dog owners

Check with your landlord

Landlord

Before you even consider buying a pet, you need to check and make sure if it is cool with your landlord. 

It is common for lease agreements to include restrictions for pet ownership. Sure, some will be fine with owning a dog, but they will require the pet to be under a certain weight, and might even ban certain breeds. 

If you’ve always wanted a pit bull, German shepherd, or a rottweiler, you might be out of luck as these breeds are commonly banned by landlords.

Lease agreements also often require a pet deposit if you buy a dog. On top of whatever you paid for the dog from the breeder or adoption agency, you will now most likely have to pay a few hundred dollars to your landlord to keep the dog.

According to your lease, you might also have to pay to replace carpeting if your dog soiled them beyond repair. Basically, pray that you have hardwood floors.

Your dog might not be allowed in certain areas of your complex as well. Typically, common areas like the laundry room and storage rooms are off limits to dogs. If you were hoping to keep your dog’s kennel in one of those areas, you’re probably out of luck.

Rover: Dog Boarding/Walking DOWNLOAD FREE ►
8

Research what your state allows

Dog on a leash

Even if your lease agreement doesn’t specify a restriction, the city you live in might. Many cities have bans on certain breeds. Along with the typical breeds you hear about getting banned, some cities even ban dogs like huskies, chow chows, and even shar-peis. 

Even if your city allows all breeds of dogs, you need to look into leash laws. If your dog is seen off its leash while outside of your home, you can get fined. These fines can be as low as $20 but can get to upwards of $100. If your dog is off its leash and you’re not allowed, it can and will be sent to a pound where you will have to pay to get them out.

Know about bites

Dog bite

It is also in your best interest to learn your city and state’s dog bite rules. Obviously, if your dog hurts a person or another dog, you are going to need to pay for it. However, bites are registered much like if a human committed a crime.

Many states have a one-bite rule, which means that the owner and the dog can get away with the first bite in some cases (mainly bites that didn’t require medical attention). However, after the first bite, you and your dog can be held liable. This can lead to you having to pay hefty court fees, and your dog possibly being euthanized.

Adopt from a shelter! Don’t find a private breeder!

Adopt a dogThis point cannot be stressed enough.

If you adopt a dog from an animal shelter, you will receive a laundry list of benefits.

First off, your dog will be ridiculously cheaper. Shelters typically don’t charge more or less based on your dog’s breed. Instead, you will pay a flat adoption fee and a refundable deposit for training. These fees are a few hundred bucks, but they pale in comparison to the thousands of dollars private breeders typically charge.

Adoption centers also only have dogs that are up-to-date on their vaccinations. Many will also cover the cost of having your pets spayed or neutered. That’ll make Bob Barker happy!

Adoption centers will typically also microchip your dog. This means that if your dog gets lost, whoever finds them can return them home by checking your animals implanted microchip.

When you adopt a dog, you will get all the available paperwork on your animal, which you will need for future vet visits. Here, you can see even more reasons why adoption is the better choice.

Private breeders typically also have this paperwork, but there you will see some of the dark realities of private breeding. Rather than your dog’s parents being strays or pets that got pregnant on accident, you will see breeding dogs with names like M-429 and F-2319.

Too often, the parents of your puppy live in harsh conditions where they live their lives having litter after litter of puppies. This can result in your pet being born with birth defects that can be problematic later in their life. As a result, more states are making laws that prevent the sale of animals from private breeders. 

Sure, sometimes you want a specific breed, and your local adoption agency won’t have them. However, by doing some research, you can find a regulated facility with suitable conditions for the animals. You might still have to pay more, but it’s a lot better than supporting animal abusers. 

Prepare for lots of poop
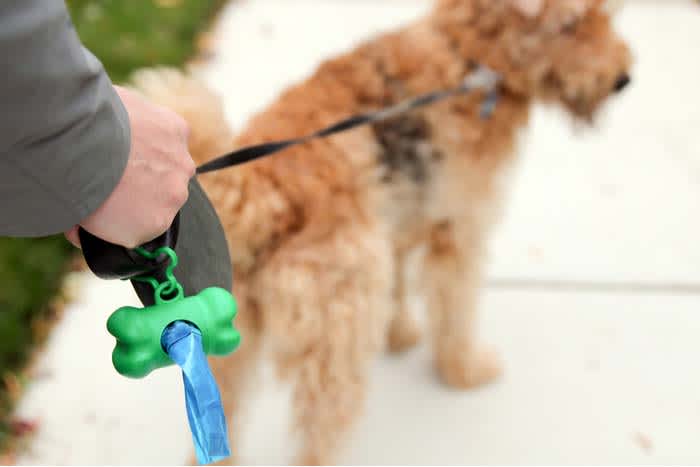
Dog bagsYou might think that if your dog does their business outside, you don’t have to pick it up.

Oh, how wrong you are.

If you are caught not picking up your dog’s poop, you can face a HEFTY fine. Cities like Chicago will fine you between $50 and $100 per deuce. Backtracking to your landlord, many lease agreements will also penalize you if you don’t clean up after your dog around the premises. This can result in more fines, and even you having to get rid of your dog. 

With that being said, if you want to have a dog, you need to swallow your pride and pick up after Fido. Dog bags and leash attachments are sold everywhere pet supplies are sold. You can also get a deal by buying in bulk on Amazon.

Amazon Shopping Download Free ►
8

If picking up doggie doo is a dealbreaker for you, it might be in your best interest to get a cat instead. 

Things you need to buy right away

Dog toys

Within your first three days of dog ownership, you should have purchased the following:

These things altogether cost a few hundred bucks. True, you can take some hand-me-downs from friends and relatives, but you need to make sure they are clean.

Kennel training

When it comes to your dog’s kennel, you need your dog to view it as their own safe space. If your dog has an accident or makes a mess, it is important to not angrily put them in their kennel. If you do, they will associate their kennel with being in trouble, so they will not want to go in there ever again.

Have a plan for when you’re not home

Dog walker

If you aren’t going to be home for hours on end, you will need to figure out who will watch your dog.

The typical rule of thumb is every month of your dog’s age equals an hour they can be left alone. This rule ends after your dog turns eight-months-old. So, if you have a young puppy, you really can’t do much more than run to the mini-mart around the corner.

If you’re lucky, you might have a nearby friend or relative who can watch your dog for you when you’re not at home. If you’re really lucky, your job might even let you bring your pup to the office (the least you can do is ask). However, for those who have neither option, you need to look into a dog-walking service or a doggie daycare.

Wag! is an online service that helps you find dog walkers in your area. When you first sign up, your first walk is free!

PetSmart has a service at some of its locations called Doggie Day Camp. Here, your dog can spend all day running around playing with other dogs in a safe environment. They will also feed your dog, or give them a treat if you specify. The service costs about $20 a visit, which is a steal when compared to most other boarding services. They also have a service for a few dollars less, but your dog won’t get to play all day with other dogs, so it’s worth paying a little more for the day camp.

Devote time every day to training

There are training services that can attempt to train your dog for you when you’re not there. However, most trainers agree that training is only effective when the owner is present.

With that being said, you’ll need to devote time every day to help teach your dog basic commands. 

Determine whether your dog is motivated by food or affection. If your dog is motivated by food, have a few treats on hand to establish positive reinforcement for the behavior. If your dog is motivated by affection, shower them with pets and praises when they follow orders.

Choose your treats wisely

Dog treats

When you first get a dog, friends and relatives might literally throw a dog a bone by giving your new pooch some treats. However, you need to research everything your dog puts in its body.

Treats made outside your home country often contain preservatives that can make your dog sick. Common treats like rawhides can be difficult to digest and can result in a costly vet visit if your dog swallows a big chunk. If treats are extra salty, they can make your dog irritable.

If your dog is a breed that is known for hip and joint problems like German shepherds, you want to get treats that promote good hip and joint health.

If your dog has allergies, you can get treats that have vitamins that reduce cold symptoms.

If your dog doesn’t sleep through the night, there are even treats that have melatonin in them. 

Have money set aside for emergencies

Vet visit

Along with buying medicine to prevent fleas, ticks, and heartworms, you also need to set aside money for emergencies.

Even the best dog owners have emergencies from time to time. Dogs get into things they shouldn’t; it’s part of their nature.

One minute they can be behaving fine, and the next they can be swallowing something they shouldn’t. For these emergencies, you need to be prepared for an emergency vet visit, and an expensive one at that.

If your dog needs to get its stomach pumped, this can cost thousands of dollars, so it is important to have money socked away in case of emergency.

On the low side, you need to be able to afford a $1,500 vet fee.

Wrapping up

Not everyone is cut out to own a pet.

If these things really concerned you and gave you second thoughts, it might not be the right time for you to own a pet. Try pet-sitting a friend or relative’s pet before jumping in with both feet.

True, pet ownership is very rewarding. However, you need to be ready for everything that comes with it.