4 free programs for making posters and banners

Making an advertising poster is a must for any graphic designer. They make the difference between a successful marketing campaign or a product failing miserably in the market. Events, exhibitions, concerts or parties are nothing without a good poster to advertise them. With the rise of digital media, most posters and billboards are made with some expensive image editing software. Is there no affordable program to design a poster with?

In today’s article we are going to offer you a selection of the best programs for making free posters, which will not only help you to create posters as you wish, but also to amaze those who see them thanks to their professional appearance. There are free tools to create posters that have nothing to envy to the great design suites. Would you like to know which ones we like the most?

1. GIMP

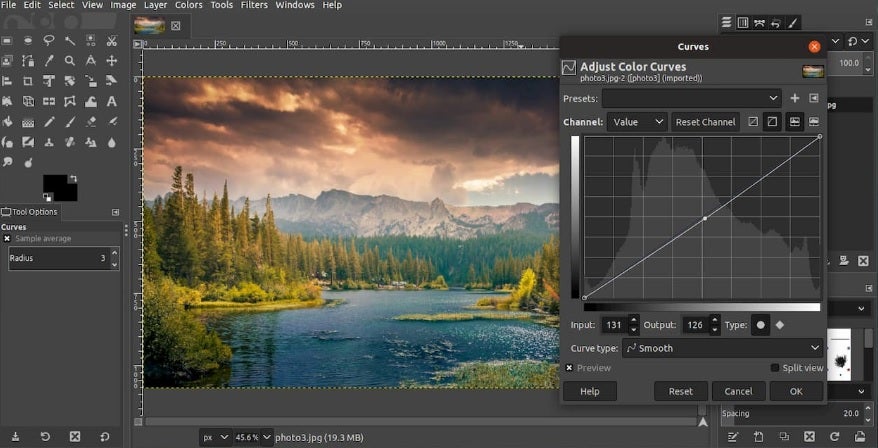
GIMP is already a classic in any list of the best free image editors. The eternal rival of Photoshop is the favorite of illustrators and graphic designers around the world thanks to its good results, wide range of tools and, of course, for being free.

One of GIMP’s strong points is that, being an open-source image editor, it offers unlimited versatility to its user. With it you can not only manipulate photographs for your posters, but also make your own illustrations or designs and thus create the perfect poster.
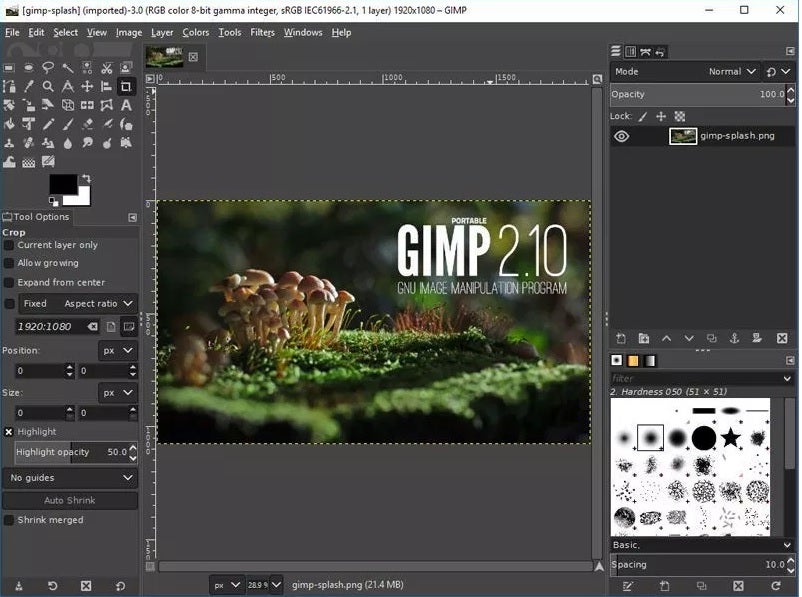
GIMP provides all the basic and advanced options that any photo editing program needs. That is why basically the resulting product you get will be directly proportional to your experience with such programs.

The only drawback of this editor is its high learning curve for those who are not used to this kind of programs. Although a really useful alternative is to download any poster or poster template you find on the Internet and start working with it.

PROS:

  • Includes all the tools to make professional posters
  • It is free and open-source
  • Multi-platform
  • Compatible with most image formats

CONS:

  • High learning curve
GIMP DOWNLOAD
9
Interfaz de GIMP

2. Inkscape

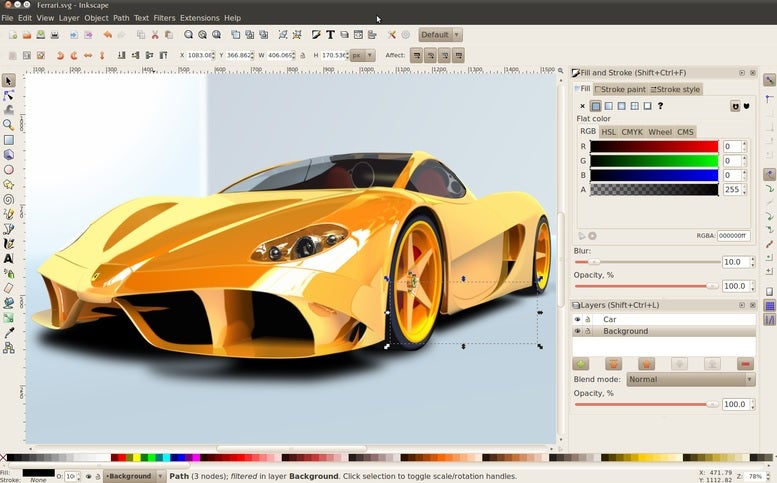
Inkscape is a powerful open-source vector graphics editor and a perfect alternative to paid programs such as Illustrator, Xara Xtreme or CorelDRAW. This graphic design software is ideal for creating all kinds of posters, as well as being widely used in the web design industry.

With Inkscape you will be able to perform any task typical of a drawing or design program. You will find tools as well known as the pencil, cut shapes, add text to images and of course the ability to add layers or clone parts of the image.
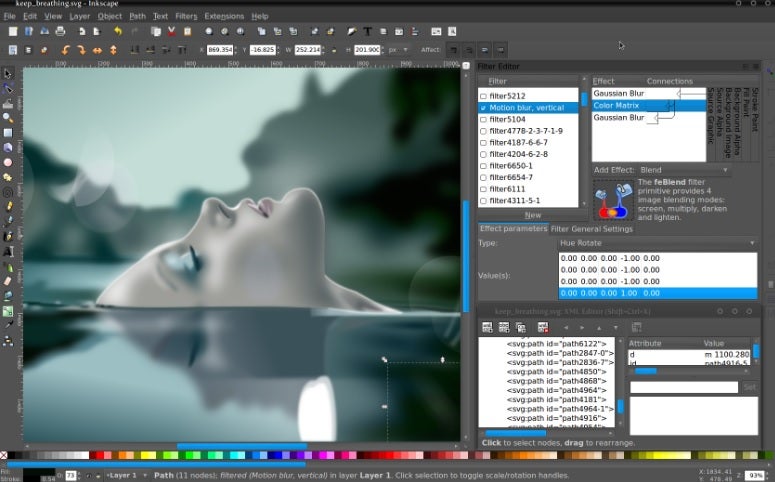
One of Inkscape’s strong points is its high compatibility between files, allowing you to open, edit and save projects in standard formats such as XML, SVG or CSS. In addition to this, it is also possible to work in PDF format and add text to any design, something really essential when making a poster.

Inkscape is a program as complete as GIMP but it is a much more intuitive and easy to use option for those of us who are not experienced in digital illustration.

PROS:

  • Free and open source image editor
  • Includes professional tools for creating posters
  • Allows working with PDF files

CONS:

  • Lacks Pantone palette
  • No preview of filters and effects
Inkscape DOWNLOAD
8
Interfaz de inkscape

3. Canva

If you want to make a professional-looking poster without complicating your life too much, you’ll love Canva. This wonderful online graphic design tool is not only free, but also very easy to use. You can easily access it by simply visiting its website or, if you wish, download its desktop version or for Android and iOS mobiles.

Canva stands out for being a very easy to use program. It has a really simple and intuitive interface, where you can create all kinds of designs in a matter of seconds. Just select the type of project you want to carry out, upload your images and start processing them thanks to its complete selection of tools. We assure you that you will have your poster done in no time.

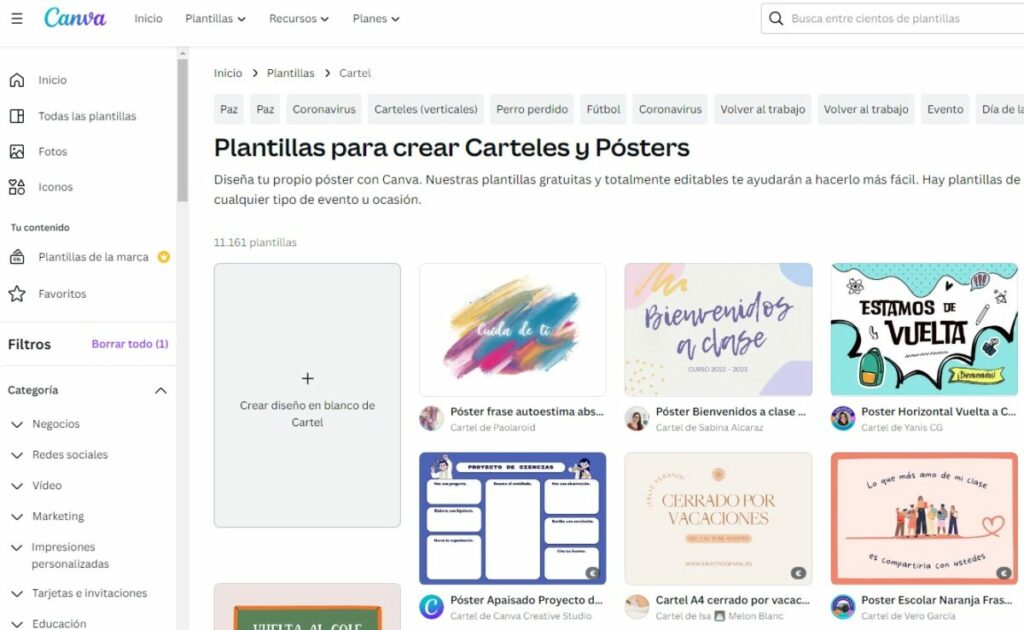
Página oficial de canvas

To create your poster on Canva you will first of all need to register on their website. Don’t worry, the service is completely free. Once in its interface, select the “Templates” option that you will find on the left side menu and slide the project bar until you find “Posters”. Finally, select the template that comes closest to the design you were looking for, upload the images you want to add and edit your poster to your liking.

From Canva you’ll be able to add customized elements to your posters, add frames, shapes, illustrations, etc. In addition, the tool includes a complete selection of fonts, perfect for conveying the message you want. Once your project is finished, you can easily download it in multiple formats, including PDF – ideal for having a poster ready in just a few minutes!

PROS:

  • Very easy to use
  • Multiplatform
  • Includes a good selection of tools to create posters

CONS:

  • It can be somewhat limited
Canva DOWNLOAD
8

4. Adobe Express

It is impossible to talk about creativity and graphic design without mentioning an Adobe program. Since we are talking about free programs, this time we want to talk about Adobe Express (formerly Adobe Spark). This online tool is a real gem for anyone who wants to give shape in a few seconds to any type of design you have in mind. Images for social networks, collages, brochures, logos, posters… All this is at your fingertips from Adobe Express!

In a similar way to Canva, Adobe Express is a perfect option for all those users who are not used to using image editors. Its operation is very simple thanks to its system of templates, all of them completely customizable and in which you can add any image or illustration you want. Besides, being an online tool, you will be able to access any of your projects regardless of the computer or device from which you connect.
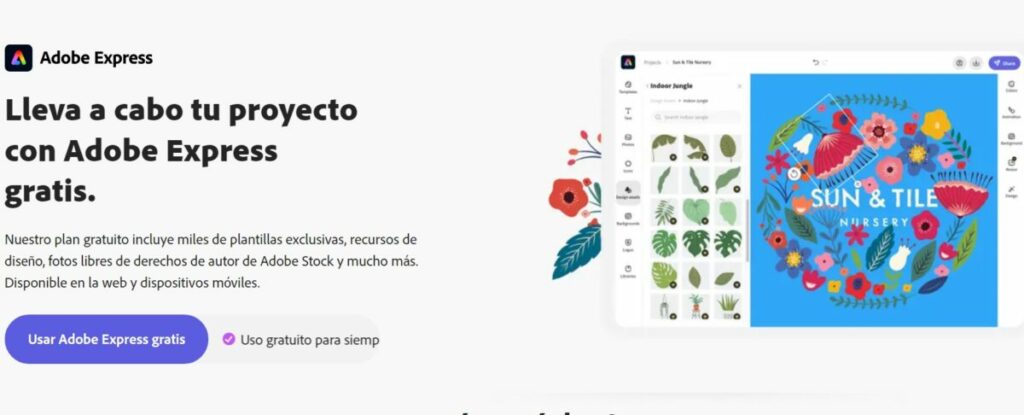
Página web de Adobe Express

If you want to make a poster from Adobe Express, first of all it will be necessary to create an account with Adobe. These are completely free, but if you have used any of the company’s programs in the past, it is very likely that you already have one. Once in the main interface, select the “Poster” option in the “Create a new project” section. This will take you to a very complete selection of poster templates.

Now simply upload the images you want to add to the poster by clicking on “Photos” followed by “Upload photo” and edit the poster to your liking. Adobe Express incorporates all kinds of editing tools with which you can change the background, add shapes, text and even textures. Once your poster is ready, you can easily download it in PNG, JPG or PDF format. All this in a simple, easy and very intuitive way.

PROS:

  • Professional results
  • Allows the use of Adobe Stock images
  • Very intuitive

CONS:

  • Their best templates are available for a fee

Interfaz de Adobe Express

Create a banner or poster easily

We hope we have been able to help you when it comes to downloading a free program to make posters. As you can see, there are totally free graphic design tools that have nothing to envy to the most expensive ones on the market. If we have given you a hand, don’t forget to share the article with your friends on social networks.

Say Goodbye to Boring Photos: 5 Free Programs to Create Collages!

Making a photo collage from your PC is never an easy task. First you have to choose the perfect images, resize them and create a good composition from editors such as Photosohop or GIMP. If you are not an expert in them the results are usually disappointing, something that can frustrate you if you have spent several hours on it. Fortunately there are specialized programs with which you can create a collage with photos in the blink of an eye. Would you like to know them?

If you often wonder how to make a collage with photos from your PC, you’ve come to the right place. In today’s article we are going to share with you the best free programs with which you can make a collage of your photos in just a few minutes. Here we go!

1. Canva

Canva is an excellent app and online platform from which you can design, create and publish any type of image, including collages. It is completely free (although it has some paid premium features) and has endless tools and templates to shape your ideas. If you want to make a spectacular poster or photomontage with your photos, Canva is undoubtedly the best option.

PROS:

  • Very easy to use
  • Professional results
  • Hundreds of templates at your disposal

CONS:

  • Some of its functions and templates are fee-based
Canva DOWNLOAD
9
Interfaz de canvas

How to make a collage with Canva

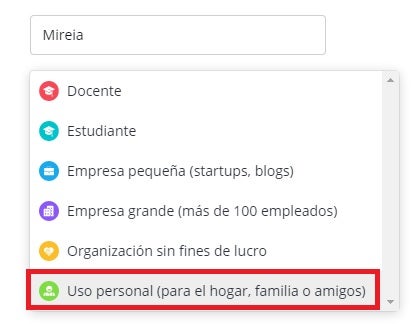
Creating a collage with Canva is very simple, whether you opt for its web version or its desktop application. First of all you will need to open an account on the platform. You will see that there are paid versions of Canva but don’t worry, the program is fully functional from its free version. Simply opt for the “Personal use (for home, family or friends)” option when opening your account.

Cómo abrir una cuenta con canvas

Once your account is open, log in and select the “Photo Collage” option. If you can’t find it, don’t worry, you can create a new project and then type “Collage” in the search engine. You will then see a selection of free collage templates that are really useful and 100% customizable, so you will have your photo collage finished in no time. Choose the template you like the most and think about which photos you want to use.

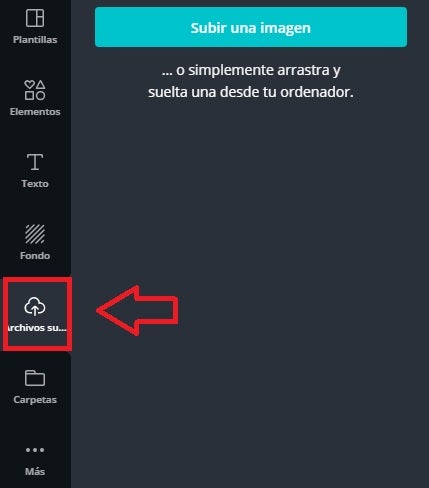
Once you know which images you want for your collage, click on “Uploaded files” and upload your images to Canva. If you prefer, you can also drag and drop them into the dark gray box to upload them all at once.

Cómo subir imágenes a canvas

Once you have finished the previous point you will see how all the images appear in the Canva interface. Now simply drag them to the section of the template you want to create the collage of your dreams. Note that you can resize the images, add text and customize the template to your liking.

Collage con canvas

It’s that simple! Once your project is finished you will be able to save it on your computer or share it on social networks. As you can see, this is an ideal option for making collages in a jiffy.

2. Fotojet

Fotojet is an online tool for creating collages without the need to download anything. It is very similar to Canva, offering a simple and intuitive interface but providing excellent results in a matter of seconds. All in all, it is a very good option for anyone looking for an uncomplicated tool with which to make a great collage without complicating your life.

PROS:

  • Very intuitive interface
  • Offers a good number of free templates
  • No registration required

CONS:

  • Some of its functions are paid
  • No mobile app
Fotojet DOWNLOAD
8
Interfaz de photojet

How to make a collage with Fotojet

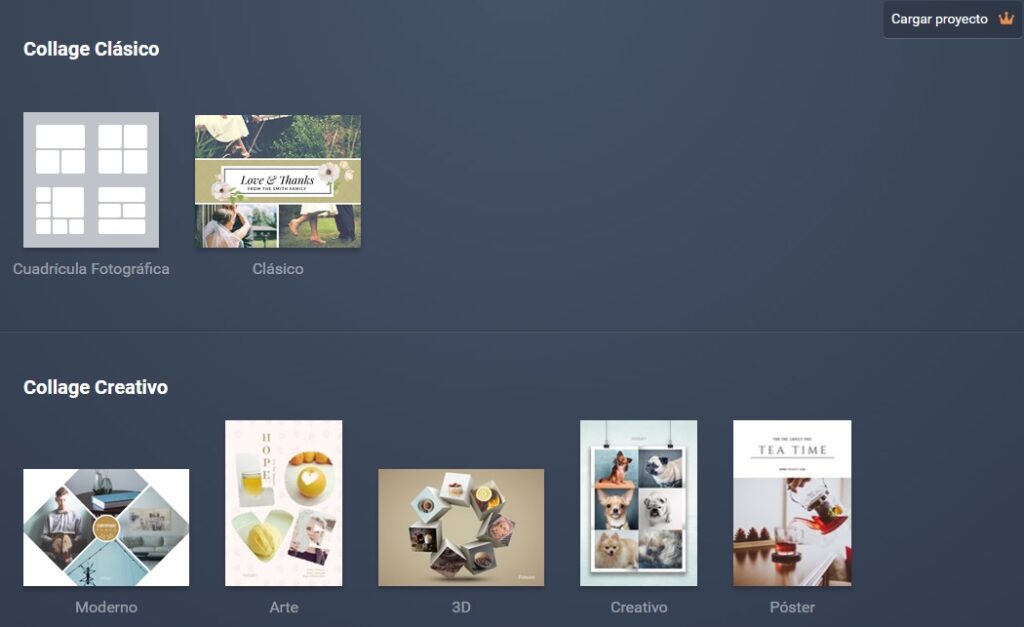
To create a collage with Fotojet, first of all click on the “Create a Collage” button. You will then be presented with a selection of free templates that you can use as a basis to shape your project. You will find the classic grids, templates that use a photo as a base, templates with 3D objects, etc. Choose the one you like best for your collage.

Plantillas de photojet

Once you have selected your template, select each of the spaces for images and upload the photo you want. If you prefer, you can also choose an image from the Fotojet catalog, thus creating a much more complex collage.

If you have chosen to use Fotojet’s image catalog, you will see that some of the photographs and illustrations have a small crown associated with them. These are premium images, to which only users with a paid account have access. However, they are not really necessary for anything.

Imágenes premium de photojet

Uploading a photo to the collage is very easy. Just click on the blank space you want and select the image from your computer. Once it appears on the screen you can resize and edit it to your liking.

Collage hecho con photojet

It is important to note that Fotojet allows you to add effects and filters to the images once they are in your collage. After finishing it, you will be able to download your creation in PNG or JPG format. As you can see, it is a powerful tool, easy to use and really useful.

3. Fotor

Fotor is a free but very complete photo and image editor. In fact, because of its many tools and good results, the BBC has called it the “Photoshop Light” and an excellent choice for those who can’t afford Adobe software. Offering both an online and desktop version, it is also very versatile, allowing you to create graphic designs at any time and with professional results.

PROS:

  • Very easy to use
  • Elegant interface
  • Professional results

CONS:

  • Lack of automatic saving
Interfaz de photo
Fotor DOWNLOAD
9

How to make a collage with Fotor

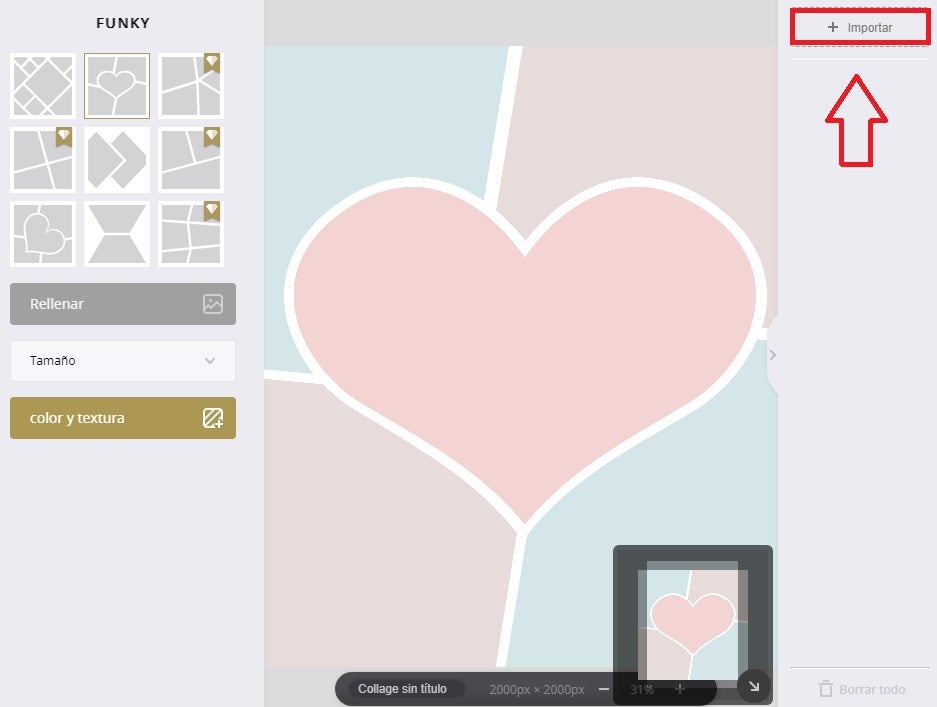
If you want to create your own collage with Fotor, first of all select the “Make a collage” option. Then select the type of collage you want to create and choose one of the many default templates that appear. All of them are fully customizable, so even if you are not completely satisfied with one of them, you can modify it later. You will also see that some templates come with a small diamond. These are the premium templates and are only available to paying customers.

Tipos de collage disponibles en photo

Once you have selected the template, click on the “Import” option in the upper right corner of the screen. From there you can upload all the photos and images you want to add to the collage. Once you have done this, drag the photos to the section of the collage you want them to occupy.

Plantilla de collage de photo

If you are not sure which photo to place where, don’t worry. Fotor has an option called “Fill” (on the left side of the screen) that will place all the photos you have uploaded in the way the program considers optimal. We assure you that it will surprise you!

Collage hecho con photo

Once you have finished your collage you will be able to save it in JPG, PNG and even PDF format. As you can see, although it is not as intuitive as the previous options, it is still an excellent resource for making free collages.

4. Adobe Express

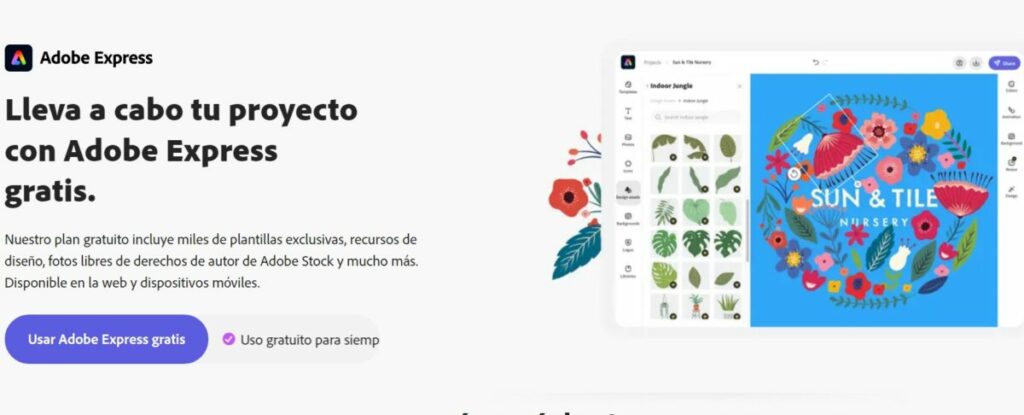
Adobe Express (formerly Adobe Spark) is an excellent option to make online collages without having to download any program. This tool is really easy to use and provides excellent results, although we couldn’t expect anything less from the parents of Photoshop.

PROS:

  • Fully online
  • Over 2000 free collage templates
  • Allows you to use Adobe Stock images

CONS:

  • The best templates are paid templates
Página web de Adobe Express

How to make a collage with Adobe Express

To start using Adobe Express you will first need to log in with an Adobe account. Don’t worry, it’s completely free. Once in the tool’s interface, select the “Collage” option that you will find under “Create a new project”.

Create un collage en Adobe Express

Next, upload the photos you want to add to your collage by clicking “Upload” or select the ones you like from Adobe Stock. Once done, choose the size of your collage and click the “Next” button.

Tamaño del collage de Adobe Express

After that you only have to design your own collage. You will see how all your photos will appear on the screen and you will be able to move or resize them simply by dragging them. You can also choose one of the program’s free collage templates. Once the collage looks the way you like it, you can add text by double-clicking on the image.

Collage hecho con Adobe Express

Once your collage is finished, you will be able to download it by clicking on the “Download” button in the upper right corner of the screen. Simply select whether you want to save the file in PNG, JPG or PDF format and click the “Start download” button. Last but not least, Adobe Express can now schedule your content on social networks.

5. PhotoPad

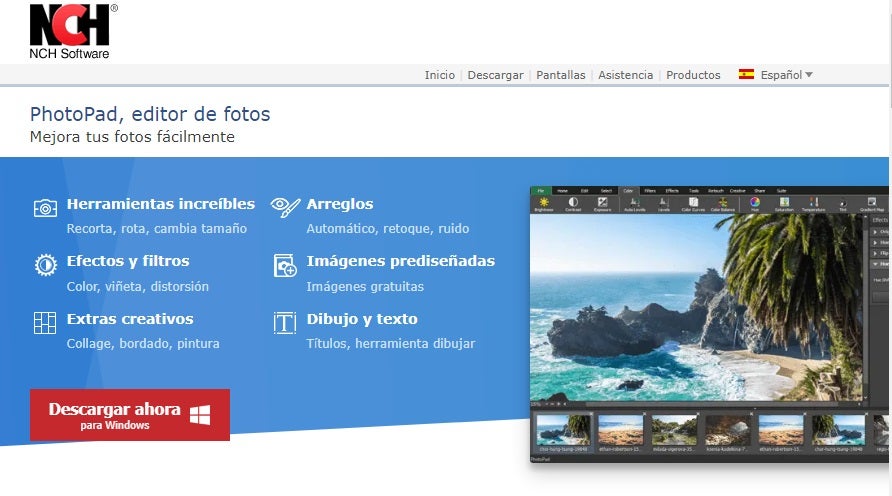
To finish the selection we want to recommend PhotoPad, a free image editor with which it is really easy to edit all your digital photographs. Besides being a really intuitive program, PhotoPad includes as an extra an option to make collages. Thus, this little gem is an invaluable help to make photo collages in just a few seconds.

PROS:

  • Includes all basic editing tools
  • Allows the use of layers
  • Includes many filters

CONS:

  • Very simple in some respects
  • Slow to open large files
PhotoPad DOWNLOAD
7
Página de PhotoPad

How to make a collage with PhotoPad

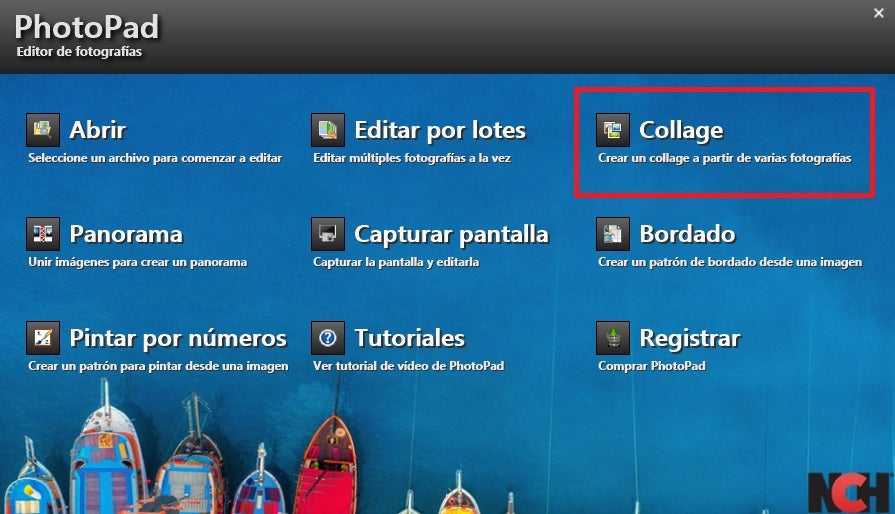
To start creating your collage with PhotoPad simply click on the “Collage” button and click on the “Create” button. Once you have a blank canvas, click on the “Collage” drop-down button on the right side menu of the screen and then click on “Edit Collage”.

Menú de PhotoPad

After choosing the background, select the type of template or grid in which you want to place your images. You will be able to choose the location, spacing and even the shape of each of the spaces where your photos will appear. You will find all this in the menus “Canvas options”, “Background options”, “Design options” and “Image options”.

Once you have done this, all that remains is to choose the photos you want to add from your PC. To do this click on the “Add” button at the bottom of the right side menu.

Collage hecho con PhotoPad

Alternatively, you can double-click on the spaces of the pictures and add them directly. Voilà, your collage is ready. Wasn’t that easy?

Create collages with photos quickly and easily

We hope that our selection of free programs to make collages has helped you. As you can see, there are many options to easily create beautiful montages with all your memories. If you liked the article, don’t forget to share it with your friends on social networks!

Unlock Endless Possibilities for Your Sims 4 Game – Learn How to Install Mods Now!

The Sims 4 is an exceptional life simulator with unlimited possibilities thanks to its mods. These allow you to add free custom content (CC) to your games, such as new hairstyles, clothes, houses, furniture… even remove censorship! Since its first release, mods have always been one of the star points of the Maxis franchise. And with them, anything you can imagine can happen in the life of The Sims. But… Do you know how to install them?

Imagen promocional de Los Sims  4

In today’s article we are going to show you how to download and install mods and CC in The Sims 4. Don’t worry, it’s a really simple process that won’t jeopardize your games, and they’re free! So if you are bored of waiting for the release of The Sims 5… Why don’t you give new life to its fourth part with the best mods? Follow our steps and in a few minutes you will start enjoying all the customized content you can imagine.

The Sims 4 DOWNLOAD
9

What are mods and CC for The Sims 4 and what are they for?

When we talk about mods we mean any modification or custom content that players have created for The Sims 4. These can be downloaded from the Internet and easily added to the game, adding all kinds of improvements and new options. Since its first release, mods have been a fundamental part of The Sims. In fact, the game has one of the largest and most prolific creative communities in the video game world. Thanks to mods, The Sims 4 can be considered a timeless game.

Among the main mods that exist for The Sims 4 we find:

  • Custom Content – Also known as CC (Custom Content). It includes all the objects, clothing, hairstyles, furniture, etc. that a player has created for the game.
  • Game Mods – Refers to those modifications that, instead of adding an object, create new functions for the title. For example a mod to add new personality traits, new jobs, UI functions or simply remove censorship from the game.
Imagen de CC para the sims 4

What do I need to install mods or CC for The Sims 4?

Fortunately, installing custom content in The Sims 4 is very simple. In fact, you’ll only need these three things:

  1. The Sims 4 base game (you can download it here).
  2. The mods or CC files.
  3. A program to unzip files like WinZIP or WinRAR.

If you have all this on your computer, we can start installing mods now!

Distintas relaciones entre Sims

How to install mods and CC for The Sims 4

Installing mods or custom content in The Sims 4 is a very simple process that will only take you a few minutes. All you have to do is follow these steps.

Step 1. Update The Sims 4

Before you start installing anything, you should make sure that your version of The Sims 4 is completely updated. This is important because this way you will ensure that none of the mods or CC that you install will create any kind of incompatibility with the game.

To update The Sims 4 you will simply need to open Origin, find The Sims 4 in your game library and within your options click on the update button.

Step 2. Download the mods or CC

Now that you know you have The Sims 4 updated, it’s time to get downloading the mods or custom content you want. You will find thousands of websites where Simmers will share their creations but we especially recommend the big sites like modthesims to download your files. These are updated very often and you will always have the assurance that the mod you download has been tested by other players and works without any problems.

To avoid unpleasantness it is also recommended that all mods you download are from reliable sites. If you doubt any file, do not hesitate to use some antivirus software to ensure that the file you have downloaded does not contain any type of Trojan or malware that can put your computer in check. If you do not have any installed, we recommend that you try the free version of Avast, it is very reliable and ensures the protection of your computer.

Mod para the sims 4

Step 3. Unzip the mods or CC files

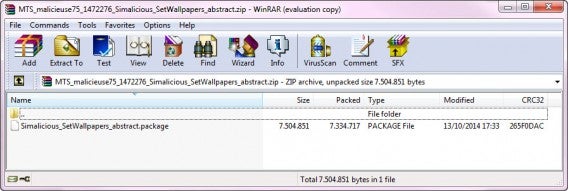
In most cases, both mods and custom content for The Sims come compressed in .ZIP or .RAR format. In order to use them, you will first need to unzip the files and then move them to their folder. You will see that some of these files are in .pyo, .package or .ts4script formats, do not try to unzip them as you will only need to move them to the mods folder.

Descomprimir archivos de the sims 4

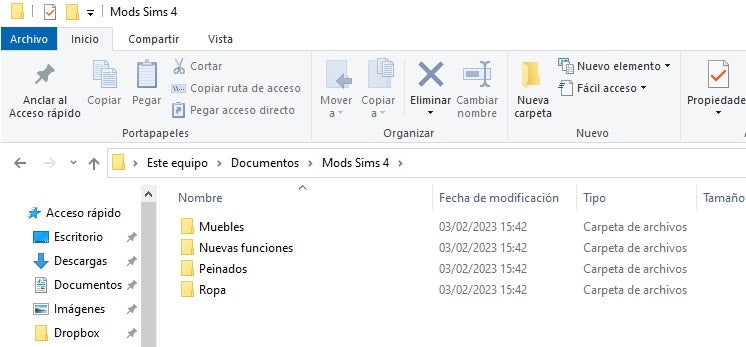
Step 4. Organize your mods or CC by folders

Although this is an additional step, it is highly recommended that you create folders to organize the mods or custom content you want to install. Keep in mind that there are an inordinate amount of mods that you will probably want to download and install and their files will all have generic names. To be able to locate and have control over the added content you install, it is good to classify it by content folders (“Clothes”, “Build mode”, “Modifications in Create a Sim”) or by specific mods (“Rock band t-shirts”, “Eye colors”, “Mod to remove censorship from The Sims”).

Crear carpetas para los mods de the sims 4

Step 5. Copy the mods or CC to the mods folder.

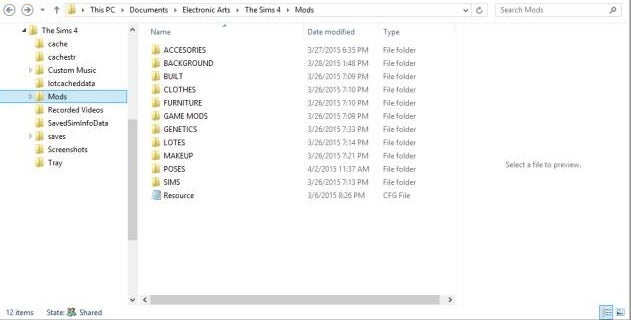
Now that your .ZIP or .RAR file is unzipped, it’s time to copy its contents to the Documents/Electronic Arts/The Sims 4/Mods folder. You will see that by default, in this folder there is a file called Resource.cfg. Do not delete it! This is the file that allows mods to work in the game.

If by mistake you deleted the resource.cfg file, nothing happens. It will be generated again once you start a game in The Sims 4.

Ubicación de la carpeta mods en the sims 4

step 6. Activate mods or CC in The Sims 4

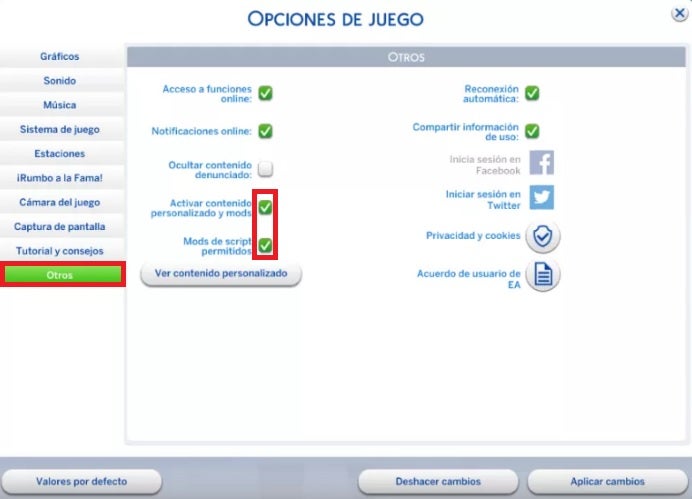
Finally, you need to activate the mods within the base game of The Sims 4. To do this, go to the main menu of the game and press the “Esc” key to access its options. Once this is done, click on the “Others” button that you will find on the left side menu of the screen. Finally, check the “Enable custom content and mods” and “Script mods allowed” boxes. After that the game will ask to restart and all the mods you added in the folder will be active. And enjoy the mods!

How do I know which mods or CC I have installed?

Are you one of those who have added countless files to the mods folder and don’t know exactly what you have installed? Don’t worry! From The Sims 4 you will be able to check which mods are active in your game. To do this go into the game options and click on the “Other” button followed by “View custom content”. You will now be able to check which custom content is active in the game.

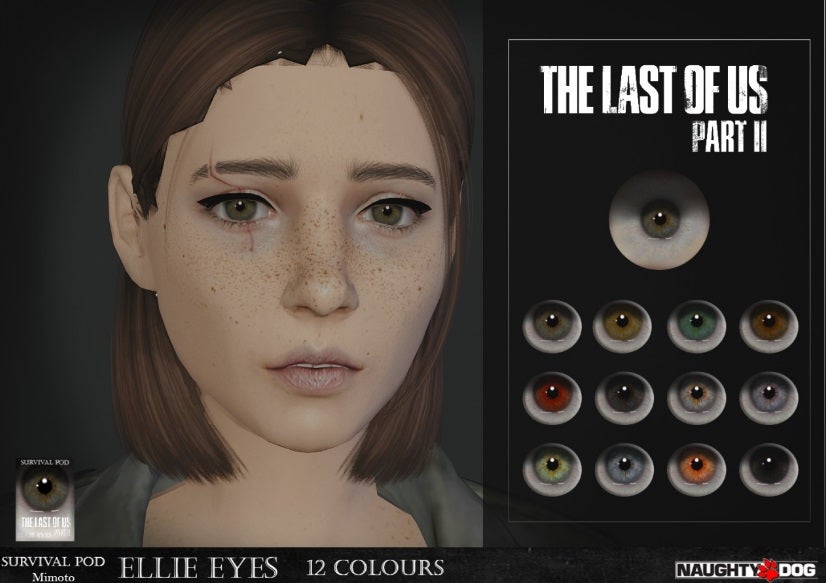
Sims 4 mod de ojos para Ellie

How to delete mods or CC for The Sims 4

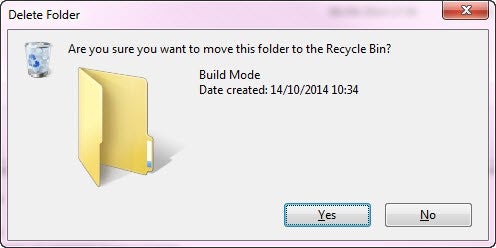
If you are tired of a mod or you think it is giving you problems in your game, simply delete it. To do this, close the game, go to the mods folder (Documents/Electronic Arts/Los Sims 4/Mods) and delete the files manually, whether they are separate files or entire folders. It is for this reason that it is always advisable to copy each mod into a separate folder so that you can locate them later.

How to recover your game, mods and CC if you change PCs

It’s not uncommon that over time, you end up retiring your old computer and buying a new computer. Fortunately that doesn’t mean you have to say goodbye to your Sims and mods. You can create a backup copy of both your mods and your save games and CC from the “Documents/Electronic Arts/The Sims4” folder. Simply create a copy of the “Saves”, “Mods” and “Tray” folders and paste them on your new PC after installing The Sims 4.

What to do when a mod or CC has stopped working after an update in The Sims 4

It is very common that as The Sims 4 is updated some of the mods stop working. In most cases you should not worry because fortunately, the community of Simmers of this video game is very active and will be offering updated versions of the mods. To reactivate them simply access the web page from where you downloaded the mod and see if there is a new version for it. Once this is done, download the updated mod and install it following the steps in this tutorial. It’s that simple!

Mod para añadir nuevos rasgos a Los Sims

Where to download free mods and CC for The Sims 4

Now that you know how to install mods and custom content for The Sims 4, you’re probably eager to start downloading CC left and right. If you have searched the Internet you will have realized that the offer of mods sites for The Sims 4 is really overwhelming. That is why we want to recommend you a list with the best sites to download mods and CC for The Sims 4 of this 2023.

  1. The Sims Resource
  2. ModtheSims
  3. Sims4Updates
  4. Sims4CC (Tumblr)
  5. Maxis Match CC World

If you prefer a selection of the best mods of the moment, read on. At Softonic we have compiled a list with all the mods that we consider essential for a self-respecting Sims player.

  • The Sims 4: improve the game with these 8 amazing mods
  • The Sims 4 essential mods to customize your sims
  • The best Sims 4 mods that change the way you play the game
mods de pestañas para the sims 4

Is there any other method to add additional content to The Sims 4?

If the idea of adding user-created mods doesn’t appeal to you, this doesn’t mean that you’ll be stuck with a version of The Sims with fewer options. Maxis offers a very good selection of both expansion packs for the game and additional content to add new features and gameplay to the title. At the moment these are the ones that have appeared on the market:

The Sims 4 Expansion Packs

The Sims 4 Additional Content Packs

We hope that all our recommendations have helped you to get the most out of The Sims 4. If you found it helpful, don’t forget to share this article with your friends through social networks. And remember, the release of The Sims 5 is just around the corner, full of juicy new features!

Fix Your High CPU Usage with This Simple Solution for Windows Modules Installer Worker

Is your computer running very slowly or suddenly getting very hot? If you are a Windows user and lately your PC is not performing as well as it used to, the Windows Modules Installer is most likely the culprit. This process appears in the Task Manager under the name Windows Modules Installer Worker and often makes high CPU usage due to an error. The result? Your PC slows down and no longer runs as it used to.

If Windows Modules Installer Worker is using 100% of your disk and your computer is barely working, don’t worry. In today’s article we are going to help you solve this problem in a quick and easy way. Read on and in no time you will reduce the load on your CPU and your PC will be back to working as before.

Windows 11 DOWNLOAD
9

What is Windows Modules Installer Worker and what is it for

The Windows Module Installer, also known as WMIW or TiWorker.exe, is a fundamental component for the proper functioning of your operating system. It performs the basic maintenance tasks of your computer as well as searching for and installing all the updates that your operating system may need. It is, therefore, a process closely linked to Windows Update.

One of the primary functions of Windows Modules Installer Worker is to ensure that your computer will continue to work after any Windows update. To do this, WMIW updates all Windows files as well as creating a backup copy of any old files that may remain installed.

Panel de control de Windows

Why does Windows Modules Installer Worker consume so much CPU?

As we mentioned in the previous point, the Windows Module Installer is responsible for performing updates to your computer and ensuring that, once completed, it will continue to function normally. This is a resource-intensive and intensive process, so it is quite normal that during an update, TiWorker.exe triggers CPU usage. After the process is finished, the values should return to normal.

If your disk or CPU usage is still at 100% after upgrading your computer, it is likely that there is a bug in the Windows Modules Installer Worker. This would lead to a considerable decrease in your computer’s performance, constant slowdowns, frozen screens and an increase in PC temperature.

How to fix the high CPU consumption of Windows Modules Installer Worker

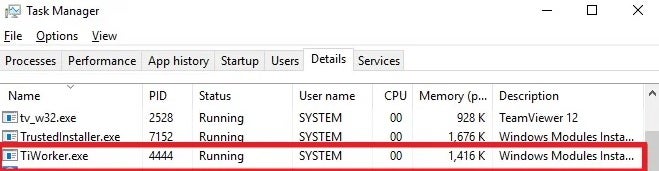
If your PC is running slow, we recommend that before following any of these methods, you check that the culprit is really WMIW. To do this, open the Windows Task Manager and find out which file is responsible for the high CPU usage. If the file is Tiworker.exe, it is time to get to work with one of these solutions.

Method 1. Use the Windows Troubleshooter

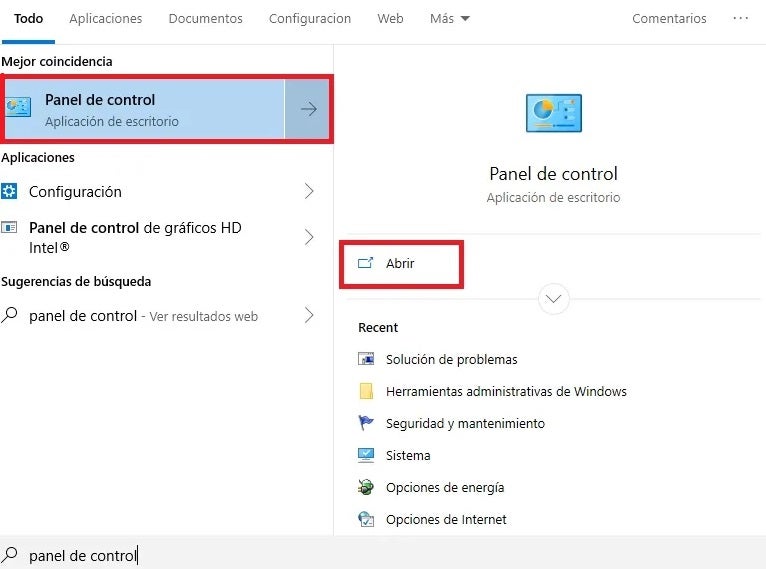
The easiest way to fix the Windows Modules Installer Worker bug is to use the Windows Troubleshooter. To get to the Troubleshooter, first you need to access the OS Control Panel. If you do not know how to get there, click Start and then type “Control Panel”. Click on the result that Windows offers you.

Panel de control de Windows

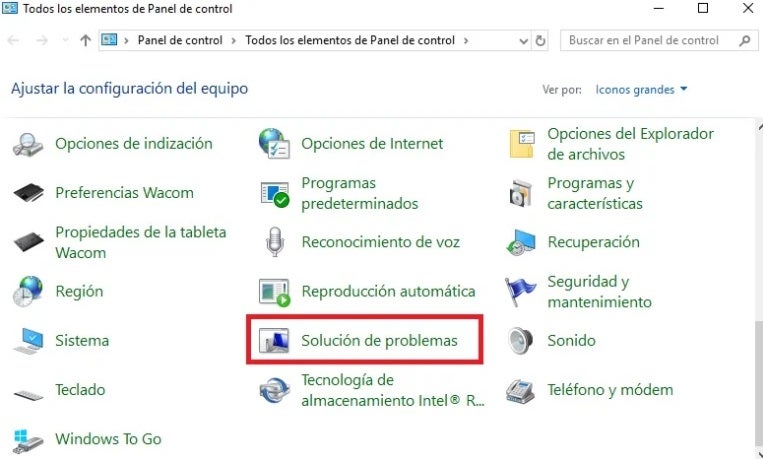
Once in the Control Panel, find and click on the “Troubleshooting” option.

Problem solving de Windows

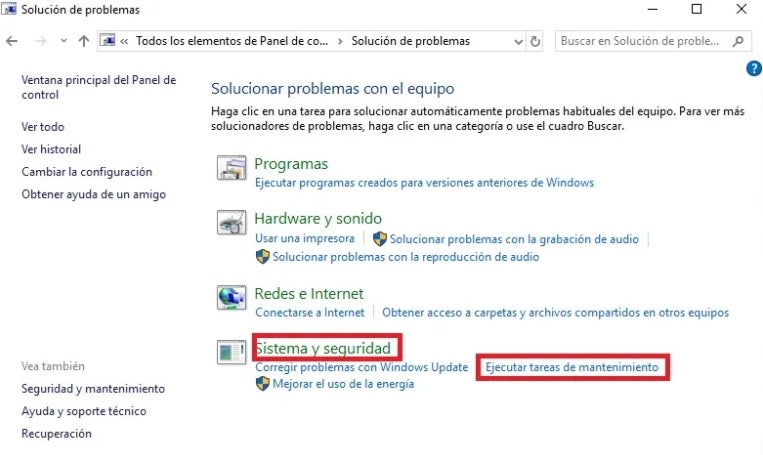
Next go to the bottom of the list to “System and Security” and click on Run maintenance tasks. This will open the Windows program aimed at fixing any problems or errors that your operating system is currently experiencing.

Ejecutar tareas de mantenimiento

Finally, Windows will ask you if you want to troubleshoot your computer as an administrator. Select this option and let the program analyze any problem that is affecting your PC. If everything goes well, Windows will repair the problem with Windows Modules Installer Worker and your computer will work as before.

Method 2. Use the Windows Update Troubleshooting Wizard

If the previous method did not work, we recommend that this time you use the Windows Update troubleshooting wizard. Note that WMIW is closely linked to operating system updates, so an error in Windows Update could be the cause of the problem.

Depending on the version of Windows you are using, you will have to follow these steps.

If you are a Windows 10 user:

  1. Access Windows settings (Windows Key + I)
  2. Select the Update and Security option
  3. Click on Solution of problems followed by Additional troubleshooters.
  4. It pulsates in “To begin to work” and it selects “Windows Update”.

If you are a Windows 11 user:

  1. Access Windows settings and go to “System”.
  2. Click on the “Troubleshooting” option.
  3. Click on “Other troubleshooters” followed by “Most frequently used”.
  4. Select “Windows Update” and run the troubleshooter.

After that, restart your computer and check if the CPU usage has normalized. Remember that it is possible that the CPU usage is at 100% when you start your computer, so before moving on to the next method it is advisable to wait a few minutes to see if the Windows Update fixer has repaired the problem.

Hombre utilizando un portátil

Method 3. Make sure that Windows is not being updated

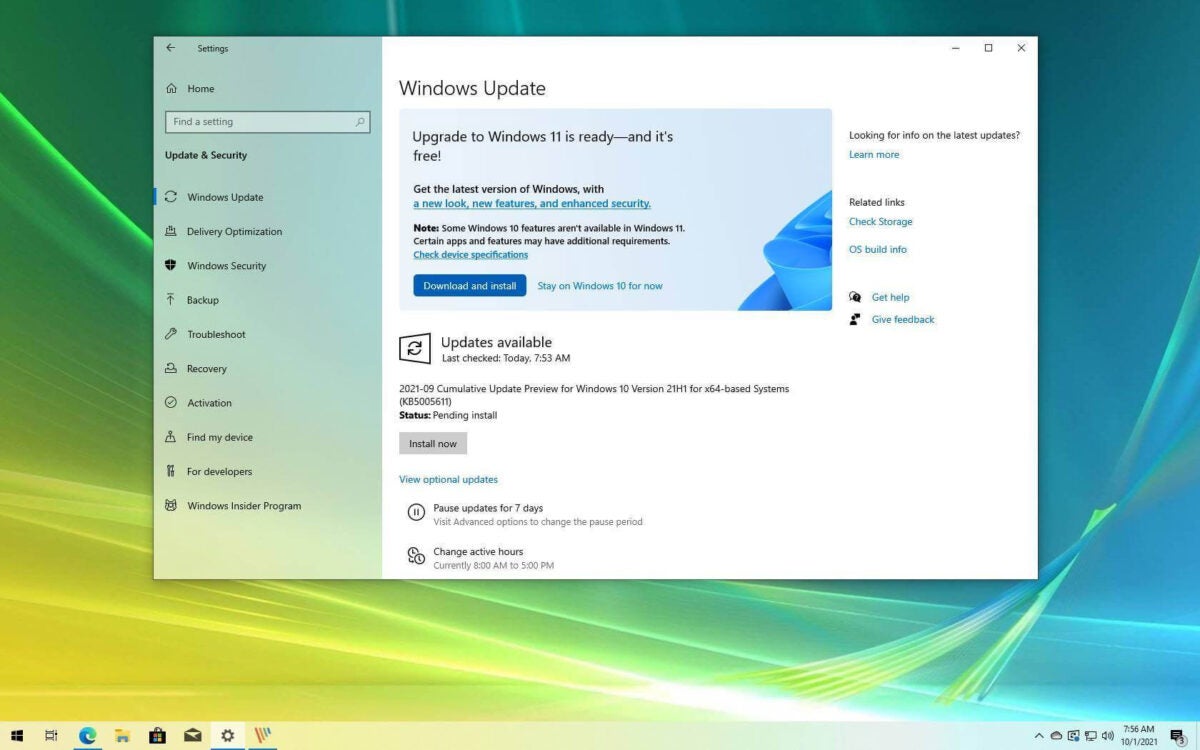
It is common that when your PC is in the process of downloading or installing an update, it will run much slower. Before being alarmed by the high CPU usage of Tiworker.exe, make sure that an update is not being installed. To check, you can access the Windows Update window by going to Settings (Windows Key + I) followed by “Update and security“.

In the new window you will see the Windows Update status. Here you will check if your computer is downloading an update, installing it or if, on the contrary, any of these updates is blocked. If this is the case, you will need to stop the Windows Update service, delete its history and restart its service. Don’t know how? Don’t worry, we have a step-by-step guide to fix the Windows Update can’t check for updates error.

Ventana de windows update

Method 4: Troubleshoot 100% CPU usage in Windows

If none of the above methods have worked, don’t worry. There are plenty of ways to speed up your computer and thus reduce your PC’s CPU usage. Tricks as simple as restarting your computer, removing annoying bloatware or disabling startup programs you don’t use can drastically increase the performance and speed of your computer. If you want to know them all, we recommend that you take a look at our guide to tricks and programs to speed up Windows.

Desinstalar programas en Windows 10

Get your PC running like new again

We hope that our article has helped you to solve the problems with CPU usage caused by Windows Modules Installer Worker. This error, despite being quite common, can cause more than one headache due to its annoying consequences. If any of the methods we have shared worked for you, don’t forget to share it with your friends on social networks.
5 Best Free Apps to Record Audio with your PC

Have you ever wondered how to record a podcast, take audio notes or record the sound of any streaming video? With the rise of new technologies, recording audio has become an increasingly present task in our classrooms, companies and even among online teaching professionals. If you are thinking of taking voice notes, recording any kind of audio clip or trying your hand at recording your own podcast, you will need to have the right software installed on your PC. But… Which program to download?

If you have searched the Internet, surely you have already seen that there are endless tools with which to record audio from your PC. However, not all of them are easy to use or free. To make your life easier, at Softonic we have prepared a list of the best free programs to record audio from your PC. We hope they help you!

1. Audacity

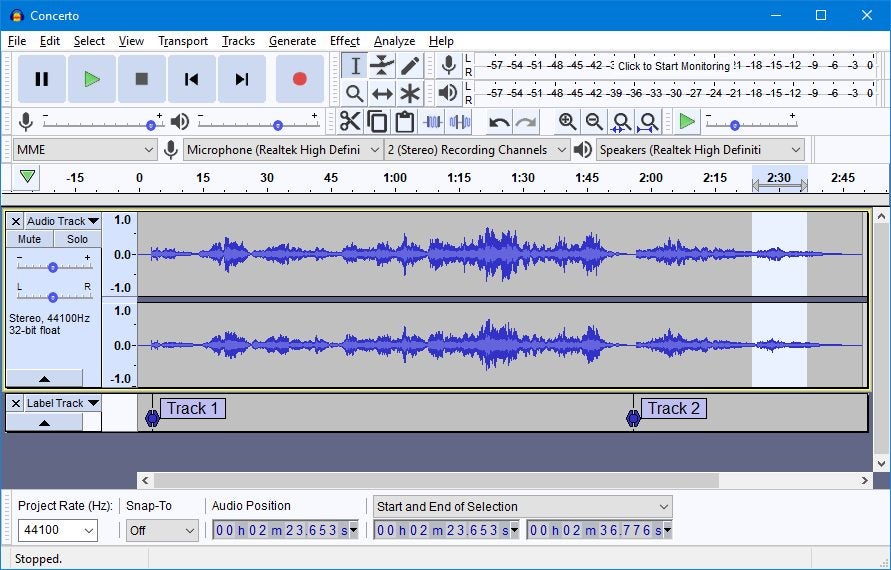
Audacity is, without a doubt, the best option to record audio from your PC. Not only is it a powerful free recording software, but it is also open source, thus opening up a world of possibilities for its users. One of its strengths is that, thanks to its simple and intuitive interface, it is a program accessible to all types of users. This translates into recording and editing tracks in record time, always offering professional results.

Despite being a seemingly simple program, Audacity offers all the necessary tools to record and mix audio tracks. It also includes tools to improve the sound, analyze the bass frequency and add effects such as audio equalization. Without a doubt, it is the perfect option to record any audio track from your PC.

Main features of Audacity :

  • Allows you to record and edit audio tracks
  • Very easy to use
  • Professional tools
  • Multiplatform
  • Free and Open Source
Audacity DOWNLOAD
9

2. Sound Forge

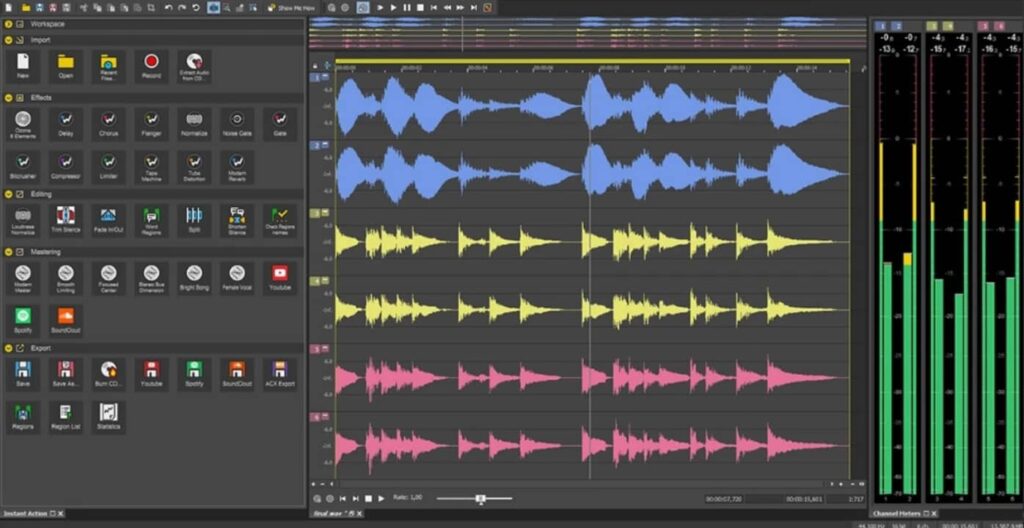
Sound Forge is a very powerful digital audio editing suite designed for the professional and semi-professional audience. In fact, for many years it has been considered the go-to audio editing program for artists, producers and engineers in the industry. Among its main features we find its exceptional audio quality and its advanced mastering and effects tools, with which you can create the perfect audio track.

In addition to being able to record audio, Sound Forge is a software designed to edit and polish the tracks created to the smallest detail. The program also stands out for its high compatibility with file formats and the possibility of exporting them directly to your favorite platforms. Its only weak point: its high learning curve. Sound Forge has a free trial version with which you can enjoy this editor and, if it meets your expectations, purchase its Pro version.

Main features of Sound Forge :

  • Professional recording and track editing tools
  • Recording of up to 32 different audio channels
  • VST plug-in support
  • Supports high-resolution audio recording
  • Includes a wizard to help beginners
  • Headlining software for major artists
Sound Forge DOWNLOAD
8

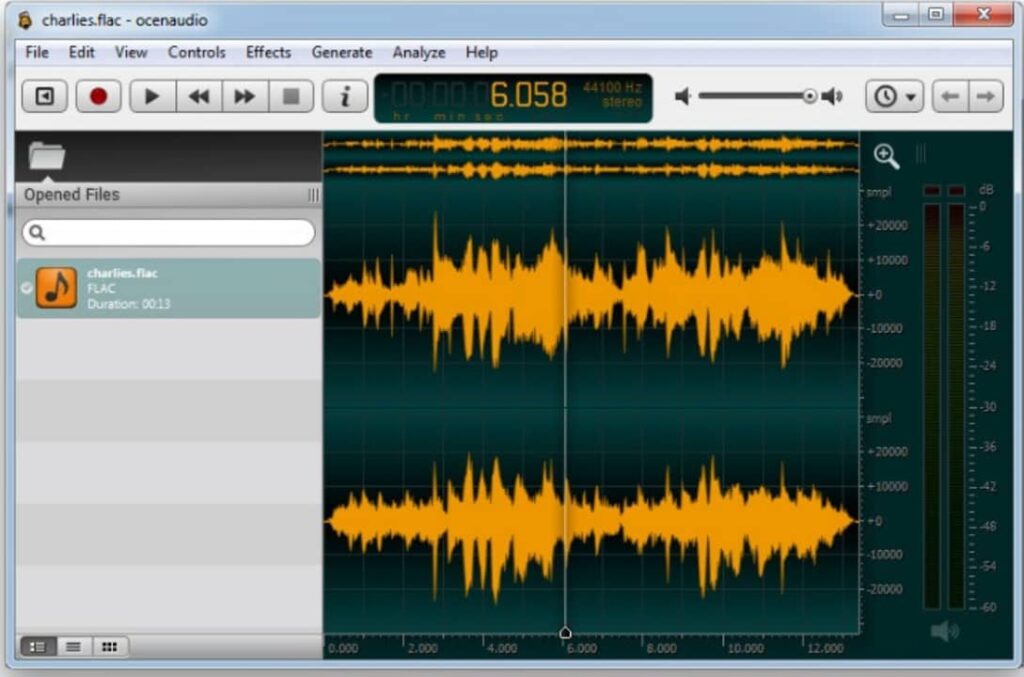
3. Ocenaudio

Ocenaudio is a free audio editor that is very easy to use with which you will be able to record, edit and analyze any track in just a few clicks. Although it is not the most powerful tool on the market, it does include some really interesting features such as the ability to add VST (Virtual Studio Technology) plugins. This makes it especially suitable software if, in addition to recording audio tracks, you want to add effects to them.

Among the main virtues of Ocenaudio is its ease of use. It has an intuitive interface and easy-to-learn controls. In addition, the program is completely translated into several languages, ideal for those who do not yet master the language of Shakespeare. As a final point, Ocenaudio is compatible with a large number of formats (FLT, MP3, M4A, 3GP, OGG, MOV, MKV, AVI, VOC, WAV, etc.) being perfect for both importing and exporting our audio tracks.

Main features of Ocenaudio:

  • Easy to use
  • Allows simultaneous editing of multiple files
  • VST plug-in support
  • Portable version available
  • Available in different languages
  • Completely free of charge
Ocenaudio DOWNLOAD
8

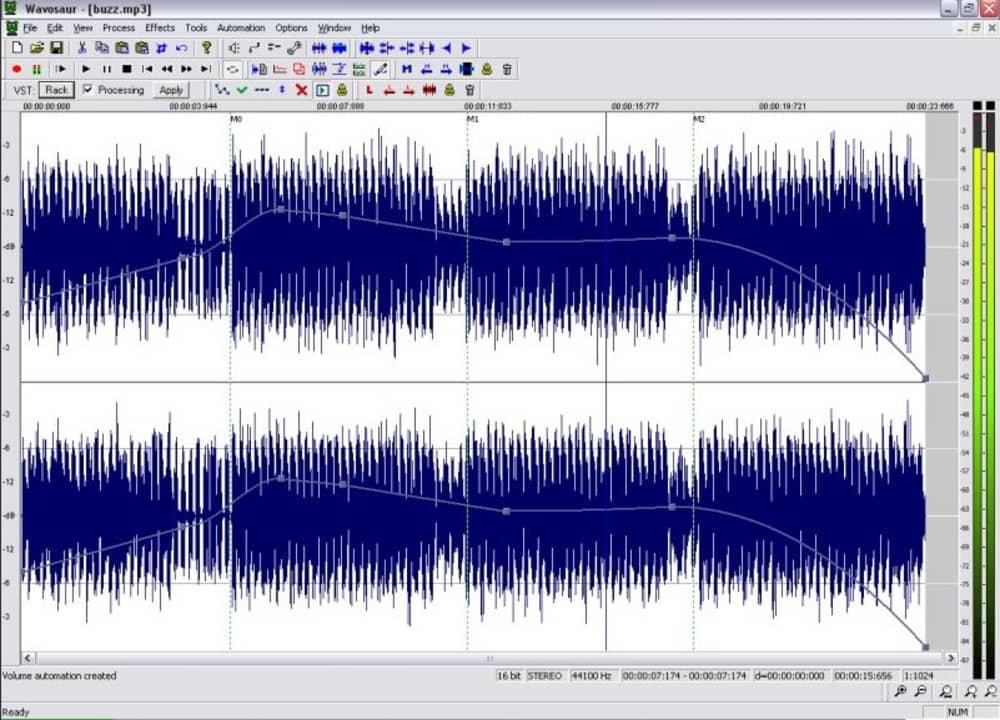
4. Wavosaur

Wavosaur is another excellent option to record audio from your PC completely free of charge. This application stands out for offering native support for VST, making it a useful tool not only for recording, but also for editing, adding an effector and manipulating tracks to your liking. In addition to this, it has all the options of a good audio editor, allowing you to record, analyze, copy, paste, modify channels and convert any type of track with just a few clicks.

A very interesting point about Wavosaur is that it is a portable program and therefore does not require installation. Just download the file, double click on it and start recording and editing audio instantly. In addition to this, it is an app with high file compatibility, accepting to import and export audio in WAV, MP3, AIF, AIFF and OGG VORBIS formats. And it’s free!

Main features of Wavosaur:

  • No installation required
  • VST support
  • Export audio files as text
  • Analyzes the audio frequency of the second and third spectra
  • High format compatibility
Wavosaur DOWNLOAD
8

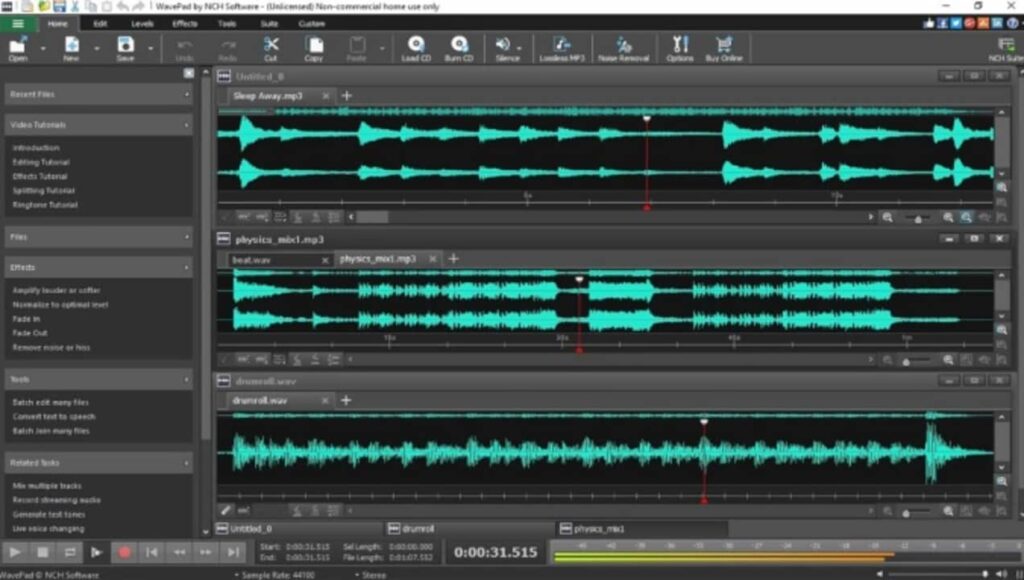
5. WavePad

We close our selection with WavePad, a powerful and complete audio editor with which you can record and edit tracks from your PC. The program has all the basic and advanced editing tools as well as the possibility of adding audio effects. In addition to this, it allows the integration of DirectX and VST plugins, thus opening the possibility of adding endless additional tools and effects.

One of WavePad’s strengths is its compatibility between formats. In fact, it is compatible with almost all current music and audio file formats (MP3, WAV, VOX, GSM, WMA, AU, AIF, FLAC, real audio, OGG, AAC, M4A, MID, AMR, etc.) It is also very intuitive and easy to use, making it perfect for both new and experienced users. WavePad is completely free to download, but is only available for non-commercial use.

Main features of WavePad :

  • Compatible with the vast majority of formats
  • Intuitive and easy to use
  • Compatible with DirectX and VST plug-ins
  • Includes a large number of audio effects
  • Allows batch processing
WavePad DOWNLOAD
8

Is it time to update from Windows 10 to Windows 11?

The latest version of the Windows operating system (OS), Windows 11, was released in October 2021. Alongside the release, there was also the option for current Windows 10 users to upgrade to the newest version for free. However, it’s been a little over a year since the release, and so far, the uptake of Windows 11 is very slow.

If we look at all versions of Windows currently operating on users’ computers, Windows 11 only makes up 13.6%, barely surpassing Windows 7, which is 10.6%. Windows 7 was released in 2007 and is still used today, despite no longer receiving updates or security patches. Windows 10 is still the preferred operating system and dominates, with 71.9% of all Windows computers running this version.

There are many reasons why you should consider upgrading to Windows 11, just as there are compelling reasons to wait. However, the primary reason why the uptake has been slow is that there isn’t any pressing need to upgrade right now. Windows 10 is still receiving patches and security fixes – so why change the system now
A spokesperson at Windows explained that Microsoft isn’t worried, and the slow uptake isn’t unusual as they experienced similar trends with Windows 10 and even Windows XP back in the day. Windows is still dominating the market by being the most-bought device in the world, with a 76% market share globally. However, the spokesperson also noted that we might see more urgent incentivized campaigns to get users to switch to the newest OS.

Windows 11 Upgrades Still Not Taking Off

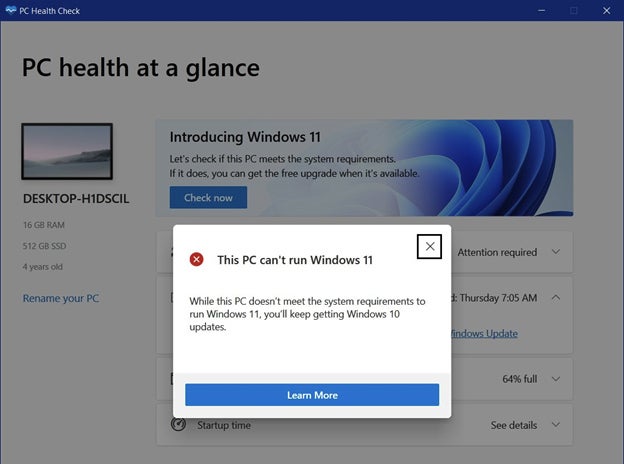
Another major reason why the uptake of the free upgrade is so slow is because of the insane system requirements needed to run the new OS. Windows 11 requires users to have a reasonably new CPU, a large amount of RAM and the security chip known as TPM 2.0. Unfortunately, many current Windows computers don’t meet these requirements. Approximately 55% of business devices used globally won’t meet these requirements.

You’d be wrong if you think the biggest issue with the system requirements is the TPM chip. Many devices purchased today come with this chip already built into the motherboard. The issue is the combination of these requirements, and if they aren’t met, you can’t proceed with the upgrade.

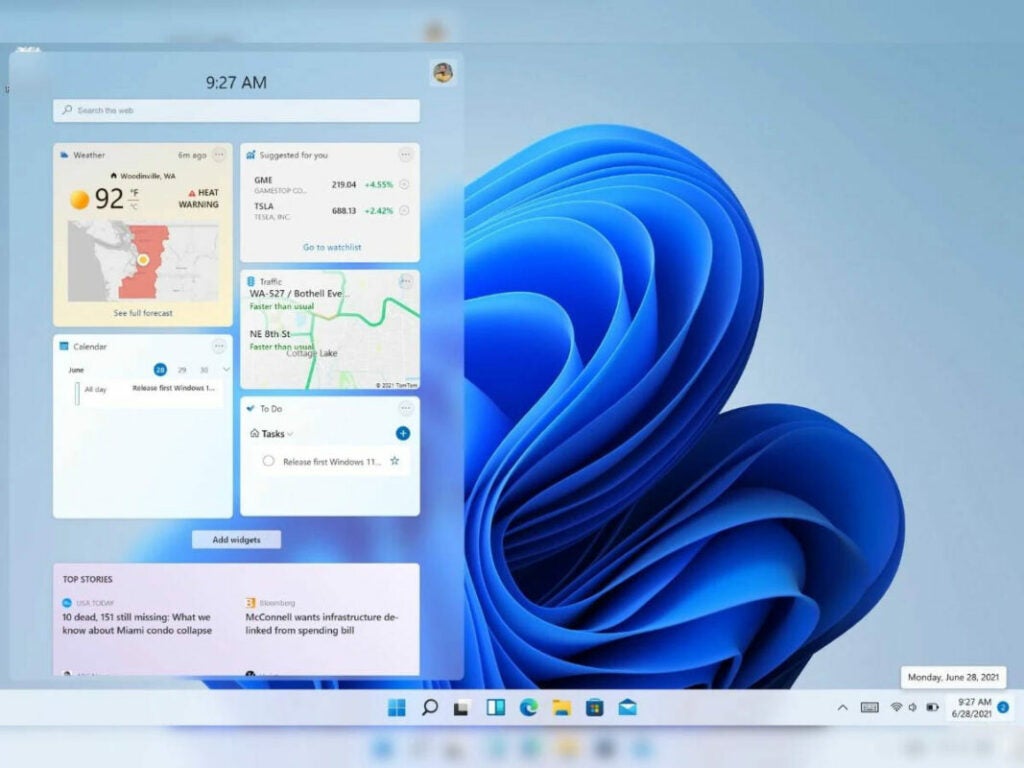
Many users believe that Windows 11 is nothing more than just Windows 10 with a paint job. While it is true that there are many similarities between the two OS, Windows 11 does have a few unique features. Visually it’s much more appealing with rounded edges, a centralized taskbar and pastel colors, but the features go beyond looks. The performance of Windows 11 is much better and faster. The development team spends a lot of time improving memory management to ensure that open apps get allocated more resources than those running in the background. The version also supports Android apps. Returning from a sleep state is also 25% faster due to improvement in RAM suspension.

Since Windows 11 utilizes the TPM chip, the operating system’s security is also much more powerful. This is one of the biggest differences between Windows 10 and the new version. This chip enables SHA-256 encryption, Autopilot, SecureBIO and Windows Defender System Guard. 
It also didn’t help that the first release was riddled with bugs and other issues. These issues range from minor annoyances such as slow file transfers to major issues such as the blue screen of death. While updates have been released since this debacle, users are still wary of making the change until all the issues have been addressed.

Windows 11 Upgrades Still Not Taking Off

Windows recently announced that they were returning to a single annual feature update for new operating systems instead of the bi-annual system it’s been using. Security and bug patches will still be released monthly. There are also rumors that Windows is considering returning to releasing a new OS once every three years. Taking this into account, we could see a new operating system by 2024.

If you want to stick with Windows 10, that’s entirely possible for now. However, users that currently use Version 21H1 might want to consider updating to Version 21H2. This is because 21H1 will reach its end-of-life rules on December 13th, 2022. At this point, it will receive no further security or bug patches. Windows 10 Version 21H2 is a newer version and will continue to receive updates and patches for now.

We’re wondering if we’ll see an increase in upgrades to Windows 11 and whether users are just biding their time. It’s apparent that in many cases, if users don’t have to make a change, they’ll stick to what’s familiar and works.
All the best Space wallpapers

These five sites have all the best space wallpapers you can download for free. Check them out now.

This week at Softonic HQ we’re concentrating on bringing you fantastic wallpapers for your Windows PC or Apple Mac, and also all the best places to find them.  If you’re looking for cool desktop backgrounds including scenes and images from your favorite video games, the biggest sporting events around the world, the latest movies, and hip minimalist pictures we have you covered. Today though, we’re covering wallpapers and backgrounds from space. We don’t mean they’ve come from space; we mean desktop wallpapers of all things space related. We’ve got to say, some of these are incredible!

With these Space wallpapers we’re going to do things a little differently. Rather than highlighting particular images we like such as famous nebulas, supernovas, black holes, spiral galaxies, and planets like Saturn and Jupiter; we’re going to concentrate on where to find them all. Let’s go.

HD and 4K Space Wallpapers

Wallpaper Access

As you’ve probably guessed from the name of this website, it doesn’t specialize in space-related matters. Clearly, what Wallpaper Access specializes in are wallpapers and backgrounds. That doesn’t mean though, that the space images you find here won’t be special. On the contrary, Wallpaper Access is a great place to go find a huge collection of ultra-high-resolution space images that you can use as the background on your PC or Mac. In particular, the 4K Space Wallpapers collection is fantastic, with 69 breathtaking scenes both of outer space and views from outer space looking back to earth.

Hubble Space Telescope

The Hubble Telescope is one of the most iconic human machines ever built. Thanks to its earth orbiting platform, the Hubble has been able to capture some of the most incredible scenes of space the human race has ever laid eyes on. If you have a particular image of outer space stuck in your mind, chances are it was taken by the Hubble. By going to straight to the source of those space images here, you’ll be able to get your hands on space images with ridiculously epic titles like A rose made of galaxiesThe pillars of creation, and Galactic wreckage. What’s also great about the Hubble website is that it gives you free access to the full size original image meaning you won’t have to compromise on quality, if you don’t want to, and you’ll also get interesting explanations about all the images written by teams that captured them. If you’re looking for HD space wallpapers of the Milky Way, Orion’s Belt, our Solar System and beyond; this is the place to start your search.

Unsplash

Unsplash might just be the coolest stock photography library on the internet. It has thousands, if not millions of fantastic images, which have all been uploaded by the artist or photographer behind them. What’s even better about Unsplash is that all the images are available for free. As you’d expect from such a site, Unsplash has a fantastic section on space images that has many great space scenes and vistas that would be perfect as your wallpaper.

Space.com

Space.com describes itself as, “the premier source of space exploration, innovation, and astronomy news, chronicling (and celebrating) humanity’s ongoing expansion across the final frontier.”  Sounds cool, doesn’t it! As you’d rightly imagine, all that makes space.com the perfect place to find some truly awe-inspiring space-related backgrounds. Also, just like with at the Hubble website you’ll not just get the images to use as your background, you’ll also learn about what is going in the images and how they were taken. If you’re looking for something a little deeper than merely an image that looks cool, this is the place to go.

NASA

Our final source of amazing space-related wallpapers is NASA. As you’d expect from the most famous space agency on the planet, NASA has a huge library of space images. These include photos captured by telescopes on earth and in orbit, photos of cool equipment such as radio telescopes, mission mockup images like those of the famous Curiosity Rover, historic mission photos, and much much more. If you want backgrounds with space shuttles and International Space Station missions, this is the site you’re looking for.

Out of all the sites we’ve brought you today, the NASA website is our favorite because on top of offering you some fantastic images that will make great backgrounds, being a fantastic place to learn about space, and doing all of that for free; many of the images on the NASA site will make you feel emotional as you’ll recognize them. You might know who the person is in the image, what the shot is of, or even just feel an emotional attachment for the robot you’re looking at. NASA is a huge part of our global culture these days and that really gives the desktop wallpapers you’ll find here a lot more weight.

Wrapping up

We’ve shown you five great places to source all the best space wallpapers available on the web. If you’re a big space fan, you’ll definitely find the wallpaper you’re looking for on one of the five sites above. In fact, you’ll find a lot more than just backgrounds on three of the sites meaning it all depends just how deep you want to go. You might log on to the Hubble or NASA websites simply looking for a new background for your PC and emerge hours later having ended up researching anything from the composition of moon rocks to the age of the oldest and youngest galaxies. That’s just it with space though, the possibilities are endless.

Will Microsoft be able to solve the mysterious Windows 11 gaming bug?

Just over two weeks ago, Microsoft released the Windows 11 22H2 update that many of us have been waiting for. Unfortunately, it didn’t run as smoothly as the company expected. PC gamers ended up with stuttering and lag in many games, killing the previous delightful performance. Now, the 22H2 is rolling out again, but only to those gamers who don’t have specific games or apps installed.

Microsoft did a deep investigation into what was causing the lag in gaming performance when 22H2 was released. What it found was that some games and apps enabled debugging features on the GPU. While this is a built-in feature for Windows, it’s not something that other apps should be able to access.

When Microsoft discovered this issue, they put a safeguard in place. That meant that all affected PCs had a block enabled, preventing the Windows upgrade from happening. So while it was advertised that the new version was available, many users didn’t see the option to upgrade.

Despite the time since the investigation, Microsoft hasn’t been able to fix the problem yet. When you head to the health dashboard, you may see this message:

“The safeguard hold with the safeguard ID of 41990091 has been updated to only safeguard Windows devices which have one of the small subset of games and apps which are still affected by this issue.”

Windows

In effect, it means that Microsoft has identified which games and apps are enabling the GPU debugging features. If your device doesn’t have any of these installed, then you’re going to see the Windows 22H2 update ready for your device. The safeguard hold will be gone. 

However, should you have programs that cause this issue, you won’t be able to upgrade. Microsoft recommends you update all your apps, games, and drivers for the best way to remove this issue. For now, it will continue trying to find a solution to this gaming bug problem.

How to Back Up Your Files and Which Ones To Back Up Regularly

You may not be aware of it, but you save a huge amount of data on your hard drive every day, including irreplaceable files that you would never want to lose. Photos from your recent vacation, your wedding video, sensitive work emails, sessions of your favorite games… You probably don’t spend too much time thinking about it, but your hard drive is like a little safe that holds a large part of your life. But are all your files truly safe?

Disco duro

The answer is no. Files saved on your PC are not as safe as you might assume, and in fact, any unexpected error, power outage or virus could corrupt everything you have, wiping away your memories. Fortunately, there’s a way to keep your files safe: creating a backup of your PC.

In today’s article, we’ll walk you through the steps to create a system image of your Windows 10 computer. Don’t worry, because the process is easy and requires no prior IT knowledge. Let’s have a look!

Windows 10 DOWNLOAD
8

What is a backup?

Persona utilizando un portátil

A backup is a copy of your documents and files that you can create in order to restore them in case of emergency. It’s especially useful for recovering files that have been corrupted or deleted by mistake, or, for example, restoring your computer after reverting to factory settings.

Essentially, there are two kinds of backups you can create: a backup of the files stored on your computer or a full system backup. The first option saves your personal documents (photos, emails, videos, etc.), and the second one creates an exact image of your OS that can be transferred to an empty computer.

Whether you want to back up files or your entire system, you’ve come to the right place. Keep on reading to find out how to do both things!

How to back up your personal files on Windows 10

Windows 10 has its own tool to back up personal files, and it’s quite easy to use. Called “File History,” it lets you back up your personal data on a regular basis in a matter of seconds.

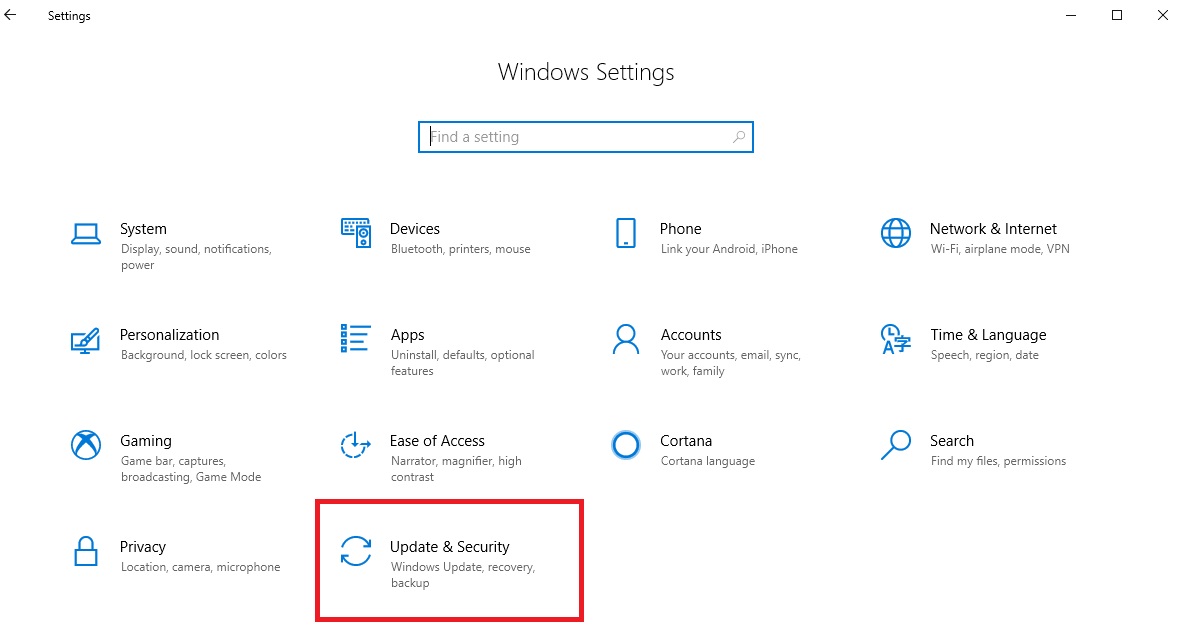
To access File History, first go to the Settings menu (Windows key + I) and then select the “Update & Security” option.


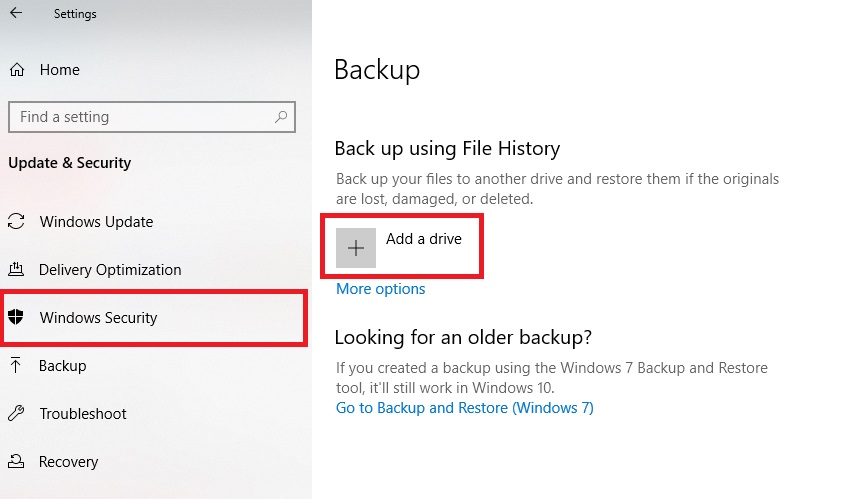
Next click “Backup” in the menu on the left side of the screen. When the window opens, select “Add a drive,” which you’ll find under “Back up using File History.”

Click there, and a menu will appear on the left side with all the external hard drives connected to your computer right now. Choose one to save your backup on. Then Windows 10 will automatically copy all the files you have stored on your PC.

If you prefer, you can create your backup manually by selecting “More options” followed by “Back up now.”

On the same screen, you can choose how frequently you want to back up your files and which folders you want to include in your Windows 10 backup.

How to restore personal files from your backup 

Now that you have your files backed up, we’re going to teach you how to restore them. Not to worry, the process is easy and intuitive!

To restore any file saved in File History, go to Start (the button with the Windows icon on the lower left side of your screen). Then type “Restore files with File History” and click on the result that Windows displays.

In the next window, you’ll see your backups listed by date. You can browse through them using the arrow icons at the bottom of the window.

Navegar por las copias de seguridad

Once you find your copy, you can fully restore it, or if you prefer, only restore the file you need.

Where can I store the backup copies of my files?

The best place to store backup copies of your files is an external hard drive, but a cloud storage service is also an option. Both have their pros and cons. Keep reading to find out what they are!

External hard drives are great for storing your files in a physical location where they can be accessed anytime, without needing to connect to the internet. Besides being durable and easy to use, this option gives you the peace of mind of knowing exactly where your files are and that they’ll never disappear on you.

You can buy a hard drive for a great price by searching online or checking out the options on Amazon.

Also, be sure to read our article below with a roundup of the best budget external hard drives in the market today.

Cloud storage services are another great option for keeping your backups safe. They’re convenient because you can access your files on any device with an internet connection. That makes them a perfect option for storing work files that you need to be able to access at home or the office.

There are many excellent cloud storage services. You can find our favorite ones below.

  • Dropbox

Dropbox DOWNLOAD
8

  • Google Drive

Google Drive (Android) DOWNLOAD
8

  • Microsoft OneDrive

Microsoft OneDrive DOWNLOAD
8

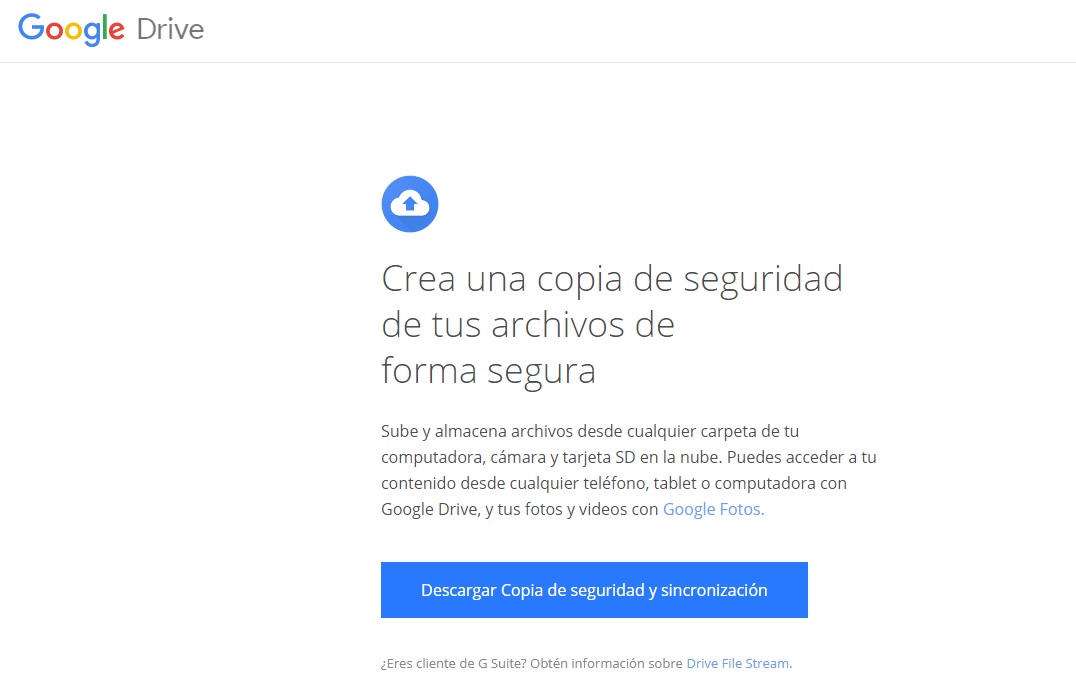
Due to its user-friendliness and great performance, we recommend using Google’s cloud storage service, Drive. You can find an in-depth article on how to use Google Drive to create backups below.

What are the main types of files I should back up?

Now that you know how to back up your files and where to store them, we’re going to look at what kinds of files you should back up.

First of all, there are personal files, that is, your photos, documents, music, etc. Usually you can find them under”C:\Users\Your username” and saved in the corresponding folder (Photos, Documents and Music).

Also, we strongly suggest backing up your AppData folder, which contains the settings of all the programs, applications and games on your PC.

And don’t forget to back up important emails, such as sensitive work emails and personal messages.

Finally, make sure to back up any essential files for projects you are working on. For example, edited videos, photos or work files.

In short, use your common sense when deciding which files on your computer are important in your life, and which ones would mean a big personal loss if you couldn’t recover them. Once you have identified them, add them to your list of files so Windows can back them up regularly.

How to create a system restore point in Windows 10

If you’re looking to protect your operating system files, Windows 10 has an easy tool for creating backups in the blink of an eye. We’re talking about system restore points.

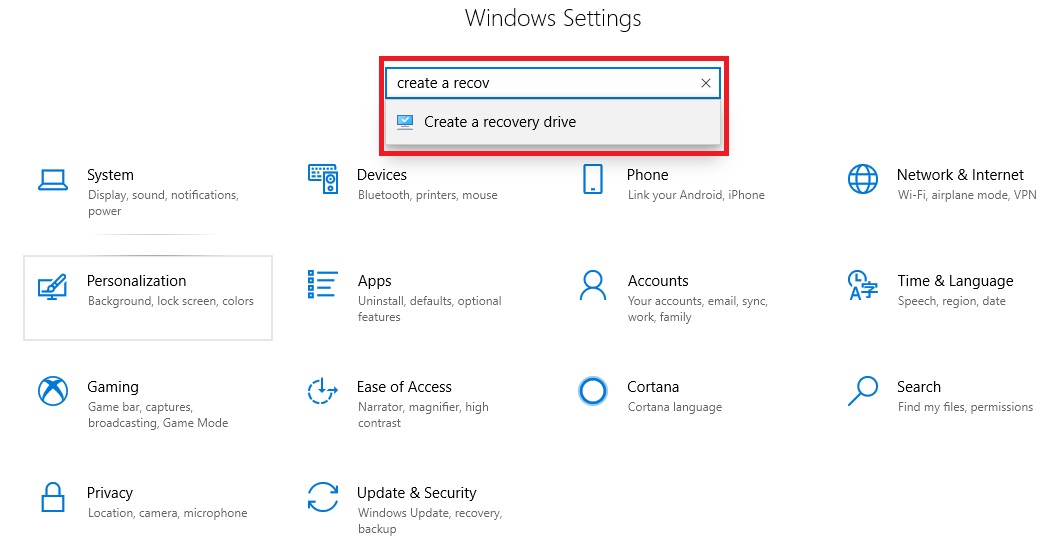
To create a restore point in Windows 10, first open the Settings menu (Windows key + I). Then type “restore point” and click the result that comes up.

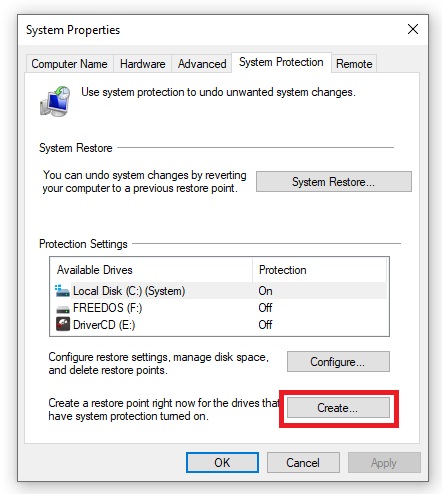
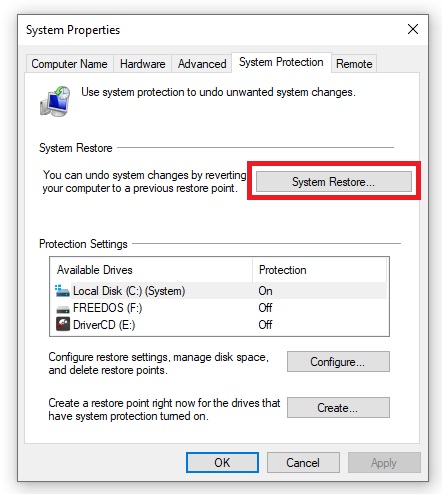
When the System Properties window opens, click the “System Protection” tab and the “Create” button.

If this option appears inactive, first select “Configure” to activate it. Ta-da! Your operating system backup is finished.

If you’re still feeling lost, be sure to check out our guide so we can walk you through all the steps.

How to revert your computer to a system restore point

Reverting your computer to an earlier point is very easy. Just follow the steps described above, and in the System Property window, select “System Restore.” 

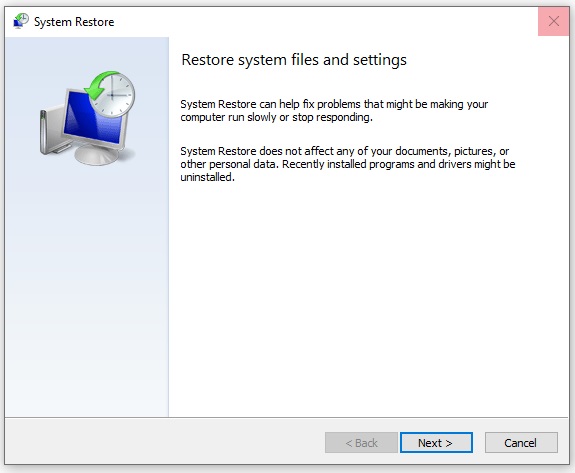
In the new window, Windows will ask you if you want to revert your computer to the point before your last program installation or to an earlier point.

Select a system restore point and click “Next.” Now all you have to do is wait for Windows to work its magic and restart your computer. Once the process is finished, your system will be reverted to your chosen point.

We hope our guide on how to back up your files has been helpful to you. What are some of the files on your PC that you couldn’t live without? Tell us about them in the comments section!

The Best Windows Security Tips

We live in a world full of dangers, including cyberattacks, viruses, malware and online scams. They can infiltrate your operating system before you even realize it, and by the time you do, it’s already too late. It may seem like a hassle or a waste of time, but spending a few minutes strengthening Windows 10 security on your computer can prevent a bad experience or two. And believe us, it’s worth the trouble.

Person using laptop

At first glance, Windows may seem like an impenetrable operating system, but it’s actually a prime target for hackers around the world, who are discovering new security holes every day. Want to use Windows without worrying about online attacks? Keep reading for some useful tips!

Windows 10 DOWNLOAD
8

1. Keep your PC up-to-date

Many people think of Windows updates as a hassle that slows down their work or asks them to reboot at the worst possible time. But did you know these updates play a vital role in keeping your computer secure? Every time you update Windows, Microsoft repairs the security holes in the operating system and strengthens its line of defense, ensuring your security and that of your data.

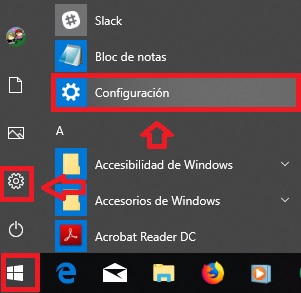
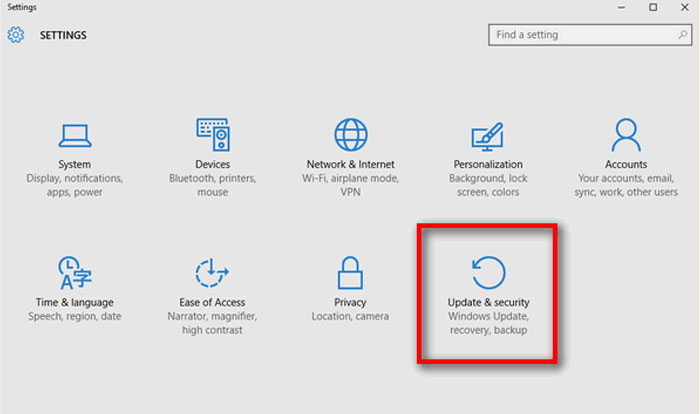
If you don’t know how to update Windows 10, don’t worry. It’s a piece of cake! Just click the Start button (the Windows icon on the lower left side of your screen) and then Settings (the gear icon). Alternatively, you can press the Windows key + I. Next, click “Update & Security.”


How to get to Update and security

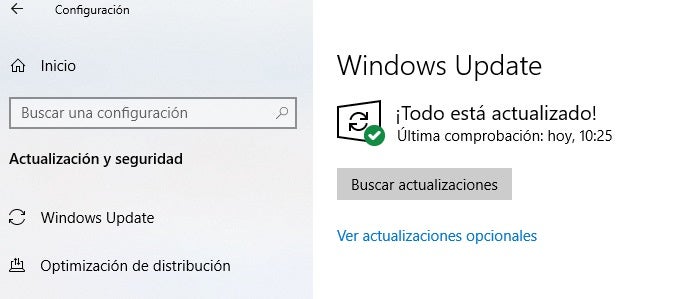
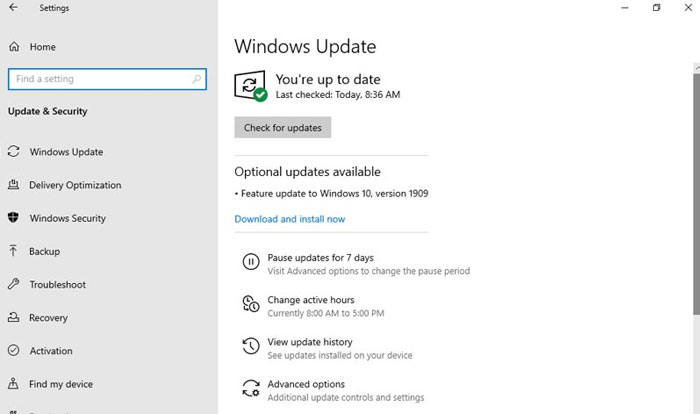
In the new window, click on “Windows Update,” which appears in the menu on the right side. Finally, click the “Check for updates” button and wait for Windows to be updated. See how easy that was?

Windows-Update-interface

2. Secure your computer with a password

Your PC’s security can be compromised not only over the internet, but also in the physical world, right where you are. If you use your private computer in a public place, for example, you use your laptop in a coffee shop, or if your home or office is robbed, your data will be at risk as well. If you haven’t set a password to log into your computer, it will be vulnerable if it falls into the wrong hands.

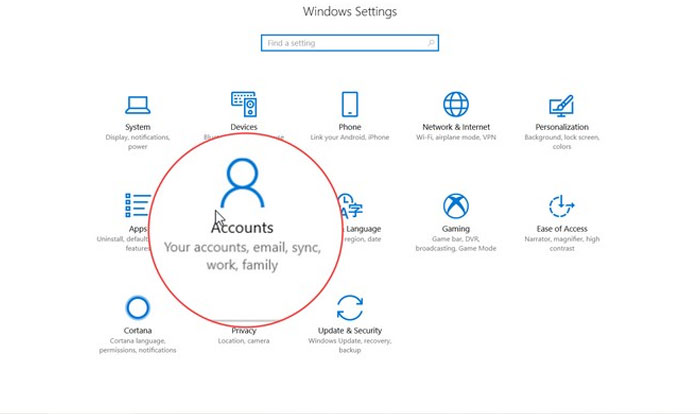
To set a password for Windows 10, follow these easy steps. Click Start (the button with the Windows logo on the lower left side of the screen) and then Settings (the gear icon). If you prefer, you can also click the Windows button + I. Next click the “Accounts” option.

How to get to the Accounts window

In the new window, go to “Sign-in options” in the menu on the left. Then a new menu will appear where you can set a password to sign into Windows and other new options for unlocking your device (a physical security key, a PIN, your fingerprint, a picture password, facial recognition, etc.).

3. Make sure you have the only administrator account on your computer

Not all Windows accounts are created equal. There is one kind of account that lets you make any change on your computer without the other users’ consent. We’re referring to administrator accounts. To see which user accounts are linked to your computer, follow these steps.

Click the Start button (the Windows icon in the lower left corner of your screen) and then Settings (the gear icon). You can get to the same window by clicking the Windows button + I. Next, just go to “Accounts.”

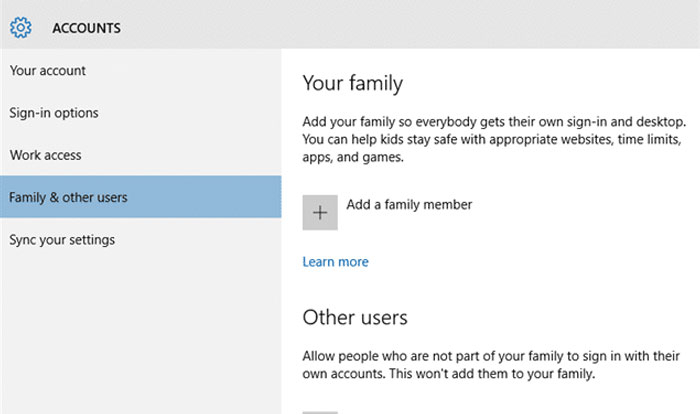
Family accounts and other users

In this new window, click “Family & other users.” This will show you everyone who has an account to access your computer. Make sure that nobody but you can log on as an administrator.

4. Update all computer programs regularly 

Keeping your operating system up-to-date isn’t enough to prevent a security hole from compromising your data. It’s important to make sure that all the programs and internet browsers on your PC are always up-to-date.

Fortunately, many programs are updated automatically whenever you open them, but others need some extra help. That’s why we recommend that you visit their websites regularly to check for new versions.

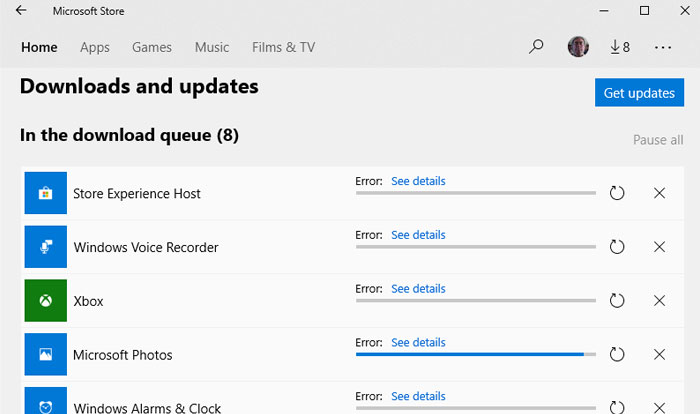
If you have downloaded programs from the Microsoft Store, the process is a lot easier. To check for updates, just open the Microsoft Store, click the three-point icon on the upper right side of the window and go to “Downloads and updates.”

5. Delete programs and apps you don’t use 

Hard drives have so much space these days that it’s easy to install programs over time and never delete them, even if you don’t use them. But it’s important to clean your PC of old programs or ones that are just taking up space. By deleting them, you’ll make sure they never cause any security problems. At the same time, you’ll be surprised how much your computer’s performance will improve.

Access Applications in Windows 10

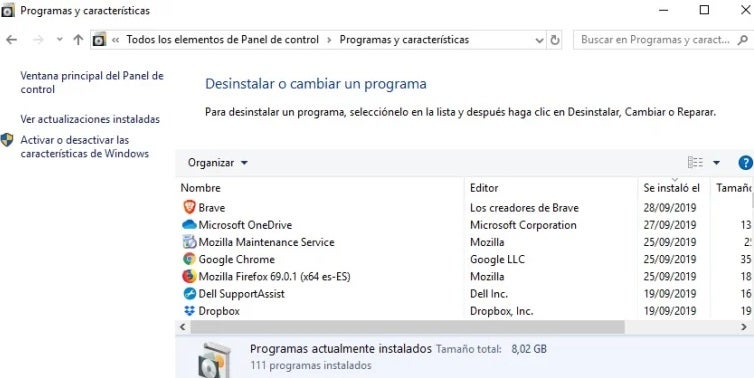
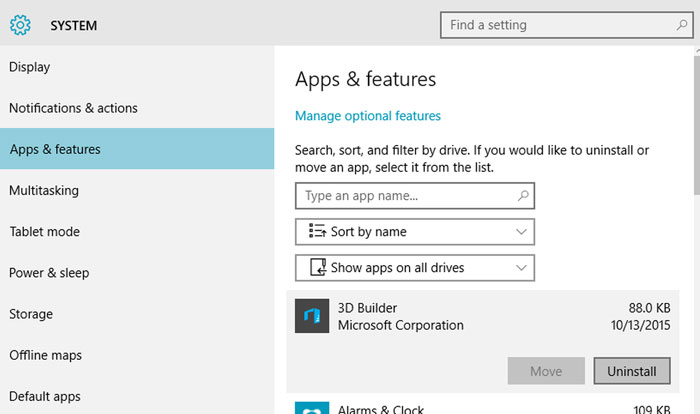
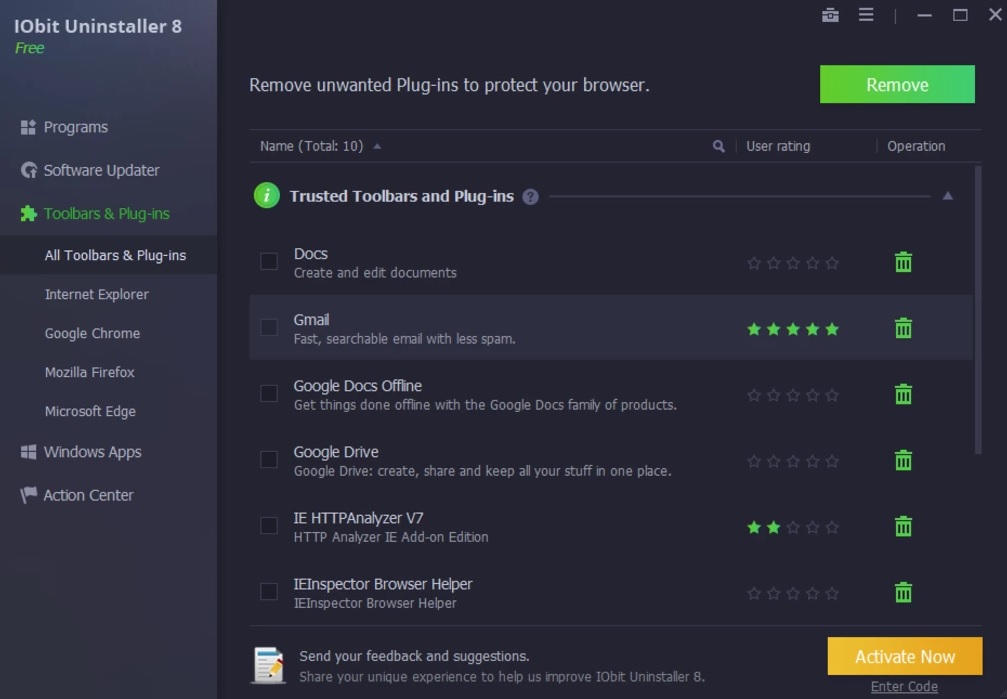
To get rid of a program on Windows 10, always use the uninstaller. Go to the Settings menu (click the Windows button + I) and click the “Apps” option. Next, you’ll see a menu with all the programs and apps installed on your computer. Click the one you want to delete and then “Uninstall.” If you prefer, you can also use software to uninstall programs. Check out the article below to find out which ones we like the most.

6. Deactivate “spyware” on Windows 10

Windows 10 is an excellent operating system, but it has always been criticized for invading users’ privacy. Unless we disable them, Windows 10 comes with a series of enabled options that share our data without us even realizing it (our location, data to help it decide what ads to display, activity, etc.)

How to access the Privacy menu in Windows 10

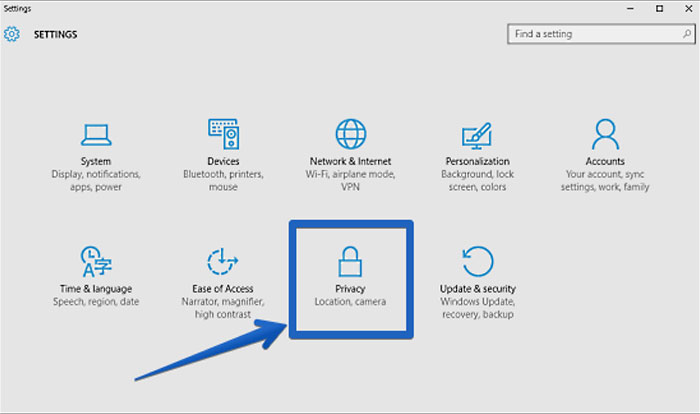
To disable them, go to Settings (click the Windows button + I) and the “Privacy” option. In the new window, turn off the options under the “General” tab, and under “Activity history,” disable “Send my activity history to Microsoft.” Finally, under “Diagnostics & feedback,” turn off “Tailored experiences.”

7. Install good antivirus software

This may come as a surprise, but many Windows 10 users don’t have antivirus software, making them an easy target for potential hacker attacks. Good antivirus software is not necessarily expensive, and in fact, there are many free antivirus products that are excellent and will protect your PC without impacting its performance.

Hacker attack

Here at Softonic, we especially recommend Avast Free Antivirus. It detects the vast majority of viruses, and you’ll barely notice you have it installed. Click below to download it completely free.


Avast Free Antivirus DOWNLOAD
8

If you’re not a fan of Avast, don’t worry. We have a great article about the best free antivirus programs to protect your computer with Windows 10.

8. Always keep your firewall on

This point is closely related to the one above: always keep your computer’s firewall on. If you use Windows Defender, we recommend checking regularly to make sure that it’s on.

Windows Security Interface

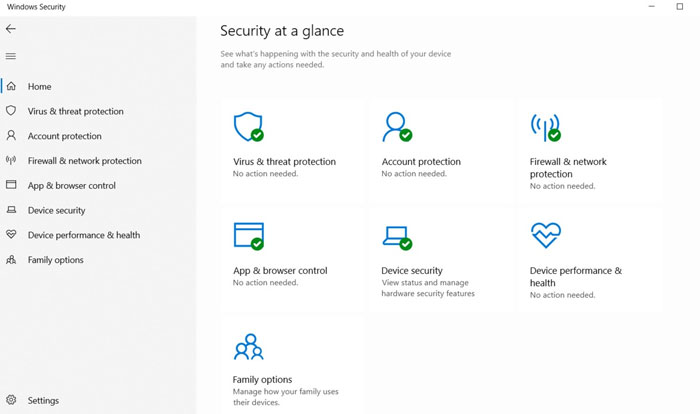
Go to Settings (click the Windows button + I) and the “Update & Security” option. When the new window opens, click “Windows Security” and make sure there is a green check mark beside “Firewall & network protection.” You can also make sure by going to the Control Panel and clicking “Windows Defender Firewall.”

9. Use a paid VPN

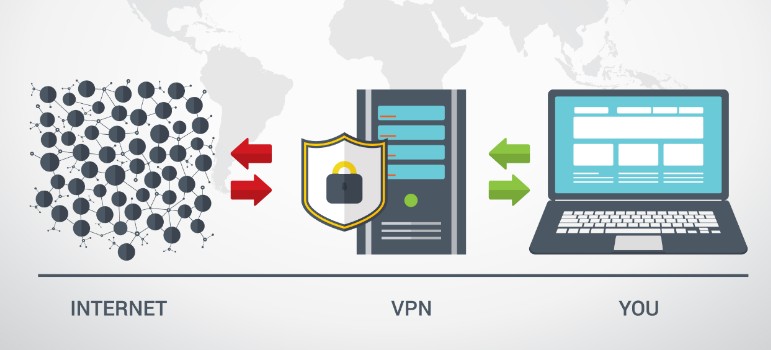
Many of us browse the internet without using a VPN. This isn’t a problem if you only use your computer on your Wi-Fi at home. But everything changes if you access open Wi-Fi networks on your laptop at a library, coffee shop, airport, etc. Unless you use a VPN, your data won’t be encrypted and can be intercepted by any malicious user who is using the same network at the same time. So why is it important to use a paid VPN?

Free VPNs could seem like a bargain at first, but keep in mind that unless they cover their costs via subscriptions, they do so by other means. One of the most typical ways these free VPNs earn money is by selling your data to third parties, and they’re even capable of selling your internet bandwidth to other users without you realizing it. Want to know more about why we advise against free VPNs? Read the article below.

When choosing a VPN, make sure that it’s the right one to meet your needs, so consider how you use your computer. A good VPN for browsing the internet isn’t the same as one for streaming content or, for example, online gaming. To make your decision easier, read our roundup of the best VPNs for safe browsing.

We hope our list of tricks and tips helps to protect your operating system from hacker attacks. Know of any we didn’t mention? Feel free to share it in the comments section!