Luca Galante, creator of the acclaimed game Vampire Survivors, has highlighted the growing interest in roguelike elements across various video game genres, including big-budget or AAA titles. During a recent interview, Galante expressed his excitement about seeing how these types of mechanics are being integrated into more conventional games, allowing players to enjoy a complete experience from the start. They end when you start enjoying them Galante mentioned that he has experienced frustration with certain role-playing games where the true fun and potential of skills only manifest once the end is reached
Luca Galante, creator of the acclaimed game Vampire Survivors, has highlighted the growing interest in roguelike elements across various video game genres, including big-budget or AAA titles. During a recent interview, Galante expressed his excitement about seeing how these types of mechanics are being integrated into more conventional games, allowing players to enjoy a complete experience from the start.
They run out when you start enjoying them
Galante mentioned that he has experienced frustration with certain role-playing games where the true fun and potential of skills only manifest once the end of the game is reached, describing the initial narrative as an extensive tutorial. This feeling resonates with many players, who see roguelikes as an alternative that offers challenges and entertainment from the very first moment, eliminating the need to restart the game to enjoy the more complex mechanics.
The success of roguelikes has been palpable, not only in the indie realm where they have gained great popularity, but also in the AAA space, as demonstrated by the roguelike mode in God of War: Ragnarok and other similar additions in titles like The Last of Us 2 and Elden Ring. Galante pointed out that, despite the current trend towards roguelikes, it is possible that players will eventually return to more linear styles of gameplay, a shift that could make the variety and randomness of roguelikes less appealing over time.
At the end of the conversation, Galante made it clear that his desire is to see more games, especially in the AAA sector, that incorporate these roguelike systems, as they allow players to enjoy gameplay without waiting for a long time. As he expresses, “it makes me happy to know that these mechanics are being used, as it is one of the best ways to enjoy a video game”.
The Reminders app offers us many more functions than we can see with the naked eye.
The Reminders app offers us many more functions than we can see at first glance. It allows us to remember errands, lists of books to read, shopping items or simply write down pending tasks or projects -such as cleaning the iPhone to free up storage space-. To keep all the information in order we can create and use several lists within the application.
Protecting all our personal information is really easy. And unlocking our iPhone in less than a second is even easier.
In recent years, we have become accustomed to using our iPhones for just about everything: communicating, working, entertainment, etc. For this reason, and considering the enormous amount of information they contain, it is essential that we make sure our device is properly protected and accessible only to us. This is where Face ID comes into play, Apple’s facial unlocking system that ensures security as well as convenience.
Face ID is a facial recognition system that allows us to unlock our iPhone, authenticate our identity to make purchases and access compatible applications, all in a fast and secure way. A technology that is available on the iPhone X and later.
How to set up Face ID
Before we start, we must verify that our iPhone is compatible with Face ID. As mentioned above, this feature is available on the iPhone X and later models. Beyond this, and to ensure that Face ID works properly, we need to make sure that our iPhone is updated with the latest version of iOS available. To do this, we go to Settings > General > Software Update and check if there are any updates available. If so, let’s install it.
Once we have checked the compatibility of our device and updated it, we can proceed to set up Face ID. To do this, follow these steps:
We open the Settings app on our iPhone or iPad.
Go to Face ID and passcode.
We enter the code of our iPhone, if we have not configured any we will be offered to create it.
Tap on Set up Face ID.
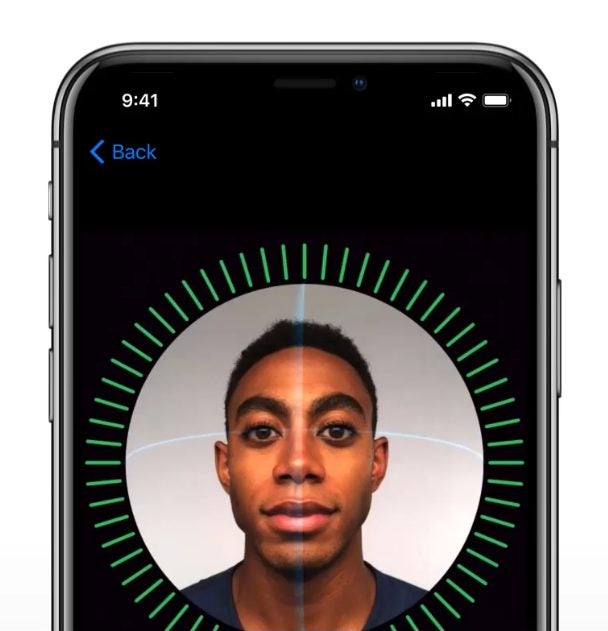
Now, when prompted, we place the device in front of the face and tap Start.
We place our face inside the frame and slowly move our head to complete the circle. We should look right and left and up and down.
After completing the circle we tap Continue.
We complete the second circle.
Touch OK.
How to customize Face ID functions
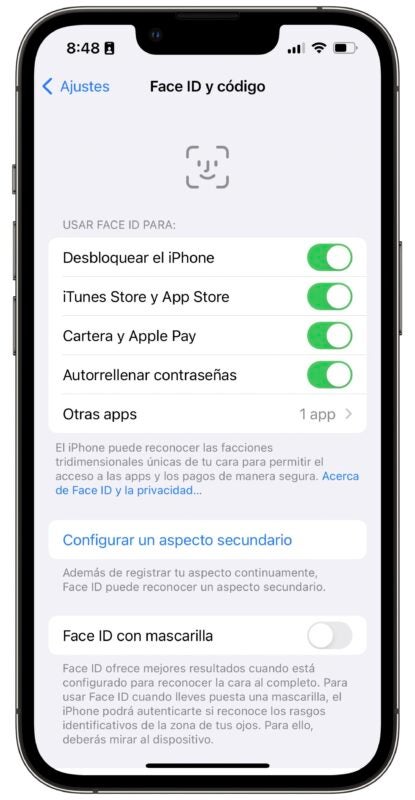
Once configured, we can customize Face ID functions according to our needs. Some of the options available include the ability to use Face ID to Unlock the iPhone, but also to make purchases in the iTunes Store and App Store, use it for the Wallet appand Apple Pay, to Autofill passwords and for Other apps.
In addition, we can Configure a secondary appearance, which will take us to the same process that we have just followed and where we can register a very different appearance to the one we usually have. The system also offers us to be able to use Face ID with mask, Require attention for Face ID with what is guaranteed not to unlock without us looking at the screen.
To finish, we can configure what we have access to with the iPhone or iPad locked. Options such as Today View and Search, Notification Center, Control Center, Widgets, Live Activities, Siri and others are available for us to enable or disable at will. All with the aim of being able to decide what will require us to unlock our iPhone or iPad with a glance before consulting.
Some tips for using Face ID
Face ID works really well. It is fast and recognizes us in almost any circumstance. However, a few tips are always useful to make it work even better. The most important thing is to make sure the cameras see us. Especially on the iPad, we may be covering the camera with our hand.
A case or considerable dirt can also affect its performance. It is also important that the angle at which our iPhone sees us is sufficient for it to recognize us. A distance of between two and three palms between the phone and our face is ideal.
If we still notice that the performance is not what it should, we can reset Face ID and configure it again. To do this, we go to Settings > Face ID and code > Reset Face ID and follow the steps we explained above to configure it again. Something, it must be said, that we should not do often, because the system is re-starting once configured, thus gaining in reliability and speed with use.
And by the way, Face ID does not depend on light, we can use it in absolute darkness.
Face ID is undoubtedly one of the most outstanding advantages offered by the iPhone. A feature that allows us to enjoy a much more secure and, above all, comfortable experience. Configuring and customizing Face ID on our device is really easy. Protecting all our personal information is really easy. And unlocking our iPhone in less than a second is even easier.
Surely you have asked yourself more than once… How do we set up our podcast? Don’t worry: we’ll tell you.
Every time you get together with your friends you talk about it: the old “we should start a band” has become the new “we should do a podcast“. Of course we should: if you are willing to face a crowd of professionals and amateurs working their throats out on a weekly basis with the most varied topics for a hundred or two hundred listeners, this is the thing for you. But, if you have made the decision, surely you have asked yourself more than once… How do we set up our podcast? Don’t worry: we’ll tell you.
There is a podcast already created about literally everything. Cooking, travel, manga, international politics, Roman history, Tom Cruise movies. Think carefully about what you have to contribute to the world: Is it going to be informative or chatty? Comical or serious? Scripted or improvised? Do you know something that you absolutely have to share with the rest of the world? Find that topic you want to talk about and define the tone: then create a list of titles and choose the best one. Let’s say, for example, you decided to talk about gardening with a comedic tone and called yourselves ‘What a Planter’. This was the easy part.
From here, define a structure for the podcast: Is it going to be free-form and different for each show, or are you going to have sections? If you have sections, who is going to present them, are you going to set boundaries for the length of the episodes or will ‘Qué plantón’ last as long as it has to? Once you have everything defined and you are sure that what you are going to do is unique (either because of your natural wit, the subject you deal with or the way you do it), it is time to get down to the technical stuff.
Microphone, camera, action
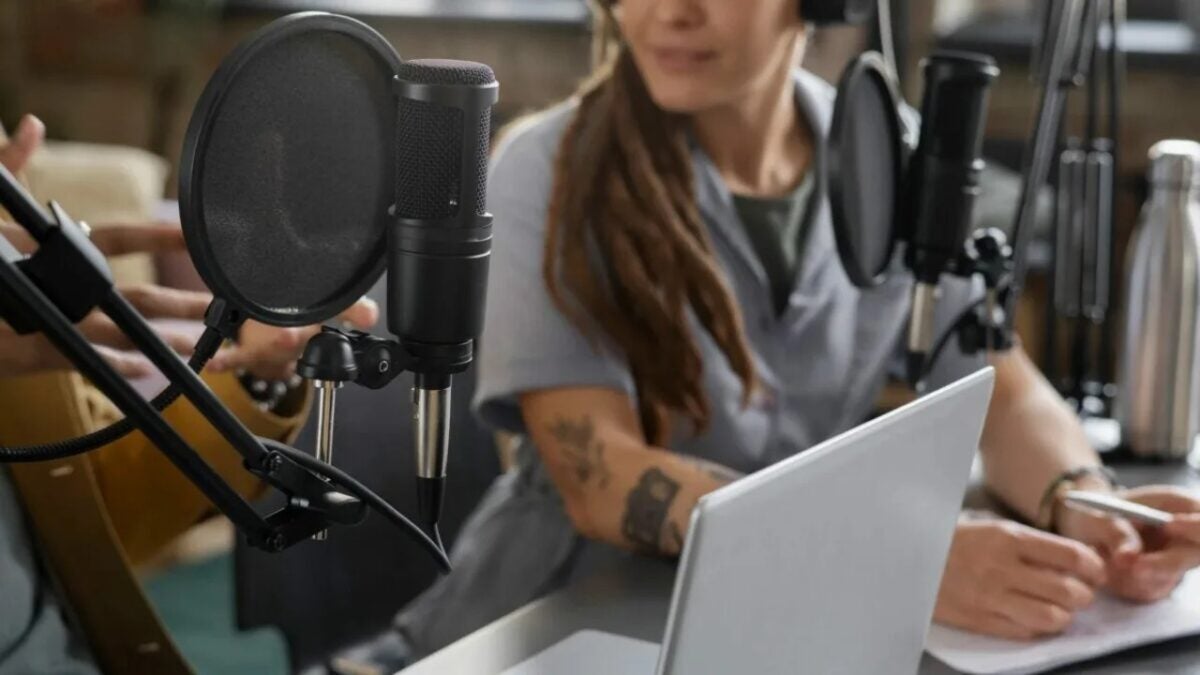
In the past, explaining the requirements for recording a podcast was much simpler, but the advent of Twitch, Youtube and TikTok and video podcasts has made everything a bit more complicated. At this point in the 21st century, you can’t record a podcast with a computer microphone and over Skype. Pamper it a bit, come on. If you are recording in person, get a mixing console with as many audio outputs as members of the podcast (plus at least one for computer music) and the same number of microphones (preferably all the same to avoid sound variation).
If, on the other hand, you have decided to do it online, each one from home, make sure that each one has a good microphone and records his track alone, so that the editing is cleaner. It’s more work, but it’s worth it: although Skype, Zoom and other alternatives have improved a lot since confinement, you will have more control over the audio if you have each track available separately.
You will also need at least one computer to record the audio, for which you can use a free program like Audacity, which you can then use to edit in a terribly simple way. And now comes the problem: if you also want to record the video, you will have to get at least two or three cameras and learn how to use a video editor to synchronize the audio (this is easier if you have already broadcast on Twitch) and make small clips for social networks. Don’t forget to look your best: ‘Qué plantón’ deserves nothing less.
We’ve already recorded an episode, now what?
Now comes the hardest part: you’ve already had fun recording, editing and preparing the podcast. You have to upload it to the different platforms: iVoox, Spotify, Apple Music, YouTube, prepare videos for Twitter, Instagram, TikTok and Facebook. Get ready to familiarize yourself with the concept of RSS, thumbnails, comments and regularity.
And now you just have to wait for success! And if it never comes, don’t worry: focus on having fun. After all, there are only a few people who make a living with podcasts. Come on, become a radio star!
night can negatively affect our circadian rhythm and sleep quality, but we can avoid it.
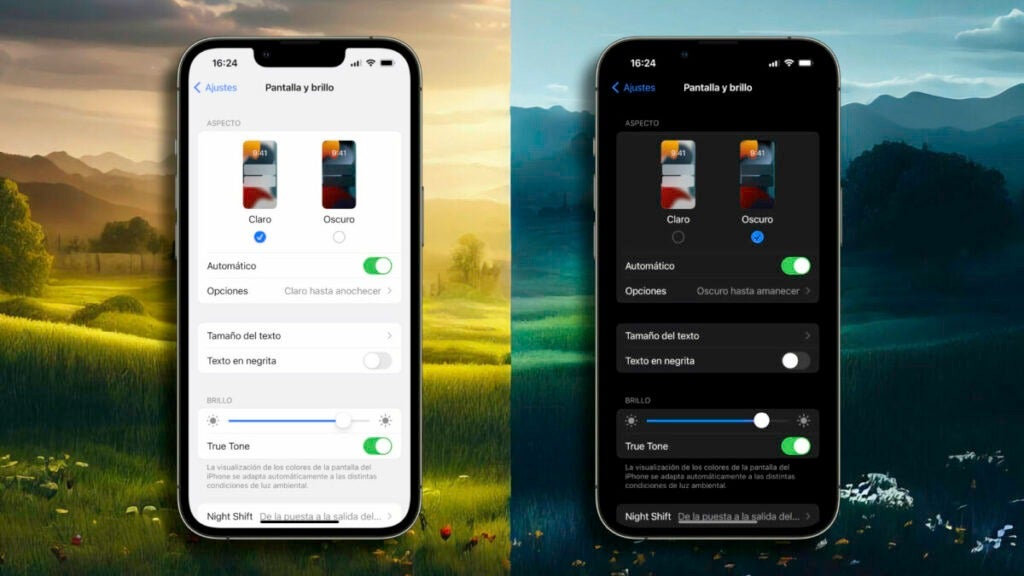
Exposure to bright light from our electronic devices at night can negatively affect our circadian rhythm and sleep quality. Since we use our iPhones all the time, it is essential to be able to reduce the impact of this light on our health and well-being. Apple offers us just the key tool to do just that.
Recommendations for books and comics you will read everywhere, but… Do you know how to choose the perfect rose?
On April 23, 1917, construction of the Madrid Metro began. On 1925 ‘Don Quixote’ was published in Braille, and in 2005 the first video in history was uploaded to YouTube. And yet, today is remembered and celebrated every year for only one thing: Sant Jordi or, what is the same, the day of the book… And, if you live in Catalonia, the day of the rose. Because recommendations of books and comics you will read everywhere (watch out for ‘Cornelius’, the great masterpiece of 2023), but… Do you know how to choose the perfect rose? Come, we’ll tell you.
You may think “Well, it’s not that hard: I buy a rose, give it as a gift, and that’s it, right?”. But the reality is much more complex. First you must look closely at the stem: if you want your rose to survive, discard those with a thinner and weaker stem. The good ones, the ones that last for years, have a thick and hard stem. Please don’t think dirty.
It is common that in Sant Jordi they try to sneak you roses already worn as freshly cut, but you are going to have enough eye to catch their imperfections. Pinch the place where the petals and the stem meet: if it is weak and you feel watery, it is a flower that has been cut for days. Pay close attention to the firmness at this point: it is essential for a good rose.
The next point is going to cause controversy, but take our advice: when you are about to buy the rose, look at the outer petals… And buy the one with the ugly ones. Yes, yes, we haven’t gone crazy. These ugly petals protect the rest and when the flower opens you can’t see them: Do you want it to arrive home intact? Well, you know the drill. Beauty is literally on the inside.
But what if you want to be original and not fall into the typical roses? You have thousands of options: wooden roses (even with your names engraved on them), ‘Beauty and the Beast’ style or, our favorite, chocolate roses. Because giving roses as a gift is all very well, but eating as a couple brings you together like nothing else, and don’t forget to accompany the flower with a good book. At Softonic we have our own recommendations, but we’re sure you can trust your good taste. Happy turning pages!
There are many situations in which we may want to record the screen. Doing so is as easy as swiping and pressing a button.
Our mobile devices have become absolutely essential tools for our daily lives. We do so much on them, besides allowing us to communicate with our loved ones. They also give us the ability to work, study and entertain ourselves – perhaps by listening to Apple Music Classical – and that’s just three examples. The screen of our devices sees everything from the daily weather to that game in which we passed the last level of our favorite game.
At a time when information is presented to us in such a visual and interactive way, being able to capture it in a simple and, above all, complete way, is of great importance.
Our iPhone or iPad is capable of taking screenshots to record whatever we’re looking at. Whether we need to capture a snippet of a website or a conversation, check how fast our iPhone loads with a Shortcut or show that we have passed a level in the game we have been playing for weeks, the screenshot is vital.
With a backlight that we can easily adjust to our needs, we can write comfortably wherever we are.
The way we type on our iPad significantly influences our comfort and productivity. While typing directly on the touchscreen can be an option, there is also the feel of a physical keyboard, such as the Magic Keyboard, to consider for a more comfortable and efficient experience.
We can delete text backwards, but also forwards. A resource that seems irrelevant, but that makes a big difference in our productivity.
When it comes to typing text on a device, especially if it is long, it is normal that we need to delete, edit, reorder and make changes to get the final product we want. We often know what a green or orange dot on the Mac menu bar means and also which key to tap to delete a word, but what if we want to delete forward?