It doesn’t quite work the same when you type it out in classic numbers, but that was the first ever text message I sent. I typed it out on my Casio calculator, turned the calculator upside down and then asked the boy sitting next to me in math class to pass it across to my friend sitting two desks over. All it said was hello. It was amazingly simple yet I was immensely proud of myself. You might argue that it wasn’t a text message but it felt oddly familiar to the thousands of text messages I’ve sent throughout the years that followed as it didn’t get a response.
Text messages used to be just that: text. They came into being when some innovative mobile users discovered they could push through 160 characters across cellular networks to communicate with each other. The networks realized what was going on, monetized the idea, and the rest is history.
A lot has changed since then. The dawn of internet messaging apps like WhatsApp, Messenger, Viber, and a whole host of others has opened up text messaging to a whole new world of possibilities. So much so, that it might be a stretch still calling them text messages at all. With WhatsApp being one of the most popular messaging apps on the planet we’re not unfamiliar with saying we will “WhatsApp somebody” or hearing that they are “going to WhatsApp us.”
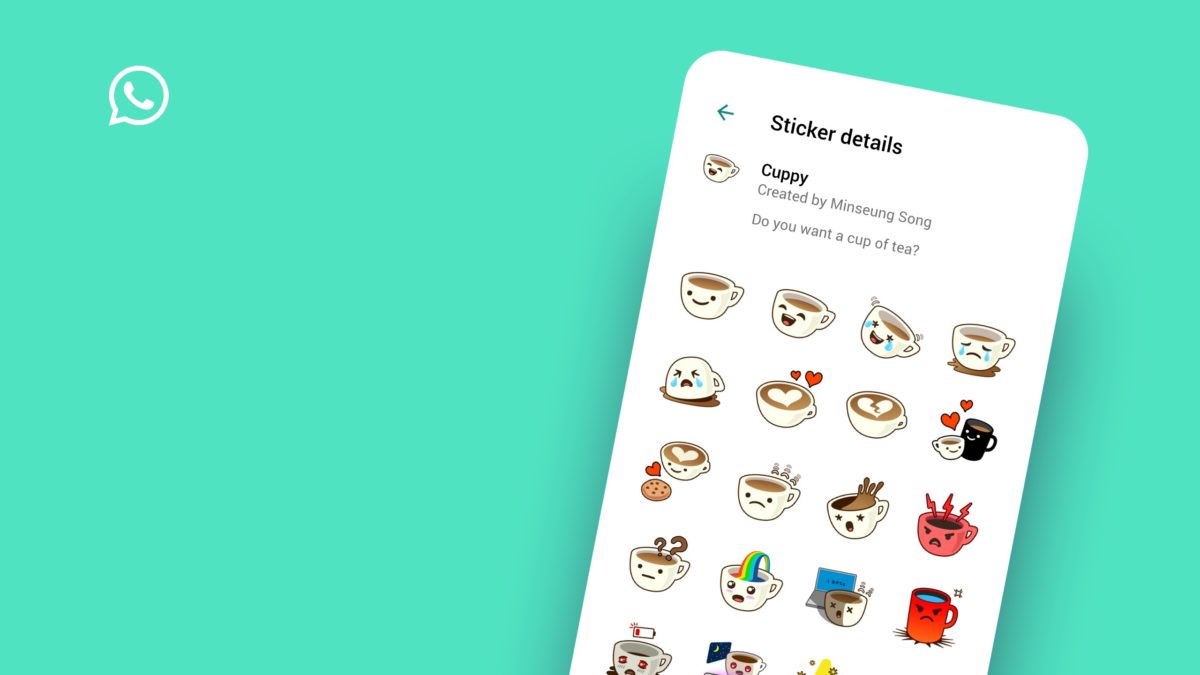
This evolution makes perfect sense as WhatsApps can include so much more than just text. With WhatsApp, you can send images, videos, documents, GIFs, links, voice notes, GPS coordinates, and contact details from your phone book. No Casio calculator in the world is getting close to that. Something has always been missing from WhatsApp, however, which has been present on other messaging apps for quite some time: stickers. Not anymore. In a recent blog post, WhatsApp announced that stickers will be rolling out to all WhatsApp users in the coming weeks.
When they land on your phone, you’ll have a new and fun way of personalizing your WhatsApps to your friends. To make sure you are ready to go when you do get access to WhatsApp stickers, we’ve put together a little guide to show you how to use them.
How WhatsApp stickers work
Open a WhatsApp chat.
Tap the new sticker button.
Tap the sticker you want to share with your friend.
Easy peasy. You can also download new sticker packs by clicking on the + icon once you’ve opened the sticker tab. Interestingly enough, WhatsApp has also said that third-party developers will be able to create their own sticker packs and publish them to the Google Play and Apple App stores. If you want to have a go at creating your very own sticker pack, you can check out the WhatsApp sticker guidelines here.
An international chain of coffee shops called Shiru Café will give you a cup of coffee in exchange for your personal data
It can be hard to understand the value of something that you can’t hold in your hand or see. Our personal data is a prime example of this. We hand it over to access online services without giving a second’s thought to what it is actually worth.
To make the matter even more complicated, the online services themselves are not something we can touch either. We trade our data for access instead of ownership. This makes it even harder to comprehend what we are giving up because we can’t really understand what we are getting in return. Do you think you’d have a better understanding of what your personal data was worth, if you received something physical in exchange for it? Let’s find out.
An international chain of coffee shops called Shiru Café will give you a cup of coffee in exchange for your personal data
How much is your private data worth to you?
Shiru Café has one branch near Brown University in Providence, Rhode Island and is opening new coffee shops near Harvard, Yale, and Princeton as well as Amherst College.
The way the Shiru system works is students offer information like their name, email, college, major, year in school, and professional interests in exchange for a coffee. This information is then used by the corporate brands, that pay for the running of the coffee shop, to target students that might be suitable for positions they’re looking to fill.
We give over this type of information all the time in exchange for access to services like Facebook and Gmail but exchanging it for something as tangible as a cup of coffee creates a new way of looking what our data is actually worth. Although Shiru claims its business model is a new and advanced way of monetizing your personal data, it is still a basic system.
In essence, all they’ve done is offer a basic incentive for putting some advanced personal data down onto an advanced recruiters mailing list. This reality is borne out by the fact that Shiru expects upwards of 75% of all Brown students will have registered with the Brown University branch of Shiru by the end of the semester.
The model would be much more interesting and enlightening if students were able to haggle. I’ll let you know my major if you throw in a Danish with my coffee. Much more could be learned then about how people see their data and how much they think it is worth. Either that, or you would just get a long line of poor and hungry students trying to peddle their personal data for a few bites of an artisanal panini.
The fact is that trading your personal data for a cup of coffee isn’t going to give you a better understanding what it is worth. On a cold Monday morning, however, it will give you a very clear understanding that it is worth something. Considering we give our data away all the time, often without knowing it, any initiative that makes us understand the situation a little better should be seen as positive.
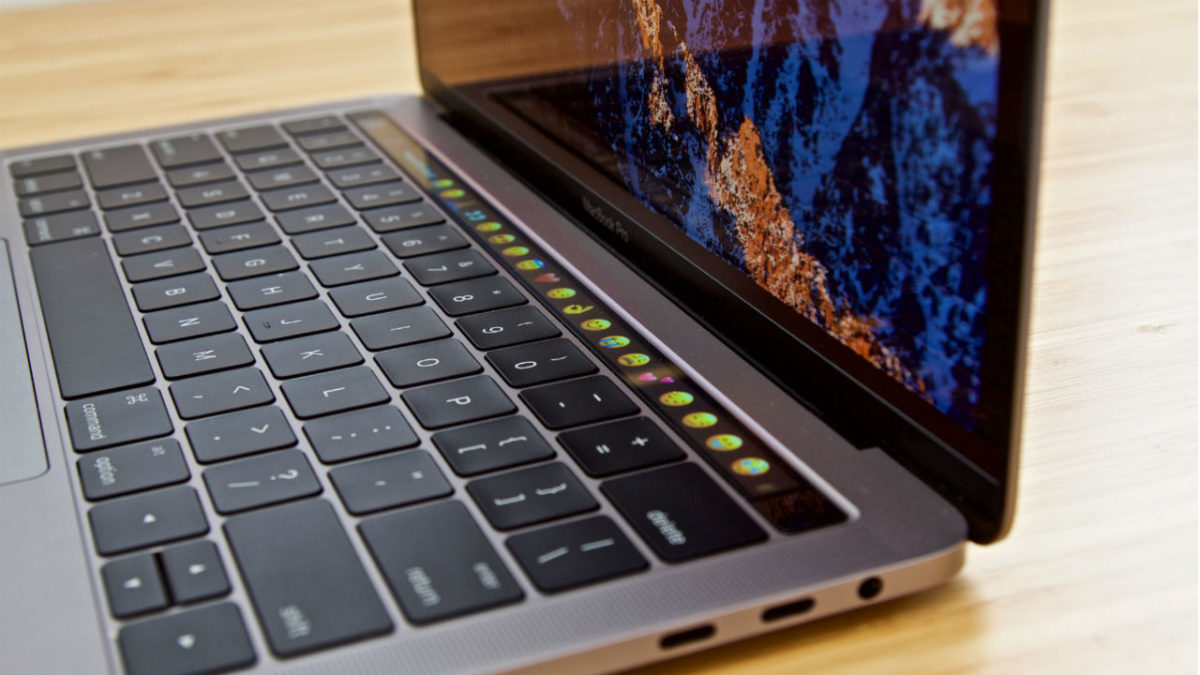
If you have a MacBook Pro, make that toolbar your own! Just follow our guide.
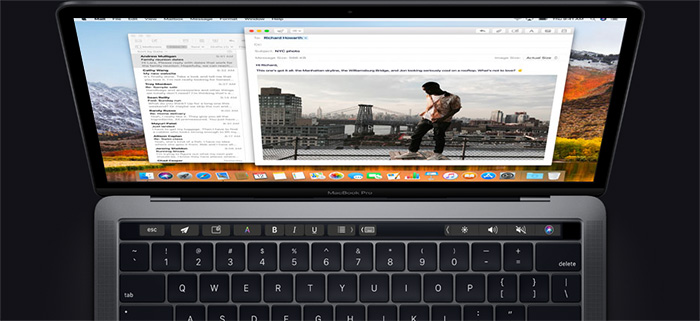
Did you know that customizing the Control Strip on your MacBook Pro can greatly improve your internet experience? You can edit the Control Strip to make it look however you want it to look! Just follow these simple steps to customize the Control Strip on your MacBook Pro.
How to customize the Control Strip on your MacBook Pro
1. Open System Preferences
First, you will need to click the Apple menu icon that is located in the upper-left corner of the screen of your MacBook Pro. Then, once you’ve opened the Apple menu, you need to click on the System Preferences option.
2. Select Customize Control Strip
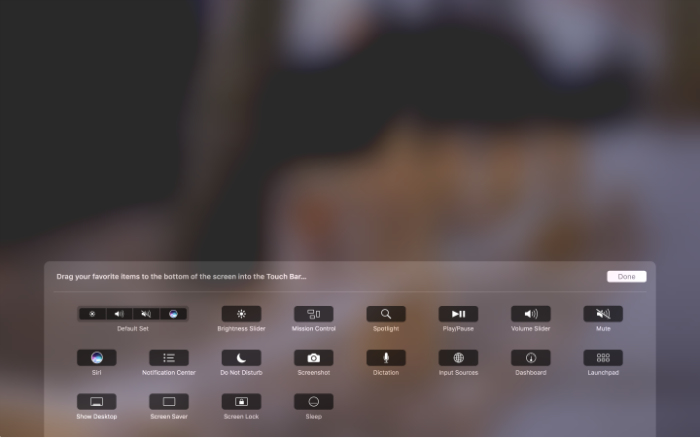
Now that you’ve selected System Preferences, click on the Keyboard option. After that, simply select the Keyboard tab. Now that you’ve gotten this far, you can select the Customize Control Strip option toward the bottom of the window. Once you’ve done that, your screen will briefly become blurry, and the customization panel will appear. In addition to that, the buttons on the Touch Bar will also enter jiggly mode.
3. Customize your Control Strip
If you want to customize the tools in the collapsed Control Strip, then you will click the Collapse button that’s located far left of the Touch Bar. If you choose to customize the full Control Strip, then select the Expand button that is found directly left of the tools in collapsed mode. You would do this if you want to move a tool from the screen into the Touch Bar to add it directly to the Control Strip. Just drop the tool into the Touch Bar and it will appear there.
If you want to remove a tool from the Control Strip on your MacBook Pro, you can move the cursor into the Touch Bar and select a tool to remove it from the Control Strip. Simply click on a tool on the Controls Strip and drag it to a new location on the Touch bar to rearrange the order. Finally, once you’re finished with customizing your Control Strip, click Done and your changes will be saved.
If you have an iOS or Mac device, you’ve got an amazing free audio editor. Here’s how to use it.
Making music and need to rework your creations? Or do you have a purchased song that you need to edit? Garageband offers a free environment for macOS users to rework their audio projects!
If your device came from Apple, it should already have Garageband downloaded and updated. If not, try our easy download:
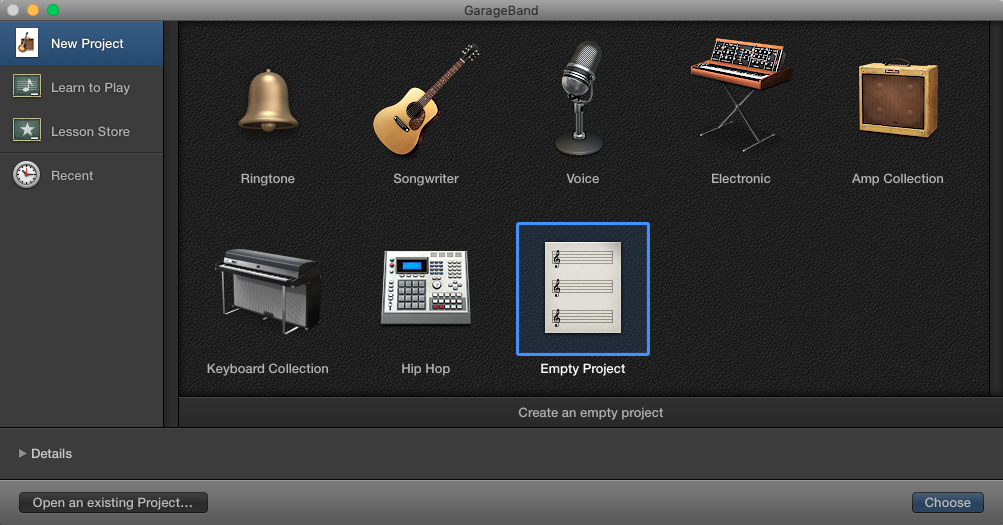
You’ll be met with a few options. For editing pre-existing tunes, we recommend “Empty Project.” The others often include audio presets, meant to improve the recording of works in progress. For example, the “Voice” setting applies a “Bright Vocals” effect to whatever audio lands in its main track. The unaware user may become frustrated when their recording doesn’t sound natural at all!
Trust us: start with a blank slate.
Even if you’re recording, we’d still suggest “Empty Project”.
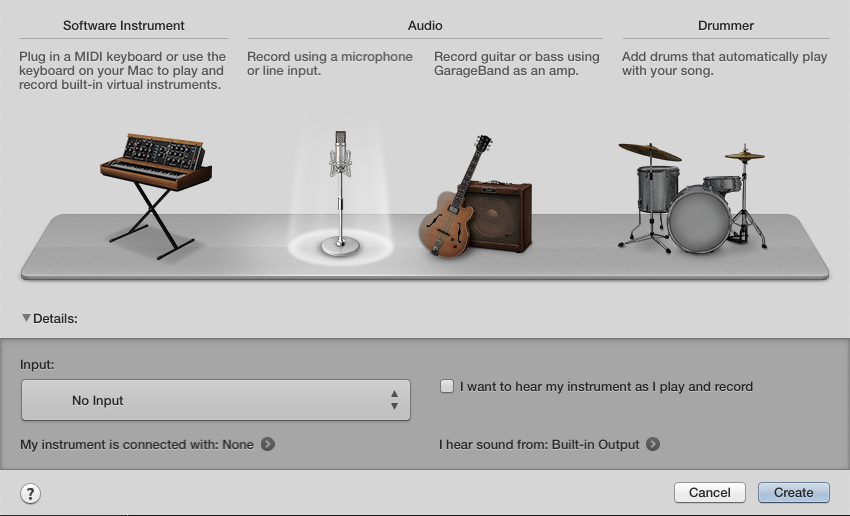
From here, you’ll meet another options screen: instrument choice. Since you’re coming with audio already recorded, use the basic “Microphone” setting. Then click “Create.” We’re on to the studio!
(If you’re going to record something as well, select the instrument that best fits your needs. Forewarning: using a guitar or other instrument may require specific cords to interface with the computer, but will get better audio quality than, say, a USB microphone.)
Into Garageband
Allows us to introduce…the creator environment!
If it looks too packed, head to the top left buttons:
Hitting “Folders” on the left removes the sound settings, which reside in the leftmost bar – normally, these settings add a new audio track with different sound qualities.
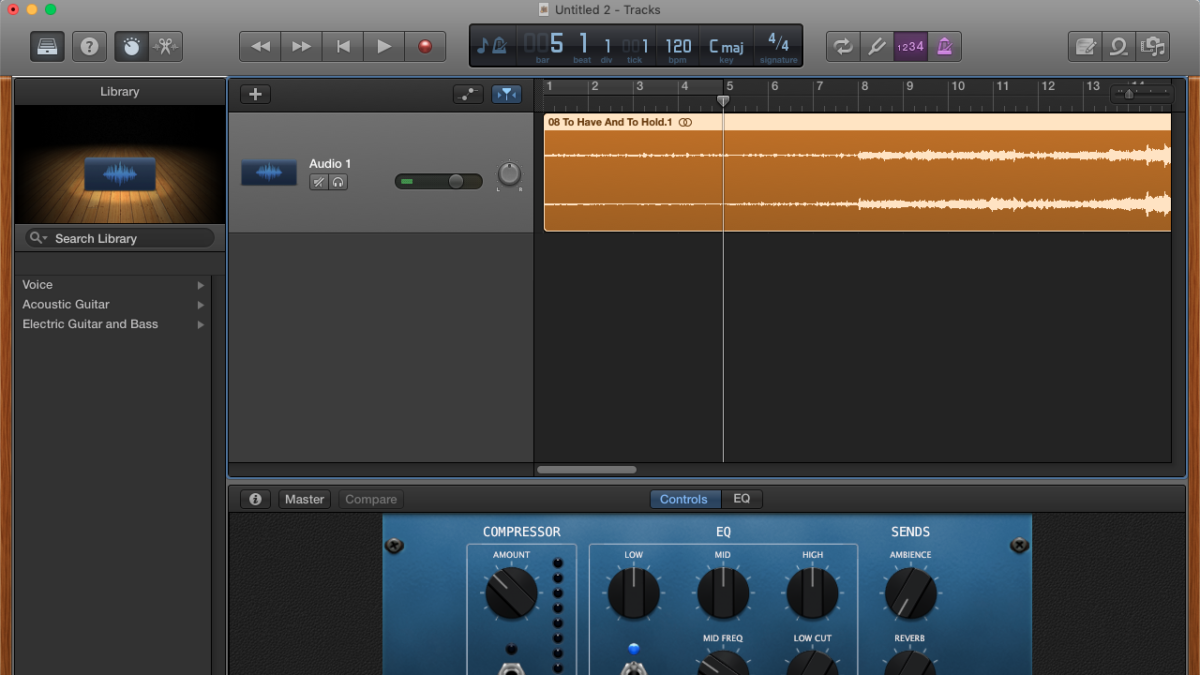
Hitting the “Knob” icon reduces the EQ bar, which can be seen at the bottom of the picture – EQ stands for equalization and allows you to manually alter music filters and frequencies.
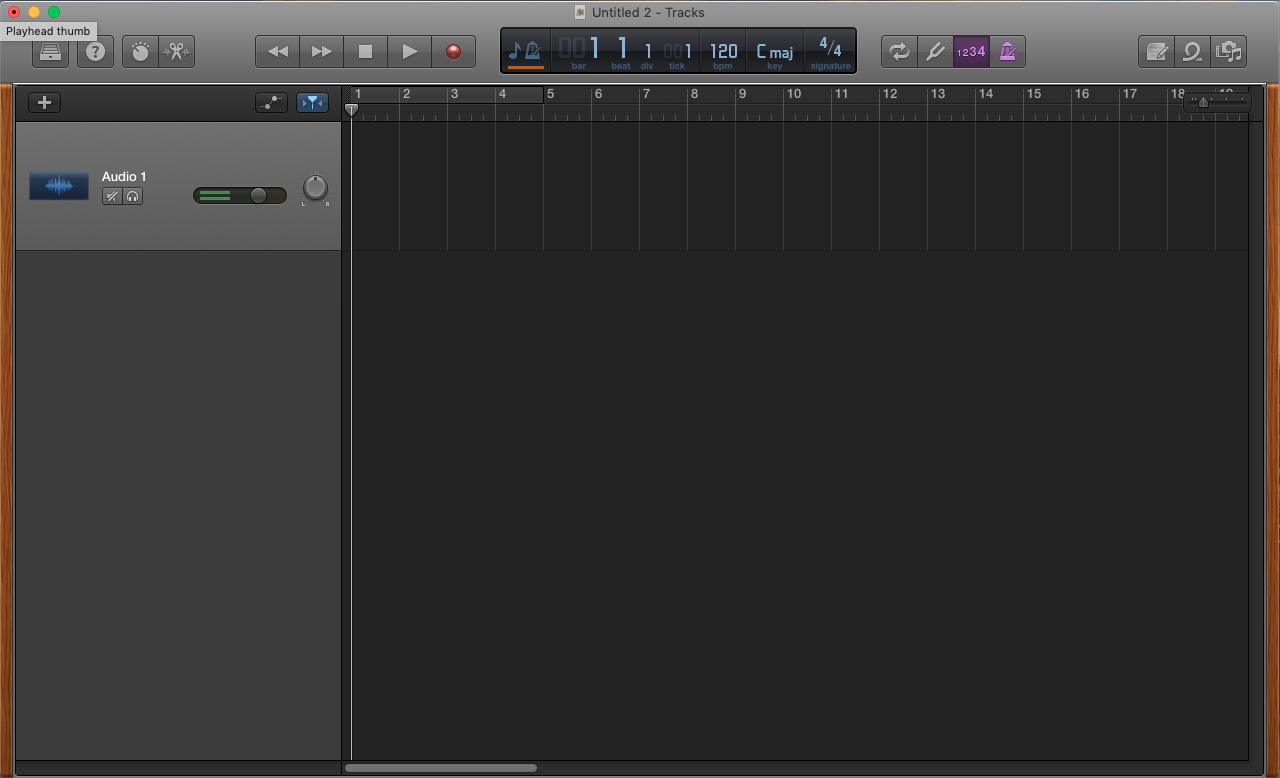
Your simplified environment will now look something like this:
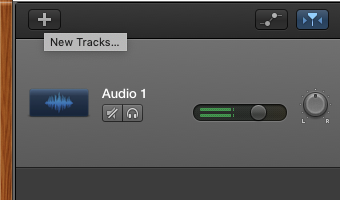
If you need to add more audio tracks, click the “New Tracks” button:
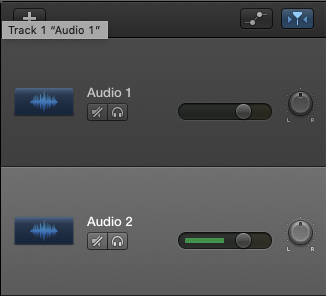
Surprise surprise! A new track appears:
Just remember that working with multiple tracks can become difficult. Hitting the noise cancellation button will silence one track to make listening easier. Also, you can use the volume adjustment knob to increase the output of one section, and the “Left/Right” adjustor will place your selected track further to one side or the other.
Use these settings to your advantage!
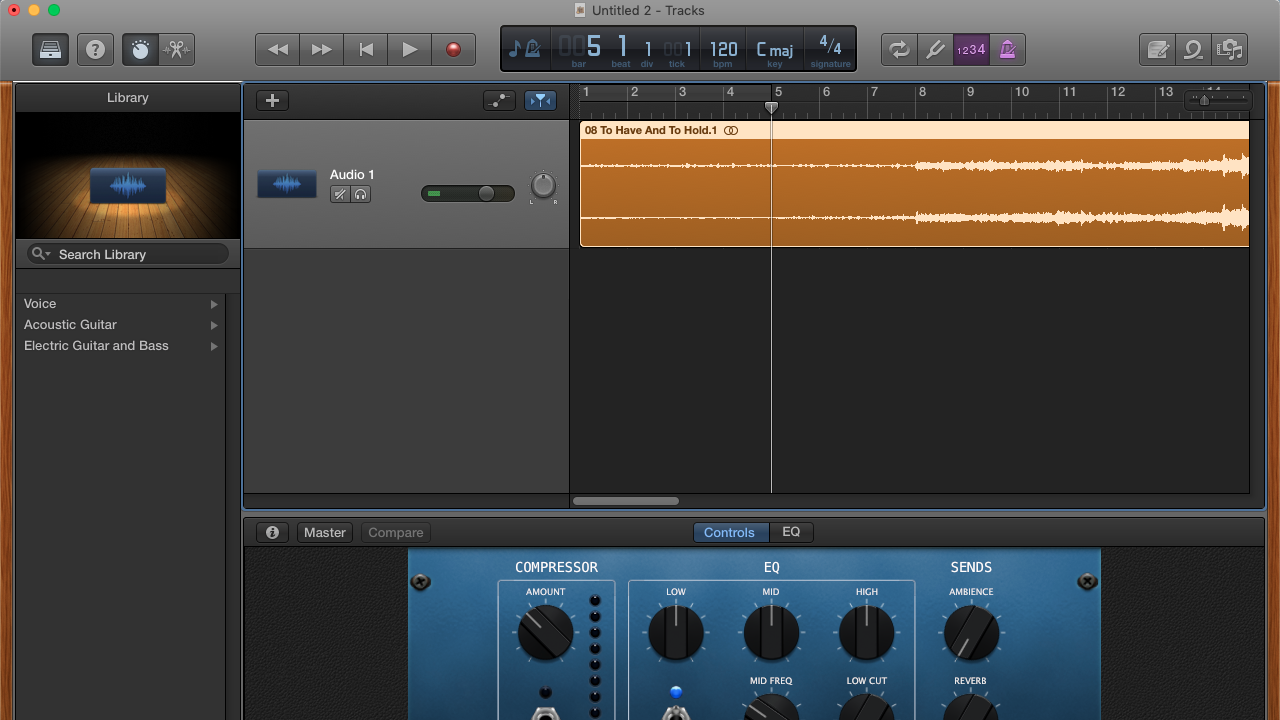
At last, drag and drop your audio files into Garageband’s window. With that simple step, you’re ready to get down to business.
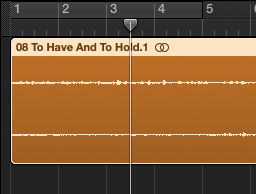
Casual audio recordings may require little more effort than moving, cropping, and clipping:
To move a piece of audio, simply grab the middle and then drag it left or right to move the position within a single track. Going up or down will allow you to pull your selection onto other tracks.
To crop, click either side of an audio track. A special cursor will appear. Use this to shorten a track, but note: everything you overwrite disappears.
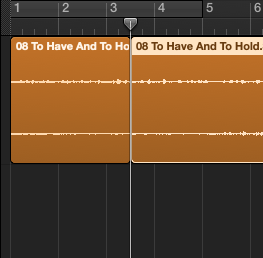
To clip a track, click on your audio segment. Move the cursor to whatever spot you wish to clip. Finally, click “Control-T” to divide the area. (We assume the “T” refers to “Trim”.)
Volume Adjustment
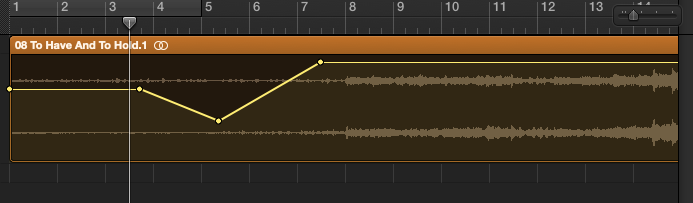
The volume adjustment button can be found over the tracks tab. Using this button shows the volume settings for each track:
Click the yellow line to insert a “handle”. Once you have two or more, you can begin to raise or lower the volume in specific areas.
EQ
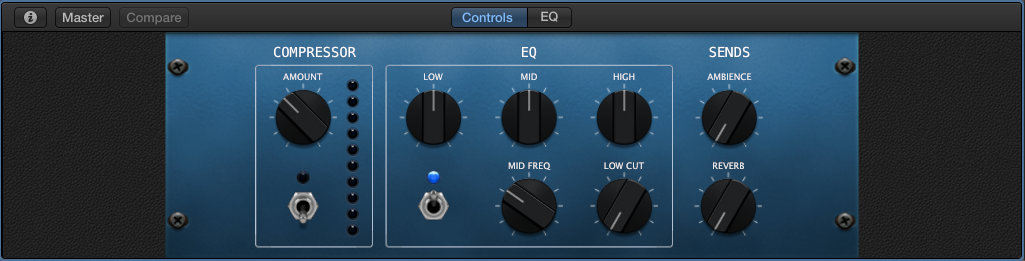
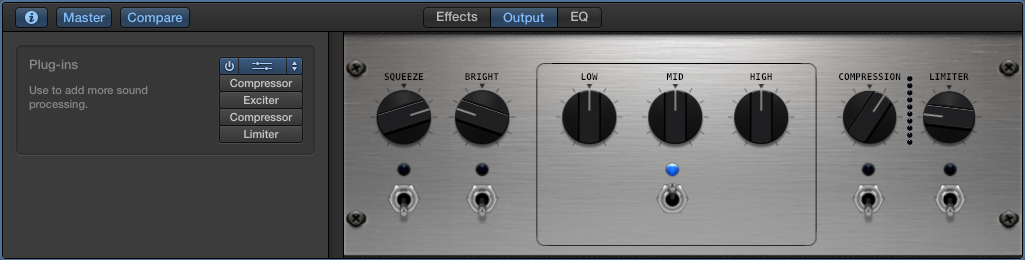
While Garageband offers preset options for EQ, you can play around with the settings yourself. Hitting the icon opens the settings:
As you can see, Apple designed the knobs to look like those of a real amp. Adjust levels for low, mid, and high frequencies, increase reverb, and more! Both the “Info” and “Compare” buttons provide more options.
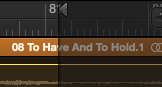
To export, first make sure your song “ends” where you wish. A small arrow delineates where the export will finish:
Often, this lands much too far to the right, so be careful! You don’t want the export to end too late, or too soon. Grab the arrow and drag left or right. Let go to set the ending in the position you’ve selected.
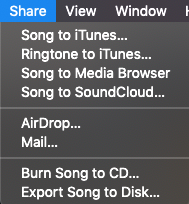
Next, visit the “Share” tab at the very top of the screen:
We recommend “Export Song to Disk,” which creates an MP3 file on your desktop or within a folder on your computer. From there, you can perform all the other actions: place it in an email, burn it to a CD, or drop it into iTunes!
Bonus: Editing Purchased Songs
Uh-oh!
You just purchased a song on iTunes, but found that one terrible part! Maybe it’s an opening that takes forever, a randomly silent area, or an addition that has nothing to do with the rest.
What? You need an example? Well…
The soothing song “Music of the Night,” from “Phantom of the Opera”, has a thunderous organ solo at the end. At best, you skip this moment of pure cacophony and move on with your life. At worst, it sneaks into your “calm study” playlist and gives you a heart attack at 3 a.m. Not that we have personal experience with such an event.
The good news is: you can edit these songs just like you edited your own music! Follow our steps in “The Beginning,” but drag and drop your song straight from iTunes rather than using a file from a folder. Then, use your audio manipulation skills to remove that terrible organ solo!
Once you’re finished, export the song back to iTunes with a title like “Music of the Night (Improved),” and replace the old version.
You may be wondering: is this okay? Can I legally alter the music? The answer is yes… as long as you legally purchased it in the first place, and don’t try using either version for professional use. Please obey copyright laws, for everyone’s sake!
Final Words
If you’re planning to record and develop original music with Garageband, there’s a lot more to learn. A whole lot more.
However, you don’t need a sound engineering background to appreciate the convenience of music editing, whether you’re making a quick recording or deleting an organ solo that sent your blood pressure skyrocketing.
Stay safe, obey the laws, and have fun improving your music!
Thinking of switching from PC to Mac? Follow our guide for an easy transition.
So, you’re considering the switch from PC to Mac. Good choice! We’re here to make the transition smooth.
Guide to transitioning from PC to Mac
A few prior considerations
(If you’ve already bought a Mac, no worries! Skip on down to the “Welcome” section. If not, here’s a quick description of why moving to Mac makes sense.)
Apple sells you an experience. PC makers have great laptops (arguable a few better ones for a superior price), but there are fundamental aspects on which Apple wins. For example, the great Hewlett-Packard’s webpage caters to computer enthusiasts who know their business, want the perfect product, and can narrow down the search to a few choices from a hundred (of course, if you toss in the options for Lenovo and Dell, things get crazy real fast). Apple, on the other hand, makes the process simple for everyone while delivering consistent quality. There are three easy choices at the start: Macbook, Macbook Air, and Macbook Pro. From there, you simply build the laptop you want, choosing which color, processor, and data storage work best for you. Simple as that.
Apple then delivers a well-packaged product that works great. If it doesn’t, you can take it down to the Apple store, which is known for good customer service. We can verify from experience!
And those are just the startup benefits of buying from Apple…
Just remember to consider if you’re prepared to join the Apple culture! Because you will, eventually. It starts with the laptop, but a soon enough there’s an iPhone in your pocket, an Apple Watch on your wrist, and an iPad in your hipster satchel! How did that happen? The answer is: Apple products work great, and they perform well together.
Enjoy taking your product home and unwrapping it, Apple’s products are designed with unboxing in mind. Partially, it’s meant to symbolize their adherence to beauty and precision. Partially, it’s meant to be awesome!
Once that’s finished, there are a few things to note:
Starting
When you boot up your new Mac, there will be a series of questions before you get going. These will help you create or sign in to an Apple ID, which helps in a number of situations: transfer of iTunes purchases, or finding a lost device with “Find My iPhone” on the Apple website (we’ve used it to track down a misplaced iPad, embarrassingly enough).
Nothing much different here. Isn’t that a relief? Typing works pretty much the same, although there is a “command” button added where the “home” button went. It has been replaced by an effective sidebar, seen below. We’ll discuss that later.
The bar can be dark thanks to update Mojave!
Navigation
There it is: one of the biggest issues between Mac and PC comes down to navigation.
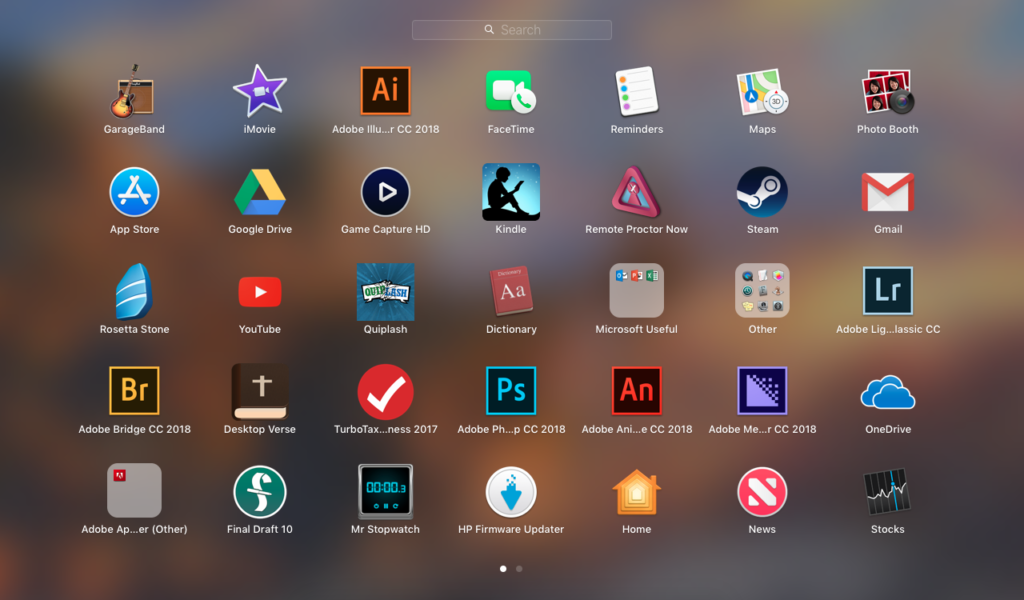
PC’s generally have one area, “Home” for everything. Mac eases through the process by using Finder to retrieve files and Launchpad to visibly organize apps.
Knowing this, you won’t have to search through “Home” for applications, they’ll be in one of two places (and after a day, you’ll know which without having to think about it).
Customization
Apple prides itself on giving users the ability to change their user interface. With so many different options, we’re going to list a number of places that changes can be made and a few specific tools we found the most helpful. It’s not an extensive list by any means.
1. The top bar
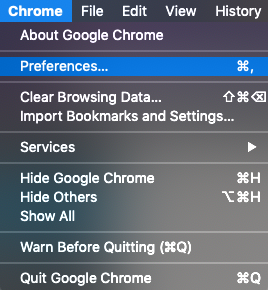
Tabs change for every application; make sure to see what’s available! Just remember that all of them have a “Main” tab with “Preferences” and a “View” tab. These may come in handy.
The image below shows our current Google options bar:
2. Settings
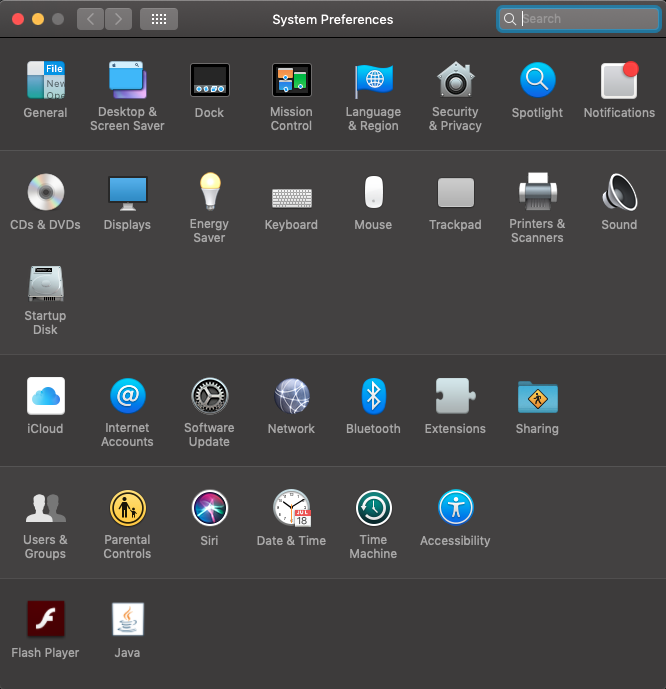
How can you go wrong with settings? This single location, usually available on the side bar or Launchpad area, gives the user control over security, background, Bluetooth connections, keyboard short key options, printer selection and more!
You can easily add or remove applications available here by opening Launchpad, grabbing an application, and holding it over the sidebar. After a few moments, a spot will open for your new quick app.
If you want to remove an app, do the opposite: grab an app in the sidebar menu, hold it over your empty desktop, and it will show the option to “remove.” Let go, and it’s gone!
Why is this so important? Working on laptops often hinges on the use of applications like Word, Google, Adobe Creative Cloud, or SolidWorks. The ability to keep those tools organized in a designated area saves a lot of time and hassle.
4. Pages
When you “maximize” a window on the Mac, it doesn’t just cover everything else. It actually creates a new page where it can take up the full screen! Switch between these pages by sliding left or right with three fingers. Or swipe up for the full menu, which’ll look something like:
5. Drag and Drop
Apple lets you drag and drop files almost anywhere. As long as you can see the file on your desktop or within Finder, you can pull it somewhere else. The ability to “physically” move files in addition to searching through a list makes a ton of difference! It’s hard to go back to a PC after enjoying this function for years.
Final Words
When it comes down to it, PCs and Macs aren’t too different. In fact, we’d argue that the initial switch won’t be too difficult for the average user. However, the benefit of owning an Apple product makes a huge difference once the powerful combination of small but significant details, from the design to the interface, make sense for the user. Take your time, figure out how you wish to use your Mac, and then adjust it to fit your style.
Thanks for reading, and we hope this helps your transition!
The new Apple Watch has some amazing features. Here are our favorites.
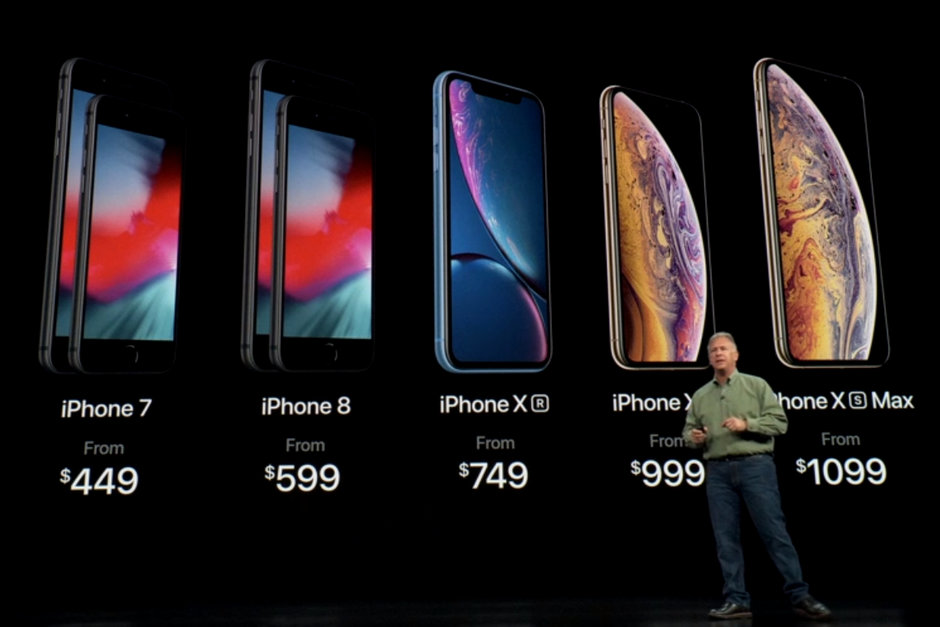
Apple’s September unveiling of their new line of products covered three new iPhones: The XS, XS Max, and XR. While the new phones do boast some neat features and some definite improvements, the response was a little lukewarm. Many users are holding off to buy the less expensive XR while others found the XS Max to be generally unwieldy. The phones are all expensive and while there are new features are there really enough to warrant dropping near $1,000?
Unconvinced that the new watch is deserving of your attention? What makes the new Apple Watch so great anyway? After doing some research of our own, these look to be the top 10 reasons you need one in your life.
Top 10 Apple Watch features
10. You can re-use watch bands
Starting small, one nice aspect to the new Apple Watch is that you can re-use the same bands from the old S3 model. It’s nothing ground-breaking and certainly doesn’t do anything in the way of jaw-dropping new tech, but since the bands are as varied in appearance as they are expensive it’s nice to know that anyone who owned an Apple Watch previously will be able to simply substitute in their old bands and not have to buy a whole new one just so it fits the S4.
For a company that’s infamous for trying to get you to drop more cash on accessories and is often accused of plannedobsolescence it’s good to see that at least they’re not adding new mandatory wristband purchases to the list.
9. Walkie-Talkie mode
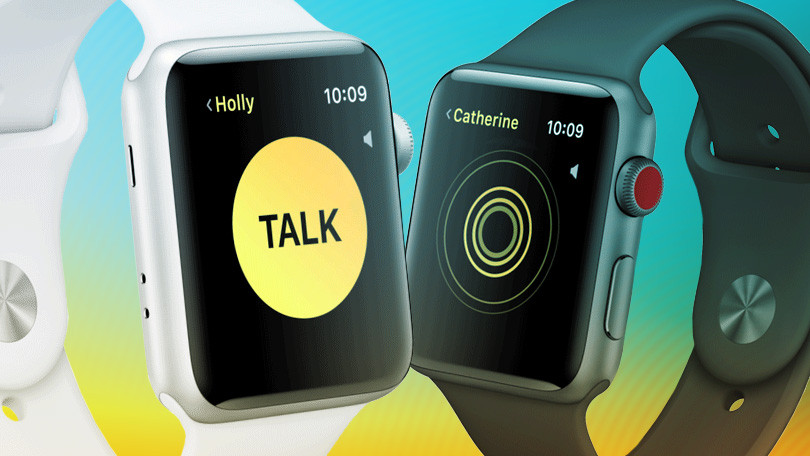
Walkie-Talkie mode isn’t a new feature for the S4, but if you’re new to Apple Watch, this could be the first feature that catches your interest. Walkie-talkie mode is essentially a FaceTime call that’s interrupted by button presses when you want to speak (much like a real walkie-talkie). It’s useful when you’re out shopping or want to try and find someone in a crowd. We have to admit, though, it can be a little jarring to suddenly hear your friend’s voice coming out of your wrist unannounced!
The reason this didn’t score higher on our list is that while this is certainly a fun feature, the fact that both you and the other user both need the FaceTime app on your iPhone and need to have FaceTime audio set up to make and receive calls just make this feel like a gimmicky side note to the already inherent FaceTime feature. That and the fact that it looks awfully silly when you try to use it without pressing down with your other hand …
8. New watch faces, complications, and info graphs
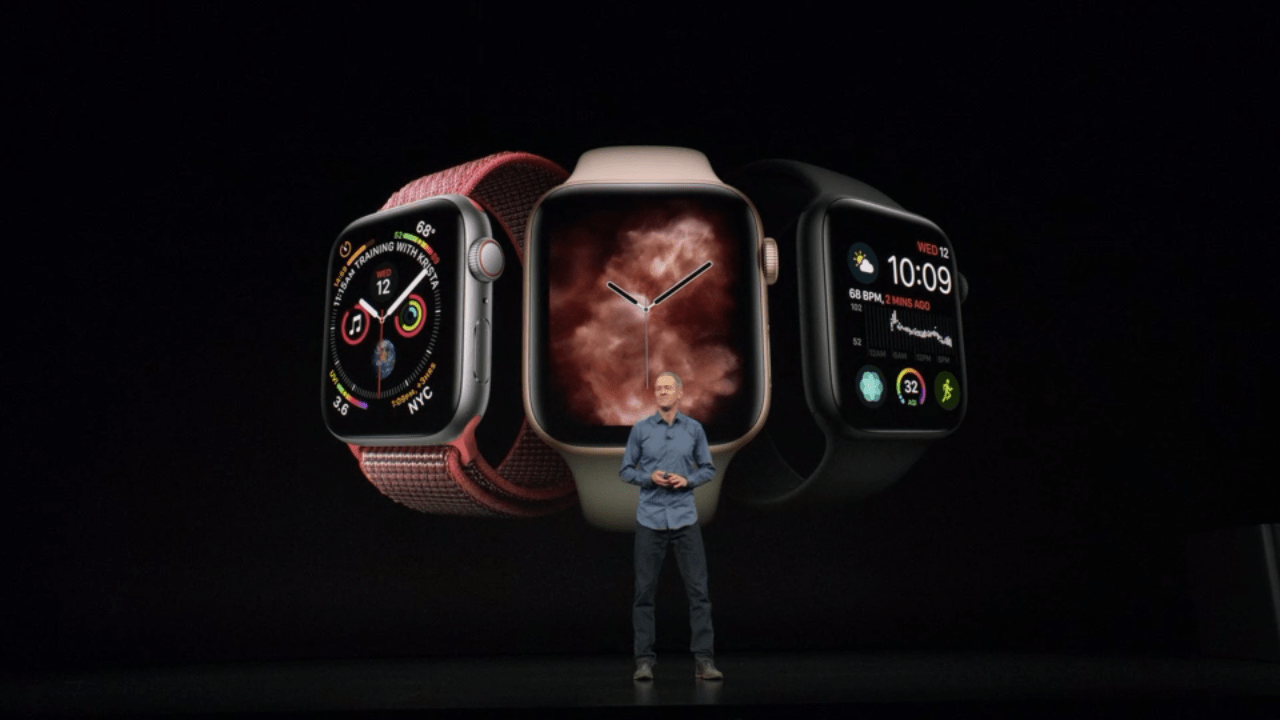
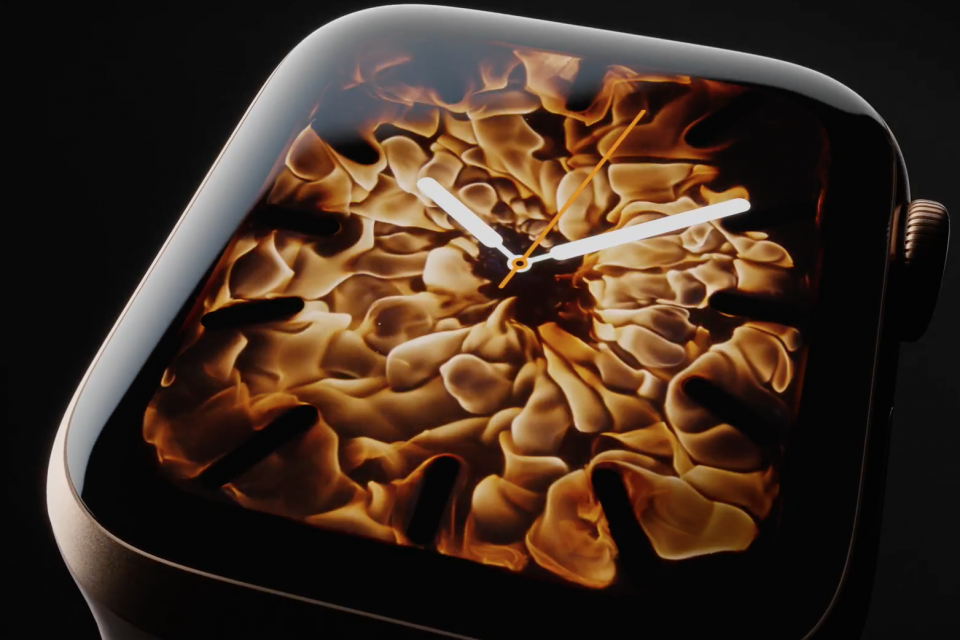
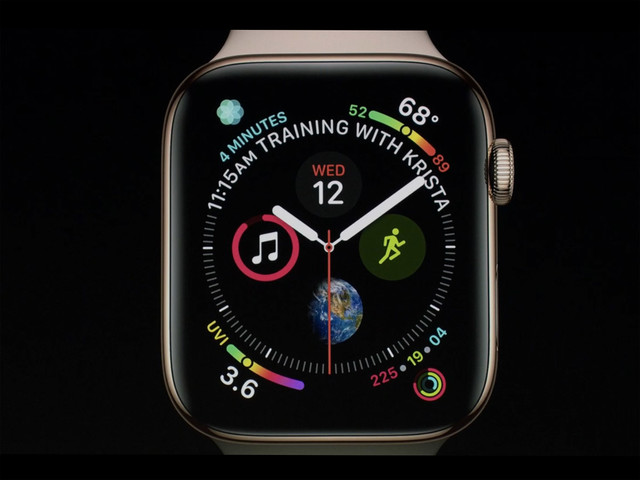
Aesthetically we can’t argue that the new Apple Watch faces look beautiful. Be it mesmerizing color swells, the cool fresh flow of water pooling across the screen, or a functional spread of complications and info graphs, the fact that users can intuitively customize to their heart’s content is something we want to see more of from Apple – let the people decide how they want the product to look!
If you want to learn more about how to customize your watch face, check out this useful guide.
7. Better mic and speaker placement
This one’s big for us since our main use for the watch (besides using it to tell time (imagine that!)) is using it to take phone calls, write messages, talk with Siri, and chat with FaceTime – all of which benefit from improved microphone and speaker. We were okay with holding the watch up to our ear with previous Apple Watch generations but after trying it out on the S4 … we don’t think we can go back.
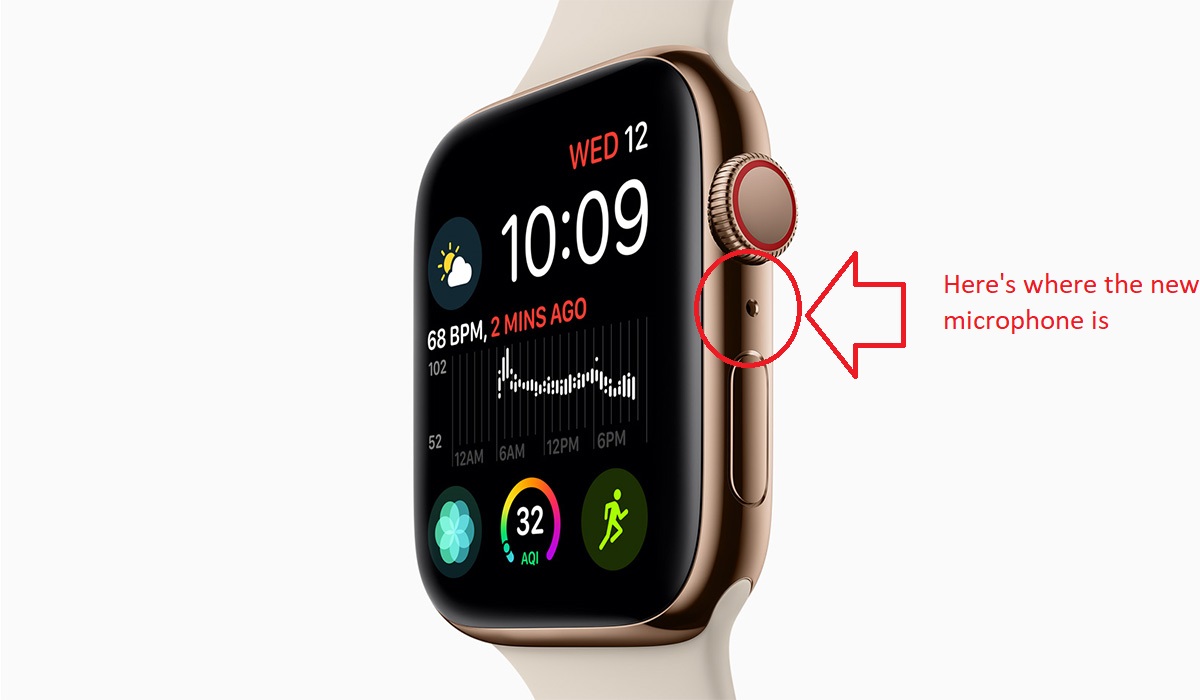
The new microphone is next to the (now thankfully less red) dial and can pick up your voice from over two feet away, making it far less awkward to talk into. As for audio reception is concerned we were surprised at how much louder and clearer we were able to hear on it. The audio quality of the S4 actually rivals the iPhone X in terms of clarity, which is crazy considering one’s a phone and the other is a wristwatch.
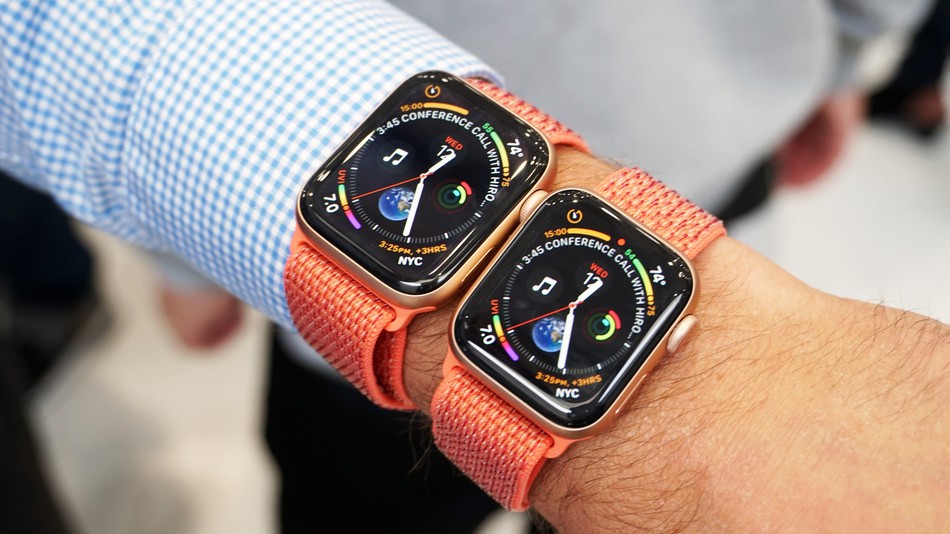
Going along with the S4’s improved aesthetic we can’t ignore the inclusion of sensors for haptic feedback and a smaller Digital Crown. How much smaller is it? The S4 knocks down the bulkiness by approximately 30%, but still somehow manages to feature more components than the S3.
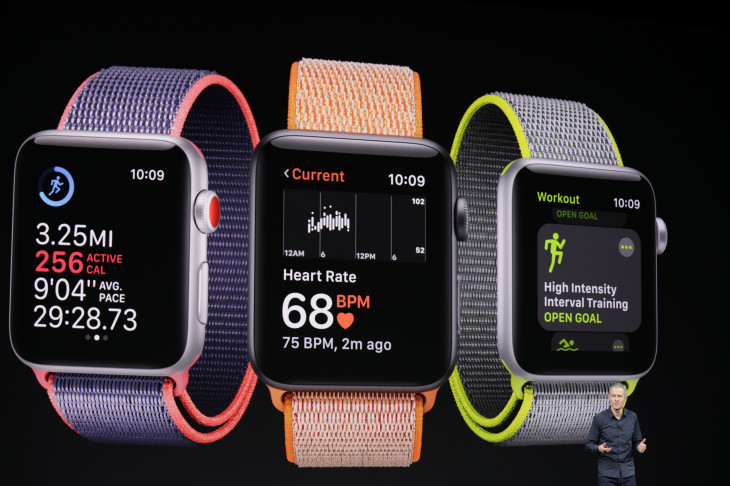
The actual watch face now comes in two sizes as well (as shown above), with the first being 40mm and the other 44mm. Similar to the iPhone XR vs the XS Max, Apple has proven it’s wise to spread the demographic from the previous median of 42mm, allowing for folks to choose whether they want a smaller, more compact watch or one that has a larger screen.
You can also use the Digital Crown to scroll as before, but the new haptic sensors make for vibrations with each pulse. We didn’t think that would be something we’d care about but it makes for a surprisingly satisfying feeling. Not to mention it could potentially help to use the watch without even looking at it; just go by the pulses.
5. Battery life
The first thing our cynical minds thought of while Apple was presenting the abundant new features of the Apple Watch was how much quicker it would likely drain our battery life. Imagine our relief when we heard that it lasts even longer than the S3.
While the S3 could go about 18 hours before needing a recharge, the S4 can go at minimum the same amount of time, perhaps even as long as 1.5-2 days, depending on how frequently you use it and which apps you’re using.
Remember how we like to use our watches to make calls, send texts, and use FaceTime? Pepperidge Farm remembers. Luckily so does Apple, which is why we were treated to improved wireless reception in the S4.
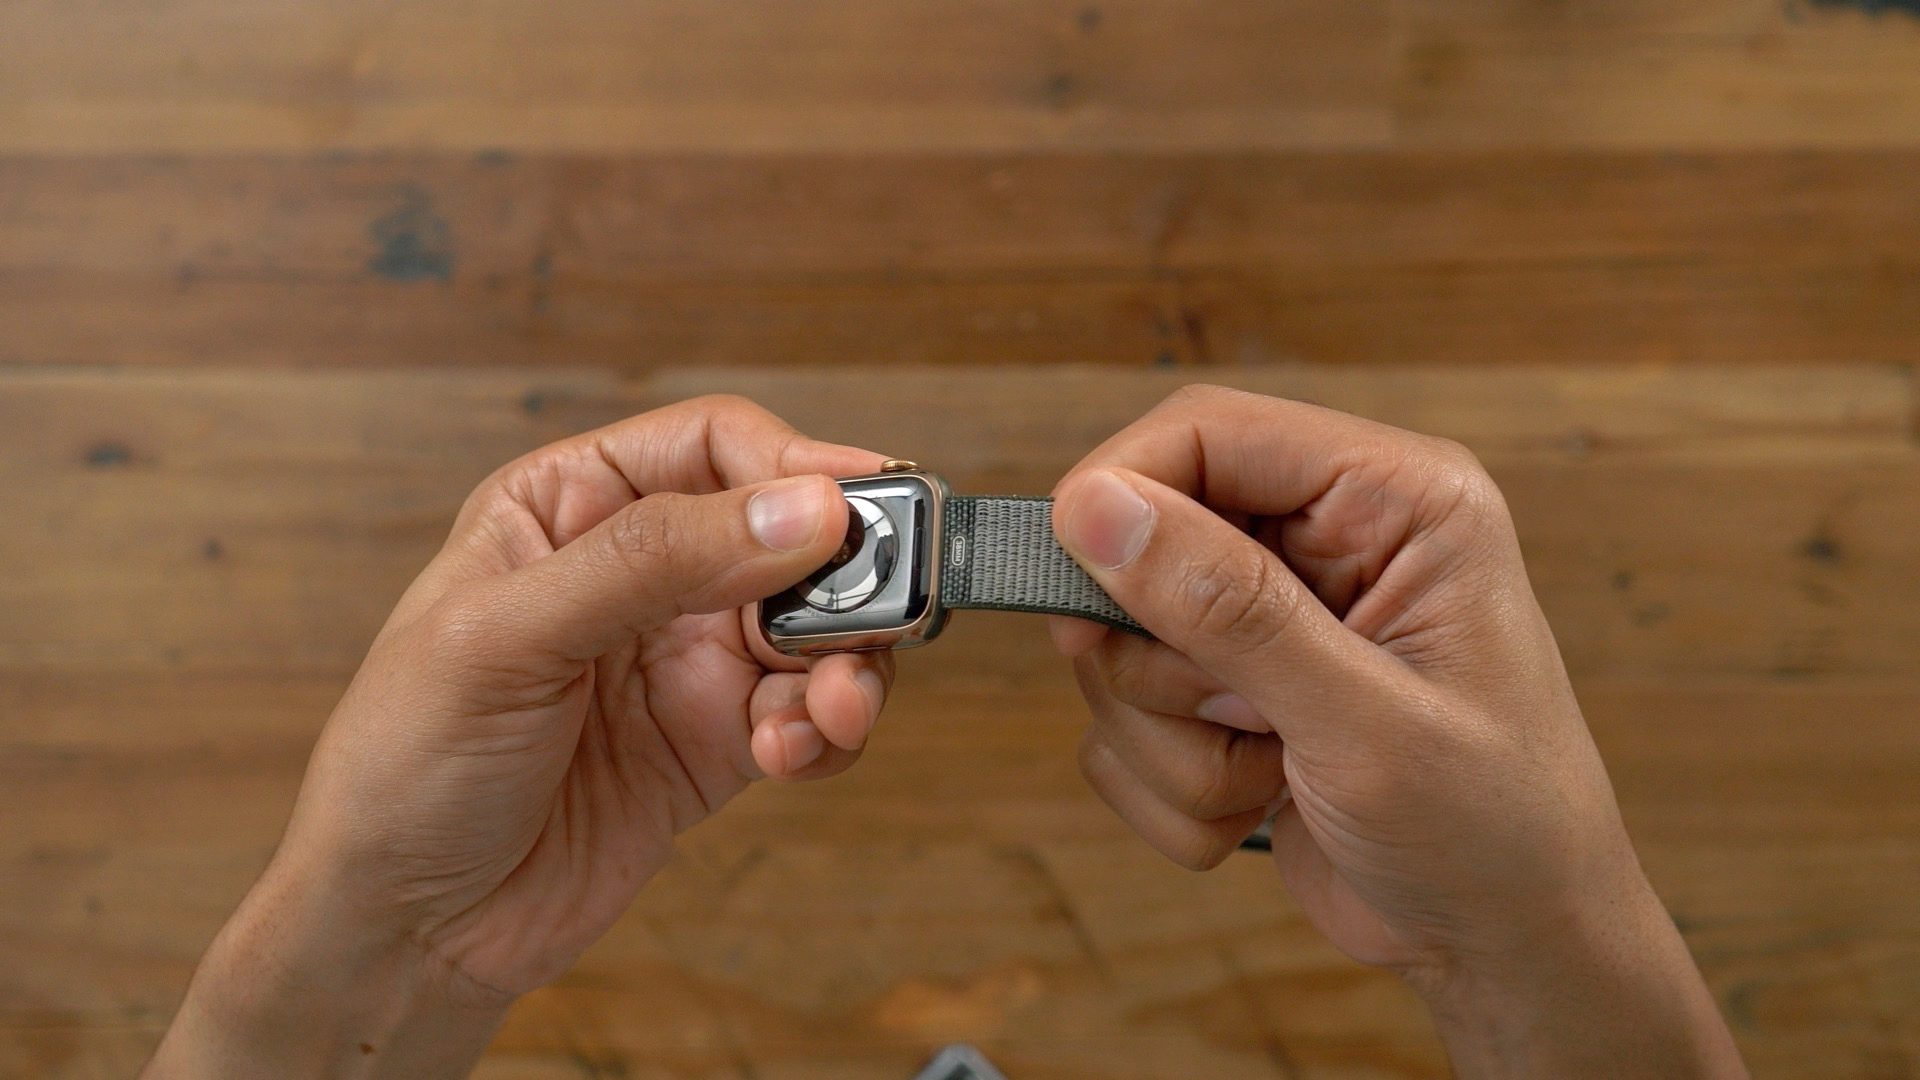
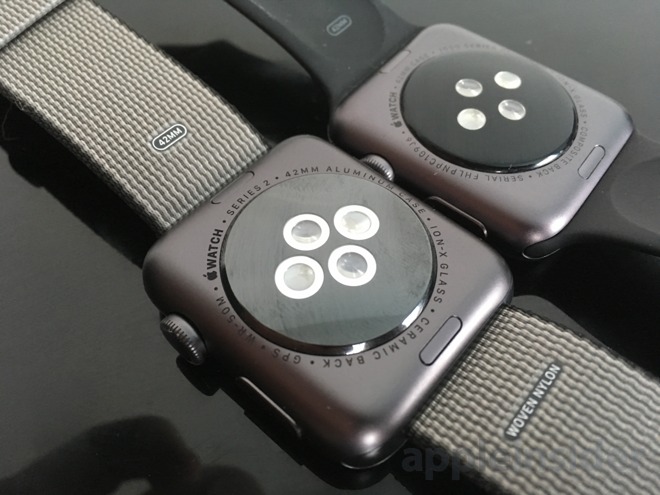
How do they accomplish this? It’s actually the hardware – the back of the watch is no longer made with metal, but instead uses ceramic – a material that generates better reception since the wireless signals can better travel through it. The result is that your calls will come in and be broadcast that much faster than before.
Despite that, Siri can still be a little sluggish. It takes a little longer to establish connection, which often leads to the frustrating “hang on” message or “I’ll tap you when I’m ready.”
3. The new watch incorporates OS 5
OS 5 is another excellent facet to the Apple Watch, and it brings to the table virtually anything you could want to use your watch to do. More likely, it’s probably even going to offer you things you never even thought you needed.
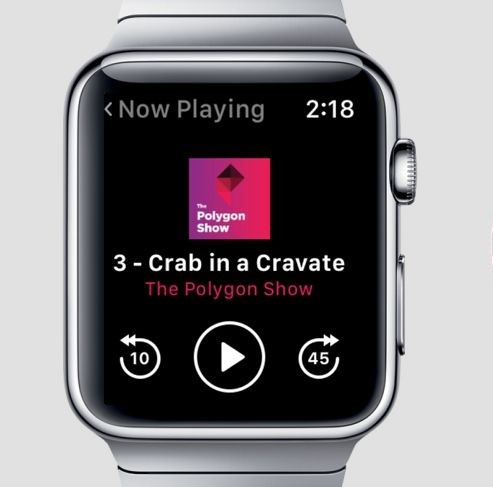
OS 5 allows for Podcasts, streaming Apple music, the aforementioned walkie-talkie mode, automatic workout detection, accessing Control Center and Notification Center within apps, and the additional new watch faces we brought up earlier. For those of us who frequently use our Apple products for music and podcasts, this is extremely convenient.
2. Powerful new S4 chip
The S4 chip is the latest in Apple’s tech and its incorporation into the S4 Apple Watch might just be the best thing about it. No matter how you use your watch, no matter what function you derive from it, no matter what lifestyle you follow it’s going to make using your Apple Watch faster, easier, and more useful to you on a daily basis.
According to Apple, the S4 chip boasts double the power of the chip they used in series 3. The result is that the Apple Watch now boots up faster, launches apps quicker, and is overall far more responsive to everything you do.
The reason this is so high on our list is that the whole point of the Apple Watch (when compared to the iphone) is that it encourages speedier utility, more spur-of-the-moment app usage, and provides the feeling of being constantly entwined in your network of apps, conveniences, and contacts. When everything about that is done that much faster it really feels like it’s doing the job right.
1. Health and fitness settings
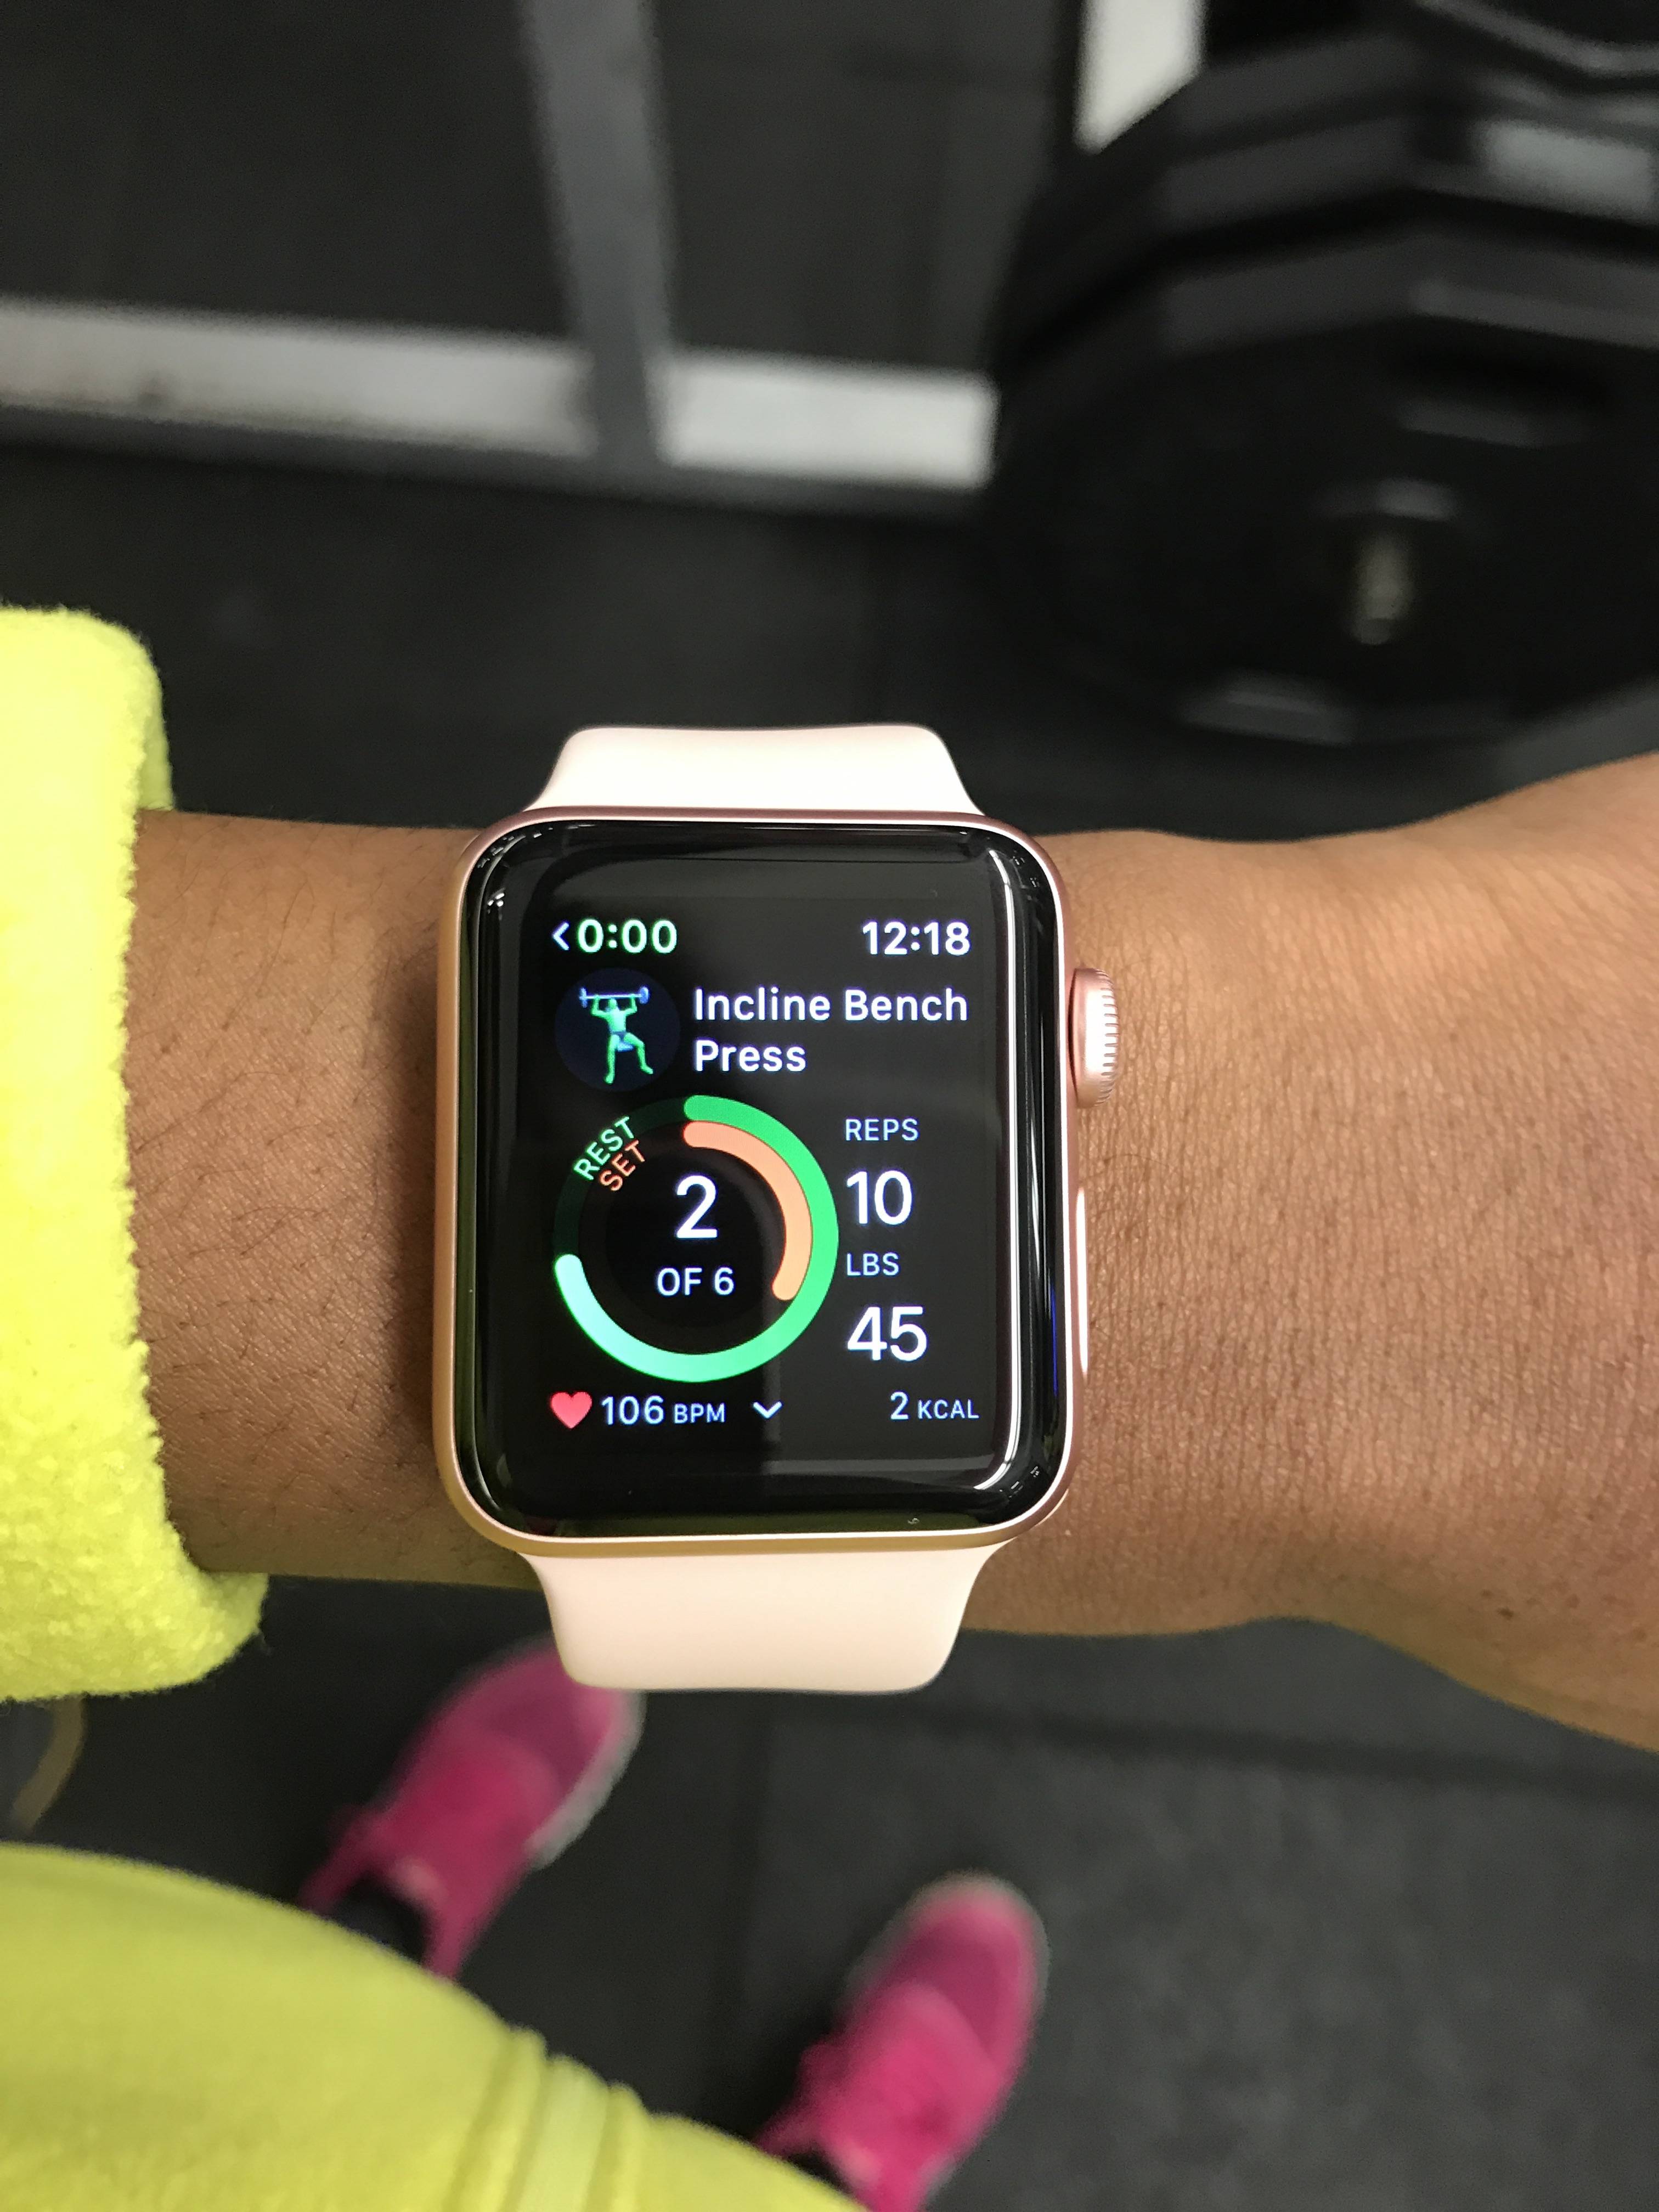
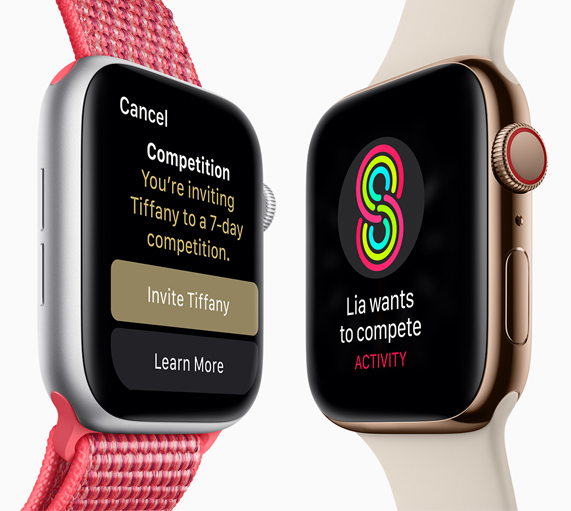
For all the great features we mentioned already, they’re pretty much icing on the cake compared to the Apple Watch’s new health and fitness settings: The watch’s heart rate sensor is more accurate than before and is FDA-cleared to now detect atrial fibrillation. It’s also gotten a boost in the way of fitness tracking, providing more up-to-date readouts and scans as well as allowing fitness competitions with friends over the course of a week. Not for everyone, perhaps, but for the many athletes who work better with group encouragement, this is a huge way to encourage more consistent fitness.
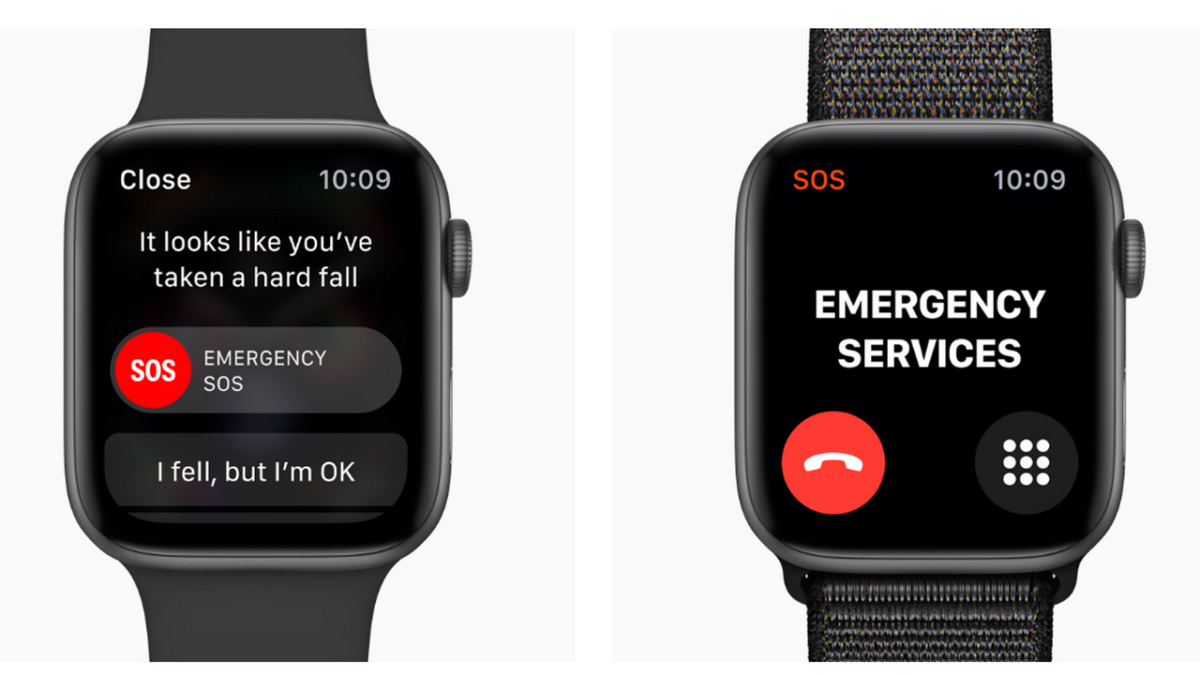
The health tracking isn’t just for jocks and athletes, though. Fall detection due to the new accelerator and gyroscope mean that this watch could literally save your life. This feature works in tandem with the SOS, which calls emergency services if you don’t show movement over the course of a minute after the fall is detected. With its heart rate scanning, the S4 can also now detect when your heart rate is too low, unlike previous generations that only knew how to alert when heart rate was high. Lastly, the new watch can also take an electrocardiogram, which you can instantly send to your doctor as a .pdf.
In short, if you owned an Apple Watch previously and want to take the experience to the next level there’s no reason not to grab the new one; it’s virtually an improvement in every way. Not only is it more convenient in terms of size, weight, and shape, but is also dramatically more responsive and quicker. If you haven’t owned an Apple Watch previously and are torn between splurging that money on an iPhone XS or an Apple Watch … just re-read this article if you still need convincing!
Pricing for the Apple Watch starts at $399, with $499 if you want cellular built in. If you want stainless steel that also has cellular you’re looking at a watch that could cost upwards of $700. Pricey, yes, but still less than even the cheapest of the new iphones!
Love the new Apple Watch S4 and want to see more of its features? Check out this awesome video listing over fifty!
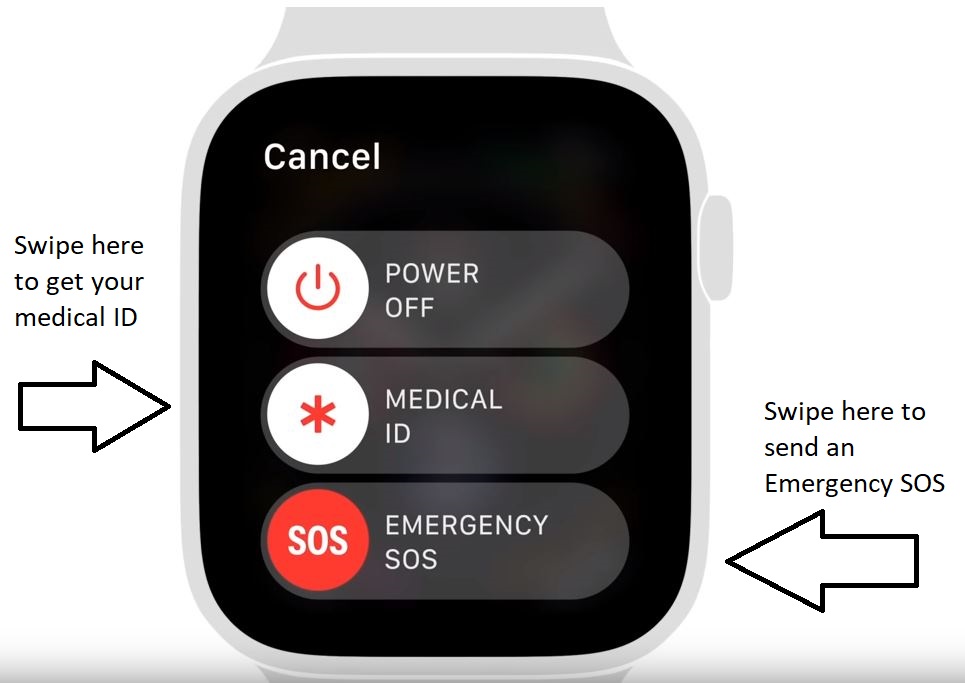
Press and hold the power button (the large one on the side with the below the digital crown). After a few seconds, a prompt will come up.
2. Slide Emergency SOS
Just slide the option that says Emergency SOS and the call will take place immediately. No extra prompts, no pass codes. This is an emergency.
And that’s it!
You can also swipe the medical id tab if you want to bring up useful information like your medical ID. Although you probably won’t need to be reminded of your own name and date of birth. If you do, you’re really in trouble!
Apple often showcases ‘how to’ videos on their channel for users who like a step-by-step walk-though of how to use them. It’s definitely worth noting, though, that while the above video shows the SOS feature on the new S4, you can also use Emergency SOS on older models. It just goes to show that health and emergency response were always a key part of the design for Apple’s wearables.
While the benefits to this are obvious, we’re sure there will be more cases of people accidentally setting off the device and having police show up at incredibly inopportune times.
Public service announcement: If you sleep with an Apple Watch on, consider turning off the Emergency SOS feature, or you too may wake up to 3 cops in your bedroom at 1 AM.
We see where Apple’s coming from, however, and we have to agree this seems a decision made in good conscience. The S4’s new wellness features will undoubtedly continue to help us keep track of our health, even when we’re not so conscious of any issues ourselves. Stay informed, stay aware, and let Apple make it easier for you to do both!
AI-powered robot lawyer DoNotPay now has its own iOS app to help people sue for damages, refunds, and ticket cancellations
Sometimes the world isn’t fair. Sometimes bad things happen that aren’t your fault and you still have to pay for them. Whether it’s a mistaken parking ticket, an unhelpful insurance broker, or a dodgy broken gadget that you literally just bought, there are plenty of ways the modern world can knock you down. If you can afford it, a lawyer could try to help you solve some of these problems. Most of us don’t have that option. Now though, there is an app to help us out when things aren’t fair.
AI-powered robot lawyer DoNotPay now has its own iOS app to help people sue for damages, refunds, and ticket cancellations
The legal aid bot DoNotPay started its life in the UK fighting unfair parking fines. Last year, DoNotPay expanded aggressively to cover all 50 U.S. states, too. As well as a larger jurisdiction, the expansion also saw DoNotPay taking on an increased caseload on issues including consumer and workplace rights.
DoNotPay has been a succesful web app for quite some time
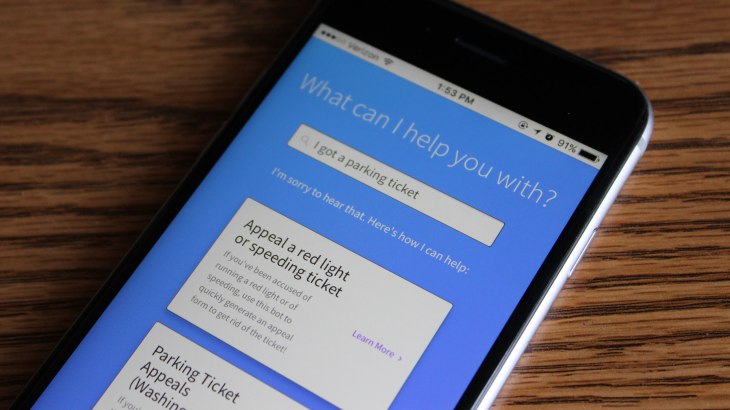
The bot has worked quite successfully online ever since. It looks similar to a standard search bar, but when users input their legal query, they’re shown a number of different ways that DoNotPay can help them solve their legal issues. With even the most basic of legal services (like drafting official letters of complaint) costing hundreds of dollars, a free virtual lawyer opens legal services to many more people.
Now DoNotPay’s services are being brought to your mobile via a brand-new free app that promises to give you the power to “Sue Anyone By Pressing The Button.” The DoNotPay app is available now on iOS.
You can now get a Free Robot Lawyer to Protect your Rights
The app works similarly to DoNotPay’s webpage. It will ask you questions relating to your legal issue and then draw up official documents that fit your particular situation. All you have to do then is print the letter and send it off, per the instructions given on the app. Then you’re a plaintiff in your very own case! What is even more impressive is that if you do have to go to court in person, the app will give you a script to read out. There is no need to have a lawyer standing next to you, you can do it yourself.
The creator of the new DoNotPay app, Joshua Browder states that user privacy is of paramount importance. All user data is protected by 256-bit encryption and DoNotPay doesn’t share any details with third parties. At the moment, the app is being funded by seed funding and small donations. Browder believes that his app is a tool for the little guy to fight back against the man. He wants all basic legal services to remain free but recognizes that in the future the app might need to charge for more advanced case-specific advice.
9 websites for free book downloads (Kindle, ePub, PDF …)
The figures are quite impressive too. DoNotPay has helped users recoup over $16 million in disputed parking fines. This works out at an average success rate of around 50% with an average payout of $7,000. Not bad at all for a free app.
iOS 12 came with this cool new feature. Here’s how to use it!
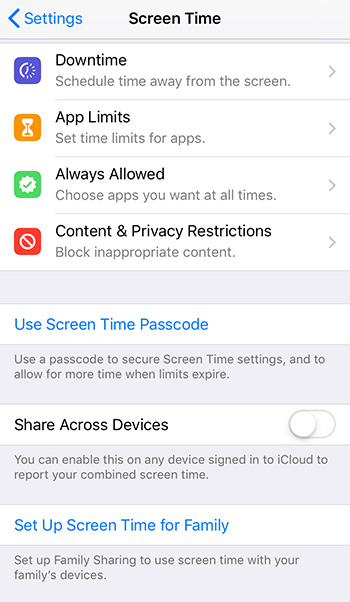
As our phones become more addictive, Apple is doing its part to reduce the time we spend on our smartphones. They’re doing this via their new feature: screen time controls. The service is also helpful as a parental control.
How to use Apple’s new Screen Time controls
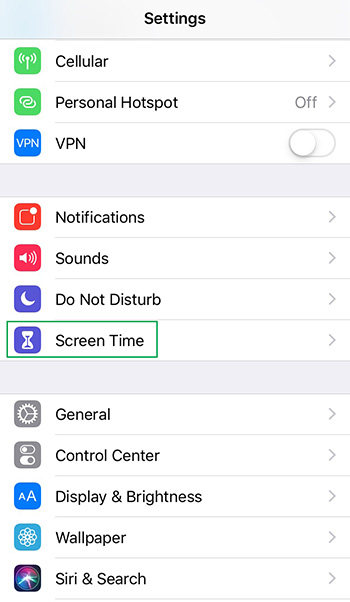
As a part of iOS 12, there will be a section in settings called Screen Time. Just go into Settings and you’ll see it right below Do Not Disturb.
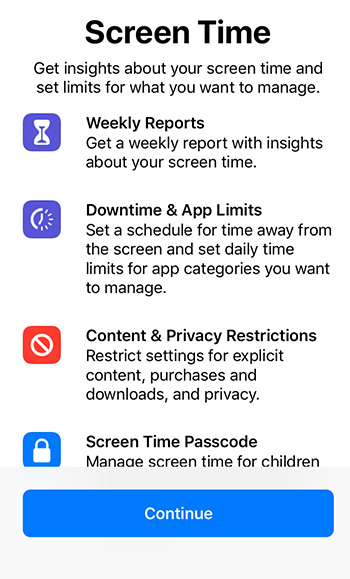
Here, you will find a breakdown of how much time is being spent on all iOS devices linked to one iCloud account. It also will break down the usage day by day and for the past week. You will receive automated weekly reports about this each Sunday, giving a full rundown of the week. Finally, this feature will break down how often your phone is picked up and which apps you visit most frequently.
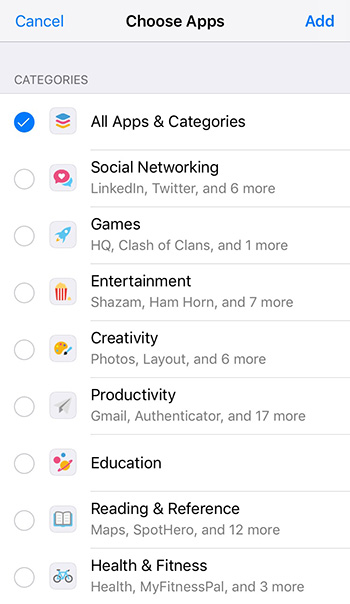
After all these insights are compiled, you can then set limits for specific apps or categories that exist on a 24-hour cycle. Once inside Screen Time, click App Limits, then choose Add Limit. Then, customize the allotted time. You can limit everything or specific categories like social networking or games or entertainment. Or limit just one app. You can even make this limit different depending on the day of the week.
Once these limits are set, your device will provide alerts regarding usage, specifically when the allotted time is almost up. Once that time arrives, the app will lock you out for the remainder of the day. Of course, there is also the option at that point to approve more time for the app if desired.
Another component of this feature is called Downtime. Here, you can set scheduled times when your device locks itself down and restricts access to a wide range of apps (leaving available only communication apps such as Phone, Messages, and FaceTime). This is particularly useful, for instance, around bedtime as a fail-safe way to force yourself to stay off of your device and to truly unplug.
This is just the tip of the iceberg with this useful and intriguing new setting. However, it’s enough to make anyone think about just how much time they’re spending on their smartphone. Take advantage of these features on your Apple device to lead a more unplugged lifestyle!
Your phone will be your ID at select universities.
Students on college campuses are usually required to have their student ID on them at all times. With it, they have access to basically everything on campus. With Apple’s next update, being a student will be made a little easier.
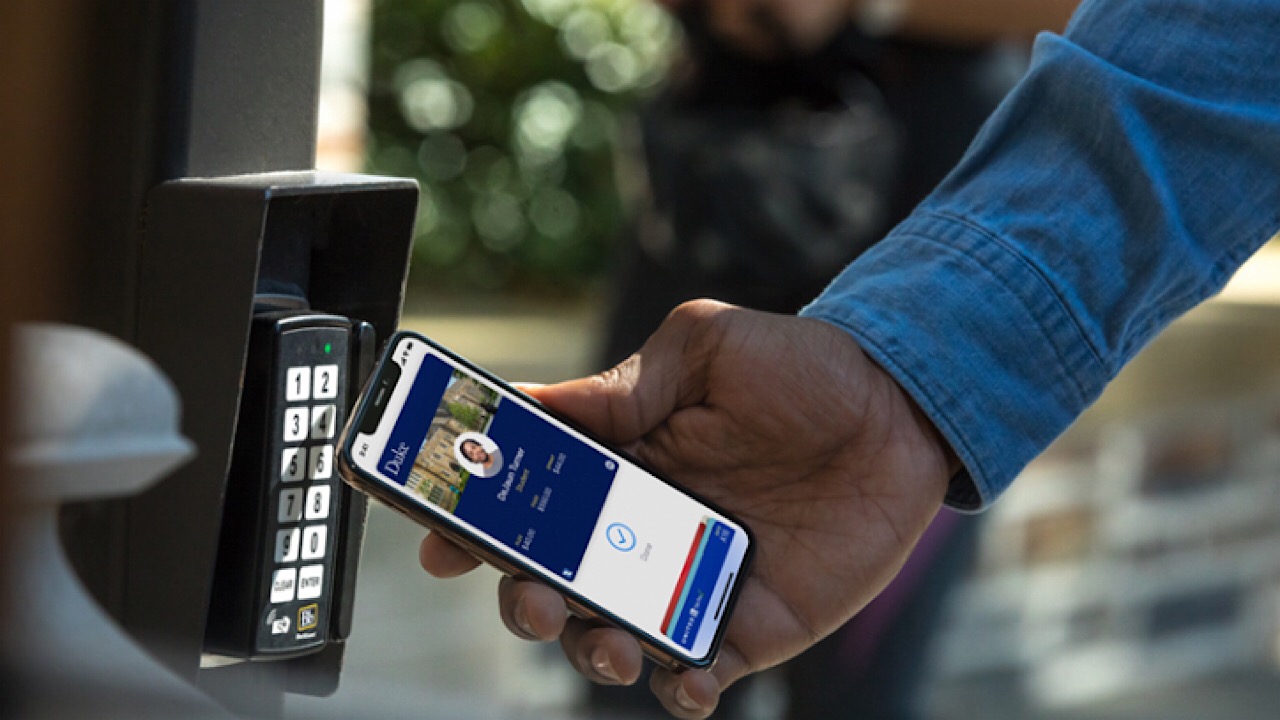
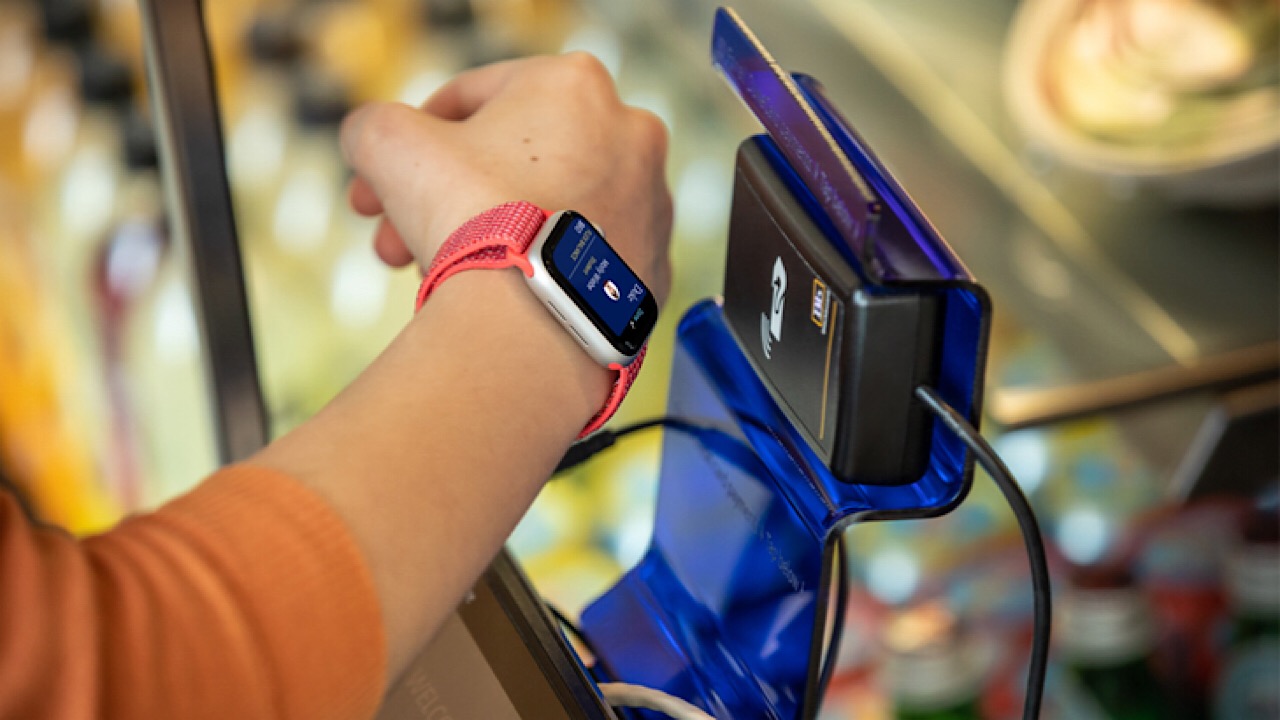
Apple announced on their newsroom page that they are working to integrate student IDs into the Wallet, a contactless payment system with Apple Pay that you can use on iPhones and Apple Watches. Just open Wallet, swipe your card, and you can pay for meals, laundry, and get into buildings that require ID like dorms.
Apple Pay is one of the most popular contactless payment methods for phones out now. You can send an accept payments in stores, on the app store, and online. Apple says that using this system is cheaper than using your card because it uses a device-specific number and unique transaction code, and since your card number won’t ever be stored on the Apple servers, no sort of online shopping or transaction footprint exists.
Right now, the only universities that are a part of the integration are Duke University, the University of Oklahoma, and the University of Alabama. Many others may follow soon like Temple University, Johns Hopkins, and Santa Clara who will have this capability by the end of this year.
Not only is this integration good for payment’s sake, but it will also help people who have the tendency to lose their IDs. We remember those days, and wish this awesome system was around back then.