10 best mobile apps for keeping up with celebrity gossip

Want to know what’s going on with your favorite celebs? Here’s how to get the inside scoop.

It’s easy to get wrapped up in the world of celebrities. There is constant news of romance, breakups, fights, and other interests that keep the gossip interesting and fresh. While there are many ways to keep up with celebrities’ official profiles, sometimes you want a little more dirt. Here are some of the best apps to keep you up to date on your favorite celebs.

Best celebrity gossip mobile apps

10. MTV News

MTV has changed a lot over the years, but for a long time now it has been a consistent and reliable source of celebrity news. While it primarily focuses on teen idols (such as Taylor Swift and One Direction), it also reports on a much larger variety when important news happens.

MTV News Free Download
7

9. Instagram


View this post on Instagram


Got myself a fiancé just before new year. We are very happy and in love, and our cats are chuffed as well xx

A post shared by Ed Sheeran (@teddysphotos) on Jan 20, 2018 at 5:49am PST

Social media is where most celebrities go to make important life announcements. All the other sites are just compiling posts made by celebrities, but going to Instagram is going to the source itself. You’ll have to follow a few celebs to get most of the gossip, but most of them love to put their lives on display here (especially with engagement announcements).

Instagram Free Download
9

8. Twitter

Perhaps the better social media option when deciding to follow celebrities, at least for some. Twitter is just as much the source of celebrity news as Instagram, though usually Twitter tends to be more drama-filled. Even the small updates can lead to intense Twitter feuds, and the network is always keeping you up to date on what’s trending in the news.

Twitter Free Download
7

7. E! News

E! News

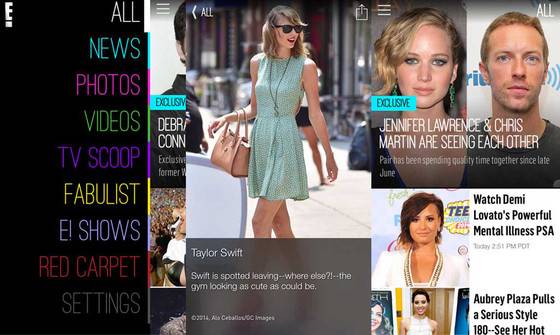
E! is a channel that has a lot of celebrity gossip within the entertainment industry. It mainly focuses on movie stars, singers, and socialites, it is also known to show a variety of trending news. The app lets you see more details of their shows, including the ever-popular “Keeping Up with the Kardashians.”

6. Apple News
Apple News

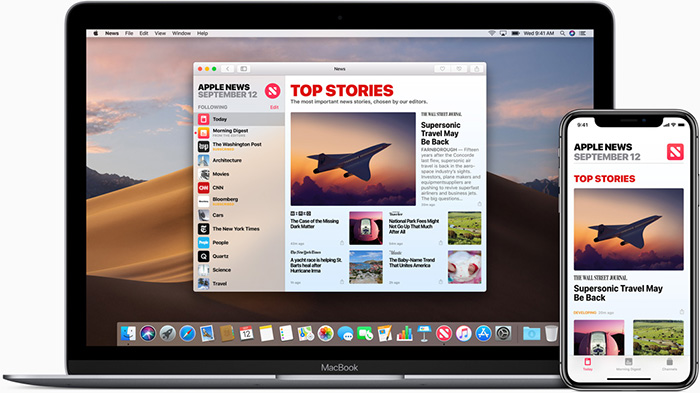
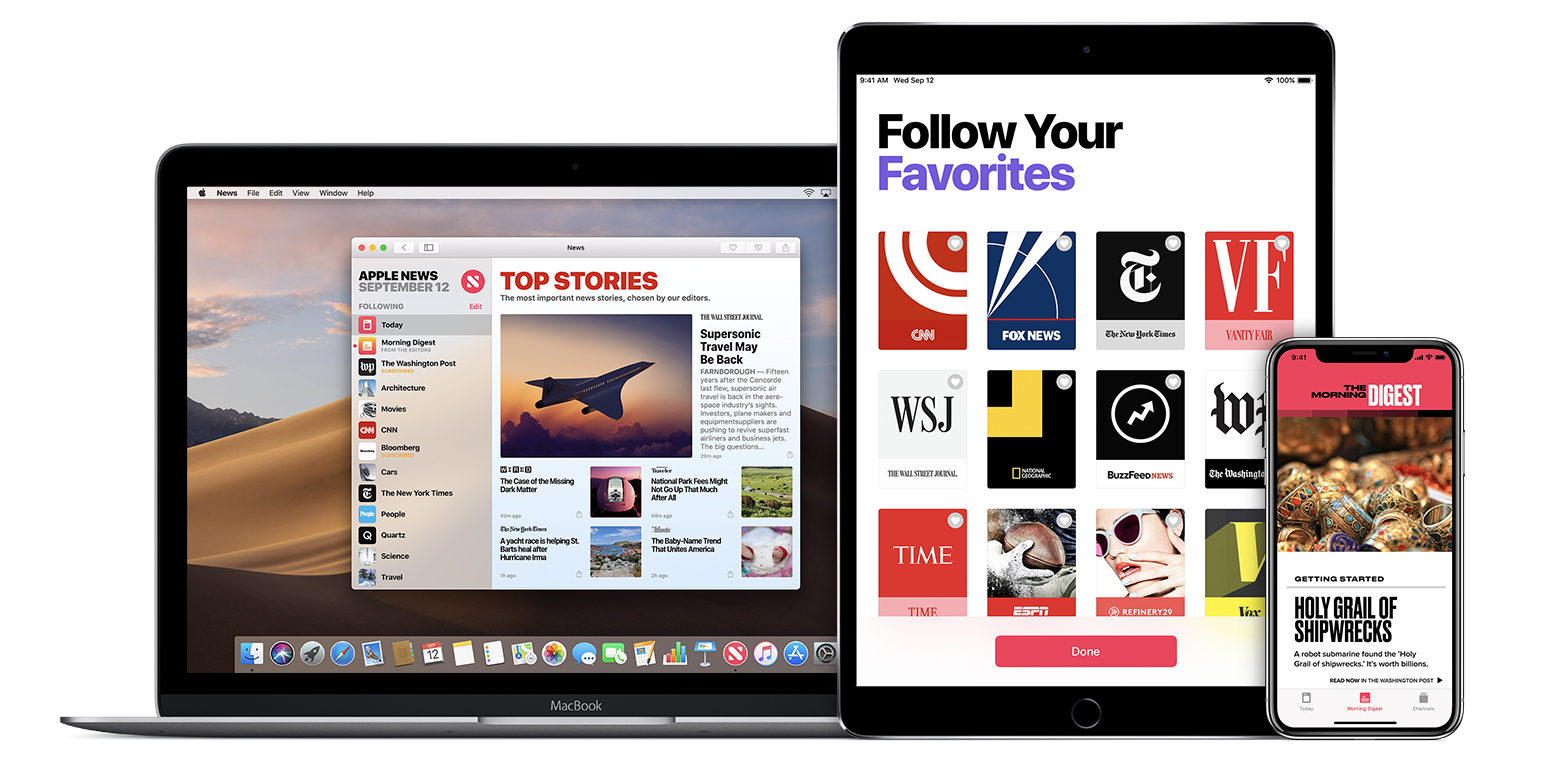
Fortunately for iPhone users, this app comes prebuilt into your mobile devices, so you already have it at the tips of your fingers. It is one of the most customizable news apps out there. You’re able to follow any news you want from virtually any reliable source you can think of. This isn’t limited to just celebrity news, as you can use this app to stay up to date on politics, sports, and any other fields of interest you might have.
5. TIME Magazine

Time Magazine

One of the most credible news sources on all subjects, Time has been a reliable source of celebrity news for a long time. Probably the most well known of these are “it” lists of “100 best” movies, music, etc. The app lets you view all of these for free, and stay up to date on any new Time information.

4. Khloé Kardashian Official
Khloe Kardashian

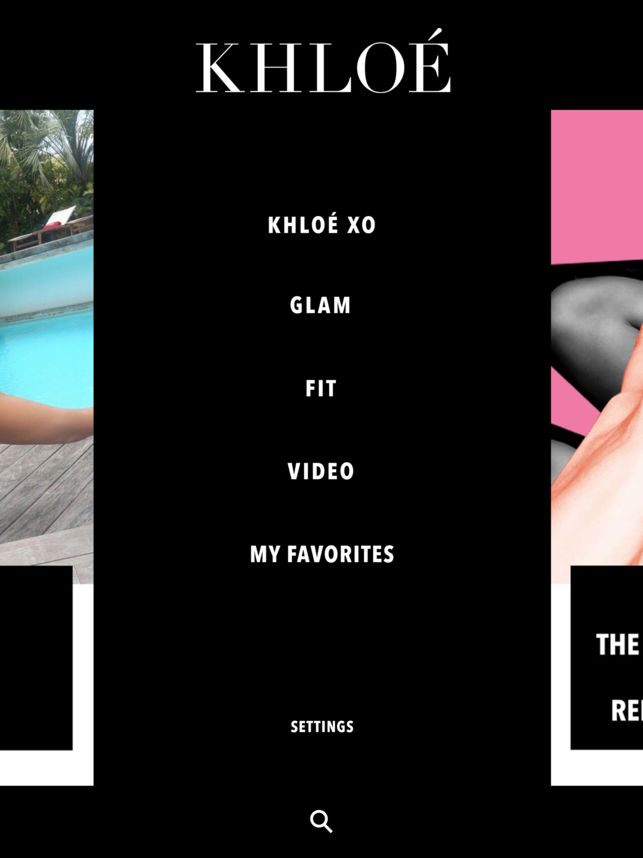
Nothing says celebrity gossip like the Kardashians, and Khloé’s official app keeps true to this. If you plan on “Keeping Up with the Kardashians,” then this is a great app to have on hand. It lets you see how Khloé lives, and can even bring you closer to looking like her someday (if that’s your thing).

3. TMZ

TMZ

Another popular source for celebrity news, TMZ has its own app with some of the biggest stories out there. Aside from Twitter and Instagram, TMZ is usually one of the primary sources of celebrity gossip, and their app has everything you would hope for it to have. It’s sponsored by ads, making it one of the few reliable news sources to be completely free.

2. Perez Hilton

Perez Hilton

The original celebrity gossip man himself has created a free app that works just like his site does. While somewhat of a controversial figure, Perez is always ready to give the most intimate details on celebrities, and his app is the same way. Longtime fans of his work will be sure to enjoy the familiar format.

1. People Magazine
People

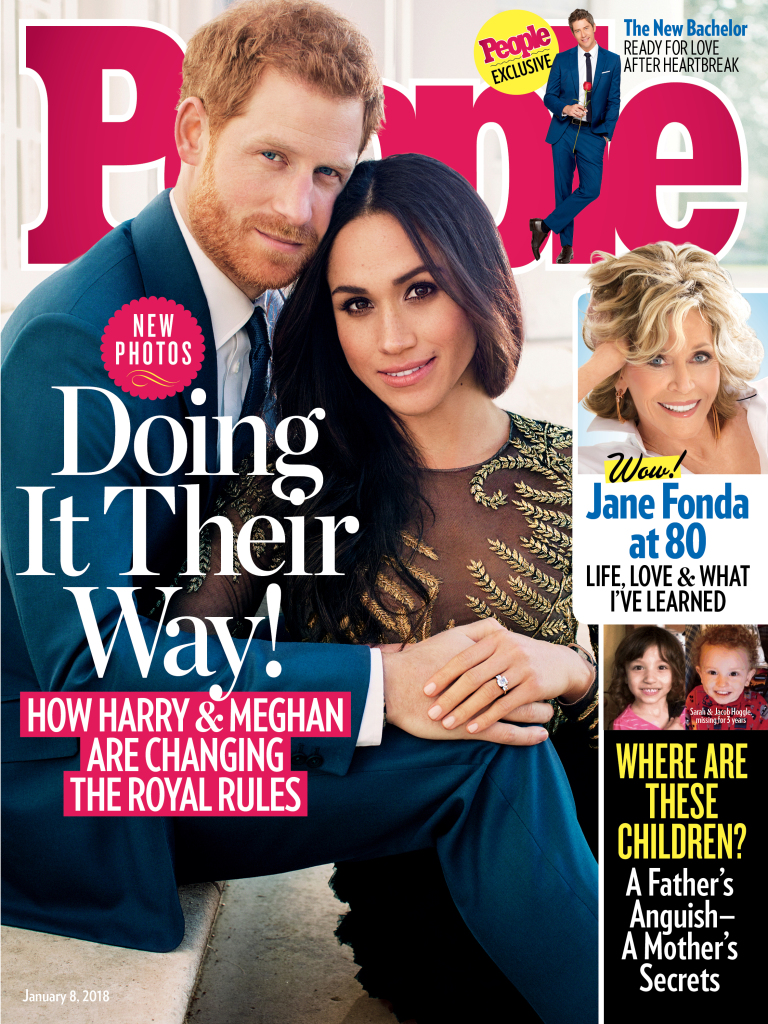
People is well known for being one of the most reliable sources of celebrity news. In fact, it’s difficult to compare it to the gossip that most sites share, as they mostly only write on factual events, instead of speculation. That being said, they are one of the few news sources you still have to pay for, though their credibility can forgive this factor.

There’s actually more celebrity news apps then you may think, as our Softonic Solutions community has listed even more great apps to try. You can even suggest your own if you think a great one is missing from the list!
iPhone users finally get a great Google app

Google Lens can now be accessed from the Google app on iOS.

Google lens Google app ios

iPhone or Android? Possibly the toughest of tech choices boils down to so much more than whether you are just an Apple fan or not. Both tech giants have brought their own magic to the market, which often ends up being exclusive to their respective operating systems and the smartphones that use them. Sometimes, however, Apple and Google come up with apps and features they think are so good that everybody should be able to use them. This now appears to be the case for Google with its Google Lens app.

Google Lens can now be accessed from the Google app on iOS

If you are unfamiliar with Google Lens, you will likely be impressed by its capabilities. Lens allows you to point your smartphone camera at objects in the real world to try and find out information about what they are. It uses Google’s famous AI to scan what your phone is looking at and then serve up the relevant information. This is a key part of Google’s strategy of moving towards a future that contains so much more than mere text-based search queries.

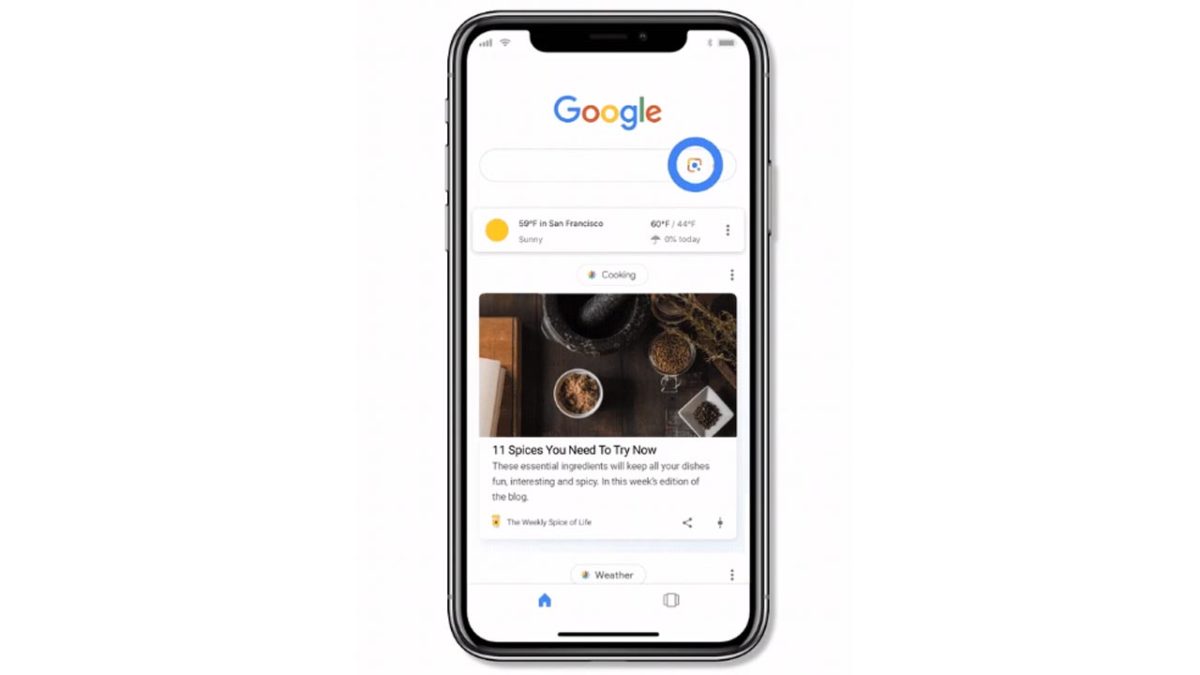
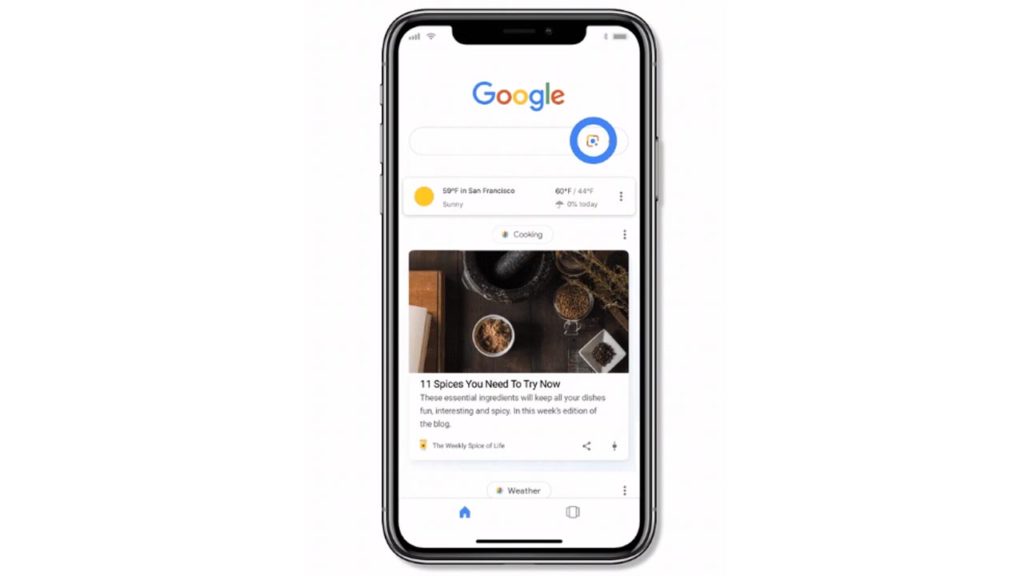
If you are an iOS user and you want to try out Google Lens for yourself, read on. All you have to do is open up the Google app on your iOS device and look for the new Lens icon. You should see it next to the microphone icon in the Google search bar. If you tap the Lens icon, your phone’s camera will switch on and you’ll see a number of moving bars, which indicate that Google’s AI is working away in the background. You’ll be able to use Google Lens to identify most things that you point your camera at including bars and restaurants, and more natural things like plants and animals. It also works very well as a quick and efficient way of copy and pasting analog text.

Google App Download Now
8

Until now, iOS users were only able to use Google Lens’ capability by scanning photos in the iOS version of the Google Photos app. The move to the Google app, and the introduction of a live scanning feature makes the whole process much more fluid and easier to pull off. iOS users can now simply tap on an object they are looking at through their phone, rather than having to first take a photo.

The Lens update to the Google app has been rolling out slowly over the last few weeks. If you still haven’t received it on your iOS device, don’t worry: it is on its way.

How to personalize your Apple News feed

Make the Apple News feed better with these simple steps.

apple news feed

Everyone likes to receive news in different ways. Some learn about the latest headlines on Twitter, others prefer to watch their favorite station on television, and still others may go the old-fashioned route by reading a newspaper. But millions of Apple users rely on their Apple News feeds to stay up to date on world happenings.

While everyone has different preferences for how they consume the news, the same is true for the type of news that they are interested in reading. For that reason, Apple has made it easier for users to customize their news feeds according to their interests. Below, we’ll take a look at how to do just that.

How to personalize your Apple News feed

7 steps to personalizing your Apple News feed

1. Open up the Apple News app on your iPhone.

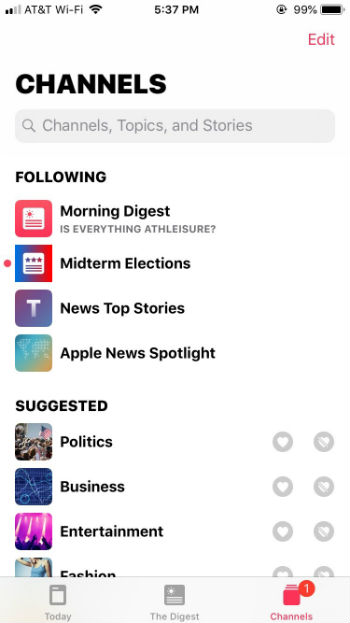
2. To personalize your news feed, click on “Channels” in the bottom-right corner. You’ll see a list of the channels you’re currently following, followed by a “Suggested” list of channels to follow.

If you don’t want to follow “News Top Stories” or “Apple News Spotlight,” click “Edit” in the upper-right corner and click the minus (“-”) button on the left side to remove them from your list.

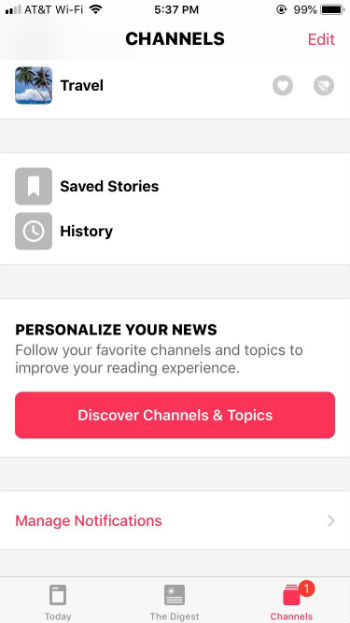
3. If you want to follow a suggested channel, click the heart icon next to the topic you’re interested in. If you’re not interested in a channel that the app suggests, click the icon with a crossed-out heart so that the app knows you don’t want to see channels related to that topic in the future. This channel will then be moved to “Blocked Channels & Topics,” which will appear at the bottom of the Channels section, right below “Manage Notifications.” From there you can easily remove a blocked topic if you clicked the crossed-out heart by accident.

4. If there’s a particular channel or news source that you want to follow that wasn’t in the suggested section, scroll down to the bottom of the Channels section to click on “Discover Channels & Topics.”

To follow a topic or channel, tap on the news channel that you’re interested in to “heart” it. Once you’ve selected all of the channels you’re interested in, they’ll show up in the “Today” tab on the bottom-left corner of the Apple News app. Scroll down and you’ll see an organized list of news topics from each channel you’re following.

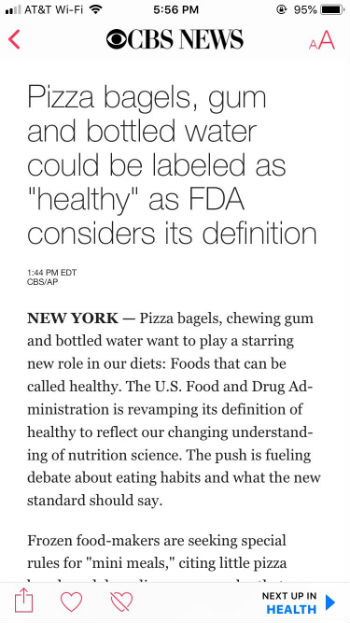
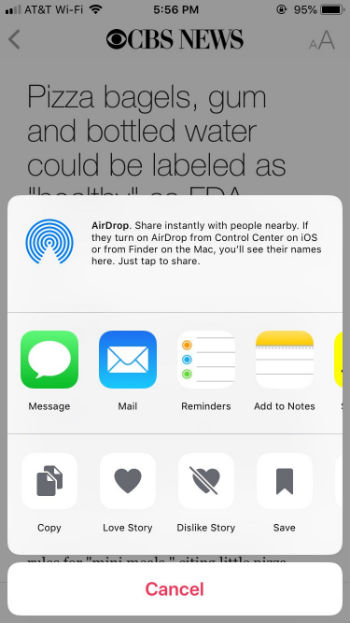
5. If you want to save an article to read later, you’ll want to click on the icon of a box with an upward-pointing arrow. You’ll see this icon to the right of a headline or in the bottom-left corner of the screen after clicking on an article (next to the heart icon).

Click the box icon and then select “Save.”

To view your saved articles or article history, go back to Channels and scroll down to “Saved Stories” and “History.”

6. The more you customize your Apple News app, the better it will learn your interests and behavior. To do this, click the heart icon (“love”) or the crossed-out heart icon (“dislike”) so that Apple News will be able to better personalize your news feed. You can also swipe left on an article headline to save, share, or “love” a story. Swipe right on a headline to “dislike” that topic (and see less of it), or report an article.

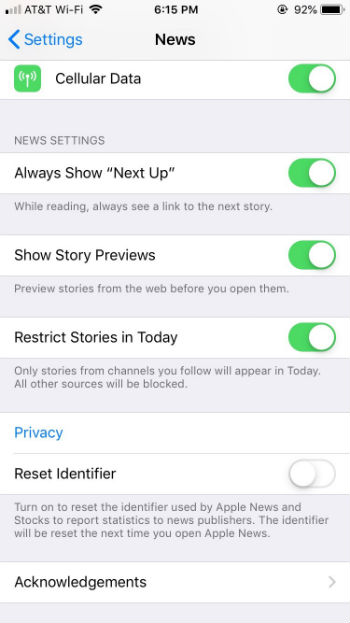
7. To change your Apple News settings, first close the app. Then, go to your phone’s settings and scroll down to Apple News. From there you can choose to see links to the next story, story previews, or restrict stories to only channels that you follow.


It’s as simple as that! If you’re looking for a better way to personalize your news experience, give Apple News a shot.

Amazon is ditching unauthorized Apple resellers — are knock-offs next?

How can you be sure you’re not getting a fake from Amazon?

amazon selling authorized apple products

It’s no secret that Amazon has a major counterfeit problem.

From hot beauty products that don’t live up to expectations to knock-off electronics, shoes, and more — it’s become a real challenge to know whether you’re getting the real deal or some shoddy imitation.

By sheer volume, Amazon’s marketplace is hard to regulate. The bookseller-turned-platform company is a sprawling digital pool filled with more third-party sellers than they can realistically monitor for quality.

Still, the e-commerce giant has made some inroads toward remedying the problem.

Amazon announced recently would stop selling unauthorized Apple products, two years after a 2016 audit found that 90% of MacBooks, iPhones, and iPads were fake.

Amazon faces its counterfeit problem

Counterfeits disproportionately affect small sellers

Amazon has made it relatively easy for smaller brands to expand their reach to a broader audience, but it’s also made it easy for counterfeit sellers to infringe on those smaller businesses.

Back in July, the Wall Street Journal reported that counterfeiters have been creating fake versions of smaller manufacturers’ products and undercutting sellers’ profits.

In short, the digital seller has become an online hub for the kind of goods you’ll find on New York’s Canal Street or Los Angeles’ Santee Alley.

According to the Los Angeles Times, it’s become increasingly difficult for Amazon shoppers to identify counterfeits based on photos.

Seller John Fawcett found that months after receiving rave reviews from customers for his durable phone chargers, reviews began dipping into the one-star territory.

Initially, he was confused by the dramatic turn, but Fawcett told the Times that he found a clue in an image of his brand logo that just didn’t look right. He then placed a few orders and confirmed his suspicions: consumers were getting low-end counterfeits instead of the real product.

The Global Brand Counterfeiting Report 2018-2020 from ResearchAndMarkets.com found losses from e-commerce scams totaled $323 billion last year alone.

And, another report from Gartner found that one in three third-party products sold on Amazon has at least one customer review stating that they received a fake product.

So, while it seems like Amazon is in over its head, there is a hint of evidence the company is taking steps toward improving their efforts, or risk brands ditching the platform in higher numbers.

Swatch and Birkenstock are out. Likewise, many smaller brands don’t want to risk their reputation or their bottom line by selling their wares with the platform.

Is the Apple move a step in the right direction?

Apple authorized store

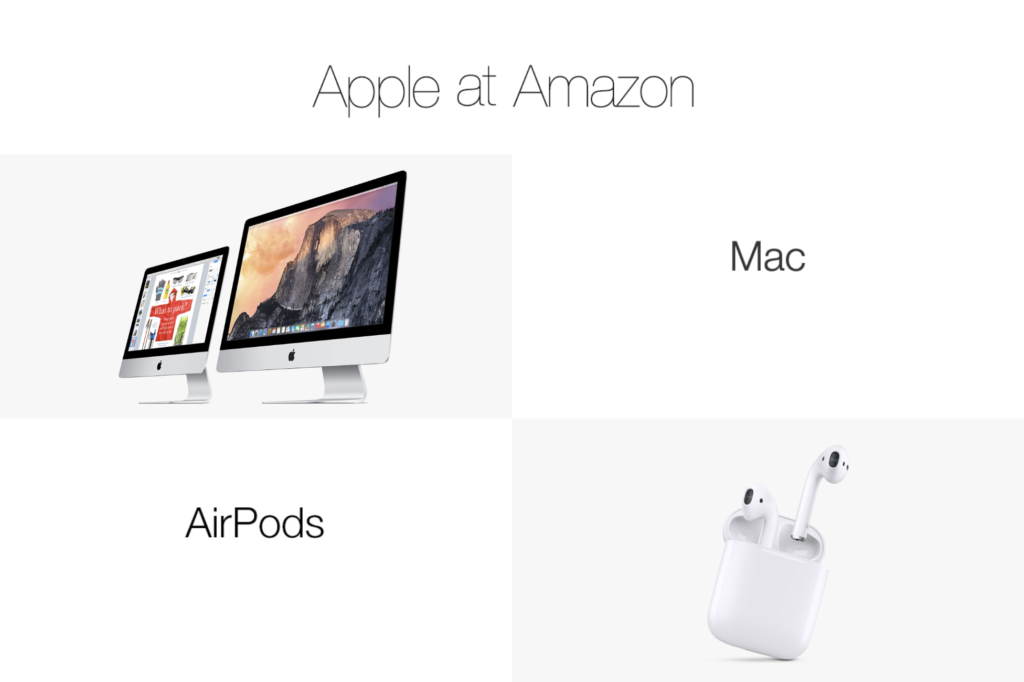
Earlier this month, Apple and Amazon announced that they struck a deal marking the return of the Apple TV to the platform, as well as the launch of an Apple Authorized Reseller page. The new page gives shoppers access to iPhones and such with Prime shipping — and it protects against the rampant problem with fake electronics.

The Apple announcement is undeniably a big deal, but it’s unclear if similar deals are in the works. The brand registry tool has been around for a while now, and the problem persists.

Amazon’s Brand Registry 2.0, which rolled out last year, gives brands access to tools that allow them to manage their presence on the platform. Sellers can accurately represent their products, report violations, and share information about suspicious actors on the platform.

Brand Registry can help you prevent counterfeiters. However, it does not prevent nonauthorized resellers from selling your products on the platform below the minimum advertised price.

Additionally, brands need to police their channels on a regular basis, meaning smaller sellers may not have the resources to fight against bad actors.

Do counterfeits affect the brand?

Amazon stresses that they strictly prohibit the sales of counterfeit products and have invested tremendous resources in combatting sales of illicit goods.

But counterfeits might offer some benefits for Amazon. Stacy Mitchell of the nonprofit Institute for Local Self-Reliance says fakes “enhance its market power over suppliers.” While sellers suffer, Amazon still takes a cut from all sales that pass through the platform.

On the downside, consumers may well lose trust in Amazon if they can’t count on receiving an authentic product from the e-tailer. Where things like household goods, books, or media will likely remain big sellers, other products like makeup brands, skincare, fashion, and consumer electronics may fall.

Brands won’t want to sell on the platform and consumers won’t want to risk receiving an item that doesn’t match their expectations.

While Amazon is currently working on new AI technology aimed at reducing the number of counterfeits in their warehouse, we wonder if it will be enough to protect consumers and sellers alike.

Brands like Apple can throw their weight around and come out with a deal. But small sellers face a tough decision. They can pull their wares and see a drop in traffic or stick with the platform and risk bad reviews.

Masters guide to creating iTunes playlists

Build the ultimate playlist with our guide.

We love iTunes and enjoy creating new playlists but it took years to realize the full potential of iTunes’s options! Rather than going through a long journey of technological discovery, enjoy this short guide to Apple music mastery. Prepare yourself for the…

Master’s guide to creating iTunes playlists

Creating a Playlist

Hop into iTunes!

iTunes 12.8.0 DOWNLOAD NOW ►
10

To create a playlist (a grouping of songs) there are two simple paths:

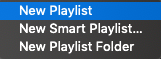
1. Easy Mode: right click the left bar, hit “New Playlist”. You’ll be given the option to name your new playlist!
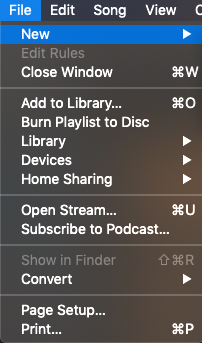
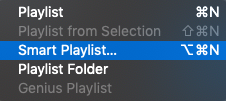
2. Thorough Mode (for Mac users): open iTunes, and visit “File” in the top bar:

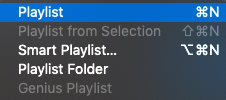
Within the “New” section, you’ll see the same three choices available.

Creating a Smart Playlist

Smart Playlists bundles music, videos, and more based on preset conditions: date added, title, year composed, etc. If you know how to shape the playlist, it can become whatever you like!

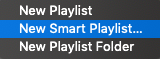
Starting a Smart Playlist begins much the same as a normal playlist. Double click the left bar or hit “File” and “New” in the top bar to arrive at the playlist menus:

You can go with this…
Or you can go with that!

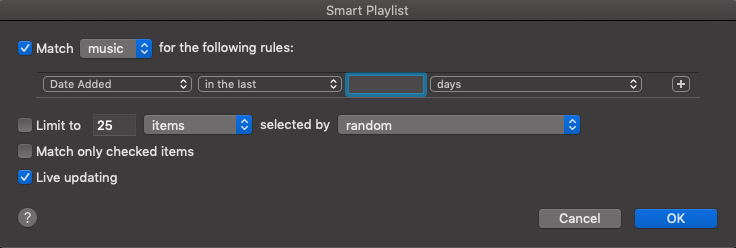
For smart playlists, you have another step! The “Smart Playlist” window:

The magic happens here. In general, smart playlists gather songs with a similar characteristic. Right now, the targeted characteristic is “Date Added”, but there are a number of other parameters available:

Recently, iTunes randomly deleted our “Recently Added” section, so we made our own smart playlist that compiles all songs added within the last month. Play around and see what you could make!

(NOTE: in the smart playlist window, make sure to select “Live Update”. This keeps the folder updated without requiring extra effort.)

Developing Your Playlist

Guess what? Now that you have a playlist, it’s time for customization!

ADDING SONGS

Want to add a song? Select one and drag it over your playlist name, in the left column. Easy as that!

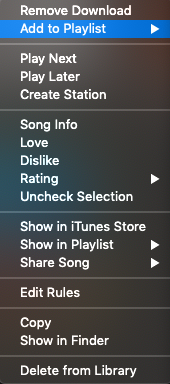
On the other hand, if you aren’t using MacOS, right click the song in question. Select “Add to Playlist” in the dropdown menu. Then, choose your playlist from the options given:

CHANGING PLAYLIST ARTWORK

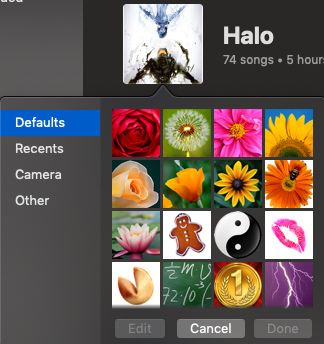
To change the playlist artwork, simply click the current artwork directly, at the top left. A new window will appear, from which you can search for another graphic file:

ALTERING PLAYLIST DETAILS

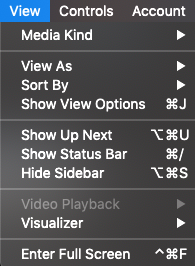
Select the “View” tab, at the top of your screen:

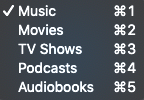
The three most important options are: Media Kind, View As, and Sort By. The first, Media Kind, simply tells iTunes whether its dealing with music, movies, or something else:

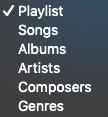
“View As” determines how you will see your song. Currently, the default goes to Playlist, which shows each individual song with artwork. Songs creates a list of songs; compact, better for ordering, but less visually appealing. The last four sections – Albums, Artists, Composers, and Genres – lump songs back into those categories.

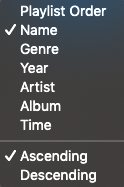
Sort By arranges music by either user arrangement, alphabetical order, genre, year, artist, album title, and song length. Within those categories, you can choose ascending or descending order.

Keep all these options in mind when making your playlist. There’s no right answer except what works for you!

Bonus: Changing Album/Song Information

Songs make playlists. Therefore, a thorough playlist guide deserves guidelines on how to work with songs and albums, right?

Of course!

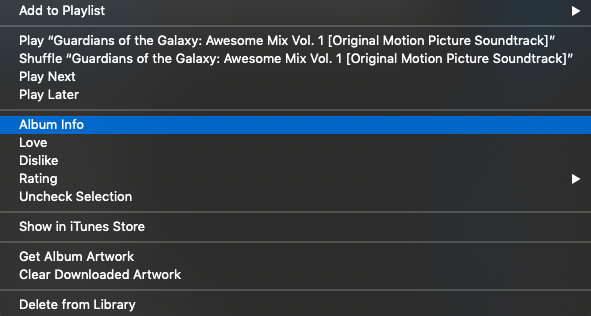
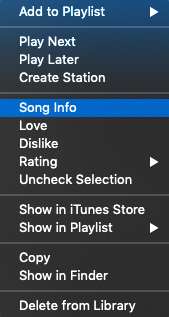
Right-click your song or album. The dropdown menus look slightly different, but both have an all-important “Info” button:

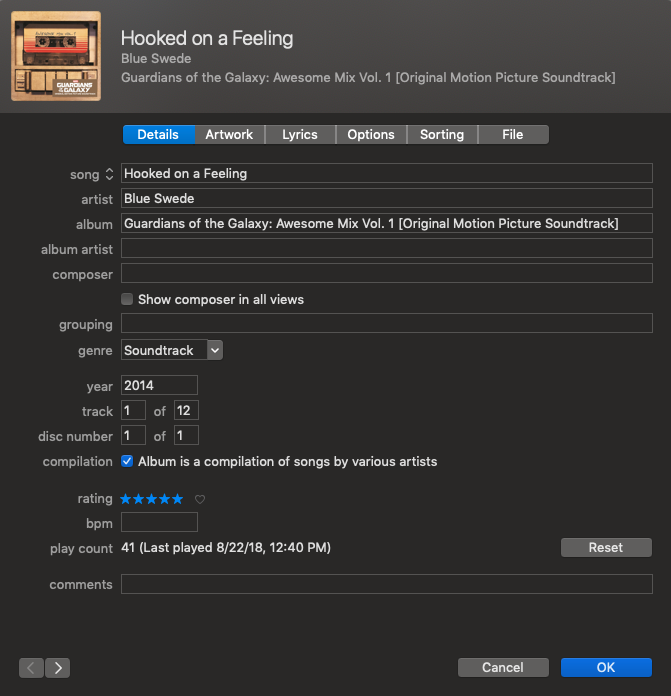
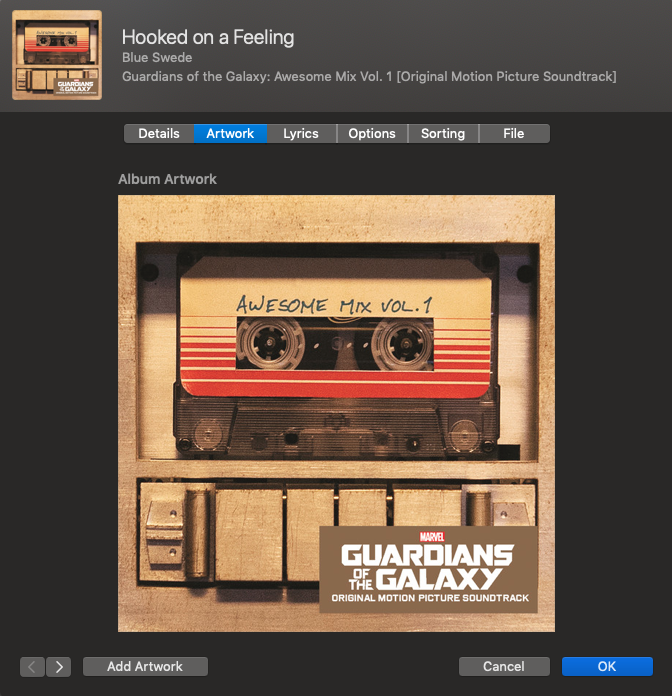
As an example, here’s the window for the song “Hooked on a Feeling” by Blue Swede, from the “Guardians of the Galaxy: Awesome Mix Vol. 1” album:
(Song and album windows look the same)

Let’s talk about the three most important tabs: Details, Artwork, and Lyrics. In the Details tab above, you may notice every piece of information from the title to ratings to BPM (Beats Per Minute). Many of these items can be adjusted right here! If you really want, “Hooked on a Feeling” can appear in your playlist as “Wizzle Wozzle,” composed in 1872 by John Williams.
It’s your playlist, we won’t judge.

Next up is Artwork! Why change the image for a song or album? Two reasons come to mind: CD’s often don’t load with the graphics, and more exciting artwork can be found elsewhere.

Pinterest FREE DOWNLOAD ►
8

Whatever the case, click “Add Artwork” at the bottom left to choose a new image. Consider deleting old artwork if you’re using a new one instead!

Next section: options.

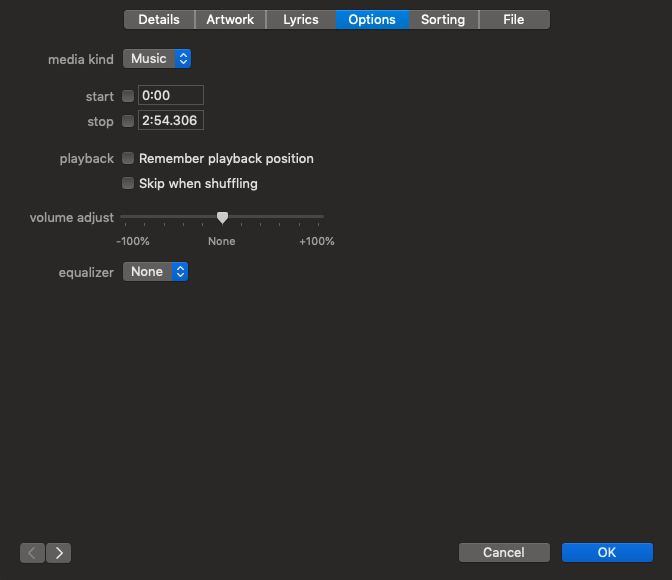
Want a song to start or stop at a certain time? You can control that here! Want the song to be skipped while you’re shuffling? Done! Is the song or album at a strange volume compared to others in the playlist? Adjust the level!

Conclusion

John Wooden said, “Small things make big things happen”. With a few easy clicks, you can set new and inspiring artwork for an album or fix offset volume levels within individual songs.

Thanks for reading, enjoy the tunes, and stay fresh!

How to save battery on your iPhone

Tips to make sure your phone always has juice when you need it.

iphone battery

Is your phone quickly losing battery and you’re not sure why? If so, there are a number of ways you can help preserve your iPhone’s battery life.

How to save battery on your iPhone

Update your phone’s software

Although new software updates can affect your phone’s battery life negatively, you may also experience battery drain from failing to update your phone whenever a new update is released. This is a good first step to take if you’re experiencing battery issues. A software update can often resolve bugs, glitches, and phone performance problems. To see if you’re due for an update, go to Settings > General > Software Update.

Restart your iPhone

If your phone has started acting a little buggy, try turning it off and on again. You should restart your phone about once a week. This may help to resolve any minor battery life issues with your phone.

Check your battery usage

This is a fast way to determine what is killing your phone’s battery life so that you can start preserving it. To check in on how your phone’s battery is doing, go to Settings > Battery. If your software is up to date, you should be able to see stats on your battery life and information on your battery’s overall health. The stats will show you your phone’s peak usage times, how much time you’ve spent on your phone overall, your battery life’s performance throughout the day, and which apps consume most of your phone’s battery life. From here, you may decide that you want to cut back on your usage of certain apps or even your phone overall.

If you want to view your battery’s health, click Battery Health. From there, your phone will tell you if your phone is operating at peak performance and the percentage of your battery’s capacity. If your phone is older, you’ll likely experience a drop in your battery’s capacity. That just means you’ll need to charge your phone more frequently.

Adjust your screen’s brightness

The brightness of your phone screen can greatly impact your phone’s battery life. Luckily, some simple adjustments can often save you a lot of battery power. First, use your finger to swipe up from the bottom of the screen to access your phone’s control center. From there, you can easily adjust your phone’s current brightness levels by dragging the slider down. You can also access this feature in Settings > Display & Brightness.

Throughout the day, to save power, you may want to adjust your brightness manually every time you go indoors or outdoors. So the next thing you’ll want to do is turn off Auto-Brightness (or True Tone for newer models) so your phone doesn’t go overboard on unnecessary screen brightness. Despite Apple’s insistence that Auto-Brightness conserves your battery, it may actually do the opposite. The location of this feature differs depending on the phone model. First, try going to Settings > Display & Brightness to turn off Auto-Brightness. If you have an older model, go to Settings > General > Accessibility > Display Accommodations to turn off Auto-Brightness.

Change Background App Refresh settings

By default, your apps are set to automatically update with new information, even when you’re not using those apps. While you might want some apps (such as your email app) to receive real-time updates, you might not care about others. To change your settings, go to General > Background App Refresh. From here you can either turn the feature off for all apps or restrict background updates to Wi-Fi only. You can also turn off any apps you don’t need to refresh in the background, such as your unused Stocks app. You can also access Background App Refresh by clicking on each individual app in your phone’s settings.

Adjust your Auto-Lock

There’s no need to keep your screen on if you’re not using it, right? Make sure to turn your screen off when you’re done using it to save battery power. To be safe, you can also adjust your phone’s Auto-Lock feature to save your phone’s battery. To do this, go to Settings > Display & Brightness > Auto-Lock (or Settings > General > Auto-Lock if you have an older phone). Select the shortest amount of time possible. If your phone has the latest software, you should have the option to set Auto-Lock at 30 seconds. If your phone isn’t up to date, you’ll have the option to set it at one minute.

Turn on Low Power Mode

If you’re trying to conserve your phone’s battery for a few hours until you’re able to charge it, activate Low Power Mode. To do this, go to Settings > Battery. Then slide the bar to turn on Low Power Mode. Note that doing this will reduce the number of functions your phone can perform. For example, it will stop receiving new mail or updating your social networking apps in the background.

WhatsApp is going to start ranking your friends!

WhatsApp will rank your friends’ status updates and then push the ones it thinks you’ll want to see most

whatsapp friends status updates

The WhatsApp Status tab is a strange old beast. It works much the same as Stories on Facebook and Instagram but is nowhere near as popular. Users can share what they’re up to via temporary messages filled with stickers, GIFs, photos, and more, knowing that their updates will disappear after 24 hours.

The fact remains though, that nobody uses the Status tab. It is always empty. If you add to this that the Status tab will be where WhatsApp begins showing ads, you can see that the messaging app needs to get more people using the Status tab if it is going to start making back some of the money Facebook paid for it back in the day.

WhatsApp Messenger Download WhatsApp ►
8

WhatsApp will rank your friends’ status updates and then push the ones it thinks you’ll want to see most

This is all just another example of just how much data these apps are collecting about our habits, and their efforts to use all that data to make money from us. The system works by monitoring all the status updates users interact with the most. It then uses that info to decide which status updates the user will see first. There are a lot more metrics that the feature measures, making it much more complicated than that.

Other things the feature will be keeping an eye on include contacts that the user interacts with the most. If you chat with somebody a lot, then their status updates will receive a higher score and you’ll be more likely to see updates from them. People you tend to ignore, will be pushed lower down the list.

Other factors include chats with a lot of media, including photos and videos, getting a higher score, and calls affecting the rating of a friend’s status update, too. If you call somebody a lot, then there is a good chance you’ll be more interested in what they are up to as opposed to people you’ve never spoken to before.

All of this works on your phone, so none of this information will be sent to the central WhatsApp servers for processing. Deleting WhatsApp and all its data will reset the Status tab should you reinstall it. Statuses will be shown in a chronological order until the app can gather enough data to start feeding you the statuses it thinks you want to see most.

How do you feel about WhatsApp ranking your friends? The testing is being done on iOS but it is likely the feature will come to Android, too. Many people complained when the likes of Facebook and Twitter started playing around with their timelines rather just showing updates chronologically. If WhatsApp wants to avoid annoying users like Facebook and Twitter did, it should at least offer the option to toggle the new ranking system on and off. Unfortunately, according to WABetaInfo who broke the story, there is no such plan in the pipeline.

Top 10 unknown Apple Watch S4 features

The Apple Watch can do more than you know. Take a look.

Apple Watch

The Apple Watch stole the show at Apple’s unveiling back in September and the S4 has captured the hearts (er, wrists?) of Apple Watch experts and novices alike. There’s been plenty of attention regarding the watch’s best features, particularly regarding how it handles and encourages health and fitness. The new watch even has an Emergency SOS function built in that might just save your life.

This article, however, is not about such things. There’s plenty of material out there telling you how to get your watch up and running, make the most use out of its many outstanding features, or how to use it to improve your health and fitness. Today we’re going to dive into some of the S4’s features that haven’t gotten as much attention. Here’s our list of 10 of them.

Top 10 unknown Apple Watch S4 features

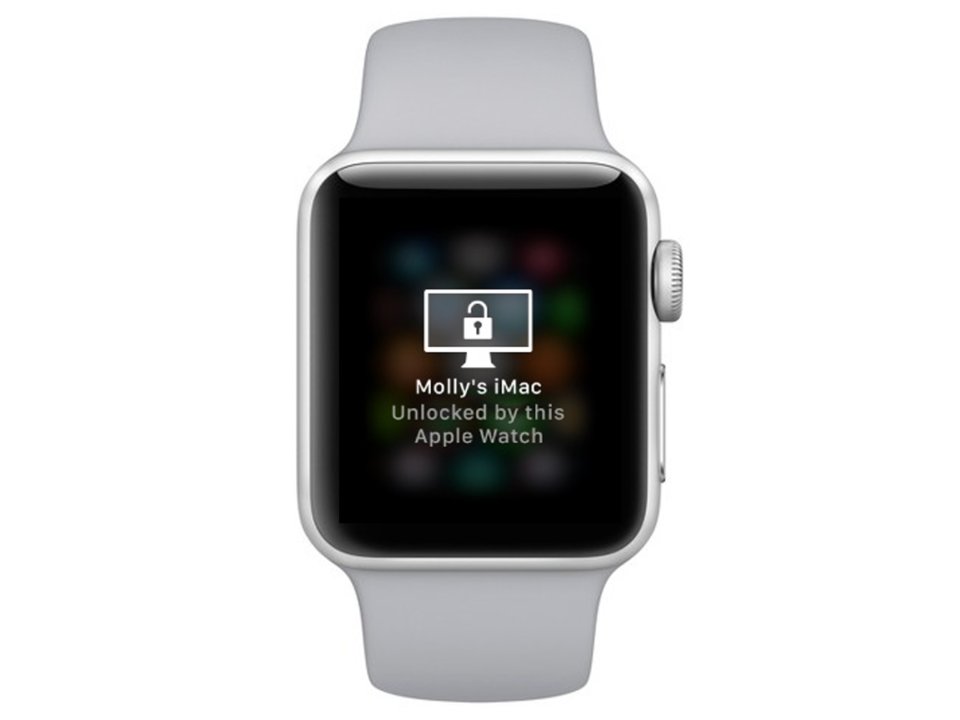
1. Unlock your Mac

One of the coolest things about Apple products is how well they work in harmony with each other. If you own an Apple Watch, odds are you also own an iPhone. If you own a Mac computer too, then you can make use of this neat little feature:

Save yourself the extra step!

When you boot up your Mac it’ll ask you to enter your password. If you’ve got your watch on, you can skip a step (as long as you’re at least running 10.12 Sierra)! To enable this, click the Apple menu on your Mac, go to your System Preferences, and click Security Privacy. From here enter the General tab and check off the box that says Allow your Apple Watch to unlock your Mac. Now you’ll be able to unlock your Mac without entering the password! Useful if you have a long password that’s easy to mistype, or should you need to give someone else access to your Mac, but don’t want to share your password.

2. Take Photos

Your phone can do it (duh), but did you know you watch can, too? There’s a Camera Remote app on your watch that can take pictures as long as you have the camera app open on your iPhone. Once it’s engaged, just tap the watch as the shutter button!

Now you can run around the house and pretend you’re James Bond. (We recommend using this in close tandem with the Walkie-talkie app for maximum coolness.)

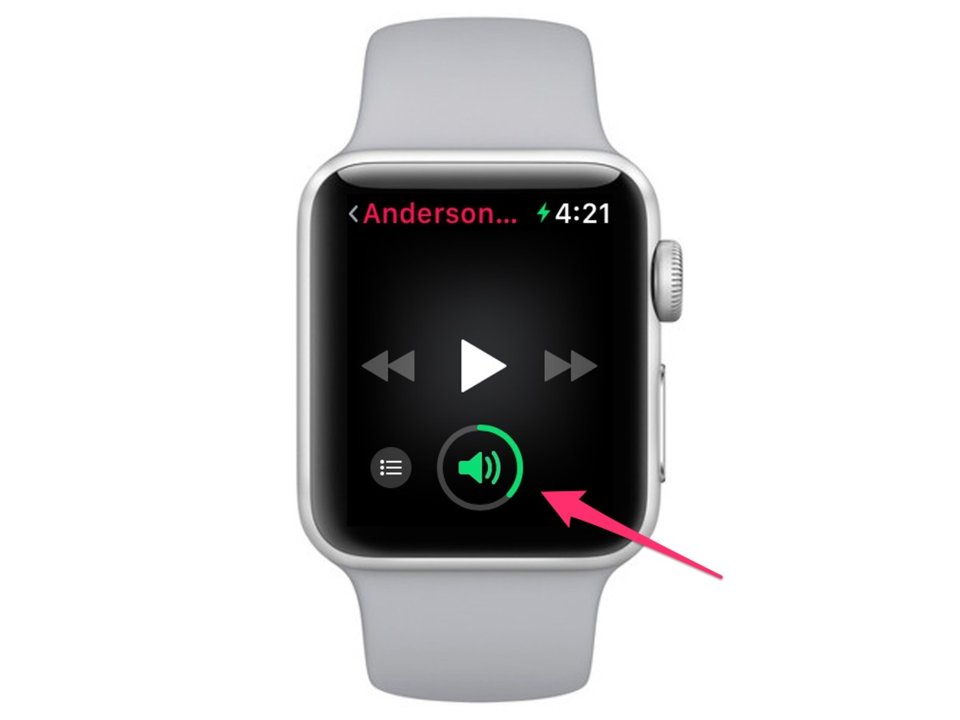
3. Set your airpod volume

If you use airpod speakers then this trick should come in handy pretty frequently. Once your airpods and watch are properly synced, all you have to do is twist the crown to raise or lower volume!

Adjusting volume on the fly was pretty awesome

If this feature isn’t working for your right away, be sure that your watch recognizes that you have music playing, and that both your phone and watch recognize the speakers.

4. Find your iPhone

Misplaced your iPhone? Don’t worry; you’re not alone. Fortunately, your watch can help you track it down. Using this function couldn’t be easier (which tells you something about how frequently this happens):

Everybody misplaces their mobile device at some point.

All you have to do is swipe up on your watch face and press Find iPhone. Your watch will send a ping to your phone, and it’ll let off a beep so you can locate it. If you’re in a noisy room you can also hold the button down to make it flash your phone’s LED light.

Just be sure you don’t accidentally lose both your phone and your watch. That would be silly.

5. Set haptic strength

Digging the haptic feature? Maybe not? Like it or hate it, you can adjust how strong the vibration is. Open Settings, and tap Sounds & Haptics, then switch it by pressing Prominent.

Cooler still, you can also adjust the strength of specific alerts. Go to My Watch, choose Sound and Haptics, then select the alert that you’d like to change the strength of. Now you can make your Snapchat vibrate at a different frequency than Facebook, for example. Useful if there are only some alerts you particularly care about.

6. Set your photos as your watch face

If you’ve got a lot of photos on your iPhone then this might just be your favorite tip on this list. There’s no better way to customize your watch face than by subbing in a picture you took of you and your friends, your pet, or a picture from that cruise you went on during your anniversary.

To enable this, open your iPhone and go to your Photos folder. Click the Share icon on the picture you want to use, then select Create Watch Face. When you’re done configuring and adjusting tap Add. A moment later, the picture will be available for use on your watch!

Have the picture on your watch but not your phone? Easy. Press down on the watch face, swipe left, and press New. Then pick Photos.

7. App quick-use

Using a specific app frequently? There’s a way to make it much more convenient, rather than having to keep opening up your phone, navigating to it, and then opening it. Open your Settings, tap General, then Activate on Wrist Raise. Then switch it to Open to the Last-Used App. Now all you have to do is raise your wrist and it’ll open right to that app!

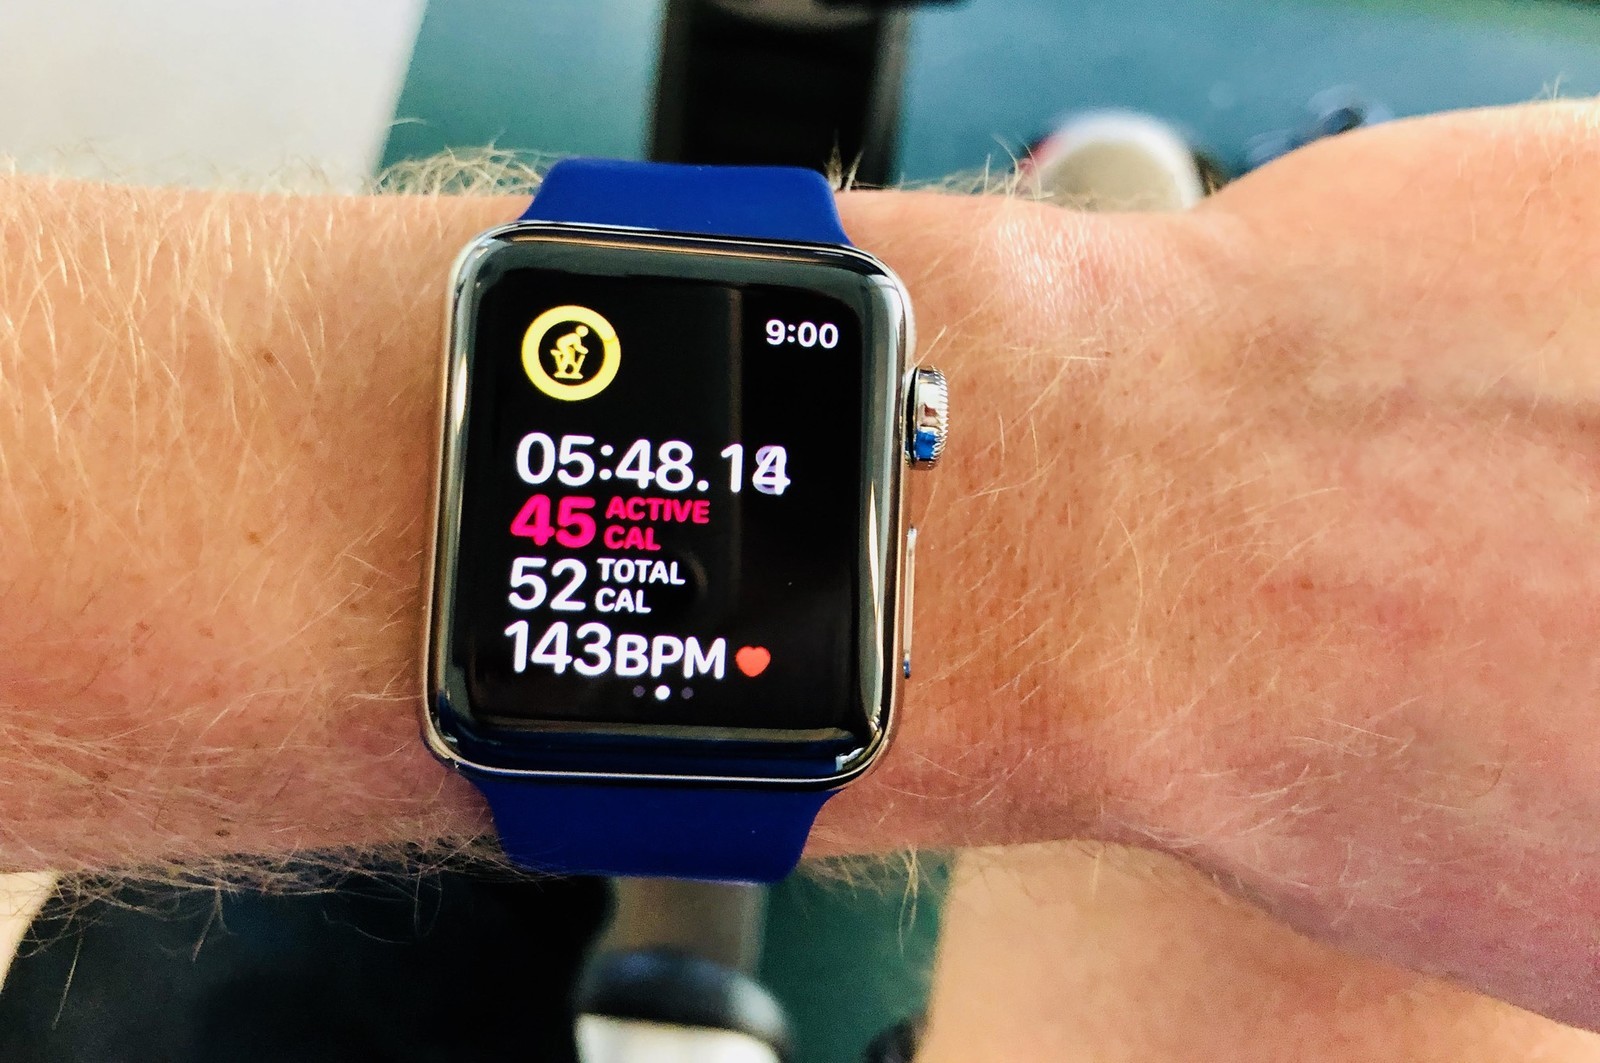
Navigating between apps while running was really annoying

This feature is really useful if you’re using an app like Snapchat, Camera Remote, or walkie-talkie where you don’t want to keep having to flip through screens just to get back to the app you want to use.

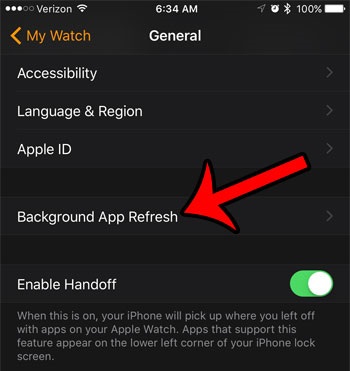
8. Disable background app refresh

By default, your watch always has certain apps running in the background. It’s useful for things like immediate updates, but can definitely eat up your watch’s battery life. Open the Apple Watch app on your iPhone, tap My Watch, then hit General. You should see the Background refresh option right there. Turn it off.

Honestly this should probably always be turned off

This setting is on your iPhone as well, so be sure to switch it off if you’re looking to conserve battery on it as well.

9. List apps instead of grid

The grid view is helpful for a lot of S4 users, but for those who prefer a more logical alphabetical list there’s a way to switch it. Press down on your home screen and once a message pops up select List View.

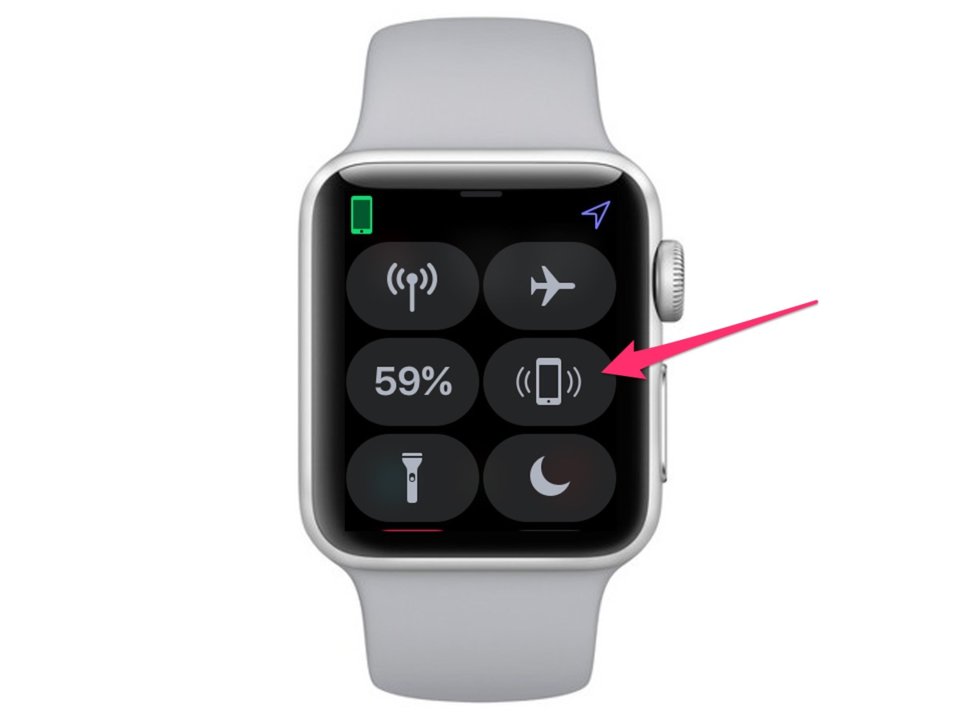
10. Quick-mute

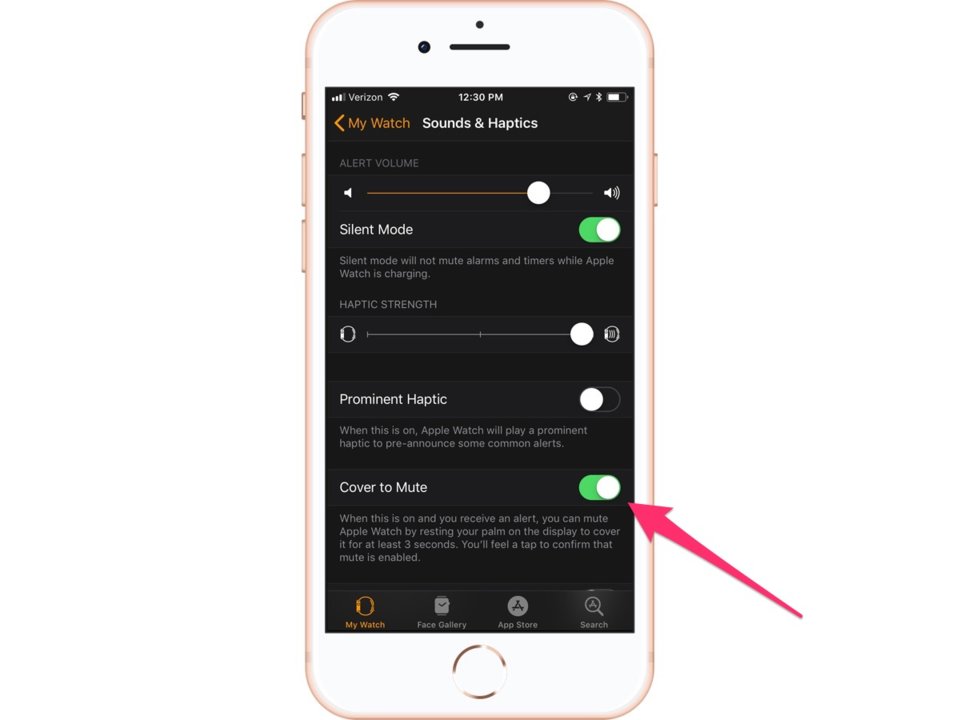
Don’t be that guy whose watch keeps beeping and making noise during a presentation or inappropriate moment. Go to My Watch, then Sounds & Haptics. Switch on Cover to Mute and now it won’t make any noise if you put your hand over it.

Cover to mute is useful if you need to silence with minimal warning

We wouldn’t suggest using this long-term – for that just keep it off or mute all sound. Rather, this is a little more of a niche function that’s helpful if you think you might need to mute your watch with minimal warning  – like during meetings, theater trips, funerals, or Sunday morning services.

Hopefully, this list helped you discover something new about your Apple Watch. Let us know in the comments below if there’s anything that we missed!

Best music app alternatives to Spotify

Find more music with these great apps.

Spotify

Spotify has dominated the music streaming industry over the last few years, and it’s no surprise why. It has one of the largest collections of music of any streaming app, and a lot of options on how to play this music. Despite this, its popularity lets it outshine some of its competitors that are actually better in some ways.

Best music app alternatives to Spotify

SoundCloud Free Download ►
8
SoundCloud is basically the social media version of music streaming, similar to what MySpace was back in the day. You can upload and share music easily for free, while also following many other users as well. The app is also not very ad heavy, and you have the option to pay to remove the ads altogether.
Pandora Radio Free Download ►
7
The second most popular music app after Spotify, Pandora is perfect for anyone who doesn’t want to make a playlist, and instead wants to listen to a radio station tailored directly to their music tastes. It’s great for choosing a radio station based on your mood, since you decide what kind of music each station plays.
Apple Music Free Download ►
8
With a huge selection of songs, and very little limitation in downloading any song you want to listen to, Apple Music is a great alternative if you are paying for your Spotify. It’s roughly the same price, but with more customizability when it comes to how you play your music offline.
iHeartRadio: Top Radio & Music Free Download ►
10
Similar to Pandora, iHeartRadio lets you listen to customize your own radio stations, as well as providing its own live radio stations.
Essentially the same concept of Spotify but with a different business model. While Spotify caters to record labels, Tidal caters to artists directly. This allows them to get some more indie artists, who potentially wouldn’t be on Spotify. It is worth checking out the free trial if you’re currently unsatisfied with your Spotify experience. Tidal was also created by Jay-Z, as an attempt to create a music streaming software that works well for both the consumers who use it, and the artists they sponsor.

For more great options, check out our Softonic Solutions page where our community suggests even more streaming services to choose from.

How to best organize Macbook apps

Don’t let clutter take over your desktop!

Mac

If you haven’t heard, Macs provide a tiering system for organizing your applications!

Much like a keyboard, which places the most-used letters by your pointer fingers, Macbook’s are designed to help arrange your favorite programs for easy access, with the rest waiting nearby.

Check it out!

How to best organize Macbook apps

Tier 1: The Dock

For many users, the dock holds their most important items:

Dock

This area should be reserved for applications you pull up constantly, often in conjunction with other applications. Unlike the desktop and Launchpad, all programs in this area will be available while using other windows, unless those have been maximized over the whole screen.

To put apps here, start by opening Launchpad:

Launch

Hold onto the app with your cursor and drag it over the dock.

Release, and a shortcut to the application appears!

Removal works much the same: visit the dock, grab an application, and then hold it over the desktop. After a few seconds, a “Remove” notification will appear. Release and the shortcut disappears.

It’s nice when things work in simple ways.

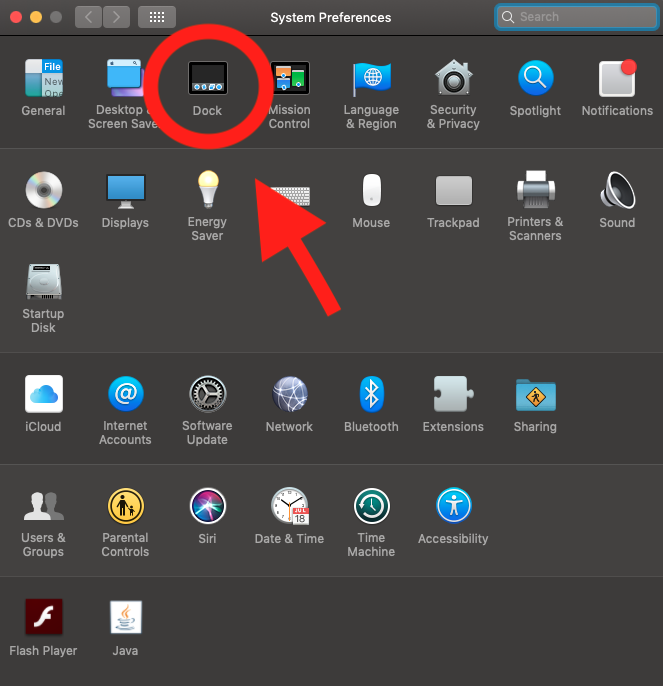
To improve your experience further, play around with the dock settings! Go to “System Settings” and find the “Dock” tab:

Prefs

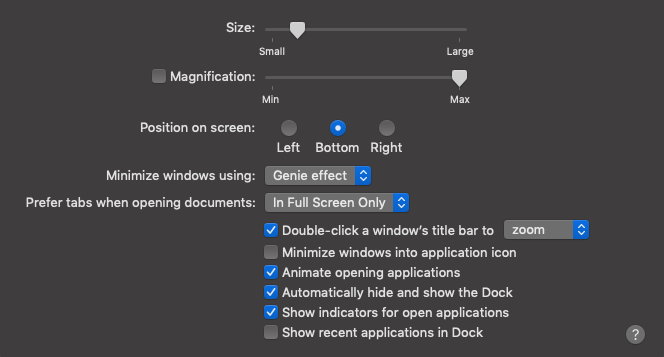
Docking

Here, you’ll encounter a number of useful features. There are classics like as “size” and “position”. Still, we especially enjoy the “Automatically hide and show the Dock”, which makes it disappear until your cursor scrolls over the Dock area. Try the options yourself and see what works!

Docking

The best feature

Tier 2: The Launchpad

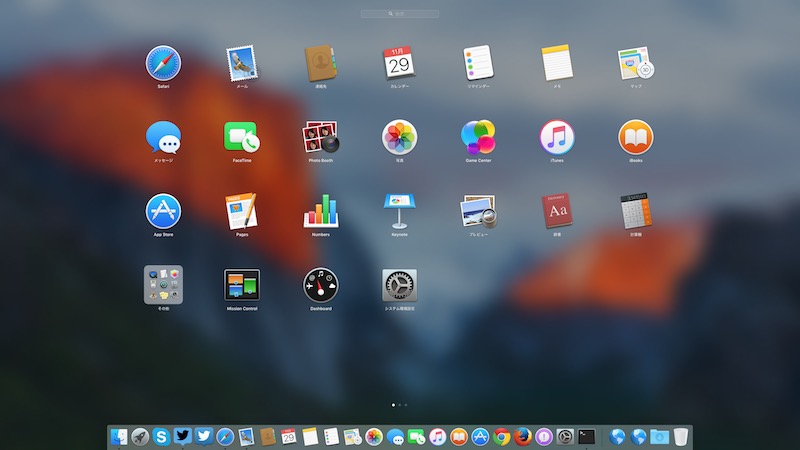
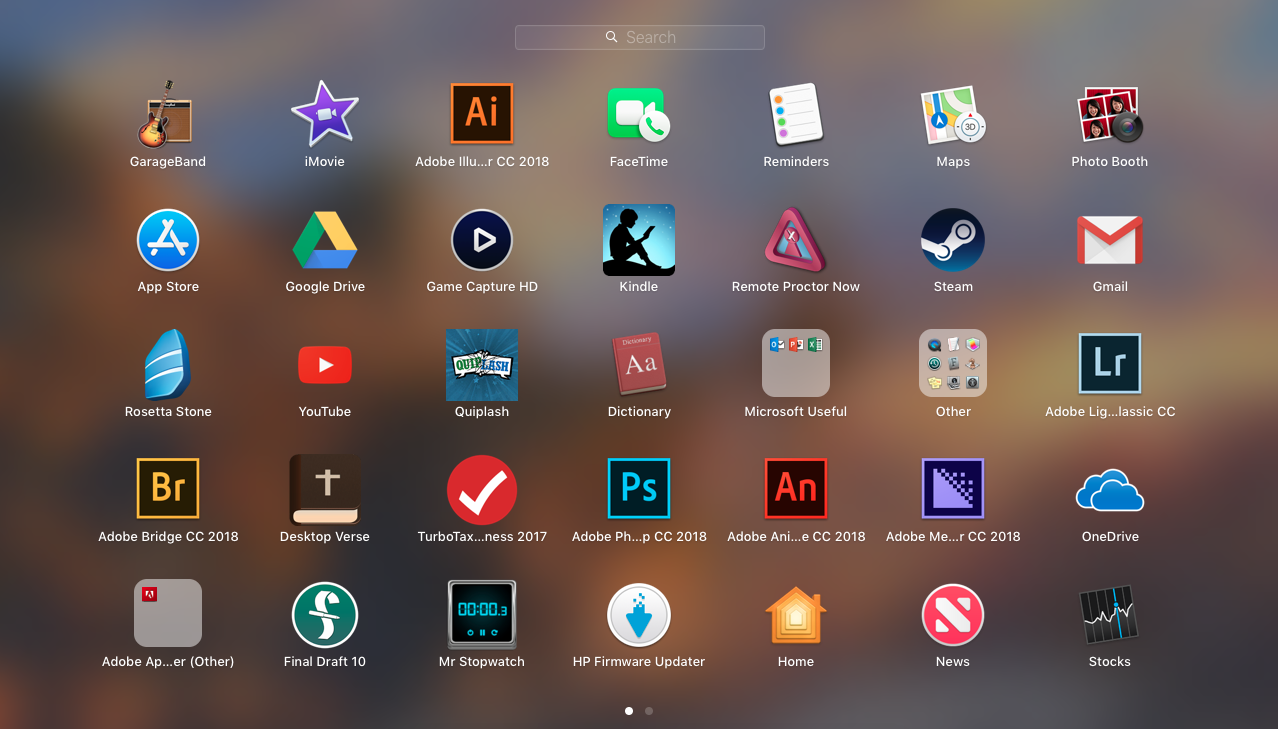
Launchpad offers a huge environment for any number of applications, only one click behind the ease and convenience of the Dock. Find that Launchpad icon once again:

You’ll be taken to the app environment:

Basic

Here, Launchpad holds the ability for further organization within itself. The function works much like an iPhone, so if you’re not familiar or would like an update, allow us to dive deeper.

First, you may notice a number of dots at the bottom of your screen:

This indicates the number of pages within Launchpad!

Pages can be organized. Flip between them using two fingers. Move apps on a page by holding the icon and dragging it around. Take apps between pages by heading to the far left or right. If you do this and no page exists to the right… a new one will be created!  By using these tools, you can design pages to fit your own style.

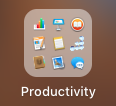
Finally: folders. Drag an application icon over another for a moment, and it gives you the option to make a folder, such as:

Productivity

As you can imagine, there are many options here: you could organize pages by type, or create a hierarchy of usefulness. You could use only one page, with numerous folders holding similar apps. Better yet, create some combination of the two! We have two pages, the first intended for our “more important” apps, which fell just short of the Dock:

Us

Tier 3: The Desktop

The desktop environment works great for links in general, but can host application shortcuts just as well!

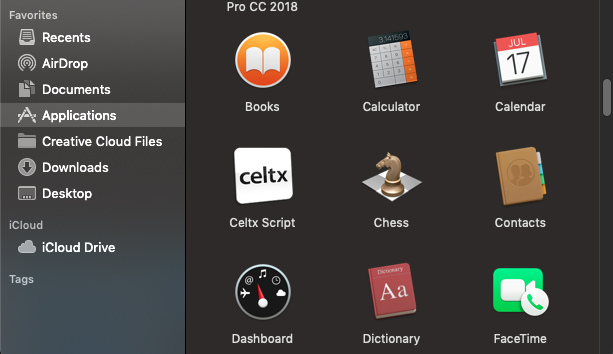
To do this, open Finder and select the Applications tab.

Finder

Finder2

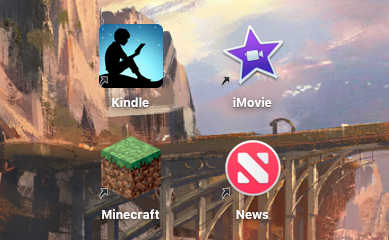
Grab an app and pull it to the desktop. Once you finish this, a shortcut appears!

Shortcuts

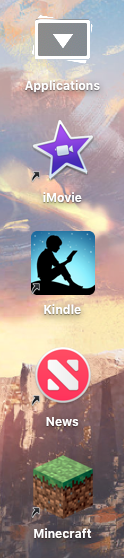
Note the small black arrow at the bottom right. This indicates the icon is a shortcut, not the full application. Thanks to that little arrow, you can delete a shortcut instead of removing the main app from your computer.

Bonus: The Stacks

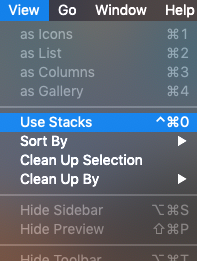
Mac update Mojave created stacks. From the main screen, select “View” at the top left and hit “Use Stacks”.

Stacked

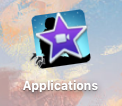
Your application shortcuts will automatically be packaged together in one folder:

Stacks

Simply clicking on this pile opens a dropdown menu with all your programs in one place:

More Stacking

Final Words

If you’re not sure where to put what applications, don’t worry: the more you work with a Mac, the more you’ll realize which programs deserve to be on the Dock and which should be left in Launchpad or on the Desktop.

Just remember to declutter from time to time, in case you stopped using one application or another! For example, if you switch to Mozilla Firefox, you may want to delete the old Google icon or vice versa.

The point is, we hope this guide helps you increase productivity and reduce complexity with a few simple, organizational tips. Thanks for reading!