Thinking of buying MS Office? Read this first

When Microsoft released Office back in 1990, few could’ve predicted its popularity today. There were 1.2 billion users in 2016. To put that into perspective, that’s around 16% of the world’s population. It might have the lion’s share of the market, but is it still good value? Let’s take a look.

To use Microsoft Office, you need a fat wallet. A single license costs at least $149.99, so for a family of four you pay almost $600. Of course, you could pay $9.99 per month for Office 365, but you’ll never own the software, and for many, it’s an unwelcome expense added to the monthly budget.
Aren’t there free alternatives? I hear you ask. Well, yes, there are cloud-based productivity apps from Google and Microsoft, and Apache’s OpenOffice if you want an offline suite. They provide a similar yet restricted feature set, but cross-platform file support isn’t great, and advanced users usually find them limiting.

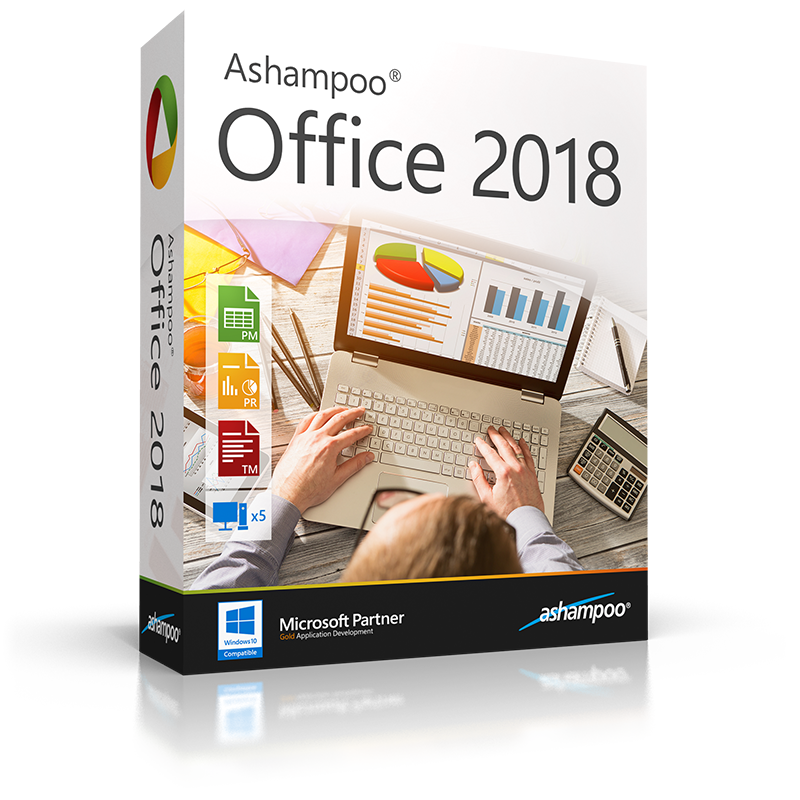
Thankfully, there’s a middle ground. For those wanting the best of both worlds – maximum performance and a low price – we recommend Ashampoo Office 2018 as the perfect mix of value and features.

The suite includes three key programs that mimic (and even excel) Microsoft’s most popular Office applications: TextMaker (similar to Word), PlanMaker (similar to Excel), and Presentations (similar to PowerPoint). Each offers similar features to those found in MS Office, but without the hefty price tag.
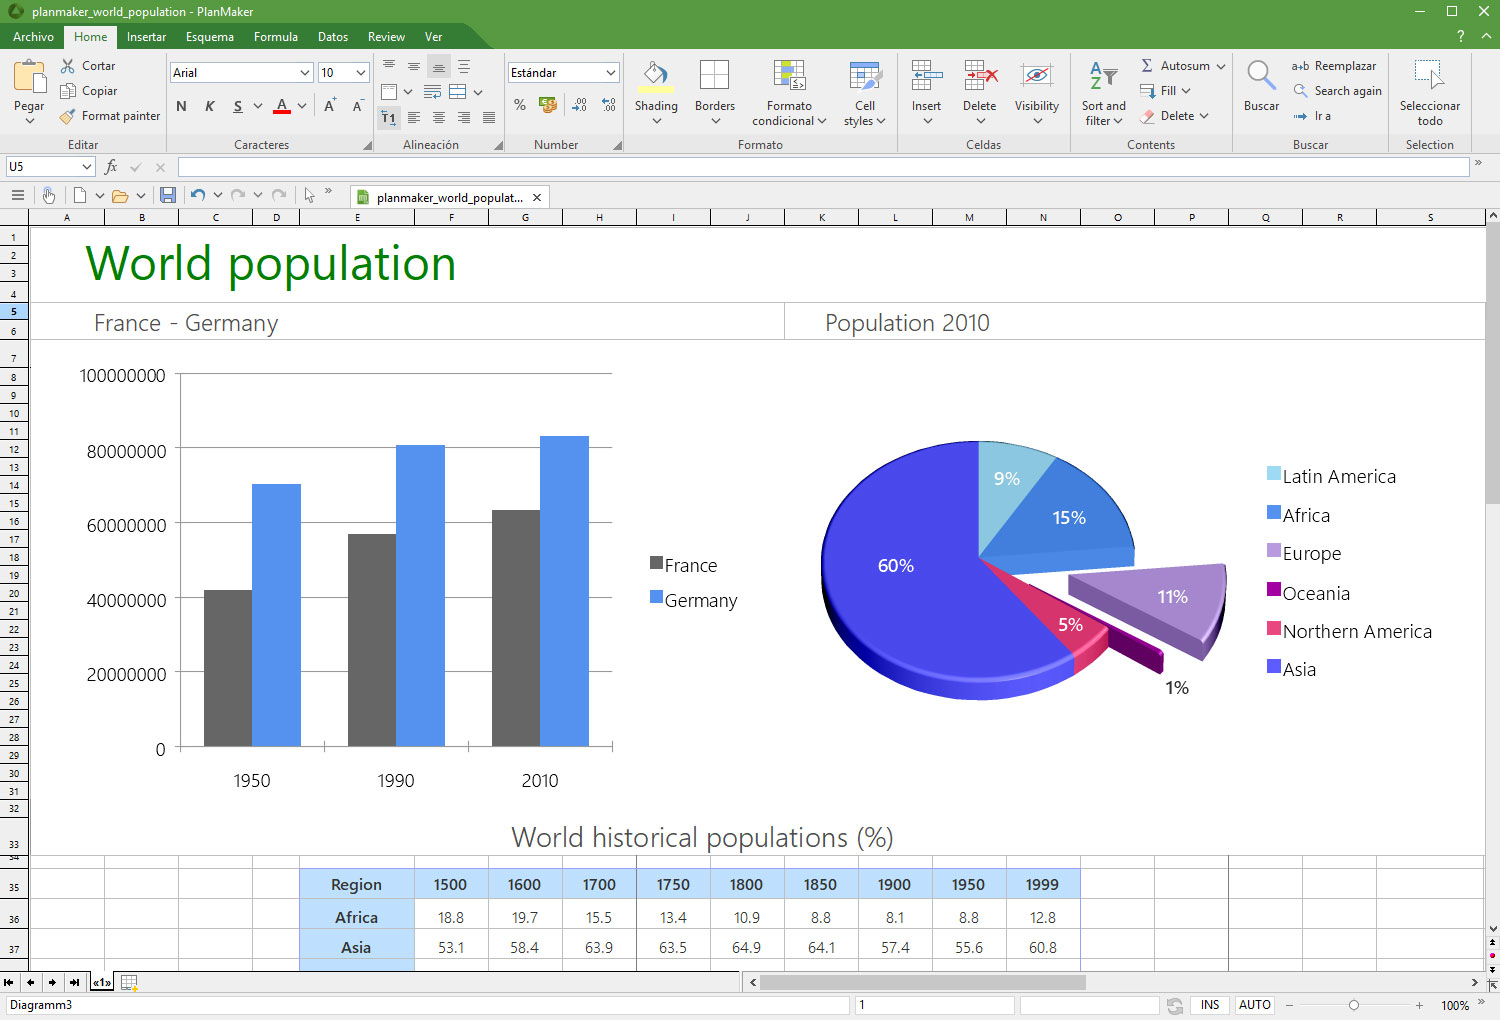
Ashampoo has spent a lot of time and effort perfecting the user experience, so there’s virtually no learning curve. The layout replicates much of what makes MS Office so simple – even the ribbon menu is there (though there’s a classic menu layout if you prefer the old style).

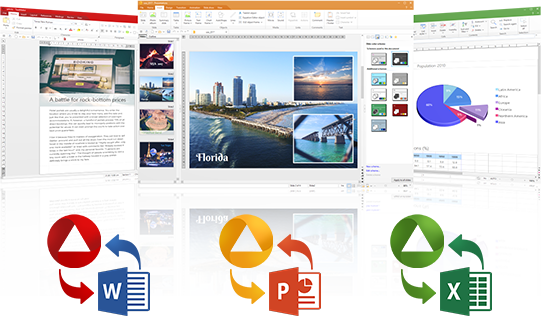
One of the reasons people are reluctant to leave Microsoft’s closed ecosystem is a fear of being unable to work with Microsoft files. Ashampoo Office uses MS Office file types by default, and supports legacy formats from MS Office 6 right up to Office 2016. So whether it’s a docx, xlsx, or pptx, Ashampoo Office works with them all, preserving content and formatting as if it were a native file.

You can also install Ashampoo Office on a portable flash drive, something Microsoft doesn’t currently support. Why would you need to do this? Well, if you’re switching computers all the time, such as hot-desking at work or university, having a portable version of the software saves installing it on other devices. Not all computers use MS Office, and not all alternatives support Microsoft files, so having a portable version of Ashampoo Office is a convenient back-up.
So what’s the price of Ashampoo’s powerful office suite? At the moment, it costs just $29.99 for a license on up to five devices. That means your whole family for a fraction of the cost of MS Office. So if you’re looking for an affordable office package that doesn’t skimp on features or cross-platform compatibility, Ashampoo Office 2018 is the one for you.

All the Best Free Software for your PC

You spend hundreds of dollars on your brand new PC, and then what happens? You have to go and spend even more money on all the software you need, to do the jobs you bought the PC for in the first place. Never mind what you bought the PC for you have to buy programs just to protect your new PC from viruses and malware.

Well, do not worry because there is a lot of free software you can get your hands on to help you out. You can get free software for Windows 10 you can get free software like Microsoft Word, you can get free software for editing photos, you can get antivirus free software and even free software for video editing. You don’t need to spend a lot of money on expensive programs for your new PC. There are plenty of free programs for PC so let us have a look at some of the best now:

Best free programs for PC

1. Best antivirus free software: Avira Antivirus

Avira header

Avira Free Antivirus offers a broad range of security features that add up to offer the best free antivirus software you’re likely to find. As well as strong antivirus scan and protection facilities Avira offers some great features like safe shopping searches, system speed up and a VPN. This is the best free software download for PC you’ll find and one of the most important. To learn more about Avira Click Here, otherwise…

Avira Free Antivirus Download Avira
8

2. Best backup free software: Google Drive

Google Drive wants to be the Ultimate Backup and Sync Tool

These days you need to do more than just install a free antivirus program to keep yourself safe. Ransomware is a modern threat that sees your data being stolen and then held for ransom. This means if you’re going to download free software you need some to get some backup free software for your computer. Free software downloads like Google Drive are essential. Drive will give you 15GB of free space to keep all of your personal data safely backed up. You need it now!

Google Drive Download Google Drive
7

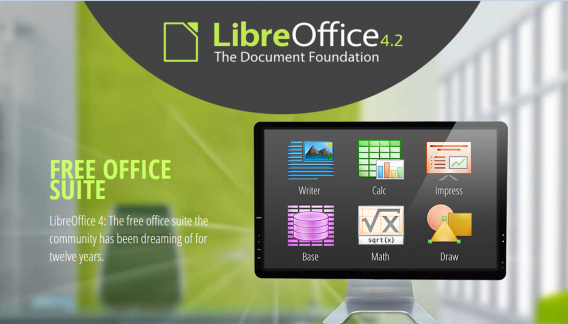
3. Free software like Microsoft Office: Libre Office

LIbreOffice header

Almost everybody needs to use programs like those found in the Microsoft Office suite so a top priority must go to getting the free software download for PC of Libre Office. Libre Office is an open source productivity suite that rivals Microsoft Office and even has programs, like Math and Draw, that can’t be found in the expensive Microsoft offering. If you work in an office this is an essential free program to download.

LibreOffice Download LibreOffice
7

4. Media Player: VLC Media Player

vlcHEADER

One of the best free programs for PC is VLC Media Player. It is one of the most popular programs in the world and carries the codecs required to play almost every kind of video file. Once you’ve downloaded VLC you will be able to play almost any type of video you can find. As well as offering a complete video playback solution VLC has plenty of other features and you can check out 5 of the best here.

VLC Media Player Download VLC
8

5. Free software for photo editing: GIMP

Do you want the photos you share to be breathtaking - GIMP

If you want free software like Photoshop you should look no further than GIMP. GIMP stands for GNU Image Manipulation Program and it is almost as powerful as Adobe Photoshop. With this free software editing becomes possible for all. Whether you’re merely touching up an old image or creating a brand new one, GIMP offers you a complete set of tools to take care of whatever editing job you have in front of you. GIMP may be the best photo editing free software but we’ve also put a list together of 5 free photo editing programs. Check it out here.

7

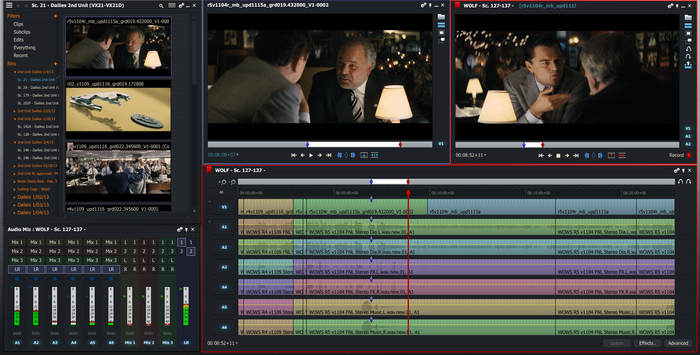
6. Free software for video editing: Lightworks

5 Free Programs for Editing Videos lightworks

Lightworks is available on many free software download websites but you can get it right here. It is one of the best editing free software programs you can get and is used by professionals as well as amateurs. If you’re a budding video editor or director this is great free video editing program for you to download. For info on other free video editing programs click here.

Lightworks Download Lightworks
7

Follow me on Twitter: @PatrickDevaney_


Five fantastic free alternatives to Microsoft Office

Microsoft Office is beyond a doubt the most recognizable productivity suite out there. But not everyone wants to invest in office software, so we have found you the five best free alternatives.

OpenOffice (Windows|Mac)

Perhaps the best known of our list is OpenOffice. This is a powerful package that provides four main applications: Writer (Work), Calc (Excel), Impress (PowerPoint), and Base (a management tool). All of these are great, but what makes Open Office standout are it add-ons that further increase its power.

LibreOffice (Windows|Mac)

LibreOffice is an off shoot of OpenOffice that is developed with the same ethos. It is a complete suite that continues to grow and renew itself thanks to the support of its ever growing number of followers. Though it is similar to OpenOffice, LibreOffice provides greater compatibility and a faster update cycle.

Google Docs (Web|iOS|Android)

You are probably already well aware of Google’s incredibly versatile online productivity suite. To use Google Docs all you need is a Gmail account to access Drive. From there you can store, manage, and edit all kind of documents for free, either through your browser or with the mobile apps. Best of all these all sync automatically, letting you continue working when on the move.

FreeOffice (Windows)

It may not be the most well-known on the list, but that does not impact FreeOffice’s quality. Offering TextMaker, PlanMaker, and Presentation’ll, you won’t feel like you are missing anything with this suite. In addition to this, it is fully compatible with all Microsoft file types and it is lightweight, making it perfect for older PCs.

Office Online (Web)

That’s right, a great free alternative to Office is Office… well, Office Online. Microsoft’s connected service that integrates OneDrive, slightly stripped back versions of Word, Excel, and Power Point, plus a few extras like OneNote and Sway. Each of these tools also integrates Skype to better facilitate collaborative work.

And there you have it, 5 apps to help you get productive without spending a cent. If you think we have forgotten any, just let us know in the comments

Next week we’ll talking about Chromecast apps. Subscribe so you don’t miss that, and I’ll see you then.

Related Stories

The best antiviruses of 2016

Top 5 battery saving apps for your smartphone

2016’s most anticipated games

Follow me on Twitter: @DoFuss

Office Tip: how to create a PowerPoint presentation from a Word document

If you need to make a presentation based off of something you’ve written, why not kill two birds with one stone and turn your Word document into a PowerPoint presentation?

When it comes to making a public presentation, PowerPoint remains the industry standard. Luckily, Word does the same for word processing software. Here, I’ll show you a little trick that’ll help you take advantage of two of Microsoft’s most used programs in its Office suite: converting a PowerPoint into a Word document (and vice versa).

1. Open a new PowerPoint presentation

Open a new PowerPoint presentation and then go to the Insert tab. On the left you’ll find the New Slide icon. Click on it.

Insert New Slide

2. Choose Slides from Outline

In the drop-down menu that appears, select Slides from Outline to import the contents of a Word document as slides.

Slides from Outline

You can also change the theme of the presentation using the default themes provided.

3. Select document

Select the Word document you want. PowerPoint will then import the different headings within the text, which have been formatted using the Heading styles. The images and the text of the document will not be automatically added to the presentation.

4. Copy & Paste

To finish importing the document, all that’s left to do is copy and paste the images and text from the Word document to the presentation. How? The easiest way is to have the two documents open side by side, and manually copy and paste the contents.

Word PowerPoint

5. Save as PowerPoint

All that’s left to do now is save the presentation in pptx format, PowerPoint’s default format. To do this go to File, then click Save as and then finally Computer. And there you have it, your PowerPoint document is finished and ready to be presented to your audience.

One last tip: To do this operation in reverse, that is to say, quickly turn your PowerPoint presentation into a Word document, click on File and then Save As. Change the output format and choose Outline / RTF. Once it’s saved on your PC, you can simply reopen the document and edit it in Word.

Check out some more Office tips:

Office Tip: add page numbers to your Word document

Office Tip: how to type multiple lines in an Excel cell

Office Tip: type faster by replacing one word with another

Office Tip: access your Word, PowerPoint and Excel documents online

Office Tip: use tabs in Word, Excel and PowerPoint

Office Tip: restore or minimize the Ribbon interface in Word and Excel

Originally published in French on Softonic FR.

Follow me on Twitter: bbrassart

Office Tip: type faster by replacing one word with another

Did you know that you can actually type faster in Microsoft with the Find and Replace function?

As part of our Office Tips series, I’ll show you a little trick that’ll help you type faster by replacing a few letters with a complete word using the Find and Replace function.

1. Specify abbreviations

Before typing up your document, you need to specify which abbreviations you want to use and for which words. In this example, I’ll shorten the term Softonic International to Sint and then replace it, once the text is written.

My advice: choose a set of letters that is unlikely to appear in other words. For example, you can type xxx for the phrase return on investment or any other expression that comes up frequently in the document. xxx is very quick to type, and that particular sequence of letters isn’t likely to appear in other words.

Of course, you can use multiple abbreviations to represent different words or phrases in a single document. This is even more effective when you need to type long words or expressions.

So, as you can see below, I chose to type in Sint for Softonic International. The term appears twice in the text.

sint Replace Word

2. Find and replace

Once the document is written, press Control + H to bring up the Find and Replace menu.

In the first box marked Find what, type in the expression that you want to replace– in this case Sint.

In the second box marked Replace with, enter the word or words you want to replace it with– in this case Softonic International.

Then hit Replace all to change all occurrences of the word in that document.

Softonic International

3. Replacements

A pop up menu tells you the number of replacements made. Click Yes to scan the entire document.

Replacements Yes Word

In this case, there were only two, and they’ve been properly placed.

Not only does this save time, it can also prevent spelling errors for words or names that you commonly misspell. And just like that, you’ll be able to write a text quicker and with less errors (hopefully).

In the next episode of the series, I’ll explain how to write multiple lines in a single Excel cell.

Check out all of our Office Tips:

Office Tip: Add page numbers to your Word document

Office Tip: Access your Word, PowerPoint and Excel documents online

Office Tip: Restore or minimize the Ribbon interface in Word and Excel

Office Tip: Use tabs in Word, Excel and PowerPoint

Follow me on Twitter: bbrassart

Office Tip: access your Word, PowerPoint and Excel documents online

If you happen to be away from home but need to access a Microsoft Office document, you can use Office Online. It’s a really practical solution for keeping all your documents close and editing them from any computer with an internet connection.

When I was a student, I always carried a USB stick with me. Today, if you look through my bag, you won’t find anything that resembles removable storage. These days, I edit my Office documents with Office Online, a Microsoft web app that synchronizes with the different programs in Microsoft Office.

Here’s how to use Office Online.

1. Save documents

Save documents to OneDrive so that you can access them later.

Once you’ve completed your Word document, Excel spreadsheet or PowerPoint presentation, click Save As. You’ll be given three options: OneDrive (Microsoft’s online storage), Computer (to save locally,) and Add a place (for using Office 365).

Choose OneDrive, then Sign in.

Connect OneDrive

2. Create a Microsoft Account

If you don’t have a Microsoft account, you can create one on this page. A Microsoft account includes your OneDrive storage, an Outlook email address, and the ability to sync your PC or smartphone with your account.

3. Connect to OneDrive

By connecting your OneDrive account to Microsoft Office 2013, you can save all your documents to the Microsoft cloud in just one click.

4. Access Office Online

How can you edit these documents on another computer?

Once you’re on another PC or Mac, open the web browser, go to the Office Online home page, click Sign in at the top right, and enter your email address.

Email Office Online

5. Log in

Enter your account details and log in.

6. Edit documents

This is where you will be able to edit all of your Word, PowerPoint and Excel documents. Select the icon of the program you want to open.

Then choose Recent documents on OneDrive, open the document you want, then edit it by going to Edit document, and then Edit in Word Online.

Recent documents Office Online

Edit in Word Online

You’ll find that the interface is very similar to Office 2013; the only difference is that it’s in the browser. Your documents will be automatically saved. In other words, when you’re back on your PC, you’ll be able to find the most recent versions of any texts, spreadsheets, or presentations you may have tweaked in the web browser.

Check back for our next office tips, where we’ll give you info about page numbering.

Related Articles

Office Tip: Restore or minimize the Ribbon interface in Word and Excel

Office Tip: use tabs in Word, Excel, and PowerPoint

PowerPoint: 6 essential tips for creating the perfect presentation

Follow me on Twitter: @bbrassart

Office Tip: use tabs in Word, Excel and PowerPoint

Over the years, I’ve learned a few simple tricks using Office, and none have come in handy as much as Office Tab. I can’t count the number of times I’ve dreamed of being able to use tabs with Microsoft Office. I was convinced that it was impossible to open multiple files in one window. Then, I discovered Office Tab.

How does it works? Once installed, if you double-click on a Word document while another one is already open, the program adds a tab to the Word interface instead of creating a new window.

The demo version is free for 30 days, and it comes in two versions: Office Tab, which is compatible with Word, Excel, and PowerPoint, and Office Tab Enterprise, which works with all Microsoft Office software packages.

1. Download and set-up

Download Office Tab and follow the installation process. In the Select products window, if you use an older version of Microsoft Office, check the first box only. If you’ve already purchased Office 2013, choose the second option, then confirm by clicking Next.

Office Tabs 2010 2013

2. Select destination

Select the destination path, then select the components you need: Office Tab for Word, Excel, or PowerPoint. I advise you all to install all of them since the files are small.

Office Tabs programs

3. Close and install

Close all windows in Word, Excel, and any other program in Microsoft Office before proceeding with the installation.

4. Customize

Finally, after installation is finished, Office Tab takes you directly to the Office Tab options control panel.

In this panel, you can customize how you’d like these plug-ins to behave. If you explore a little bit, you’ll find a few interesting features.

Office Tabs options

5. Access tabs

Below is a screenshot of Word 2013 before and after you install Office Tab. The second image shows the same thing, but with Excel 2013.

In any case, notice that the ribbon interface has been changed. A new section, located at the top right, appears on the screen. Tabs that allow you to juggle between documents are placed just below the ribbon.

Word with or without Office Tabs

Excel before and after having installed Office Tabs

Now, you can comfortably navigate Office with multiple documents in a single window using tabs.

Although the free trial lasts only 30 days, if you’re a big user of Office products (which let’s face it, many of us are), then it’s a great solution.

Related Articles

Office Tip: Restore or minimize the Ribbon interface in Word and Excel

How to restart Windows Explorer if it isn’t responding

The top 5 Skype voice changers

Follow me on Twitter: @bbrassart

Office Tip: Restore or minimize the Ribbon interface in Word and Excel

Microsoft Office remains one of the most popular productivity suites on the market. It contains almost every program you’d ever need to finish any paper, project, or assignment: WordPowerPoint, and Excel are all fair game. But one of the first things you might have trouble navigating is the Ribbon interface. The toolbar appears in all Microsoft Office apps, but can sometimes be hard to master. Here, I’ll show you how it works.

Ribbon interface

The Ribbon interface, a toolbar located above the document, sometimes acts a little funny: it’ll disappear, reappear, or maybe only display the names of each section.

Depending on your preferences, here’s how to minimize or restore the Ribbon interface.

1. Ribbon Display Options

To minimize the Ribbon, restore it, or change it to a different view, there is one button you need to know: Ribbon Display Options.

Ribbon interface options

2. Choose one of three options

There are three available options for the view of the Ribbon interface, depending on how you want to see it.

Ribbon display options

Auto-hide Ribbon is a full-screen view where the Ribbon is completely hidden. To see the options, you’re forced to click the top of the screen before you can do anything. This view is not for beginners, but better suited for keyboard shortcuts in Microsoft Office.

Auto hide

The second option, Show Tabs, actually hides the ribbon from view. Only the titles of the menus remain visible on the screen. To see more options, you need to click on the tab to show all of its commands.

Ribbon show tabsThe last option, Show Tabs and Commands, provides an extensive view of the Ribbon. I strongly advise using this view, unless your PC screen is really tiny. In that case, the second option would probably be better.

Show tabs and commands

3. Finding the Ribbon interface

If you’re having trouble getting out of Word or Excel’s full screen display, the view is probably set to Auto-hide Ribbon.

To make it reappear, go to the top of the screen. Click on the colored bar that appears transparent under the cursor, and the Ribbon interface will pop up again. By clicking on the Ribbon display options button, you can find the three view options mentioned above.

Blue ribbon interface cursor

Auto hide ribbon options

4. Restoring the Ribbon interface

More than once, I’ve accidentally clicked on the small arrow that minimizes the interface, located at the bottom right of the Ribbon. The Ribbon disappears, and it’s impossible to find a similar arrow to restore the Ribbon interface.

Ribbon display options

The solution? The Ribbon display options button once again. To recap, you need to go through the Ribbon display options button, and select Show Tabs and Commands.

Navigating the Ribbon interface? One less problem in Microsoft Office.

In the next article in this Office Tips series, I’ll show you how to open multiple documents in one window using Word and Excel.

Related Articles

How to restart Windows Explorer if it isn’t responding

How to automatically update drivers in Windows 7 and 8

How to add tabs to Windows Explorer

How to use screensavers as animated wallpaper

Follow me on Twitter: @bbrassart

How to open Excel files without Excel

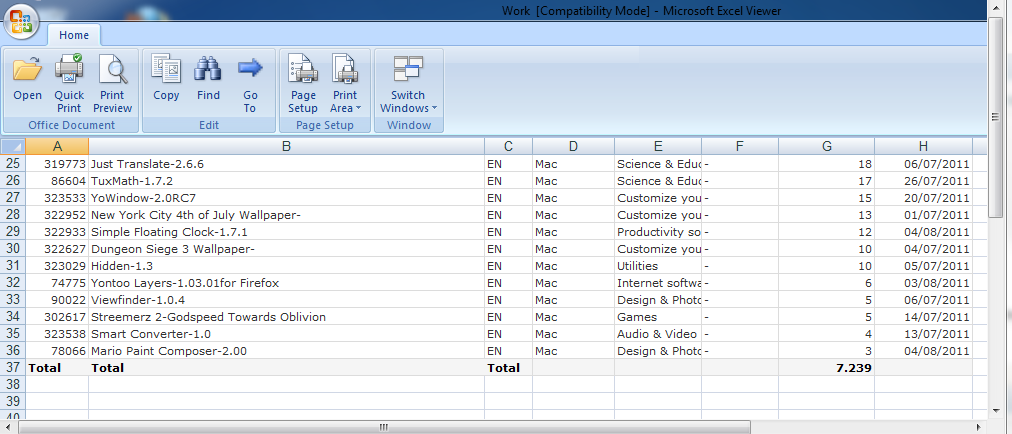
If you need to open an Excel document but don’t have Microsoft Office installed, then don’t fear – you can open them with Microsoft Excel Viewer.

Microsoft Excel Viewer is a simple application which allows you to open Excel sheets without Excel. Once installed, just double-click on the file you want to open and Microsoft Excel Viewer does the rest:

It’s just like using the real thing but obviously, there’s no editing of any kind allowed but it’s ideal for just browsing or viewing Excel documents if you don’t have Office or your Excel isn’t working.

If you need to edit Excel, you can opt for OpenOffice which is completely free to use and allows you to both open and edit Excel, PowerPoint, Word and many other formats although it’s much heavier and requires a longer installation process than Microsoft Excel Viewer. There’s also LibreOffice which you can read more about here.

Download Microsoft Excel Viewer.

How to: Create a photo slideshow in PowerPoint

You’ve probably had a few PowerPoint photo slideshows in your email already. They seem to be a popular topic for messages coming from friends and relatives with too much spare time on their hands. But have you ever tried creating one? It’s easier than you think, and it might actually be a good way to share pictures – just don’t abuse the slideshows with cute kitty images!

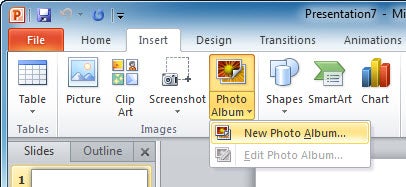
1. Open up PowerPoint, click the Insert tab and then the Photo Album button. Select New Photo Album to open the Photo Album settings menu.

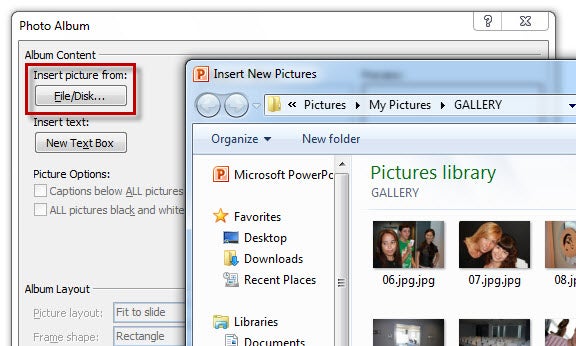
2. In this new window, click the File/Disk button to select the photos you want to use in your slideshow. Remember you can select multiple files simultaneously by holding the Ctrl key while selecting them with your mouse.


Continue reading “How to: Create a photo slideshow in PowerPoint”