Google makes an interesting change to Gmail’s Smart Compose feature

Google has removed gender pronouns from Gmail’s Smart Compose feature to avoid AI gender bias

gmail

Google has been pushing ahead and breaking barriers with its work bringing powerful AI to consumer products. Google’s Assistant grabs all the headlines with John Legend’s voice and the full-on human impersonating Duplex feature, but there are plenty of other Google products packing a powerful AI punch. Google Photos’ Live Albums show just how good AI features can actually be and Gmail’s Smart Compose can take the strain out of having to write boring emails all the time. The Smart Compose feature is now highlighting some of the advanced issues facing Google’s AI efforts as the company leaps forward.

Gmail Access now
8

Google has removed gender pronouns from Gmail’s Smart Compose feature to avoid AI gender bias

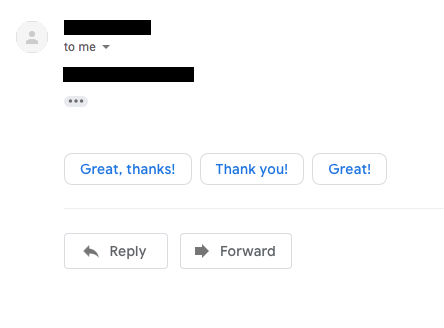
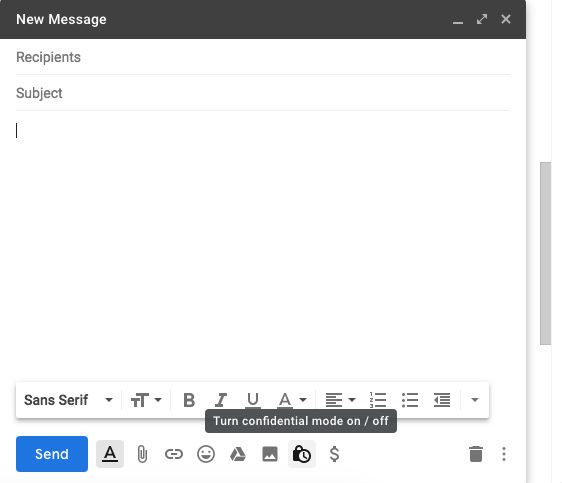
Smart Compose works by analyzing past emails and using them to predict what a user will say in the email they are writing. As if to show just how in-sync Gmail is with its users, Smart Compose can even go as far as finishing their sentences for them. This sounds great and, in many cases, it works without a problem.

The system isn’t infallible though as predictions can only ever be made based on the data that is being fed into the algorithm. If an email includes a gender-neutral word like “doctor” or “teacher,” there is nothing there to give Smart Compose an indication of what gender that doctor or teacher may be. If Smart Compose offers a pronoun like “him” or “her” in a predicted reply, there is a chance it will pick the wrong gender. That’s a public relations nightmare waiting to unfold.

This problem first came to Google’s attention back in January when a research scientist at Google was writing an email about meeting an investor. Gmail suggested the pronoun “him,” which wrongly assumed that the investor was male. Speaking to Reuters about the problem, Gmail product manager Paul Lambert said that he and his team had been working on a solution to the problem but that they couldn’t find a reliable enough answer to roll-out. This led to the decision to remove gender pronouns from Smart Compose altogether. Lambert was eager to show though, that this decision will affect less than one percent of all Smart Compose predictions.

The issue raises a fundamental limitation in how AI learns and improves itself. As all learning comes from past data, an inherent discrimination in that data will present itself in the actions of the AI. Even if it isn’t discrimination per se, there is no reason to expect that just because a data set includes more male investors than female investors there is anything to say that the current investor in question will be male or female. This provides a problem for AI developers who don’t want to be seen as perpetrating the biases found in the data they are using to train their AI. And it’s a problem for society at large as AI is given more and more responsibility over our daily lives.

For a relatively small issue like predicting email sentences, this is not a serious problem. As AI begins to do more and more jobs like sorting through job applications, however, a problem like this could be huge. With that in mind, it is important to remember that Google couldn’t fix this problem, they just removed the issue causing it.

How to use search parameters in Gmail to find that one lost email

Here’s how to find that lost email in a hurry.

gmail

Sometimes, it can feel almost impossible to locate an old email. If you have thousands of emails in your inbox, it can take a long time to go through them all just to find that one email that mentions the time and place you’re supposed to meet someone.

Luckily, Google has some tools to help you finally track down that one long-lost email. Below are some of the ways you can use search parameters in Gmail to locate what you’re missing.

How to use search parameters in Gmail to find that one lost email

1. Find a specific sender

If you want to quickly locate all the emails from a specific sender, use from: in the search bar, followed by the contact you’re trying to locate. For example: from:joe.

2. Find a specific recipient

If you send a lot of emails, sometimes it can be hard to find the exact email you sent someone. To aid in your search, try searching for the recipient of your email. To do this, use to: in the search bar, followed by the contact you’re looking for. For example: to:sarah. You can also locate a specific recipient by their email address. To do this, type deliveredto: before the email address.

3. Find an email from different senders

Not sure who sent the email you’re looking for? Try searching for emails from two different people by using OR or { }. For example: from:joe OR from:sarah or {from:joe from:sarah}.

4. Find an email with a specific subject line

If you know that the email you’re looking for has a specific subject line, try searching for that. You can do this by typing subject: followed by what you’re looking for. For example: subject:meeting.

5. Find an exact phrase

If you remember that your lost email has a specific phrase or word, put quotation marks around the phrase that you’re searching for. For example: “meeting on Tuesday”.

6. Find an email with a specific attachment

If the email you’re looking for has a Google Docs, Sheets, Slides, or Drive attachment, try searching for that. To do this, type has:document, has:spreadsheet, has:drive, or has:presentation in the search bar.

You can also find an email with a specific attachment by searching the file type or name. To do this, type filename: before the type of file or file name. For example, you can search filename:pdf or filename:classreadinglist.

7. Find an email from a specific time period

If you know that the email you’re looking for is before or after a specific date, try using that in your search. To do this, use before: or after: before the date. For example: before:2017/06/30.

How to add or remove inbox tabs in Gmail

Make Gmail look the way you want. Just follow these 4 steps.

gmail

These days, it seems like Gmail is continually updating its appearance. That can make it tough to remember how to add tabs that you’re missing or remove tabs you no longer want. Thankfully, we’ve got you covered. Read on for simple step-by-step instructions.

How to add or remove inbox tabs in Gmail

1. Open Gmail

The first thing you need to do is find the Google Sidebar in the top right-hand corner of your computer. After that, click the Gmail icon to open your Gmail. (Or, log in to your Gmail account.)

Gmail Access now
8

2. Locate your settings and inbox

Once you have Gmail open, locate the Settings icon. This icon can be found in the top right-hand corner of your Gmail. Once you’ve found it, click settings. After that, locate the tab that is labeled Inbox.

3. Change your inbox

Once you’ve located the Inbox tab, change the “Inbox type” section. The drop-down menu contains several options, but you will need to select the “Default” option. (However, if you want to hide all the tabs, you will need to select another inbox type.)

4. Select tabs

Finally, once you have changed the Inbox type to Default you will need to go to the “Categories” section. Once you’re in the Categories section, check the boxes of tabs you want to show. This means that you can add or remove any categories. In addition, you can also hide categories that you don’t want to show but that you don’t want to delete.

After you have finished adding and removing tabs, scroll to the bottom of the page. Then, click the “Save Changes” button to finalize all of your additions and removals.

It is that simple! In four easy steps, you can add and remove any tabs from your Gmail to make it look exactly the way you want it.

4 Gmail hacks you probably don’t know about

Gmail has tons of features you may not know about. Here are four of our favorites.

Gmail offers a ton of features for its users, and Google is continually improving them or adding new ones. Plenty of Gmail features are simply functions you’d expect — like having the option to customize your tabs or create multiple inboxes. However, there are some other things you can do in Gmail that aren’t so widely known.

4 Gmail hacks you probably don’t know about

1. Boomerang for Gmail

If you haven’t used Gmail with Boomerang, you haven’t really used Gmail. Seriously, this is a really cool add-on that can save you a ton of time and hassle — especially if you have any kind of business or side hustle going on.

Boomerang is Chrome extension for Gmail. Install it and you’ll be able to schedule your emails to be sent out at any time. You can also have an email re-sent to you. This second feature is great for those important emails you just don’t have time to deal with right now. Simply tell Gmail to send it again later, and you can go about your business without the risk of forgetting to come back to it.

2. Quick unsubscribe

You know how you normally have to go through this whole process when you want to unsubscribe from someone’s email list? Often you need to click through to some external site, where you have to explain why you’re leaving (and often endure some passive-aggressive chiding for your decision to unsubscribe). No more! Gmail lets you cut and run without all the drama. As soon as you get said unwanted email, click on the sender’s name and then select “unsubscribe.” Done and done.

Gmail Access now
8

3. Going back in time via Gmail

Ever send an email and immediately wish you could take it back? You can actually do that with Gmail. Set this up by going into your “Settings” and selecting “Enable Undo.” Now, whenever you send an email, you’ll have an “Undo” button that lets you cancel the whole thing out. You’ll have a very short window to retrieve the offending email (generally no more than 30 seconds), but still — it’s practically time travel.

4. Using Gmail offline

What? Checking your emails without an internet connection? Yes, that’s a thing. You can even respond to them (your responses won’t actually be sent until you’re back online, though). However, this doesn’t happen automatically. Access the offline section of your Gmail settings and select “enable offline mail.” You’ll need the latest version of both Chrome and Gmail to do this. Before recent updates, this feature was only available through a Chrome extension.

How to use the 4 best features in the new Gmail

Gmail just got better. Here’s how to use all the new bells and whistles.

Have you noticed that your Gmail updated? With the new update comes some pretty cool new features that will make your Gmail experience better than it’s ever been.

4 great features in the new Gmail

1. Snooze your emails

With the new Gmail update, you can now snooze your emails so that you can get back to them later. Before the Gmail update, the only options for your emails was to keep them unread or mark them as read and hope you remembered to get back to them later. This new snooze feature simply removes emails from your inbox and brings them back later. This feature will work very well for any email that you know you need to respond to but you don’t have time for at the moment.

Gmail Access now
8

To activate the snooze feature, first select the email you want to snooze. You can do this by pressing down on the email in the Gmail app to select it, or by checking the box to the left of the email you want to select when on Gmail in your web browser.

Once you’ve selected the email, click the clock icon that appears in the toolbar (below the search bar in your web browser). You’ll then be able to snooze the email for a specific length of time. Once snoozed, the email will then be moved to the “Snoozed” label in your account.

2. Smart compose

Have you noticed that Gmail will prompt you with some possible responses at the bottom of an email? This new predictive text feature will give you some possible responses to emails. In addition, this new Gmail feature can save you time when sending short responses. Now you can simply click the “Thank you” prompt at the end of an email and it will send it in response. For anyone who stresses out over how to reply to an email, the smart compose feature of Gmail is a godsend!

To use smart compose, simply click on the appropriate text bubble that appears at the end of an email, right above “Reply.” You can either send this message as is or you can add more text to the email before you send it.

3. Confidential mode

Now, emails can self-destruct after a certain amount of time, just like Snapchats. With the new confidential mode, you can select when your email will expire and delete itself. Of course, this doesn’t keep your emails completely safe as they can always be captured via a screenshot, but if you’re trying to keep a secret, this confidential mode is perfect. For example, if you’re trying to plan a surprise birthday party for your wife, you can send confidential emails so the birthday girl won’t be able to see them if she happens to look at your inbox.

You can use confidential mode whenever you compose or reply to an email. To turn the feature on, you’ll need to click the clock/padlock icon in the bottom toolbar of your email (to the right of “Send”).

You can then set an expiration date for the email or require a passcode. Hit “Save” and you’re good to go!

4. Notifications

Before the update, Gmail would send you notifications for everything. However, with the new update, you can select to only be notified for important things. On your computer, click the gear icon in the upper-right corner and select “Settings.” Under Settings > General, scroll down to Desktop Notifications. Then select “Important mail notifications on.”

To change your notification settings on the Gmail app, go to Menu > Settings and tap your account. Then scroll down to Notifications and click “High priority only.”

With so many great changes added, be sure to explore the new Gmail and customize it to your liking!

Gmail update: How to get the old Gmail back again

The Gmail update has brought a modern layout. If you don’t like the new design, this is how to go back to the classic Gmail.

The Gmail update has brought a modern layout. If you don’t like the new design, this is how to go back to the classic Gmail.

It is all happening so fast. Too fast. Why won’t the world just slow down? Or better yet, why won’t the world stop moving forward and stay the way it is now, just the way I like it. Updates and redesigns are starting to take the spring out of my step. I’m looking at you Gmail.

First, it was the Reddit redesign looking all fancy pants and modern. It just isn’t the same. Then as I was starting to get over that significant change in my life, Gmail followed suit. Well no, I’m taking a stand. I’m going back to the way things were. The way they should be. I’m going to make Gmail great again. If anybody else wants the old Gmail back, follow me, this is how to do it.

We can stick with the classic Gmail design, for now.

For now, at least, Google is keeping the old Gmail design around. This means that if we don’t like the Gmail update, we can go back to the classic Gmail design. Also, when we do go back, Google will ask us why we don’t want to keep using the new one. All we can say here is, try to be polite.

To get the good old Gmail design back open Gmail and click on the cog icon in the top right-hand side of the page. This will open a menu, and right at the top, you’ll see the option Go back to classic Gmail. Hit this and Google will ask your opinion on the updated Gmail design and why you want to go back to the old Gmail layout. Answer if you wish, but if you don’t just skip this and get back to the classic Gmail layout and get on with your life, for now.

Google laid out a timetable for migration from the old Gmail design to the new one. According to Google’s schedule, come October, everybody will have been moved across to the Gmail update. Google has explicitly said that people who have opted into the Gmail updatebwill lose the ability to opt out again. Anybody yet to opt in, at this point, will be forced on to the new Gmail design and won’t have the ability to opt out.

It seems then that the days of classic Gmail goodness are numbered. It is only a matter of time before Google takes away our ability to keep things the way we like them, or is it?

Remember the survey. Remember that Google will ask you why you don’t want to keep using the new Gmail design. If you genuinely don’t like the Gmail update, this could be your last chance to save the classic Gmail design. Tell Google that you much prefer the old Gmail layout over the new one. If enough of us do this then maybe Google won’t pull the plug on the classic Gmail layout we all know and love. With that in mind, remember possibly the most critical trick in this article. Try to be polite.


The best ways to collaborate in Google Docs

Want to start collaborating with other people on a project in Google Docs? Follow these easy steps so every member of your team can join in.

Google Docs provides one of the best word processing tools for free. Likely, its one downside comes from the need to connect online… but this also leads to one of its greatest strengths: real-time collaboration.

Before online collaboration, word processing documents had to be sent via email or flash drive to the other members. Now, a group can work together at the same time with a few easy steps!

Google Docs download free
8

1. Create an Account

Working in Google Docs requires simply creating an account. If you have a Gmail already, there’s no need to worry: sign into Docs with your usual email and password.

In fact… if you’re signed in to Gmail you may be automatically taken to the welcome screen of your fresh Docs page!

2. Create a Document

The top of the page should show various document types to choose from. Select any of these to start your new project:

If, instead, you see the “New” button shown below, you are in probably in Google Drive, not Google Docs. Don’t worry: Google Drive simply collects all your documents from Google Docs, Spreadsheets, and Slides. Aside from that, it performs most of the same functions.

That said, clicking the “New” button gives you the choice of creating a new word document, spreadsheet, or slideshow. Unlike Google Docs, it doesn’t offer pre-formatted templates.

3. In the Document, Hit the “Share” Button

The button should look something like this:

Tapping the button leads you to the share screen:

This is where you choose who to collaborate with. Any address can be entered, Gmail or not. You can choose whether or not that person can view, edit, or become the owner. Be careful with ownership, however: once ownership is transferred to someone else, you cannot get it back yourself.

4. Start Working

So, project invites have been sent! The email will include a simple and efficient link to the project. As long an account has editing privileges, the user can change things at the same time as others.

NOTE: you can tell when multiple users (or the same user on different devices) are viewing the document. An icon will appear at the top right for each device currently using the page.

Collaboration can now begin!

5. Moving Forward

From here on out, there are a few more tools that may be useful for your team.

First, the view mode:

Selecting this button allows you to choose whether you are editing, suggesting, or viewing. We’ll focus on suggesting: the suggesting option allows you to harmlessly enter changes which then appear as (pause for effect) suggestions! This can be useful for communicating in group projects.

If you need to leave a more detailed message, try the comment button:

Comments are attached to specific items – letters, words, or phrases – within the project.

Bonus Tip

You can add collaborators to a project or even an entire file from the main page of Google Drive as well. Clicking the “Add Person” button below pulls up the familiar “Share” window.

We wish you the best with your new project!


How to set up your Gmail account in Outlook

Lots of us use Outlook as a program to check our email. But did you know you can also use this software to read Gmail messages? It’s true! Today we’ll show you how to set up your Gmail in Outlook.

Enable Gmail

First of all, you must see if your Gmail account is enabled to send and receive email from other platforms. To do this, go to “Settings” and click on the field “Forwarding and POP / IMAP” (depending on the version of Gmail you have, it can change names). Once inside, check three areas specifically:

  • “POP Download” is enabled.
  • “IMAP Access” is enabled.
  • The size limit of folders has no limits .

That done, let’s hop over to Outlook.

Quick and easy

Once you have Outlook open, it’s as quick and easy as clicking on the icon of three lines at the top and going to the “Information” section. Here, look for the first option that appears: “Add account.” 

If you click on it, a pop-up window will appear where you can add your email address and password. After enabling everything in the previous step, the approval will take only a few minutes (and shouldn’t give you any trouble).

Congratulations! Now your email can find you wherever you go!


Your Gmail inbox is not as private as you think it is!

It probably won’t come as a big surprise, but Facebook isn’t the only big tech company sharing your personal data all over the internet. Google is doing the same in a somewhat shocking manner. According to a report in The Wall Street Journal (WSJ), Google is allowing third-party app developers access to your inbox so that they can read your emails.

Gmail app developers can read your emails
App developers have access to your Gmail inbox and can read your private emails

Google hasn’t exactly been hiding this practice, but it certainly hasn’t highlighted the fact. Talking to The Verge, Google said that it only gives access to vetted third-party app developers.

“The vetting process involves checking whether a company’s identity is correctly represented by its app, its privacy policy states that it will monitor emails, and the data that the company is requesting makes sense for what the company does.”

This means that Gmail app developers will get access to Gmail user data, which will include people’s emails, private details, who they’re writing to, and when emails were sent.

The real shocking revelation to come out of the report from The WSJ is that it isn’t just machines which are scanning for Metadata. Real people have access to the content of users’ emails and can read even the most private correspondence. User consent is required, but as always it is buried in confusing language. The example below shows an example of a consent form users receive. It shows that the app will have access, but there is no mention of human access.

Image via: Google

If you’re shocked by the revelation that strangers can read your emails and would like to review which apps have access to your account, you can do so here. If you’re not happy with the apps that have access to your Gmail, you’ll be able to revoke permission also.


Gmail notifications to be more useful and less annoying

Back at Google’s big I/O conference in May, Google made a small announcement that crept under the radar due to all the other big news. The company said it was going to try and improve Gmail notifications so that you’ll only get the useful ones you need, rather than be bombarded by everything that comes into your email inbox.  Google has now announced that this change is now available on iOS and is coming to Android soon.

Gmail Access now
8

Google claims that these new notifications will use Gmail’s advanced machine learning and artificial intelligence algorithms to learn which emails you may want to read first. If you’re an iOS Gmail user, Google has laid out the following instructions for you to try out the new high priority email notification setting:

“To enable the feature, select “High priority only” from the Notifications drop-down in the settings menu of your Gmail iOS app.”

Image via: Google

For anybody who feels overrun by the constant pings coming from their phone, this will be a great feature. If Google can get this right, there will be a lot of people clicking enable. This will be tricky to get right, however, as if it filters out essential emails it will be impossible to use and next to useless. We’ll be trying this new feature out over the next few days to see how it works, and keeping an eye out for an Android release date.

Let us know your thoughts on the important notification feature for Gmail in the comments below.