
5 games Myst fans will love

Find out why puzzle gamers need to add these titles to their list.

Myst

It’s been over 25 years since Cyan revolutionized the puzzle gaming genre with Myst. At a time where point-and-click adventure titles were leading the market, Myst was a clever first-person exploration game that centered around unlocking and traversing new Ages solving puzzles in order to correct a wrong made many years ago. If you’ve never played Myst, check it out here:

RealMYST Download
6
Uncover the secrets of the island

The gaming industry has exploded since Myst came out (way back in 1993!), and games of its ilk that blend easy controls with complex puzzles are few and far between. If you know where to look, though, there’s the rare gem that might let you relive the mind-bending puzzle of this classic game. Check out our list!
5. Prominence

Prominence hallway Letarri
Discover the fate of the Letarri

Prominence is similar to Myst in that it’s a first-person puzzle game with compelling character arcs, a captivating narrative, and a rich atmosphere that keeps you excited to see what’s waiting around the next corner.

It’s a very different setting than Myst (Prominence is heavier sci-fi and takes place on an abandoned spaceship), and relies more on listening to messages and hacking terminals to progress and gather clues. There’s even a text-based interface that makes you feel like a La Forge from Star Trek.
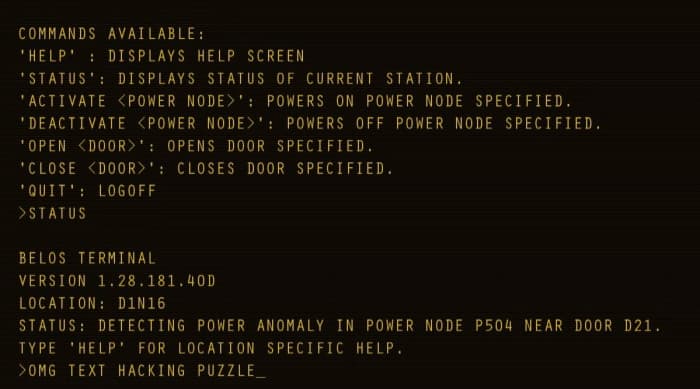
Prominence text hacking puzzle
“Shall we play a game?”

Some of the puzzles in Prominence are more difficult than others, but they’re arranged in a satisfying way; none feel illogical or forced. They all fit appropriately within the context of the story as it unfurls around you, and you as the character rise to meet them.

The soundtrack is exceptional, breathing life into the walking back-and-forth that might otherwise seem tiresome. If you want a more claustrophobic, space-faring Myst experience, Prominence will not disappoint!

4. The Witness

The Witness
Explore and unlock a rich, artistic world island brimming with mystery.

The tagline for The Witness is “you wake up, alone, on a strange island full of puzzles that will challenge and surprise you.” If that doesn’t sound like Myst nostalgia, nothing does! The moment you boot up the game and set foot on the gorgeous, expansive, island you’ll want to explore it fully. Thankfully there are over 500 puzzles to occupy your time, and bright, vivid colors to reward your travails.
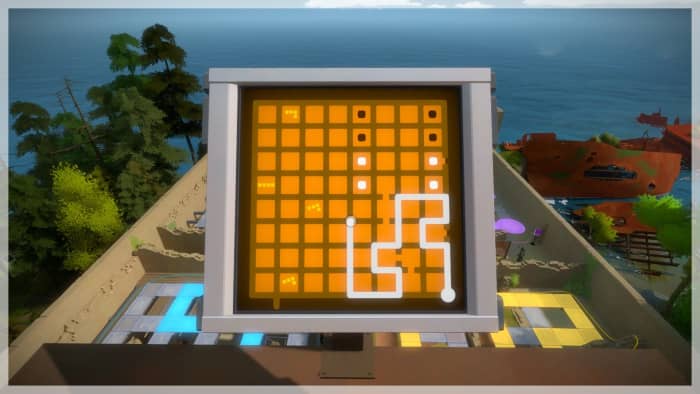
The Witness puzzle
Each small puzzle solved is a step closer to the truth.

The Witness differs from Myst in that in Myst the game was divided into separate Ages tied together with the theme of the island. The Ages of Myst all had their different quirks (using sound for Selenetic, or diverting water for Channelwood and Stoneship) that held the Age together and made it feel unique.

Conversely, The Witness is not a game where the player interacts with a puzzle per se. Rather you’re solving singular puzzles to make individual things work, kind of like Sudoku or crosswords. The game is still goal-oriented at its core, however, and you’ll still have plenty of incentive to explore new ground, discover new clues, regain your lost memory, and hopefully make your way back home.

3. The Room

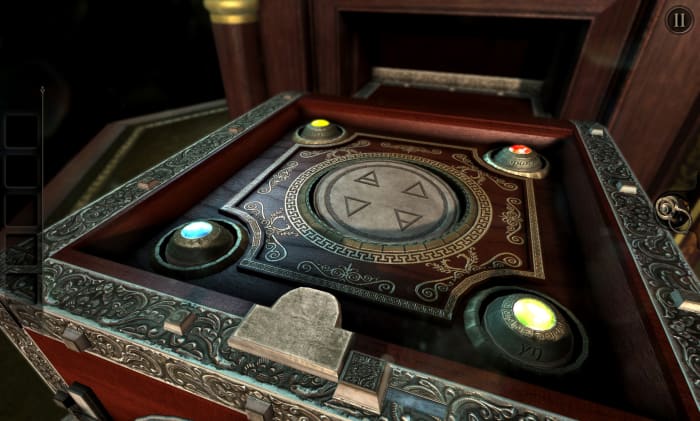
The Room color triangles panel
The Room has been gorgeously remastered for PC

Probably the most critically-acclaimed title in our list, The Room is simply a must-play, even for the less hardcore puzzle gamers. Why? It’s full of content, there’s a cohesive plot, the puzzles are delightful, the atmosphere is beautiful and dramatic, and we savored every moment of it.

The Room takes place in the steampunk-inspired attic of an abandoned house. A cast-iron safe looms ominously in the foreground and promises something wondrous and ancient concealed within. Can you figure out how to open it?
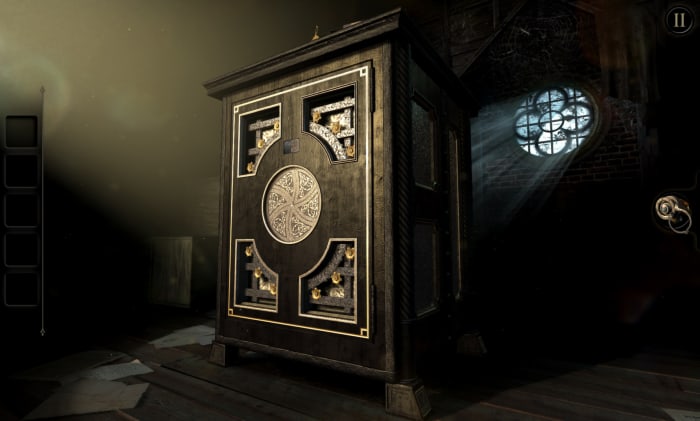
The Room puzzle box
Stuck? Try looking from a different angle.

The Room won a BAFTA and also spawned two more games, The Room Two and The Room Three, both of which also received overwhelmingly positive reviews on Steam. We’d say more about the game, but frankly, we don’t want to give anything away! Suffice it to say that all three games in the series are well worth your while, and we can’t wait for The Room Four!

2. Quern – Undying Thoughts
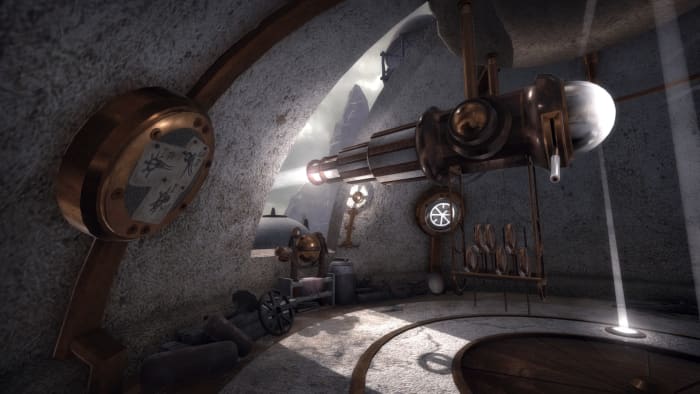
Quern light puzzle
Follow in the footsteps of the enlightened Professor Maythorn

Quern is one of our favorite games on this list because not only does it play like Myst (welcome back to an island full of unsolved puzzles!), it also looks and feels like it. The soundtrack and SFX are on point, and the UI is a step above and beyond the expectation.

As for its puzzles, Quern takes a different approach from most games. Rather than giving individual smaller puzzles like The Witness or wider, more macro puzzles like Myst sequels Riven or Exile, Quern teaches you mechanics that evolve and grow more complex as you explore further and further on the island.
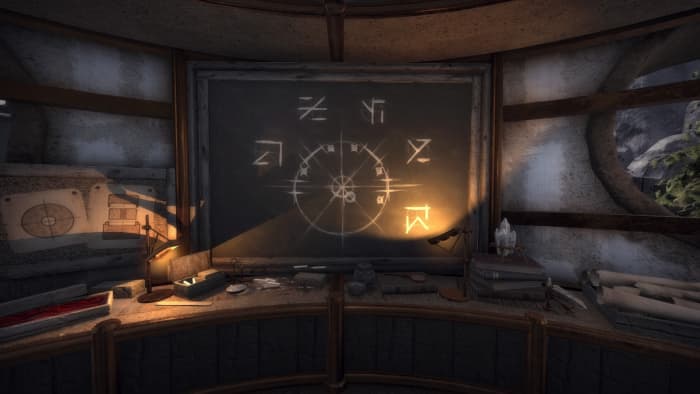
Quern symbols
Look important? Take a snapshot with your in-game notebook!

Early on you’ll also receive an in-game notebook that you can write in and use to sketch. While this system isn’t completely revolutionary, it is polished to perfection. Simply point your mouse and press a button, and a drawing of what you’re looking at will appear in your notebook for you to reference later on. It saves a lot of needless running back and forth that other games of the genre suffer from. After playing Quern, this was a feature we definitely missed in other games!

1. Obduction

Obduction Hunrath
Robyn Miller dazzles with an original soundtrack reminiscent of Myst

If you’re looking for the experience closest to Myst, look no further than Obduction. Not only is it another expansive first-person puzzle game, it was even designed by the same company! As such you’ll see a lot of similarities to Myst, including a lot of world-hopping, extraterrestrial encounters, and heavy use of tracks and trolleys.

Obduction was even scored by the same composer (the outstanding Robyn Miller) which adds another layer to the nostalgia factor for any Myst fan.
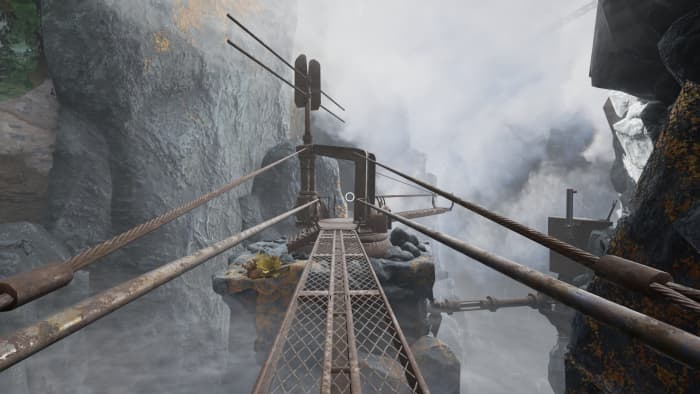
Obduction Kaptar
Explore alien planets and connect four different worlds

Similar to Myst, many of Obduction’s puzzles involve transporting between worlds, and the core of the game is finding a way to connect them to each other. That means you’ll be exploring a variety of memorable, colorful landscapes and vistas as you solve puzzles, open new doors, and uncover the secrets of what makes each location tick. If you love Myst, your collection simply isn’t complete without Obduction.

Riven
Riven still looks gorgeous over 20 years later

Lastly, it goes without saying that if you enjoyed Myst you should definitely give the sequel games a shot. Myst grew into a six-game series and if you’re like us you’ll be happy to see similar themes (Atrus, linking books, Ages, and puzzles galore) as you go through. As for other games worth your while, you might also want to put Discolored and Memorrha on your Steam wishlist. They look to be similar games as well, and both are coming out later this year!

In the meantime, let us know in the comments below which of these games in our list is your favorite, and stick with Softonic for more Myst!


6 leveling tips for Marvel Ultimate Alliance 3

Follow these tips to level up your team even faster!

Marvel Ultimate Alliance 3

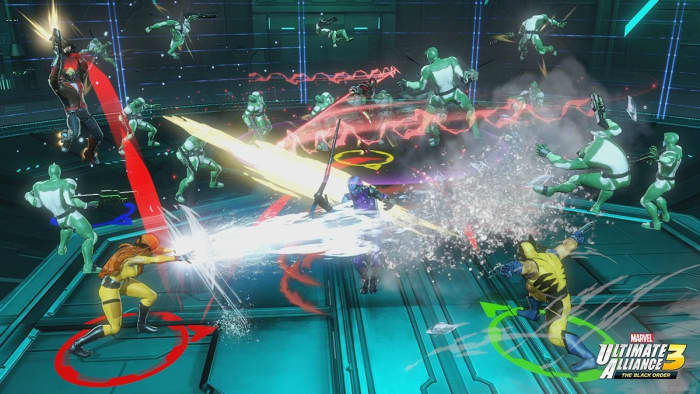
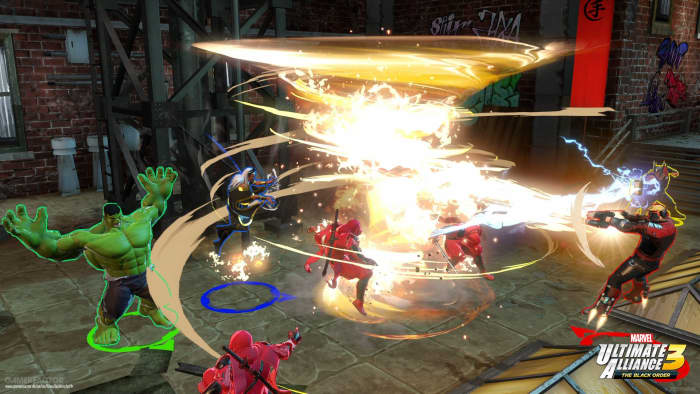
Marvel Ultimate Alliance 3 has been out for less than a month and there are already over 35 characters available. That’s a lot of spandex and emotes to keep track of, especially if you’re trying to keep your whole cast around the same level. That’s not even getting into the upcoming DLC (the first of which drops August 30 and will be adding X-Men Colossus and Cyclops) and Season Pass which will include three more packs of characters.

MUA 3 might be as grueling or gritty as Dark Souls or the Witcher, but it’s still designed by Team Ninja, a company infamous for making challenging games. This one is no exception, and a team of low-level characters, no matter how well-balanced they are, can still get pummeled in later chapters or higher difficulties. Keeping your team at a respectable level is the easiest way to get through unscathed, so we’ve put together six tips to do just that. First, however, it’s time to answer an age-old question:

Is it better to stick with one team, or play as everybody equally?

The adventure kicks off with the Guardians of the Galaxy, and if they’re your favorite Marvel crew, you may be wondering why you’d ever want to switch to anybody else. Or maybe you found a team of high-level characters later in your playthrough and you’ve formed a super-team that’s way more adept at handling baddies than your sadly under-leveled starter teams. Have they seen the last of their useful days?

Marvel Ultimate Alliance 3 Psylocke
Psylocke comes in around mid-game. Use her and Nightcrawler to boost up your low-level characters!

Of course not! Variety is the spice of life, and swapping teammates in and out is what this game series is all about. It’s not just for the sake of keeping the game fresh, either; certain characters (and character combinations) provide you with very different bonuses and perks than others. Depending on what you’re up against you may find your usual team of four is struggling, even if they are a higher level.
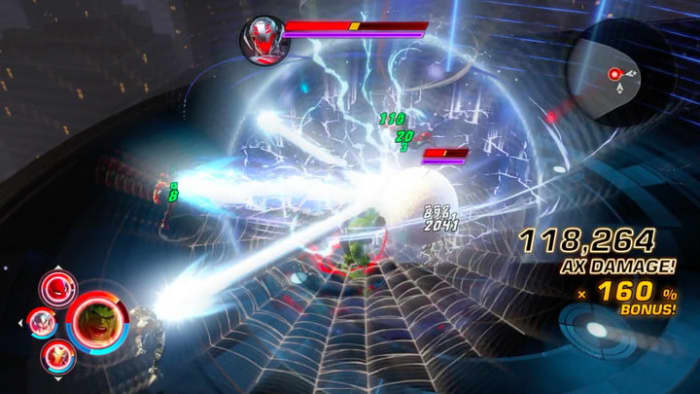
Mastery vs. Strength

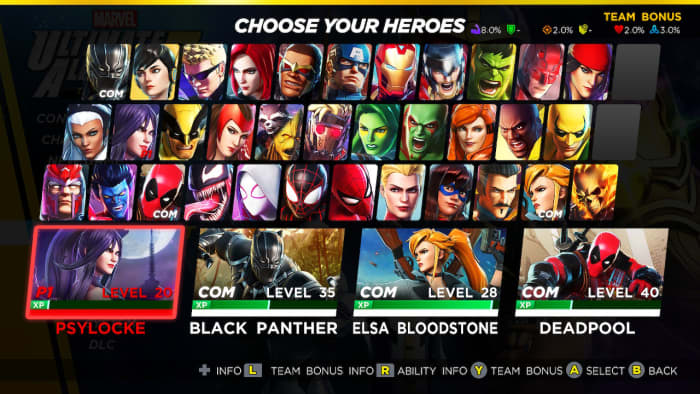
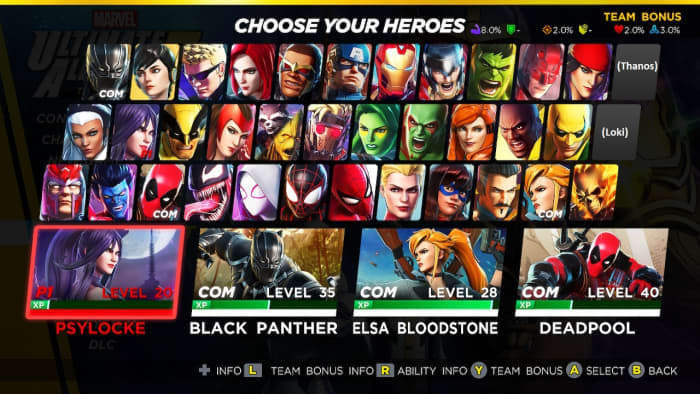
In the end, your success is dependent not on how hard your team can hit, but what it is they’re hitting with. If you find you’re not doing enough damage with a team comprised of Hulk, Black Panther, Ms. Marvel, and Elektra it might be time to go for a team that’s less strength-heavy. Try something like Ghost Rider, Doctor Strange, Elsa Bloodstone, and Scarlet Witch. You may find that Mastery-based characters (plus the nice 10% Mastery team bonus they get) will make your job way easier.

Marvel Ultimate Alliance 3 hero select
This team’s got a good blend of Mastery and Strength-based attacks.

Likewise, if you find you’re dying really quickly try and up your Resilience (if you’re up against energy or magic) or Durability (if you’re up against bruisers or bullets). In the end it’s combining damage types and defenses, and stacking them with appropriate bonuses and ISO-8 that makes a formidable team. So how do you level this team up?

1. Play Rift Challenges

The best place to level up is Rift Challenges. They’re tough, they’re grindy, and they can be outright frustrating, but the rewards are well worth it. Don’t be afraid to try Rifts that are a little above your level; it may take you a few tries, but you’ll be rewarded extra XP for taking down opponents with a higher level.

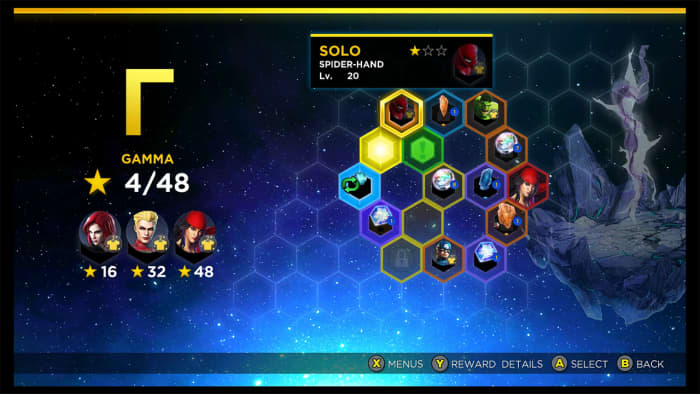
Marvel Ultimate Alliance 3 Gamma Rift Spider-Man challenge
Don’t forget that you’ll only keep your new level if you beat the challenge!

We’ve found the best mission for farming XP is the level 25 Rush challenge in the Psi Rift: You’ll deal (and receive!) extra damage as the timer counts down, which means that as long as you’re good at dodging you’ll be able to clean house even if the bad guys have a ton of health.

2. Use XP cubes

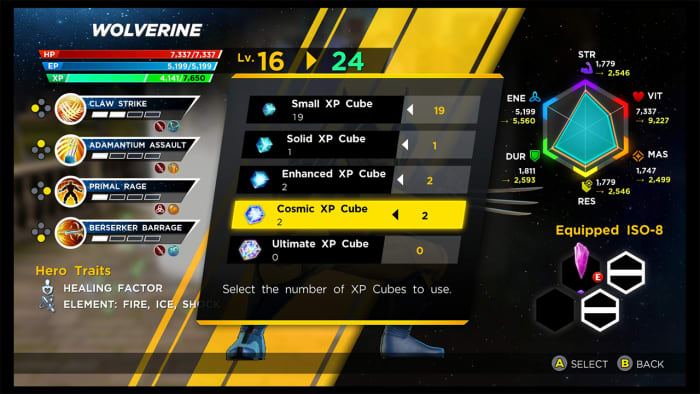
The game rewards you with all those XP cubes for a reason – sometimes a character just falls behind, even if you play as them frequently. If you want a character to join you but they’re just too low-level to fight by your side, you might want to spend a few XP cubes on them to get them on par with the rest of you.

Though it may be tempting to hoard your cubes, it’s better that you don’t; less powerful cubes won’t be as useful once your characters hit higher levels.

Marvel Ultimate Alliance 3 XP cubes
Don’t be shy about using cubes on heroes who need it!

That’s another reason we like the aforementioned level 25 Ruch Challenge; each time you complete it you’re rewarded with small XP cubes. So really you’re leveling up characters and gaining cubes to be used on leveling further.

3. Return to old ground

If you’re tired of grinding in the Rifts you might still be able to squeeze a few levels out of the game’s campaign. Boss fights and tough encounters will reward a decent amount of XP, and if you missed a hidden box earlier on you can break it on your return trip for some free XP cubes.

Replaying easier missions but cranking up the game’s general difficulty can also be a good way to fine-tune your comfort level.

4. Mix your teammates’ levels

If you’re trying to raise your old characters to match the level of your new high-level characters, intuitively you’ll want to avoid playing with your higher-level characters. Otherwise, they’ll stay at too high a level, right?

Wrong!

XP is not distributed evenly between your high and low characters. Instead, it favors teammates at lower levels. The best way to use this to your advantage is to bring a low-level character with a team of two or three high-level characters. Now take that team to higher-level areas and your weaker characters will reap the benefits of the increased XP that harder enemies grant.

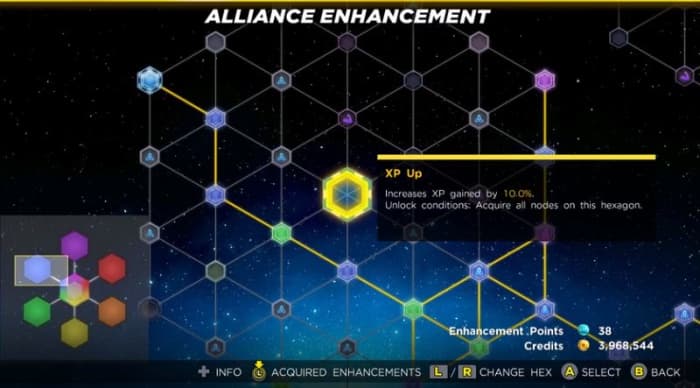
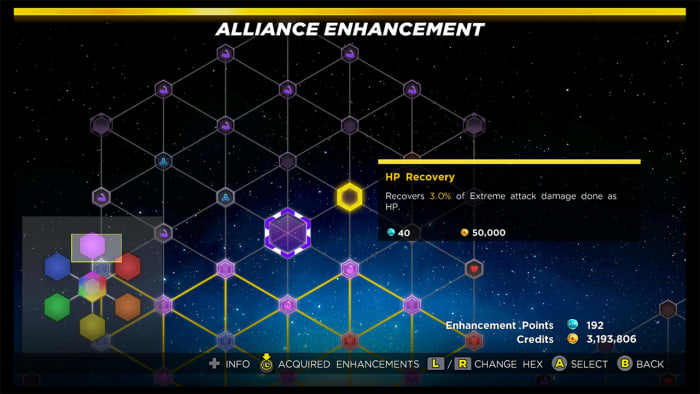
5. Max out the blue section of the Alliance Enhancement tree

This tip will take you a little longer, but it’s one of the most efficient ways to globally speed up how fast all of your characters gain levels. The Alliance Enhancement chart can be a bit daunting at first (SO MANY NODES TO CHOOSE!), but the one you’ll want to complete first is the set of blue nodes on the top left.

Marvel Ultimate Alliance 3 blue section
Fill out the blue section for a permanent +10% XP gain bonus!

When you complete a whole section of the Alliance Enhancement network you’ll gain a global bonus specific to that section. Purchasing all nodes in the blue section will reward a universal +10% XP gain. The earlier you get it, the more it’ll help.

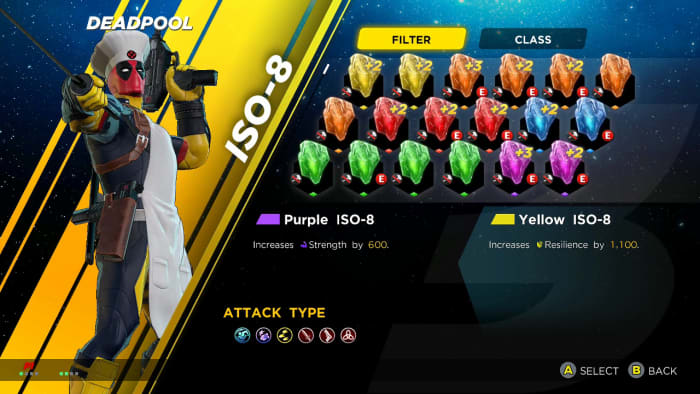
6. Equip XP-boosting ISO-8

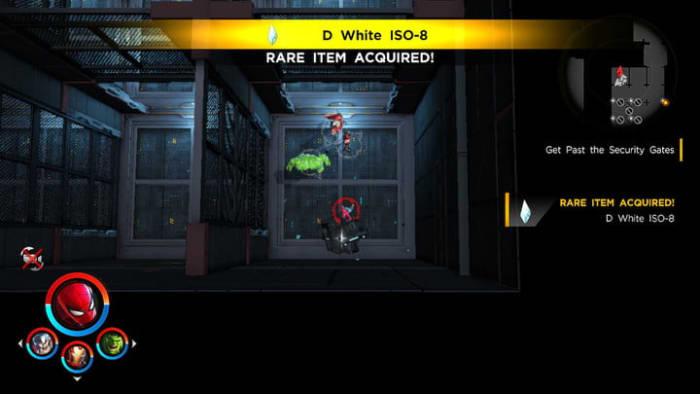
Lastly, there are a couple ISO-8 crystals that can help you gain XP quicker. They’re quite rare, but definitely worth farming or looking for if you’re trying to maximize a particular character’s XP gain. Upgrade them and slap two or three on one character and they’ll be cruising in no time.

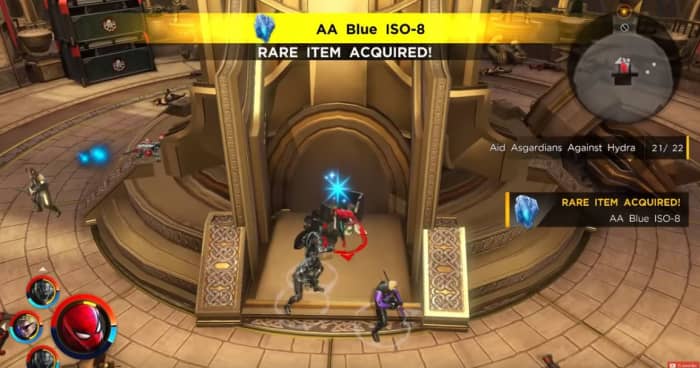
Marvel Ultimate Alliance 3 AA blue ISO-8 XP
Enjoy a gift from Odin

The most reliable location to get ISO-8 that boosts XP is in the fifth chapter of Asgard. Progress to this point (or start at this checkpoint via the Chapter Select screen) and break down the door that’s guarded by HYDRA soldiers. Clear out the next room and peek behind the big statue of Odin. This box should contain a rare blue XP crystal. You can check out this more detailed video walkthrough if you’re having trouble finding it.

Finally, the level 61 Wakanda Rush and level 65 Wakanda Wave Rift challenges are excellent places to farm XP once you reach higher levels, as well as gain more rare ISO-8 in general. This rift also has a higher frequency of white crystals, which can boost XP further.

Hopefully, this guide helps you level your characters and create a more balanced team. Let us know in the comments below if you found these strategies helpful, and stick with Softonic for more Ultimate Alliance tips and tricks!

How to unlock every character in Marvel Ultimate Alliance 3

Fight with your favorite superhero! Here’s how to unlock them all.

There’s nothing quite as liberating as running around the X-Mansion as Deadpool, slicing Sentinels to pieces while munching tacos and hurling insults at Juggernaut. Or maybe you’re more of a Sorcerer Supreme who prefers spending time meandering through the mystic miasma of the deadly Dark Dimension. Heck, maybe you want to play as Thanos. It was inevitable.

Marvel Ultimate Alliance 3 Thanos
You heard right: You can play as Thanos in this game.

Regardless of who your favorite Marvel character happens to be, Marvel Ultimate Alliance 3 is at its most fun when you can, y’know, play as that character. With a cast of over 35 characters already available (and a dozen more to drop in coming months via DLC), not everybody is unlocked right off the bat.

Here’s a list of every character in the game, and where/how to unlock them. For simplicity, we’ll just follow the order they appear on the Hero Select screen:

Marvel Ultimate Alliance 3 Hero Select screen

Black Panther: Unlocked in Chapter 8 (Wakanda) at the third SHIELD Access Point, right after the cutscene where Klaw destroys the bridge.

Wasp: Available in Chapter 4 (Avengers Tower) at the third Checkpoint. She helps you clear out a bunch of bots before being available at the SHIELD Access point.

Hawkeye: Available right after defeating the first phase of the Ultron battle. You need to clear out a landing zone for the Quinjet and then he joins your team for the brawl up to Ultimo.

Black Widow: Available in Chapter 2 (the Raft) right after beating Sandman.

Falcon: Available in Chapter 2 (the Raft) right after beating Sandman.

Captain America: Available in Chapter 2 (the Raft) right after beating Sandman.

Iron Man: Available in Chapter 2 (the Raft) right after beating Sandman.

Thor: Available in Chapter 2 (the Raft) right after beating Sandman.

Hulk: Available in Chapter 2 (the Raft) right after beating Sandman.

Daredevil: Available in Chapter 3 (Shadowland) just before you hit Checkpoint 3. He’ll help you navigate a hall filled with traps.

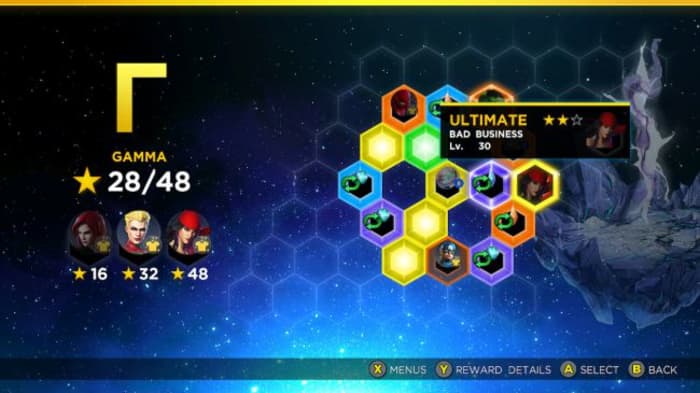
Elektra: Unlocked as a reward for completing the Bad Business challenge in the Gamma Rift.

Marvel Ultimate Alliance 3 Gamma Rift Elektra challenge
Unlock Elektra by completing this Rift challenge.

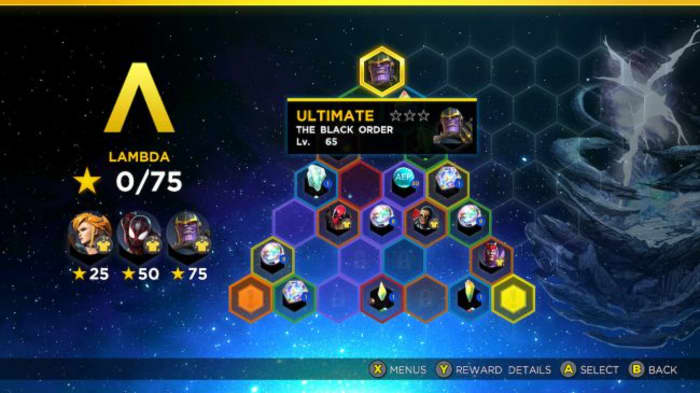
Thanos: Unlocked as a reward for completing The Black Order challenge at the top of the Lambda Rift.

Marvel Ultimate Alliance 3 Lambda Rift Thanos challenge
Unlock Thanos by completing this Rift challenge. Best of luck!

Storm: Available in Chapter 8 (Wakanda) after helping her defeat a group of AIM soldiers. She joins you right at the second SHIELD Access Point.

Psylocke: Available in Chapter 5 (Xavier Institute) right after the first fight: Clearing out the front courtyard with Colossus and Cyclops. Nightcrawler joins her.

Wolverine: Available in Chapter 2 (the Raft) right after beating Sandman.

Scarlet Witch: Available in Chapter 2 (the Raft) right after beating Sandman.

Rocket/Groot: Available right at the start of the game. They’re on the first team you get.

Star-Lord: Available right at the start of the game. He’s on the first team you get.

Gamora: Available right at the start of the game. She’s on the first team you get.

Drax: Available right at the start of the game. He’s on the first team you get.

Crystal: Available in Chapter 2 (the Raft) right after beating Sandman.

Luke Cage: Available in Chapter 2 (the Raft) once you’ve defeated Venom and Electro. He’s right in the next room and you can switch to him at a SHIELD Access point.

Iron Fist: Available in Chapter 3 (Shadowland) just before you reach Checkpoint 2. He’ll help you clear out a bunch of ninjas guarding the main door.

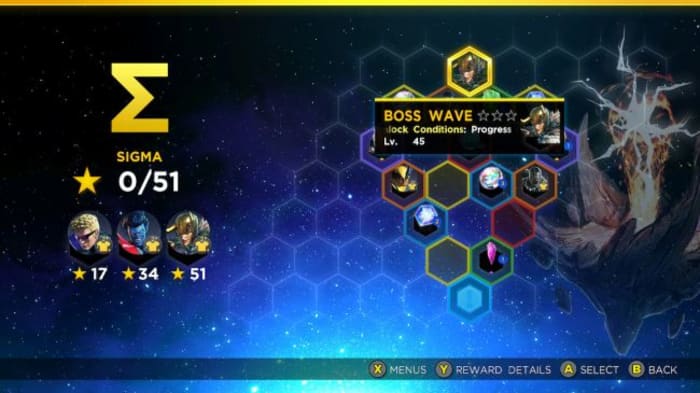
Loki: Unlocked as a reward for completing the ‘defeat Ebony Maw & 4 bosses’ challenge at the top of the Sigma Rift.

Marvel Ultimate Alliance 3 Sigma Rift Loki challenge
Unlock Loki by completing this Rift challenge.

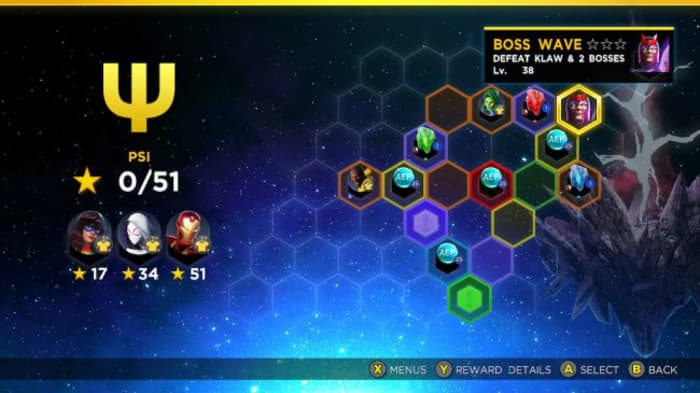
Magneto: Unlocked as a reward for completing the ‘defeat Klaw & 2 bosses’ challenge in the Psi Rift.

Marvel Ultimate Alliance 3 Psi Rift Magneto challenge
Unlock Magneto by completing this Rift challenge.

Nightcrawler: Available in Chapter 5 (Xavier Institute) right after the first fight – clearing out the front courtyard with Colossus and Cyclops. Pyslocke joins him.

Deadpool: Available in Chapter 5 (Xavier Institute) right after facing off against Magneto, Mystique, and Juggernaut behind the mansion. The battle takes you inside where Juggernaut ruins poor Deadpool’s taco night. He joins you in a quest for revenge. (Alternatively, you can unlock Deadpool and his chef outfit earlier by purchasing the Season Pass!)

Venom: Available in Chapter 2 (The Raft) after defeating Electro and him right past Checkpoint 4.

Spider-Gwen: Available in Chapter 2 (the Raft) after defeating Mysterio. Comes with Miles Morales and Ms. Marvel.

Miles Morales: Available in Chapter 2 (the Raft) after defeating Mysterio. Comes with Spider-Gwen and Ms. Marvel.

Spider-Man: Spider-Man’s joins your party early on in Chapter 2 (The Raft). He’ll be available via Shield Access Point right after you beat Sandman.

Captain Marvel: Available in Chapter 2 (the Raft) right after beating Sandman.

Ms. Marvel: Available in Chapter 2 (the Raft) after defeating Mysterio. Comes with Spider-Gwen and Miles Morales.

Doctor Strange: Available in Chapter 6 (Dark Dimension) after defeating him in a (rather difficult!) two-stage boss fight. Talk to him at the SHIELD Access Point after the fight and he joins your team.

Elsa Bloodstone: Available in Chapter 6 (Dark Dimension) after helping her fight off a bunch of Mindless Ones. The second SHIELD Access Point is right after completing this fight.

Ghost Rider: Available in Chapter 6 (Dark Dimension) after helping him defeat a horde of Mindless Ones. He’s hanging out right above the third SHIELD Access Point.

Upcoming DLC

Didn’t see your favorite character in the list? You’ll be happy to hear that Cyclops and Colossus are being added on August 30 as a free update! You don’t even need the Season Pass to get them.

The Season Pass

If that’s still not enough characters for you, there are three upcoming DLC packages (with four characters each) only available through purchasing the game’s Season Pass. The Marvel Knights DLC drops this Fall and will feature Moon Knight, Punisher, Blade, and Morbius.

Marvel Ultimate Alliance 3 Marvel Knights DLC
These guys will be joining the cast just in time for Halloween!

The X-Men DLC will come out later this year and features four more X-Men (separate from Colossus and Cyclops). Team Ninja has not specified which X-Men these will be, but considering they’ve already got character models we’d guess it’s Beast, Juggernaut, Mystique, and a mystery character (Jean Grey?).

Marvel Ultimate Alliance 3 Dark Brotherhood Magneto Mystique Juggernaut
They’ve already got character models and attack animations!

Lastly, Team Ninja also announced an upcoming Fantastic 4 DLC that should be landing in 2020. It’ll be a ways from now, but we can’t wait to play as Human Torch, Mr. Fantastic, Invisible Woman, and Thing.

Let us know your favorite character in the comments below, and stay tuned with Softonic for more news, strategies, and tips on Marvel Ultimate Alliance 3!

How to stream to Discord Community in 5 easy steps

Soon you will be able to stream games on Discord, but there’s a catch!

Discord is software that allows many people to talk to each other for an unlimited amount of time. You can use it to create channels and servers to interact with friends, colleagues, or groups of family members in visual, audio, or text formats. It doesn’t matter if you do so casually or in a formal business context. The result is still excellent communication about anything.

The app was originally designed for gamers to get together online and chat about games and gaming. But before too long, the players wanted a more inclusive communication platform for social groups, businesses, schools, clubs, and more. That led to Discord opening up to other uses, including streaming. Here’s a look at how to stream on Discord.

Discord FREE DOWNLOAD
9

Accessing Discord

The app is available for Windows (11, 10, 8.1, 8, 7), iOS, Mac, Linux, and Android.

 Once you’ve downloaded it onto your device, you can start communicating with whoever you want or streaming content. An increasing number of people are live streaming videos of themselves playing games while giving commentary. You, too, can build your own community and stream games or whatever else you like to people on your channels.

How to stream on Discord

Discord has a live chat feature that allows subscribers and streamers to interact in the same room. Therefore, streamers have many opportunities to interact with their viewers and build their communities to include as many people as possible who want to hear or see what they are offering. You need a server as well as a voice channel to stream. Here’s how to do it

  1. Download and install Discord

    How to stream to Discord Community

    Go to the Discord download page. Click on Download for Mac/Windows. Then install the software on your device. Open the app, register, and log in. You’ll see an invitation to go into public servers on the screen. There’s a plus icon that allows you to create your own servers. Once you’ve done so, a list of your servers will appear.

  2. Create a server

    How to stream to Discord Community

    Clicking on the Plus icon will take you to a screen where you’ll see templates for different categories of servers and an option to create your own. Once you have done so, give your server a name and an icon.

  3. Create channels

    How to stream to Discord Community

    Now you can set up different channels in your server for different topics, invite friends and contacts and start communicating. There are Voice or Text channels. To create a new channel, click the small plus icon. Pick the channel type, name your channel, and click on Create Channel. Now you can start streaming on any of your channels.

  4. Start streaming

    How to stream to Discord Community

    You can only stream on Mac or Windows, and audio sharing is only available on Windows 10 or macOS version 10.13 or later. Here’s how: Open Discord and get onto a voice channel on one of your servers. Look for the option to turn on your video. Click on the Video button to make the camera appear. You’ll then be visible on the screen, and conversation mode will be on.

  5. Share your screen

    How to stream to Discord Community

    Click on the Screen icon. A pop-up window will appear where you can choose how to share (a screen on your system or the whole screen). Then click on the Go Live button to share your screen with viewers. And you’ll be streaming!

    You can invite people to join you on our server. Click on the Invite button or send a server invite link. You can end your stream by clicking on the red Disconnect button on your Discord screen.

Watching a Stream

If you’re on a server where someone is live streaming, you can join the stream with a click.

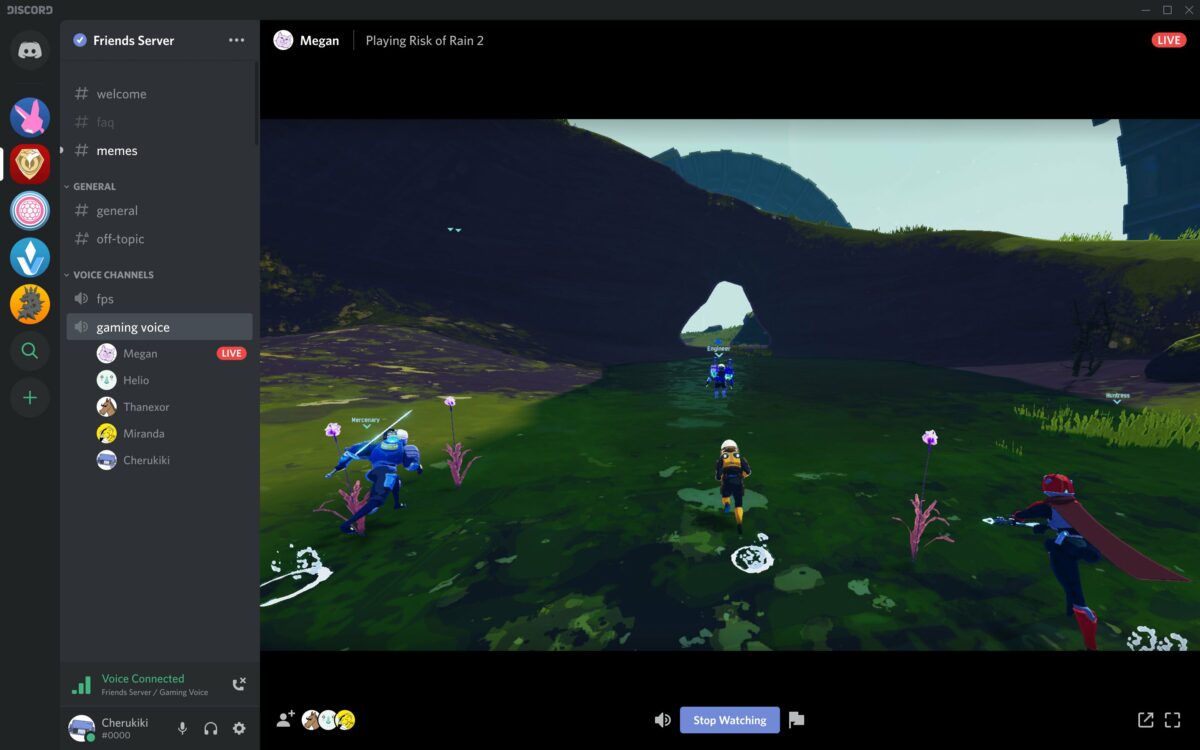
 You can see if someone is streaming because there’ll be a Live button on the screen. Click on the server’s name in the voice channel, and a window will pop up. Click on Join Stream to watch it.

Should you stream on Discord?

Streaming is a wonderful way to reach many people live on a Discord channel. You can stream so many different things, including games, the original reason for the introduction of streaming, cooking or gardening demonstrations, music, music videos, and movies, to name a few. The best thing about streaming is that you can find new Discord friends while you’re doing so. 

You can see their messages and replies in real-time, and you can reply to them in the same way. Engaging them while streaming is a good way to get them interested in your content so that they can spread the word about your stream. If you’d like to learn more, check out our guide on what Discord is and how it works.

Microsoft, Nintendo, and Sony to require games to disclose loot box odds

Loot box rates will be disclosed in all Xbox, PlayStation, and Nintendo games from now on.

Loot box

After entering my credit card info, I opened up my loot box in hopes of getting a cool, new skin for my character. After the shimmering box finally opens, a bunch of junk falls out. I then repeat the process 10 more times as my checking account dwindles and dwindles.

If this sounds familiar, you’re probably not a fan of loot boxes either.

Luckily, it seems like Nintendo, Microsoft, and Sony have gotten that memo. Starting in 2020, every game published on a Nintendo, Microsoft, or Sony console has to disclose its loot box drop rates. Now, players can at least see their actual chances of scoring decent loot before entering their credit card information.

Also, several video game publishers have agreed to disclose their loot box drop rates in all of their games regardless of the publisher. These include:

  • Activision Blizzard
  • Bandai Namco
  • Bethesda
  • Bungie
  • EA
  • Take-Two Interactive
  • Ubisoft
  • Warner Bros.
  • Wizards of the Coast

This has all been a part of a new initiative from the Entertainment Software Association and the Federal Trade Commission.

What is the issue with loot boxes?

Back in the day, unlockables were obtained by, well, unlocking them through in-game challenges.  Also, if they came out after the game’s release, you would just purchase them as DLC without having to jump through any hoops. However, it seems that nowadays,Sur the name of the game is loot boxes. Game developers have realized that instead of doing the extra work of making in-game challenges, they could make more money by making players purchase loot box after loot box.

A loot box is a relatively new mechanic in games where players spend real-world money on boxes that have the potential to give them rare items. Although there were loot-box-like features in games in the mid-2000s, the loot boxes we know today have mainly been inspired by Overwatch.

Overwatch Download now ►
8

Loot boxes always drop some loot, but most of what you’ll get is junk. It’s a lot like if buying a pack of trading cards.

What are the real dangers?

Since we first saw them enter the world of gaming, loot boxes have left a bit of a sour taste in our mouth. The potential to get cool gear in our favorite games is great, but dishing out real-world money for a chance to get the better loot came has come off as gambling.

A recent article from The Verge dove into the harsh realities of loot boxes. In the article, one gamer said that their loot box gambling addiction lead to about $10,000 in spending. 

The Game Theorists also created a video discussing the science behind why buying loot boxes is so addictive. Basically, every time we invest more time and money into buying loot boxes, our brains are telling us that it would be a bigger loss to stop buying them rather than keep going. This is quite similar to what most gambling addicts suffer through. 

Wrapping up

Regardless of whether you think loot boxes are good or bad for the gaming industry, the fact remains that knowing the rates of which rare items are dropped will be nice. If we see that we have a 1 in 10,000 chance to get a new skin in a $3 loot box, it’s going to be a pretty easy decision to give it a pass.

10 beginner tips for Marvel Ultimate Alliance 3

Since Marvel Ultimate Alliance 3 hit the shelves last month, we’ve barely seen the sun. It’s been a decade since Ultimate Alliance 2, so we were understandably thrilled when we heard the title was making a comeback, and that Koei Tecmo’s Team Ninja was at the helm, and the game was being published by Nintendo.

Marvel Ultimate Alliance 3 Guardians of the Galaxy
This time the story kicks off with the Guardians of the Galaxy!

While the game is fairly intuitive (especially if you played the earlier games in the series) there are still a number of things we wished we’d known going in, like the best way to prioritize leveling up characters, manage the complex ISO-8 system, or minimize grinding before tackling the game’s tougher encounters. There are definitely a couple of spikes in difficulty, so we put together a list of 10 tips to help get you started off on the right foot. If you don’t own the game yet, you can buy it here.

1. Adjust the camera and controls

First things first, the game’s an isometric top-down hack n’ slash. You’re going to spend a lot of time trying to keep track of the character you’re currently playing amidst a screen full of enemies, colorful explosions, and walls and objects that the camera likes to get stuck behind. Needless to say, navigation is difficult. Angry Joe explains it best in the vid below (and he explains angrily, so NSFW warning):

If you’re playing couch co-op with your friends you’re going to be fighting over control of the camera often; it’s inevitable (cue Thanos’ “I am inevitable”).

There are two things that can help: If you’re playing the game by yourself you can switch over to “heroic camera,” which keeps closer to the character you’re playing instead of hovering in top-down. The second thing you can do is play the game online, since that allows you and the other players to move further apart before the camera gets confused.

Marvel Ultimate Alliance 3 rift nebula
Wait, where’d my character go?

If you’re new to the Nintendo Switch, there might also be a learning curve for using the controls. The Options menu has three different configurations you can cycle between, though, so at the start of the game find the one that feels most intuitive.

2. Use multiple save slots

This is a really general video game tip, but it’s one that bears repeating here: There are five save slots available in Ultimate Alliance 3, and you should be cycling between at least two of them.

“But the game auto-saves, like, all the time,” you might say. This is true, but it might also auto-save after you’ve made a really, really bad decision. Trust us, you don’t want to be stuck with a save where you accidentally deconstructed the wrong ISO-8 crystals or spent your limited resources on the wrong upgrades or characters.

Additional save slots provide you with the opportunity to experiment. Is it worth enhancing this ISO-8 crystal? Will giving Wolverine ALL of our XP cubes really get us through this harder fight? If it wasn’t worth it, this way you’re not 100% committed to risky decisions.

You’ll thank us later.

3. Use synergies. Like, a lot.

Right after the prologue mission, the game teaches you about using synergies, Ultimate Alliance 3’s take on the fusion system introduced in Ultimate Alliance 2. Essentially this involves two characters using their abilities in tandem to enhance the damage, increase the effective radius, and/or reduce the cost of their abilities.

Marvel Ultimate Alliance 3 synergy star lord storm
As you unlock more abilities, you character can perform more synergies off of more teammates.

You can activate these abilities in two ways. You either initiate (by performing an ability with ZR instead of R) and the AI joins you, or you can respond to a synergy request by pressing B when the option arises (it’ll cue you in with a flashing button, visual, and a sound effect). Synergies fill up the extreme meter quicker, deal more damage, and stagger larger targets more effectively, so don’t be shy to use them often. Characters can also use synergies to open certain blocked paths or secret doors, so keep your eyes peeled.

Marvel: Ultimate Alliance 2 Download
9
Like synergies? Play the game that introduced them!

4. Beating the stagger meter

One of the new features implemented in the series is the stagger meter – that purple bar under a boss or mini-boss’s health meter. You can do damage to the boss even if they aren’t staggered, but you’ll do way more if they are. Take down that purple bar and then hit ’em with the best stuff you’ve got to drop them more efficiently.

Marvel Ultimate Alliance 3 Ultron fight extreme
You can still hurt bosses even if their stagger meter is full; it’ll just damage them less.

While the most intuitive tactic is to use your synergies or extreme attacks when the meter is down, you might actually be better off using them just before the stagger bar depletes. Some bosses regen their stagger meter really quickly, so in order to maximize damage and hit them before they can escape, trigger these moves just a hair early. Later on in the game, you might also find ISO-8 that does extra damage to this meter, so outfit your team with that in mind.

5. Throw something at it

While we’re on the topic of beating the stagger meter, nothing does the job quite like a forklift thrown at the bad guy’s head. For whatever reason, thrown objects dish out a ton of damage to enemies, especially to their stagger gauge. If you spot an object you can throw, it’s there for a reason.

6. Time your extreme attacks

Extreme attacks are the strongest move in your character’s bag of tricks, and they can only be done once your attack momentum reaches a peak threshold. It may be tempting to use it right away, but the smart move might be to save it for when you really need it (like that boss fight around the corner).

Marvel Ultimate Alliance 3 ultimate alliance extreme
Ultimate alliance extremes are the most powerful tools in your arsenal

Extreme attacks (even when just one character does it) are usually enough to topple the stagger meters of a crowd of mini-bosses, so don’t spend all four needlessly (unless you’re trying to maximize your damage for a rift challenge or something). Maybe try one or two at a time and see how much damage you can dish out. The only time you’ll really need all four is when you’re up against a tough boss. Then every bit of damage counts.

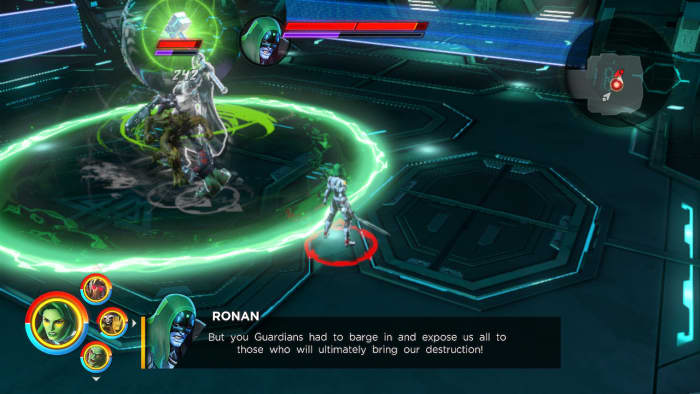
Lastly, boss fights are often split into multiple stages. If you look carefully at an enemy’s health bar you can see where the partition hits. Don’t perform your extreme attacks if they’re about to bump to the next stage of the fight; all that damage will be wasted.

Marvel Ultimate Alliance 3 Ronan boss fight
See the partition in Ronan’s health bar? Wait until phase 2 before you hit him with the best stuff!

7. Manage your team bonuses

Earlier games in the series would put in fun names for specific teams of four (‘bruiser brigade,’ ‘energy corps,’ ‘femmes fatales,’ or ‘classic avengers.’). Ultimate Alliance 3 altered the formula a bit and made it both more flexible and more approachable.

First off, now it only takes two characters with matching affiliations to provide a bonus for your team, and the specific percentage increase it rewards is displayed at the top of the screen.

Second, you can press L to see the affiliations every character has on the hero selection screen. That way you can stack your bonuses more efficiently.

Marvel Ultimate Alliance 3 team bonuses
See which heroes are in which teams. Stack your bonuses accordingly.

This opens up two avenues of play: You can either put together a team that’s weak in one area, but stack them with team bonuses to make up the difference; or you can stack one specific bonus really high, providing a really noticeable change to, say, your energy output or your durability. Don’t forget ISO-8 bonuses stack on top of that!

8. Use the Lab

A lot of your team’s success will take place behind the scenes. The Alliance Enhancement network and ISO-8 management are key components towards buffing your characters, negating weaknesses, and even unlocking entirely new facets to your game, like extra revives, faster XP gain, or health regen.

Marvel Ultimate Alliance 3 ISO-8 management screen
ISO-8 can add wholly new effects to your character

If you’re finding a particular juncture of the story is suddenly way harder than expected, it’s probably time to check out the lab (accessible from a SHIELD point once the feature is unlocked) and pick some upgrades. Once you’ve stretched the first portion of the Alliance Enhancement network out to the edges of the shape, it’ll unlock entire new sections to explore, each one with a focus towards one attribute (strength, mastery, durability, energy, health, and resilience). Max out a section and you’ll unlock a powerful unique bonus.

Marvel Ultimate Alliance 3 Alliance Enhancement
Every section caps out with a special shared bonus. Decide which ones to prioritize.

9. Manage your ISO-8

ISO-8 is probably the most complex part of this game, so we’ll spare you the nitty gritty details. If that’s what you’re after, check out this in-depth video.

Fundamentally, these are crystals of varying rank and color, and they can be slotted into your characters on the Team menu (accessible via SHIELD access point or even just the base game menu). As you level up you’ll unlock more ISO-8 slots per character, and the fourth slot is unlocked by filling out all of the 100,000-cost ticks in the Alliance Enhancement menu, which will probably take a few playthroughs.

Marvel Ultimate Alliance 3 ISO-8 acquired
D level ISO-8 is probably better off deconstructed than equipped.

What’s important to know right up front is that you can swap ISO-8 between team members any time you like, so we recommend giving your team a once-over every time you bring out new characters. This also means you can keep swapping them between characters whenever you switch up your squad.

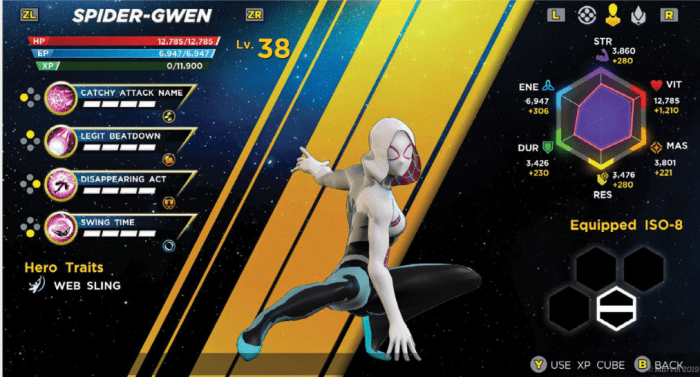
When it comes to deciding which ISO-8 to give to which team member, check out specific strengths and weaknesses on their character screen. Does this character use mostly strength-based attacks? Then give them a purple strength ISO-8 to boost their damage. Does this character have health regen? Then give them a red ISO-8 to synergize with that trait so they passively heal even faster.

Marvel Ultimate Alliance 3 Spider-Gwen
Look carefully at a characters’s stats before you decide which ISO-8 is best for them.

Lastly, we recommend deconstructing any ISO-8 below C grade. It takes a LOT of ISO-8 to build a crystal towards any noticeable bonuses, so these weaker crystals are better ground up and fused with crystals that are already powerful.

10. Leveling up

Keeping your characters at a comfortable level is one of the most challenging aspects of the game, and it can be discouraging when the game hands you a new level 30 character that blows your current team of level 14 characters out the window. There are a few things you can do to keep your team strong enough to tackle the game’s increasingly difficult scenarios.

Marvel Ultimate Alliance 3 Infinity Rift
Infinity Rifts are challenging, but optional

Rifts can be grindy, but there’s no better place to level up your characters, especially in Wave modes. The caveat is that you have to beat the challenge for the rewarded levels to stick, so be sure you don’t bite off more than you can chew. Rifts are also great places to find the second best way to level up quickly – XP cubes.

Marvel Ultimate Alliance 3 Infinity Rift Gamma
Complete Infinity Rifts to level up, earn XP cubes, costumes, and even new characters.

XP cubes can be found in scattered boxes throughout the game (usually hidden behind breakable synergy walls or secret panels), but they’re more frequently obtained through rift challenges – especially the harder ones. One trick we found was to take a powerful team (comprised of the higher-level characters the game rewards you with around mid-game) and sending them to complete the harder challenges in the first rift. Then we went back and distributed all the XP cubes to our weaker characters to balance out our team.

We hope these tips help you get a strong start in Marvel Ultimate Alliance 3. Let us know if there are any other strategies you’ve found, and stick with Softonic for the latest in tactics, guides, and upcoming DLC for the game!

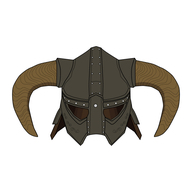
How to improve Skyrim combat without mods

Are you still immersed in the world of Skyrim? Follow these tips to enhance your experience!

SKyrim

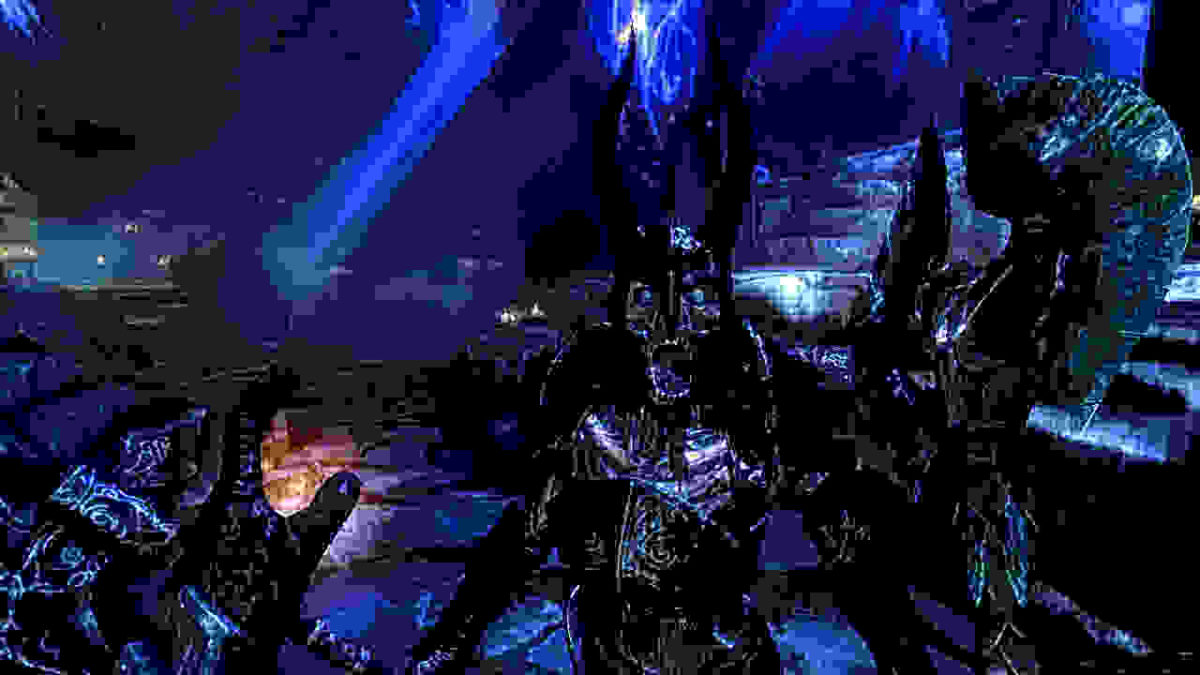
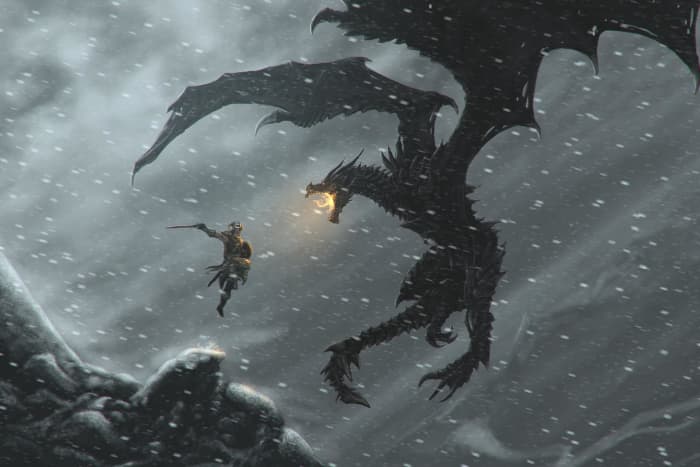
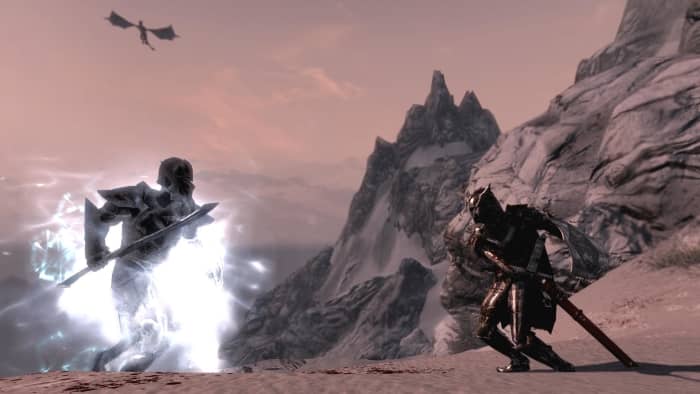
Skyrim is not a very friendly place. There’s scheming vampire lords, vicious bears that will maul you to pieces, a civil war raging across the land, werewolves, and of course the looming threat that a dragon could swoop down and barbecue you just because he’s bored. Suffice it to say that combat is a huge cornerstone of Elder Scrolls V, and eight years after the game’s original release, it’s starting to feel a bit stale. If you look around, though, there are actually a number of ways to revitalize battle in Skyrim:

Elder Scrolls V: Skyrim Special Edition Download ►
9

There are plenty of mods to improve Skyrim’s visuals, restore cut content, fix bugs, or make new dungeons, homes, and followers. However, exploring all these new crypts and caves is still going to feel tiresome if your fighting is restricted to what Bethesda offered back in 2011, and one of the largest contributing factors to that lack of spice is that at higher levels you’re likely not changing your style, armor, weapons, or appearances anymore, and your offensive spells cap at a certain damage.

Skyrim steel warhammer vampire Whiterun combat
Attack 1: Swing your sword. Attack 2: Swing it harder. There is no third attack.

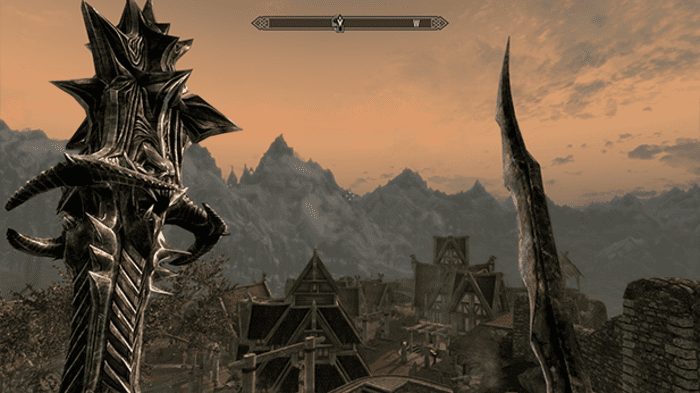
There is a “best weapon” in Skyrim

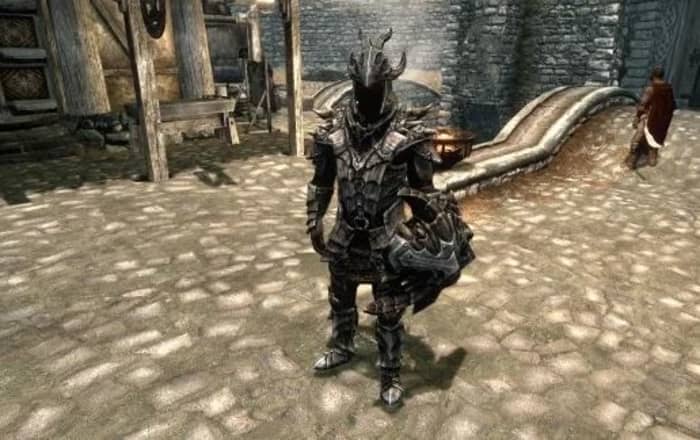
Whether you’re an Orc wielding a greatsword, a Wood Elf aiming with a bow, or a Redguard dual-wielding axes, the problem with late-game martial characters is that once you’ve smithed a set of Daedric armor or forged a Dragonbone dagger you have zero reasons to go back to steel, Elven, or bonemold. That means that in order to maximize your defense score you’ll donning the same weapons and armor. Every time. Why would you not?

Skyrim armor dragonscale
This is the best armor. Prepare to never take it off.

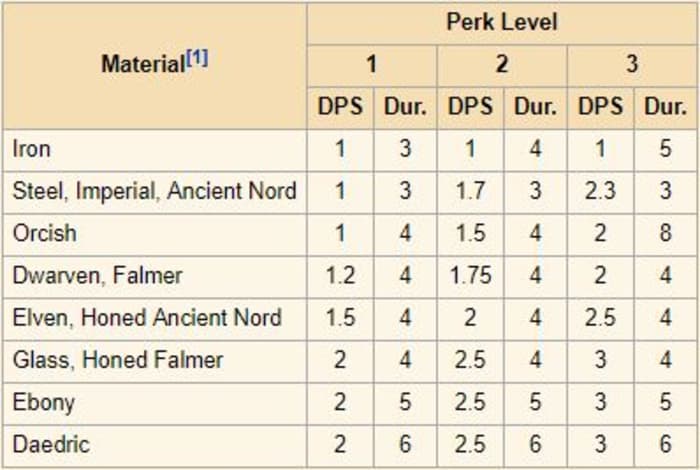
The same goes for perks – if you’re a pure mage class, all you’ve really got for combat is the frost, fire, and shock spells of the Destruction tree. Once you buy the most damaging spell (Incinerate, Thunderbolt, or Icy Spear), Dual Casting, and a couple of perks to buff the damage (Augmented Flames, Frost, or Shock) you’ve reached your damage cap and probably won’t be casting the weaker versions of these spells ever again. By your second or third mage playthrough, you’ll probably be tired of them. The same goes for that Orc with a greatsword – you’re probably going to sink the same three points into the stacking Deep Wounds perk.

Skyrim Limbsplitter perks
See the stats for ‘bleed damage:’ The best material yields the best results.

1. There is no best weapon in Skyrim

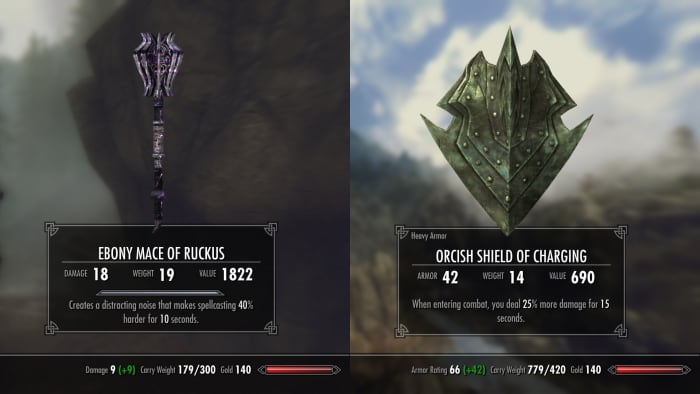
Remember when we said there was the best weapon in Skyrim? Statistically speaking, this is true. Here’s the flip side: Different weapons and spells serve a different purpose. Even if you just play a one-handed specialist there’s still some variation you can get by using different types of one-handed weapons. Don’t just stick with the sword because that’s the most damaging weapon you’ve found. There’s a use for each one:

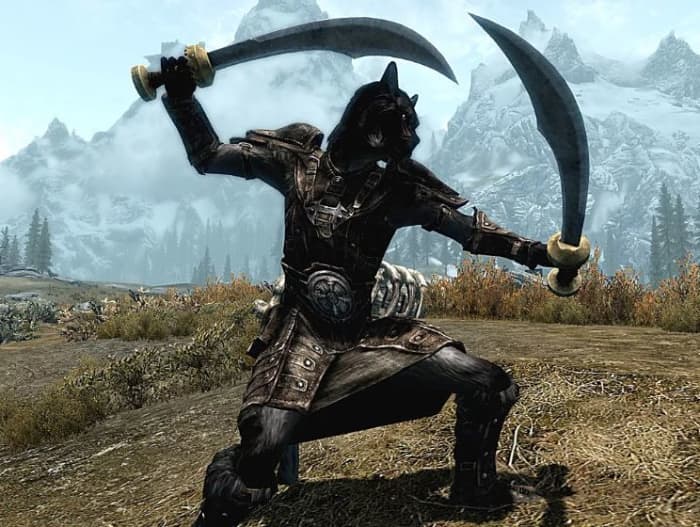
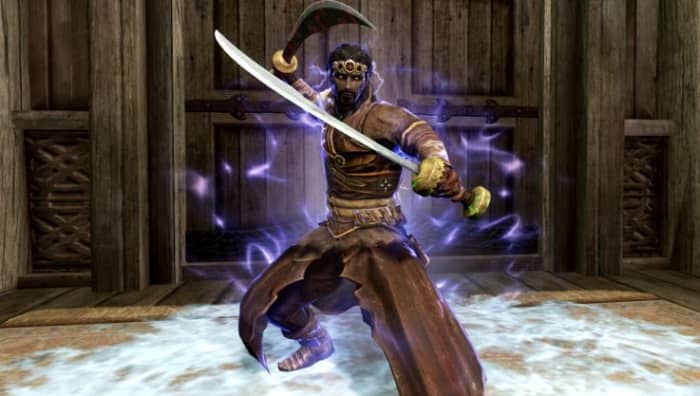
Skyrim Khajiit dual wield scimitars
Swords are fast and can deal critical damage, but are weaker than maces and axes.

Sword

Swords have a (10%-20%) chance to deal critical damage to targets, eventually boosting up to +50% crit damage. Since swords also boast a higher swing speed than axes and maces, that means you’re going for multiple fast strikes with the chance that one of them will score a critical. Dual-wielding (or using the dual-wielding exploit with a sword and dagger) doubles your chances even more. Try enchanting your blades with this in mind for a plethora of clever combinations.

Dagger

If faster swings per second make you happy, then daggers are your best bet. While they’ll always deal less damage than a sword, ax, or mace, if you properly smith or enchant it, it can hold its own, particularly if the enchantment does high damage. Appropriately, the dagger is also a great weapon of choice for the rogue classes; get the Assassin’s Blade perk and performing a sneak attack with a dagger will deal 15x the damage!

Ax

Axes are the awkward middle child of the martial weapons family, swinging slower than swords and daggers, and dealing less damage than maces. What’s the draw, then? Axes deal bleed damage, which is likely the most underrated, undervalued damage type in the game. Bleed effects cannot be absorbed or resisted in any way, and every rank of the respective perks will bump the magnitude and duration of bleeding damage dealt by weapons (the material of which is another factor). Bleed does DPS, and the effects stack with other DPS implements in the game, such as poison, fire, or Absorb Health. If you’re good at enchanting or concocting poisons, the ax can be a formidable weapon indeed.

Mace/hammer

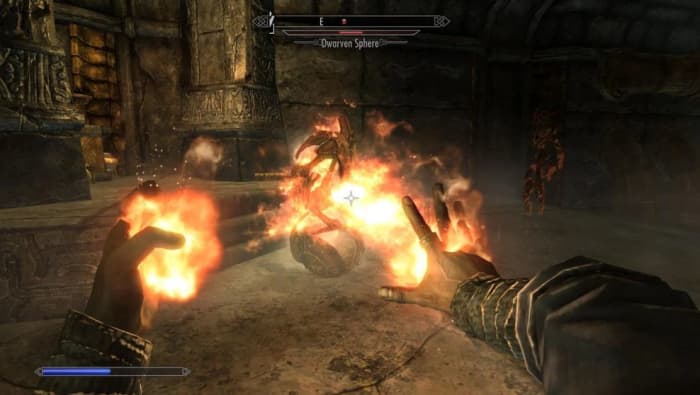
Last but not least, you’ve got the blunt weapons – the martial bad boys; the heavy hitters of Skyrim. While they’re slower to hit with, these massive bludgeon tools always deal more damage than any other weapon in an even encounter. Better still, they can ignore 25%-75% of armor, cutting right through whatever damage resistance your enemy has. This makes a warhammer a deadly tool against bandit chiefs, Falmer warmongers, Dwemer automatons, or any armored foe who dares step in your way.

Skyrim dual mace sword
Ride a dragon with this build and feel like the Witch-King.

Don’t limit yourself to one weapon type. Carry one of each. Use maces on armored foes, and use a battle-ax when you have poisons available. Pull out a dagger when it’s time to sneak, and dual-wield swords when you’re banking on a critical strike for massive damage!

2. Switch up your elemental damage

Similarly, mages should opt away from specializing in just one type of offensive spell. Fire, frost, and shock all have their time and place, and switching between them will both make combat more visually exciting and keep you alive longer.

Skyrim destruction magic
Fire is great, but when is shock smarter?

Fire

Fire is the most commonly used spell type for Skyrim mages and that’s because it’s awesome. Burn an enemy and they’ll take more damage while on fire. What that means, then, is that if you have fire in your left hand and a melee weapon in your right, you’ll do more damage to the target per hit as long as you keep them lit up. This makes it a great choice for when you’re trying to maximize stackable DPS (like the aforementioned poisoned ax). Fire’s also a great choice when you’re fighting through the many, many Draugr crypts.

Frost

Frost is the squishy mage’s best friend. The main reason for this is that frost spells do half their damage value to an opponent’s stamina level. This does two things: First, it means melee opponents can’t keep slamming you with power attacks. Second (and more importantly) it means they are slowed. A slow bandit chief whose stamina bar is depleted is way less scary than one charging at you with a battle-ax – even if he is on fire. Frost spells are best used against humanoid opponents, but using them against Draugr or Dwemer robots should be avoided. As a unique quirk, frost enchantments are 25% stronger on anything made of Stalhrim!

Shock

Resisting shock damage in Skyrim is very rare. As such, you’ll probably do more damage with shock spells than with fire or frost. While frost spells deal half their damage value to an opponent’s stamina pool, shock spells do the same to their magicka, making lightning a great choice when you’re up against enemy spellcasters. It doesn’t matter how powerful a mage’s spell is if they don’t have enough magicka to cast it! It also means they won’t be able to block with wards, or do the ever-so-annoying strategy of running away at the last second to cast a healing spell. Lastly, shock spells are the easiest to hit with, as the blast has no travel time. Enemies will have a much harder time dodging Thunderbolt than Icy Spear.

3. Destruction magic is more than just projectiles

If you’re playing a mage, once you get Dual Casting with Impact, it’s easy to forget that there are any Destruction spells other than Thunderbolt, Icy Spear, and Incinerate. While these will probably still remain the cornerstone of your offense, there are other tools in your Destruction arsenal you may have abandoned: Cloak spells, Wall spells, and Runes.

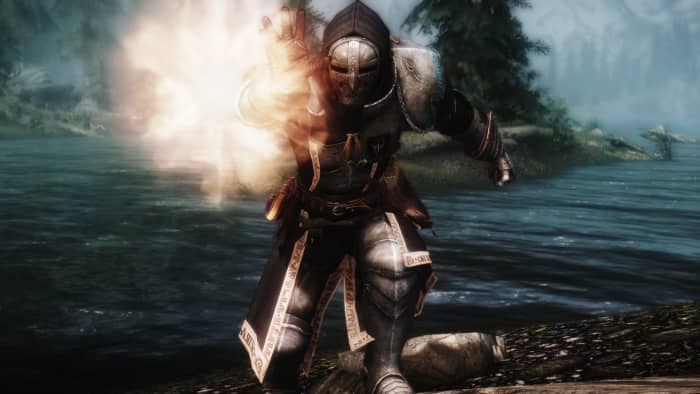
Skyrim dual scimitar Miraak robes lightning storm
A build like this will slaughter enemy mages.

Cloak

The biggest thing to remember about Destruction cloak spells is that they still boast the same elemental effects that we brought up earlier. If you’re playing a warrior, try throwing on a Flame Cloak to increase the damage of your hits! Use a Lightning Cloak to deter mages. A Frost Cloak can sap away the stamina of enemy warriors, leaving them vulnerable to attack and stagger.

Wall

Remember back at the start of the game when all you had was a Flames spell? Wall of Fire is like an upgraded version of that spell. You don’t even have to be directly attacking enemies for Wall spells to wreak havoc on crowds of enemies. Use Frost Wall to deplete the stamina gauge of an entire room. Switch to projectiles or physical attacks while they’re all slowed. Mages who throw up a ward can’t block a Wall of Storms under their feet!

Rune

Runes are rarely used in Skyrim since most combat is initiated before you have much time to plan. The trick with runes is to get the Quiet Casting perk under Illusion. Dual Casting in Destruction means that you can lay down a more powerful trap (which can be placed quite far away with the Rune Master perk) that can catch enemies by surprise, all without them even knowing where you are. Lightning Rune can be an especially good method for sabotaging a mage’s magicka before you even engage them in combat.

4. Use non-combat trees to enhance your combat

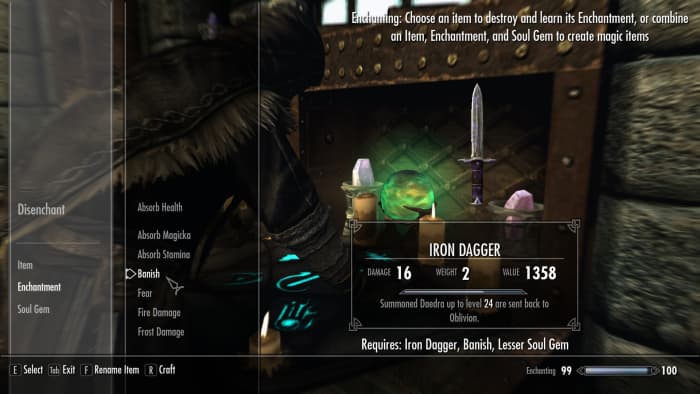
The beauty of Skyrim’s RPG system is that many skill trees work in harmony, benefiting from perks you’ve put into other trees. You can always run a pure thief or warrior, but mixing and matching your talents actually breeds the best results in combat – particularly the more ‘hybrid’ trees like Enchanting or Alchemy. A high skill in Enchanting is essential for virtually any build you can think of, upping the resistances of your armor, augmenting damage, letting you regenerate magicka more quickly, or increasing your thief skills like Pickpocketing or Lockpicking.

Skyrim enchanting
Enchanting can add an extra layer of utility to any build

Alchemy is a versatile tool that’s often forgotten. Everyone gulps down health potions when they’re hurt, but what about those typically ignored Frenzy or Aversion potions you can coat your weapons with? Try putting Aversion to Fire on your enchanted fire ax (which does bleed damage), then attacking an enemy with it while barraging them with Flames from your other hand. If you want to get really radical, put away your ultra-damage ebony bow in favor of an old hunting bow that’ll wound instead of kill. Apply a Frenzy potion to the bow and fire a couple of arrows into a group of bandits. Watch them tear each other to pieces!

5. Play out of type

The last tip we have for shaking up your Skyrim experience is to tackle the quests in a different order. Most players start with the Main Quest and the Companions, but what happens if you join the Dark Brotherhood first? If you have DLC installed, what’s the final fight with Alduin like if you’re already a fully-powered Vampire Lord? Or try and get all the Black Books in the Dragonborn DLC before you start the Thieves’ Guild questline to really shake up what’s in your bag of tricks.

Playing a race other than your usual can also encourage you to try new approaches to old combat scenarios. If you’re used to playing the hardy Nord, try and mix things up by playing a nimble Khajiit, a powerful High Elf, or an expert Redguard pickpocket who dabbles in illusion. It’s an open world. Stop confining yourself to what’s comfortable!

If you don’t want to play Skyrim with mods, then changing your approach to combat is probably the best way to avoid repetitive gameplay. The stories and dungeons of Elder Scrolls V may always stay the same, but its RPG elements are whatever you make of them. You’re in control of the archetype you want to run, so try and approach old stories from wholly new angles.

Let us know in the comments below what kind of build you’re going for in your next Skyrim playthrough, and stay in touch for more Elder Scrolls VI information as it becomes available.

(function(d,s,id){var js,fjs=d.getElementsByTagName(s)[0];if(d.getElementById(id))return;js=d.createElement(s);js.id=id;js.src=’https://embed.playbuzz.com/sdk.js’;fjs.parentNode.insertBefore(js,fjs);}(document,’script’,’playbuzz-sdk’));

Skyrim: 6 most fun mod varieties to improve combat

Make fighting more fun with our list of the best mods for Skyrim.

Skyrim

You can’t travel from Solitude to Markarth without running into some wild Forsworn, and you can consider yourself the luckiest person in Tamriel if you make it from Windhelm to Riften without incurring the wrath of a hungry dragon. Skyrim is in midst of a vicious civil war, the Dark Brotherhood is painting targets on people, and Solstheim is being enslaved by the treacherous Miraak. Suffice it to say, you’re going to be in combat. A lot.

Elder Scrolls V: Skyrim Special Edition download
9

While there are ways to spice up enemy encounters in Skyrim – like trying an unusual build or race, swapping to a different weapon or armor set, or changing the order in which you do the quests – eight years later we’re feeling pretty uninspired to whip out an iron sword and hack at that wounded frostbite spider in Bleak Falls Barrow.

Any way you spin it, the combat starts feeling tiresome and repetitive, particularly once you’re at a high level, completed the quests, have all the perks you want, and no longer have any reason to change your spells or gear.

Fear not; the Skyrim modding community has you covered. There are tons of (free) ways to shake up battles and encounters in Elder Scrolls V with mods, and here are some of our favorites:

1. Combat overhaul

If you don’t like anything about the way combat feels in Skyrim, the most obvious solution is to play a different game get a mod that completely changes it. There are a number of combat overhaul mods, some of which implement new features like being able to parry when dual-wielding, giving enemies access to modded spells, or allowing for the chance that an enemy will be using an upgraded weapon. These 10 mods might be just what you’re looking for:

If you’re looking for a more controlled combat experience that puts you in charge of the ebb and flow of combat, you can also try Wildcat Combat by EnaiSiaion. This mod adds injuries, stagger, and more responsive AI, and lets you tweak the settings on the fly via an in-game mod menu. Take control of combat in Skryim, and let it play the way you want!

2. Harder enemies

One popular aspect of Wildcat Combat is that it makes survival harder all around. Enemies are more reactive, more aggressive, and generally more powerful. Wildcat Combat isn’t the only way to accomplish this (check out Combat Evolved by CrushBoss, Deadly Combat by Borgutt1337, or Duel by LogRaam), and the sentiment is the same: Instead of adding new enemies or more enemies, you’re simply making enemies more threatening and more challenging.

If you’re a fan of tougher games like Dark Souls or Witcher 3 these kinds of mods (plus simply raising the general difficulty in the base Settings menu of the game) are probably what you’re looking for.

Skyrim Ebony Warrior
Hard fights are memorable fights.

3. New monsters

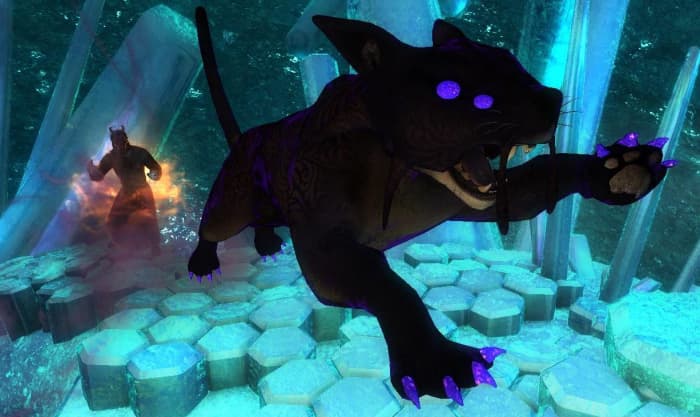
Fighting bandits, cave bears, and giants is fun, but we’ve been doing it for eight years. There’s a slew of free monster mods online, and adding some will add some much-needed freshness and excitement to your typical cave-clearing and everyday meanderings.

A lot of these community-made monsters are pretty impressive – some of them are even scary. Some of these mods can replace monster encounters, subbing in things like a wraith or a lich instead of a draugr deathlord, or a minotaur or cyclops instead of another bear. If you’re a fan of Witcher, you’ll love these fantasy-inspired monsters from MihailMods.

Skyrim demon cat azura's star
New enemies shake up the way you fight

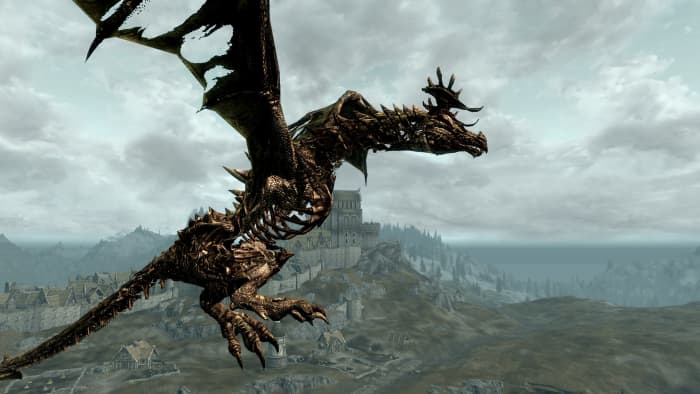
Dragon encounters are the roaming boss fights of Skyrim, but at the end of the day, it’s just a leveled frost or fire dragon 80% of the time. Check out Diverse Dragons by OpusGlass which adds dozens of new dragon types to the mix.

Skyrim Diverse Dragons Collection 3
That’s no ordinary dragon!

4. New weapons and armor

Combat in Skyrim is comprised of slinging spells and shouts, swinging weapons, and firing arrows. If you want to change that experience, literally change the weapons and spells at your disposal.

There are more mods in this category than any other; providing craftable staves, throwable knives, spears, and hatchets, even weapons inspired by Lord of the Rings. Our favorites are the Immersive Weapons and Armor series from Hothtrooper44 which adds hundreds of new armor variants and weapons that you can find and craft as you explore Skyrim. You’ll rarely find two bandits who look alike anymore, which makes for a much more visually fun experience.

Skyrim Immersive Armors
New weapons, new armor, new stats: New builds.

5. New weapon enchantments

There’s some creativity involved when it comes to enchanting in the original Skyrim. We remember putting countless hours into figuring out the best pattern of elemental resistances and buffs into our final set of smithed armor, before cranking up the difficulty and diving back into fights.

Wintermyst by The Care Taker helps us relive that same enthusiastic sense of wonder we felt when we began crafting and enchanting in our first playthrough years ago. The mod adds over 100 completely new, unique, and clever enchantments that you can put on your weapons, armor, and accessories. Enchant a shield to disarm foes, stagger enemies when you jump, summon spectral predators to aid you in battle – there are tons of combinations you can play with, and entirely new builds you can make thanks to this mod alone.

Skyrim Wintermyst enchantments mod
Radically change your combat approach

6. Perk overhaul

Last but not least you can radically change combat by installing an overhaul to Skyrim’s RPG system. The original skill trees are decent, but a bit sparse when you’re going for multiple runs through the game.

Adding and modifying the perks you can obtain lets you envision and work towards a completely new character than you could back in 2011. Play a zany alchemist or a wayfaring druid with Perkus Maximus, a dimension-walking ranger or a Daedra-worshiping Dwemer hacker with Ordinator, or a necromantic warlord with Path of Sorcery.

Skyrim Ordinator perk tree
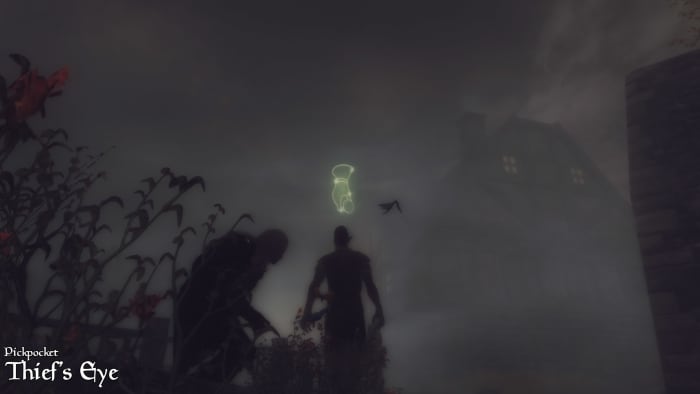
Use the Thief’s Eye to see who’s worth stealing from.

If you’re looking to radically overhaul your Skyrim experience, a perk overhaul is a great place to start; not only will it add lots of new builds for combat – it can also change the game as a whole, encouraging you prioritize new perks, manage your survival differently, or even hold conversations with NPCs differently or start worshiping divines regularly for passive boosts.

We love Skyrim because by 2019 you can use mods to mold the game into whatever you want it to be.

Let us know how you’re planning to change combat in Skyrim, and stay tuned for more news on Elder Scrolls 6 as it’s made available!

Dr. Mario World gives a good dose of puzzle fun

Dr. Mario World mobile game is just what the doctor ordered!

Dr. Mario World

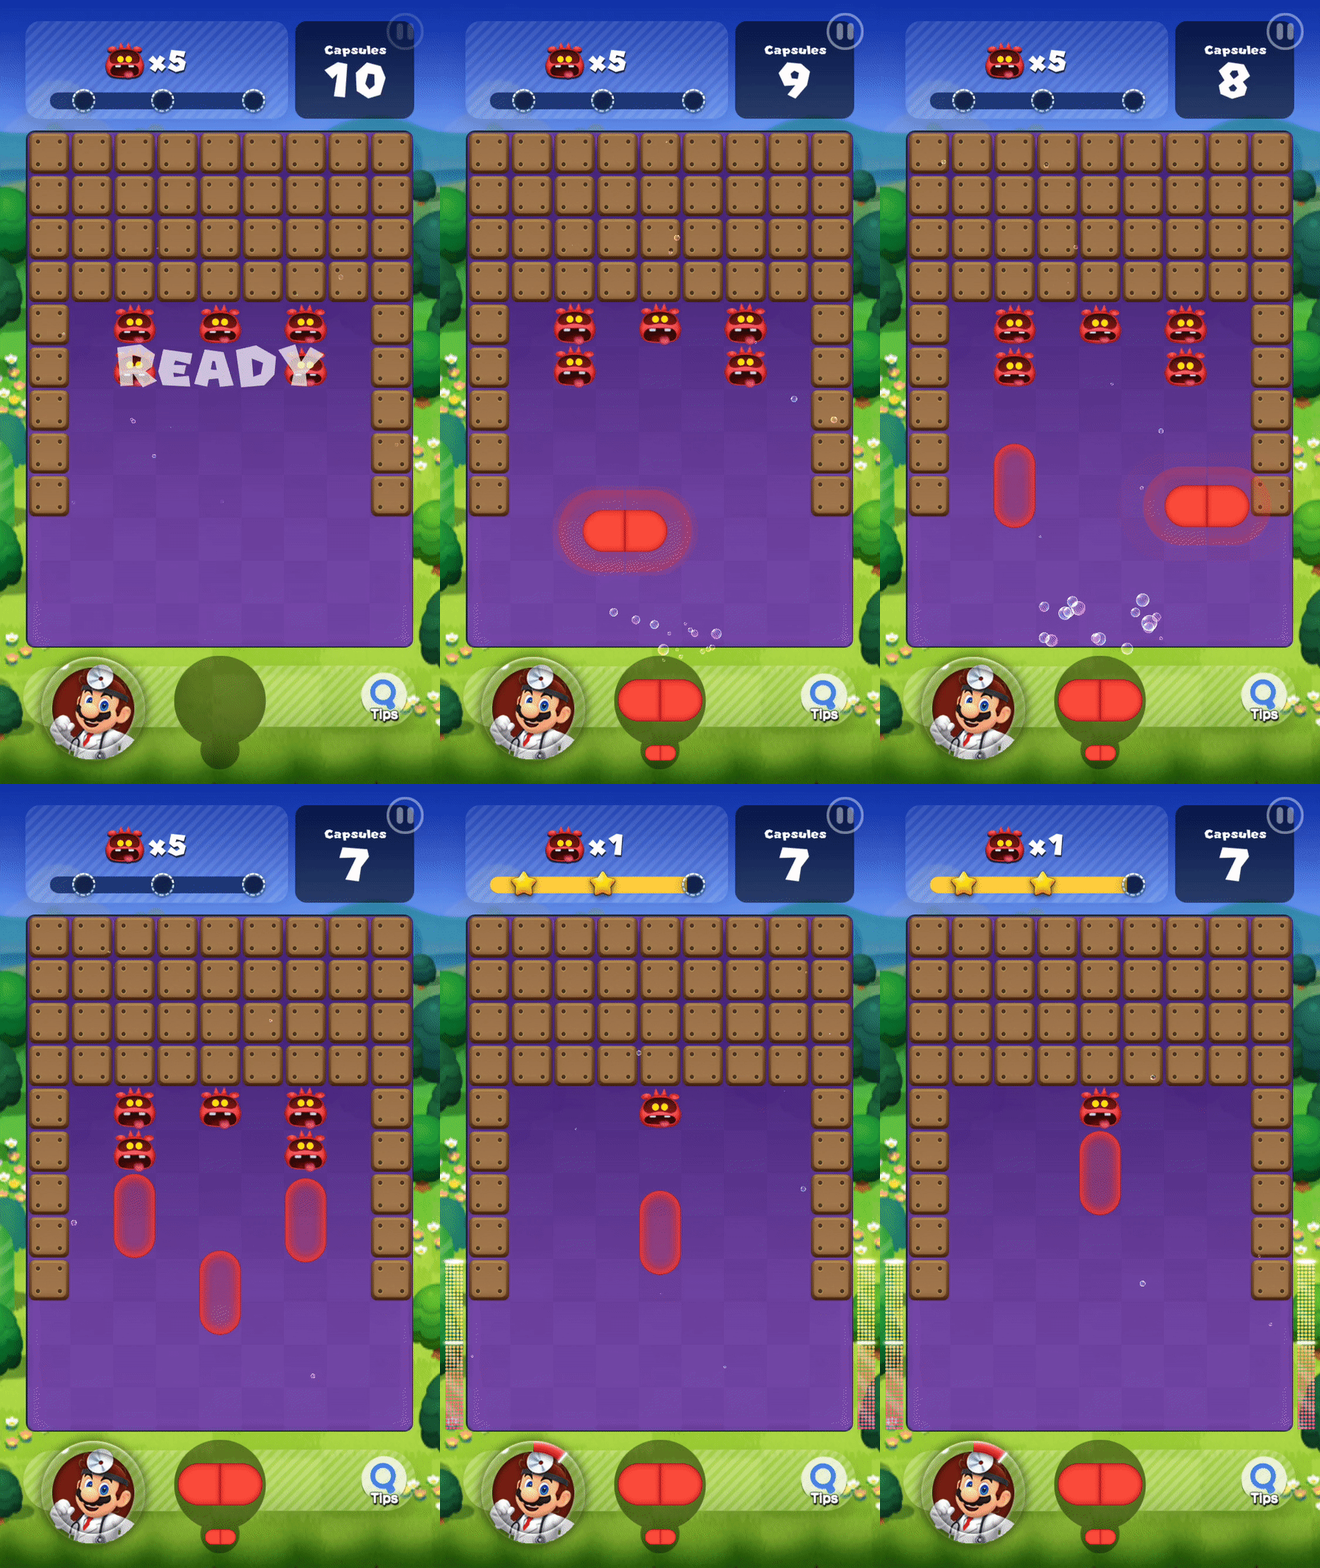
For the first time in years, Mario has put down his plumbing tools and has donned the white coat and stethoscope in another Dr. Mario adventure. This time, Mario brings his medical knowledge to the world of mobile gaming in Dr. Mario World. 

If you played Dr. Mario for the NES or Gameboy, you probably are familiar with the capsule stacking gameplay where you simply align four colors in a row.

This game is a little different from the original. Instead, capsules you throw float up to the surface where they take out viruses. If you were hoping to bring the original classic game to your smartphone, you’re out of luck. This game looks and feels way different. Luckily, the insanely catchy Dr. Mario theme is still there.

Dr. Mario World

However, even though it is different from the classic Dr. Mario, there are still a lot of fun new additions. For example, you can play as other characters including Bowser, Peach, Yoshi, and Toad! 

There are also power-ups you can add use such as bombs and shells. Each playable character also has a unique ability to help you in each level.

Dr. Mario World Download now ►
10

Because it’s a free mobile game, there are some annoying things in the game to help it make money. There’s in-game currency you can buy with real-world money. The in-game currency can buy things like power-ups and extra lives. You absolutely do not have to buy in-game currency in order to play the game.

The game is very easy.  All of the difficulty from the original is gone. You’ll play through at least a dozen levels before you play one with any real challenge. If you were looking for something with old-school Nintendo difficulty, this is not for you. If you’re looking for something that will keep you mildly entertained for a few minutes, this will suffice.

How to create your own Secret Hitler game for free

Learn how to play this hit board game for free!

Secret Hitler

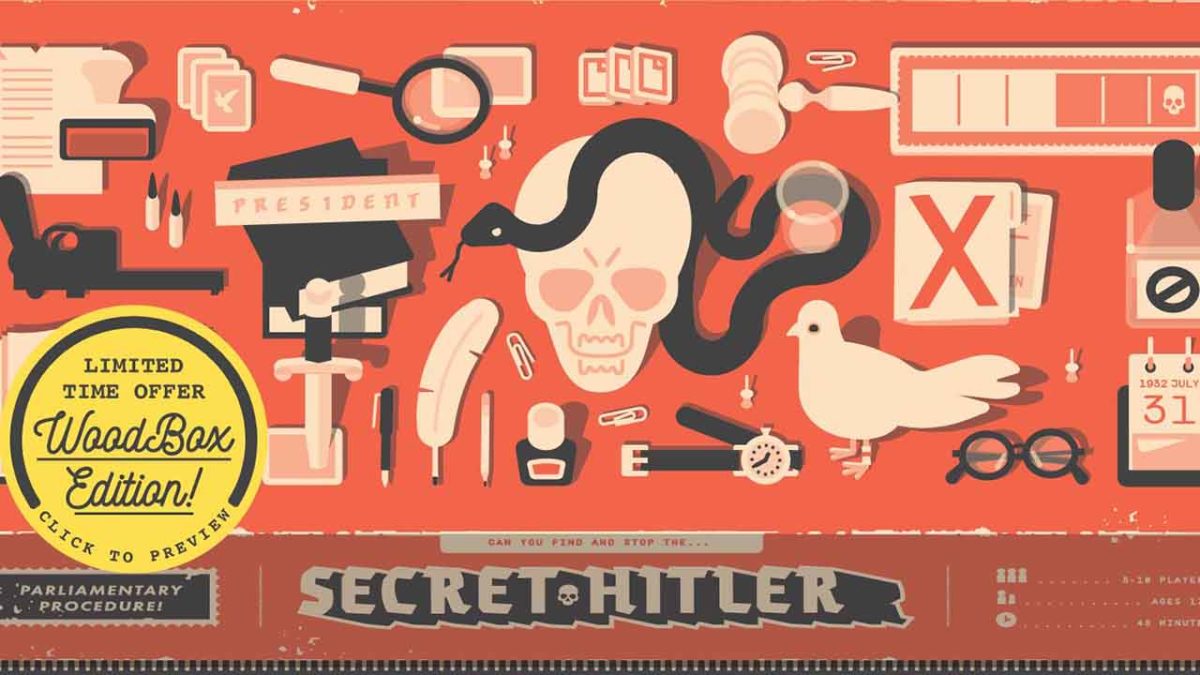
Secret Hitler is the best hidden role game, and nobody can convince us otherwise. Bang, Ultimate Werewolf, Avalon, and Mafia are great options, but the political machinations and end-game trust freakout make SH our top title in a highly competitive board game genre. We’ve played this game time and time again, and it never gets old!

Know what’s even better? It’s FREE.

Official game sets can be purchased, but Secret Hitler also has a Print-and-Play option on their website. In this article, we’re going to show you where to find it, how to make your set, and a few options for improving your self-made boards! By the time you’re done, you’ll have a quality game board for one of the best hidden role games ever made.

Please enjoy our friendly guide on…

How to create your own Secret Hitler game set

Step 1: Printing

Secret HitlerHead over the Secret Hitler website if you haven’t already. Here, you can find more information about the game, including the print links for the Game Set and Rule Book.

Once you’ve downloaded the PDF’s, just print ’em. That’s all there is to it!

Step 2: Cut it Out!

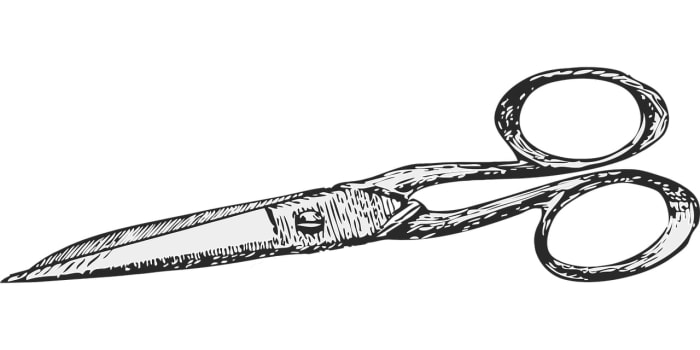
ScissorsGet ye some scissors and cut them out! Be careful to follow the lines, make sure everything’s nice and neat.
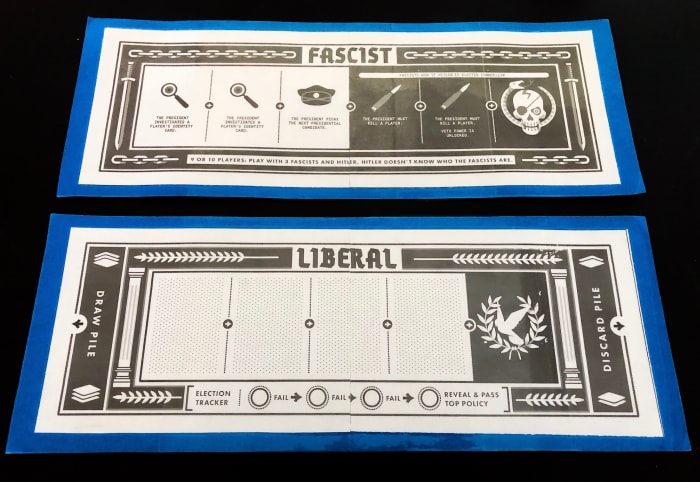


Now comes a decision: how nice of a game set do you want? If you’re playing this once with family members at Christmas, you can simply play as is. If you want your game to look pretty, head to the next step on card stock. If you want your game to last, go on to Step 3, lamination. If you just want somewhere to store it, voyage to the final instructions on making a box!

Step 3: Card stock

Card Stock

Why use card stock on a Secret Hitler set? First, it’s a great way to make everything sturdier. Two, it’s a decently effective way to tie the game board pieces together, since they print in two parts. Finally, for the paranoid players, card stock ensures light won’t shine through your cards and allow others to see them.

They’re cheaters, the lot of ’em!

Head to your nearest Staples, Walmart, or scrapbooking store. Pick up your favorite color of card stock (we suggest 10 9 x 12-inch pieces at least) and a good number of glue sticks. Or, if you’re a madman, grab a glue bottle.

At this point, glue your Secret Hitler pieces to the card stock. If you’re using 9×10 papers they can be divided thusly:

  • Voting cards, discard piles, and role cards: divide the paper into 8ths.
  • Liberal and Fascist policy cards: divide the paper into 16ths.
  • Game boards: divide the paper once, lay it down long-ways to form a backboard. Place the game pieces on top, closer to one end of the backboard so the breaks in card stock and board pieces aren’t on top of each other.

Step 3: Laminate

Lamination

To make your cards water resistant, tear resistant, and glue-getting-old resistant, you should laminate them. A well-laminated deck looks professional and stays around much longer!

Personal suggestion from us to you: if you don’t own a laminator yourself, ask friends and family first, then buy your own lamination pouches if they have one. It’ll make life easier.

Once you have the materials, using the laminator shouldn’t be too difficult: the real trick is fitting as many game cards inside one lamination pouch at a time. It all depends on how much material you want on the sides, and how uniform they’ll look afterward.

As usual, the game boards will be an issue, since they’re so long. We put two lamination pouches over them, on opposite sides, with overlap in the middle. Before you run this beast through the laminator, make sure to wait a while for it the machine to get hot. It may struggle to heat up the center.

When that’s all finished, pull a Step 2 and cut the lamination off!

“Final” step: The extras

Extras

To play Secret Hitler, there are just a few more housecleaning items:

  1. Get envelopes to hold the secret role cards. You’ll hand these out at the start of the game to let everyone know their identity for the round. Manila envelopes, plain white, whatever works for you.
  2. Staple the rule book if you haven’t already.
  3. Get a container. There are a lot of moving pieces. We recommend grabbing a canvas bag at the very least, somewhere to store the game. If you’re going all-out, you can even make your own box…

Bonus round: Making a box!

Box

We made this box ourselves, which turned out looking pretty great!

You may be wondering: why put in the effort? Aside from looking fly, Secret Hitler game sets are so long and thin that no box on earth seems to fit them perfectly. However, with a little wood, spray paint, and a few key items, you can have a comfy box too!

You can do it. Seriously. We aren’t carpentry professionals by any stretch.

Let’s run through the steps quickly!

  1. Measure your game boards to determine size. Plan to have a little extra space at the edges: our box ended up measuring in at around 15 x 6 x 3 inches.
  2. Buy your materials: mosey on over to Lowe’s or Home Depot and pick up a large board of thin wood, preferably under 1/2 an inch of thickness.
  3. Using your measurements, draw out all pieces on the board. When it comes to piece organization, we made two panels for the top and bottom, then made top and bottom slices for the “wall” to create a lip for the cap. This makes attaching hinges and a latch much easier.
  4. Cut it. We recommend a radial saw for straight cuts like this. Be warned: the saw takes about 1/8 of an inch from the material. Keep that in mind when drawing out the cuts! And, of course, be careful: stay safe, ask a professional for help if you’re not experienced with power tools.
  5. Sand it. Just use a light sanding, you don’t want to accidentally form pieces and make them harder to fit together when you:
  6. Attach your pieces. If your board was too thin for nails or screws, no problem: grab wood glue. Trust us, it’s strong enough by far! Don’t worry if there’s an overhang, that will be dealt with after you:
  7. Sand that thing to perfection! Even out edges, make it as smooth as you like. Be careful if you bevel, you don’t want to remove too much of the glue.
  8. Pick up hinges, a latch, maybe even a handle! We found great things at Hobby Lobby, although you may find great options in the craft section of superstores like Walmart. Check it out!
  9. First finish: We didn’t have time to do lacquer, but we certainly wanted to; make your wood look even nicer if you have the chance! Instead of that, we used a clear spray enamel to protect the box.
  10. Make the logo. We printed a Secret Hitler logo to the size we wanted on the box, then made a masking tape paint mask by cutting out the letters with an X-Acto knife, using the printout as a guide. From there, we put the paint mask on the top and used black spray paint (three coats).
  11. Final finish: we recommend one more coat of clear enamel to protect the logo. After that, you’re finished!

Enjoy the box! At the very least, we hope it carries your game set well. At best, we hope you’re proud of your work and can show it off at game nights.

A few more things (IMPORTANT!)

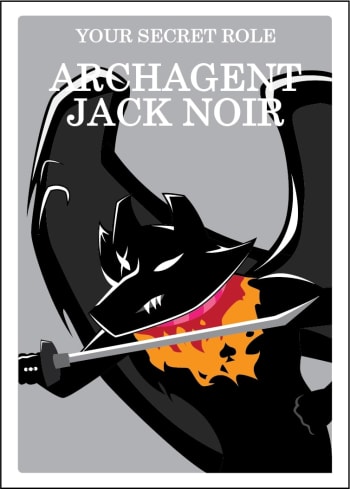
Jack Noir

Secret Hitler has a specific creative commons license: you can print off as many copies as you like, but you may not sell them for profit. You can remake the game as you wish (we made a Homestuck version for fun, you can see Jack Noir above), but any new version must be released under the same license, and still cannot be used for profit.

Thanks for reading, we hope you enjoy creating your Secret Hitler game set! After just a few hours of work, you and your friends can enjoy many more hours of fun, learning tells and forming trust issues.