Best Apps to Unblur Pictures on iPhone & Android

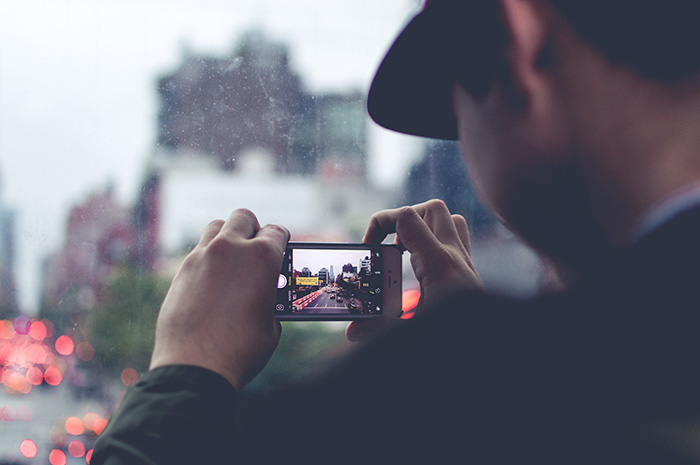
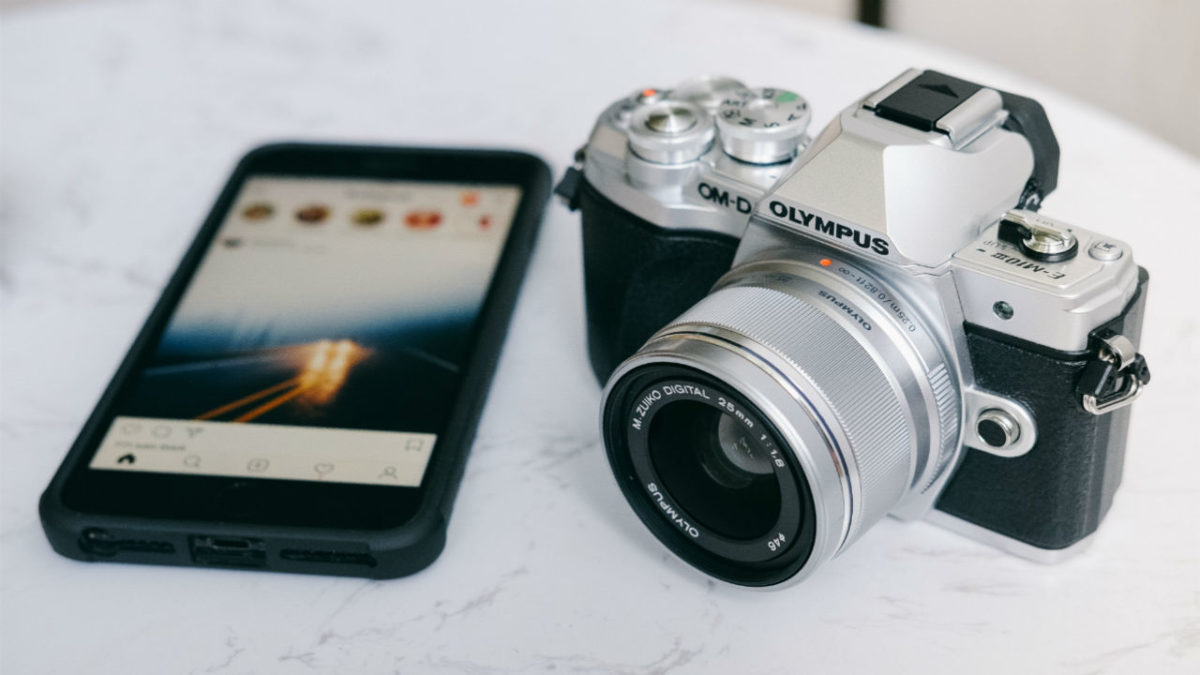
Smartphone cameras keep getting better, which is causing the change that analysts have been predicting: traditional cameras are becoming less important to consumers, and nowadays, anyone can be a photographer because we always have a camera on us.

But that’s not to say that all our photos come out well, and people often take pictures that fail to impress. If this happens to you frequently, keep reading for some tips on how to fix blurry photos on iPhone and Android, and for recommendations on the best photo editing software available for each platform.

Why are my photos blurry?

Before we get down to business and explain how to fix a blurry photo, there’s an important question we must answer, one that might keep us from having to fix our pictures in the first place: why are my photos blurry?

There are many factors that can make a photo blurry, so it’s best to address them before you tap the shoot button. The first and perhaps most common issue is a dirty smartphone lens. Yes, you read that correctly. Having your camera lens covered in dust, dirt, etc. is enough to make a photo come out blurry. It’s that simple. To fix it, just clean the lens of your Android device or iPhone before you take a picture. But be careful: make sure to use a chamois cloth (like the kind you use to clean glasses) or a microfiber towel. Camera lenses can also be cleaned with other materials, but take care not to scratch the surface!

Another frequent mistake that leads to blurry photos is shaking the camera. The shakier your hands, the blurrier your images will be. It’s an equation that never fails. To remedy this, use a tripod when taking pictures. If you don’t have one, here’s an easy tip: hold your breath just before you snap your pic.

Finally, there is a series of other photography-related parameters to keep in mind. For example, when objects are in motion (a bird, a car, etc.), it’s harder to capture a still image of them (unless you adjust the camera settings). Likewise, lighting plays an important role: the dimmer the lighting, the likelier that your photo will come out fuzzy. So consider all these factors to determine if there’s a chance you might take blurry photos!

5 Basic Mobile Phone Photography Tips For Beginners | favbulous

How to sharpen photos

To fix a blurry photo, you don’t need a magic class at Hogwarts School of Witchcraft and Wizardry, but a good image editor. These tools, available on PCs for years, didn’t become popular on phones until recently, amid the rise of social media platforms like Instagram and Tik Tok.

Before trying to fix a blurry photo, there’s one truth to keep in mind: if a photo is extremely out of focus, no program in the world can sharpen it. There’s a saying in the audiovisual world that “you can’t polish a turd,” meaning that something inherently bad can’t be fixed. Therefore, if your photo is really blurry… it’s going to be hard to solve the problem. Now that we’ve explained this, let’s get down to brass tacks!

How to Make a Blurry Picture Clear on iPhone and iPad

While you can use iOS’s native photo correctors, the best way to make the picture clear is to use an image editing tool. These have been around for a long time on PC, for example, if you think about Photoshop. However, sometimes you need a quick and easy way to fix blurry photos on your iPhone or iPad. Enter image editing mobile apps. Although these may not be as full-featured as their PC counterparts, they are ideal for those quick fixes and touch-ups. 

Before we get into the apps and how to fix blurry pictures, it is good to remember that the less there is to fix, the easier it will be. Try to keep this in mind while taking photos and take photos that don’t need any fixing.

Best Apps That Make Pictures Clear for iOS

If you want to learn how to unblur a photo on iPhone, this section is for you. We will be looking at a few of the best apps to unblur photos on your iPhone. We will also be sharing how to use these apps step by step so that you can start to fix blurry photos.

Adobe Lightroom

If you like Photoshop, be sure to check out Adobe Lightroom. This “first cousin” of the Adobe suite can also be used to retouch and edit photos. What makes it unique is the fact that it’s oriented towards photography and newbies in the field.

In terms of sharpening photos, Lightroom gets the job done, but we prefer Photoshop. Again, it’s an incredibly competent photo editor, especially since you can apply “filter” packs that make everything easier.

Adobe Photoshop Android DOWNLOAD
8

Step 1: Launch Lightroom and Open Your Image

Launch Adobe Lightroom on your iPhone and choose the image you want to sharpen/unblur from the Library Module.

Step 2: Go to the Develop Module

Next, click on ‘Develop’ in the module picker to start editing your photo.

Step 3: Adjust the Amount/Intensity Slider

With the first available slider, you will be adjusting the intensity of the sharpening. Moving the slider to the left makes it less intense, whereas adjusting to the right increases the sharpness. The easiest way to adjust this is by keeping one finger on the photo and using another finger to adjust the slider. By doing this, you can see a black and white version of your photo that will clearly show the changes made as you drag the slider. The app will also warn you if you over-sharpen your photo by displaying red in the slider. A value around 30 is usually sufficient here, but adjust it to what works best for you. You can always come back and re-adjust if needed.

Step 4: Adjust the Radius Slider

By adjusting the second slider, known as the radius slider, you will be defining how strong (in terms of pixels) the sharpness is applied to the edges. A high value will show thicker edges, whereas a lower value will show finer, more subtle lines. Again, keep one finger on the image while the other toggles the slider to see the details of the changes in black and white. 

Step 5: Adjust the Detail Slider

With the details slider, as the name suggests, you control how many details are sharpened. Keep one finger on the screen and drag the slider left and right until you get the needed detail.

Step 6: Adjust the Masking Slider

The masking slider determines if sharpness will be added to your entire photo or just the subject. The lower the sharpness mask, the more of your image will be sharpened. The higher you go, the more specific the program will get and focus more on the subject of your photo instead of the background. Hold your one finger on the image and use another finger to drag the slider left and right. 

Canva

If you’ve been on social media for a while, the name Canva will surely ring a bell. This app –or web service– stands out for its easy photo editing features. You can also create graphics, prints, presentations, layouts, backgrounds, and a long list of features. 

One of the main characteristics of Canva is that it’s designed for infographics. So, if you want to create a spectacular design without using a more complicated photo editing tool (recommendable if you want a more professional result), this application will surely get you out of a pinch.

Canvas (Android) Download now
8

Step 1: Open Canva

Open the Canva app on your iPhone

Step 2: Upload Image

Upload your image to Canva by tapping on the ‘Uploads’ tab and choosing the photo from your device. Once the image has been uploaded, drag it into the blank canvas.

Step 3: Adjust Image

Now, tap on the image and in the top menu, tap on ‘Adjust’. Once you do this, you will see a ‘Blur’ slider appear. By dragging this slider to the left, you will increase the sharpness of your image and lessen the blur.

How to Make a Blurry Picture Clear on Android

Android also has a native photo corrector that can often be enough to fix minor issues with photos. Most newer Android devices have AI-based editing features in the form of skins and features that can make minor corrections. You might have to use another third-party app with more robust features for photos that cannot be fixed with the native editing tools.

Best Apps That Make Pictures Clear for Android

This section will cover how to fix a blurry picture on Android devices using third-party apps. 

Enhance Photo Quality

Enhance Photo Quality is beneficial if you’re looking for a decent free image editing app that works well on fixing blurry photos. 

Step 1: Open the App

Open the app on your Android phone by tapping on the app icon.

Step 2: Open the Image You Want to Edit

Import the image you want to correct into the app.

Step 3: Tap on ‘Sharpness’

Tap on the ‘Sharpness’ tab at the bottom of the screen.

Step 4: Adjust the Dial

This app doesn’t have the traditional slider. Instead, it has a dial complete with sound effects and vibrations to imitate a real camera. To increase the sharpness, you turn the dial towards the ‘+’. However, we recommend you do this very slowly as this app has a powerful sharpening effect, and if you move too fast, you may miss the perfect spot.

PIXLR

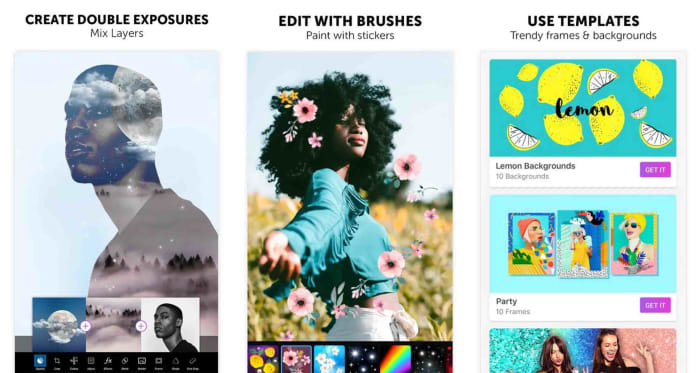
PIXLR is another excellent free photo editing tool that enables users to make various editing changes to their photos. This app comes complete with effects, overlays, filters, collages and even double exposure.

Step 1: Open the App

Open the PIXLR app by tapping on the app icon in your menu.

Step 2: Open Your Photo

On the app’s main menu, choose ‘Photo’ and upload the photo you want to edit from the gallery.

Step 3: Select the Editing Tools

Now, click on the ‘Editing Tools’ represented by a bag icon at the bottom left of your screen.

Step 4: Tap on ‘Sharpen Tool’

With the editing tools open, look for ‘Sharpen’ and tap on it.

Step 5: Adjust the Amount

The first adjustment you can make is the amount of sharpness. Adjust the slider until you reach the ideal sharpness for your image.

Get more clarity!!

Now that you know the best apps to unblur pictures on iPhone & Android, you can make your images clearer. Your followers on Facebook and Instagram will appreciate the effort! We hope these techniques have helped you.

The Best Apps for Improving your Photos this Summer

After a strange start to the year due to COVID-19, we can finally say that summer is here. The sun, the beach, the mountains, seeing the world… It doesn’t matter where you’ve decided to spend your vacation this year, the important thing is for you to relax, take a break from your routine, and of course, snap lots of photos to make all your friends green with envy on social media!

Pareja sacándose una selfie

It’s probably happened to you more than once: you take a ton of photos on your phone, but you never do anything with them because you’re too lazy to edit them on your PC. But did you know that you can improve them right on your phone? Google Play has hundreds of great apps that you can use to edit any image in a matter of seconds, and many of them are free!

To help you find the best app, in today’s article, we’re going to share a roundup of the best photo-editing apps for Android phones. We hope you find it helpful!

Adobe Photoshop Express

Imagen de Adobe Photoshop Express

When we think of photo-editing software, for many of us, Photoshop immediately comes to mind. This program has literally everything you need to turn an ordinary photo into a work of art. That said, the software is expensive, you have to use it on a desktop, and there’s a learning curve if you want to get the best results. But did you know that Photoshop has a completely free version for your phone?

Photoshop Express, a simplified version of this photo editor, maintains the basic tools of Photoshop so you can use it on your Android phone. You can do all the essential tasks to modify your photo however you want. For example, you can crop images, adjust the exposure, and even create predetermined settings to edit your photos much faster.

Photoshop Express is a useful app that achieves optimal results, and  it’s completely free, so… what are you waiting for? Download it today!

Adobe Photoshop Express DOWNLOAD
8

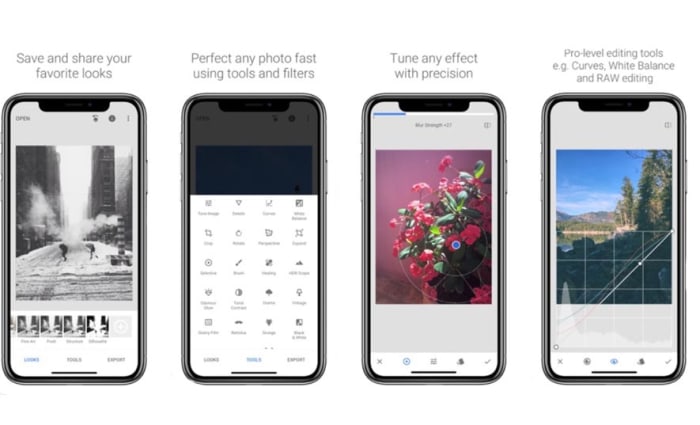
Snapseed

Imagen de Snapseed

Snapseed is a revolutionary photo-editing tool for your phone. This app, designed by Google, has a wide range of options, tools and filters that will make your summer photos the envy of all your friends on social media.

One of Snapseed’s main advantages is the fact that it was developed by Google. This guarantees not only quality, but also great performance on any Android device. It’s so easy to use: just select a photo to improve, crop it, transform it, draw on it, or use the sliding controls to make all kinds of edits. For instance, you can sharpen or blur the image, change the temperature, etc. Another cool feature lets you repair sections of your images, and there’s an interesting selection of filters to put the finishing touches on your photo.

Snapseed is an easy app to use, and the results are truly amazing. What’s more, it’s completely free, and it barely uses any of your phone’s resources. What more could you want? Download Snapseed quickly and safely below.

Snapseed DOWNLOAD
9

VSCO

Imagen de VSCO

VSCO is a professional app that will make your summer photos look magazine-worthy. Although it has integrated purchases, they are completely optional, and the app works perfectly without them.

If you check out Google Play, you’ll see that VSCO is one of the highest-rated photo-editing apps on the platform. This is because the app is user-friendly, comprehensive, and capable of achieving professional results. It has a wide range of filters to improve your photo, and you can compare them easily by using its menus.

What’s more, VSCO’s active community of users includes professional photographers who, in addition to sharing their work, will give you all kinds of tips to improve your technique. If you’re interested, you can download VSCO for free below.

VSCO DOWNLOAD
7

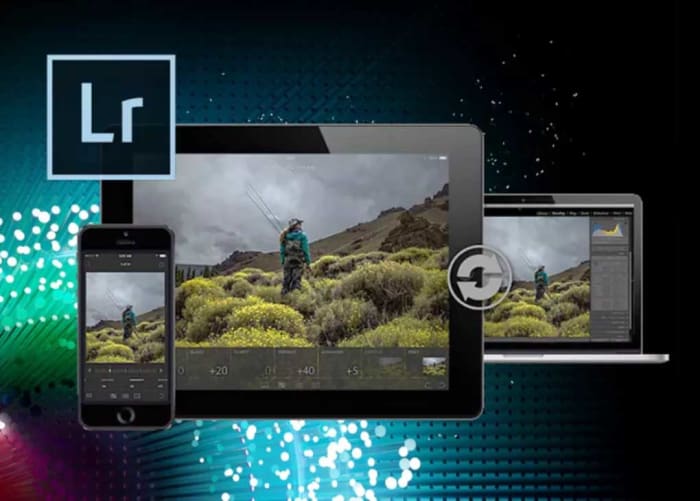
Adobe Lightroom

Adobe Lightroom

Lightroom is, along with Photoshop, one of today’s most popular photo-editing programs. You can use it to edit photos in RAW format en masse, adjust the exposure, add watermarks, and use a number of interesting features to achieve the perfect photo. You’re probably familiar with the desktop version of Lightroom, but not everyone is aware that it has a version for phones. What’s more, it’s free!

Adobe Lightroom for Android lets you do the same tasks as the PC version. So get ready to improve your beach photos or that cute selfie from your hiking trip. Lightroom for Android is completely free, but to use some of the features (for example, synchronize your photos), you’ll need a subscription to Adobe Creative Cloud.

Adobe Lightroom is an excellent complementary tool if you regularly use Adobe Photoshop Express. If you’re interested, you can download Adobe Lightroom below. It’s completely free.

Adobe Lightroom DOWNLOAD
9

Lens Distortions

Lens distortions

Lens Distortions is an app for anyone who wants to improve their photos by adding filters or special effects. In fact, many of these effects are used regularly by top advertising agencies and in the film industry. So, this simple yet powerful and free app is an excellent option if you want to wow your friends with the best photos.

In the mobile version of Lens Distortion, all of the program’s features have been adapted to be intuitive and easy to use on a touch screen. You’ll find a variety of overlays, shimmers and light hits to give any photo the focus or mood that you desire.

Lens Distortion is completely free to download. This version comes with five filters that you can use as much as you wish. If you want more, you can purchase the premium version, which has a total of 250. Download the free version of Lens Distortion below.

Lens Distortions DOWNLOAD
8

PicsArt

Imagen de Picsart

If you’re looking to do more than just improve image quality or add filters, check out PicsArt. It’s not only an excellent photo editor, similar to Photoshop, but also a tool that lets you paint, decorate, and add all kinds of cute details to your picture. And it’s completely free!

PicsArt is an easy app to use: just open your photo and make all the changes you desire. You can crop it, adjust the color, make it brighter, or add a glossy effect. Also, the app has tools such as a pencil for drawing on the photo, adding text, or adding drawings and stickers.

This app is comprehensive and fun, and it’s ideal for anyone who wants to make their summer photos light and colorful. You can download PicsArt quickly and safely below.

PicsArt DOWNLOAD
8

Hypocam

Hypocam is the perfect app for anyone who enjoys taking black and white photos. Instead of taking a photo and removing the color, you can use it to take black and white photos directly.

Hypocam adds a monochrome filter to your phone’s camera and has a good selection of photo-editing tools. They range from classics like crop and rotate image to a range of textures you can use to enhance your photo. Another interesting thing is that the app regularly shares news about the world of black and white photography so you can stay on top of the latest trends.

Hypocam is a free app that offers built-in purchases. If you find the free version too limited, you can purchase new tools to improve your photos. Download this app quickly and safely below.

Hypocam DOWNLOAD
9

I don’t like any of the above apps… Do I really need one to edit my photos? 

All Android phones have a built-in photo editor that you can use to make simple edits to your photo. Just open “Gallery” in your phone, select the photo you want to edit, and tap the pencil icon.

When you open your phone’s photo editor, you can crop the image, adjust the brightness, draw, add text, or rotate the photo. Don’t expect special effects or magazine-worthy results, but it’s a useful tool if, for example, you just want to crop your photo a bit. Then simply save the image, and you’ll find both the edited photo and the original in the Gallery on your phone. It’s that easy!

We hope you liked our roundup of apps to improve your vacation photos. Where are you going on vacation this year? Tell us about it in the comments section!

The best apps for making videos from photos

Want to turn your photo collections into videos? These five apps, programs, and websites will help you create epic slideshow videos.

According to Facebook users on the social network engage with videos an awful lot more than they engage with photos. Furthermore, we’ve now also got social networks like Snapchat and Tik Tok that encourage users to create short and snappy videos and photo videos to share across the network. We’re transitioning from a photo first world to a video-first world. Hell, we might even be living in a video-first world right now and we simply haven’t caught up yet.

It isn’t easy for many of us, I included, to simply create fun and engaging videos at the drop of hat. If like me, you’re still a photos first person, you will be looking to make videos out of your photos. Today, we’ll walk you through some of the best apps to help you make videos from photographs.

How to make videos with pictures

Below we’ve laid five of the best ways to turn your photographs into slideshow-like videos. You don’t need impressive video editing skills or experience. These Android and iPhone apps, programs, and websites have all been designed to be user-friendly and with ease of use in mind.

MiniTool Movie Maker

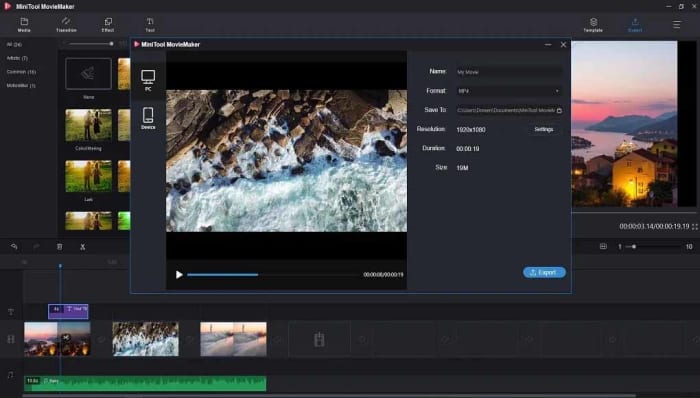
Our top choice today is the MiniTool Movie Maker, which offers a fantastic and free solution to anybody looking to turn their photos into videos. What stands out about the MiniTool solution is that it gives you the freedom to create your movies without imposing a company watermark. Normally, these tools make you include their branding on free versions and will only remove them if you pay for a premium version.

Other standout features of the MiniTool Movie Maker app, which is available to download on Windows include fun and easy to use Hollywood-style movie templates and an impressive array of effects including transitions titles. Editing tools to go with your slideshow capabilities include splitting and trimming clips and combining multiple clips together. When you’re done and your video is complete, MiniTool can export your creation to all major video file formats.

MiniTool Movie Maker Download now
9

Google Photos

Google Photos is a great tool for making videos out of your photos. The app is so good at making videos from Photos that it can do it by itself. Google Photos can automatically group your photos together, based on a number of different categories it can recognize, and then add music and transition effects to create short videos from your pictures. This means that once you have the app installed on your Android phone or tablet, or iOS iPhone or iPad you’ll automatically receive notifications from the app telling you whenever it makes movies from your photos.

These automatic movies are great but obviously you’re going to want to make your own too. There’s nothing stopping you at all from making your own photo slideshow movies using Google Photos and you can include all the cool effects that go into the automatic movies too. These features include music, text, transition effects, and even Google Maps integrations showing where you were when the photos were taken and even including your travel details too.

Google Photos Download Google Photos
7

Slideshow Maker

Slideshow Maker is another video editor for Windows 10 that offers a lot of video editing features that will help you take your static photographs and give them a new life. Similar to the MiniTool Movie Maker, Slideshow Maker has some really great features including slow-motion effects, color filters, and more. Impressively, Slideshow Maker is even capable of outputting videos that can work with VR headsets too.

Another key feature of Slideshow Maker is that it is free although you will have to deal with a number of adverts if you use the free version. Another negative point that you need to consider is that the app isn’t compatible with MP4 video files, which is a very common video format. If most of your files are MP4, you might want to look at one of the other apps on today’s list.

Slideshow Maker Download now
9

Photo Slideshow

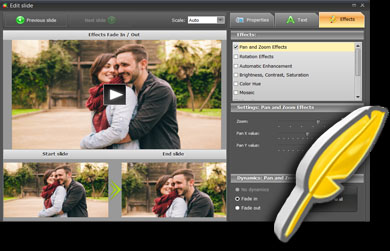
This classic Windows program offers a wide array of professional-level movie-making features. The kicker here, however, is that the program isn’t free, and you’ll only get access to its features for a very short free trial period.

If you do decide to go with Photo Slideshow, however, you’ll get access to features like transition effects, music tracks for your slideshows, face focusing effects, and even animation. The animation effects, in particular, add a lot of possibilities to your videos allowing you to pan in and zoom into your photos. Other cool animations adding vignettes and retro film-like effects to your movies too.

Photo Slideshow Download now
7

Animoto

Our final solution today for turning photos into videos is the Animoto site. Animoto does have professional and team plans but, fortunately, it also offers a free plan for casual users like you and me. The only catch with the free version is that your videos will include an Animoto watermark. If you don’t mind that, however, then Animoto offers a simple solution that doesn’t require you to download any apps or programs at all.

What’s great about the Animoto solution is just how simple it is. You will have to create an account on the site but once you’ve done that everything will run smoothly. All you need to do is select the template you want from the many available on the site and then upload your photos. After that is just a case of putting your photos in order and letting Animoto do the rest. If you’re a technophobe, then we suggest you look at Animoto as it couldn’t be simpler to use and still impressive results.

How to take better pictures on your phone

These quick and simple tips will help you take much better photos using your smartphone camera.

smartphone photography

Your phone today likely has a camera that is better than the digital camera you used to own just a few years ago. The smartphone camera has long been one of those battleground features that manufacturers have used to try and get one over on their competitors. This is why we now live in a world with AI-infused smartphone cameras with dedicated neural chips and ridiculous 108-megapixel mobile photography rigs.

Technology and hardware, though, is just only half of it when it comes to taking good photos. Sure, having a powerful DSLR camera with a beautiful lens or an expensive smartphone equivalent is one thing but if you don’t know what you’re doing it with, your photos will still come out the same, they’ll just be a little clearer and their file sizes will likely be bigger. Therefore, today we’re going to bring you some basic photography tips and tricks to help you take better photos on your Android phone or iPhone.

Tips on how to take better pictures

If you want to take better photos with your smartphone check out these quick tips below. These simple tricks will help you take photos you’re proud to show other people.

Learn about light

Photography is the art of capturing light. Whatever your light source, the photo you take will only ever be the light your camera captures that has reflected off everything that falls within the field of view of your lens. This means that you have to consider the lighting in your shot as much as you need to consider the subject. This is so important that we’re going to give a few more tips on it.

Avoid direct sunlight

The sun is a very powerful source of light and in most cases, it is so powerful that it is too difficult to control. You see the sun won’t just be lighting up your subject, it’ll also be lighting up your surrounding environment making it hard to clearly define what the photo is supposed to be and, even worse, creating shadows. The brighter the sun, the darker the shadows and you’ll notice this particularly when taking photos of people and faces. On a bright sunny day, stepping into the shadows will give you much more control over what you’re photographing and help you take great photos.

Use the flash during the day

This might sound counter-intuitive but in many situations, it is the perfect remedy to what we’ve outlined above. Your camera’s flash is there to provide extra light on your subject. You can use this extra light fill in the shadows that direct sunlight might be creating on your subject. You see, it is all about the light. Control the light, control the photo.

The magic hours

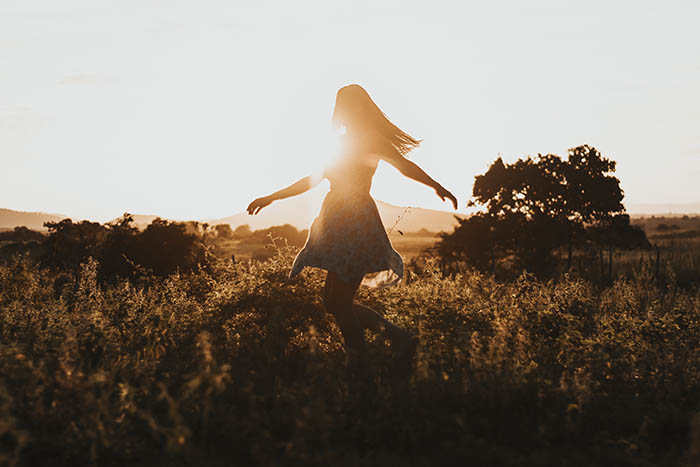
Our final tip on controlling the light in your smartphone photography is simple but also will help you take fantastic photos. The level of daylight is different throughout the day and there are two magical hours when the natural sunlight will bathe everything you could ever want to take a photo of in warm, beautiful light countered with softer more subtle shades and shadows that help create fantastic photos. The two magic hours in photography are just after sunrise and just before sunset. Make yourself available to take photos during these hours and you’re already well on the way to taking better pictures.

Think about height

Another amazingly simple way you can drastically affect the quality of your shots is to think about the height you’re holding your smartphone camera. It is second nature to grab your camera and hold the viewfinder up to your eye or at least hold it up to see the screen and then start snapping away. If you instead stop and start to think about the level you want the camera to be at in relation to the subject, you’re already beginning to construct the photograph rather than simply grabbing a shot of something that caught your eye.

Start thinking off-center

Another common photography faux pas is to place the subject of your photo smack bang in the middle. Instead, a good rule to follow when you’re taking a photo of something is to think about the rule of thirds. Photographers split everything that will make up a photo into thirds and then decide to place the subject of the photo on one of the lines that would represent one of these thirds. It also works on landscape shots if you think about the elements that make up the shot. This can make photos appear less busy but again it forces you to think more about the photograph as a whole rather than simply considering what you’re taking a photograph of. Fortunately, your camera app will likely have a grid view that will help you break up your shots into thirds.

Focus manually

Auto-focus is great in many situations but learning to focus yourself will help you take your photos o the next level. Focusing is a way to contrast your subject from the surrounding environment and it is all the more powerful on smartphones that have Portrait modes. Portrait modes will blur the background while leaving the subject of the photo crystal clear. This is either achieved through using lens trickery or AI algorithms. Either way, the end result is fantastic and shows you what you can achieve if you focus your shots manually. On smartphone cameras focusing couldn’t be easier, you simply tap the screen where you want to focus and the camera will do the rest.

Practice

Our final tip is the simplest of them all. Take photos every day. It is only through keeping an eye out for potential photos all around you and then trying to capture that image perfectly as often as you can that you will get better. Photography is just like anything else in that practice makes perfect. Take photos and then see which ones you like and which ones you don’t. Follow the tips above and hone your technique and results until you start to see a style you like.

Best Mobile Apps for Enhancing Photos

These are the best apps to help you edit the photos you take on your Android smartphone or iPhone

Are you a professional photographer that needs to be able to edit images on the move or just a person who likes to add that extra zing to their personal snaps? The development of mobile technology has brought about more complex photo editing apps with features that only used to be able on the desktop. Here is a compilation of the best apps to increase your creativity and get you producing photos that will surely impress your audience.

Best mobile apps to make photos look better

Snapseed

Another excellent Google app creation is Snapseed, which is a professional level app for editing your photos with a huge range of tools to spruce up your images.  It takes some knowledge of photography but a little experimentation will have you producing images that will be the envy of your friends. Being a Google app, it can also be accessed from Google Photos inside the editing options.

Key features:
  • Choose from over ten convenient styles to apply to your photo.
  • Finely tune your image with popular options such as brightness, contrast, saturation, and ambiance.
  • Rotate, crop, expand, and apply perspective to your pictures.
  • Apply HDR and other visually pleasing filters.
  • Comprehensive export options including exporting to selected folders, sharing with people of other apps, and saving copies with size/format/quality adjustments.

There are more features to play around with, just download and dive straight in.

9

Adobe Photoshop Express

Originally for desktop PCs, Adobe Photoshop has become the best photo editor on the market and the go-to image editor for the discerning professional. It offers an endless list of alterations that you can apply to images to get them to the required standard.

What this app does is take the best features of Photoshop and make them accessible for free on your mobile device. The interface is relatively easy to use, and a welcome benefit of this app is that it does not contain any annoying advertisements to interrupt your editing.

Other Key features:
  • Adjustment of contrast, brightness, exposure, hue saturation, luminance, and shadows.\
  • Rotate, flip, and perspective correcting functions.
  • A crop function that comes with pre-sets for those of us who like to upload to social media.
  • Removal of red-eye for people and animals.
  • The ability to make beautiful collages.
  • Usual sharing with links to the desktop version and Adobe cloud, but also other apps like Google Photos and Facebook.

Adobe Photoshop Express Download now
8

Adobe Lightroom CC

As with Photoshop, Adobe Lightroom CC also has a fully functional desktop version.  The mobile version of the app and in closely linked to the desktop app and if you want the full benefits of this amazing program, you really have to buy the full version. It main benefits are that it is easier to use than photoshop and enables you to work on more than one photograph at a time.

Other Key features:
  • Comprehensive feature set with similar adjustments to photoshop.
  • Great for people who like to post to social media easily and quickly.
  • Ability to edit RAW images (paid only).
  • Editing does not destroy the original image and all edits can be undone.
  • Can create and apply pre-sets even in the mobile version.
  • Available on iOS, Android, Windows, and Mac.

Adobe Lightroom CC Download now
7

VSCO

VSCO Cam for Android header

Being another of the best free editing packages in the mobile world, VSCO offers a wide range of features for editing and posting to social media. You have access to the VSCO community, where you can post your pictures and view others to gain ideas from other users.  The paid version introduces a place where you can expand your knowledge with tips and tutorials.

Other Key Features:
  • Easy use interface
  • Features comparable to other apps in this category, like light exposure, contrast, cropping, clarity, and shadow adjustments. All available without upgrading.
  • The same adjustments can also be made to videos.
  • Access to some of the best filters in the business and even more with the paid version. It will also suggest pre-sets for quick editing on the go.
  • Available on iOS, Android, Windows, and Mac.

6

Touchretouch

Remove any unwanted blemishes from your images with this handy app with just one touch or swipe of your finger. It is a paid app but at such a low price compared to the results it produces, it has become one of the most popular photography tools on the market.

Key features:

  • One-touch removal of unwanted objects in your pictures.
  • Quick repair tool.
  • Line removal tool.
  • Clone stamp to recreate selected parts of the image.

TouchRetouch Download now
8

PicsArt

An awesome app containing the standard editing tools but also the ability to add a multitude of quality effects to your images. Like VSCO it also has it’s own community, where you can explore ideas from other users, and your photos can also be uploaded to popular social media sites like Facebook and Twitter. Believe it or not, a negative aspect of this app could be that it has too many features, but that is for you to decide.

Key features:
  • A huge amount of editing tools including the standard options provided by the other apps in this list.
  • A template gallery for quick and easy editing.
  • Several different types of effects that can be applied to your images, such as Magic, Duotone, and pixel stretch, to name but a few.
  • Ability to change picture backgrounds.
  • A great range of interesting filters.
  • A meme generator that provides templates to create some humorous memes to share.
  • Available on iOS, Android, and Windows.

PicsArt Download now
7

Chrome extensions for a better Instagram experience on your PC

In the same league as Tik Tok, Instagram has become the most popular social media platform for teens and young adults today. As audiovisual takes precedence over text, it has managed to hook millions of people around the world. However, it continues to gain ground among an older audience, and here, a key variable comes into play: the Instagram version for desktop leaves a lot to be desired.

Although Facebook – the owner of Instagram – continues to add new features, it still can’t hold a candle to the smartphone version. So today, we’ve brought you a few Chrome extensions to improve your Instagram experience on your PC.

First of all, make sure you have updated Chrome. You can download it below for free.

Google Chrome Download
7

Real-time notifications

We’re going to start our article with a basic feature: real-time notifications from your account. If Instagram had a drawback, it would have to be the notification system. It doesn’t matter if it’s on Android, iPhone, iPad, PC, etc. In all cases, the service doesn’t work as well as other social media platforms.

On desktop, we can at least add a “patch” through a Google Chrome extension called WebClient for Instagram. This tool simply notifies us about comments, likes, new followers, and more from our profile. Just enable the extension on your Chrome browser and make sure you’re logged into your Instagram account (this applies to all the extensions going forward). You’ll start to receive real-time notifications about everything as it happens. How cool is that?

Download photos and videos

https://www.youtube.com/watch?v=NYYjp83aUH8&feature=emb_title

As you may have already noticed, Instagram won’t let you download images or videos from its platform. On your phone, you have no choice but to use a mobile app or your operating system’s tools, while on desktop, you can’t do the classic “Save image as.”

To make it happen, you need the Downloader for Instagram extension. As the name suggests, this tool lets you download any photo or video from the famous social media platform. You can save something with just a few clicks of your mouse.

Likewise, this extension lets you read and reply to direct messages from the Instagram website, something that wasn’t possible until recently (however, since the latest update a few weeks ago, you can check messages without a problem).

WhatsGreen Multi Messenger

This extension is for not only Instagram but all the social media platforms and messaging services you use on a daily basis. WhatsGreen Multi Messenger is a tool that lets you check all your linked apps with a few clicks of your mouse.

For example, imagine if you use WhatsApp, Telegram, Twitter, Instagram, Skype, etc., every day. Well, with this extension you can keep all the icons for these apps organized in the same folder. It’s like having a smartphone display right on your Google Chrome browser.

GrowBot Automator

The next extension isn’t our favorite if you want a clean, healthy Instagram account, but it could be convenient for a business account: GrowBot Automator.

This automated tool follows other accounts to flesh out your Following and Followers lists. You can program the “bot” to follow accounts with a minimum and maximum number of followers, with a minimum and maximum ratio of followers to following, with a minimum number of posts on their profiles, that are verified or unverified, that are private and much more. There are so many options that it could be overwhelming when you install it, but the idea is to automatically gain followers.

Improved Layout for Instagram

This extension is one of the most popular in Google’s online store for a reason: it enhances all of Instagram’s features to the point where the mobile version will seem too limited to you.

Improved Layout for Instagram is based on the following premise: “The default Instagram.com layout is not optimized for desktop.” That’s how blunt the developers are, and what they do is implement several functions: for example, you can view several posts simultaneously, since they appear in a horizontal format as opposed to vertical; controls are added to videos, such as fast-forward, rewind, pause, etc. (something the mobile version lacks and we miss), and there is full-screen mode and much more. You should definitely try it because the difference is amazing.
Night Mode

This extension is easy and straightforward: Night Mode for Instagram. As you may well know, this dark tone has become a favorite among users, and practically all the applications, programs, etc., on the market are including this feature.

Instagram Night Mode dims the entire page. And we mean that quite literally, as everything is displayed in this dark tone. Backgrounds, posts, stories… If anything ever appeared as white in the original version, it will be reversed with this extension. It’s an easy way to rest your eyes so the brightness doesn’t fry your pupils.

App for Instagram

Last but not least, we have an extension called App for Instagram. Its purpose is clear: to let you use Instagram on a PC just like you do on your phone. It’s that simple.

The developer of this extension, one of the most popular in the Chrome Web Store, wants to ensure the same experience on both systems: you can view (and respond to) Instagram stories just like you would do on a smartphone, display “Likes” the same way, at the bottom of the page instead of the top (as usual on the PC version), have an identical layout, etc.

In short, it aims to eliminate any visible differences between the mobile and desktop versions, so it’s the same app for everyone.

And those are the best Google Chrome extensions to make the most of Instagram. They’ll let you download photos and videos and even use the PC version just like the mobile one. Which one is your favorite?

WhatsApp Web is getting some nice image upgrades

Image Albums are coming to WhatsApp Web

WhatsApp on a computer

WhatsApp Web is a great way of staying in touch with your friends and family while using your computer. You open it up, zap the QR code with your phone, and then you’re away. I’ve a WhatsApp Web window open right now and I’m pretty sure, if you’re reading this article on your laptop or desktop PC, you do too.

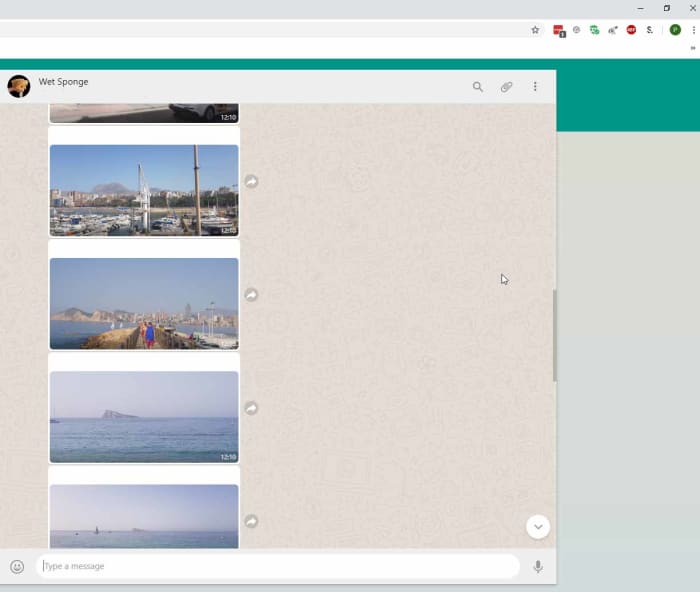
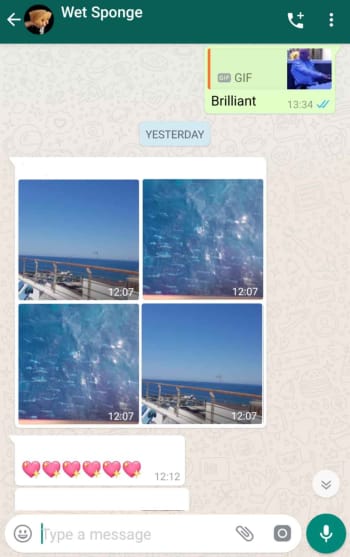
The only thing with WhatsApp Web though, is that isn’t as fully featured as the mobile app. I’m not going to get into the fact you need your phone to be on to use it; which rumor has it, WhatsApp is working to fix, I’m talking more here about viewing images on WhatsApp Web. When you receive a big batch of images all at once you can view them as an album on your mobile, but when you go to WhatsApp Web all you see is a stream of single images. This looks set to change.

8

Image Albums are coming to WhatsApp Web

There are two main problems with receiving a lot of photos at once and only being able to look at them one at a time. The first, is that it breaks up the chat. If you’re chatting to somebody about their holiday and they send you 57 holiday snaps with them all showing up individually, you’re going to have to do a lot of scrolling in between what was said before they were sent and what was sent afterwards. On mobile, this isn’t an issue as all those photos get grouped into an Album and you can see what was said before and after right there on the same screen.

whatsapp web album screenshot
This is annoying

The other main problem is downloading or sharing the images. If somebody has sent you a group of photos and you decide you want to keep or share them, it can be a painstaking process going through each of them and hitting the download or share button individually. Again, on mobile, this isn’t an issue and one click will download and share them all.

Whatsapp mobile album screenshot
This is less annoying

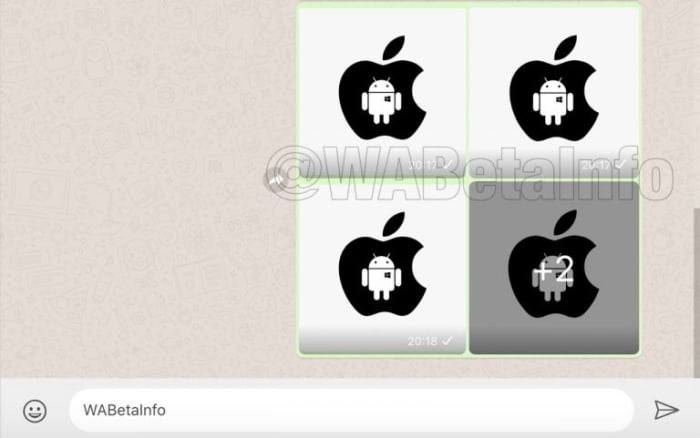
This is why it is good news that WhatsApp is developing an Albums feature for WhatsApp Web. Although not yet even available in the beta version of WhatsApp it has been spotted in some advance code by the team at WABetaInfo.

new whatsapp web album screenshot
Image via: WABetaInfo

The advance Albums feature for WhatsApp Web will work just like the Albums feature on WhatsApp for mobile. Whenever you receive multiple items at once, they’ll automatically be grouped together into an Album. Furthermore, you’ll also be able to share and download Albums entirely from WhatsApp Web, just like you can on mobile.

This is still a very advanced feature, however, that still has a lot of development ahead of it before it’ll get a general roll-out.

They’re coming for your camera! New ransomware attack in play

Researchers have discovered how to infect DSLR cameras with ransomware

Ransomware on a pc

Ransomware is possibly the most terrifying of all the malware threats. Even without all the Hollywood style nightmares the name alone can induce, the ransomware reality is bad enough. Data gets hacked and then held hostage. You either pay up or you lose it forever, or if there is something embarrassing in there, it gets spread all over the internet.

This reality sees ransomware being a more of a major enterprise-level threat than something the average joe should worry about. That is unless you’re the type of average joe who goes to or has a child in school, visits a hospital, or even just lives in a city. All three types of institution have fallen victim to ransomware attacks in recent memory, with the most recent attacks seeing two small cities in Florida having to fork out over $1 million between them to free up the citywide systems that kept the basic functions of government moving along.

It now seems that it isn’t just computers and phones that are vulnerable to ransomware attack. Internet of Things devices, otherwise known as smart devices, now look to be on the menu for hackers too.

Researchers have discovered how to infect DSLR cameras with ransomware

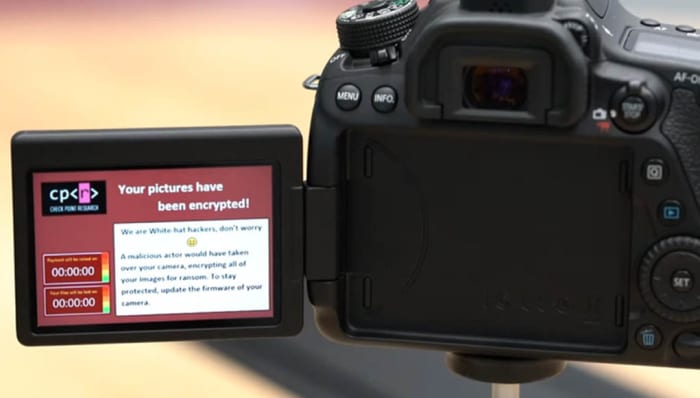
ransomware on a canon eos 80d

Security researchers at Check Point software have presented some rather interesting findings at the Def Con security conference in Las Vegas. Looking at the Canon EOS 80D, which has both USB and Wi-Fi connectivity they discovered that the camera, and others enjoying similar levels of connectivity, could be vulnerable to attack.

Eyal Itkin, a researcher at Check Point, recounts the vulnerability in a recent Check Point blog post, “Our research shows how an attacker in close proximity (WiFi), or an attacker who already hijacked our PC (USB), can also propagate to and infect our beloved cameras with malware.” He goes on to ask how you would feel, if attackers took control of both your computer and your camera, with all pictures being held until a ransom was paid.

The vulnerability relates to the Picture Transfer Protocol (PTP) found on the EOS 80D, which manages the transfer of digital files. Vulnerabilities found in the PTP make it possible for a malicious actor to infect the camera with ransomware. The PTP could then be used to infect accompanying computer systems whenever the infected camera is hooked using its USB or Wi-Fi connection.

Think about all the different types of staff members connected to local government institutions, hospitals, and schools that use cameras regularly and you’ll understand how explosive this development could be.

Speaking to ZDNet, a spokesperson for Canon said the company is working tirelessly to remove the vulnerability from the firmware it loads onto its cameras. The problem, however, is that PTPs are used by all camera vendors, meaning this isn’t just a Canon problem.

Google Photos now has over 1 billion users and a new younger sibling

Photos becomes one of 9 Google apps to have over 1 billion users and the Photos team has just launched Gallery Go to offer their services to owners of more modest devices.

Google Photos is one of the best, if not the best photo organizing program out there. Add that it is free and that it comes pre-loaded on every Android device and you might think that having 1 billion users isn’t that big of a deal. It wasn’t that long ago that Google Chrome logged its 5 billionth download after all.

The truth is though, that Google Photos’ success was a given as it was originally designed to bolster Google’s ill-fated social network Google+. An unmitigated failure, that risible misstep is no more, with Google having pulled the plug earlier this year. Photos, however, is here to stay and it could be argued it has seamlessly facilitated our shift towards a world where we take photos first and ask questions later.

Photos becomes one of 9 Google apps to have over 1 billion users

Google Photos on an Android phone

Reaching one billion downloads is a big deal then but, unsurprisingly, this isn’t Google’s first rodeo. Photos is actually the ninth Google product to clock such a huge number of active users.

The other 8 Google products to make it to the 1 billion club are Android, Chrome, Gmail, Google Drive, Google Maps, the Google Play Store, YouTube, and Google Search. Even with failures like Google+ in  recent memory, clearly, Google knows a thing or two about internet success.

Despite its connection to a doomed product, however, and even in such lofty company as its Google products brothers and sisters, Photos has managed to show itself to be something quite special indeed.

Google Photos Download Google Photos
7

One marker for its success is the speed of its uptake. Photos first hit the scene around four years ago in 2015. It took only five months before Photos had 100 million users and had reached 500 million just a year and a half later.

Fast Company has pointed out just how quickly Photos has been adopted by so many people: “Gmail took a dozen years to hit a billion users; Facebook and Instagram, about eight years apiece.” Google Photos hit the 1 billion user mark in half the time it took Facebook and Instagram to do the same.

The Photos team doesn’t seem content with that rapid rate of expansion either. They want more users and they want them as quickly as possible. Photos has had and still has a fast but steady uptake of new users. It had 500 million users after two years and 1 billion after four. You’d expect 2 billion users in eight years then, but that number might rise quicker due to the latest announcement from the Photos team.

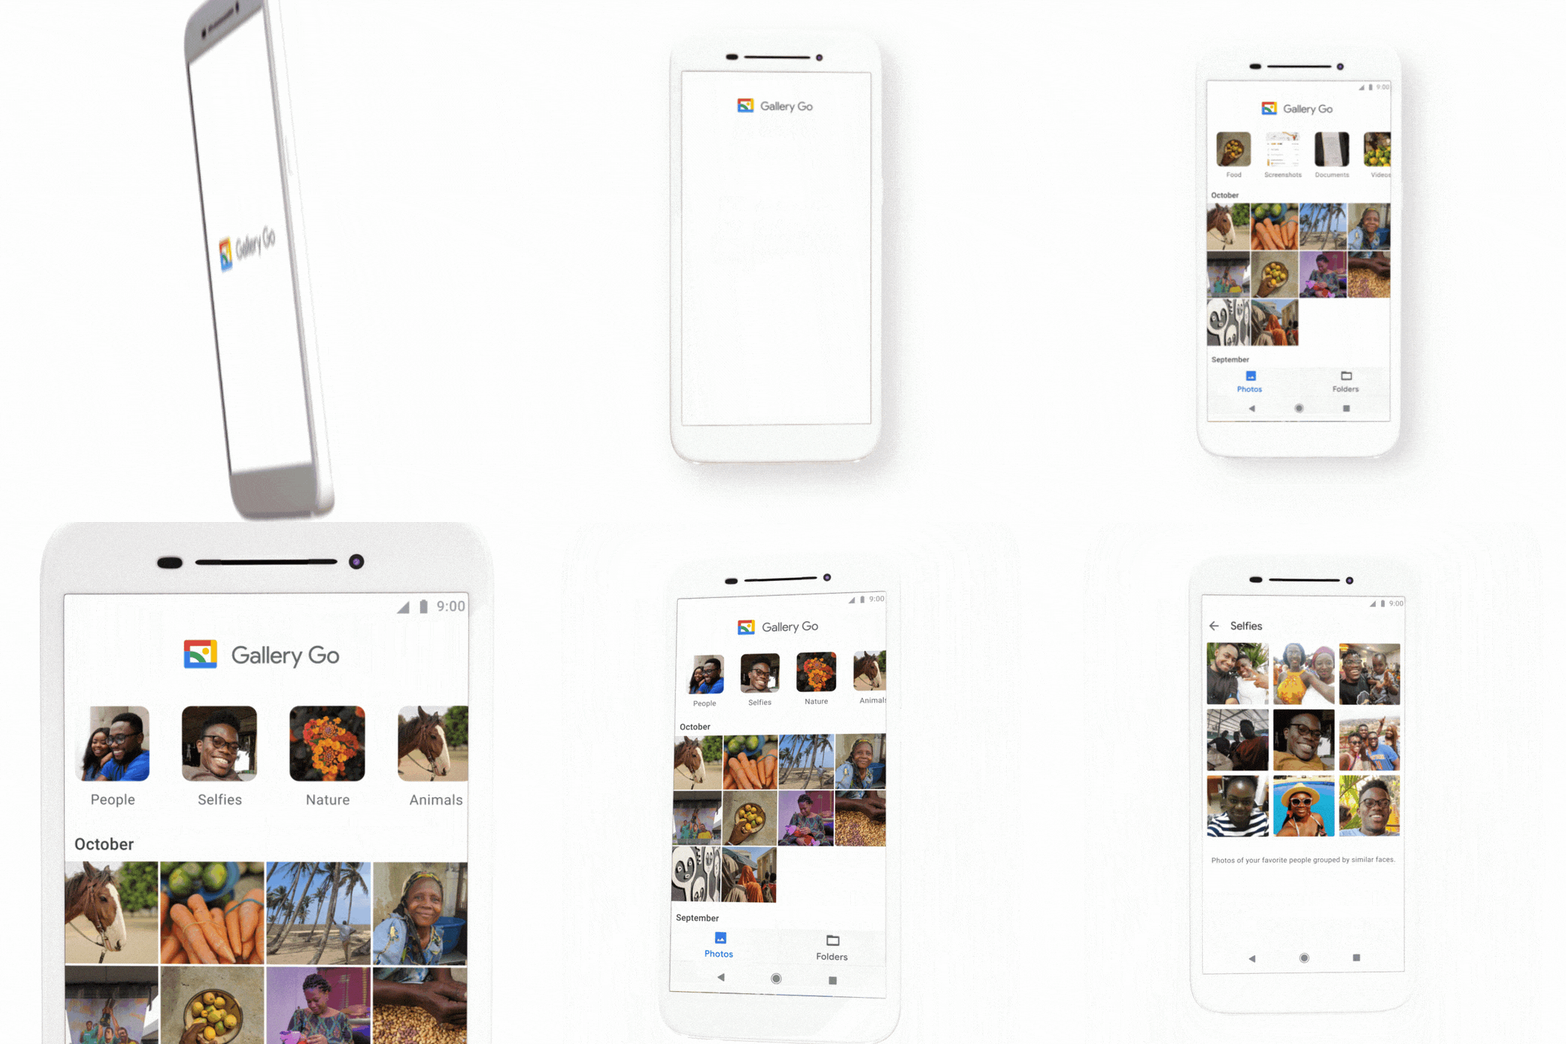
Google has launched Gallery Go, a new lightweight and offline version of Photos

Yesterday, the Google Photos team announced the release of Gallery Go. Gallery Go joins the ranks of Google other “Go” apps, designed for owners of smartphones with more modest feature sets. If your phone doesn’t have a lot of processing power or RAM, and your connection speeds or data package is limited, you’ll likely have some of Google’s Go apps on your phone.

These apps include Gmail Go, YouTube Go, Maps Go, and Files Go and there is now a Go alternative for Photos. Launched at Google for Nigeria, Gallery Go is designed to work offline meaning Gallery Go photos aren’t automatically backed up to the cloud. Gallery Go still uses Google’s machine learning algorithms, however, to automatically organize photos, but it only does so with the photos that are stored on the phone locally or on an SD card.

Image via: Google Keyword

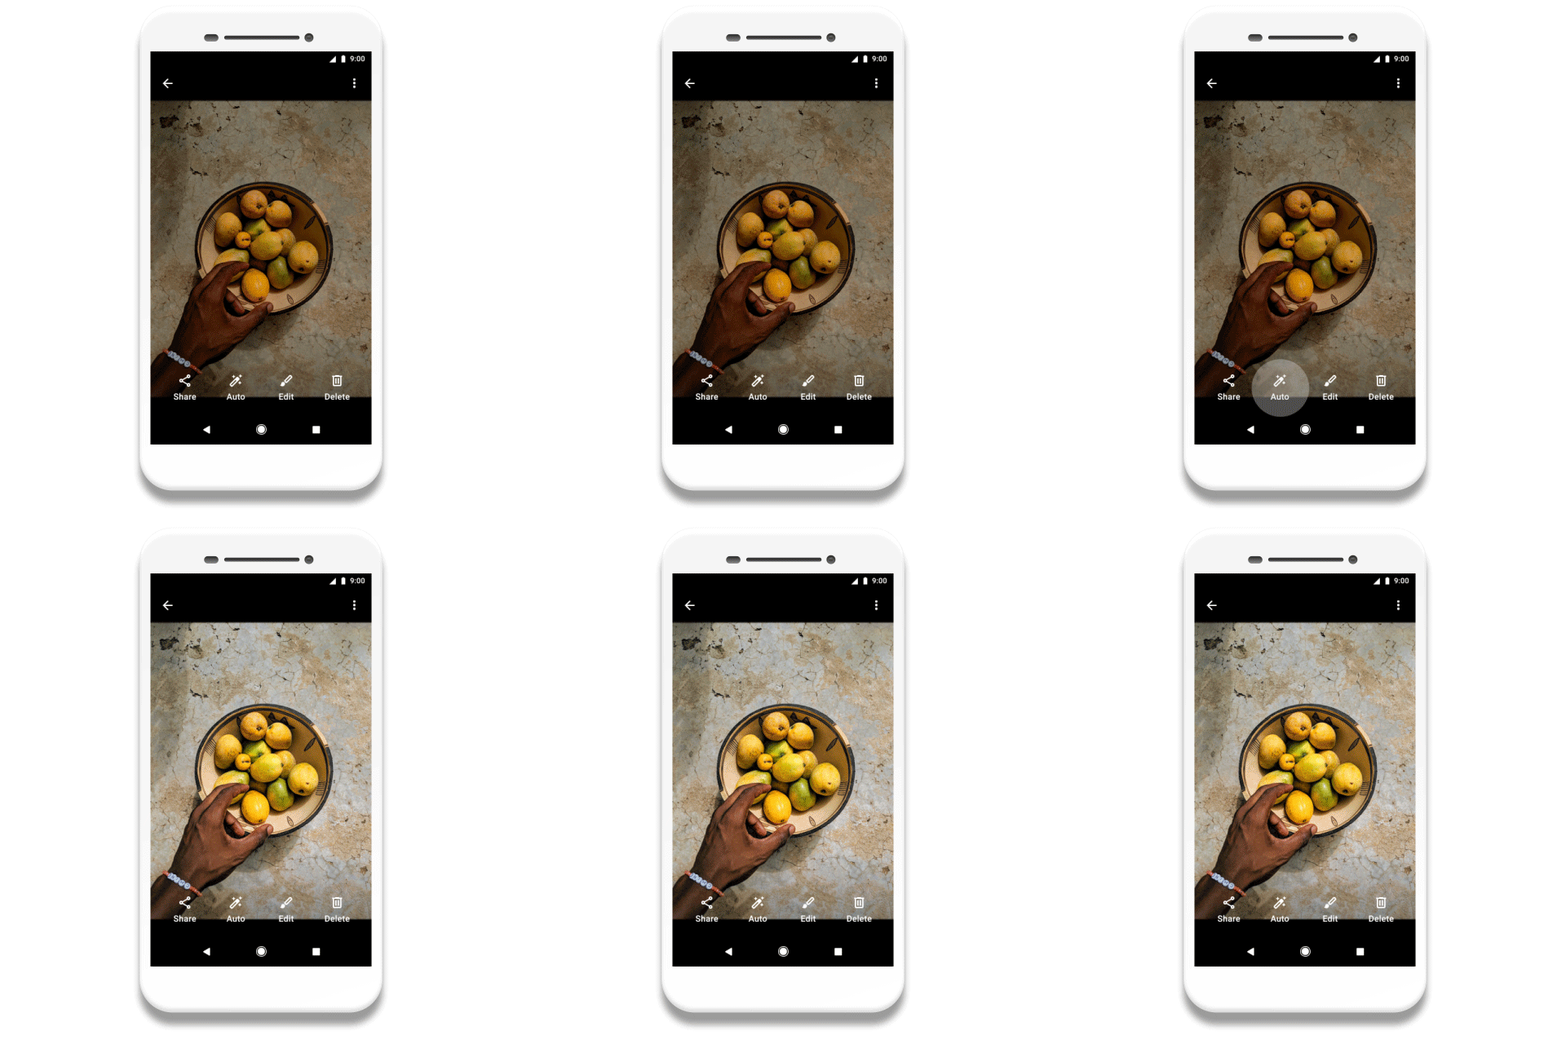
As well as offline machine learning algorithms, Gallery Go is also able to pack in some simple editing tools. The Google blog post on the launch of Gallery Go describes them like this, “With Gallery Go it’s easy to get great looking photos in just a few taps. [You can] Use auto enhance… for instant fixes. You can also choose from a variety of filters to get a new look, and easily rotate and crop, so your photo looks just right.”

Often these basic editing tools are all you need, so putting them into the lighter version of Photos means a lot more people will have access to the photo editing tools they need.

Image via: Google Keyword

Perhaps the most impressive thing about Gallery Go, and indeed all of the Google Go apps, is its size. Google has managed to squeeze in offline AI algorithms, a sleek photo library, and photo-editing tools into a package of only 10 MB.

As well as working well on less powerful smartphones, Gallery Go is also designed to not take up much hard drive space as often these less powerful phones only have 4 GB of space, if not even less. This is why it also important that Gallery Go works with photos stored on SD cards too.

Launching Gallery Go in Nigeria gives a good indication of what the Photos’ team plan is. With Photos being a powerful app that works best when it is always connected to the internet, it has alienated huge swathes of Android users around the world. Most Android users have more modest handsets and limited access to the internet. Gallery Go puts the power of Photos in their hands.

If Gallery Go can catch on in places like Nigeria, other countries in Africa, and across the continents of South America and Asia, there is a good chance the Photos team will notch up its 2 billionth user in much quicker time than it took to get to 1 billion.

Gallery Go is available now on the Google Play store and will work on all Android devices running Android 8.1 (Oreo) or higher.

How to take the best pictures of fireworks with your phone

Learn how to snap beautiful shots of fireworks with your phone!

Fireworks

Over the Fourth of July weekend, Instagram will be flooded with pictures of fireworks. The last thing you want is to miss out on free likes, but there’s just one problem; taking pictures of fireworks is hard. 

It seems like every time you try to take a photo with your phone, you end up being too early or too late. At the end of the night when you look through your photos, all you have is pictures of a blank night sky and fizzled-out fireworks. Luckily, there are some tricks to take solid pictures of fireworks with your phone. We have compiled the best ones that are easy to pick up and use this holiday weekend.

How to take pictures of fireworks with your phone

Anticipate

Your standard firework follows a basic pattern:

  • A bang to signify liftoff
  • Shooting into the air
  • Exploding
  • A delayed explosion sound

If you can get the timing right, you can get some great shots. When you hear the initial bang of a firework about to lift off, follow the firework with your camera while keeping your finger over the capture button. Once it bursts, don’t take a picture right away as the firework is still expanding. Instead, time the capture with the delayed explosion sound. By that point, the firework is still bright and pretty, but it is also at its most expanded.

Burst photo

Both iOS and Android have a burst photo mode. Through this method, you can take multiple consecutive photos. This means that you don’t necessarily have to worry about timing. 

To take burst photos on both iOS and Android, simply hold down the capture button as your smartphone will take multiple pictures the entire time you hold down the button.

When taking burst photos, make sure that you stay still. Any movement can make your photos blurry. Also, photos taken with burst won’t be as crisp and clean as ones taken the regular way.

Don’t focus just on fireworks

Firework kid

There’s a lot more to photograph on the Fourth of July than just fireworks. If there are little kids nearby, photos of their smiling faces being lit up by fireworks can be more magical than any firework.

Remember, people can play along better than any firework. Are you going out on a boat? Shoot photos of people jet skiing, water skiing, tubing, and swimming!

Watch YouTube tutorials

Aside from the tips we taught you, there is still a wealth of knowledge on the internet for how to take photos of fireworks. USA Today released this video that teaches you about stability, accessories, and more. We’d highly recommend watching it before you start shooting.

If you are looking to shoot photos with a DSLR camera, there are also YouTube videos for that! We especially like this one from Fro Knows Photo:

Wrapping up

Have fun and be safe this Fourth of July. The most important thing you can do is to spend time with your friends and loved ones. Don’t spend all of your time worrying about taking photos. Tweet your best fireworks photos to us! We would love to see them!