Hidden Chrome Settings You Should Change Right Now

Google Chrome has lots of hidden and experimental features that you cn change right now to instantly improve your web browsing experience.

Google Chrome settings

Google Chrome is by far the most popular browser on the planet. It is quick, secure, and keeps evolving to offer us more useful and innovative features via constant updates from Google HQ. One of the reasons Chrome is so popular is that it is a simple web browser that is easy to use. Available for Windows, Mac, and on Android smartphones, iPhones and iPads; you simply download it, install it, boot it up, and then you’re browsing the internet. Easy peasy. There’s a lot more to Chrome, however, than what it can do when you first download it.

Google Chrome has lots of interesting and useful features hiding just below the surface that can tweak and enhance your web browsing experience. Let’s have a look then at some of the best hidden Google Chrome features you should start using right now.

7

Google Chrome hidden settings

Manage your search engines

Obviously, the Chrome browser comes with Google as its default search engine and home screen. Google, however, would get in a lot of trouble, if it stopped you from using other search engines on Google Chrome. This means that Chrome has some useful options for managing your search engines. As well as selecting different default search engines  you can also add Omnibox search capabilities too. The Omnibox is the address bar that sits at the top of Chrome.
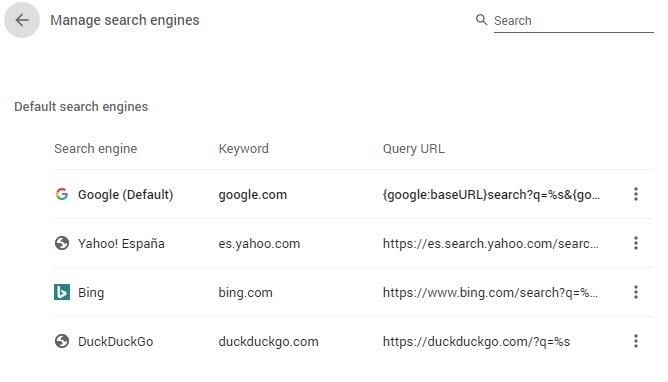
You can use the Omnibox to search websites that you set as search engines; these special searches are known as Quick searches. To do this go to Settings, then Search Engine, and then hit Manage search engines. You then want to click Add under the Manage search engines section and enter the URL for the site you want to add. Then, if you use Wikipedia, for example, every time you type Wikipedia into the Omnibox you’ll have the option to press tab and search Wikipedia directly.

Parental Controls

It is becoming increasingly normal for children these days to use the internet. Whether it be playing silly games, watching silly videos, or researching school projects there is an awful lot for kids to do online. Obviously, however, this brings with it certain risks, but Google Chrome is there to help give worried parents peace of mind.
Google Family Link

Chrome allows parents to manage the sites their kids will have access to and monitor their browser usage including how long they’re spending on all the sites they visit. Parents wanting to do this need to set up a Google Family Link, which is Google’s brand-new app for monitoring web and app usage across multiple Google accounts and devices. Family Link has actually replaced an older Chrome setting called Supervised accounts. This means that as well as monitoring web usage, parents can now monitor all online activity across apps and web pages.

Google Family Link Download now
8

Really Block Ads

If you use an ad blocker, you might have noticed recently that websites are able to detect your ad blocker then ask you to turn it off. So far, so annoying right! Well, Chrome has a secret feature that makes it next to impossible for websites to detect your ad blocker. Basically, these sites use JavaScript to detect your ad blocker and you can block that JavaScript to block that detection.
How to really block ads on Google Chrome

To unblock your ad blocker, copy and paste chrome://settings/content/javascript into Chrome’s Omnibox and hit enter. This will take you to Chrome’s JavaScript control panel where you can block the sites blocking your Ad-Blocker from using the JavaScript code.
Access your passwords

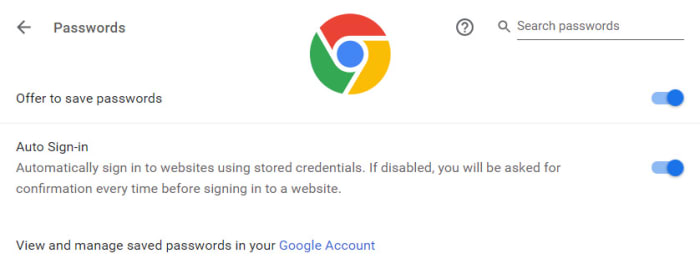
Google has built a password manager right into Google Chrome. This handy feature takes care of coming up with new and secure passwords when you create online accounts and auto-filling them in for you when you access said accounts. This is both useful and vital in today’s online world. A by-product of this, however, is that you’ll have a lot of passwords saved that you don’t actually know. If this is the case and you want to log into an account away from Chrome, you’ll need to check your passwords in Chrome first. To do this copy and paste chrome://settings/passwords into the Chrome Omnibox.

Block mic and camera use

The internet is quite a pervasive place when it comes to your personal privacy. The idea is that whatever sensors you have gathering information to feedback to you, there’ll be companies and corporations hoovering up that data too. Of all these sensors, none creep people out more than webcams and microphones. The idea of corporations spying on us so directly is frankly terrifying and this why it has become a thing these days to see people covering up their webcams with strips of tape.

The good news, however, is that using Chrome you can block websites from accessing your device’s webcam and microphone. To do so copy and paste chrome://settings/content into the Chrome Omnibox. This will take you to the Chrome permissions tab where you can decide all the permissions that websites have to access your device sensors.

Resume interrupted downloads

This is one of those hidden features that should just be the default setting. Basically, you can go into the experimental features found on the Chrome Flags page and enable Download Resumption, which will make it possible to continue downloads that were interrupted rather than having to start again from the beginning. If you’ve ever tried to download a large file such as a movie or photo album, you’ll know that it is madness that Chrome doesn’t have this setting activated by default.

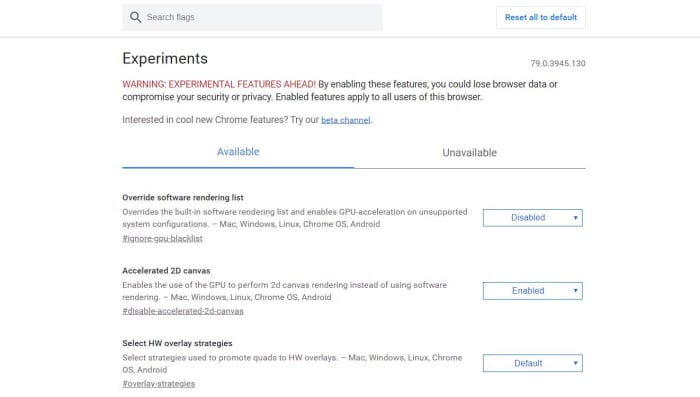
To enable Download Resumption copy and paste chrome://flags/ into the Chrome Omnibox to open the Chrome Experiments tab. Here you want to search for Allow download resumption without strong validators. Hit the button that says Default next to this option and then change the setting to Enabled.

How to avoid dangerous Chrome extensions

Chrome extensions just like apps and websites are vulnerable to attack and exploitation. This guide will show you how to avoid the dangerous extensions and stick to the safe ones.

How to avoid malicious Chrome extensions

If you use Google Chrome on a Microsoft PC or Apple Mac, it is over 99% certain that you’ve installed and used at least one Chrome extension. Chrome extensions are those magical little add-ons that can perform all manner of task from simply blocking ads to checking your passwords against databases of known hacked passwords and websites. So far, so good.

It isn’t all sunshine, lollipops, and rainbows with Chrome browser extensions, however, because just like with every other type of digital program or service, hackers and cyber-criminals target Chrome extension users too. Not all Chrome extensions are safe with possible risks including being lured into phishing scams and fake web pages, having your data stolen, or even ending up on the wrong end of a ransomware demand. This means it is important to know how to avoid dangerous Chrome extensions.

7

This is how to avoid malicious extensions on Google Chrome

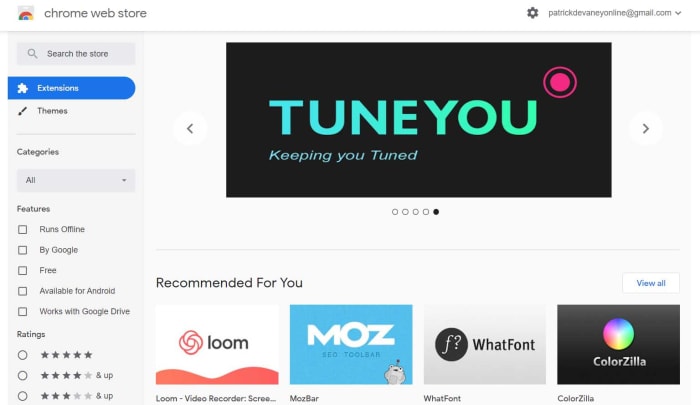
Much like with apps from the Google Play Store, there are a number of steps you can take to make sure the Chrome extensions you’re downloading are safe. Google does have a verification system for the Chrome Web Store like it does for the Play Store, but sometimes fake extensions get through. Fortunately, however, as the Chrome Web Store and the Play Store are quite similar, there are lessons we can learn on one and apply on the other.

Only download extensions from the official Chrome Web Store

Official Chrome Web Store

Although fake extensions do find their way onto the Store, there are many reasons why it should be the only place you go to download extensions. The way the store is set up forces developers to share information about themselves and also gives other users the chance to comment on the validity of the extension you’re thinking of downloading. If you download an extension from somewhere else, not only are you massively increasing the likelihood of downloading something malicious straight off the bat, you’re also denying yourself the chance to run through all the verification steps we’ll outline below.

Check the developer

Developer screenshot on Chrome web store

The developer of any extension will have to post their name next to it. This will also link to any other extensions they might have made. If you have doubts about a certain extension or if it is promising something that is too good to be true, check the developer. If the developer doesn’t have any other Chrome extensions on the Web Store, this should set alarm bells ringing. If the developer does have other extensions check them out. You should do this to well-known extensions too as there are many fake extensions on the Web Store too.

Read reviews

Reviews on Chrome Web Store

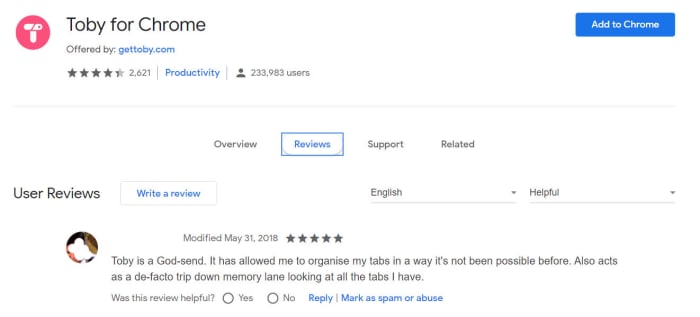
You should do this on the extension you’re thinking of downloading but also look at reviews for any other Chrome plugins the extension’s developer has made too. User reviews offer an invaluable resource to any security conscious individual. If you see things like Didn’t do what it was supposed to… or This is a virus… then you know to stay away. Generally, reliable extensions will have ratings of 3.5 stars or above across many hundreds or sometimes even thousands of reviews.

Check out the permissions

Check permissions on Google Chrome Extensions

Small print is a massive hole in our online security. More often than you’d think, we give cyber-criminals the permission they need to access all the information they’re after. In fact, many fake extensions end up in the Chrome Web Store with the sole mission of having users give all sorts of crazy permissions. When you’re downloading a Chrome extension look at the permissions it is asking for. If it is asking for permissions that don’t really fit the task it is supposed to carry out, think twice about installing it.

Regularly check your extensions are working normally

Developers sell Chrome extensions all the time. This means that the extension you installed, loved, and forgot about years ago may now belong to somebody else. Normally, when an extension is sold it is for monetization purposes. Basically, people buy extensions that have a lot of users and then turn them into adware. To stop yourself falling victim to this check your extensions. You should also check the most recent reviews as these will be most likely to reflect any major changes that will have occurred since you first installed the extension.

Do you really need the extension?

The other thing about extensions is that they’re very easy to install. This means you may have installed many extensions you don’t actually need. When you’re about to install a new Chrome extension, pause to think about whether you actually need it. If you’re convinced you are, then run through the checks outlined above and then if it passes, install it.

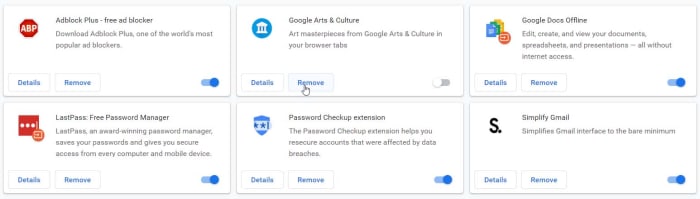
Delete unused extensions on Chrome

This isn’t to say you can’t download extensions for a bit of fun. As long you’ve checked an extension you can download it for whatever reason you wish. The key thing to remember here is that due to the previous point, having extensions that you don’t actually use installed on your Chrome browser leaves you open to potential exploitation. Download and use the extensions you need but if you have any you never use, get rid of them.

Wrapping up

So, there you have it. Chrome extensions are vulnerable to exploitation just like everything else that we can download and install onto our devices. Fortunately, however, if you stick to downloading and installing your Chrome extensions from official channels, there are plenty of ways you can verify the validity of the extensions you’re considering downloading. This means that the first and most important step to avoid dangerous Chrome extensions is to only ever download them from the Chrome Web Store. If you do that, you’ll always have a few simple steps to carry out to keep yourself safe online.

Why Chrome uses so much RAM and how to make it use less

This all you need to know about why Google Chrome uses so much RAM and what you can do to reduce Chrome’s RAM usage.

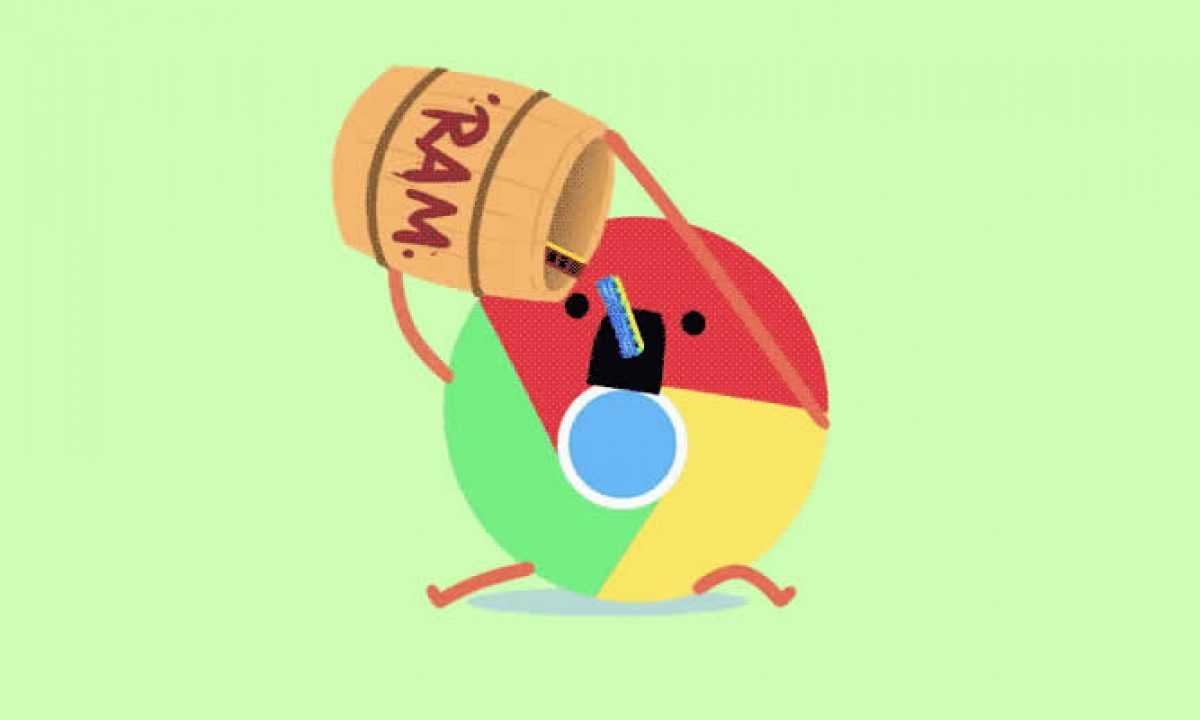
If you’ve ever used Google Chrome, you’ve probably seen your Windows PC or Mac slow down considerably. This is because Chrome is famous for using a lot of RAM. If you go to your Task Manager right now, you’ll likely see that Google Chrome is using more of your system’s RAM than any other program.

Today we’re going to walk you through why that happens and then show you some tricks you can use to help cut down on Chrome’s RAM usage so that your browser and system can work efficiently. As smartphones like Android handsets and Apple iPhones and iPads work a little differently to desktop PCs, we won’t be looking at them with this article.

7

Why does Chrome use so much of your computer’s RAM?

Chrome uses RAM in just the same way as any other app, program, or piece of software. It uses your system memory to store various processes while it performs the tasks that you and the websites you visit set it. This means that if you were to open Chrome on its own it wouldn’t actually require that much RAM, not much more than other web browsers like Microsoft Edge or Mozilla Firefox anyway. It is only when you start browsing the internet that Chrome’s bumper RAM requirements quick in. Modern websites have more fluid and interactive elements than ever before, with each requiring a lot of processes and therefore a lot of memory to perform. This is then amplified when you consider how we use the internet these days.

More Tabs = More RAM

Too many tabs open

We now think nothing of having a lot of websites open at the same time using Chrome tabs. The thing we don’t consider, however, is that every open Chrome Tab needs about 50MB of RAM to operate normally. Yes, that does say MB, which is so 90s I know, but look at how many Chrome tabs you have open right now. Ah, now you understand. It is easier than ever to browse multiple web pages at once and when your Chrome memory usage is going up in multiples of 50 things add up fast.

How to reduce the amount of RAM the Chrome browser uses

Chrome’s experimental features

Google Chrome has a number of experimental features called Flags. These Flags might be what the Chrome team is planning to introduce with future Chrome updates, or they might just be pet projects of individual team members. Some of them have been designed to help Chrome users limit Chrome’s memory consumption. You can access the Google Chrome Flags menu by copy and pasting chrome://flags/ into Chrome’s address bar.

The best Chrome Flag to help you reduce Chrome’s RAM usage is Tab Freeze. When enabled, Tab Freeze will suspend all eligible Chrome tabs that have been inactive for more than five minutes. They’ll reload when you open them again, but until that time they’ll sit dormant and won’t use any of your system’s RAM.

Extensions Toolbar Manager is another Chrome Flag that you should think of installing if you have many different extensions on Chrome performing many different tasks. Extensions can be process heavy, which means the more you have the more pressure they place on your system. The thing is, however, you might not them to perform their processes all the time. Enabling the Extensions Toolbar Manager Flag will shrink all your extensions icons into a single menu. This will then make it much easier to disable them when you’re not using them so that you can use the RAM for something else.

The Chrome Task Manager

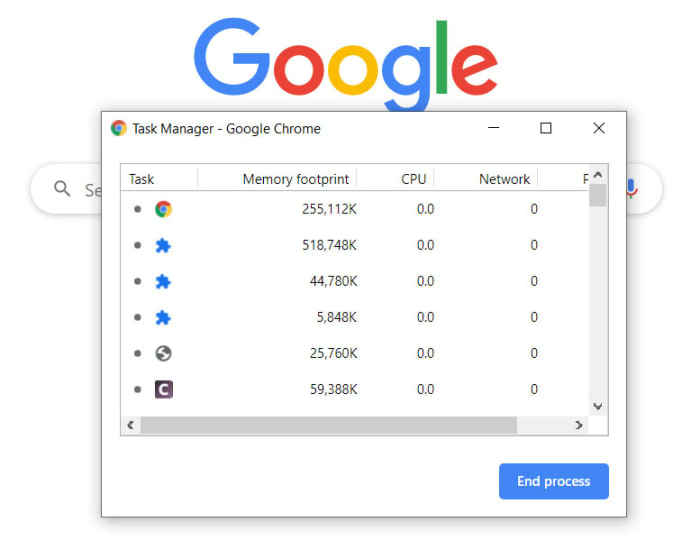
Just like Windows has one, Google Chrome has a Task Manager too. You can activate the Google Chrome Task Manager by opening Chrome and then hitting the Shift + Esc keys at the same time. Unfortunately, that hotkey only works in Windows, so if you’re using a Mac, you’ll have to go into the Window menu.

The Chrome Task Manager

Once you have the Chrome Task Manager open, you’ll be able to see each individual task that Chrome is running and shut down the ones that are hogging up all your RAM. If you have extensions that use a lot of RAM and your system is struggling, get rid of them. Another you’ll be able to do here kills any open tabs that might be using too much RAM also. Sometimes tabs might not be working exactly as they should, or the content they’re displaying may be putting excess strain on your system resources. The Task Manager will show you exactly how much system memory each tab is using and if one of them is using a lot more than the rest of them, close it.

Chrome Browser Extensions

If you find that the Chrome Flags haven’t done enough and you’re still having problems even though you know how to access the Chrome Task Manager, then maybe you should head to the Chrome Web Store and think about installing some Chrome extensions that will help you manage and reduce Chrome’s RAM usage better.

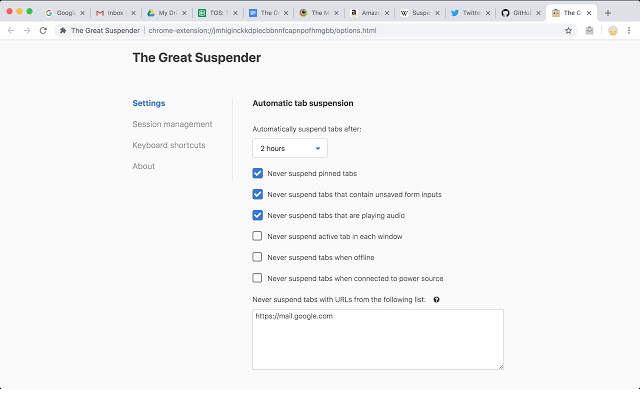
The Great Suspender is a fantastic Chrome plugin that will deliver effective results quickly. It works by giving you a number of options including setting time limits for how long tabs can remain inactive or unused before the extension will freeze their operation. When the tabs are frozen they’ll no longer put a strain on your system’s resources, which should see an upturn in performance, if you’re pushing your system’s limits. The tabs will appear dimmed when inactive and will then simply reload again when you open them up again.

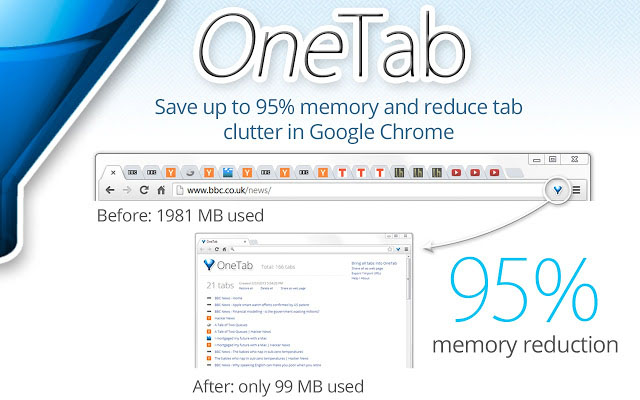
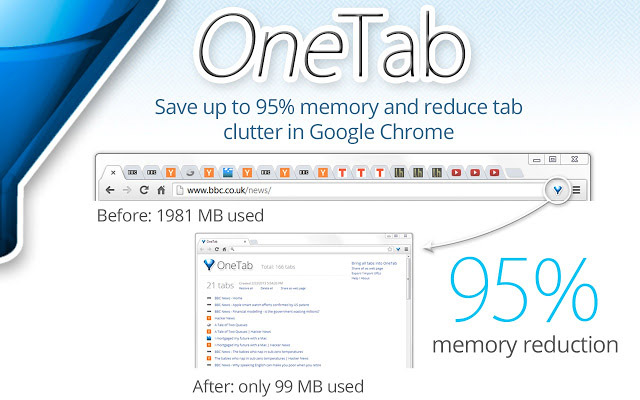
One Tab is another great Chrome extension that promises a massive 95% memory reduction against Chrome browsers that don’t have the extension installed. When activated all open tabs are shrunk down to a single tab, which then shows a list of all tabs. They’re all right there ready to go, they’re just not using all your system’s RAM anymore.

Wrapping up

Now you know why Chrome uses so much RAM and how to reduce its RAM usage. It is important to note, however, that you should only really limit Chrome’s RAM usage if it is causing a problem. If you have RAM to spare while Chrome is running full blast and it isn’t affecting your browsing experience, leave it that way. If not, which will happen more and more if your device has 8GB of RAM or less work your way through the tricks outlined above?

Take control of your Google Chrome Tabs with these extensions

Tabs can quite easily get out of control on Google Chrome. These extensions will help you take control of your Google Chrome tabs.

Google Chrome tabs

Google Chrome is a great web browser. So good in fact, that it often lulls us into a false sense of security that sees us open tab after tab without closing those we already have open. The thing is though, more often than not, we do actually leave those tabs open for a reason and don’t simply want to abandon them.

There are many reasons, however, why leaving too many tabs open is bad. For a start, there’s the clutter and the fact that once you have too many open you can’t even see what site is open on any of them. Most of all, however, is the RAM. Chrome tabs eat up your system memory and if your Windows PC or Mac has less than 8GB of RAM, there’s a good chance it will slow down considerably when you have lots of Chrome browser tabs open and your browsing experience will suffer. It’s not quite the same on Android smartphones or iOS iPhones and iPads though, so we won’t be concentrating on them for this article.

This article is about helping desktop users take back control of their Chrome tabs with the help of some fantastic Google Chrome extensions for tab management that you can find on the Chrome Web Store.

7

Best Chrome extensions for tab management

Too Many Tabs

Too many Tabs

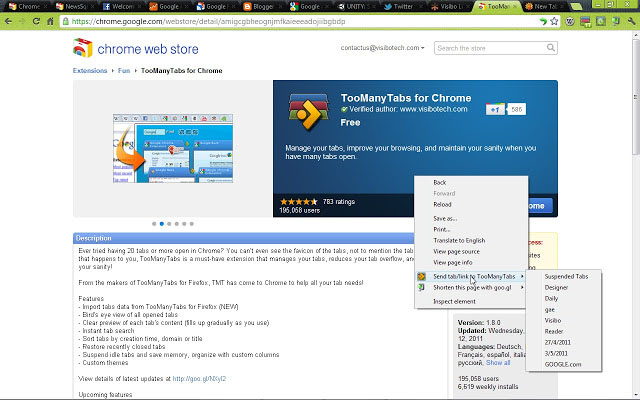
The Too Many Tabs plugin puts quite a few useful tab management features at your fingertips. When installed it will show a preview of all the open tabs you have on Chrome including full titles and mini screenshots. This is much better than tabs so small it can’t even display letters. There’s also a tab search bar that will enable you to search for open tabs based on their titles.

Other cool features include tab freezing to help clear up your system RAM and even making automatic backups of active tabs to Google Drive. This last one means you will never lose an active tab again.

Tabs Outliner

Tabs Outliner is a little complicated to get the hang of but once mastered, it turns tabs into something else altogether. Basically, it displays all your active tabs in a family tree-like diagram. It then allows you to add notes to each tab so that you can get a greater context of what is going on with each tab and why you have left it open. This will be very helpful for anybody researching complicated projects or writing reports spanning multiple websites and pages.

Toby

Toby browser extension for Chrome

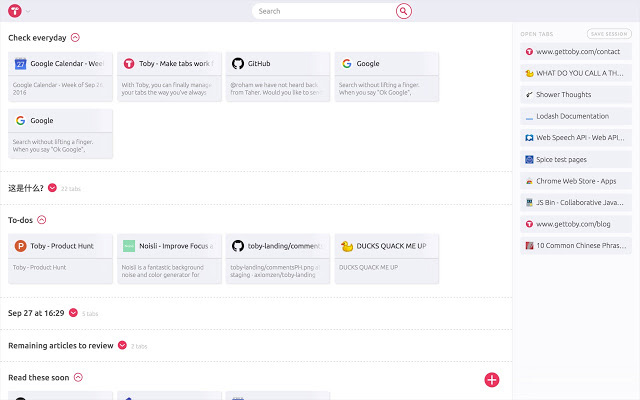
The Toby browser extension will take over your New Tab page and turn it into a tab management system. From there you’ll see Collections, which Toby uses to organize tabs into similar categories, such as to-do lists, that you can take control of and customize. There’s also keyboard shortcuts and a tab freezing feature to prevent inactive tabs slowing your machine down by using all the RAM.

Toby goes further, however, again turning tabs into a more advanced bookmark manager. Toby’s management page also shows a list of all open pages and you can then simply drag and drop them into any of the collections you’ve set up. They’ll then stay in that collection until you actively remove them. As well as this, if you need to stop working but haven’t been able to organize your tabs sufficiently, you can simply hit Save Session to create a new collection of all open tabs.

The final great feature about Toby, which really sets it apart is that you can share all of your work with others making it a fantastic collaboration tool for teams. You simply hit Share to create a link and then everybody who clicks it will instantly gain access to the collection.

One Tab

One Tabs for Chrome

If all you’re looking to do is declutter your tabs and free up a bit of system memory, then One Tab is the extension you’re looking for. One Tab gives you high levels of control over how your Chrome tabs behave. Once installed, you can click the extension icon to move all open tabs to a single tab. When you then go to that tab, you’ll see all open tabs presented as a list. This only works on the Chrome window it is activated on and won’t affect any other Chrome windows. One Tab also has a cool Send to One Tab feature, which allows you to right-click on web pages to open a variety of options including sending just the current tab, sending all open tabs, or sending all open tabs from all open Chrome windows to One Tab.

The Great Suspender

The great suspender on Chrome

If you’re not after the type of control offered by One Tab but instead simply want to spare your system’s RAM, you should consider The Great Suspender. This feature allows you to set an amount of time and will then automatically freeze all tabs that remain open beyond the time limit you’ve set. You’ll still see the frozen tabs, but they’ll be a little dimmer than active tabs. Then, when you need to use that tab again you click it and it will simply reload.

Tab Manager Plus

Tab Manager Plus

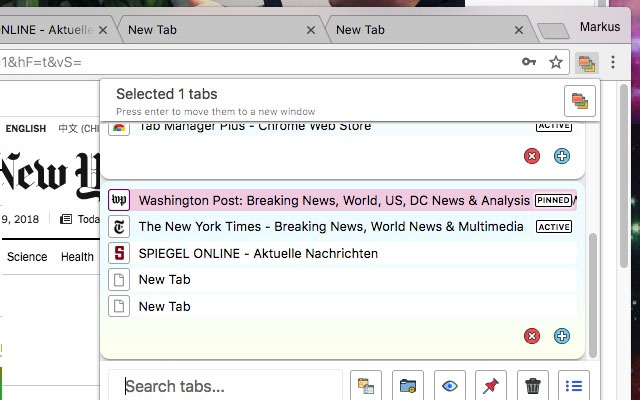
Working across multiple tabs is a complicated business. You don’t then want to add a complicated tab management system on top of it all too. This is where Tab Manager Plus comes in, which is a simple tab management extension for Google Chrome. Tab Manager Plus makes it easy to search through active tabs, switch between them instantly, and then close the ones you no longer need.
Tab Manager Plus will also tell you how many tabs you currently have open, which is a feature not found on any of the other extensions we’ve listed today.

Wrapping up

There you have six Chrome extensions that will help you keep on top of your Google Chrome tabs. You should now be able to find, organize, save, share, and close your open tabs at will in a quick and simple manner. You’ll also now be able to spare your system RAM whenever you have multiple tabs open.

The best flags for Google Chrome

Google allows you to try out experimental new features for the Chrome browser. These are called Flags and this is how to find them, how to use them, and a list of all the best Chrome Flags available now.

As Google works to continuously improve and evolve Google Chrome and all its features, some features develop faster than others. This means that while some new features get packaged up into official update packages and become official parts of the Chrome browser, others require more development and more testing. It is possible, however, to test these in-development features yourself though, as Google includes them in Chrome as Flags.

7

How to find Google Chrome Flags

Google Chrome Flags are experimental new features that aren’t quite ready to make it officially into the Chrome code. Some might not ever make it. You can still try them out, however, but you just need to be aware that they might not work as well as they should and your browser may become less stable, if you use them. If you don’t care about that and want to try them anyway, all you need to do is Open Chrome and then copy and paste chrome://flags/ into Chrome’s address bar. Then as soon as you hit Enter, you’ll be taken to the Chrome Flags page.

Chrome flags

At the top, you’ll also see a search bar. Below we’ll give you a list of all the best Chrome Flags you should try right now that will improve your browsing experience. As we go through them, all you have to do is copy and paste the title of each into the search bar and you’re away. This search bar works exactly the same as the find feature you can use on any Chrome page by using the keyboard shortcut CTRL + F on a Windows PC or CMD + F on an Apple Mac. Also, if you’re reading this article on Google Chrome, you only need to click the name of each flag mentioned below to go straight to the relevant setting.

How to use Chrome Flags

What you’ll see below the search bar is a long list of experimental features, a brief description of each feature, and a drop-down menu next to them all where you can set them to be Enabled or Disabled, although some will have the option to be set at the Default setting. You’ll also see at the top of the menu an Available tab and a Disable tab. All the experimental features listed in the Available tab are the features that work on the platform you’re currently using. If you’re using a PC, you will see different features in the Available tab than you will, if you are using Chrome on your Android smartphone or iOS iPhone or iPad.

Relaunch Chrome now

Once you’ve found the Flag you want and set it to Enabled all you need to do is relaunch Chrome to activate it. You’ll see a Relaunch now button, but you’ll also be able to do it simply by closing Chrome and then opening it again. Once you restart Chrome again, your experimental feature will be active.

Let’s then, go through some good Flags to try that will make Chrome better.

The best experimental Chrome Flags

Group Tags Together

This experimental feature is designed to help you tackle one of the most frustrating aspects of using Google Chrome; having far too many tabs open at once. If you activate this feature, you’ll be able to organize all your open tabs into groups. This will clear up your open browser as each group will then be clearly independent from the others. You’ll also be able to name these grouped tabs and color coordinate them. In essence, as well as helping you clear up the clutter, this feature can help you turn your browser tabs into an extra bookmarks bar that you build up each session.

Group Tabs Flag on Chrome

Smooth Scrolling

This Chrome flag addresses what many may see as a minor gripe. If you activate this flag, you’ll no longer see any type of delayed reaction when you scroll through pages on Chrome. The animation will be much smoother.

Parallel downloading

If you ever download multiple items at once and get frustrated about how long it all takes, this is the experimental Chrome feature you’re looking for. When you enable this Flag, your downloads will run parallel to each other, rather than in a queue. You’ll notice a considerable acceleration in your download speeds.

Chrome parallel downloads

Omnibox tab switch suggestions

This cool feature makes it really easy to switch between tabs you have open. When Enabled, you’ll be able to type the name of a site you have open in another tab and then see an option appear in the omnibox that says Switch to this tab. Hitting this option will then take you there.

Tab Freeze

One of the major gripes that most people have with Chrome is that it uses a lot of RAM and can slow PCs and Macs down to a crawl. Most of the time the issue is that too many tabs are open. Each open Chrome tab needs about 50MB of memory. That might not sound like much in today’s world, but 50s add up fast. If you enable the Tab Freeze Chrome Flag, all eligible tabs that have been inactive for five minutes will be frozen, freeing up the RAM they were using.

Too many tabs

Extensions Toolbar Menu

Chrome Extensions are one of those key features that have helped Chrome become the most popular web browser on the planet. The more you have, however, the more crowded your browser can look with all the extension icons on display. This Flag will help you tidy them all up by putting them behind a single icon, which will then open a menu of all your active Chrome Extensions.

Experimental QUIC Protocol

Chrome is a fast browser. It is one of the main reasons it is so popular. The experimental QUIC protocol, however, will make Google Chrome load pages even faster by combining TCP and UDP elements and reducing the number of connection requests. As well as making things move along much quicker, this will also make things more secure.

All the best Netflix tips and tricks

Get more from Netflix with these excellent tips and tricks.

Simplicity sits at the very heart of Netflix’s success. You can open it up on the internet, your mobile phone, and with a simple press of a button on your TV remote. After that it is just a case of scrolling through all the top shows and movies Netflix has to offer. Netflix is easy to use certainly, but that doesn’t mean it is a simple app/service. There plenty of neat hacks and tricks you can use to get more out of your Netflix viewing experience and today we’re going to through the best of them. We’re going to assume you already know how to download movies over Wi-Fi onto your Android and Apple smartphones but if you don’t, you should check out this guide.

8

Cool Netflix hacks, tricks, and tips

Access Netflix’s secret genres

One of the main reasons you might want to give your Netflix a little tune-up is because you’re sick of seeing the same old stuff pop up as you scroll through the Netflix genres. Fortunately, there is a quick fix for this as Netflix actually sorts out its shows and movies into many more genres and sub-genres than it shows you on your home screen. To access them you simply need to know the number Netflix has assigned to the genre and then add it to the end of this web URL https://www.netflix.com/browse/genre/… You don’t have to worry about knowing the numbers for each genre neither as we’ve already put a full list of Netflix genres together here. That guide will also show you how to access the improved genres on your TV and Netflix app too.

Another great way to search for Netflix TV shows and movies

Netflix Flixable

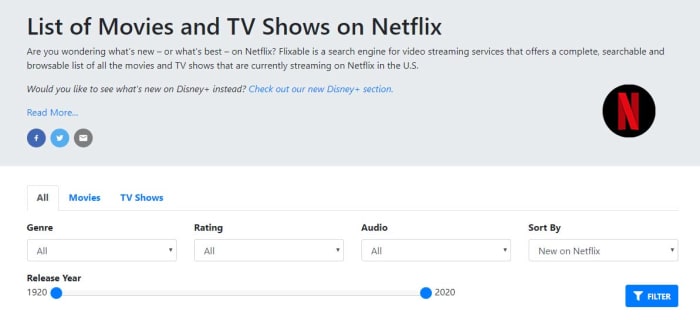
Having access to secret Netflix genres is one thing but if your problem is with the Netflix layout itself; you might be interested in this next tip. For a clean interface that works quickly and makes it much easier to search through Netflix’s catalog for the best movies and shows you should bookmark Flixable. If you’re in the US, Flixable offers a great way to find the next show you’re going to binge on Netflix. Another great feature Flixable offers are the ability to see previews of shows that are coming soon and get notifications about shows that will soon be removed from Netflix.

Reset the recommendations Netflix shows you

Netflix viewing history

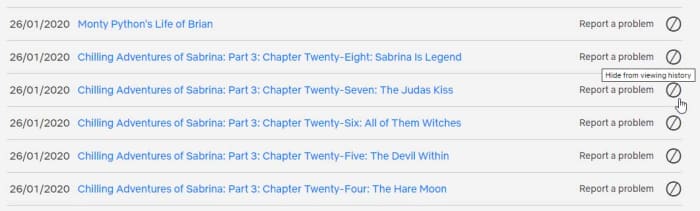
Another way to get some fresh content showing up on your homepage is to reset your Netflix viewing history. This is the data that Netflix uses to recommend new TV shows and movies so when you reset it, the recommendations will reset too. To reset your Netflix viewing history go into the app settings and go to Account, then My Activity, and then hit the small block switch that’s next to each title you want to remove from your history.

Netflix VR Download Free ►
8

Help Netflix recommend the right shows

Rate your Netflix shows and movies

Knowing that Netflix is constantly showing you the content it thinks you’ll want to see should change the way you use it. Basically, if you like a show, you should give it a thumbs up and if you don’t like a show, you should give it a thumbs down. Netflix will then use this data next time it thinks about what shows it thinks you will like.

To binge or not to binge

If you think you’re definitely going to settle into a binge-watching session and get through a full season or two, you can actually disable the Are you still watching prompt? And, even better still, completely skip out the title sequence of every show in the season. The bad news, however, is that you’re going to need a Chrome extension to do this, so you’ll only be able to do it on Netflix on your laptop or desktop PC. The extension is called Never Ending Netflix and is completely free to download.

The flip of this is that you only want to watch a single episode, but you know what you’re like and so want to disable the Auto-Play feature altogether. To disable the Netflix Auto-Play feature go to the Account menu, then hit Playback settings, and then uncheck the box next to Play next episode automatically.

The Netflix keyboard shortcuts

Netflix keyboard shortcuts

If you are watching Netflix on a PC or laptop, you might want to know that there are a number of Netflix hotkeys you can use to control media playback. If you want to make it easier to watch Netflix and don’t want to fumble around looking for your mouse every time you to pause the action, remember these hotkeys:

Play/Pause – Spacebar or Enter

Full Screen – F

Exit Full Screen – Esc

Mute – M

Volume Up – Up Arrow

Volume Down – Down Arrow

Fast Forward – Shift + Right Arrow

Rewind – Shift + Left Arrow

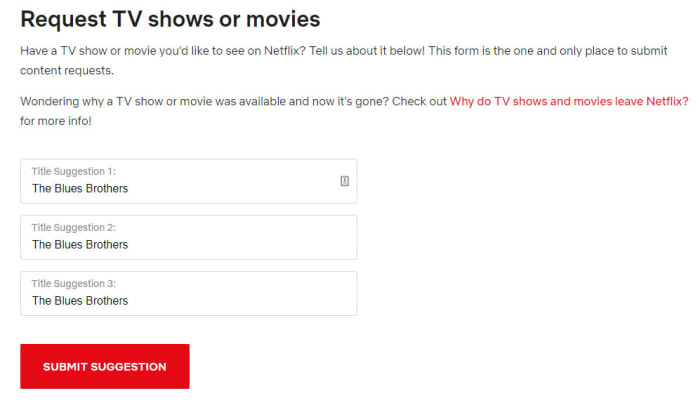
Ask Netflix to add shows or movies

Request a new title on Netflix

A direct way you can try and get more of the content you want on Netflix is to ask for it. Netflix has its very own web form you can fill out to request new titles be added to the Netflix content library. It is as simple as typing in the title and hitting submit. The form gives you three boxes too meaning you can request three titles at a time, but there is also nothing stopping you from using the form many times.

Take control of “Your” list

The My List section of the web browser takes quite a prominent place when you open Netflix. The default setting for My List is that Netflix will use it to suggest new shows for you to watch. You can change this, however, and add shows to the My List yourself. To do so you need to go to the Netflix Account menu, then go to My Profile, and then finally hit the Order in My List option. Here you’ll find the option to order the titles in My List yourself, curating your own watch list that will show highly every time you open Netflix.

Wrapping up

There you have the best Netflix tips and tricks that will give you much greater control over your Netflix experience. If you’re still finding your experience isn’t up to scratch, maybe you should think about another streaming service.

All the best new features your web browser got in 2019

Google Chrome is the most popular major web browser. Here we walk you through all the biggest new features that landed on Google Chrome in 2019.

The best new browser features 2019

Modern browsers like Mozilla Firefox, Microsoft Edge, Safari, Opera, and of course Google Chrome are monster programs that can do amazing things. The days of Internet Explorer are long gone. You only have to consider the fact that Google used its web browser Chrome to develop a whole new operating system that runs Google powered laptops called Chromebooks, and rivals the likes of Windows and MacOS. This incredible feat has been made possible by Google’s policy of continually updating the Chrome browser.

It can be hard to keep up with all these updates, however, as they just keep coming. What use is a shiny new updated feature, if you don’t even know that it’s there. Well, that’s what we’re here for today. We’re going to walk you through all the new features that came to the Google Chrome web browser in 2019.

7

New Chrome features 2019

The Google Chrome web browser received a massive 7 updates in 2019 with the first, Chrome 72, landing in January and the last, Chrome 79, arriving just before the new year in December. Let’s look at all the best new Chrome features that these updates brought with them.

Default Flash blocker

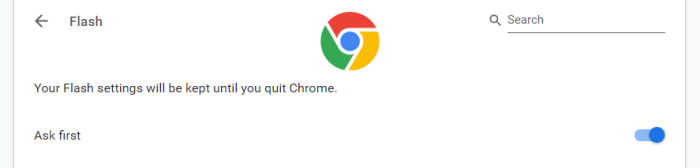
Default Flash blocker

Google has already said that it will remove the Flash plugin from Chrome towards the end of 2020. In 2019, however, Google put the impetus on users to activate Flash in Chrome by making the browser block the plugin by default. You can set the browser to ask you before blocking it, however, on each site you visit. To do so copy and paste chrome://settings/content/flash into the Chrome address bar.

Password checkup tool

Google has integrated a former Chrome plugin directly into the browser, meaning it is now available for all Chrome users. The feature will scan your passwords and then check them against known databases of leaked passwords. Basically, if any of your accounts and passwords have fallen victim to any of the massive data breaches you hear about all the time, Chrome will now tell you. To activate this feature copy and paste chrome://flags/#password-leak-detection into the Chrome address bar.

Send tabs to other devices

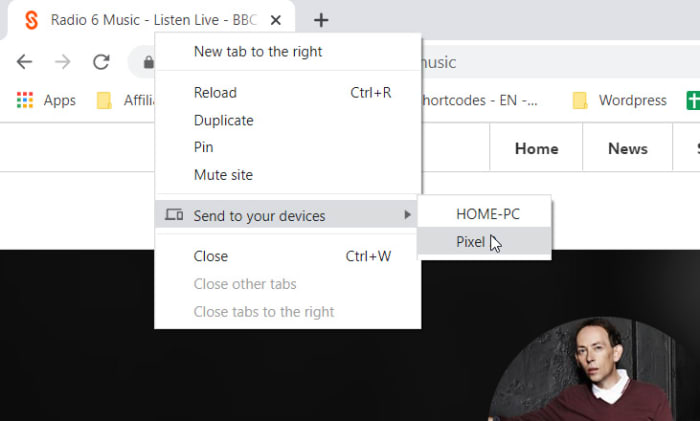
Send tabs to other devices on Chrome

Chrome 77 introduced an interesting feature that allows users to send tabs to other devices that use the same Google account on Chrome. If you use the same Google account on Chrome across different devices, you can now right-click on any of your open tabs on Chrome for desktop and hit the Send to your devices option to see a list of devices you can share the tab with.

Copy and paste across devices

Another cool Chrome Sync feature that was introduced in 2019 is the clipboard synchronization feature across multiple devices. This new feature means you can copy something on one device and then paste it on another that is using the same Google account for Google Chrome. This feature came with Chrome 79, which means both devices will need to be updated to Chrome 79 before it will work. If you have two devices that qualify, however, you’ll be able to right-click anywhere on the webpage and then select Copy to (your device’s name).

Chrome backgrounds and themes

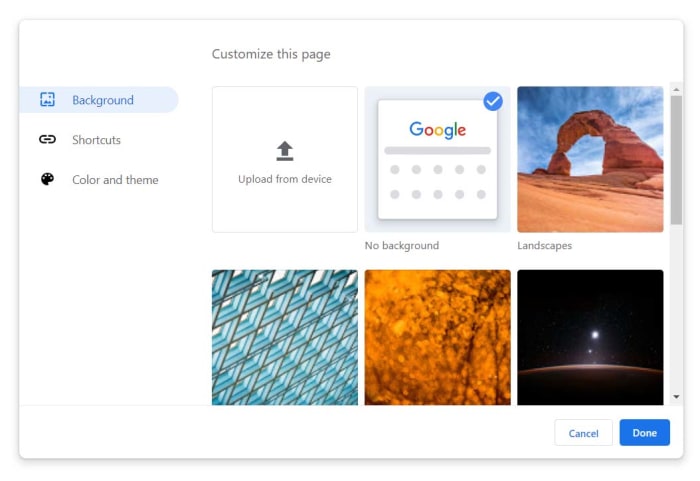
Chrome backgrounds and themes

Another cool feature that landed with Chrome 77 is the Customize button you’ll find in the bottom-right corner of the Chrome homepage. Clicking this will give you a series of different customization options including Background, Colors & Themes, and Shortcuts. You can decide on the shortcuts Chrome will show on the homepage, pick from a whole host of interesting background images, and set different themes and color schemes for the browser.

The Dark Mode

Google split the Chrome Dark Mode roll-out over two separate updates with the Mac Dark Mode coming with Chrome 73 and the Windows Dark Mode coming with Chrome 74. Both operating systems now support Chrome’s Dark mode but there are no controls for this on the web browser itself. Instead, Chrome simply copies your system OS color scheme meaning if you’ve set your Mac or Windows system to run in Dark Mode then your Chrome browser will do too. The Chrome support page here shows you how to do so.

Tab info cards

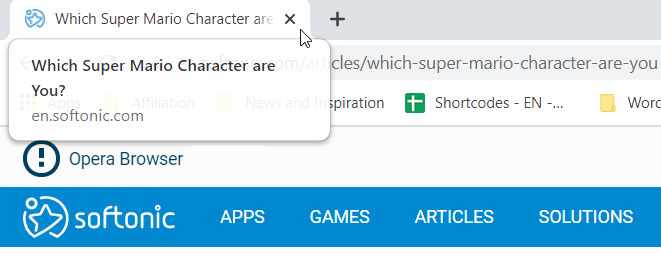
Tab info cards

A small but useful change is the introduction of tab info cards. All you need to do here is hover your cursor over an open tab and Chrome will show you the name of the site open on the tab, and its URL.

Dodgy site warning

Chrome’s password protection features were updated again when Chrome 79 landed. Chrome now offers real-time protection and will warn you whenever you enter your passwords on sites that are suspected of phishing.

Hardware support for media controls

Hardware media controls

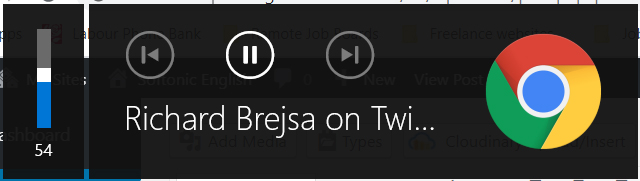
Chrome now supports media control buttons on any hardware you have connected to your device. This means if you have a keyboard with a Play/Pause button, you can now use that button to control playback on any media that is active in Google Chrome. The same goes for other controls and other types of hardware such as headphones etc.

Tab freezing

This updated feature might not sound too exciting, but it will actually make a big difference for laptop users. Basically, Chrome now automatically freezes tabs that you’ve had running in the background for a while. Chrome will no longer load ads or perform other CPU heavy tasks in tabs you’re not using, but will instead pause them and then resume them when you open them again. This is to put less pressure on your device’s CPU and then, accordingly, make your laptop’s battery last longer.

Password manager

Chrome password manager

Chrome 75 introduced the built-in password manager to Android and iOS devices meaning Chrome can now generate and store strong and unique passwords for you every time you open a new online account. This is an incredibly useful and essential feature as any time you duplicate a password across different accounts you leave yourself vulnerable to hacking.

How to clean your browser history in every Android browser

This is how to delete your browser history on all the major web browsers for Android.

How to clear your mobile android browser history

There are many reasons you might want to delete your web browsing history. You might have been buying gifts online or you could need to delete your cache to get rid of some erroneous code that has been causing your browser problems. At Softonic we’re not bothered about the why, we only care about the how.

There’s a good chance you know how to remove your web browser history from your laptop or desktop PC, but on your Android mobile it is a little bit trickier. Mobile browsers are more compact and accordingly, more complicated to navigate. Don’t worry though, because today we’re going to give you step by step instructions on how to delete your web search history on all the major Android web browsers.

How to clear Android browser history

How to clear your Android browser history on Google Chrome browser

Clear browser history on Chrome for Android

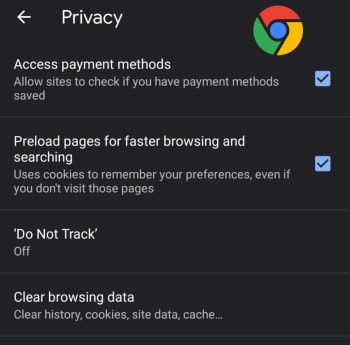
#1 Open Chrome on your Android device and hit the ellipsis (three vertical dots) menu in the top-right corner, then scroll down, and go to Settings.

#2 Scroll down to the Advanced section of the menu and hit Privacy.

#3 Hit Clear Browsing data and then select the time range you that you want to remove all data from and select the exact type of data you want to remove.

#4 Tap Clear Data to confirm the actions.

7
Chrome is a young, fast browser that can browse any web page. It supports all major technologies and standards such as HTML5 and Flash.

How to clear your Android browser history on Mozilla Firefox

Clear browser history on Firefox for Android

#1 Open Firefox on your Android device and hit the ellipsis menu in the top-right of the screen.

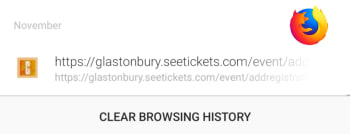
#2 Select History and then hit CLEAR BROWSING HISTORY at the bottom of the screen.

#3 Confirm the action by pressing OK.

Bonus – You can set Mozilla Firefox to automatically delete selected data including bookmarks, browsing or search history, and saved passwords every time you stop using Firefox and shut the app. To do so follow these instructions:

Delete data when close on Firefox

A – Open Firefox on your Android device and hit the ellipsis menu in the top-right of the screen.

B – Hit the Settings option and then select Privacy.

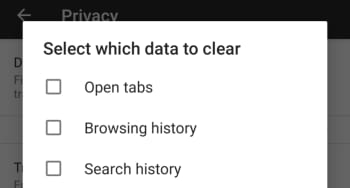
C – Select the check mark next to the Clear private data option and then select the data you want Firefox to delete every time you close the app.

D – Confirm the action by selecting Set.

How to clear history on Opera for Android

Delete browser history on Opera for Android

#1 Open the Opera browser on your Android smartphone and hit the Opera button in the bottom-right corner of the screen.

#2 Hit Settings and then scroll all the way down to the Privacy section of the menu.

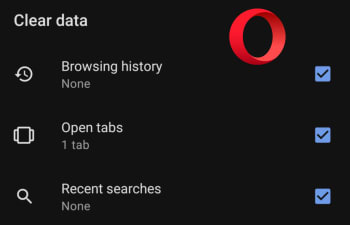
#3 At the bottom of this section you’ll see the Clear browsing data option… Tap this and then select all the data you want to delete.

#4 Confirm the action by hitting the CLEAR DATA button.

How to delete browsing history on Microsoft Edge for Android

Delete browser history on Edge for Android

#1 Open the Edge browser on your Android phone or tablet and hit the ellipsis menu button in the bottom-right corner of the screen.

#2 Scroll down to the Advanced section of the menu and tap Privacy, which is the first option in the section.

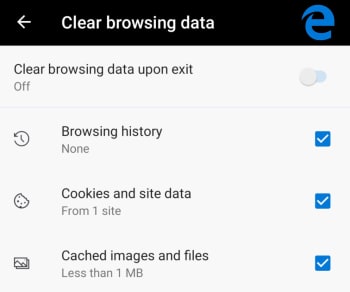
#3 The very last option in the Privacy menu is Clear browsing data. Hit this and then select the data you want to delete.

#4 Tap Clear and then confirm the action by hitting CLEAR.

Bonus – Like with Firefox you can tell Edge to automatically delete all your browsing data every time you close the app. At the top of the Clear browsing data screen, there is a toggle switch for doing this. Simply select all the data you want deleting as normal and then toggle this switch to the on position and Edge will do the rest every time you exit the app.

How to clear your Android browser data on Brave

Clear browser hist5ory on Brave

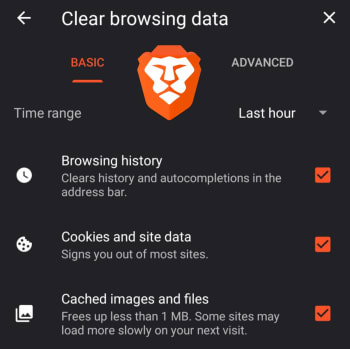
#1 Open the Brave browser on your Android smartphone and tap the ellipsis menu icon in the bottom-right of the screen.

#2 Select Settings and then scroll down to the Advanced section of the Settings menu and select Privacy.

#3 Scroll down to the second to last option, which is Clear browsing data. Select this and then choose the data you want Brave to delete.

#4 Confirm the action by tapping Clear data in the bottom-right corner of the screen.

Enjoy private, secure and fast browsing with Brave.

How to clear your Android browser history on UC Browser

Clear browser history on UC Browser

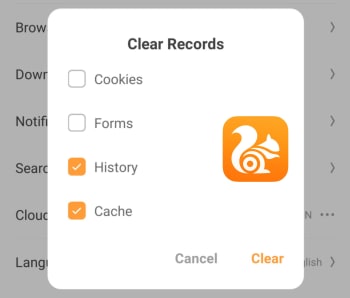
#1 Open the UC Browser on your Android phone and tap the Menu icon, which is the middle option on the bar running across the bottom of the screen.

#2 Then hit the Settings icon, which looks a little like a bolt and is found on the bottom-left of the menu screen.

#3 Tap the Clear Records button and then select the type of Data you want UC Browser to delete.

#4 Confirm the action by hitting the Clear button.

UC Browser Download now
8

How to stop Gmail spam forever

Follow these steps to block all spam emails from reaching your inbox.

Block Gmail spam

Spam is not only annoying it is dangerous. No, we’re not talking about the canned luncheon meat that you used to have nightmares about as a kid, we’re talking about the spam mail you get in your email inbox. Junk mail, as it is sometimes called, is annoying because it clogs up your inbox and makes it harder to find the emails that matter; and dangerous because it can often be carrying malware, viruses, and phishing scams.

You’d be forgiven then for wanting to get rid of spam forever and that is probably why you’ve ended up here. This is the Softonic guide to stopping spam mail forever. With these tips and tricks, you should be able to send everything to your spam folder and live a spam-free life. This is how to avoid Gmail spam.

How to block spam on Gmail

Spam blocker
This is not the spam we’re talking about

First things first. You’ll be happy to know that Gmail, like Outlook, already has a spam filter. It’ll search for incoming emails that look suspicious or that carry links to untrustworthy URLs. With the power of Google behind it too, it is pretty powerful. Unfortunately, however, some spam can trick the Gmail filter with canny subject lines, etc. and find its way into your inbox. This means to block ALL spam from your email list you’re going to have to take some extra steps. Let’s get started then.

Train your spam filter

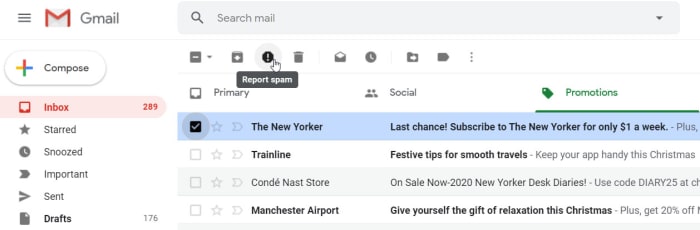
Report spam on Gmail

Like everything else from Google, your Gmail spam filter is always learning. It learns from everything it does, but it can learn most from you. You and your big human brain can look at an email and know immediately that it is spam. To help your spam filter do the same, don’t just delete the spam, report it. This way your spam filter will get a better idea of what spam looks like every time you make a spam complaint, and will then be more likely to spot it next time.

Keep your email address secret

OK, so this isn’t the most practical step you can take. If nobody knows your email address, then what good is your email service in the first place? Think of this as more of a general rule than a blanket ban. We’re constantly under pressure these days to hand over our email address whenever we want to use online services. This rule is designed to think twice about the websites you share your email address with. It is also a reminder to never post your email address on public forums and to hesitate every time you think of forwarding that spammy email content chain you received. If you’re careful enough, your email won’t ever end up on the contact lists of email marketers looking to send you spam messages.

NEVER open a spam email

We’ve already pointed out the security concerns that should be warning you off opening any spam emails that end up in your email inbox. The other big reason for not opening spam emails, however, is that they’re likely filled with trackers that will flag your email address as active whenever they’re opened or if elements like images are interacted with. Opening spam emails will lead to many more spammers sending you stuff that should only ever end up in your junk folder.

Only tick the boxes you MUST tick

Like we’ve already said, these days almost every online service and website will try and get you to hand over your email address so they can hit you with email campaigns. Then, when they get you to opt-in, they try to get you to double opt-in to other various email newsletters, and maybe even to give them permission to share your details with selected third-parties. Needless to say, if you don’t want spam, don’t allow them to share your email address with other companies. It’d also be in your best interest to only sign up to the newsletters you actually want rather than whatever they try and shove on you when they show you the terms and conditions. Only opt-in to what you have to and don’t be afraid to click that unsubscribe link whenever necessary.

Change your email address

This final trick for blocking all spam on Gmail might sound a little drastic but if you’re constantly being bombarded by nonsense spam email emails from Nigerian Princes or for cheap Viagra, it could be the best way to go. In truth, we’ve all had our email addresses for longer than we can remember so we’ve probably been bouncing all over the internet for years without even considering shielding our email address from prying eyes.

If you’re getting a lot of spam emails getting through your spam filters, follow the first rule we laid out. Report them so that your spam filter can adjust and do more to block out those unwelcome junk emails. Then unsubscribe to all the email marketing rubbish you know longer want to receive. If that still doesn’t work, you’re just going to have to bite the bullet and start again. Once you’ve done so, stick to the rules outlined above and you should be able to live a spam-free existence. Just make sure that when you’re sharing your new email address, you’re doing so in a responsible manner and not just blasting it all over the internet.

Best Chrome productivity extensions

You’ll get more done with these productivity extensions for Google Chrome

Best Chrome productivity extensions

Chrome extensions are wondrous little things. You can simply head to the Chrome Web Store, search through thousands upon thousands of options, and then bake in a brand-new feature to your web browser and augment your browsing experience. These extensions can do pretty much anything from boosting your Gmail experience to adding Evernote like features to Chrome. We’ve had a look at the best VPN Chrome extensions to protect your web traffic and today we’re going to go through the best Chrome extensions to help boost your productivity.

You should also check out our little guide on how to get Google Chrome extensions on your Android devices here.

Best Chrome extensions for productivity

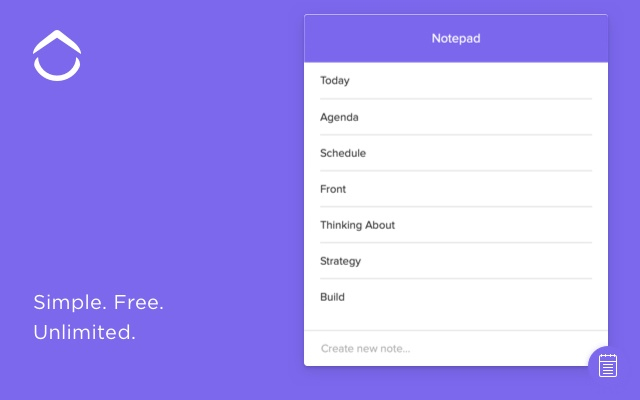
Notepad by Clickup

Notepad Chrome extension

OK, so productivity is a rather broad category that could contain many different types of tools and plugins. We’re going to start with the Notepad browser extension by Clickup, which adds a simple yet incredibly useful feature to your web browser. Notepad gives you single click note-taking abilities on all the web pages you visit. Want to note something down about that offer you saw on Amazon? No problem. You need to leave yourself a reminder or come up with an actionable to-do list based on the research you’ve been doing? Absolutely fine. Notepad gives a simple and elegant solution that augments the internet by adding something you didn’t even know you needed.

Clickup

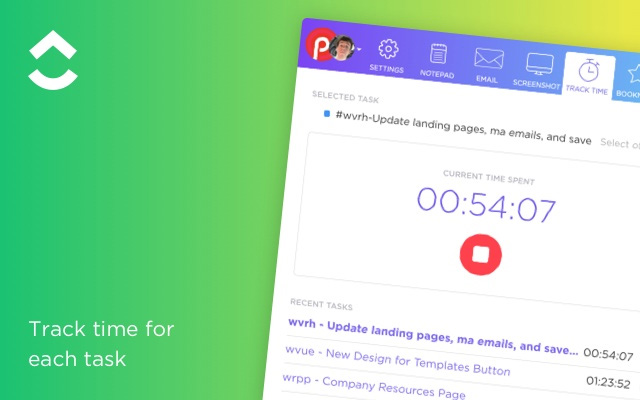
Clickup Chrome extension

Notepad is actually a part of Clickup, which is an award-winning to-do list app that has a Chrome extension that is available for free. If you’re looking for a way to organize your workflow then Clickup is the tool you’re looking for. The Chrome browser extension links flawlessly with the full Clickup app and makes it very easy to create new lists and projects, bookmark websites, and take screenshots. Another excellent feature of the Clickup extension is its time tracker. You can use Clickup to monitor the amount of time you’re spending on different websites. This could be used in a “Digital Wellbeing” kind of way to help you wean yourself off your social media addiction and get back to work, or to track the time you spend working on projects to later add to your invoices.

RescueTime

RescueTime Chrome extension

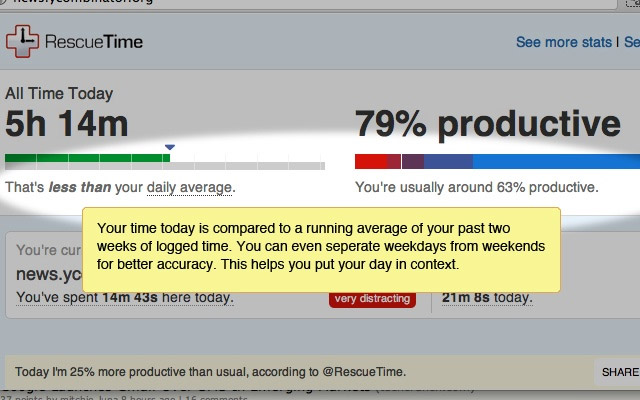
The RescueTime extension is another Chrome extension that will try to keep you working productively rather succumbing to reckless procrastination. All you do is tell the RescueTime extension which sites are productive, and which are not. Then at the end of each week, RescueTime will give you a report on how much time you’ve spent productively. Prepare yourself, you might spend a lot of time doing stuff you shouldn’t!

Trello

Trello Chrome extension

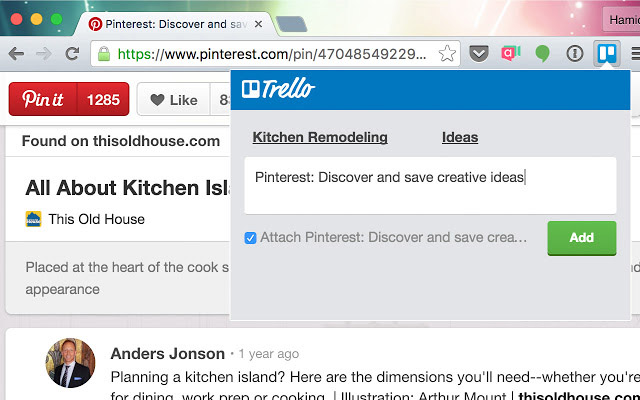
Another excellent project management extension is the Trello plugin for Chrome. The Trello extension syncs flawlessly with your Trello account, allowing you to make Trello cards quickly without having to head over to the Trello site itself. The extension also grants swift access to all your active Trello cards and boards.

Loom

Loom Chrome extension

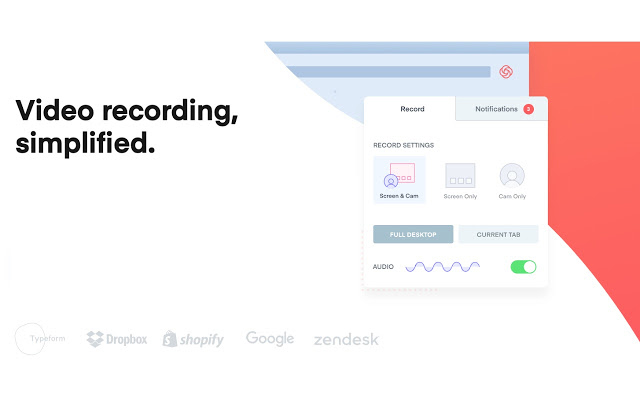
Loom is another extension, like Notepad, that gives you a tool you never even knew you needed. With Loom you can easily log into your device’s webcam, record a quick video message, and then easily share it with anybody else who you might want to see it. It is an excellent extension for anybody working in a team, who needs to quickly and concisely get across messages of more than a few words.

CrxMouse Gestures

Grx Mouse extension

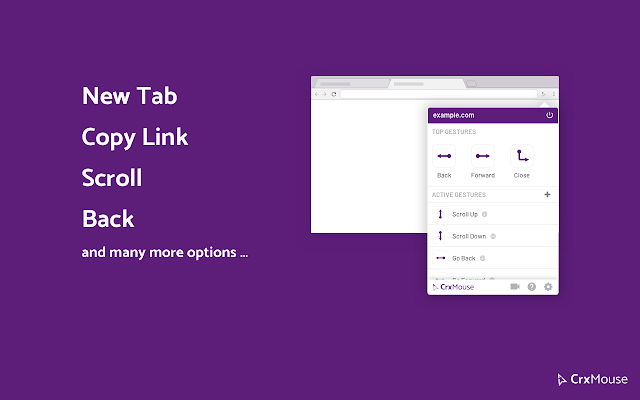
Often the latest and greatest tech innovations from the big players like Apple and Google do no more than shaving a second or two off the common tasks that we carry out every day. In this respect, the CrxMouse Gestures Chrome extension is something that deserves a lot of respect. CrxMouse creates keyboard shortcuts for your mouse. When installed on Chrome you’ll be able you navigate the web much quicker using certain mouse gestures that’ll enable you to perform many actions like opening and closing tabs, copying links and text, going back and forwards through your history, etc.

Pocket

Pocket extension

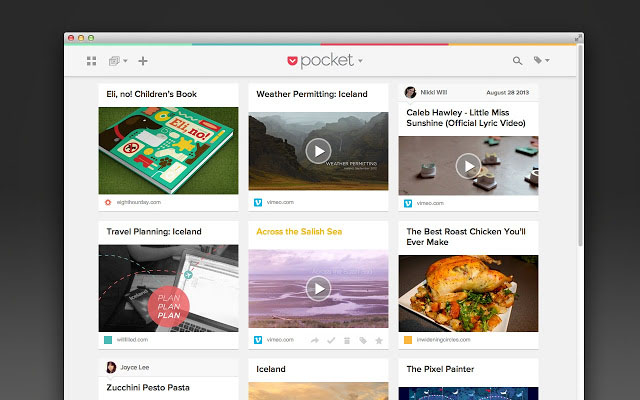
Pocket works a little like Notepad in that it helps you make notes about the web pages you’re visiting. The difference, however, is that it is a copy and paste clipping board. If you see something you think you might need a little later on all you need to do is save it in your Pocket and it will be there when you need it.

OneTab

OnetabChrome plugin

If there is an easy criticism to hurl at Google Chrome, it is the massive amount of memory it needs to function properly. Open tabs are one of the main causes of Chrome and system slow down. The more tabs you have open the closer you are to running out of memory and slowing your machine down to a crawl. OneTab has been designed to solve this very problem. If you can’t get any work done because your Windows PC or Apple Mac is running excruciatingly slowly, OneTab will quickly compress all of your open tabs into a single page. This way your system memory will be free, yet you’ll be able to access all your tabs quickly should you need them.

Instant Dictionary

Dictionary extension for Chrome

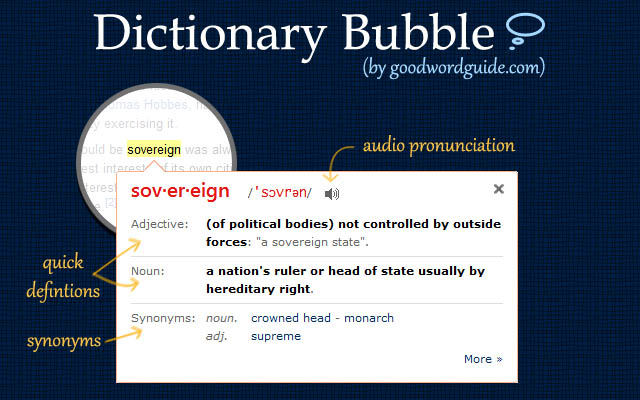
The Instant Dictionary extension gives you quick access to dictionary definitions for any and all words you find on the internet. Once installed on Chrome all you need to do is highlight the word you’re stumped by or double-click it. You’ll then get a floating definition box unless the extension can’t find one, in which case it’ll offer a Google search in a new tab.

Last Pass

Last Pass Chrome extension

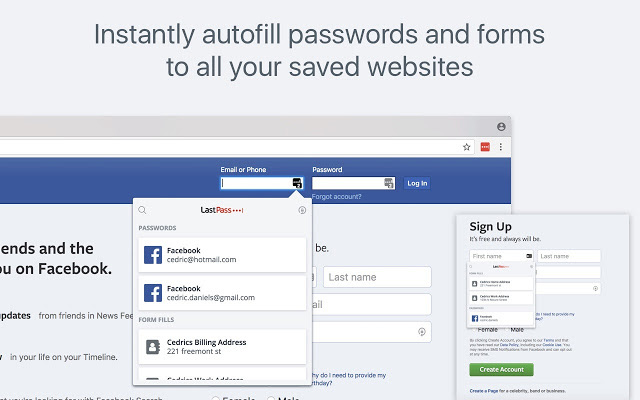
Our final extension works with a very good and free password manager. Last Pass will create secure passwords for all of your online accounts and will store them securely for you. Then whenever you try to log into these pages, the extension will automatically fill in your security details. Last Pass will also link your account with your phone and log into all your apps and mobile websites for you too. This will keep you safer and save you time.

Wrapping up

There you have 10 useful extensions for Google Chrome that will make you much more productive when you’re online. All are free and won’t use up too much system memory, which means you likely won’t have to worry about your computer slowing down too much if you install them. Other great Chrome productivity extensions worth checking out are Web Clipper, Stayfocusd, Grammarly, Google Drive and Google Docs, Todoist, Noisli, OneNote, and Ad Blocker Plus.