
The 8 best addons for World of Warcraft

Are you looking to get the most out of your WOW experience? Check out these addons!

World of Warcraft

World of Warcraft has been around for a really long time now. While the gameplay, graphics, and story have enhanced over time, the UI has not changed nearly as much. Some things that may seem like they should be obvious menu items are only accessible via addons. Addons in World of Warcraft are essentially mods that give you additional menu options and visuals. Some are small, and mostly used for organizing items or menus, while others will give you more options in combat! Below are some of the best addons for both old and new players. The majority of these can be downloaded through Curse.

World of Warcraft Download now ►
7

Bagnon

One of the best addons for organization. The basic function of Bagnon is to put all your bags into the same window. That already helps with finding items more effectively. In addition, it has functions to help to organize your bank. It also makes item searches and identifying item quality easier.

Bartender4

Another popular add-on for organization. Instead of being used to help with bag functionality, Bartender4 can be used to reorganize your action bars. This is really helpful since the original locations of the action bars are large and fixed. This lets you customize them in a way that helps you the best.

Recount

If you’re ever wondering how well you are doing in an instance or during a fight, Recount is the way to check. It gives you information on how much damage, and healing you and your party are doing at a given time.

Healbot

A stable for any healer. While not every healer uses this, those that do swear by it. It allows you to set spell combinations so that every ability you use is at its optimal effect. Healers have a large range of buffs and healing abilities, and Healbot lets you use the best ones you need when you need to. It’s a great organizing tool for any healer.

Deadly Boss Mods

If you frequently run instances, then Deadly Boss Mods is one of the best addons you can possibly have. In fact, it’s the most downloaded addon for WoW on Curse. Essentially, it alerts you on everything you need to know about a dungeon while you’re in one so that you can keep yourself alive. It’s pretty customizable, and it interacts with other people who have the addon as well, so going in with a party can really help utilize this addon’s full potential.

WeakAuras 2

WeakAuras 2 can be pretty complex and daunting for some players, but it’s another great organizational tool. It reorganizes buffs and status screens in a customizable way, so you can view them how you want to. It is a bit difficult and confusing to start these customizations, but thankfully there are templates that already exist for most of the basic customization options.

Auctioneer

Checking the auction frequently is a great way to make money in WoW. Auctioneer helps players get a better understanding of what items should be selling for. This helps a lot with organizing your thoughts on what you should be selling and the price you should be doing it at. It also helps with general auction organization.

ElvUI

There are addons for ElvUI on Curse, but unlike the other addons on this list, ElvUI itself can have to be downloaded separately. Despite this, it is probably the most useful in terms of UI customization. ElvUI is a complete UI overhaul that allows you to fix many of the basic customization issues that the original WoW UI has. The big drawback to ElvUI is that it is a bit of a time investment when you first download it. It takes a while to get used to, and you’ll have to take the time out to fully customize your UI. This can feel vastly different from other addons that are mostly set immediately once you’ve installed them. If you’re willing to put in that time though, this can be a really effective tool in organizing your menus and having a better visual experience playing WoW. With this addon, you won’t need some of the other ones, such as Bagnon, which ElvUI already has built-in.


5 free alternatives to Word on Mac

Got a Mac? Need some word processing software? Try these 5 programs.

writing with a mac

In 2019, Microsoft Word is as much of a household name as Verizon FiOS, Sony PlayStation, or Colgate toothpaste. Everyone writes with Word, and it’s a staple for practically everyone with a computer.

Unless you use a Mac.

Is it possible to get Microsoft Office on a Mac? It is, but it’s probably not worth it since it’s really the only enticing program in the suite. Office is expensive, and it takes up 2.5 GB of space. Luckily, there is a selection of free and highly accomplished alternative word processing apps for Mac, some of which not only handle Word documents but that you may even find improve on Word itself.

5 free alternatives to Word on Mac

5. Celtx

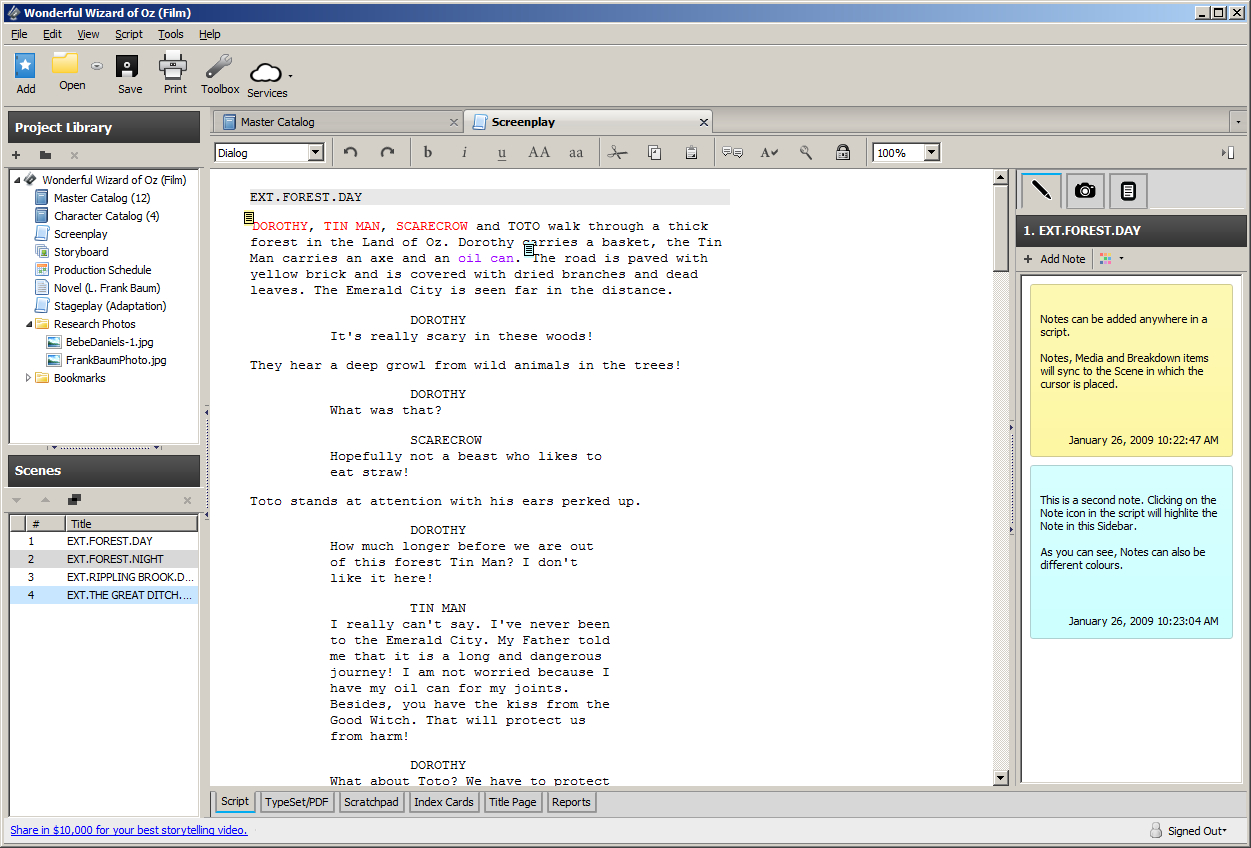
Tend to doubt Wizard of Oz was actually written with this software though.
Celtx is primarily geared towards screenwriting and TV production

Celtx is a free writing tool that’s geared mostly towards screenwriting, storyboarding, and organizing call sheets. Making an account is 100% free and all your work is saved on a cloud until you decide to download it (at which point it’s a .pdf). Available on Mac here, Celtx allows you to create properly formatted video scripts and screenplays, stageplays, audioplays, and comics. Not only that, it’ll sync up with your online studio so you can write anywhere, anytime and even share scripts with collaborators.

Celtx Script for Mac Download FREE ►
6

4. Blogo

Makes sense considering its name, huh?
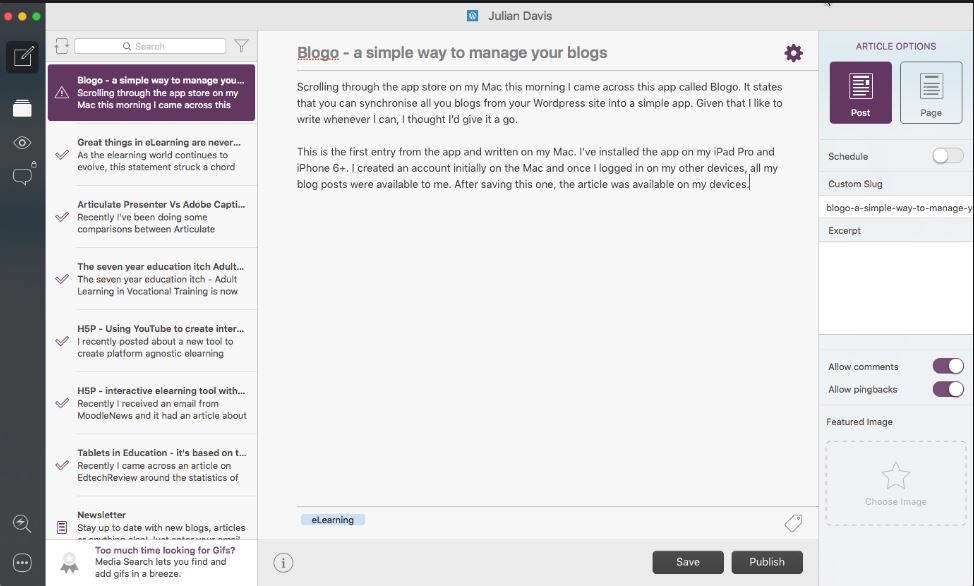
Blogo is an easy, free way to blog on the go.

Blogo is a clever app which allows users to blog right from your Mac desktop. It’s simple, distraction-free, and allows you to write even when not connected to the internet. You can use Blogo with self-hosted or WordPress blogs and the platform supports writing, editing, and rich text, but still allows for inline HTML. Blogo has a paid version which includes extra features such as Multiple blog management, integration with Evernote, enhanced social sharing functionality, and comment moderation, but odds are all you’ll really need is the free version.

Blogo for Mac Download now ►
8

3. Pages
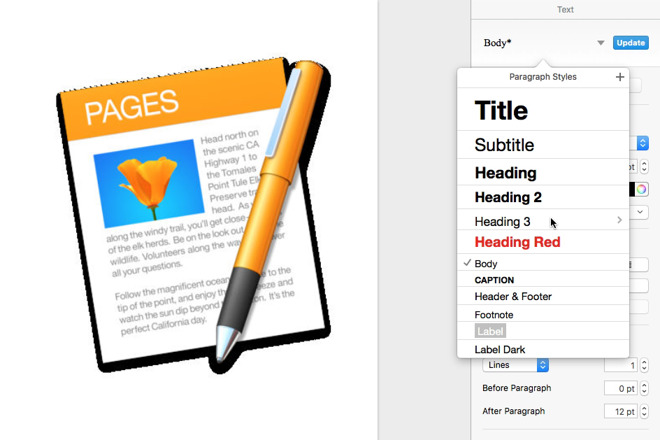
Pick different headings, subtitles - even footnotes
Create documents easily with a strong selection of slick templates

Pages is another free word processor for Mac that lets you create really beautiful documents. On top of that, the more recent versions have improved the typographical tools and are more integrated than ever with iOS and the iCloud. Users are even able to use Apple Pencil to add comments via iPad, or pen in illustrations – something that’s always been wonky on Microsoft Word. As always, Pages does a spectacular job of providing templates for easy document creation, and Placeholders also provide seamless integration with the Photos app for adding images.

Pages for Mac Download free ►
6

2. Google Docs

The best tool for collaborative writing.
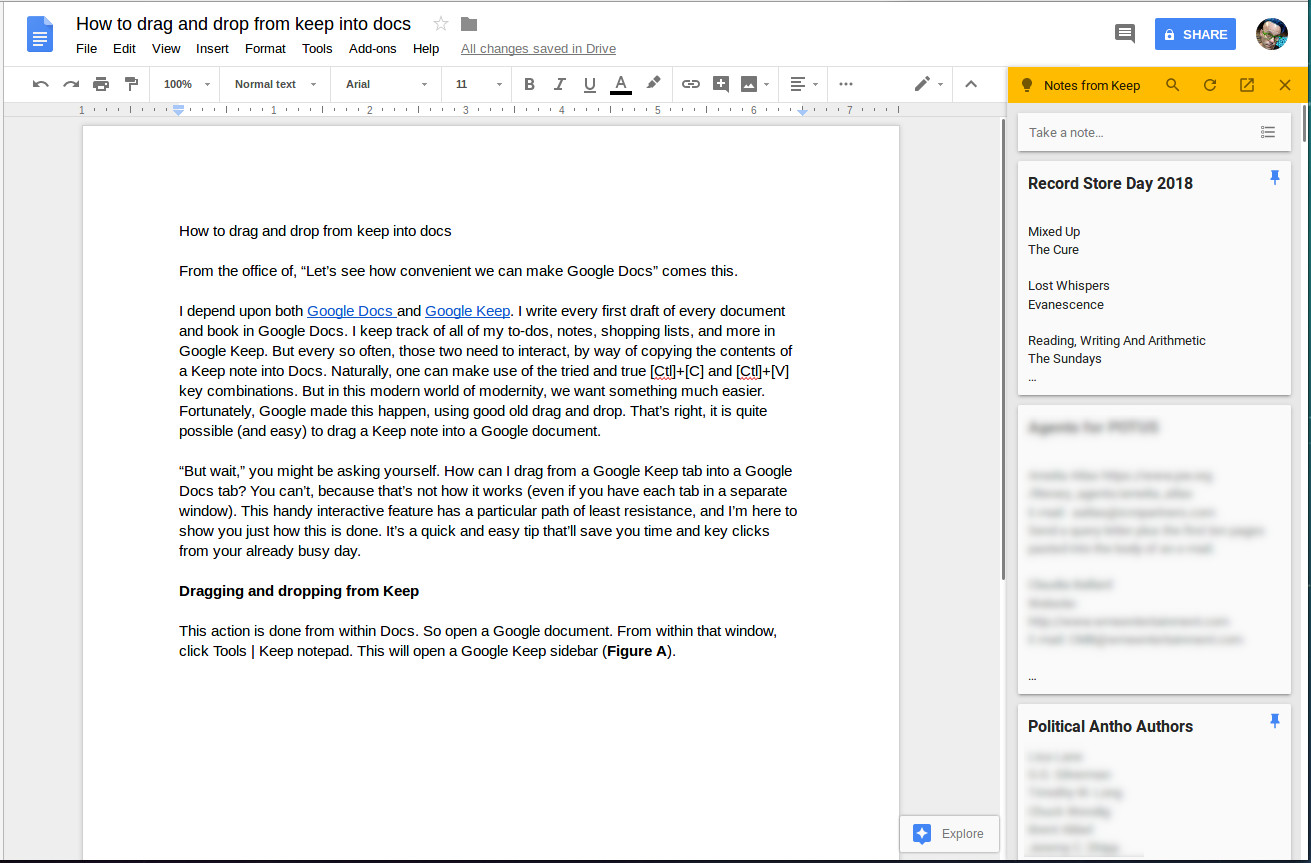
Google Docs are free, accessible on any device, and allow for multiple users at once.

Google Docs are a professional option for virtually anybody in the world. All you need is a computer (Windows and Mac both work equally well) and you’re good to go.

You don’t even need a Google account to be able to access another person’s doc; you’ll simply appear as an anonymous author with a hovering cursor. That’s one of the coolest things about Google Docs – multiple users can work on the same piece at once, meaning that it’s both a collaborative document and a chat at the same time.

You can also add comments, embed media, insert hyperlinks, and alter the settings to allow for other readers to view, comment, or edit.

Google Docs Free Download ►
8

1. LibreOffice Writer

The program allows for pretty much everything Word does too.
LIbreOffice is pretty much a free version of Word, so it’ll make all your Windows friends jealous.

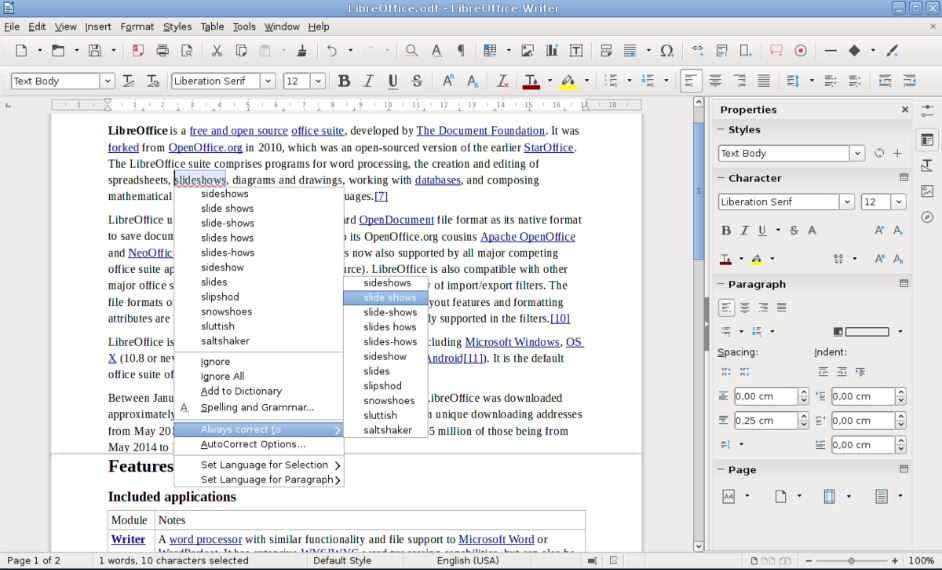
If you’re trying to mimic the experience of Microsoft Word then your best bet is LibreOffice Writer. It’s a 100% free office suite that looks and feels about as close to Word as you can get, and supports multiple formats, covering all the basics and then some.

Wizards allow for easy set-up of memos, letters, and even mail-merge documents, and the suite comes with a variety of useful tools for formatting and styling.

LibreOffice Writer also has additional tools for creating tables of contents and indexes for longer documents, with more available for download on their website.

LibreOffice Free Download ►
7

Agree with our list? Let us know in the comments below, and if you’re looking for more methods to open Word Documents on Mac, check out this simple way to do it.

10 free-to-play MMORPGs you should be playing right now

There’s a whole array of MMORPGs beyond the World of Warcraft! Check them out!

MMORPG

With the new World of Warcraft expansion coming out soon, you may find yourself looking to get into the MMORPG genre. While many popular MMOs are subscription-based or buy-to-play, there are plenty of free-to-play games available as well. These video games are fun and worth your time!. Here is a list of some of the best out there:

10 free-to-play MMORPGs you should be playing right now

10. DC Universe Online

DC Universe

Similar to World of Warcraft, DC Universe features a faction system. The player chooses between the Heroes and the Villains. Fans of DC Comics will enjoy seeing many of their favorite characters, while also getting to play within their universe. Characters are built around a specific power, which essentially works like a class in other MMOs. The powers, characters, and art style all draw heavily from the DC Comics universe.

DC Universe Online Free Download ►
7

9. Star Wars: The Old Republic

Old Republic

Another faction-based MMO, Star Wars: The Old Republic has the player choose between the Galactic Republic and the Sith Empire. Despite this choice, the player is allowed to decide their own morality through their interactions with NPCs. For example, a Sith player doesn’t have to be evil necessarily. The game is known for having some pretty long loading screens, but be patient because the game is worth it. This game is worth checking out for even non-Star Wars fans, as the storyline of each class is incredible and immersive.

Star Wars: The Old Republic Free Download ►
7

8. Tera

Unlike many of the games on this list, Tera has recently come to PS4 and Xbox One, as well as being available for PC. The game uses a real-time third-person combat system that is sure to keep you on your toes. Most MMOs allow the player to lock on to the enemies, instead of directly pointing at them, while Tera forces the player to land their abilities as skill shots. This makes the combat incredibly engaging.

7

7. RuneScape

One of the oldest MMORPGs, Runescape utilizes a skill-level system that is not commonly found in modern MMOs. Instead of grinding your character’s overall level, you instead level each skill individually by using them repeatedly. Along with this, Runescape has received continued updates for years, and is still a refreshing take on a classic game. The game is available for both PC and Mac. Either way, you’re sure to have a good time with this classic.

Runescape Free Download ►
8

6. Path of Exile

Exile

Fans of the Diablo series will be excited to see the similarities between these games. The game features the same style of combat, equipment, and dark artistic flair as the Diablo games. While not a traditional MMO, the game is played in small instances and is more focused on building your individual characters and parties, rather than massive communication that other MMOs feature.

Path of Exile Free Download ►
8

5. Trove

Trove

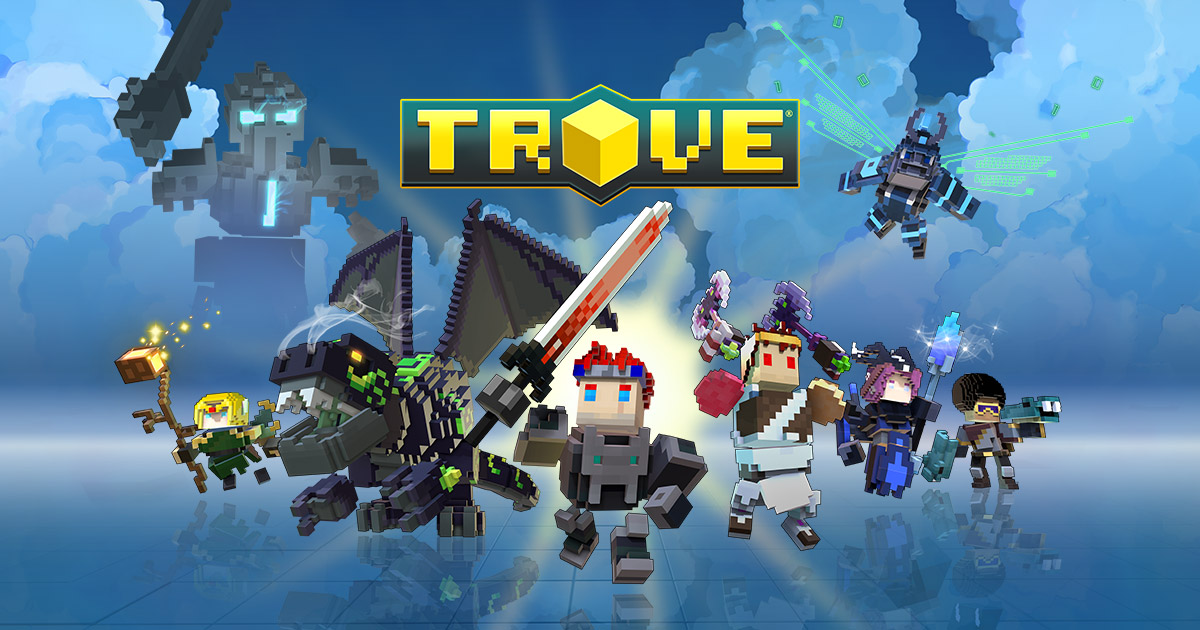
If you’ve ever wondered what Minecraft would be like as an MMO, then you’ll be excited to check out Trove. The game features combat and classes similar to other MMOs while retaining many of the sandbox features that Minecraft has to offer. There are plenty of customization features to keep your interest. Trove contains customizable homes called “Cornerstones.” These homes allow for a similar experience to Minecraft in their ability to be used as crafting stations and their customizability. It’s definitely worth checking out if you are a fan of either style of game.

4. Rift

Rift

You may have heard of Rift as being a free-to-play World of Warcraft game. While it does have many similarities to World of Warcraft, such as its factions and lore, Rift has just as many differences. One of the best parts about Rift is its soul system that allows for some incredibly diverse gameplay. The system allows for customization of your abilities and skills to a level not featured in other MMOs of its type. If you value diverse gameplay and customization, then this is a great game for you.

3. Neverwinter

Winter

Many Dungeons and Dragons fans are probably somewhat familiar with Neverwinter, and for good reason! Like many tabletop RPGs, Neverwinter contains an expansive and powerful storyline to follow that sets it apart from other free-to-play MMOs. Players can even create their own quests and stories to expand the world for themselves. The game is based on the fourth edition of Dungeons and Dragons and is perfect for anyone into the role-playing genre.

NeverWinter Free Download ►
7

2. Blade and Soul

Similar to Tera, Blade and Soul features a real-time third-person combat system. The game is inspired by martial arts, and has many references to martial arts and their origins. The combat utilizes combos, similar to the fighting game genre. This creates a unique experience that’s sure to impress fans of both fighters and MMOs. Along with this, the game also features one of the best character customizations of any MMO available.

Blade and Soul

1. Guild Wars 2

Guild WarsThe music and visuals of Guild Wars 2 are some of the most captivating of any free-to-play game. Guild Wars 2 features some of the best elements of other MMOs and combines them to create a unique gameplay experience. The story is player-driven and decided by the character’s actions and choices, while the combat is fluid and diverse. Longtime fans of MMOs will find Guild Wars 2 as a refreshing take on the genre, as every playable class features a variety of playstyles.

Guild Wars 2 Download ►
7

Best macOS desktop apps in 2019

These apps will supercharge your Mac!

Mac with apps

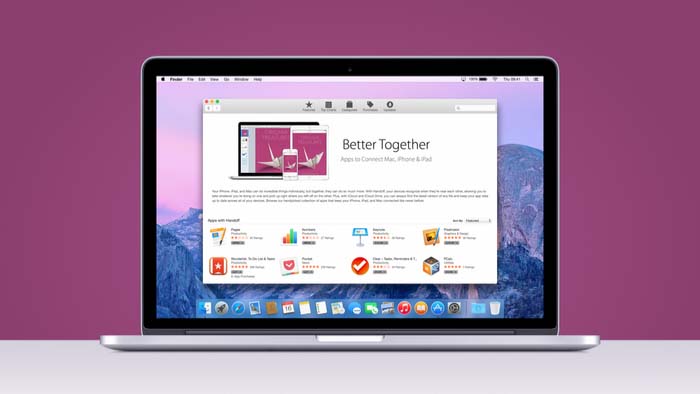
If you’re going to spend over $1,000 for a computer, you might as well load it up.

Newer MacBooks come equipped with an out-of-the-box app stack that should have you covered. 

Sure, TextEdit won’t meet your word-processing needs, but Apple News, Notes, Tasks, and more all come preloaded in your dashboard. However, it’s easy to forget that there’s a lot you can do to sweeten your setup. 

The macOS library hosts a whole lot of gems, from the tools that help you focus to those that lend a helping hand in the kitchen.

MacOS Apps to supercharge your desktop

Alfred

alfred app mac os desktop

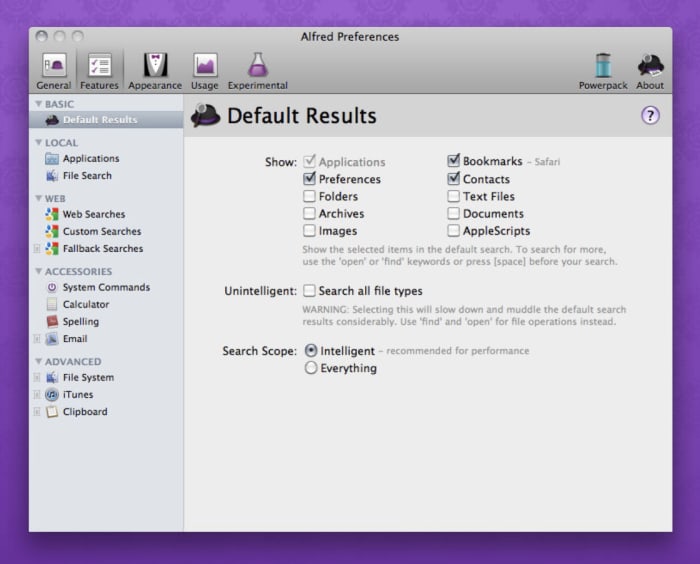
Alfred is a shortcuts app that lets you use quick keyboard commands to launch your apps, locate files, or surf the web. Use the desktop app to create your own extensions or use creations shared by the community of Alfred users.

We’ll offer a word of warning — Alfred is not an easy tool for beginners. It also isn’t for everyone. For those who thrive on shaving seconds off of tedious busywork, the upfront investment will pay off in spades. You can build workflows that automate manual tasks, control your music, link up with 1Password, and search for emails through the tool.

Alfred Download Free
8

MacPaw

If you really want to make your computer run faster, we would recommend MacPaw. Don’t be fooled by the name, MacPaw products are available for both Mac and PC. 

Amphetamine

amphetamine mac app

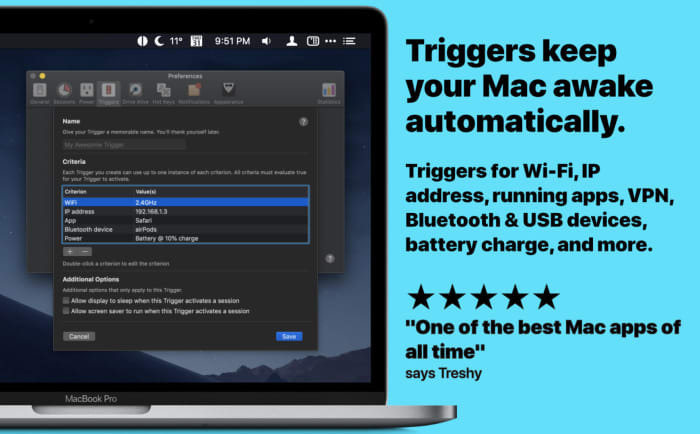
If you’re sick of adjusting the Energy Saver to keep your Mac from sleeping, Amphetamine steps in to keep your laptop awake. Install the app— and access by right-clicking the menu bar icon to turn it on. Once activated, Amphetamine keeps your Mac awake until you turn it off. 

That’s not all, though. Amphetamine settings can be updated so that it keeps your Mac awake during specific tasks or when it’s connected to a certain Wi-Fi network.

Amphetamine Download Free ►
7

Bear Notes

bear notes app

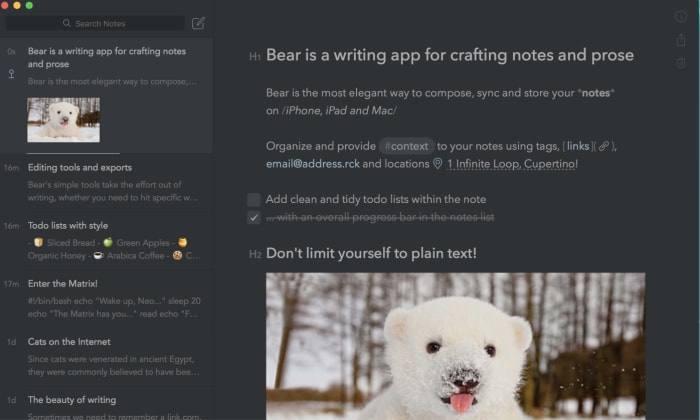
Bear Notes isn’t just another Notes app. We know, the App Store is loaded with all kinds of tools that promise to help you keep track of everything. But, if you’re naturally disorganized, even the best-designed apps can devolve into another digital trash heap. 

Bear Notes is something of an upgrade from the Notes app that comes standard with your Mac. It adds word count, read-time, paragraph count and other stats. You’ll have the option to export your notes in seven different ways including Markdown. It’s ready for WordPress, Medium, or wherever your content’s final destination happens to be.

Bear Notes Download Free ►
8

Paprika 3

Paprika app

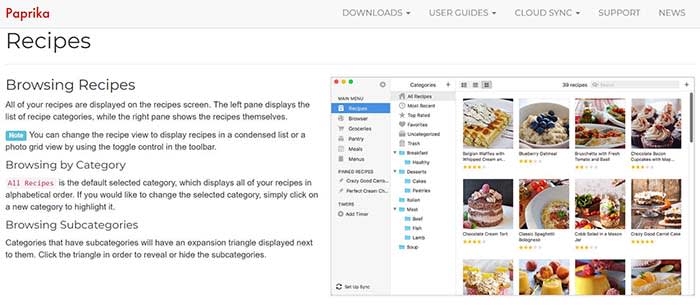
If you’re into cooking but prefer digital recipes to cookbooks, Paprika 3 is the app for you.

It costs $30 in the App Store, which seems like a lot for a tool that doesn’t promise to make you more productive or professionally edit your media. However, Paprika actually proves its worth pretty quickly.

You can download any recipe you find online and the app formats it in a way that is easy to read and easy to find. You can also create meal plans that sync up to the recipes you collect and keep track of your ingredients.

Paprika 3 Download Free ►
9

Slack

slack desktop app mac

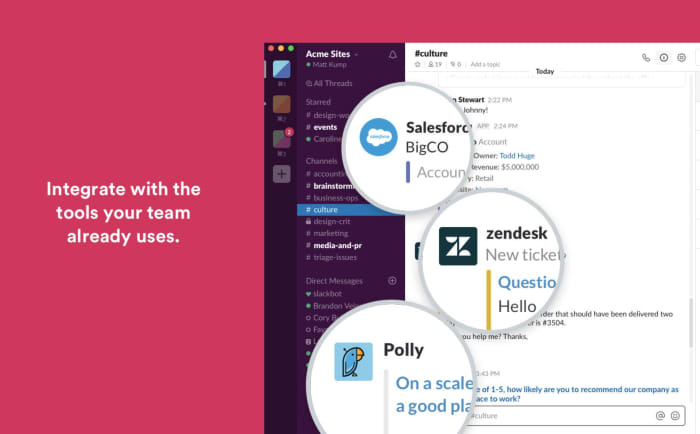
The reason we include Slack isn’t because we love the tool so much. Rather, the app is something of a revelation for those who have been using the iOS version or chatting within the web browser. 

If you love Slack or have to use it for work, download the app. It’s free and easier to keep up with alerts from your desktop rather than trying to find the correct flashing tab in a sea of chatbots.

Franz

Franz All-in-One Messaging

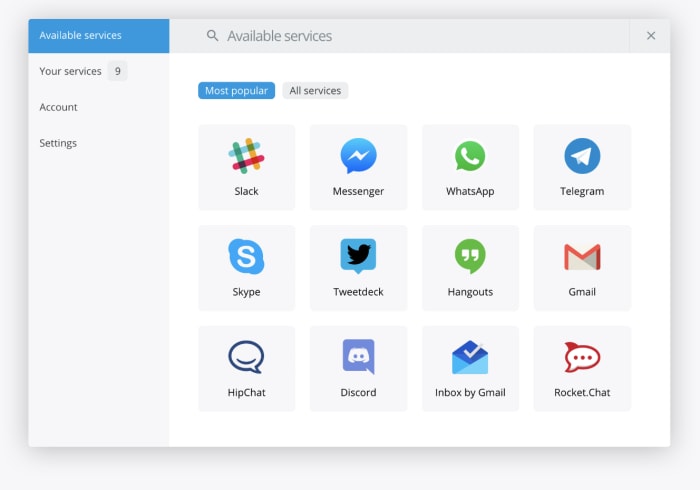
Speaking of chat apps, Franz is a tool that promises to make life a little easier if you’re a social butterfly spread across several applications. The platform brings your accounts together — Slack, WhatsApp, Facebook Messenger, and more. It brings everything together so you can respond from one place.

There’s no limit on how many accounts you can add. So, it doesn’t matter if you’re juggling multiple Facebooks or WhatsApps. 

Make it yours

Apple’s mission statement says that the Mac is the greatest personal computer in the world. Whether or not you believe Apple is up to you. However, if you’re going to spend $1,300 on a new computer that proclaims itself to be the best, you better customize it to have exactly what you want.

Try a VPN!

If you’re looking for a decent VPN service to try out on your computer, we would recommend Express VPN. By clicking this link, you can get 15 months of Express VPN for the price of 12!

How to fix dead pixels

You can fix a dead pixel safely and for free! Find out how!

Dead pixel

Nothing takes you out of the moment like a dead pixel. You’ll be trying to focus on a game or a movie, but all your eyes can focus on is that dead pixel.

Wouldn’t it be nice to rejuvenate that pixel? Well, it turns out there are ways to do so. Better yet, you can do it for free and it’s pretty simple. 

How to fix dead pixels

Detect dead pixels

You probably clicked this article because you found a dead pixel that you need to get fixed, but you might have more than you thought. For this reason, you should use a program like IsMyLCDOK to check for more.

The app has you run a color test, stress test and gradient test. After completing each test, you should be able to see every dead pixel on your computer. This is NOT a dead pixel detector app, but an app that tests the functionality of your screen. It just finds those dead pixels as a result.

isMyLcdOK Download now ►
9

Try rubbing it with a cloth

Wipe your screen

Getting rid of a dead pixel might be easier than you realize. You don’t always have to get into the hardware to fix it, you might be able to just use a cloth to rub it back to life. However, make sure that you do it in just the right way, or you can do more harm than good. 

  1. Make sure the device is turned off.
  2. Get a damp cloth. It can’t be soaked, or you can potentially damage the screen, and it can’t be dry or you can scratch the screen.
  3. Press down gently where the dead pixel lies.
  4. Do NOT press anywhere else! If you do, you could make more dead pixels.
  5. While applying pressure, turn on the device.
  6. Repeat the process until the dead pixel is gone.

JScreenFix

JScreenFixIf your screen issues require more than just using a cloth, there is another option. JScreenFix has a static box that you hover over the dead pixel. Leave the box in the area for about 10 minutes, and it should fix the dead pixel.

As annoying as a dead pixel can be, a box about the size of the GameBoy cartridge on your screen can be even worse. However, if you put the box in the problem area while you grab lunch, it should be fixed by the time you get back.

Most importantly, JScreenFix is completely free. You might have to close the occasional ad, but not having to pay for or download the service makes it all worth it.
Wrapping up

If you have an expensive computer, TV, or smartphone with a dead pixel, it’s worth looking into the warranty. It could very well be covered, and you can get a new device for free altogether.

However, if you don’t have it covered under warranty, one of these options should help you out!

Changes coming to Apple’s iOS

Apple WWDC shows new features for all Apple devices!

Apple wwdc

Apple had a LOT of news to share with us at today’s WWDC. From killing off iTunes to Minecraft making a surprise appearance, there’s a lot to process.

We took the key takeaways from the WWDC and compiled them for you below. This way, you can save yourself from listening to Tim Cook’s bad jokes and Apple’s constant humblebrags, and go straight to the important stuff.

WWDC key takeaways

WWDC

The new iOS 13 is coming this fall

Dark mode
Not gonna lie, Dark Mode on Messages looks clean

Going with the trend, Apple announced that iOS12 will be replaced with iOS13.

The theme of iOS13 is “faster.” Face ID unlocks 30% faster, app downloads are 50% smaller, and updates are 60% smaller. Because of this, apps will launch twice as fast.

Dark mode is coming to iOS. Different apps such as Messages, Safari, and even your home screen will appear darker, giving them a cool sleek new design.

More focus on privacy

You will soon be able to sign in with Apple rather than Facebook or Google to help protect your privacy.

For apps that still require an email address, signing in with Apple can also give apps a fake email address. Apple will forward emails sent from your fake address to your real one. This way, the apps will not have your real email address, and you can disable those fake addresses if you want to stop receiving messages.

While talking about a new cycle-tracking feature for women coming to the Apple Watch, a spokeswoman talked about sharing data with apps. The new takeaway from Apple is that “you control your data, and you control what gets shared with what apps IF you want to share anything at all.”

Basically, Apple is trying to be more transparent about what data users are sharing with apps. The message is that they don’t want you to divulge what you don’t want to share, and what you don’t have to share. 

You can now edit videos

Editing will now include the following new tools:

  • Vibrance
  • White balance
  • Sharpen
  • Definition
  • Vignette
  • Noise reduction

These tools can help edit photos as well as videos. You can even rotate videos and give them filters. 

Other key takeaways from WWDC:

An OS system for all devices!

Every Apple device will have its own OS system. iPhone will be keeping iOS and Mac is keeping MacOS, but iPads will get iPadOS, Apple Watch is getting WatchOS, and AppleTV is getting TVOS.

What’s new with iPad?

The new iPadOS will have all the same features that iOS13 will have.

However, probably one of the wildest features coming to the iPad is the ability to plug in a thumb drive. 

This small little change sparks a slew of questions. The new iPad they showed did not appear much thicker than your typical iPad. That said, we don’t know if a new iPad is coming that is thick enough to receive a normal USB. We also don’t know if a special type of USB must be purchased, or if you have to use an intermediary device to connect a USB to an iPad.

With all Apple devices getting thinner and thinner, we find it hard to believe that that the iPad will break the mold in this regard. However, being able to plug in a USB can potentially save us a lot of headaches.

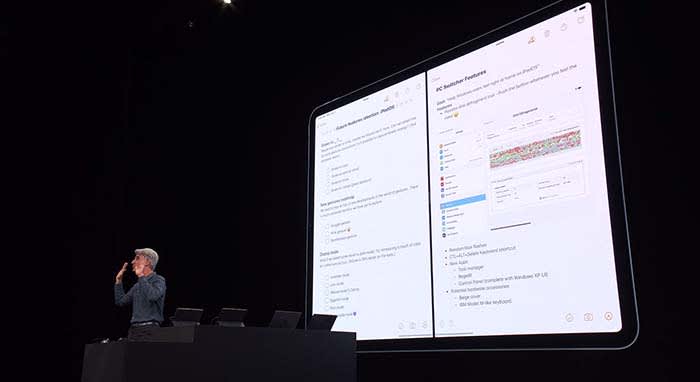
Apple wants users to be able to use their iPad as if it were a normal desktop computer. Going along with this change, iPads will be able to use split-screen to view multiple apps at once. 

iPad OS

Going along with this theme, when viewing websites through Safari, you will now see the desktop version of the page rather than the mobile version.

Along with new keyboard shortcuts being added, you will be able to use touchscreen commands to copy, paste, and undo by extending or retracting your fingers.

If you need extra space when working on your Mac, a new app called Sidecar will allow you to use your iPad as a second display screen for your Mac.

Apple TV+ is coming this fall with an original show

Apple TV+ will stream video in 4K. Along with featuring music and music-related content like videos, Apple TV+ will also have its own original show called “For All Mankind.”

“For All Mankind” takes place in a reality where the Soviets beat the U.S. in the race to put a man on the moon. It goes into how the U.S. would react to this reality, and how we would try to bounce back.

The show looks… okay, but not good enough to warrant purchasing Apple TV+. We will have to wait and see what other original content might come our way before making a decision. For now, we will just plan on buying Disney+, and be happy with that call.

Airpods

Siri will be able to read your messages to you while you’re listening to your AirPods. You can even respond to her. This works for other messaging apps as well.

During the demonstration, a man was on an exercise bike listening to music when Siri informed him that a friend sent a message. After reading off the friend’s message, the man was able to immediately reply by telling Siri what to say. Throughout the process, the man did not have to stop riding. 

It’s a cool feature, but we can’t help but point out a flaw in their demonstration. Apple also owns Beats by Dre, which is coming out with a wireless headphone of its own, similar to AirPods. These are supposed to be used while working out, not AirPods. Basically, we’re all sorts of confused.

Apple Watch is a proud, independent device that don’t need no iPhone

Apple Watch will soon be able to operate completely independently without needing to be managed through an iPhone app.

The App Store is also coming to Apple Watch. New apps will include, but are not limited to:

  • Audiobooks
  • Voice Memos
  • Calculator
  • Podcasts

Homepod hopes to compete with Alexa

Homepod can now understand who in your house is talking to it and can personalize the request. For example, if your roommate asks it to play a song, HomePod will play a song it knows your roommate will like.

Apple Arcade is coming this fall

With more than 100 titles to choose from, Apple Arcade will be a subscription service like Netflix or Hulu, but for gaming. Gamers will be able to play with both an Xbox One and a PlayStation 4 controller.


Wrapping up

Some of these new features are far more significant than others. When the iPad’s split-screen capabilities were unveiled, the audience members erupted. Why they went bananas for a feature we’ve had on computers for years, we don’t know.

However, the new privacy tools from Apple do deserve praise.

We can’t wait to see how some of these new features and products will unfold for Apple, and we will keep you updated the whole way.

How to get text messages on your MacBook

It only takes a second to sync texts across your Apple devices.

macbook

Once upon a time, phone calls and emails were the most popular ways to communicate. These days, texting is king.  Avid texters often want to be able to keep track of all their messages and save them in an easy-to-access area. One simple way to do this is by syncing a MacBook and an iPhone. Linking these devices can save time and make the texting process that much faster for frequent MacBook users. Here’s how to get text messages on a MacBook.

How to get text messages on your MacBook

Determine your eligibility

The basic requirement for getting text messages on a MacBook is to have both an Apple phone and a MacBook (or any other Apple computer). You can even receive SMS text messages in addition to iMessages.

Both the phone and the computer need to be logged into iCloud using the same Apple ID. Both also must run operating systems that can handle the text message forwarding software. The most recent operating systems for both iPhones and Macs have this capability.

Sync your phone and your computer

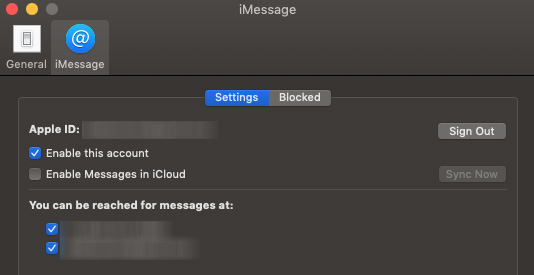
Once you’ve determined that you meet these criteria, you need to sync your phone and your computer. Make the connection by opening the Messages app on your Mac, logging in, and then enabling iMessages from your phone number and Apple ID email in Preferences.

imessages

The process is as simple as changing a notification and opening a window on an already-loaded app for your computer.

Confirm text message forwarding

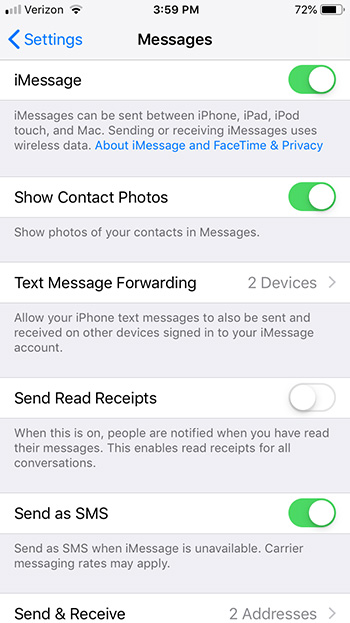
Then, to send and receive text messages on a Mac, you can set up text message forwarding on your iPhone. On your phone, open Settings, tap Messages, and then select both Text Message Forwarding and Send & Receive to link your accounts. Enter a verification code if prompted on your Mac’s Messages app. Note: if you’re not logged into Messages on Mac, you won’t even see the Text Message Forwarding option. But other than that, you’ll be quickly streamlined across your devices!

imessages setup

The benefits of MacBook texts

You can use the Messages app to send text messages to phones from your Mac. This option is particularly helpful if you don’t want to (or can’t) tap out long text messages on a small phone screen.

Text message forwarding also can help you share the storage load of your messages between your computer and your phone. In addition, text message forwarding can increase your productivity as you work on your laptop.

Greater connectivity makes communication that much easier for Apple ID users.

How to best organize Macbook apps

Don’t let clutter take over your desktop!

Mac

If you haven’t heard, Macs provide a tiering system for organizing your applications!

Much like a keyboard, which places the most-used letters by your pointer fingers, Macbook’s are designed to help arrange your favorite programs for easy access, with the rest waiting nearby.

Check it out!

How to best organize Macbook apps

Tier 1: The Dock

For many users, the dock holds their most important items:

Dock

This area should be reserved for applications you pull up constantly, often in conjunction with other applications. Unlike the desktop and Launchpad, all programs in this area will be available while using other windows, unless those have been maximized over the whole screen.

To put apps here, start by opening Launchpad:

Launch

Hold onto the app with your cursor and drag it over the dock.

Release, and a shortcut to the application appears!

Removal works much the same: visit the dock, grab an application, and then hold it over the desktop. After a few seconds, a “Remove” notification will appear. Release and the shortcut disappears.

It’s nice when things work in simple ways.

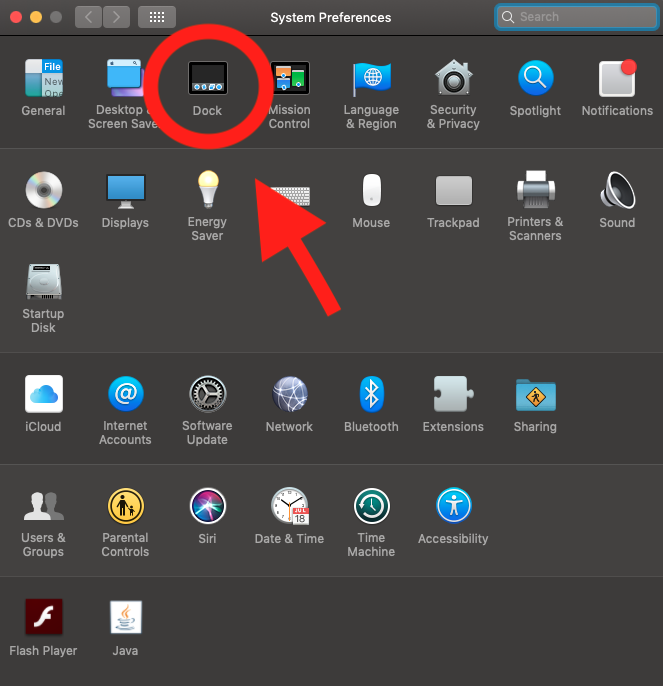
To improve your experience further, play around with the dock settings! Go to “System Settings” and find the “Dock” tab:

Prefs

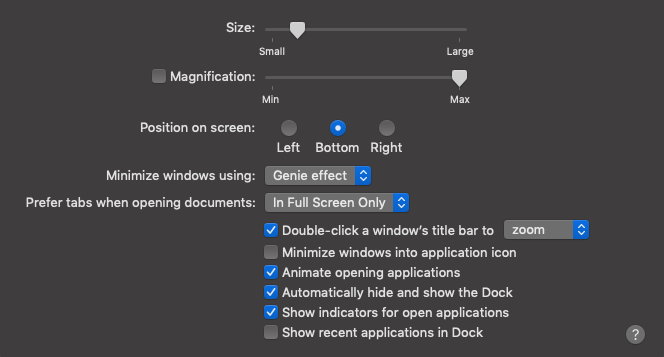
Docking

Here, you’ll encounter a number of useful features. There are classics like as “size” and “position”. Still, we especially enjoy the “Automatically hide and show the Dock”, which makes it disappear until your cursor scrolls over the Dock area. Try the options yourself and see what works!

Docking

The best feature

Tier 2: The Launchpad

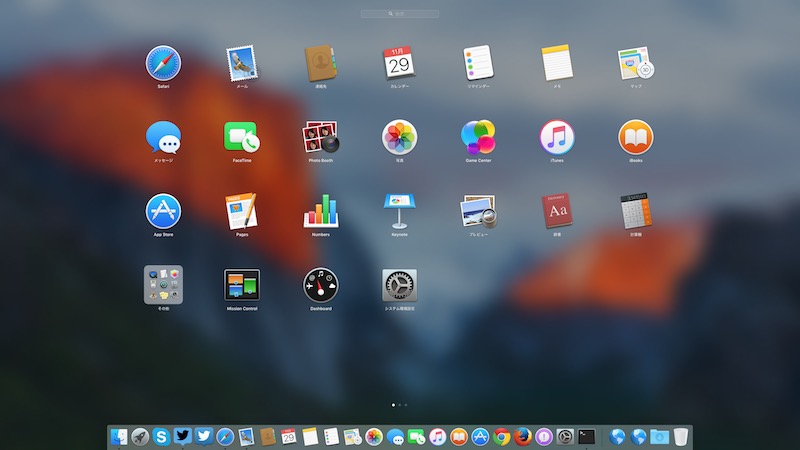
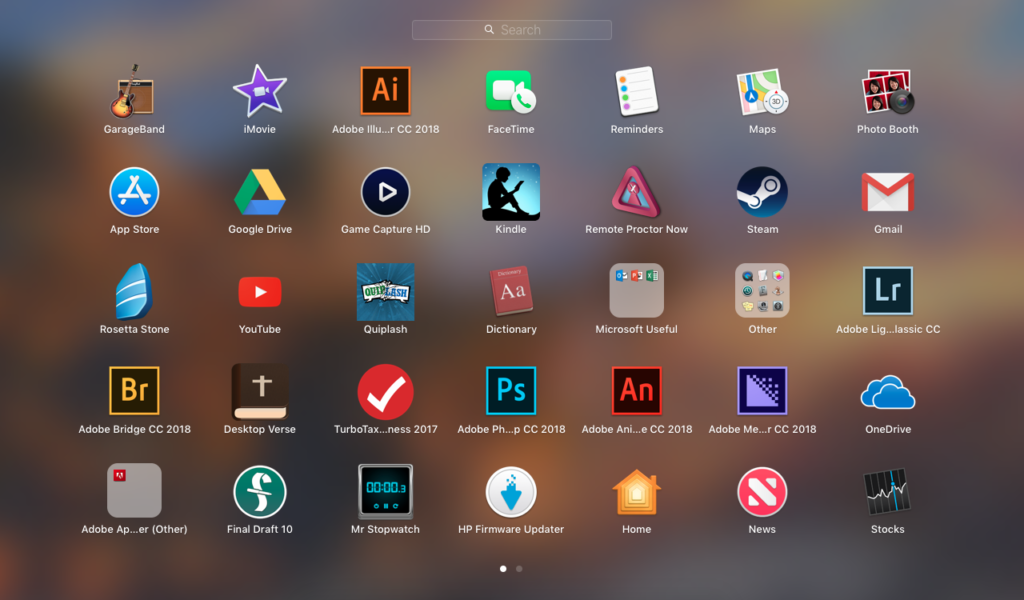
Launchpad offers a huge environment for any number of applications, only one click behind the ease and convenience of the Dock. Find that Launchpad icon once again:

You’ll be taken to the app environment:

Basic

Here, Launchpad holds the ability for further organization within itself. The function works much like an iPhone, so if you’re not familiar or would like an update, allow us to dive deeper.

First, you may notice a number of dots at the bottom of your screen:

This indicates the number of pages within Launchpad!

Pages can be organized. Flip between them using two fingers. Move apps on a page by holding the icon and dragging it around. Take apps between pages by heading to the far left or right. If you do this and no page exists to the right… a new one will be created!  By using these tools, you can design pages to fit your own style.

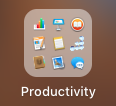
Finally: folders. Drag an application icon over another for a moment, and it gives you the option to make a folder, such as:

Productivity

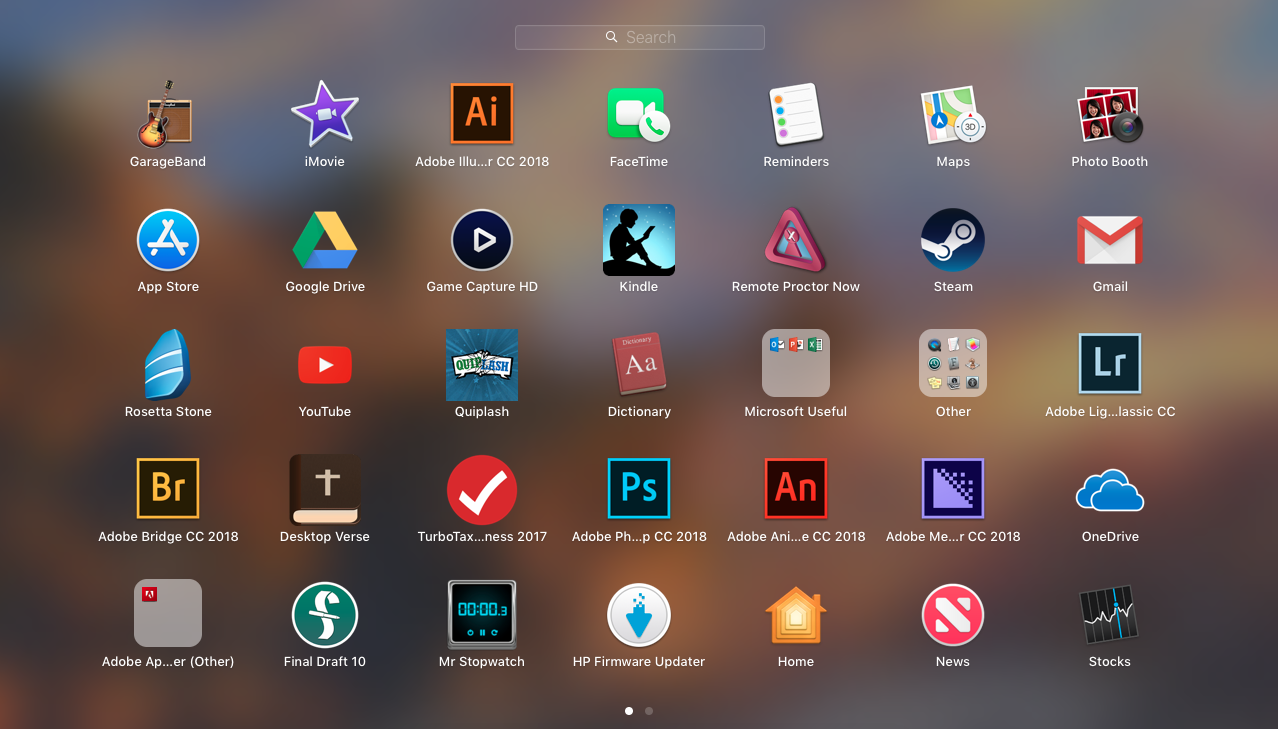
As you can imagine, there are many options here: you could organize pages by type, or create a hierarchy of usefulness. You could use only one page, with numerous folders holding similar apps. Better yet, create some combination of the two! We have two pages, the first intended for our “more important” apps, which fell just short of the Dock:

Us

Tier 3: The Desktop

The desktop environment works great for links in general, but can host application shortcuts just as well!

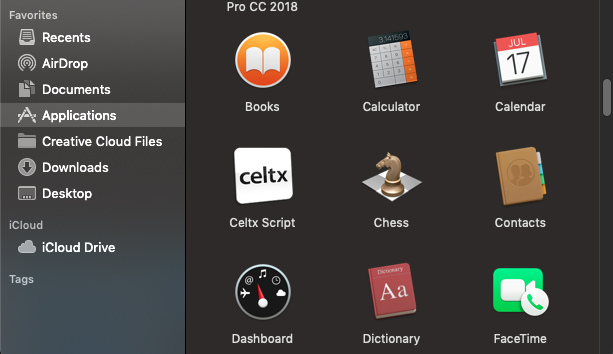
To do this, open Finder and select the Applications tab.

Finder

Finder2

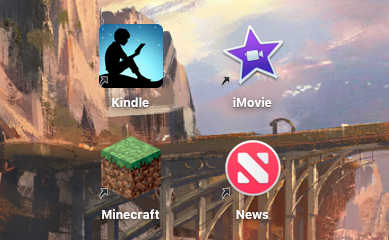
Grab an app and pull it to the desktop. Once you finish this, a shortcut appears!

Shortcuts

Note the small black arrow at the bottom right. This indicates the icon is a shortcut, not the full application. Thanks to that little arrow, you can delete a shortcut instead of removing the main app from your computer.

Bonus: The Stacks

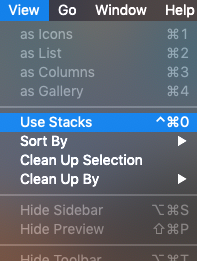
Mac update Mojave created stacks. From the main screen, select “View” at the top left and hit “Use Stacks”.

Stacked

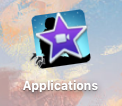
Your application shortcuts will automatically be packaged together in one folder:

Stacks

Simply clicking on this pile opens a dropdown menu with all your programs in one place:

More Stacking

Final Words

If you’re not sure where to put what applications, don’t worry: the more you work with a Mac, the more you’ll realize which programs deserve to be on the Dock and which should be left in Launchpad or on the Desktop.

Just remember to declutter from time to time, in case you stopped using one application or another! For example, if you switch to Mozilla Firefox, you may want to delete the old Google icon or vice versa.

The point is, we hope this guide helps you increase productivity and reduce complexity with a few simple, organizational tips. Thanks for reading!

How to customize the Control Strip on your MacBook Pro

If you have a MacBook Pro, make that toolbar your own! Just follow our guide.

Did you know that customizing the Control Strip on your MacBook Pro can greatly improve your internet experience? You can edit the Control Strip to make it look however you want it to look! Just follow these simple steps to customize the Control Strip on your MacBook Pro.

How to customize the Control Strip on your MacBook Pro

1. Open System Preferences

First, you will need to click the Apple menu icon that is located in the upper-left corner of the screen of your MacBook Pro. Then, once you’ve opened the Apple menu, you need to click on the System Preferences option.

2. Select Customize Control Strip

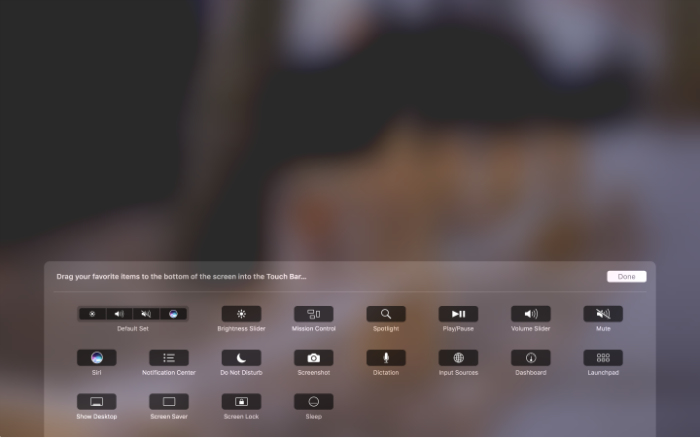
Now that you’ve selected System Preferences, click on the Keyboard option. After that, simply select the Keyboard tab. Now that you’ve gotten this far, you can select the Customize Control Strip option toward the bottom of the window. Once you’ve done that, your screen will briefly become blurry, and the customization panel will appear. In addition to that, the buttons on the Touch Bar will also enter jiggly mode.

3. Customize your Control Strip

If you want to customize the tools in the collapsed Control Strip, then you will click the Collapse button that’s located far left of the Touch Bar. If you choose to customize the full Control Strip, then select the Expand button that is found directly left of the tools in collapsed mode. You would do this if you want to move a tool from the screen into the Touch Bar to add it directly to the Control Strip. Just drop the tool into the Touch Bar and it will appear there.

4. Remove unwanted tools and finish

If you want to remove a tool from the Control Strip on your MacBook Pro, you can move the cursor into the Touch Bar and select a tool to remove it from the Control Strip. Simply click on a tool on the Controls Strip and drag it to a new location on the Touch bar to rearrange the order. Finally, once you’re finished with customizing your Control Strip, click Done and your changes will be saved.

How to transition from PC to Mac

Thinking of switching from PC to Mac? Follow our guide for an easy transition.

So, you’re considering the switch from PC to Mac. Good choice! We’re here to make the transition smooth.

Guide to transitioning from PC to Mac

A few prior considerations

(If you’ve already bought a Mac, no worries! Skip on down to the “Welcome” section. If not, here’s a quick description of why moving to Mac makes sense.)

Apple sells you an experience. PC makers have great laptops (arguable a few better ones for a superior price), but there are fundamental aspects on which Apple wins. For example, the great Hewlett-Packard’s webpage caters to computer enthusiasts who know their business, want the perfect product, and can narrow down the search to a few choices from a hundred (of course, if you toss in the options for Lenovo and Dell, things get crazy real fast). Apple, on the other hand, makes the process simple for everyone while delivering consistent quality. There are three easy choices at the start: Macbook, Macbook Air, and Macbook Pro. From there, you simply build the laptop you want, choosing which color, processor, and data storage work best for you. Simple as that.

Apple then delivers a well-packaged product that works great. If it doesn’t, you can take it down to the Apple store, which is known for good customer service. We can verify from experience!

And those are just the startup benefits of buying from Apple…

Just remember to consider if you’re prepared to join the Apple culture! Because you will, eventually. It starts with the laptop, but a soon enough there’s an iPhone in your pocket, an Apple Watch on your wrist, and an iPad in your hipster satchel! How did that happen? The answer is: Apple products work great, and they perform well together.

Welcome to the Mac

You made the purchase, congratulations!

Enjoy taking your product home and unwrapping it, Apple’s products are designed with unboxing in mind. Partially, it’s meant to symbolize their adherence to beauty and precision. Partially, it’s meant to be awesome!

Once that’s finished, there are a few things to note:

Starting

When you boot up your new Mac, there will be a series of questions before you get going. These will help you create or sign in to an Apple ID, which helps in a number of situations: transfer of iTunes purchases, or finding a lost device with “Find My iPhone” on the Apple website (we’ve used it to track down a misplaced iPad, embarrassingly enough).

The Keyboard

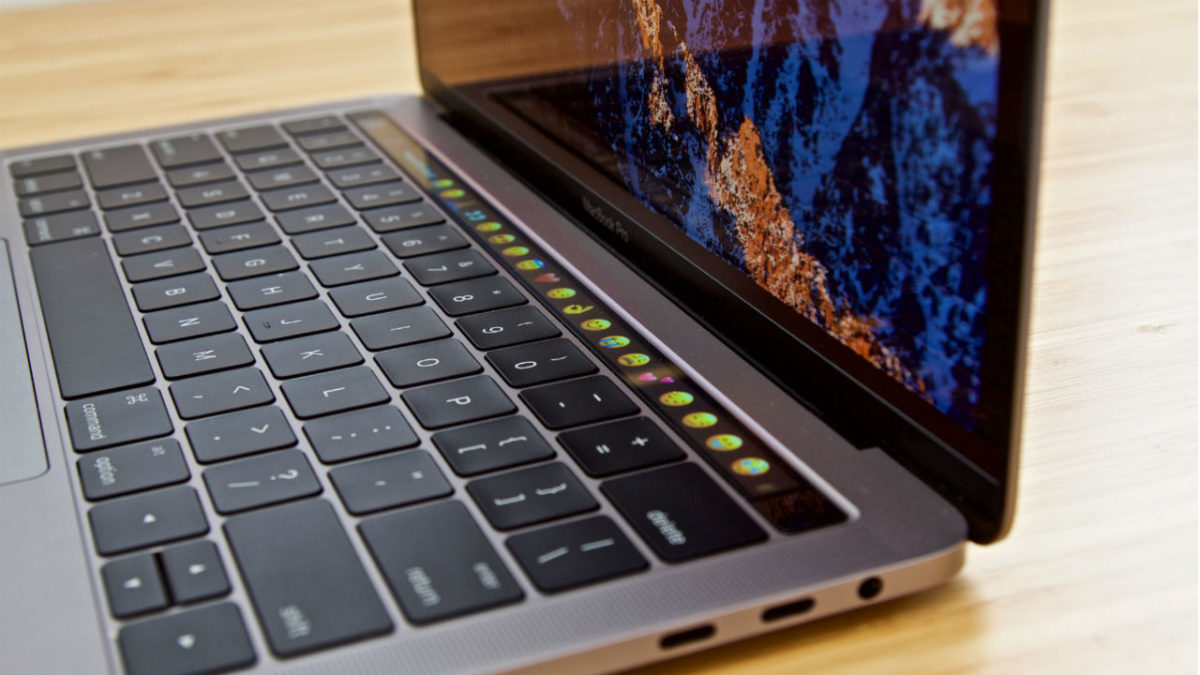
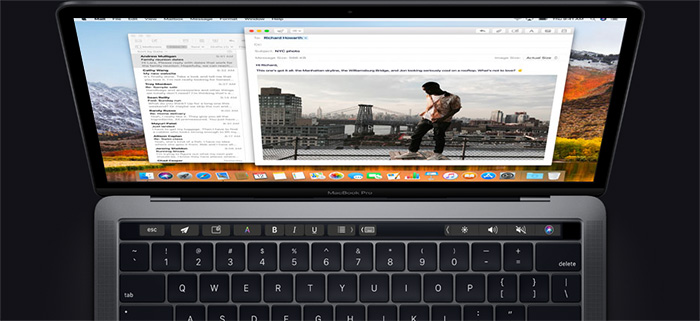
Nothing much different here. Isn’t that a relief? Typing works pretty much the same, although there is a “command” button added where the “home” button went. It has been replaced by an effective sidebar, seen below. We’ll discuss that later.

The bar
The bar can be dark thanks to update Mojave!

Navigation

There it is: one of the biggest issues between Mac and PC comes down to navigation.

PC’s generally have one area, “Home” for everything. Mac eases through the process by using Finder to retrieve files and Launchpad to visibly organize apps.

Knowing this, you won’t have to search through “Home” for applications, they’ll be in one of two places (and after a day, you’ll know which without having to think about it).

Customization

Apple prides itself on giving users the ability to change their user interface. With so many different options, we’re going to list a number of places that changes can be made and a few specific tools we found the most helpful. It’s not an extensive list by any means.

1. The top bar

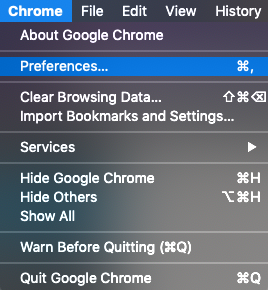
Tabs change for every application; make sure to see what’s available! Just remember that all of them have a “Main” tab with “Preferences” and a “View” tab. These may come in handy.

The image below shows our current Google options bar:

Chrome

2. Settings

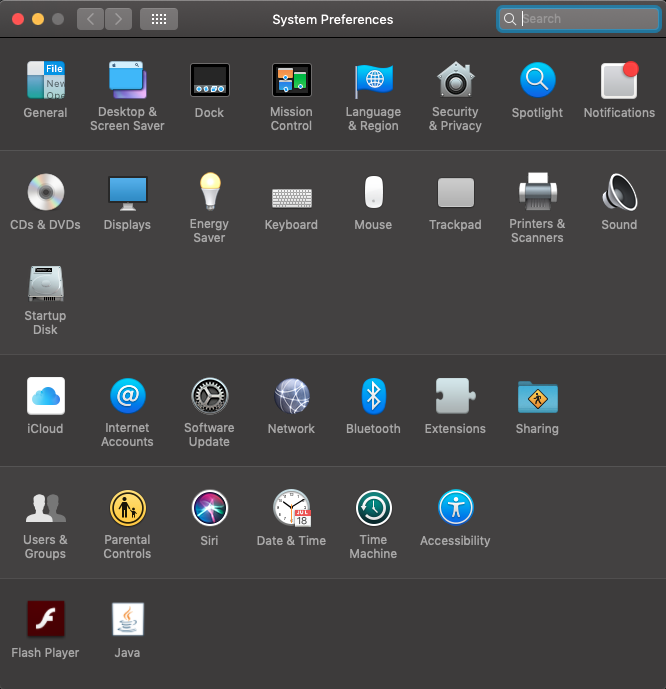
How can you go wrong with settings? This single location, usually available on the side bar or Launchpad area, gives the user control over security, background, Bluetooth connections, keyboard short key options, printer selection and more!

The Settings

3. Sidebar applications

You can easily add or remove applications available here by opening Launchpad, grabbing an application, and holding it over the sidebar. After a few moments, a spot will open for your new quick app.

If you want to remove an app, do the opposite: grab an app in the sidebar menu, hold it over your empty desktop, and it will show the option to “remove.” Let go, and it’s gone!

Why is this so important? Working on laptops often hinges on the use of applications like Word, Google, Adobe Creative Cloud, or SolidWorks. The ability to keep those tools organized in a designated area saves a lot of time and hassle.

4. Pages

When you “maximize” a window on the Mac, it doesn’t just cover everything else. It actually creates a new page where it can take up the full screen! Switch between these pages by sliding left or right with three fingers. Or swipe up for the full menu, which’ll look something like:

Dat Menu

5. Drag and Drop

Apple lets you drag and drop files almost anywhere. As long as you can see the file on your desktop or within Finder, you can pull it somewhere else. The ability to “physically” move files in addition to searching through a list makes a ton of difference! It’s hard to go back to a PC after enjoying this function for years.

Final Words

When it comes down to it, PCs and Macs aren’t too different. In fact, we’d argue that the initial switch won’t be too difficult for the average user. However, the benefit of owning an Apple product makes a huge difference once the powerful combination of small but significant details, from the design to the interface, make sense for the user. Take your time, figure out how you wish to use your Mac, and then adjust it to fit your style.

Thanks for reading, and we hope this helps your transition!