In a hurry to write down a melody playing in your head? Are you looking to transcribe a rock song for your band to cover? Or maybe you want to hammer out a melody on your MIDI keyboard and have it appear on-screen next to you?
If the answer to any of these is “yes,” then MuseScore was created for you. Not only that – it’s totally free. You can grab it here right now:
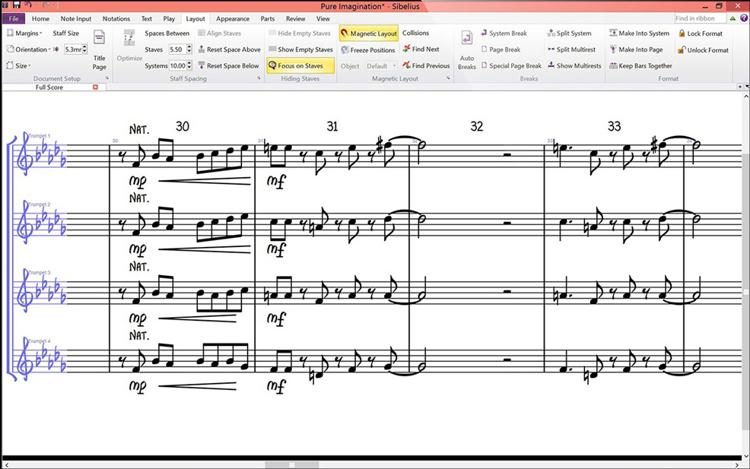
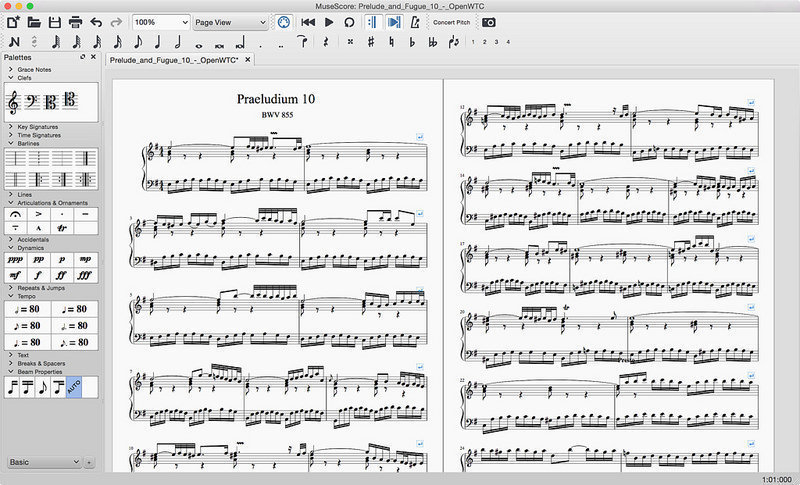
Long answer: MuseScore 2 is a score writer for Windows, Mac, and Linux – just like Finale or Sibelius – the latter of which can cost upwards of $600. Musescore 2 has practically all the bells and whistles of its more famous brothers: It transposes for you; notates for you; beams, splits, and orders measures; balances lines and complex rhythms; and even includes notation for articulations and accents. To the untrained eye, it’s tough to tell which of these two pictures is from the free program:
The only limitation here is how quickly you’ll actually be able to perform these maneuvers. The learning curve for MuseScore is steep compared to learning Sibelius, and is certainly less elegant than Finale. After our first 45 minutes, though, we found the answers to most of our questions had been right in front of our face the whole time.
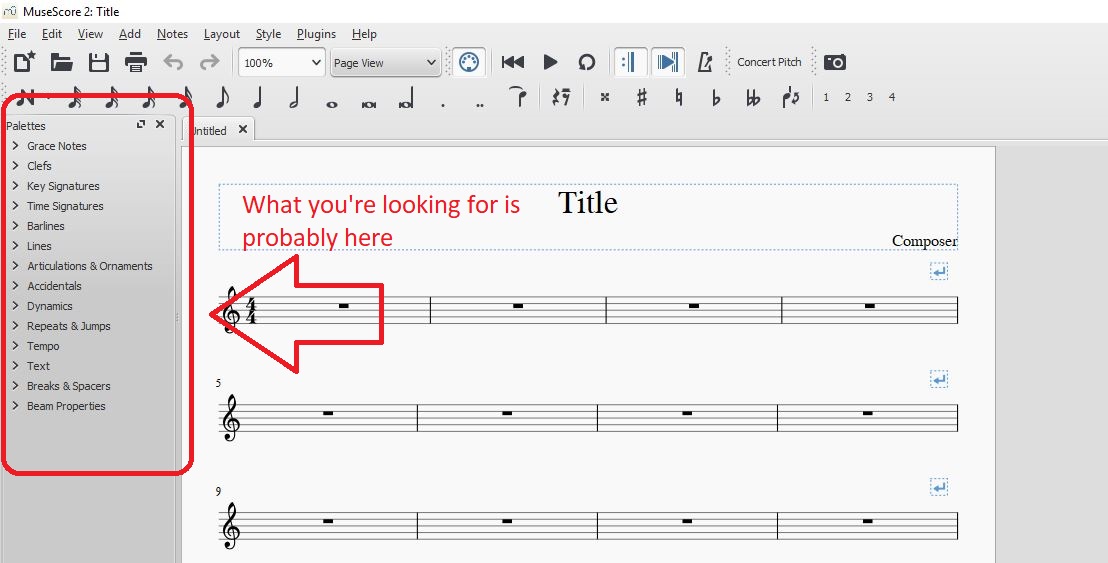
Anything that we didn’t find immediately in the main toolbar was buried under one of the tabs in the ‘palettes’ window on the left:
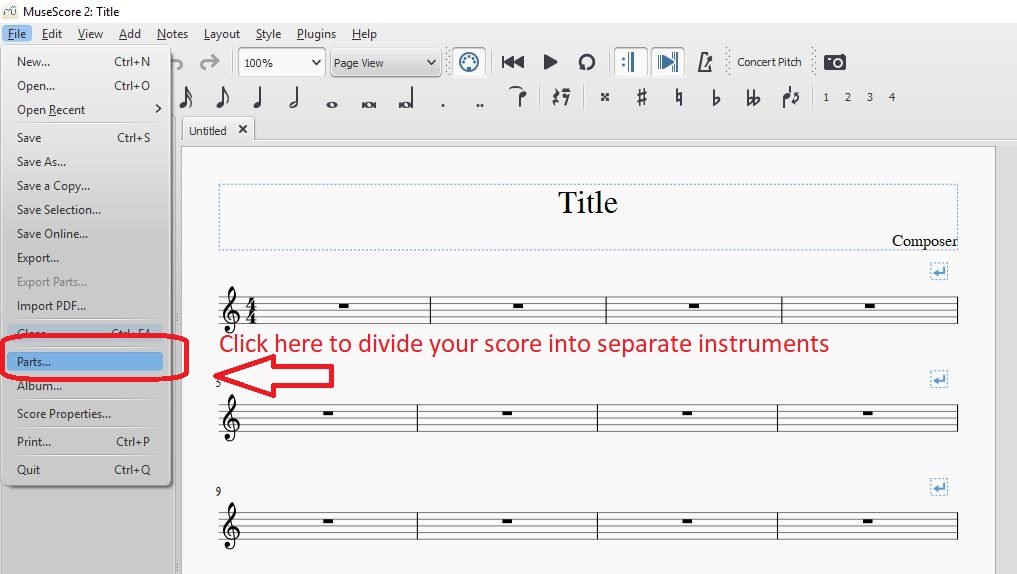
Playback options are as simple as hitting ‘play’ up top, and we were excited to find that upon completing our score, dividing it into separate instruments was as simple as clicking on ‘parts’ in the File drop-down on the top left:
What can I do with this program?
MuseScore 2 boasts a surprising variety of utilities, and really covers all the bases you can think when writing, arranging, or transcribing music. Its features include:
Add chords and lyrics to anything you write
Play a MIDI keyboard in real time and see it dictated on screen in MuseScore 2
Add, copy, repeat, or move large selections with the clipboard
Upload your audio to MuseScore.com so others can listen to your work
Reorder score tabs and add/remove brackets for accidentals
Choose to add rhythms first, pitches later (useful if you’re transcribing in a hurry)
If you want to check out MuseScore 2 in action, it’s all here in this video:
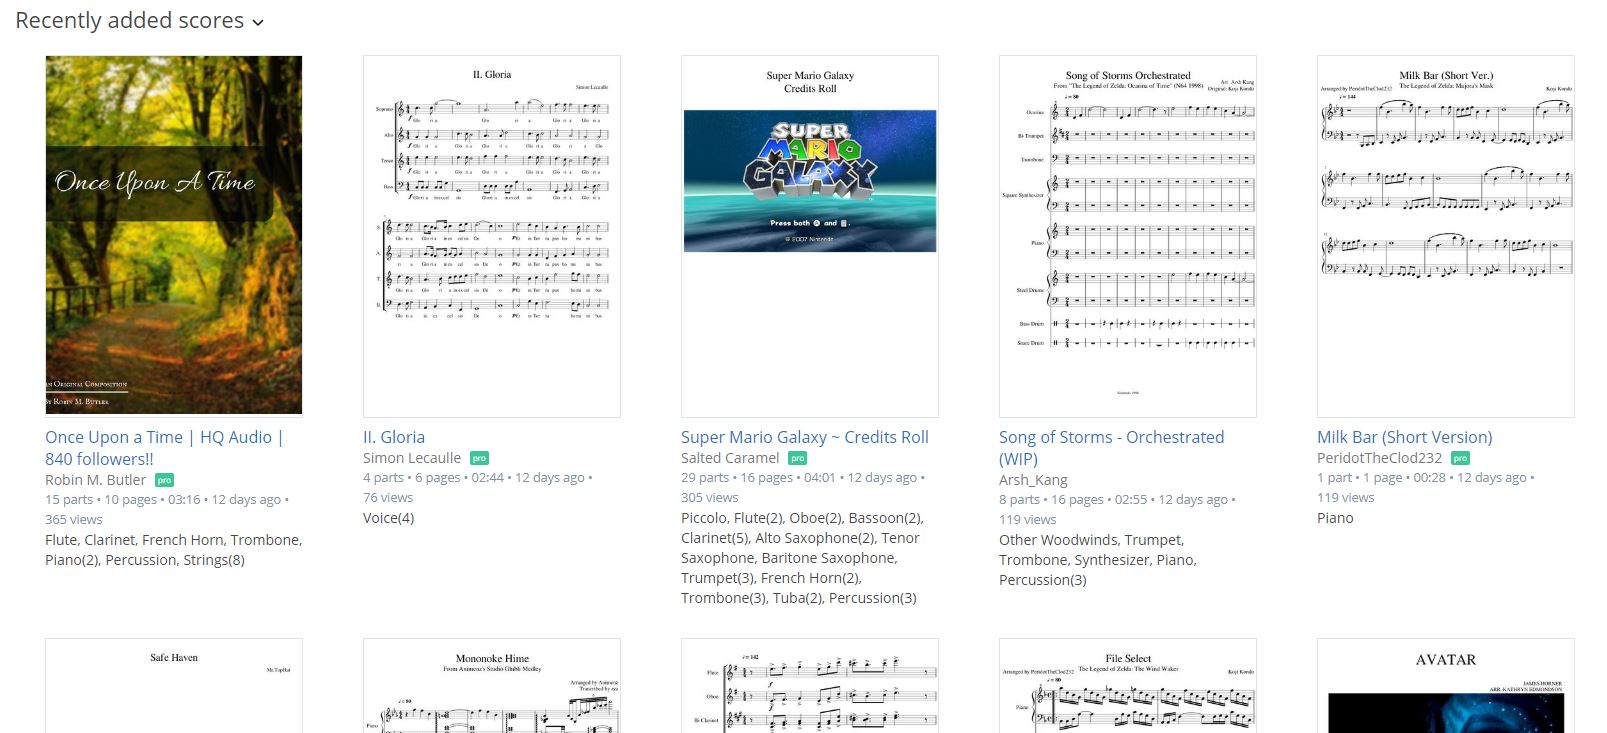
Lastly, since MuseScore2 is free, it means that musicians around the globe are already using it to transcribe and transpose music. As such, there’s a hefty catalog of free sheet music that’s been uploaded by the MuseScore community.
Definitely check this out because someone else may have already finished what you’re about to start on. Anything from this catalog can be downloaded as a .pdf, too, so you don’t even need MuseScore to access them!
https://musescore.com/hub/video_games?page=7
Give it a whirl. We’re anxious to see what you can add to MuseScore2‘s growing library!
As social networking and remote job industries become increasingly popular, so does the software we use. Webinars, conference calls, and vid chats have existed for years. We practically have more than we can keep track of – FaceTime, WebinarJam, Skype, Facebook, and Gchat to name just a few.
How do you know which one is for you?
Tech expert Steve Dotto explains, the best way to find out is to “take a step back and look at how the webinar software is designed.” That way you can tell if its strengths align with how you intend to use your webinar. For specific comparisons you can check out the man himself comparing WebinarJam, Skype, and – most notably – Zoom:
For all the benefits and uses of Skype, the webinar software that really caught our attention was Zoom. You can download here for free:
While Skype is great for casual chatting, gaming, or video calls, Zoom’s specialty is a little more business-oriented. You can tell from its straightforward presentation and the lack of any bells and whistles that you’d find on a program like Skype. Made with a focus on conferencing, Zoom is the preferred webinar software for consultation, teaching, mentorship, or one-on-one business calls.
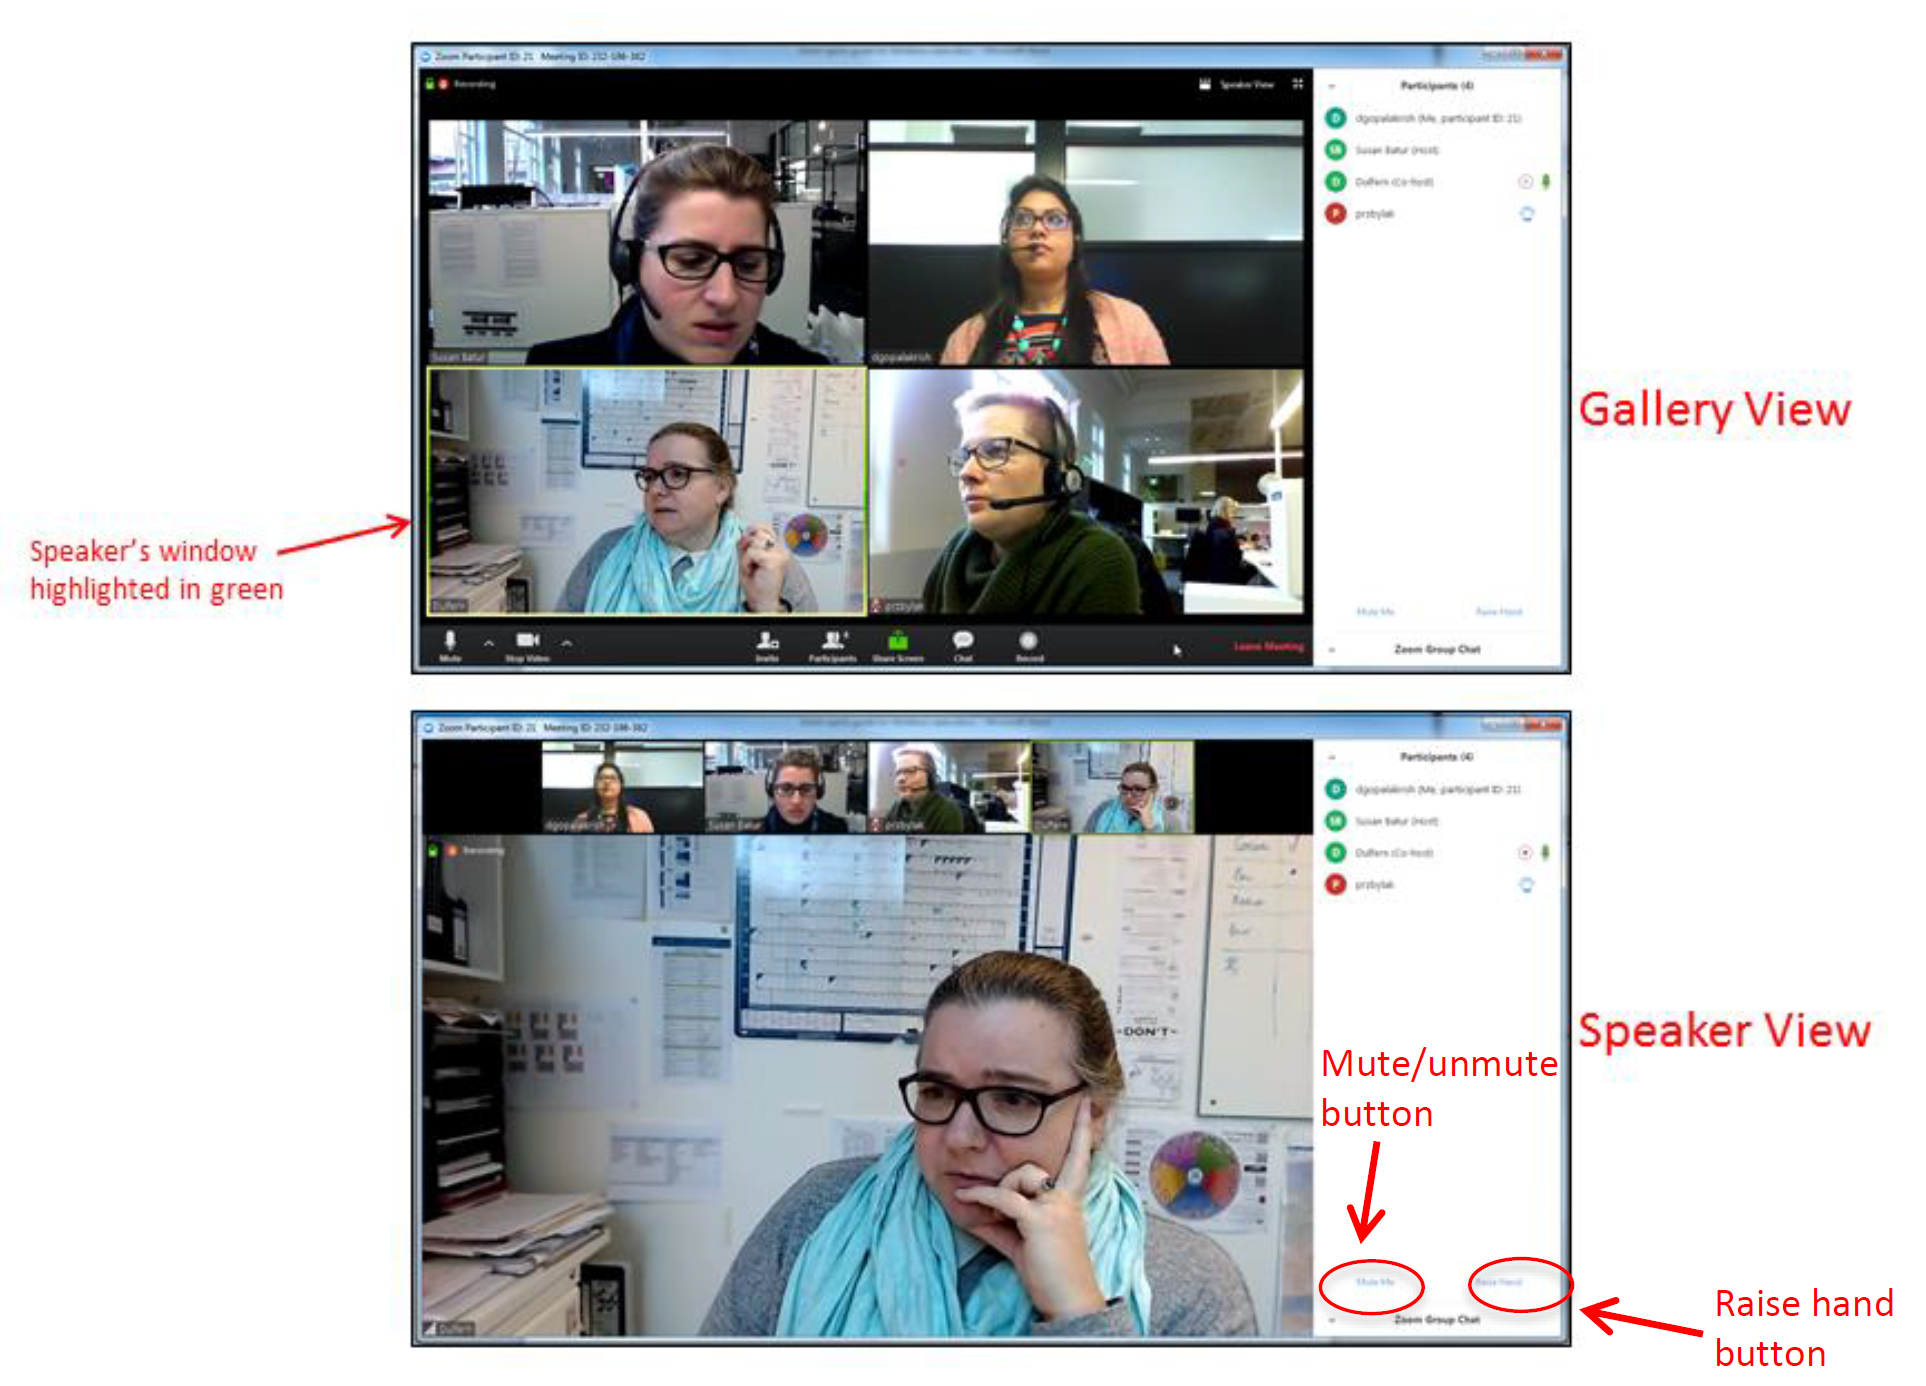
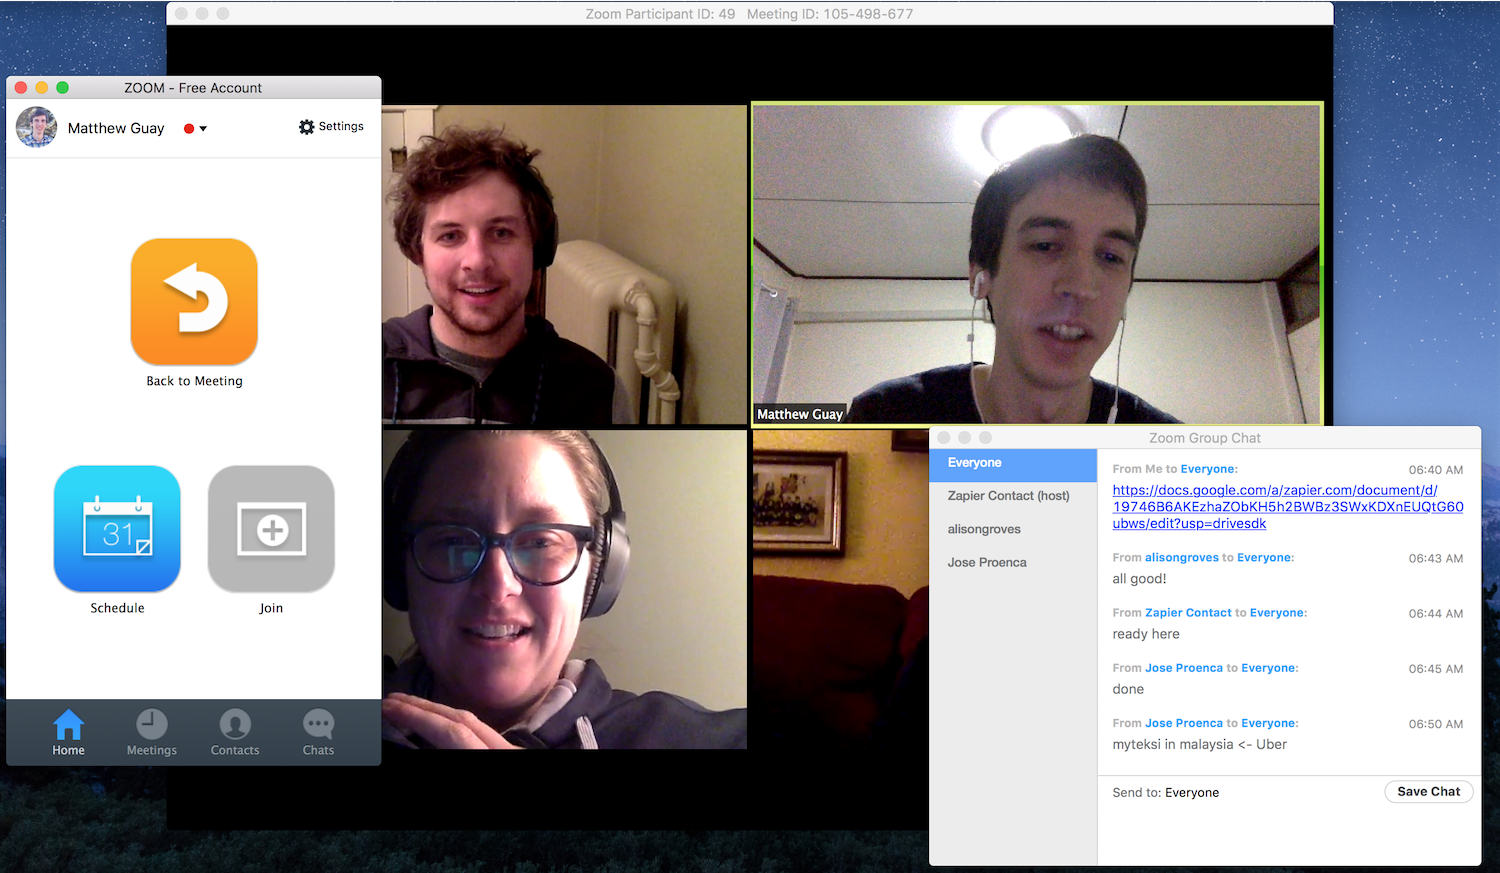
That’s not to say that Zoom can’t handle a group chat – far from it. Zoom can actually hold up to 100 people in a single vid chat at any given time. And it’s still free. Guests can be added simply by clicking ‘invite.’
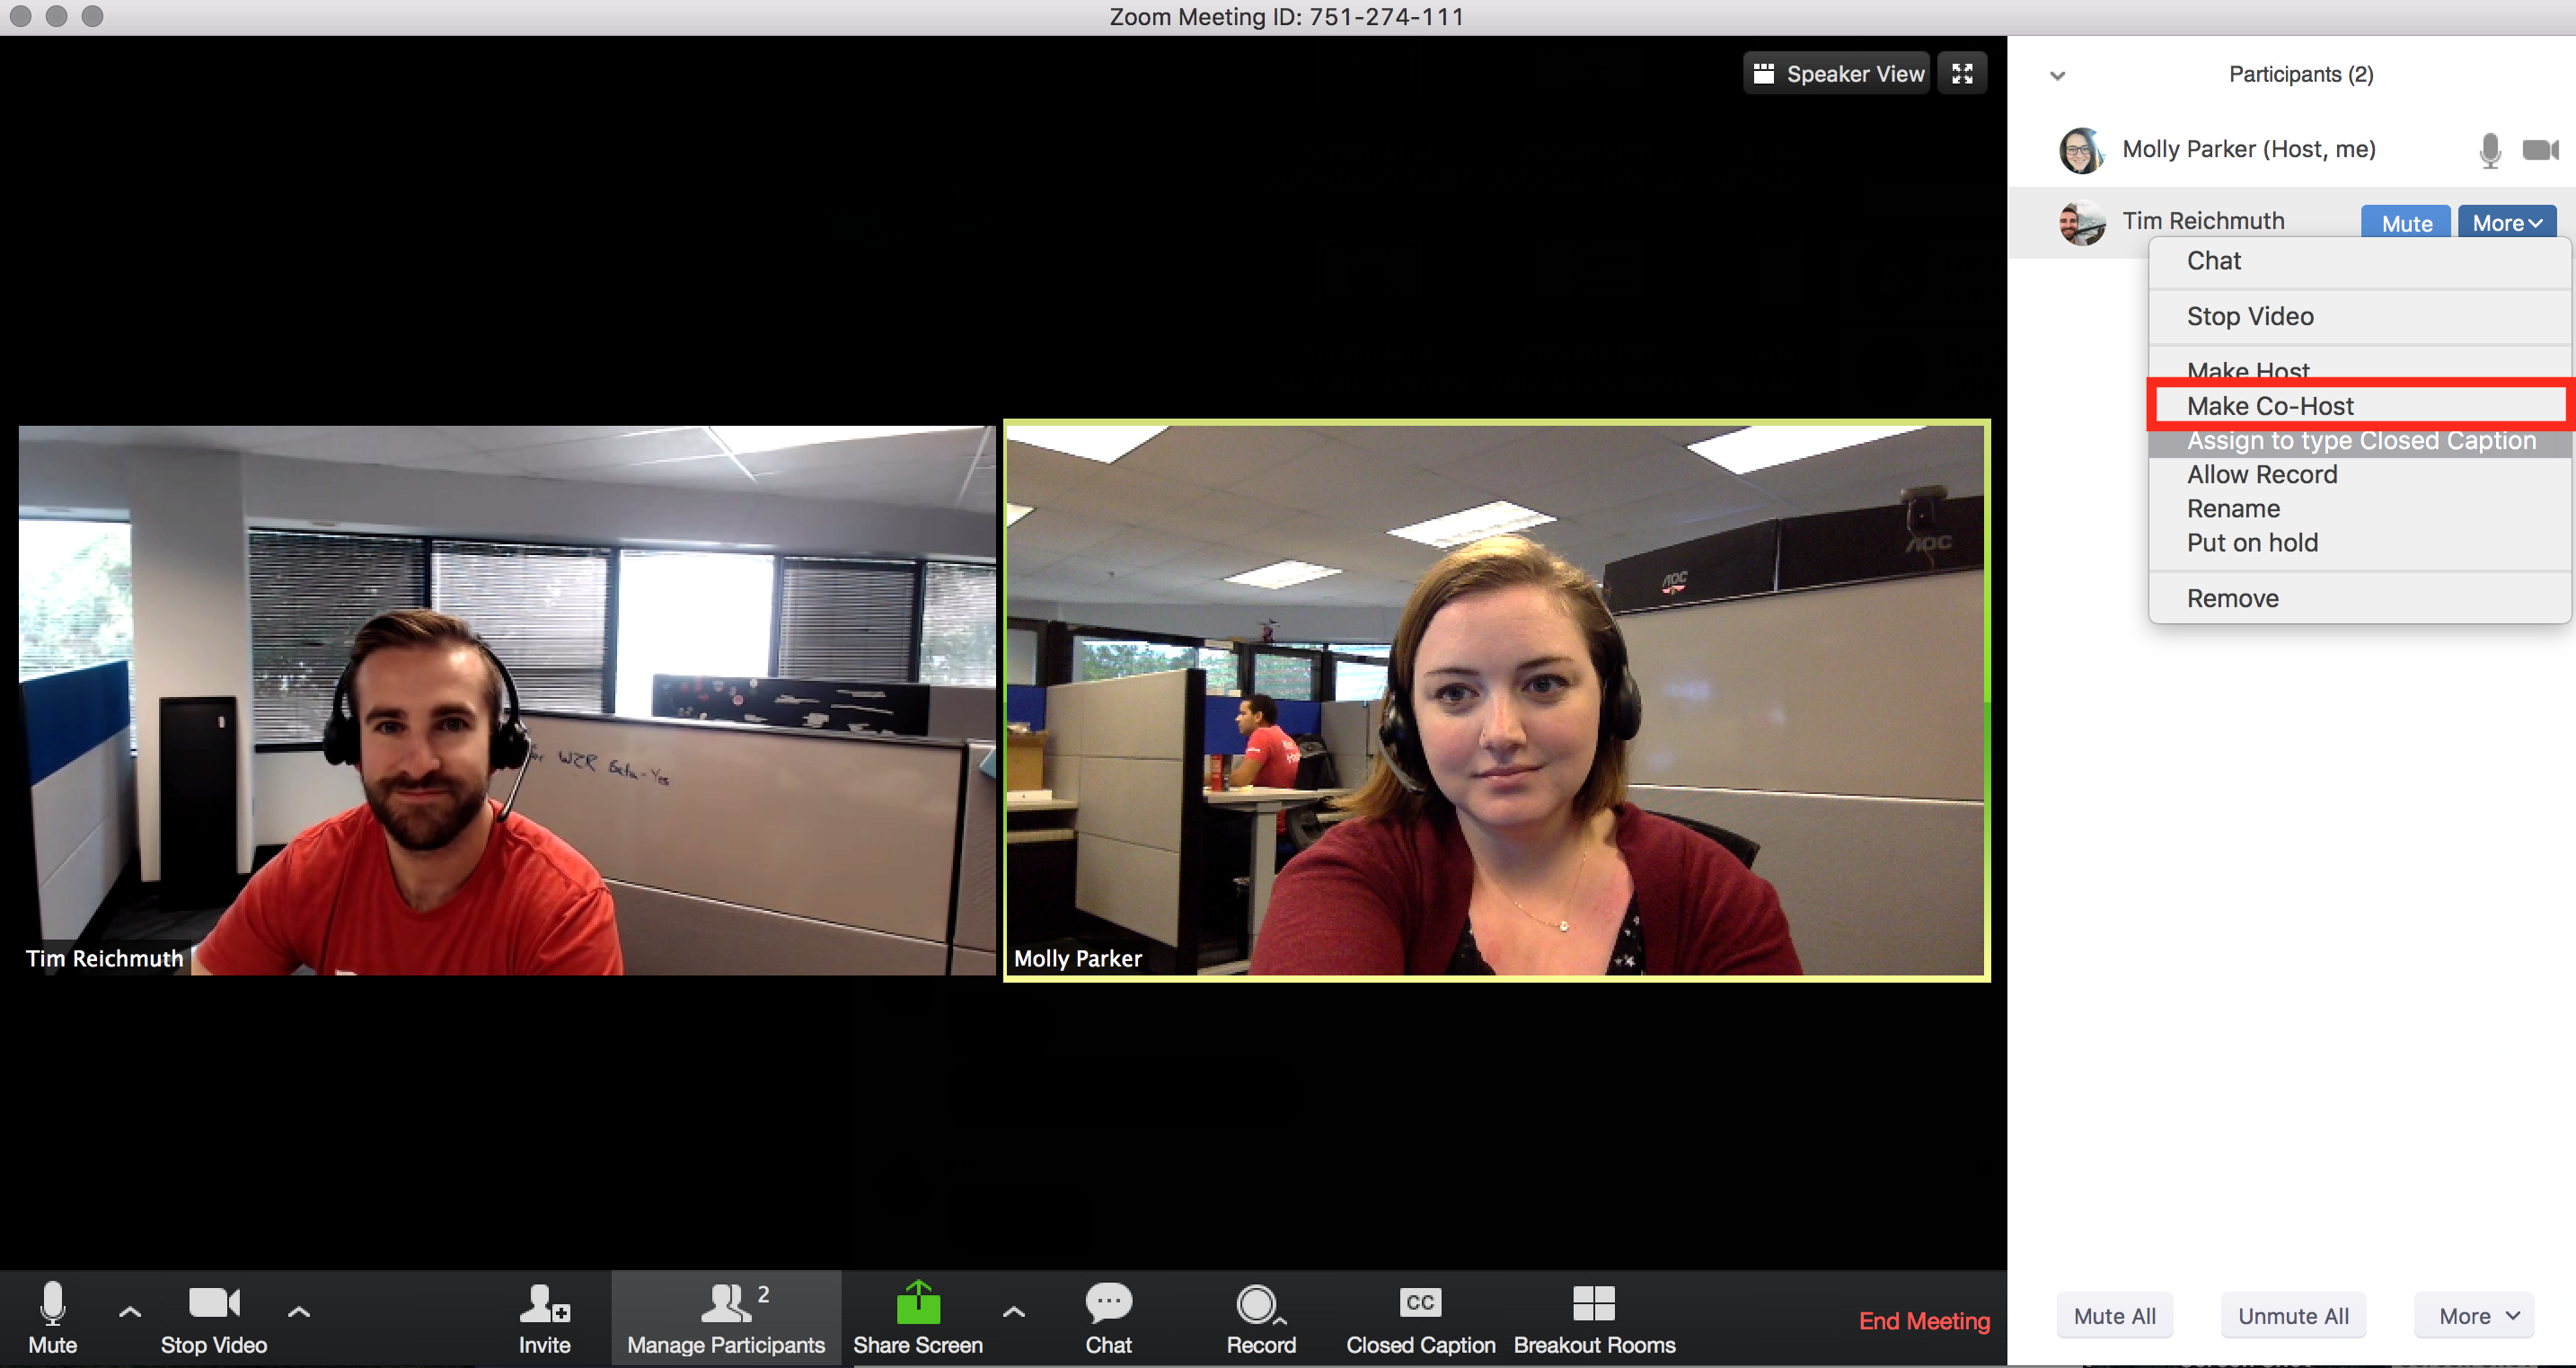
You can also make another person in your chat the co-host, giving them equal control. For instructions on how to do this, check out this article. Zoom’s screen-sharing capabilities are also straightforward, accessible instantly and at any point during your call. It’s not buried under menus like it is with some other tools.
Like Gchat, Zoom can be used for either video or phone; picture is optional. All the essential options for customization are clearly visible during the chat, and can be accessed at the click of a button. We were surprised at how fast and easy the download process was for Zoom, and how quickly we were able to jump into a chat.
https://zapier.com/apps/zoom
Efficiency was clearly the main goal when Zoom was designed, and it does its job so seamlessly without calling attention to itself with banners, spammy emails, or gaudy screen borders. It was meant for no-nonsense business calls and it shows.
Sharing contact info is not necessary
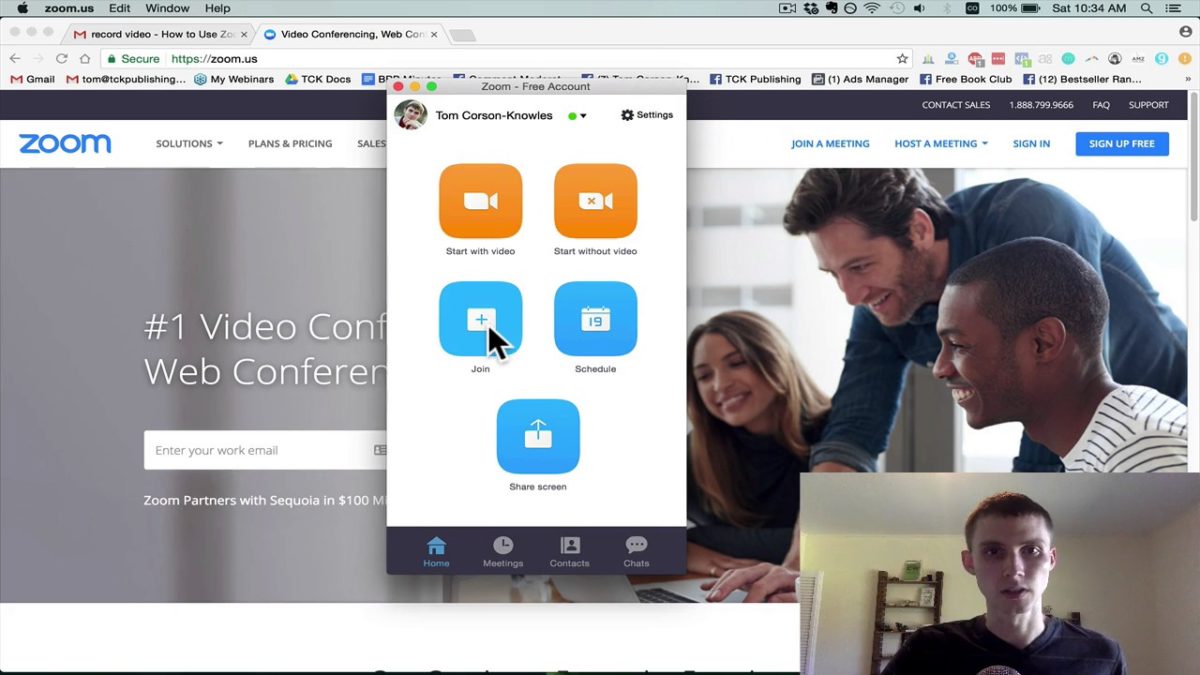
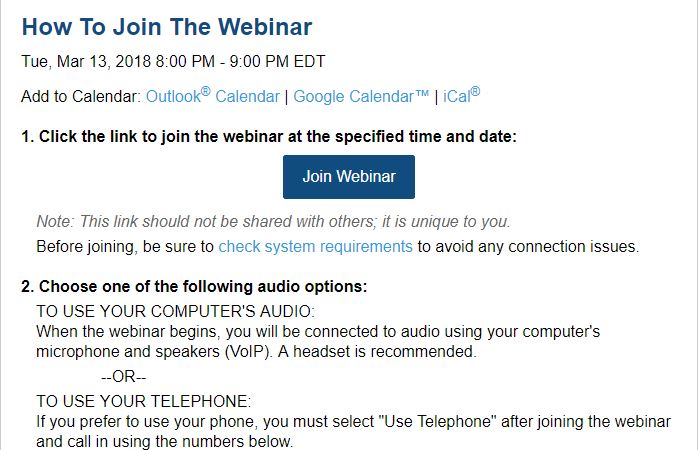
Here’s what might be Zoom’s best feature: all you need to invite someone to a Zoom chat is their email. It’s as simple as that. Recipients will find their invites in the default inbox, and when the time comes for the meeting, all they need do is click the big “join webinar” button like the one above. Zoom will take care of the rest. For step-by-step instructions, check out this article.
Is there a downside?
Our biggest gripe with Zoom was that chats only last for 40 minutes at a time. After that, another invite needs to be sent and the chat needs to be restarted. Annoying for sure, but we can only see this being majorly inconvenient if you’d been trying to talk with a dozen people at once and then suddenly had to re-invite them all. At that point, you might consider upgrading to the paid version. And yes, there’s a paid version:
https://zoom.us/pricing
If you’re interested in seeing more detail as to what each plan offers, you can look here. For the average Joe, however, we don’t see any reason for Zoom to cost a penny. There’s no trial period for Zoom either, so go ahead and give it a shot. See firsthand whether it’s the best webinar software for you.
We’ve teamed up with Adobe to offer a 1-year subscription to the Adobe Creative Cloud worth $599.88
Softonic and Adobe are extremely happy to offer you a great chance to win a fantastic prize. One lucky winner will win a complete subscription to all Adobe Creative Cloud apps for a whole year. The complete subscription comes with total access to over 20 creative programs including Photoshop CC, Adobe Illustrator CC, Adobe Premiere Pro, and Illustrator. On top of all that, the subscription comes with 100GB of cloud space to store all your artistic creations and supporting files.
If you’re an artist, photographer, designer, movie maker, or creative in any way, shape or form this is an amazing opportunity. This is your chance to get your hands on industry-leading technology.
The contest will run from Thursday, July 19 and will end at 23:59 (GMT) on Tuesday, August 7. The winner will be selected from all the qualifying entries on August 8 and will be notified via Facebook. They will then have will then have until August 15 to redeem the prize.
Good luck!
For the full terms and conditions of the contest click here.
Microsoft Windows 10 Updates will be much smaller and will run much faster from February 2019.
Microsoft Windows 10 Updates will be much smaller and will run much faster starting in February 2019
Microsoft announced this week that it will be discontinuing a rather heavy component from its regular updates. Removing Delta Updates will make the Windows 10 update cycle much smoother and faster, and we can expect to see this change from February 2019 onwards.
Windows 10 updates will soon be smaller and quicker
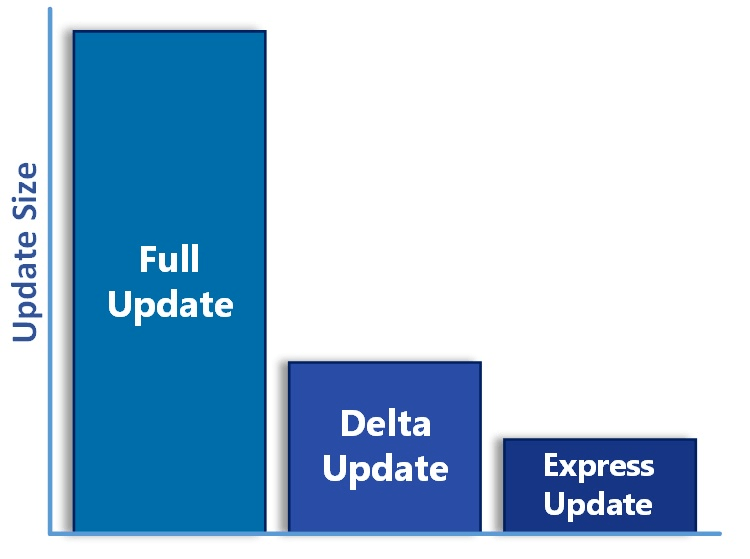
The new system called Express Updates allows Windows to update single files as needed. This is opposed to the Delta Update system, which cumulatively builds patches on top of one another. Every time something changes everything needs to be downloaded and updated again. The result is that updates get larger and larger as the months go by.
Microsoft is killing Delta Updates in February
We can see an example of this after the recent update we got in April 2018. Various patches were coming in at around 100 – 200 MB, but after a while, they ended up at approximately 1.2 GB. With the new Express system, these small patches will only ever be the sum of their individual parts, rather than including all the parts that came before them. Patches will stay at around 100 – 200 MB a month rather than growing each month until Windows 10 gets the next full update.
The result for us as Windows 10 users is that our operating system will receive smaller updates more regularly. The smaller update sizes will mean it won’t take our PCS as long to restart after an update.
Don’t expect Windows 10 full updates to end any time soon, however. We can still expect to get two of them a year. You can find out the details of the upcoming Windows 10 fall update here. This new system will only affect the smaller updates Windows 10 receives in between full updates.
Converting files to the standard PDF format can be difficult. This is how to create PDF files.
Converting files to the standard PDF format can be difficult. This is how to create PDF files.
PDFs allow us to send documents exactly as they are with confidence. When we send a PDF we know that the file can’t be altered, will arrive complete, the data it contains is secure, and the recipient will be able to read all of the information easily. PDFs are great for CVs, cover letters, reports, spreadsheets, and if you need anything printing, converting the file to PDF will make the printing process much simpler and remove any chance of the print coming out badly.
PDFs then are like digital photocopies of whatever it is we are doing. You can’t create documents as PDFs. You first have to create your document in another program and then convert the file to PDF. In this way, you’re able to continue working on your project and convert your work to PDF at various stages of development, right up until the work is complete. This begs the question, however, how do you convert files into PDF?
The complete PDF solution
If you open a PDF on almost any PC or Mac chances are it will open in Adobe Acrobat. It is not an exaggeration to call Adobe Acrobat the king of PDF programs. You would find it much more difficult to open and view PDF files if it wasn’t for the free version of Adobe Acrobat you likely have. Adobe Acrobat can do so much more, however, than just open PDF files. Adobe Acrobat is the best tool for converting files to PDF as well as a whole host of other features for creating, editing, and managing PDF files.
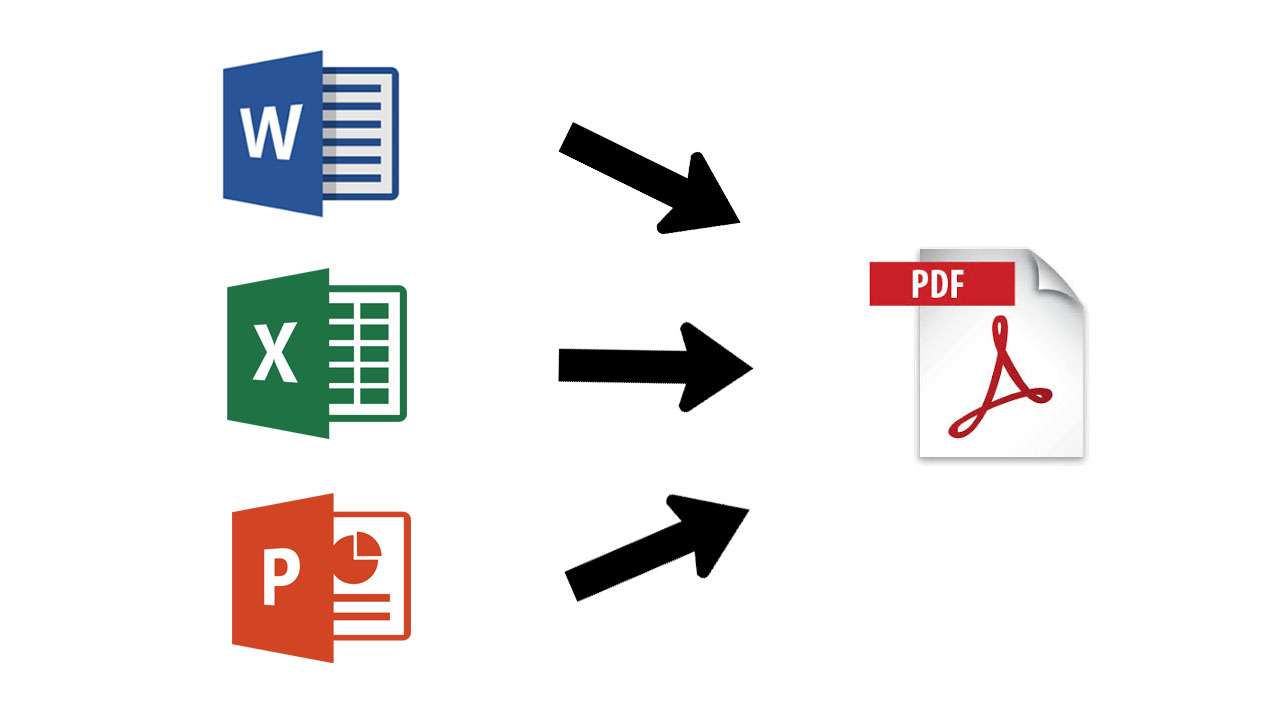
To convert a file to PDF using Adobe Acrobat is quick and simple. All you need to do to convert a Word, Excel, or Powerpoint file to PDF is:
Open the Office file you wish to convert
In the Adobe ribbon, click Create PDF.
Select Protect PDF in the resulting dialog box.
You can then decide whether add a password to encrypt your PDF file.
When complete all you have to do is Click OK, give your PDF file a name and save it in the desired folder.
Acrobat Pro can do much more than easily convert Microsoft Office files from your browser or mobile device, into PDFs. It can also send a PDF version of photographs, merge multiple files into a single PDF file, and protect your PDF files with passwords and permissions. Acrobat Pro even gives you the option to edit paper documents as PDFs and media like audio and video to your PDF files. You can see a complete list of the extensive PDF related features offered by Acrobat Pro below.
Without a doubt, Adobe Acrobat offers the most reliable and secure way of converting files to PDFs. A subscription to Acrobat Pro offers the best way to convert files into PDF and back again. It also offers a rich feature set, centered on all the different problems that may need a PDF solution. Acrobat Pro offers an easy solution for slipping between creating, editing, and viewing PDF files. If you’re looking for the best way to convert a file to PDF, you should check out Adobe Acrobat Pro
If you have a PDF that needs converting now, why not try Adobe Pro DC today.
The Gmail update has brought a modern layout. If you don’t like the new design, this is how to go back to the classic Gmail.
The Gmail update has brought a modern layout. If you don’t like the new design, this is how to go back to the classic Gmail.
It is all happening so fast. Too fast. Why won’t the world just slow down? Or better yet, why won’t the world stop moving forward and stay the way it is now, just the way I like it. Updates and redesigns are starting to take the spring out of my step. I’m looking at you Gmail.
First, it was the Reddit redesign looking all fancy pants and modern. It just isn’t the same. Then as I was starting to get over that significant change in my life, Gmail followed suit. Well no, I’m taking a stand. I’m going back to the way things were. The way they should be. I’m going to make Gmail great again. If anybody else wants the old Gmail back, follow me, this is how to do it.
We can stick with the classic Gmail design, for now.
For now, at least, Google is keeping the old Gmail design around. This means that if we don’t like the Gmail update, we can go back to the classic Gmail design. Also, when we do go back, Google will ask us why we don’t want to keep using the new one. All we can say here is, try to be polite.
To get the good old Gmail design back open Gmail and click on the cog icon in the top right-hand side of the page. This will open a menu, and right at the top, you’ll see the option Go back to classic Gmail. Hit this and Google will ask your opinion on the updated Gmail design and why you want to go back to the old Gmail layout. Answer if you wish, but if you don’t just skip this and get back to the classic Gmail layout and get on with your life, for now.
Google laid out a timetable for migration from the old Gmail design to the new one. According to Google’s schedule, come October, everybody will have been moved across to the Gmail update. Google has explicitly said that people who have opted into the Gmail updatebwill lose the ability to opt out again. Anybody yet to opt in, at this point, will be forced on to the new Gmail design and won’t have the ability to opt out.
It seems then that the days of classic Gmail goodness are numbered. It is only a matter of time before Google takes away our ability to keep things the way we like them, or is it?
Remember the survey. Remember that Google will ask you why you don’t want to keep using the new Gmail design. If you genuinely don’t like the Gmail update, this could be your last chance to save the classic Gmail design. Tell Google that you much prefer the old Gmail layout over the new one. If enough of us do this then maybe Google won’t pull the plug on the classic Gmail layout we all know and love. With that in mind, remember possibly the most critical trick in this article. Try to be polite.
It’s been eight years since Elder Scrolls V: Skyrim. We completely understand if by now you’re getting a bit tired of Lydia as a follower. While there are a ton of follower mods out there, sometimes if you want something done right it’s best to just do it yourself. So exactly how hard is it to make your own follower in Skyrim? We’ll show you in these 15 steps.
It goes without saying that you’ll need a copy of Skyrim to test this properly, so if you don’t own the game, here it is:
Alternatively, if you own Skyrim or Skyrim: Special Edition Steam, you actually already own the Creation Kit. On Steam you can find it in your Tools tab under ‘Library.’ Just scroll down and double-click to install.
Once you have the Creation Kit installed, we’re ready to begin. Please do not forget to saveyour progress oftenand be patient when working with this software. There are thousands of assets at work here, so it’s very touchy and crashes quite often.
http://elderscrolls.wikia.com/wiki/Creation_Kit
1. Getting started
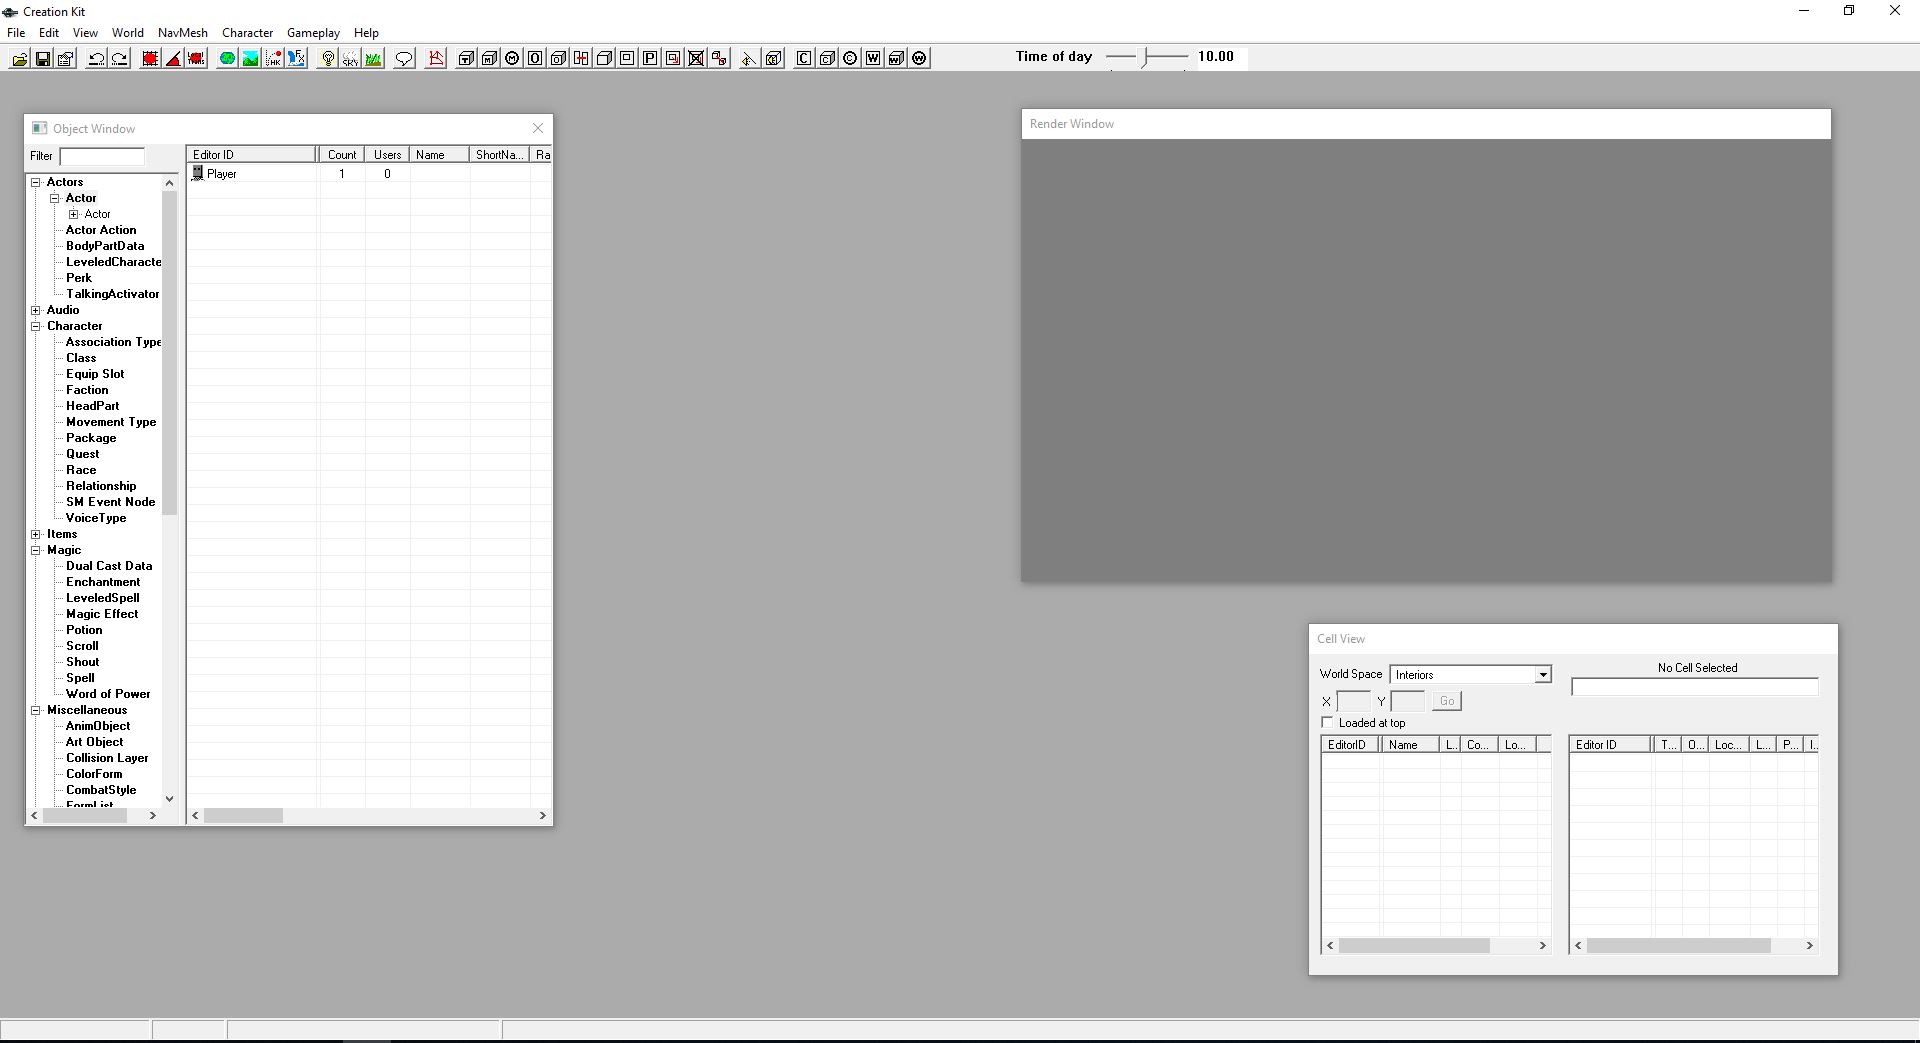
Once you’ve opened Creation Kit, you’ll be faced with this screen:
Click File > Open, then double-click ‘Skyrim.esm.’ Open it up. If a prompt comes up saying you haven’t selected an active file, ignore it. Similarly, if you get a message about missing plug-ins, just say ‘yes to all.’
Right-click on the massive list of actor names that appears on the left and say “new.” This will open up the character creation window. Now we’re ready to get working.
2. Name your follower
At the top left of the window that just opened, you’ll be putting in a ref ID. This is the unique tag that the game will identify your new character as. This will not be the character’s visible name! As such try and balance your Ref ID to be both unique and easy to remember, something like “JohnDoe101ActorFollower.”
After, type in your follower’s name. The “short name” afterward is optional. The name will be your character’s label in-game, while the short name is shorthand for quests. For example, “Jane Doe” might be referred to as “Jane” in your quest log.
Don’t touch any of the options below, like Invulnerable or Protected. We’ll do that later.
3. Assign Basic Traits
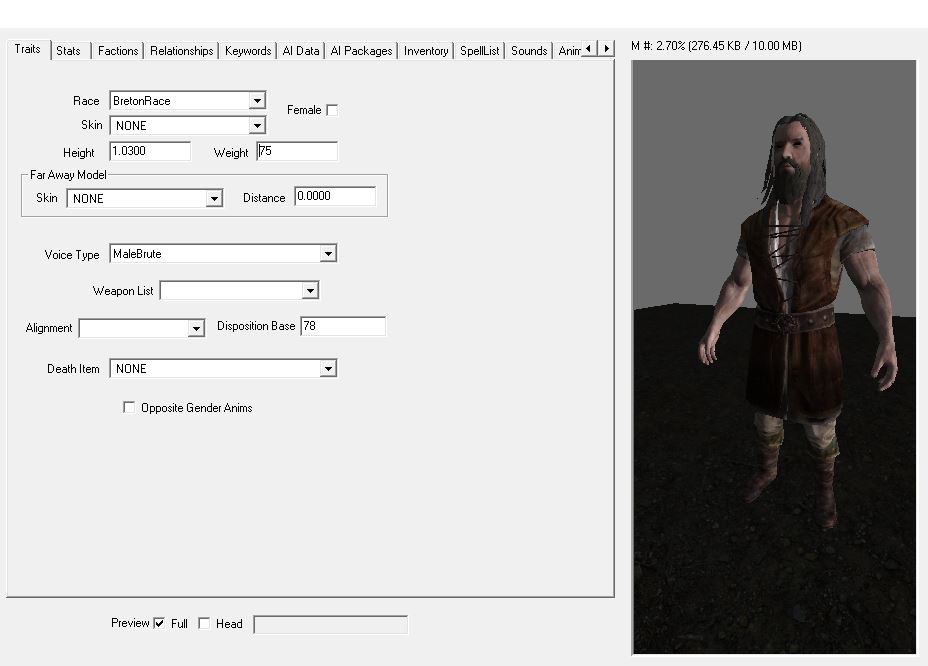
On the right, you’ll be presented with a handful of checkboxes for your character’s traits. Up top, pick your character’s race and sex. For the sake of this tutorial, we’ll be covering how to make a human follower, not an animal.
Next, you should tick the “preview” checkbox at the bottom of the window to see the character’s full body. This will help with the adjustments we’re about to make.
A character’s height and weight are very touchy, so if you make adjustments to their default they should be very minimal or they’ll look odd in-game. For reference, check the preview on your right as you go along.
4. Give your follower a voice
This next part is important. Still on the Traits tab, if you go down the Voice Type dropdown it will at first seem like you have a ton of options. This is sadly misleading. Most of these voices will unfortunately not work with follower characters. In order to find the ones that do, you’ll have to dig a bit:
https://www.youtube.com/watch?v=tLgSYzOaTnA
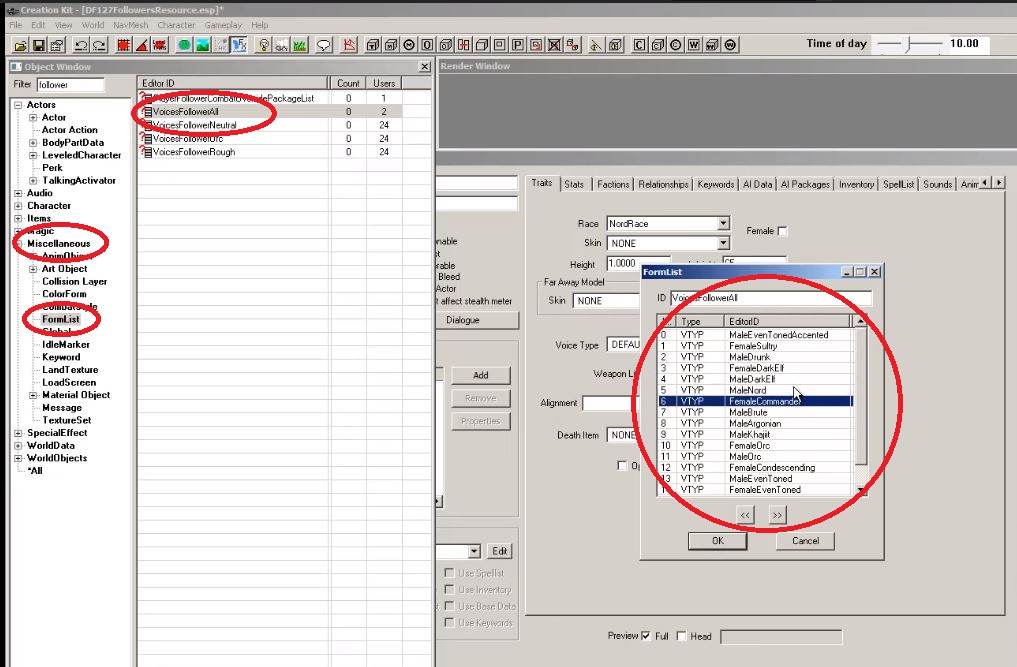
In your object window on the left, expand the Miscellaneous options and click on FormList. In the filter up top, type “follower.” Now double-click the “VoicesFollowerAll” option and scroll through to pick the one you want for your follower. If you don’t know what these voice types sound like, check out this video for samples:
5. Set your follower’s stats
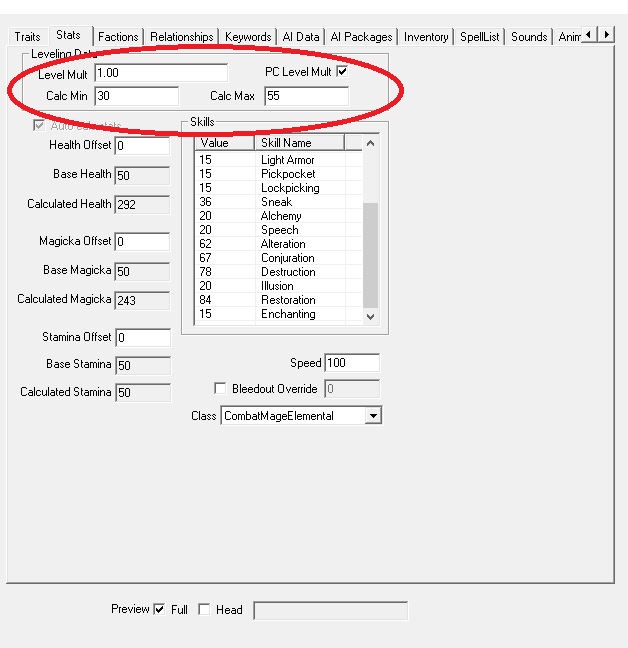
The stats tab is where you pick your follower’s level and how good he/she is with the various skills in-game. You can start by setting a follower’s level by simply typing it in the “Level Mult” portal, but we recommend a different approach:
Tick the checkbox that says “PC Level Mult” and it will unlock the two portals below that say “Calc Min” and “Calc Max.” From here you can put in the follower’s min and max level, so that they will better scale with the player character and the enemies you encounter. For example, our character starts at level 30 lowest, but caps at 55:
The bottom window has a variety of build options like Blade, Beggar, CombatScout, etc. Clicking through them will change which skills get priority for your follower. How good a follower is at any particular skill is a combination of both their “class” and their level window. Two CombatMonk class characters may have differing levels of Sneak depending on what level they are.
6. Set your faction
This tab and the next don’t have much wiggle room and aren’t as subjective as the past couple, so you’ll need to do the next steps exactly as written. Luckily they’re pretty simple:
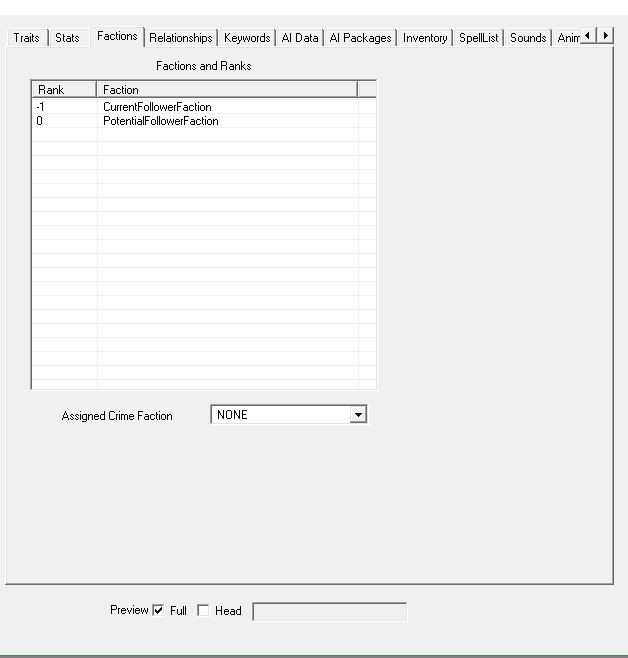
Go to the Faction tab. Now right-click in the empty lined box and say “new.” Then type follower in the filter. Choose “CurrentFollowerFaction” and “PotentialFollowerFaction” options. They should both appear in the window.
Now select the “CurrentFollowerFaction” and press F2. Then type in “-1.” This basically sets your character as unassigned to you from the start, which means they will only join you after you speak with them, as is the default in this game.
Frankly, if you set this value as anything other than -1 it’s unlikely that your follower will work at all. Do it right and your factions screen should end up looking like this:
Before we move any further, NOW is the time to check the boxes under your character’s ref ID and name. A quick runthrough of what these mean:
7. Can your follower be killed?
CharGen Face: Your follower’s face will be in the preset faces at the start of game. Essential: Your follower cannot die. Protected: You cannot kill this follower, but enemies and falls can. Respawn: After this follower dies, it will come back. Unique: This is only one follower, and there are no duplicates of this character running around the game world. Summonable: This character can be summoned via conjuration. Ghost: Weapons and spells will go through this follower. Invulnerable: Weapons and spells will impact this character, but they will be unaffected. Doesn’t Bleed: No blood animation when this follower is struck. Simple Actor: Disables several of the facial animations on this follower. Doesn’t Affect Stealth Meter: If this follower spots you while you’re crouching, it will not affect your sneak meter.
Pick whatever combination of these you like, but you’ll at least need to check the“Unique”box.
8. What is your follower’s relationship with you?
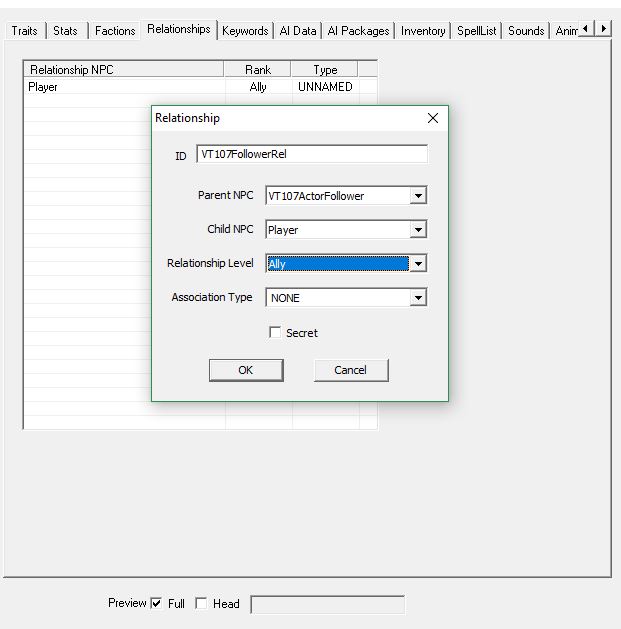
In the Relationship tab right-click in the window and click ‘new.’ Again make your ID straightforward and official – something like “JohnDoe101FollowerRel.” Your Parent NPC portal should be auto-filled to match your follower’s ID. Keep it that way.
Then simply make the Child NPC “Player” and the relationship level “Ally.” It should similar to this when you’re done:
Skip the Keywords tab and click the one that says “AI Data.”
9. Set your AI Data
This section is a little more up to your discretion. The AI attributes here affect your follower’s expressions and behavior. We do recommend, however, that you at least set the Aggression to “Unagressive” and your Confidence to “Average” just so your follower doesn’t go berserk and start attacking you should you accidentally hit him. The Mood portal determines your follower’s facial expressions, so set that with whatever you think best suits your dude.
Setting the Assistance and Morality will affect whether your follower will perform unsavory actions like attacking or stealing if commanded. Finally, the combat style should more or less mirror the class you picked out back on the Stats page. Again this might take some trial and error to pick out the one best suited for your follower.
Skip the AI Packages tab for now. We’ll come back to it soon.
10. Set your follower’s outfit and inventory
In the Inventory tab you get to pick out your follower’s clothes. Click the dropdown under “Default Outfit” and pick the one you like. What you’re really setting here is what your follower will wear when they’re not in your service. That means when they’re wandering around their starting location and such. Any armor is best given to them by you, in-game.
11. Set up your follower’s perks and spells
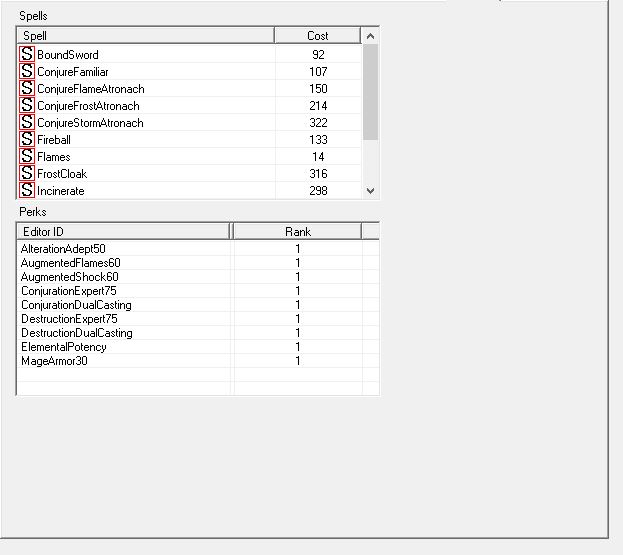
Here’s where you pick your follower’s perks and, if they use magic, their spells. We made our example follower a mage just so you can see what it will look like. If you use magic, right-click in the “Spells” window and pick out any spells you want this follower to use.
Note: Your follower will always use the strongest spells available, and that means he’ll default to using high-cost magic if they have access to something like Incinerate, Icy Spear, or Thunderbolt. If you don’t want him to run out of magicka too fast, don’t give him these spells! You can see how much mana your follower has back on their Stats page.
Next, pick your perks. It might take some guesswork to determine which perk is which, but you can always come back to adjust later. We made our character (above) a destruction conjurer with some points in alteration if you’d like to compare:
If you choose a more warrior build, the page might look something like this:
Now tab over a few to get to the Character Gen Parts
12. Make a face
Now you finally get to the fun stuff – pick what your follower’s face looks like! We recommend you start by clicking the “head” checkbox at the bottom of the window for a zoom-in view to get the best possible accuracy.
Start off with cycling through the presets, then get more in-depth with the options in the Base Head Parts box. If you want to go really crazy click the next tab over, Character Gen Morphs, to fine tune your aesthetic.
13. Where does your follower live?
If you haven’t been saving your progress lately, DO SO NOW. This next part is notoriously finicky, and the kit will often crash here.
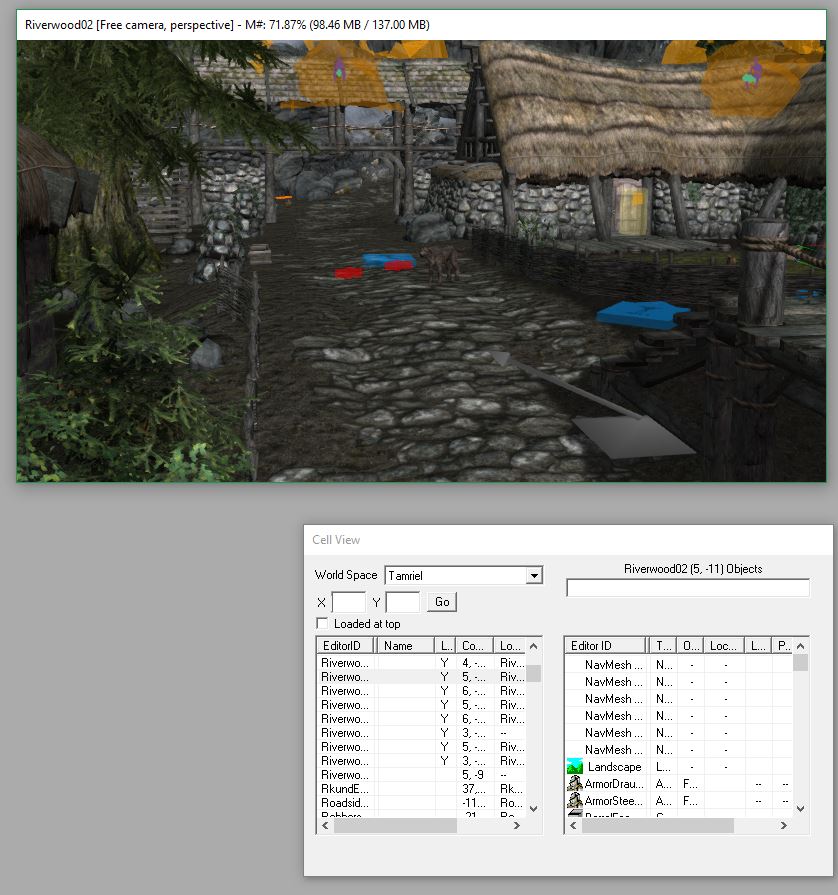
Notice the “Cell View” window towards the bottom right of Creation Kit. This is where any and all locations in the game are listed. Click where you want your follower to spawn. (We like Riverwood since it’s easily reached from the start.) If you get any error messages upon loading up your location, again just hit “yes to all.”
Navigating inside the Creation Kit takes some practice, but at it’s most basic, Shift controls the vertical angle while the mouse wheel zooms in and out. Be sure to take into account where everything in the game world was at the start, so you don’t accidentally save with a rooftop missing or something. If you do accidentally delete something, your best bet is probably just to close out and open the kit back up again.
Once you’ve found where you want to place your follower, all you have to do is drag it from the Object Window right into the map. Press ‘F‘ to make sure your follower lands on the floor correctly and doesn’t wind up embedded in the dirt or any similar embarrassment.
14. Nobody just stands still
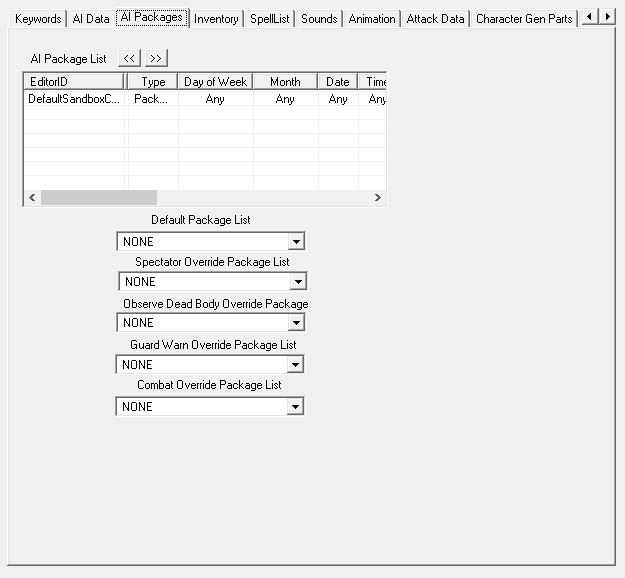
The icing on the cake is to add an AI package. Tab over to it and right-click in the window. Hit “add” this time, not “new.” “New” is if you want to make a completely new AI package, and we suggest just using one of the defaults, especially if this is your first time making a follower.
In the filter that comes up, type “defaultsandbox” and pick one of the four options that start with “DefaultSandbox.” The number after just refers to the radius in which your follower will wander from where you placed him, so probably the bigger the better.
Save your progressonce you’ve set this!
15. Meet your masterpiece
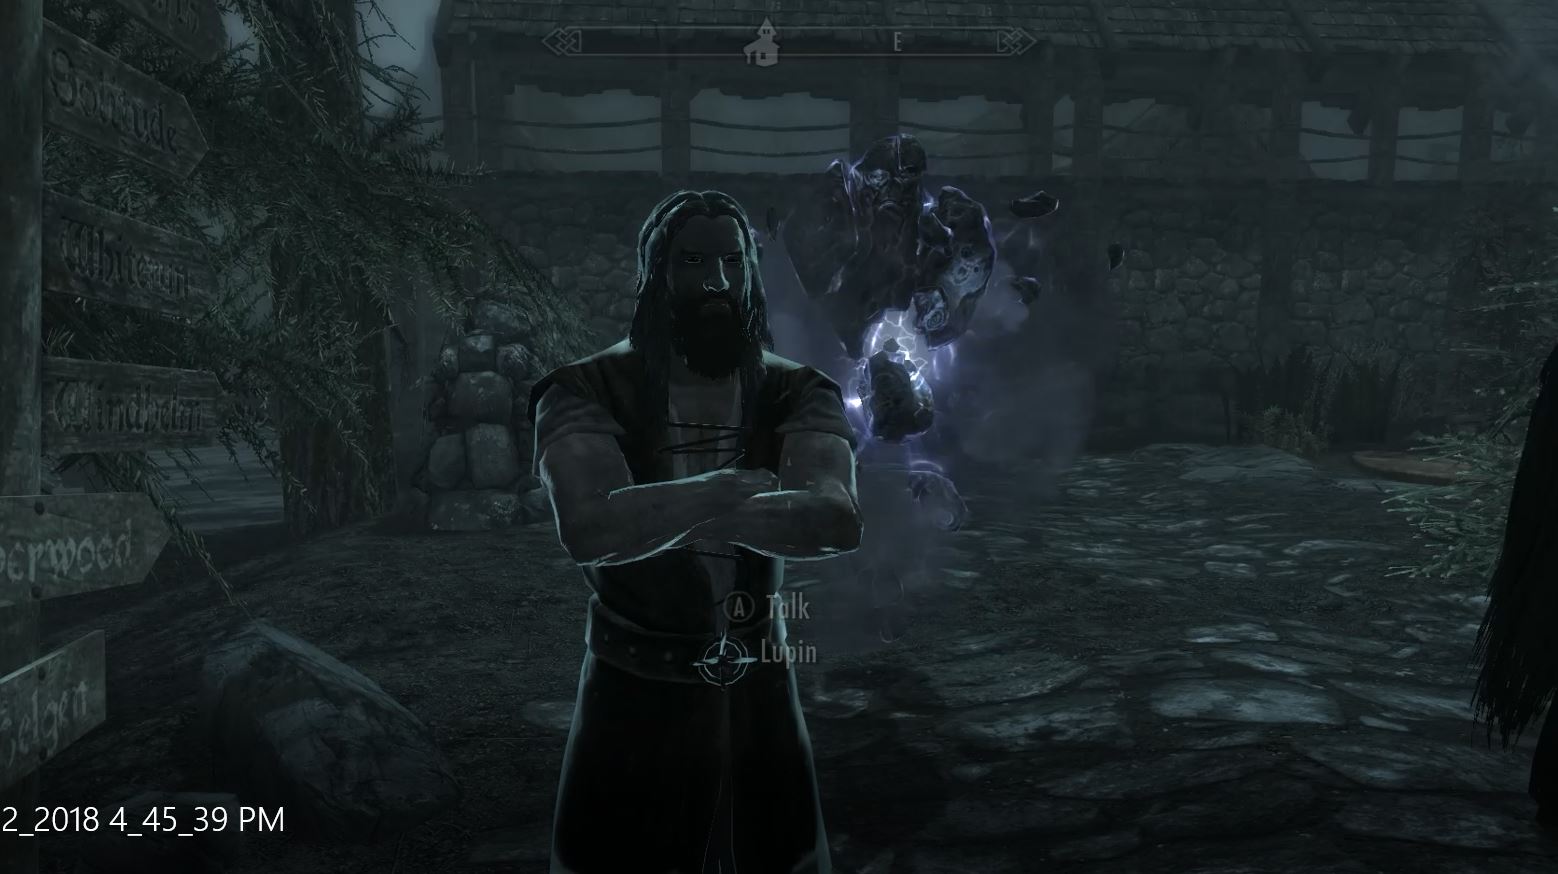
From here all you need to do is boot up Skyrim and go to the location where you placed your follower! Once you meet your creation if anything isn’t working correctly, do not fear; it happens to the best of us. Just back out and re-open the Creation Kit and try and troubleshoot.
It might also help to check out some of Bethesda’s default characters in the Creation Kit to get a better feel for how you might want to base yours. For mages, we recommend checking out Tolfdir or Nirya. Brynwolf or Karliah for thieves, Faendal or Aela for archers, and Lydia or Farkas for warriors.
Don’t beat yourself up if you’re still having trouble with this. The first follower you make is always the hardest one. Follow our guide here as best you can, but you may still find your character isn’t one hundred percent what you want. Trial and error are your best teachers, and all the characters you make afterward can be modeled off your first as a blueprint, saving you a lot of work.
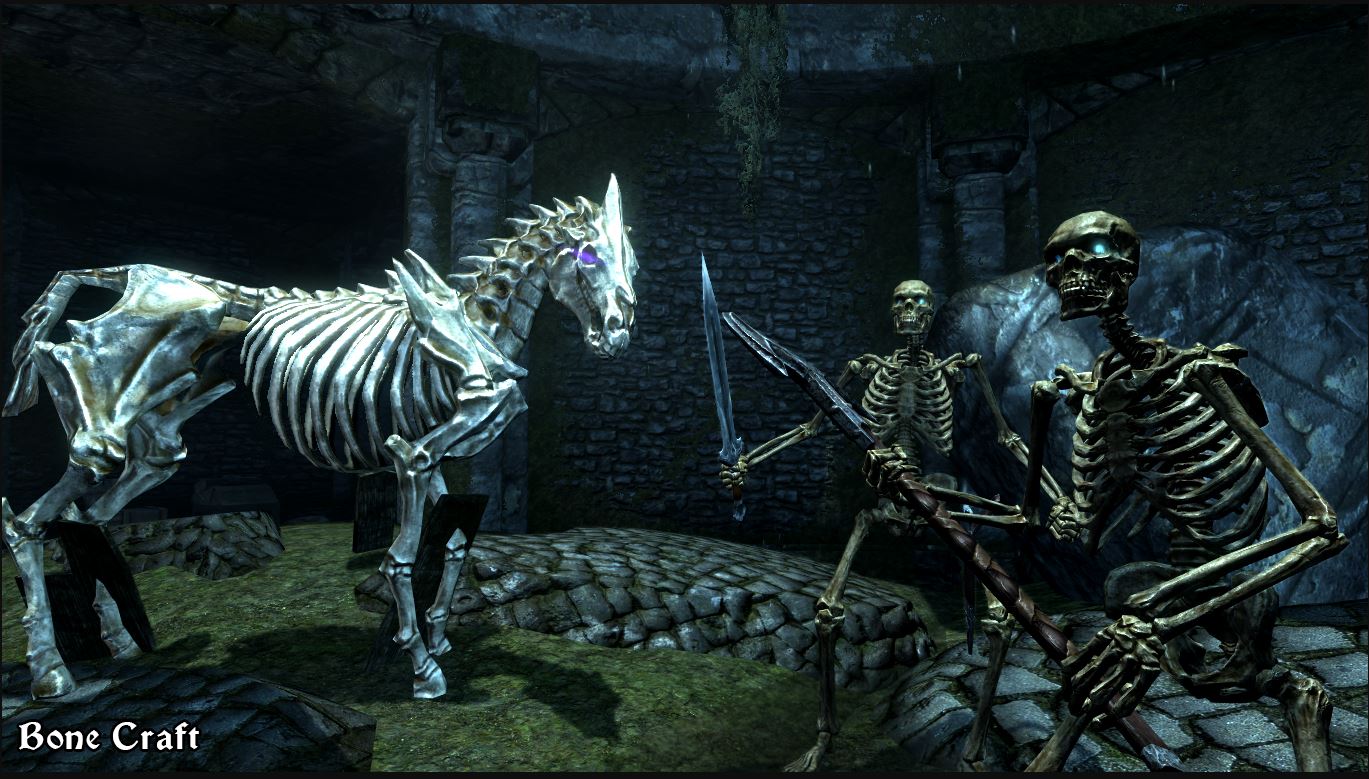
15 free Skyrim mods to satisfy fans until Elder Scrolls 6
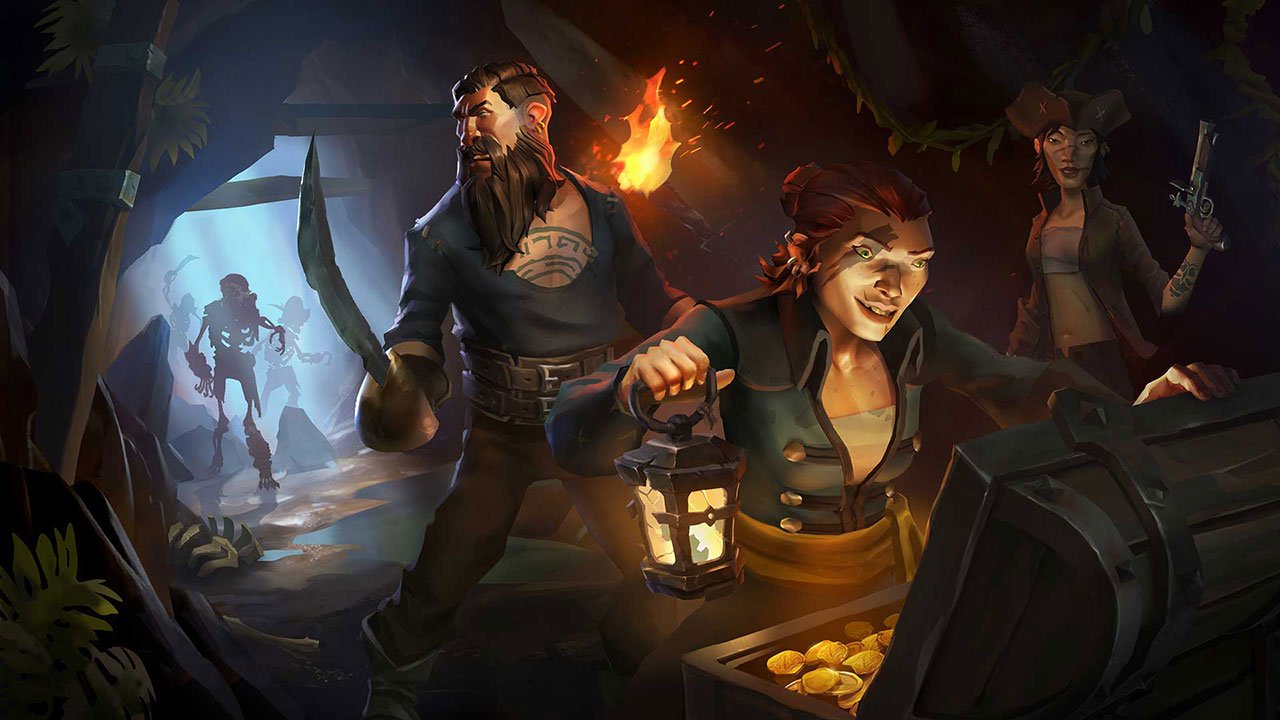
Sea of Thieves is a game about plundering the high seas in search of grog and booty. You’ll be commandeering the seas on your Sloop or Galleon, dodging all manner of angry skeletons, ferocious sharks, perilous rocky coves, the legendary Kraken, and – most terrifying of all – the other players in your match who might be just rowdy enough to try and cast you down to Davy Jones’ locker. Sound fun? Grab it here:
Jumping into a living, breathing world like Rare created with this title can be unnerving, especially with the game’s lack of tutorial. We’re sharing five tips that will play the part of the parrot on your shoulder, giving you advice and encouraging you to let your conscience be your guide.
Kind of a given, but if you can play this game with friends, do so. Trust us, it’s the way the game is meant to be played. Besides just raising the camaraderie up to 11, pretty much all the game’s mechanics assume you’re with a hearty crew.
The element where this especially comes to mind is navigation. Sailing a ship is NOT like driving a car, and having another pair of eyes can be the difference between a shiny new galleon and a waterlogged shipwreck.
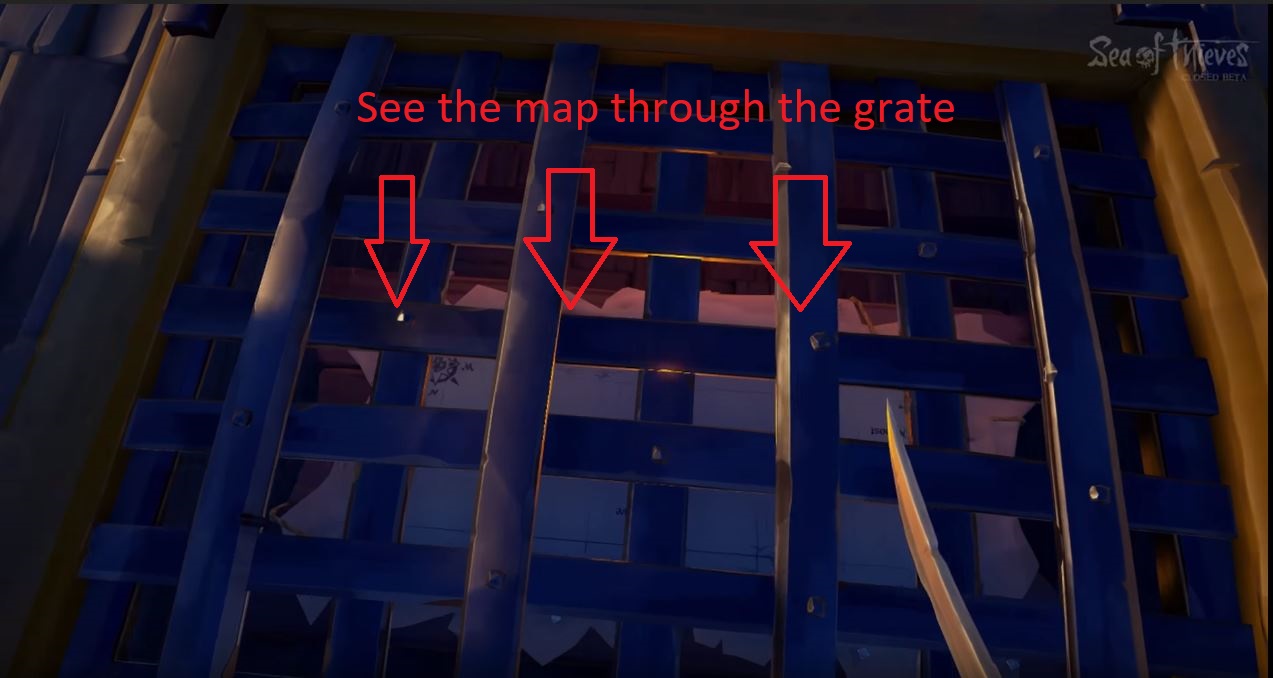
As if to reinforce this point, the map on the Galleon is in the hold, below the deck. The wheel for steering is two floors above that. The game doesn’t want you to do both. The most efficient way to plot your course is to have one player down below deck yelling directions to whoever is steering.
Trying to check the map and steer is deliberately clunky and inconvenient. Additionally, having another pair of eyes can be incredibly helpful when you’re scouting for clues during one of the game’s many treasure hunts.
2. Familiarize yourself with your vessel
Navigating and sailing in Sea of Thieves is a huge portion of the game. The more practice you get on the high seas, the more adept a sailor you become. The more adept a sailor, the better your survivability in ship-to-ship combat. Not to mention you’ll be able to pull some crazy maneuvers in and out of battle. There are two ships in Sea of Thieves: The Sloop and the Galleon.
The Sloop is faster and smaller, but isn’t decked out for a fight like its big brother. They are easier to repair, however, and their size makes them immune to Kraken attacks. We’d recommend starting off with a Sloop in Sea of Thieves, and upgrading to a Galleon when you get the hang of the game’s steering mechanics.
The Galleon is the king of the seas, boasting twice the firepower and durability of the Sloop. Since it lacks the Sloop’s maneuverability, we’d recommend around four players work together to make for the most efficient navigating. Of course, a ship is only as good as its crew, so be sure that your teammates know their roles before the lot of you go head to head with other players.
For both ships, don’t forget to use your sails properly! Look up and try to gauge the direction of the wind. If you angle your sails to catch the wind just right, you’ll see them puff out. That means you’ll be moving as fast as possible.
3. Learn your tools
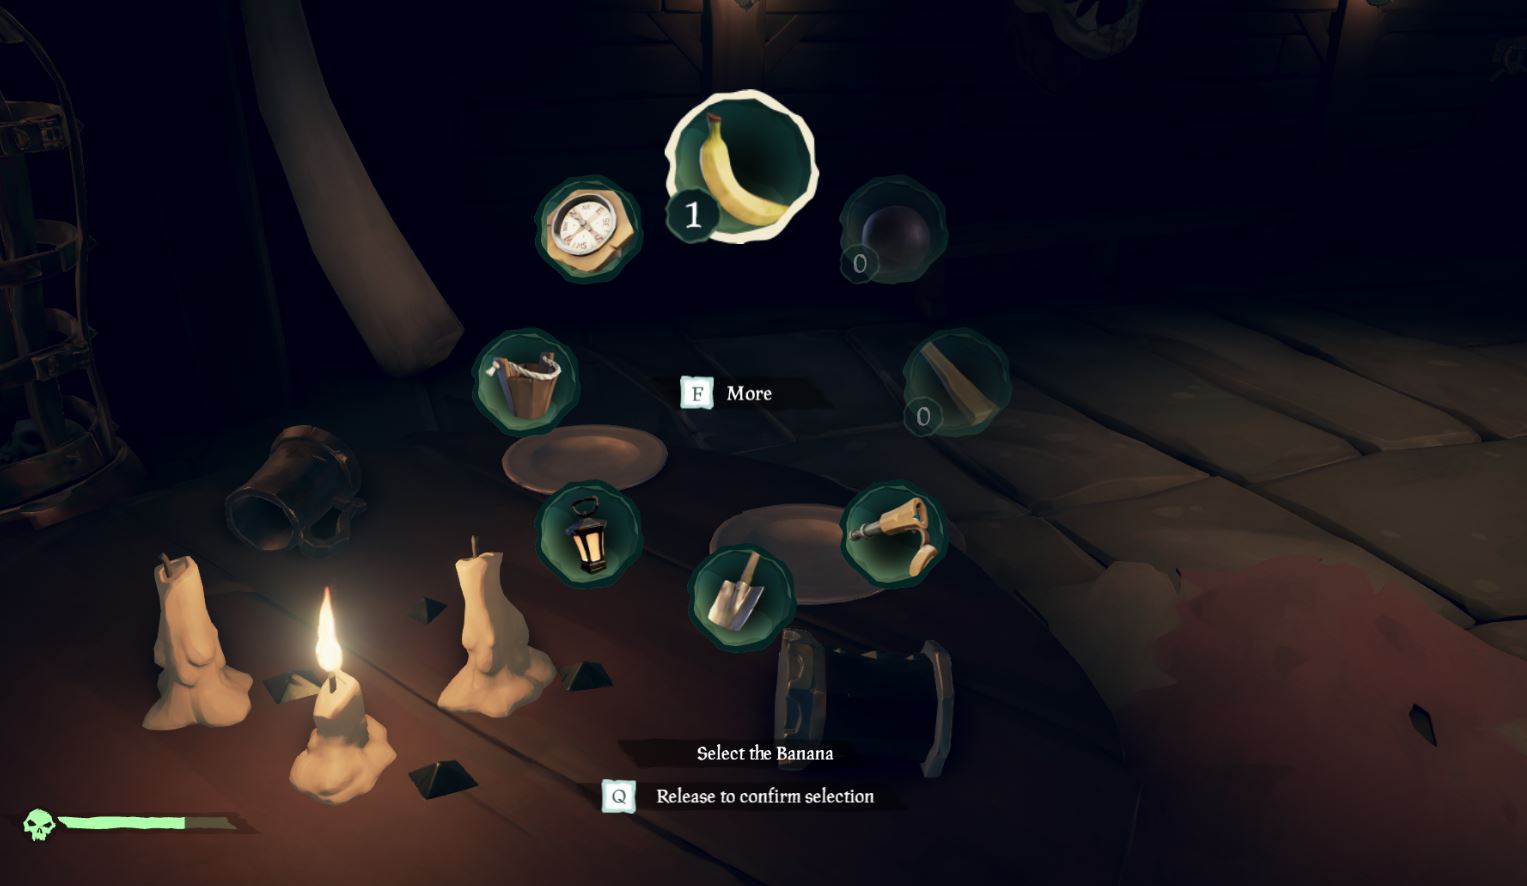
There are eight different tools in your inventory radial. You should become familiar with their purpose so you always have the right one for the right job:
Compass: The most important tool at your disposal, the compass is how you discern the right direction when away from your ship. Keep track of where you go after you drop anchor and go on land; your compass will help you get back.
The compass is also hugely valuable when you’re on land trying to hunt for treasure. Keep it handy. You can also look to the North Star if you’re wandering around at night.
Lantern: Handy when spelunking, the lantern is your default item for brightening caves or dark islands when exploring at nighttime. You can also right-click (left trigger on XB1) to lift the lantern higher, lighting up those dark corners.
Pocket Watch: Not terribly useful outside of Merchant Alliance voyages, this tool tells you the time and date. It can also help with determining how long you have before dark, but you’re a pirate – just look up at the sky!
https://www.windowscentral.com/sea-thieves-items
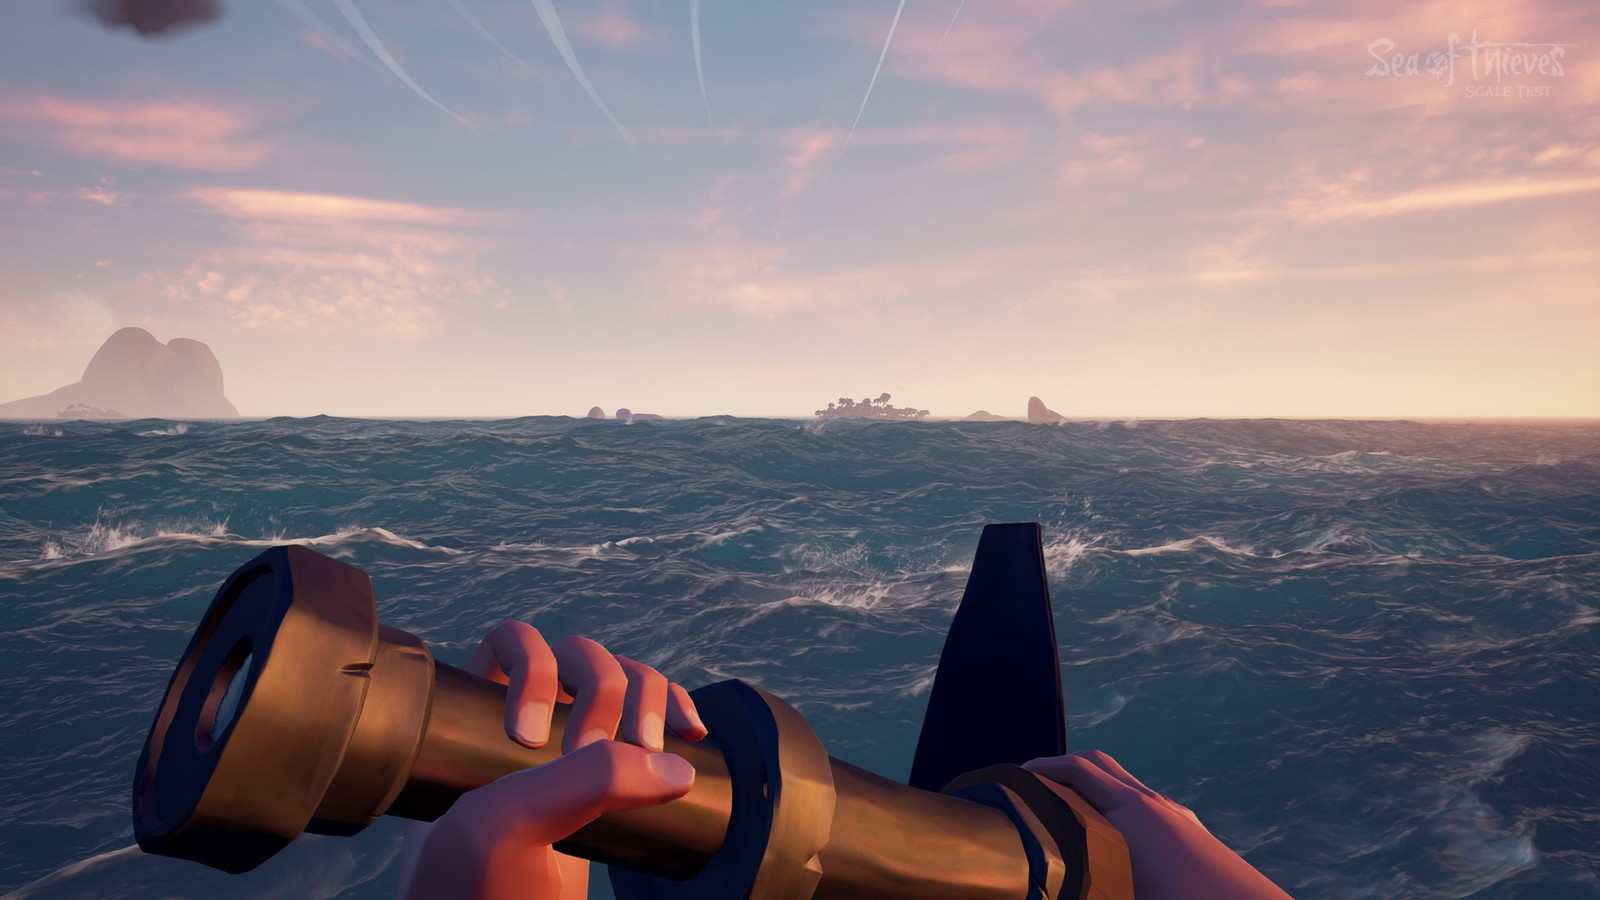
Spyglass: An unexpectedly valuable piece of equipment, this can help you spot islands, enemies, and passing ships. Passing ships should definitely be taken into account and shared with your crew. Know when to fight and when to flee, especially during timed quests or when low on supplies. Another tip is to put out your ship’s lanterns at night; other players will have a harder time spotting you in the dark if you’re not lit up like a Christmas tree.
Shovel: This digs up treasure. Listen for the clank sound; that means you’ve hit the chest.
Bucket: All players begin with the bucket, and all unfortunate players will likely end up using it. A lot. The bucket is for when your ship is taking on water and threatens to sink. Use the bucket to pour out the water, ideally when another player is patching up the hole.
Tankard: Not useful unless you want to roleplay. The tankard will hold grog for player consumption; you can find one in your equipment chest. Fun if you want to pretend you’re Captain Jack Sparrow.
4. Choose your weapons wisely
You can only carry two weapons on your person in Sea of Thieves, but can choose from four: The cutlass; blunderbuss; pistol, and Eye of Reach. When you’re picking your weapons, be mindful of two factors: What your other teammates are carrying; and whether you’re well-rounded if any of you wind up alone.
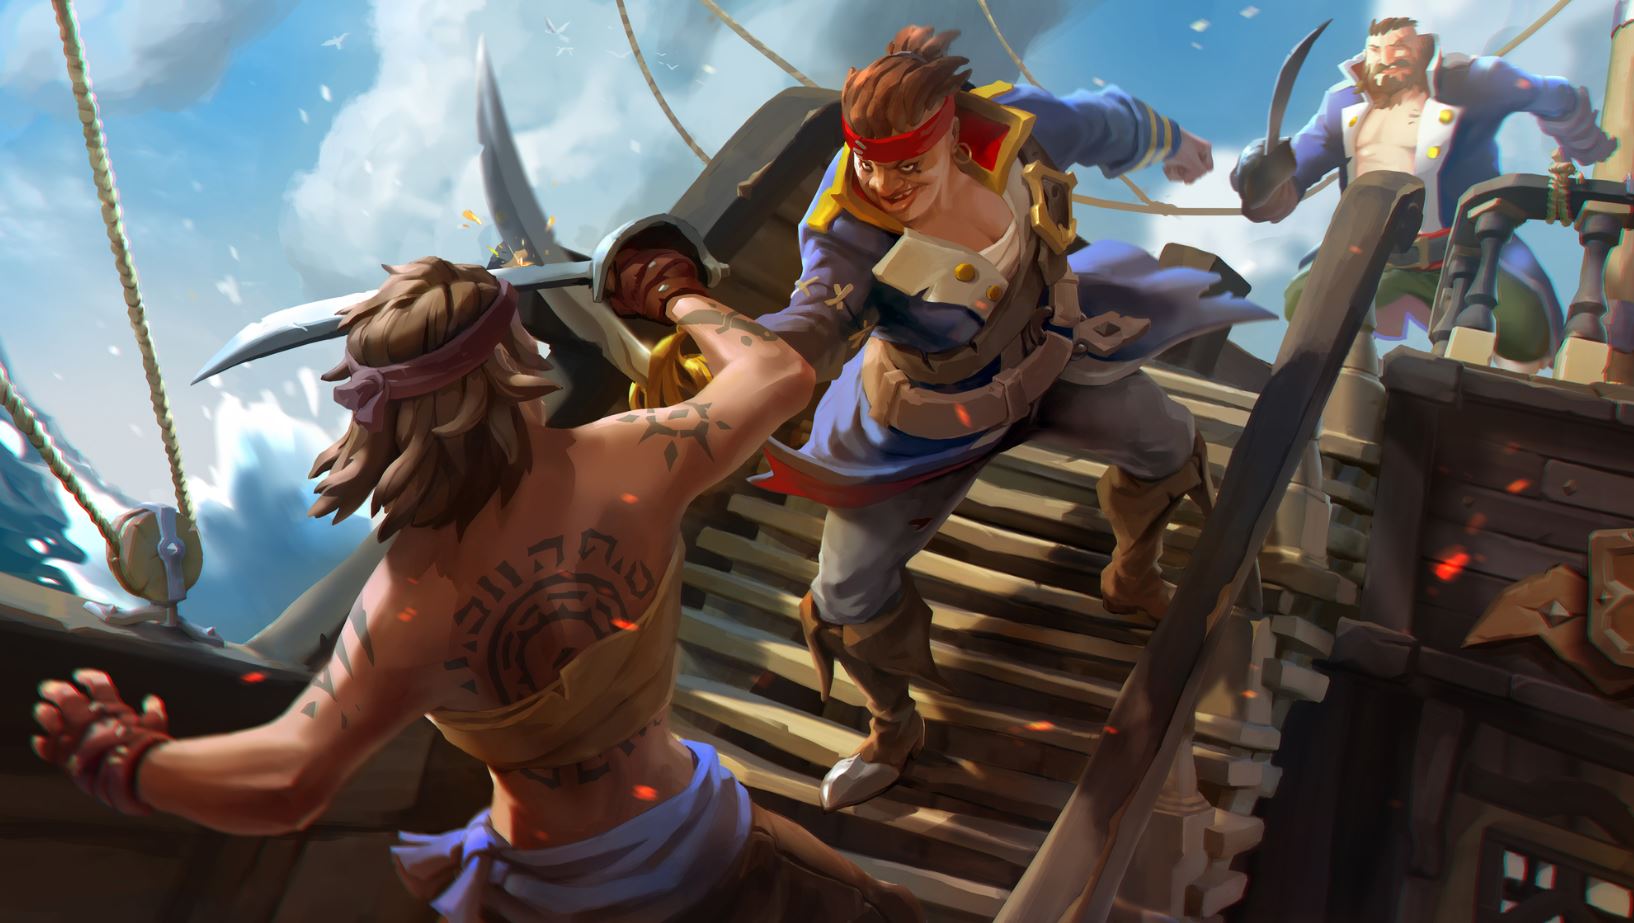
The cutlass requires the most finesse and practice. Able to swipe, parry, and lunge, it’s your most versatile (and classy) choice. The cutlass can also block, making it a viable defensive option, and is the only weapon in the game that does not require ammunition. We think it’s the best backup weapon you can pick.
The flintlock pistol is a good close-mid range gun, and accurate players will find it’s a good counter against careless sword wielders who can’t reliably close the distance. It also fires faster than the blunderbuss or Eye of Reach, so you’ve got more margin for error.
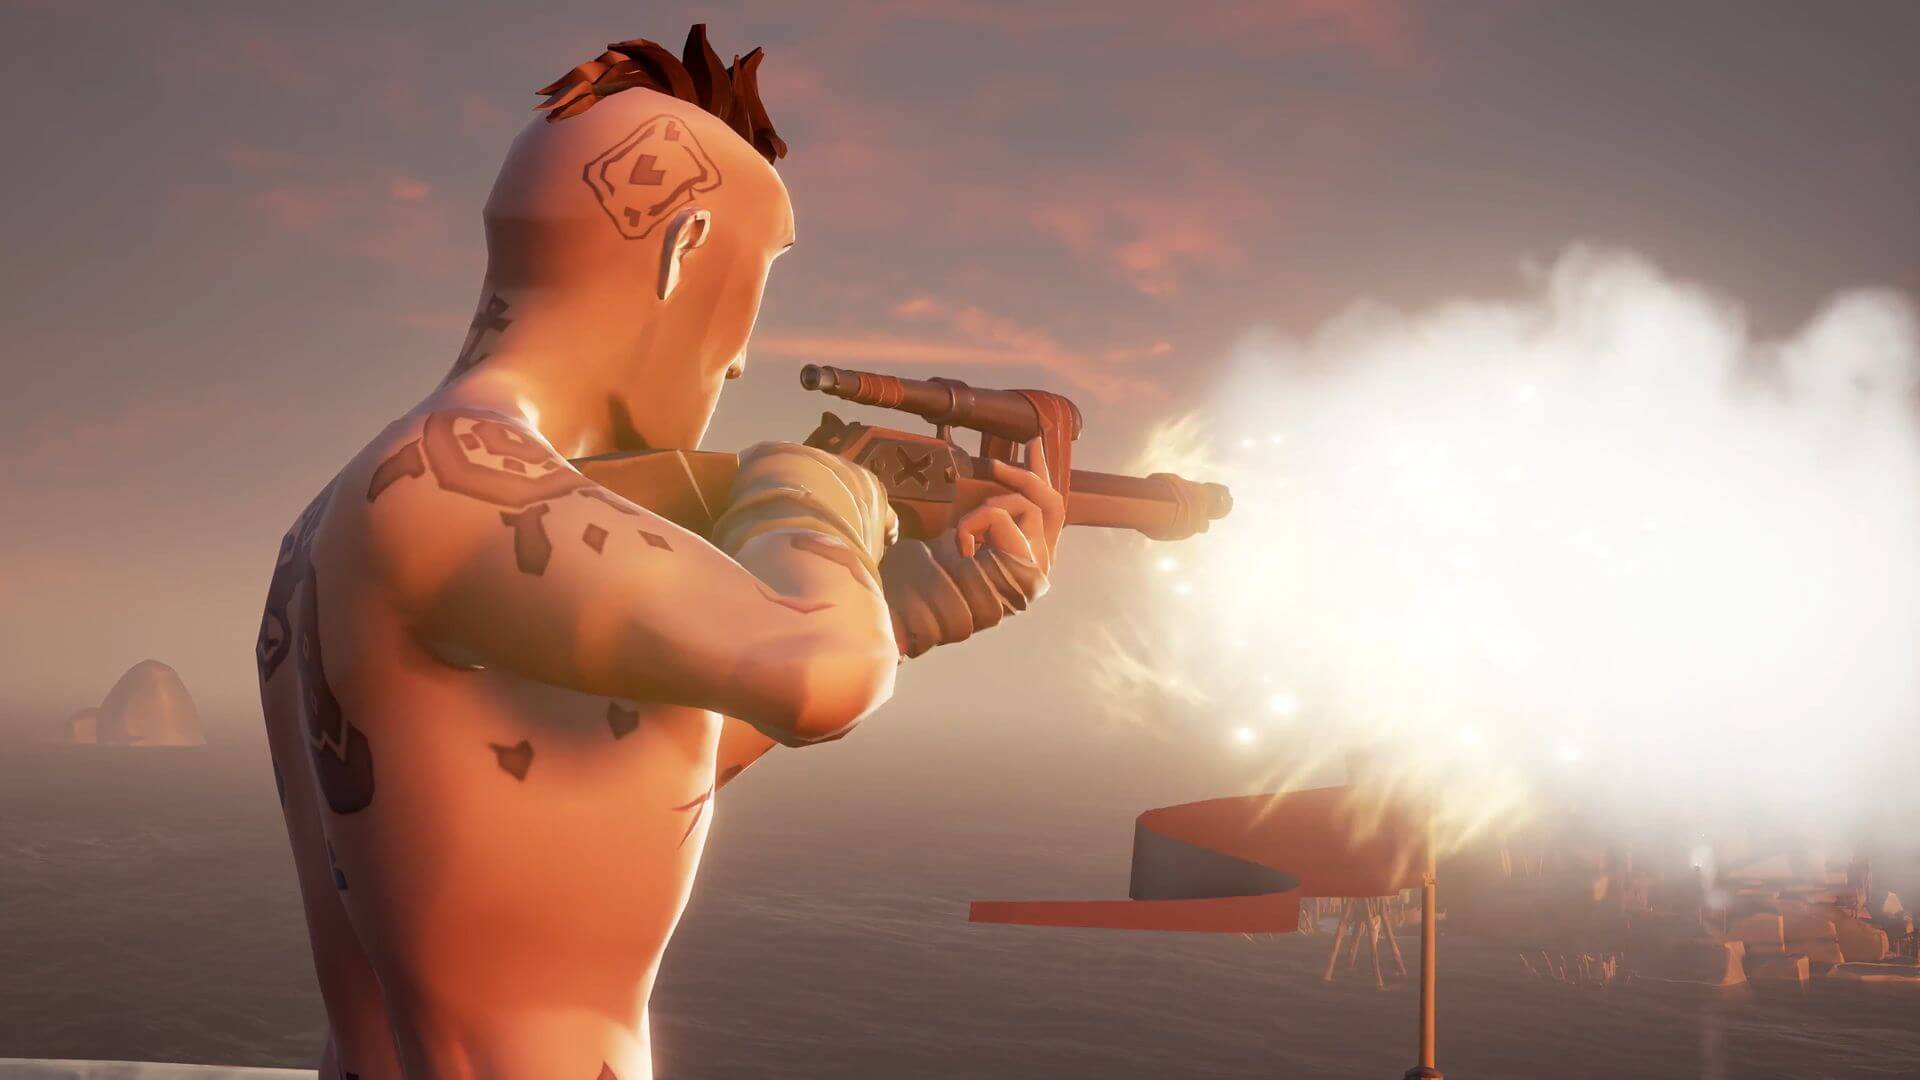
The Eyeof Reach is Sea of Thieves’ sniper rifle, using a fixed scope to engage enemies from great distances while maintaining higher accuracy. It can be incredibly useful from a hilltop or the crow’s nest of a Galleon, but don’t get caught using it alone against a pack of skeletons.
The blunderbuss is the champion of close quarters fighting, and we recommend beginner players rely heavily on this. Our blatant tip is to “practice with the sword, but proceed with the shotgun.” It’s also the only weapon capable of dispatching multiple assailants at once, making it your best choice against the game’s many skeletons hordes.
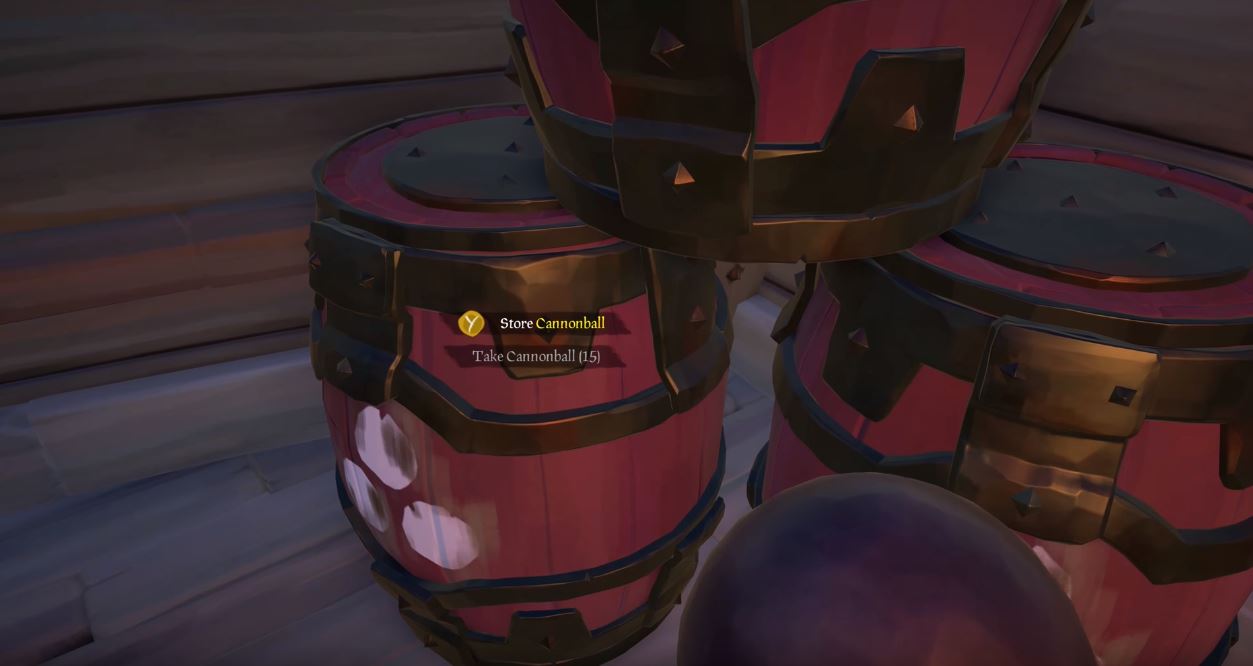
Our last tip for beginner players is to loot, loot, loot. This goes for completing quests and pillaging enemy vessels, but also extends to exploring small islands for wood, chests, or life-giving bananas. All supplies you find that belongs on your ship should be put there quickly, as you’ll never know when an enemy ship might decide to challenge you.
As for the bananas, we recommend you keep as many on your person as you can. Each will restore 25% of your health, and can be consumed one at a time to give you a fighting chance should you get ambushed.
Sea of Thieves is a ruthless, cutthroat world, but if you keep these five tips in mind and stick close to your friends you might just stay alive long enough to face down that Kraken. Or to launch yourself from a cannon only to plummet down to your death, questioning your life decisions all the way.
Do you remember filling your pockets until they were heavy with quarters so you could spend an afternoon at the arcade? Probably not. Since the introduction of PC gaming, consoles, Steam, and mobile gaming there’s not much reason to go to an arcade and feed four more quarters into Frogger or Pinball. Getting schooled by Noob Saibot in the early Mortal Kombat or dying over and over again in Battletoads are rites of gaming’s ancient past…
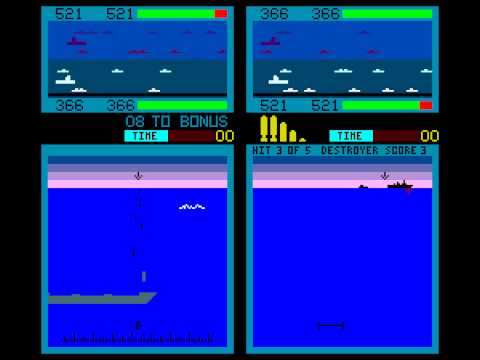
M.A.M.E. stands for Multiple Arcade Machine Emulator, and it does exactly that. Free to download on PC and instantly available via command prompt, MAME is a massive compendium of over 7,000 arcade games from 1948 to 2017.
https://www.youtube.com/watch?v=luva0m9OKpQ
Are they all free??
Yes.
Are they all readily available??
Kind of.
While the emulator itself is free, the ROMs required for the majority of the games to run are sadly not. Disclaimer: We do not condone or encourage the purchasing of any ROMs that you do not own the rights to. Sharing them is also illegal. If you’d like to see the fine print on this, you can check out thesearticles on the subject.
So what does MAME offer that IS legal?
Well, you’ll have access to an awesome emulator and a handful of cool retro games like Super Tank, The Adventures of Robby Roto, Fire One and Hard Hat!
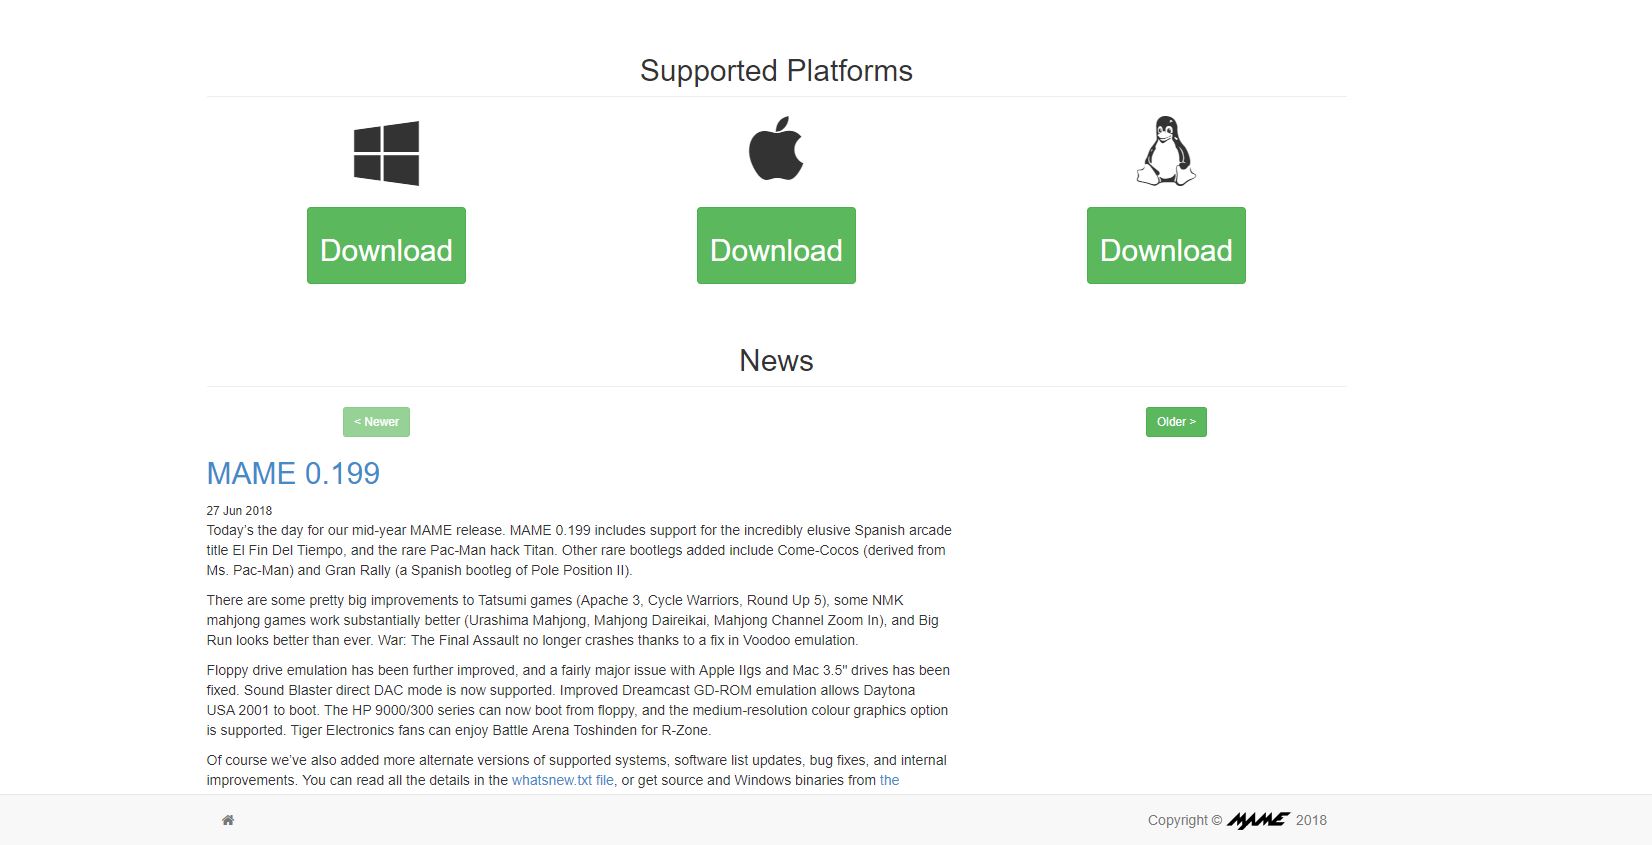
Click the above link. Once you’re, click the system you’re using. MAME is supported on the platforms pictured:
2. Choose 32-bit or 64-bit
Clicking your platform will bring you to the next page. Here you’ll need to click either the 32-bit or the 64-bit option for download.
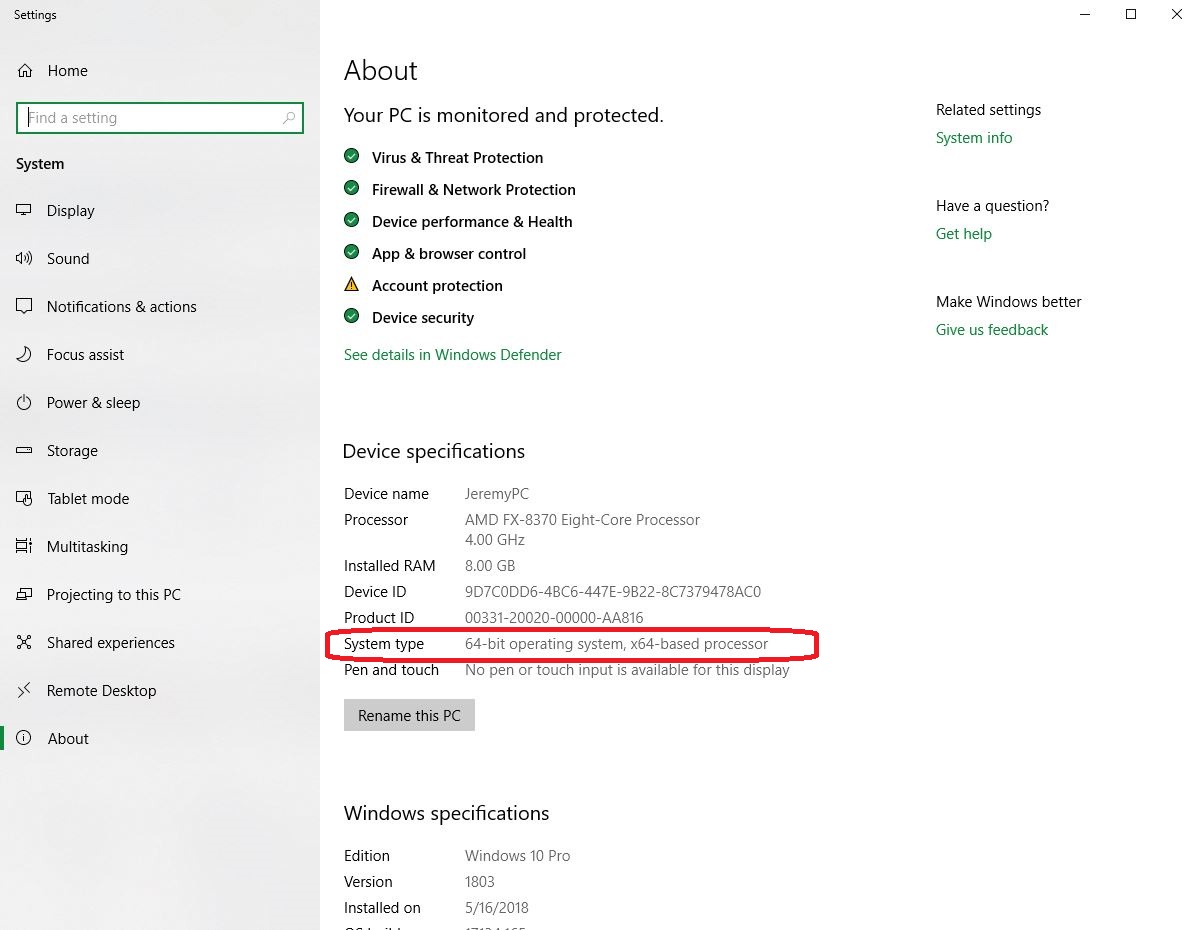
If you’re unsure which your computer is using, on PC you can click the Windows button and type “about.” Click ‘About Your PC’ at the top of the list, and it’ll take you to this page. It will list your specs there.
3. Choose where you want your folder
By default MAME downloads to your ‘downloads’ folder, but we recommend putting it in your C: drive for ease of use.
4. Download the required ROMs
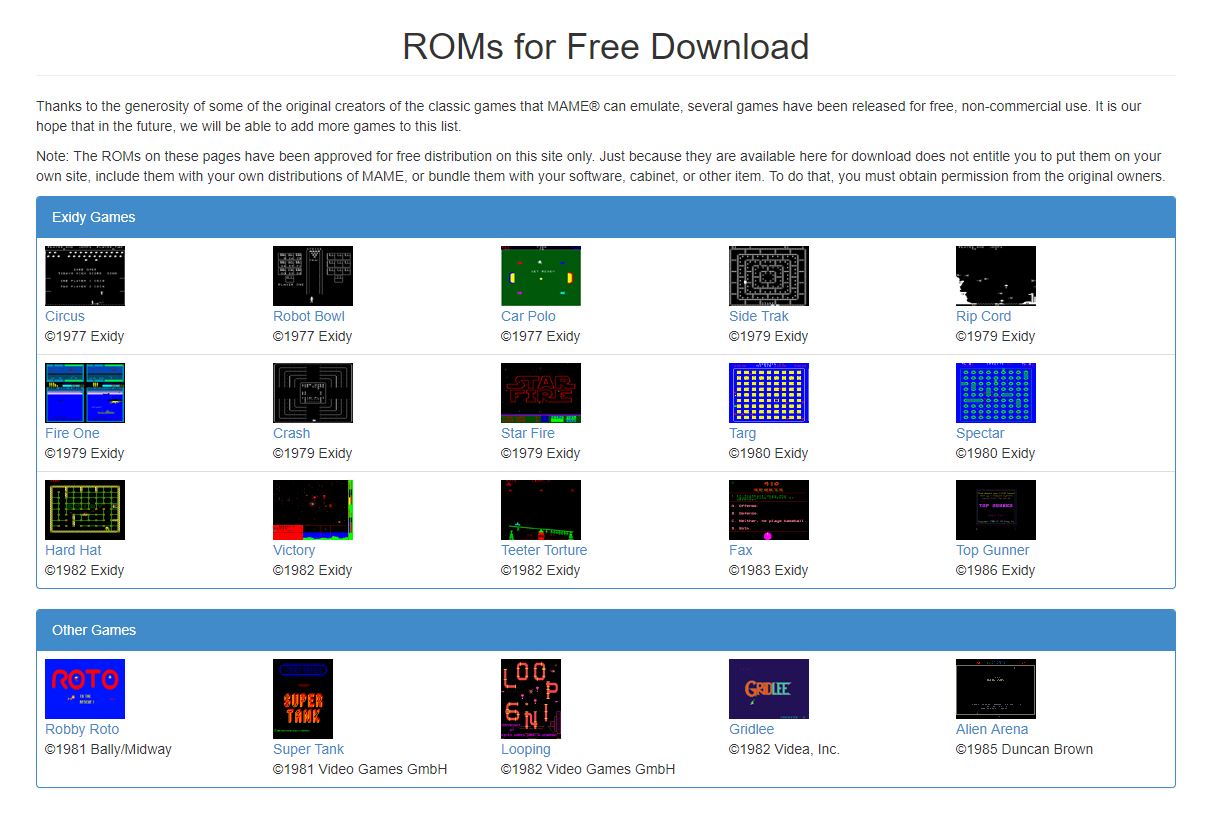
Now you’ll need some ROMs to ensure that the games work. At the top of the mamedev page click on the ‘downloads’ tab. On the dropdown click ‘ROMs.’ It’ll take you to this page:
http://mamedev.org/roms/
5. Transfer your downloaded ROMs
All the ROMs on this page are free, so if you want the easiest compatibility with the various games in MAME, we recommend you get all of them. Once you’ve downloaded them (they’re free), transfer them without unzipping them to your C:\mame\roms folder, or wherever you decided to put MAME. Now you have all the required ROMS to play the free games.
6. Open MAME
Now there are two ways to open MAME and start playing. In your MAME folder, you’ll see a mame64.exe or a mame32.exe. Double-clicking on this will open up the MAME library. Alternatively, you can bring up the command prompt (hit the windows key, then type ‘cmd’) and then type ‘cd\’ followed by ‘cd mame.’ Hit tab until you see the mame64.exe or mame32.exe, then hit enter.
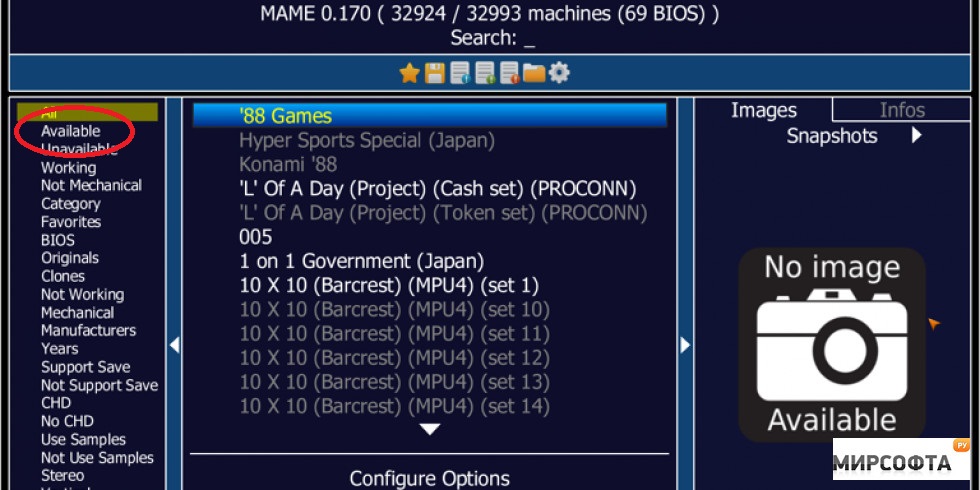
MAME’s catalog of games can be daunting at first (there are so many games)! The easiest way to find ones you can play immediately is to click the ‘available’ tab on the left of the library. From here, just scroll until you find one you like and double click to play it! You can also engage and toggle things like a gamepad if you right-click on the chosen game instead.
Playing the game
Once you’re in the game you’ll still need “quarters” to play. Press ‘5’ to “insert a quarter.”
Hooray! Infinite money!
When you’re ready, press either 1 or 2 (for two player) to start. From here, you can use the arrow keys or gamepad to move, and press ‘control’ as your primary action button. Any further controls are mapped to either alt or space bar. You can also press ‘p’ at any time to pause your game, or ‘t’ to tilt, though why you’d want to tilt the game is beyond us. Don’t ragequit, bruh.
Considering it’s massive library of playable games, downloading MAME for free is a no-brainer. Depending on your gaming background it’s a stroll down memory lane. Or maybe you’re trying to see if you’ve got what it takes to stack up to the real deal old school gamers. Download MAME now and find out!
Minecraft has been on the market for some time now, but the community hasn’t thinned a bit. If anything, they’ve become more resourceful and even more creative. Nothing is off limits in Minecraft. Building cities to scale and replicas of fictional locations, Minecraft modders have been busy making your experience more immersive and pushing the limits of what you can actually do in Minecraft. If you are looking to delve into the belly of the beast, you can find an in-depth description here.
As a fan of the mini-map, this mod is crucial to gameplay. It renders a real-time map of your generated world either in a web browser or in-game. You can download the JourneyMap mod here.
The mod for the master builders of Minecraft. Chisel allows you to download extra texture packs for blocks. As you hit them with your chisel, the blocks will change their look to match your imagination. To create the Chisel, all you need is to diagonally arrange an Iron Ingot and a stick. Simple, right? Download Chisel to start crafting!
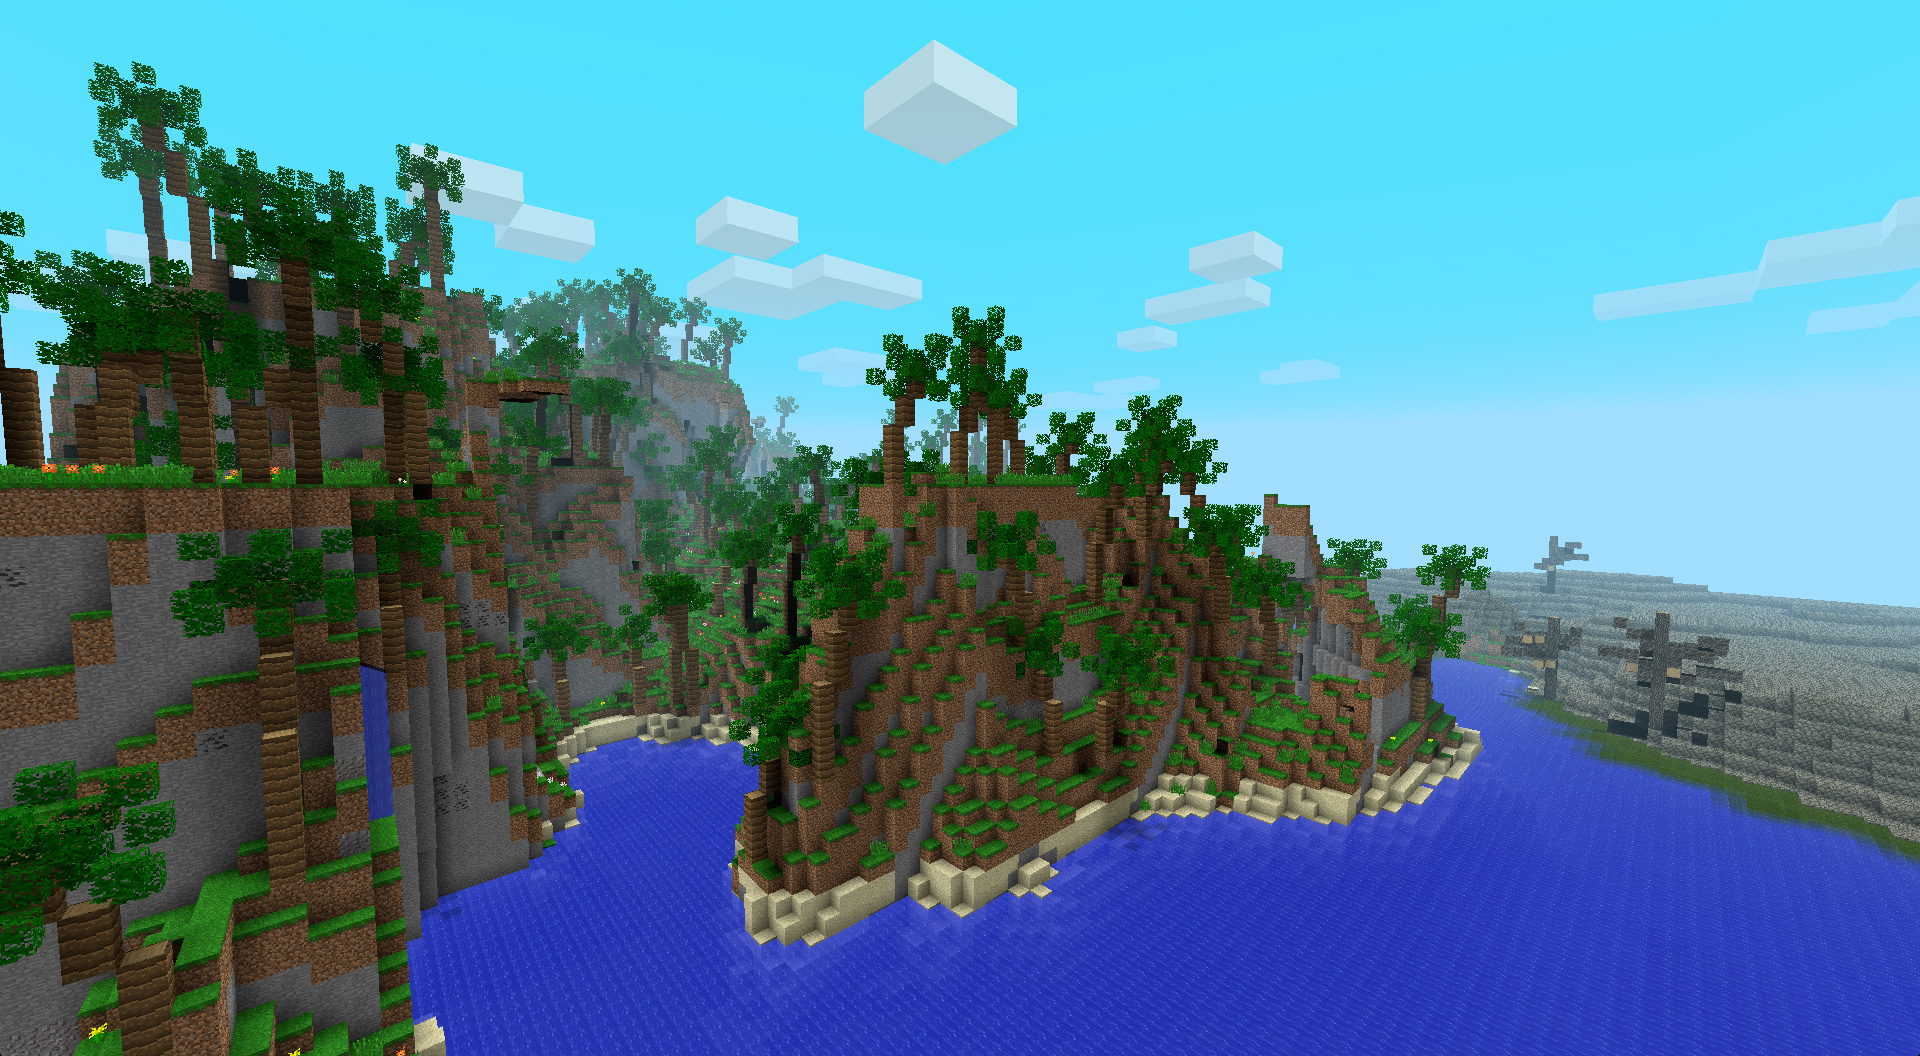
For most Minecraft players, aesthetic modifications are a great way to spice up your Minecraft experience. With Biomes O’Plenty, you are adding new geographical locations to your world with varying environments. Including a Tropical Island, Wastelands, and Pastures, your environments will never get stale. Download Biomes O’Plenty now!
Minecraft isn’t known as a graphical powerhouse, but it still has a bit of charm with its block-based landscapes and creatures. Soartex is texture pack for Minecraft that shoots right down the middle between photorealism and a cartoon art-style. This is a great download if you want to improve the lighting and immersion of Minecraft.
Of course, there’s a Battle Royale mod! Battle Royale is all the rage right now and Minecraft is no exception. You’re given a starting weapon and must survive while gathering as much powerful loot as possible to stay alive and become the victor.
This mod is straight and to the point. Once you reach end-game, there isn’t much to do with all your diamond weapons and illustrious housing. The Combat Pack gives you access to advanced weaponry and vehicles, including a helicopter! Travel faster across the landscape and eliminate your enemies with explosive enthusiasm.
By far the best lighting and texture mod on the digital marketplace for high-end PCs, adding HD textures to everything imaginable. There is a second texture overhaul called Fastcraft, which beefs up the graphics for lower-end PCs in need of some assistance.